

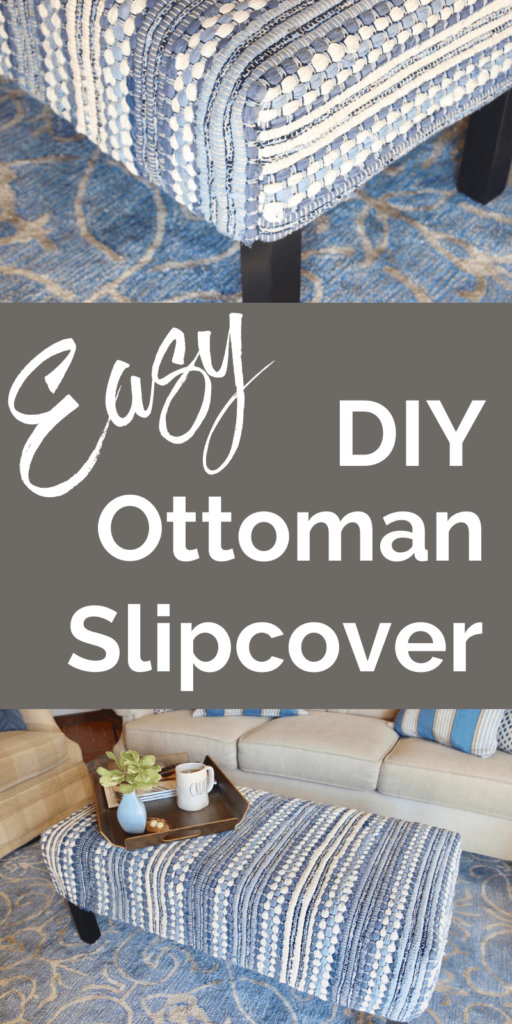
DIY Super Easy Ottoman Slipcover: From a THROW RUG!
Need a large, comfy ottoman for tired feet? Here’s the easiest way to rehab a sad bench with fresh style to take ALL that foot plopping.
Here’s the answer to your old ottoman, ugly ottoman woes!
Do you have a large ottoman you love, that’s the perfect size for your space, but it is so ready for a new look? A slip cover is a great idea to bring new life to it and your living room or perhaps family room.
Perhaps you don’t have an ottoman, but would love to replace your coffee table with a more foot-friendly option. They are plentiful (but usually dated and ugly) at thrift stores, garage sales and even curb side. As long as it’s sturdy and not buggy or smelly, bring it home for an easy peasy makeover.
IMAGE
I PROMISE, this DIY Ottoman Slipcover is the perfect, absolutely perfect, “sewing” project for the non-sewer!!!!!
For sewing, you will need a large-ish needle, upholstery thread and scissors. And that is it!!! No sewing machine. No rotary cutter. No zipper foot and all the other accoutrements — pinky swear!!!!
And NO sewing experience! Deep breath — you can do this!!!!
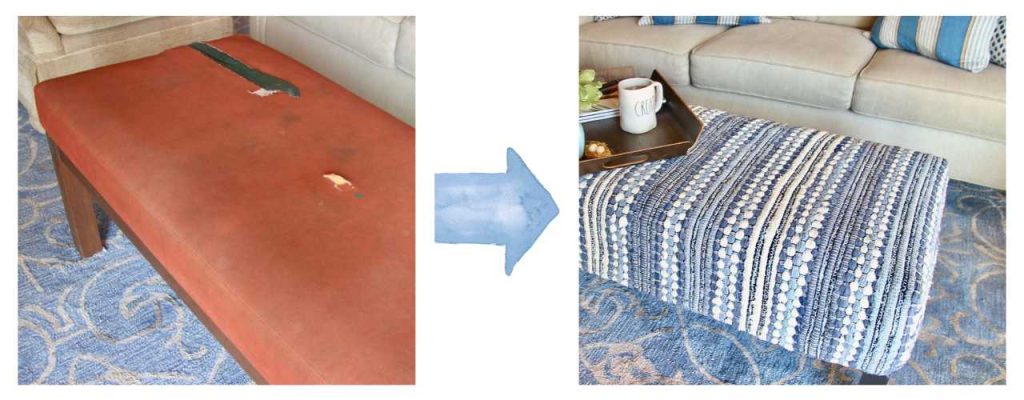
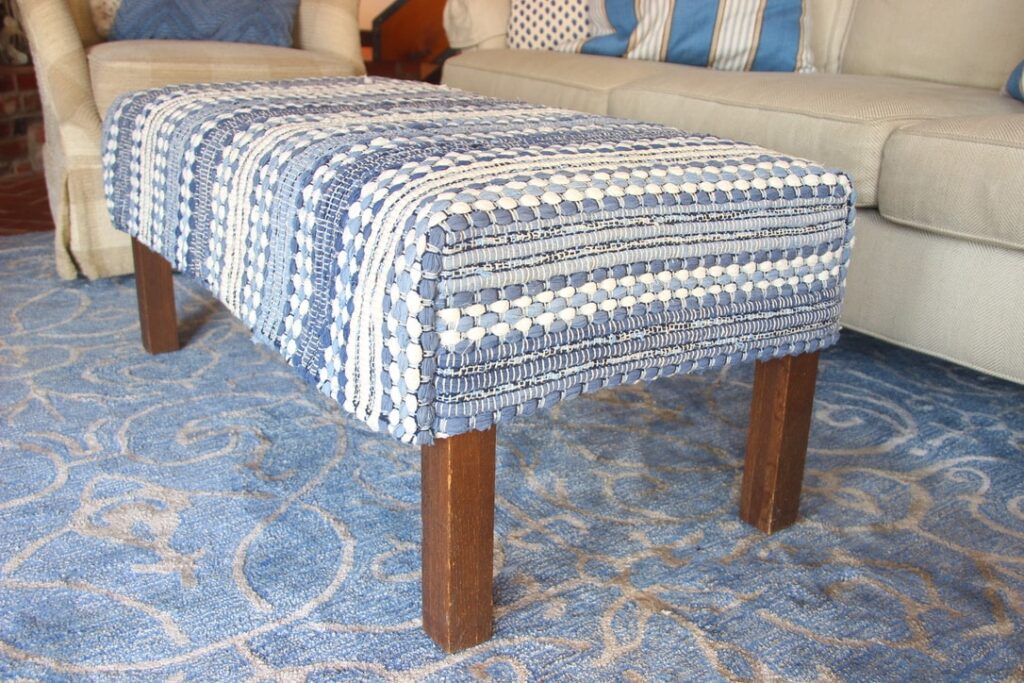
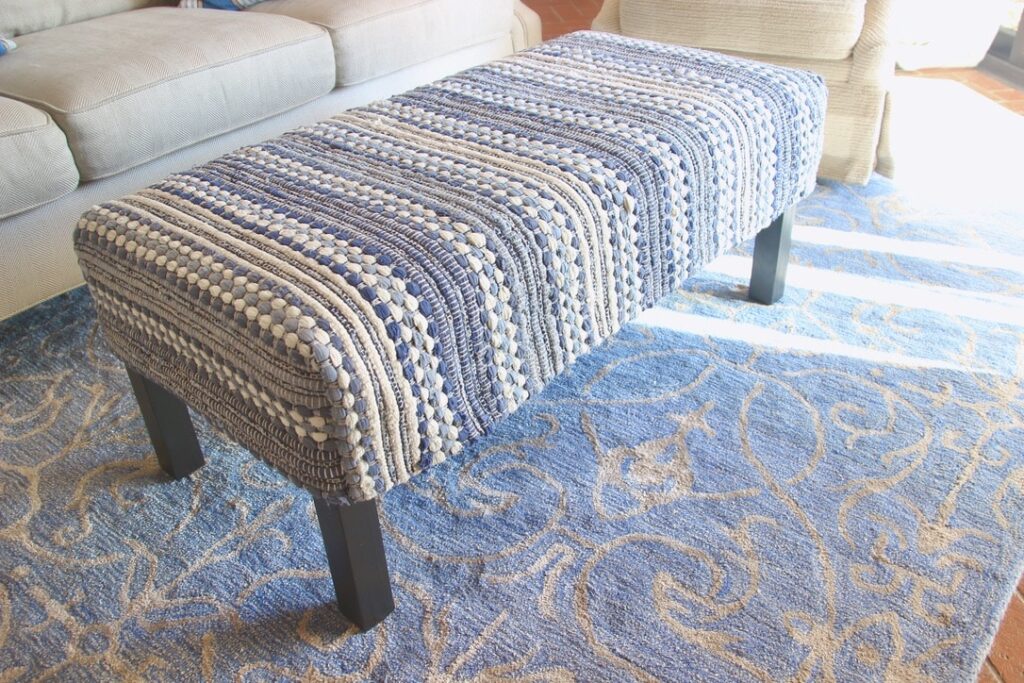
How’s this for a transformation?
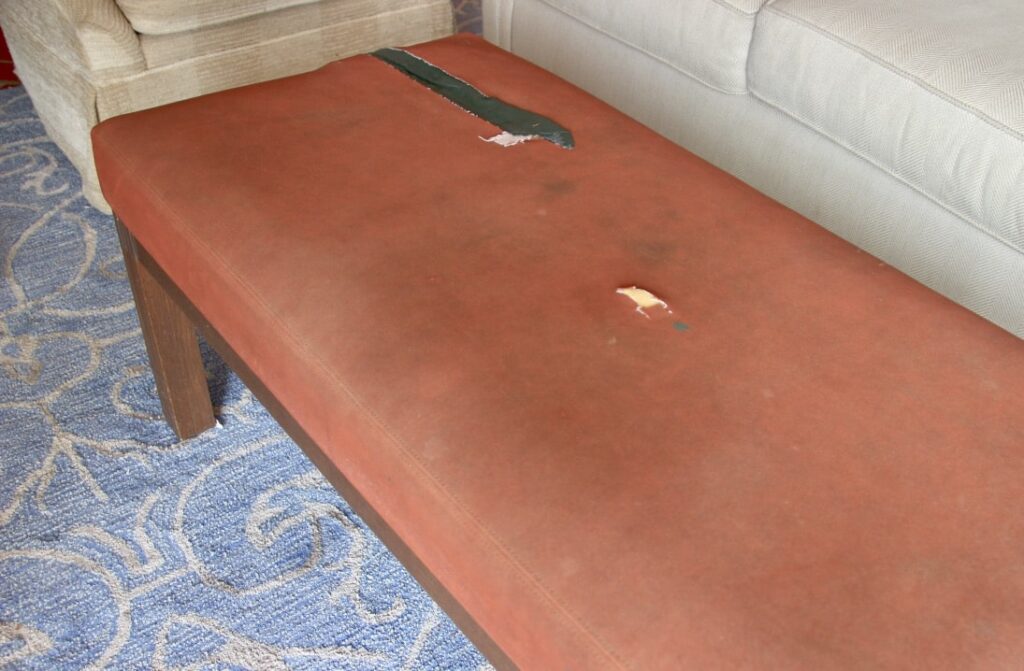
Here’s the battle worn bench. Our starting point.
I picked up a pair at an auction at the University in our home town for $2!!! NOTE: since they came from the Student Union, they are built to last!
Yep, I was the only bidder on these “beauties”! I couldn’t believe no one else saw their potential!?!?!
Now To Make Our Custom Ottoman Covers
Supplies & Materials:
Your bench, footstool or ottoman
Desired textile, read on for my choice and the considerations, you could use a decorator fabric and hem the ends
Large needle, like a tapestry needle
Upholstery thread
Scissors
Pins, clothespins, binder clips
Ruler, tape measure or equivalent
My original vision was for a cool, antique textile. But ran into trouble with scale, with condition and with price.
So then I started thinking of a cool, antique, maybe a kilim rug, like this, or this.
Huge advantage of using a rug, it’s all one piece with the corners folded and hand-stitched. That’s right, no top piece of fabric, no separate side panels, no seam allowance!
The antique kilim rug? Again, scale, condition and price — ugh!
But a rug would be sooo perfect for us. We are a casual family — like feet (furry and otherwise) up and on the furniture kinda casual.
Time to pivot. How about a NEW throw rug?
My bench measures 21 X 42-inches.
So a rug that is 3′ wide would give me the width I need, with 7 1/2-inches hanging down on the long sides. (Width of rug – width of bench) / 2 = length of long side panels.
To have the same overhang on the short ends, I would need a rug that is at least 57-inches long (my bench length 42″ + 7.5″ + 7.5″).
A 3 x 5 rug would do it!
I knew I probably wouldn’t find something exactly 57″ long, so I wanted to find something that was pliable enough to turn the short hems under or that I could cut and finish the raw edge. It also needed to be pliable enough to stitch the corners for a tight custom look.
I brought home a number of options from Home Goods and this rag rug was the winner for us.
And BONUS: It’s distinct rows and obvious stitch lines makes it super easy to stitch straight lines and the heavy texture hides sloppy stitching. Win! Win!
TIP: The newer thin washable rugs would be great for this project.
UPDATE: We still use and love this slipcover on our ottoman, after three years! Each time I run it through the washing machine, there are more threads and bits of rags that I have to pull through to the back. It takes maybe an hour while watching TV and then the cover is good for another few months before I am compelled to wash it again.

Let’s DIY a Ottoman Slipcover (the Easy Way)
But first, may I ask if you are enjoying this post. Want more content like this? Join the House Mates, subscribe so you don’t miss a thing:
Thanks Bunches! Now back to the easiest slipcover ever!!!
Start with Hemming
Begin by determining which is your right side of the fabric/rug.
Now center the rug on your bench/ottoman with the right side down and measure the length of overhang on the shortest-hanging side. Mine was 7.5 inches on the long side of the bench.
=
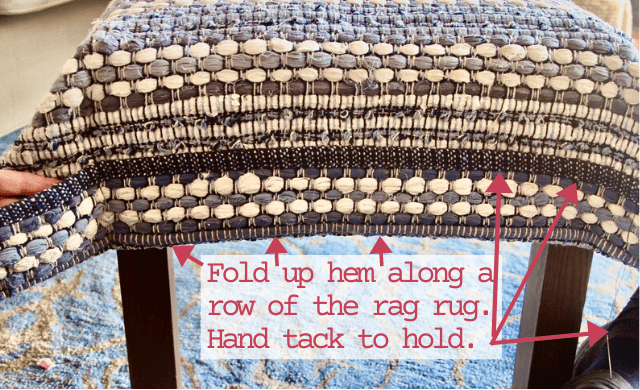
Now turn up each of the long hanging sides (in my case this was the short side of the ottoman) to match the same overhang. I turned up 3.5 inches. It’s easiest if you hold the hem in place with pins or binder clips.
Now break out the needle and thread. Tack up your hem with a simple whip stitch — it’s not going to show. Once you get started tacking the hem it will naturally fold along the row you have chosen. Just help this along by being consistent in stitching into the same horizontal row across the top of this hem.
If you non-sewers need a boost of confidence, here is a good basic tutorial video (You will not fold it under twice and you will want to use both lengths of thread in our needle, so knot the two ends together). Working with a very textured fabric — or rag rug — will hide your stitches, so really don’t overthink this.
Surprisingly easy, right?
With the hems done, I think we deserve a scoop of ice cream! Then come back and we’ll do the next step, the corners, and that’s it!!!
Your New DIY Ottoman Slipcover is so Close
Time For the Corners
First thing thread your needle and knot the end of the two threads together and have it ready.
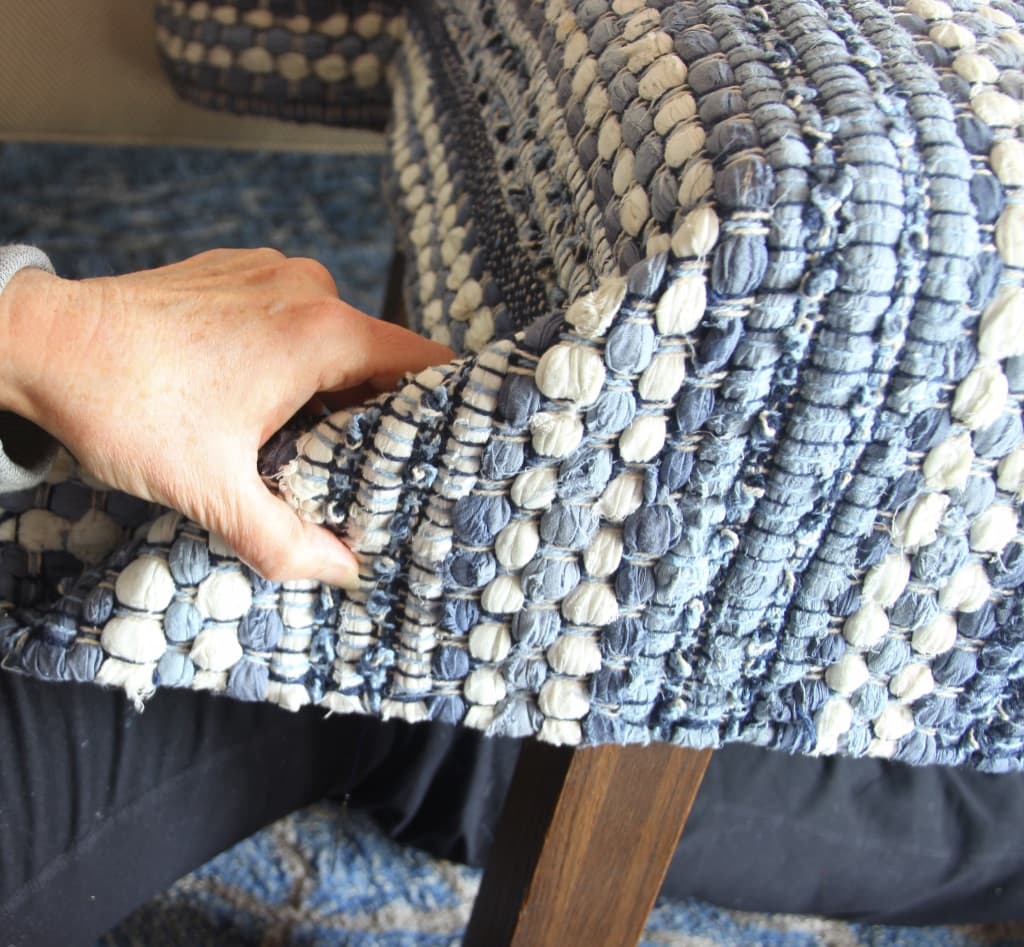
Now start by folding your corner “wings”. Then determine which line of the rug weaving you want to follow to create a nice tight, crisp corner.

Here’s a finished corner. It’s one vertical, straight line of stitching.
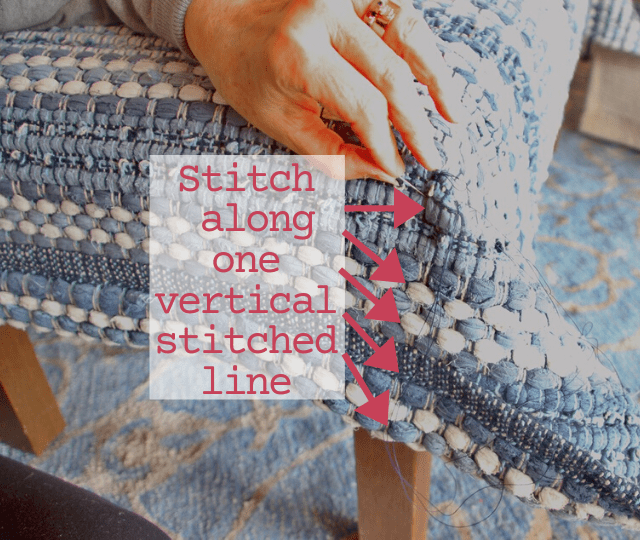
On this side, it’s easy to see your vertical line — it’s created by the rows of rags.
On this side, try to use one of the weaving strings that create the rag rug as your vertical line.
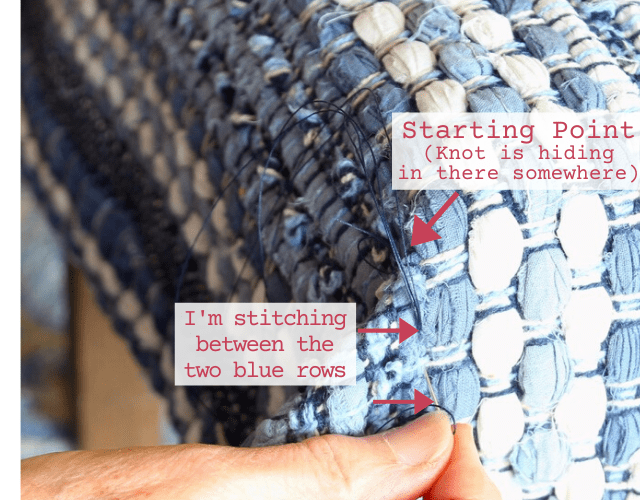
This time, starting at the top of your corner wing. Push your needle with knotted thread through the top and then loop around pulling your needle between the two threads and pull it tight.
This will create a slip knot so your thread can’t pull through the fabric. (Or you can tie a square knot around a clump fo fabric to get started — whatever works for you and is strong).
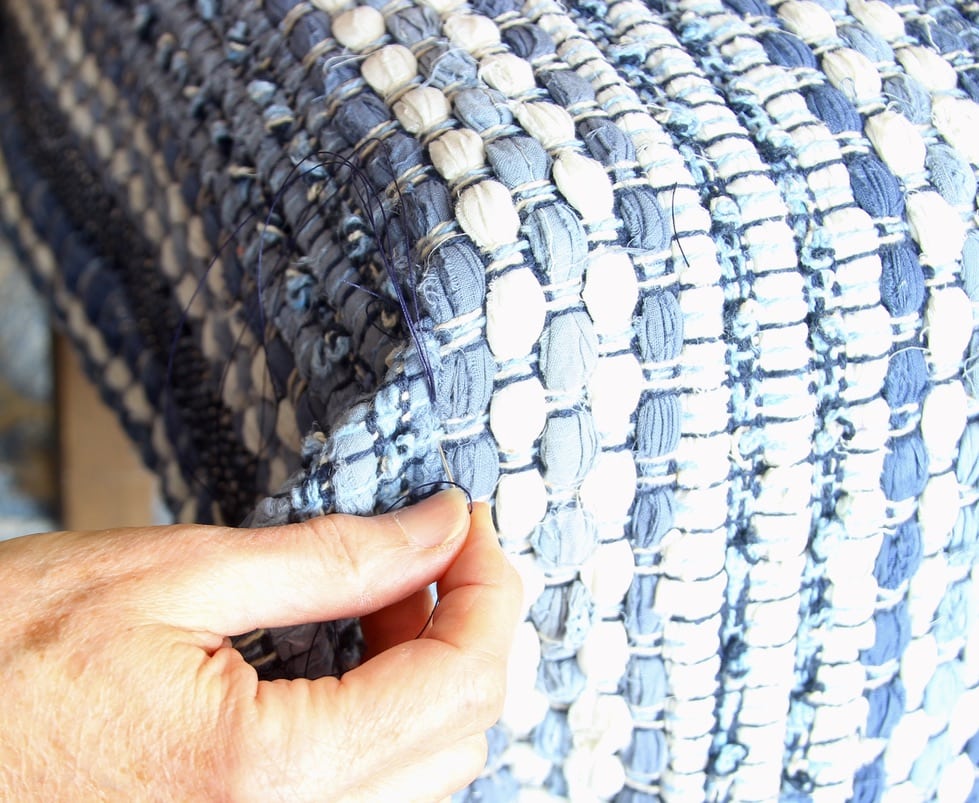
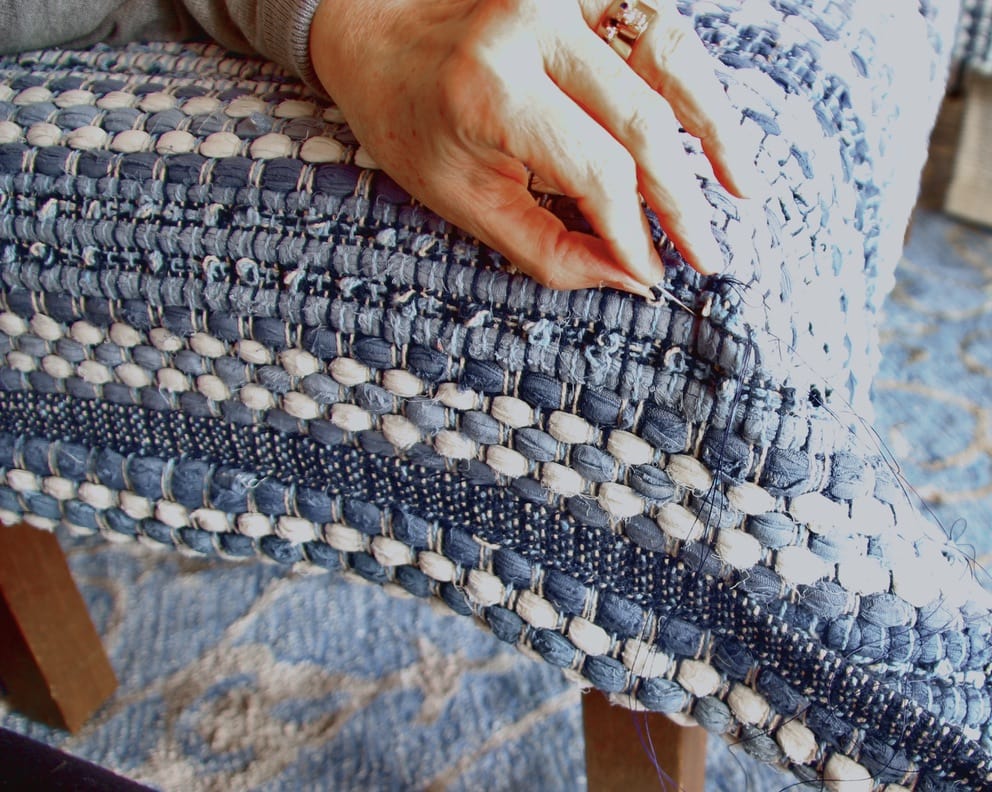
Now with this vertical row of stitching, you are pushing your needle from one side of the wing through to the other side, with the point of the needle coming out along the string you want to follow vertically.
Then on that new side, pull the thread taught, move your needle down about 1/4″ and push back through along that vertical marker string with the point this time coming out between the two rag rows you are using as your vertical guide.
Repeat and repeat all the way down using the same string and rag row as your guides. Be sure to keep your thread pulled taught the whole way down.
At the bottom of the row, stitch around the bottom edge or bottom rag row several times and then back up an inch or so.
Now tie a couple of good strong knots before clipping your threads. The very end of these corners will take the greatest pressure so we want to be sure those don’t come undone.
That’s it! Your DIY Ottoman Slipcover is done!!!
Now it’s magic time!
For the last step (really non-step), lift your slipcover off and turn right side out.
Decide which way you want you wings to fold in (mine are laying in against the long sides of the ottoman) and slide your slipcover over the top of the ottoman and in place. NOTE: if any of your wing points hang down too low, you can do a quick tack underneath to keep them out of view.

LOVE it! Except those brown legs — ugh!
Slipped the cover off. Lightly sanded the legs and hit them with some black paint I had on hand.
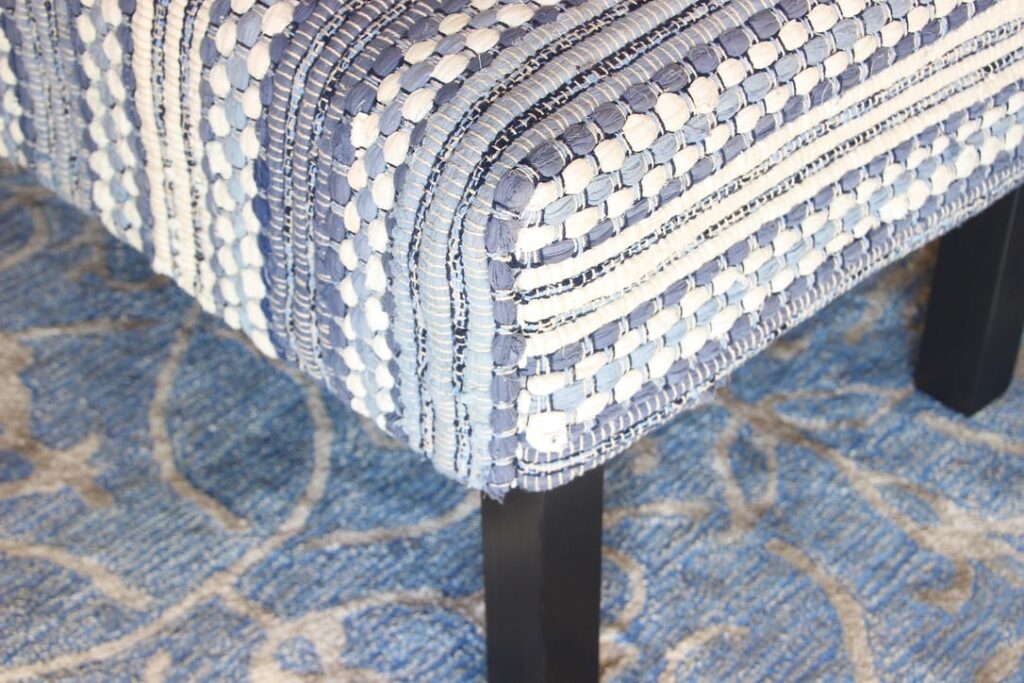
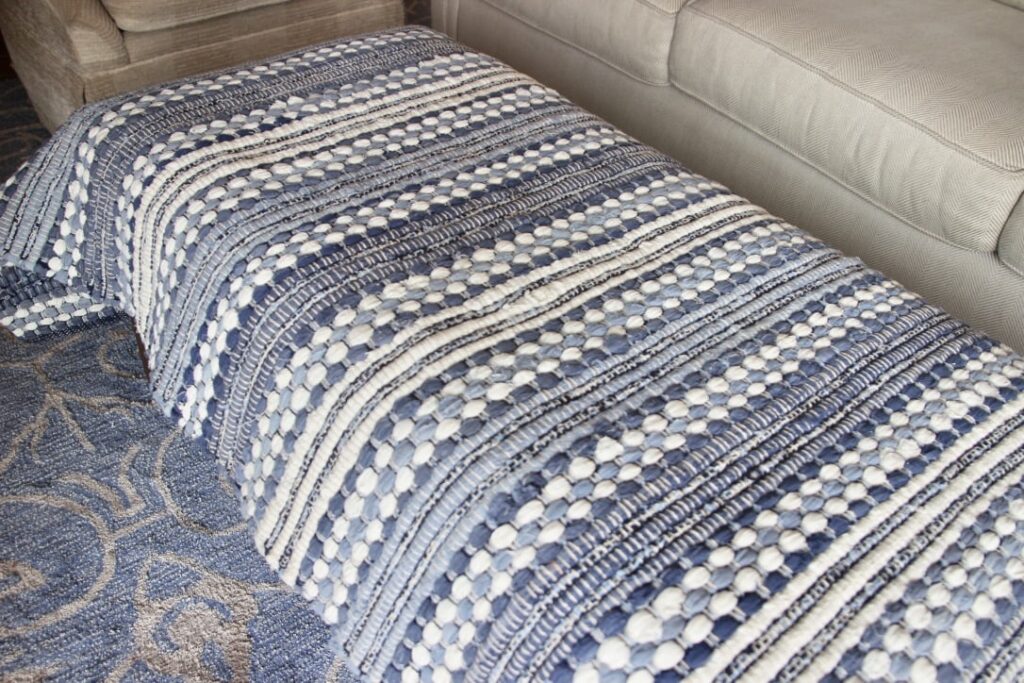
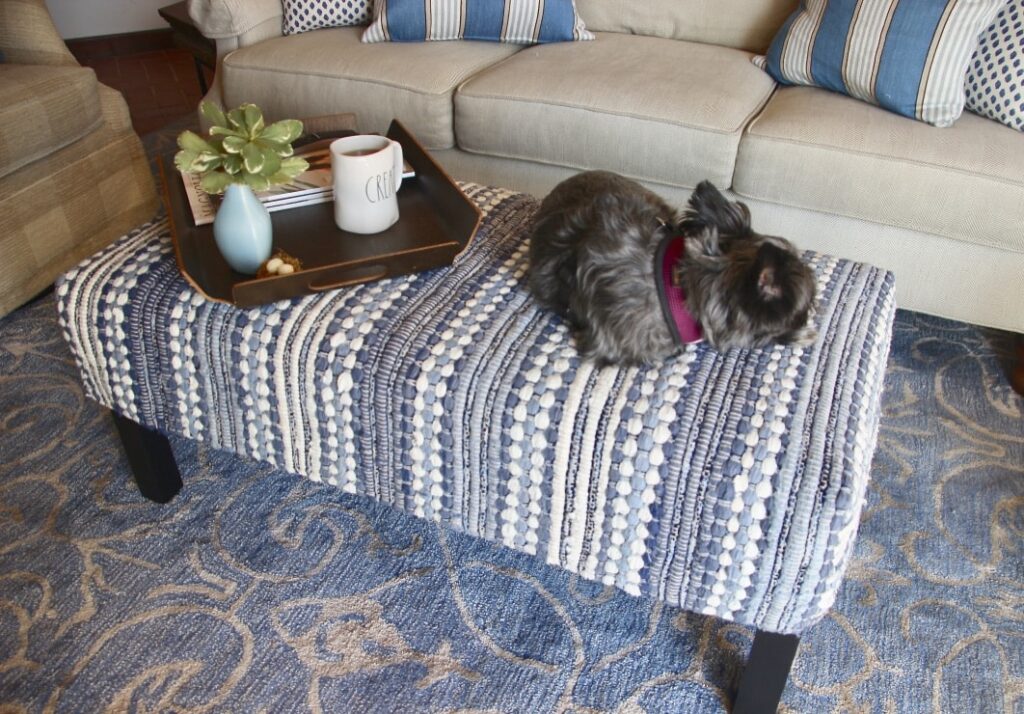
See how nice those corners look!
And look at those fresh black legs!
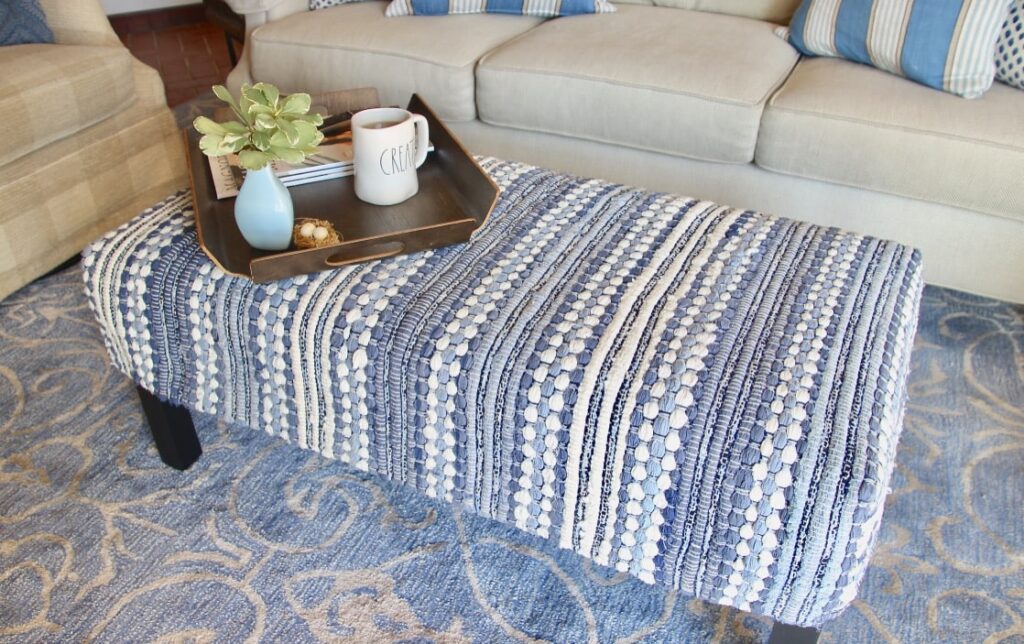
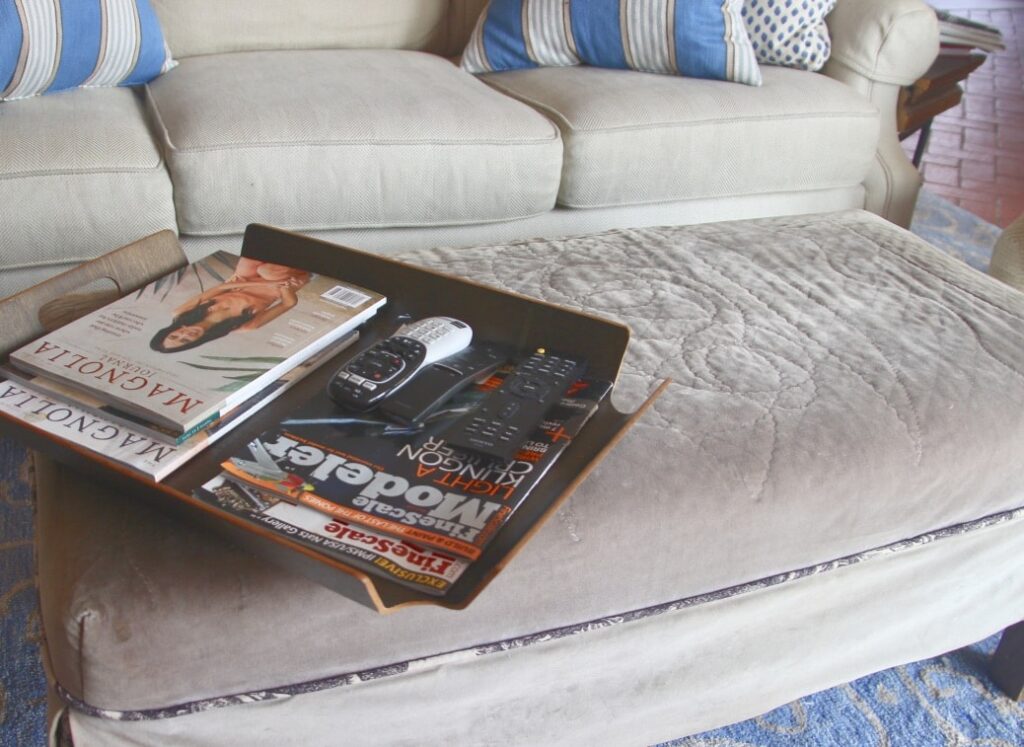
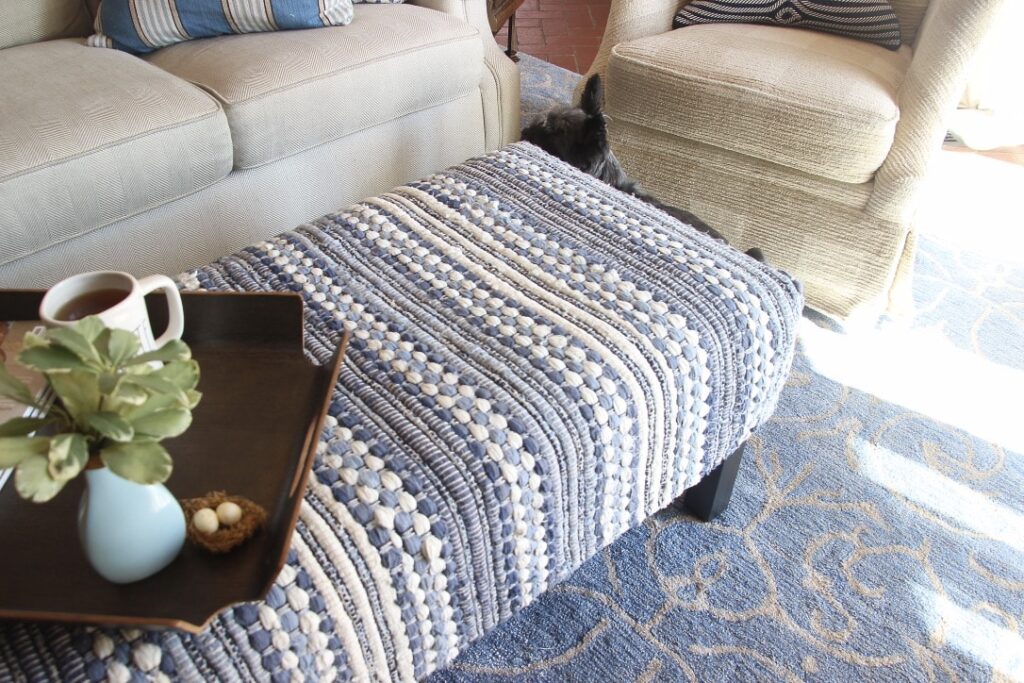
One more picture and I’m ready to prop up my feet and enjoy some tea with a bit of magazine time reclining on my fun little project.
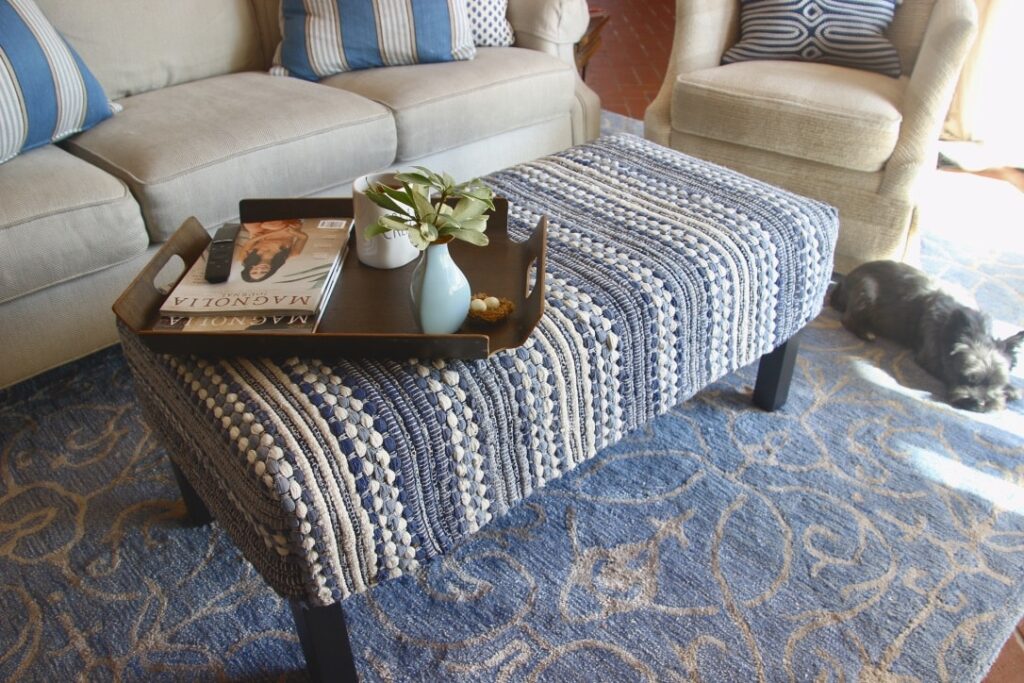
Someone’s been stealthily moving in closer — and trying to look adorable.
Grittles: Who me?
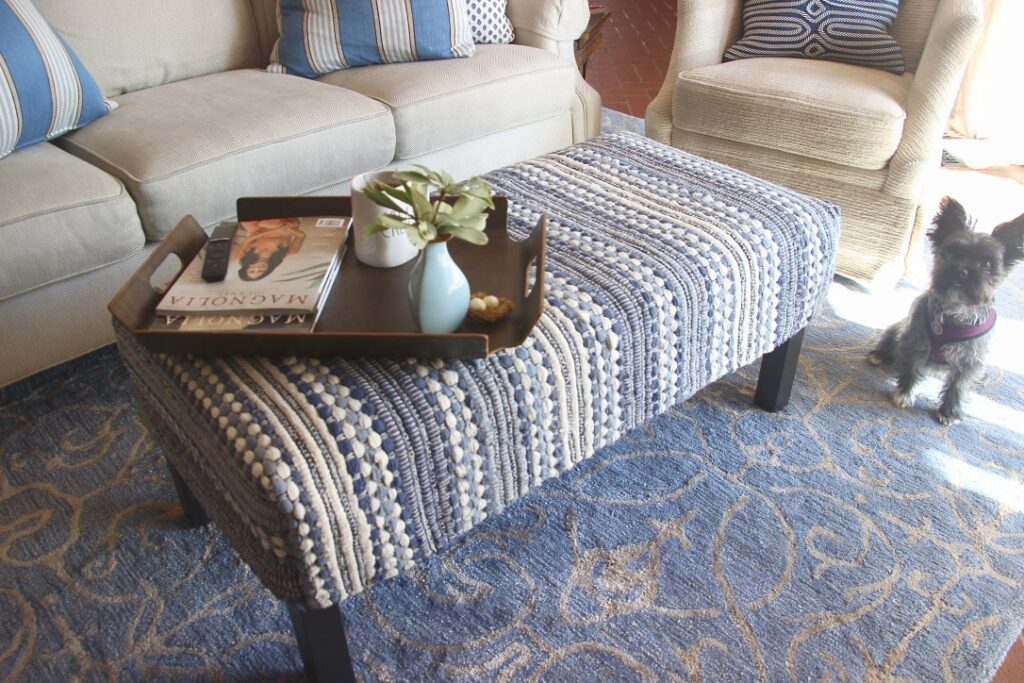
Need to investigate ….
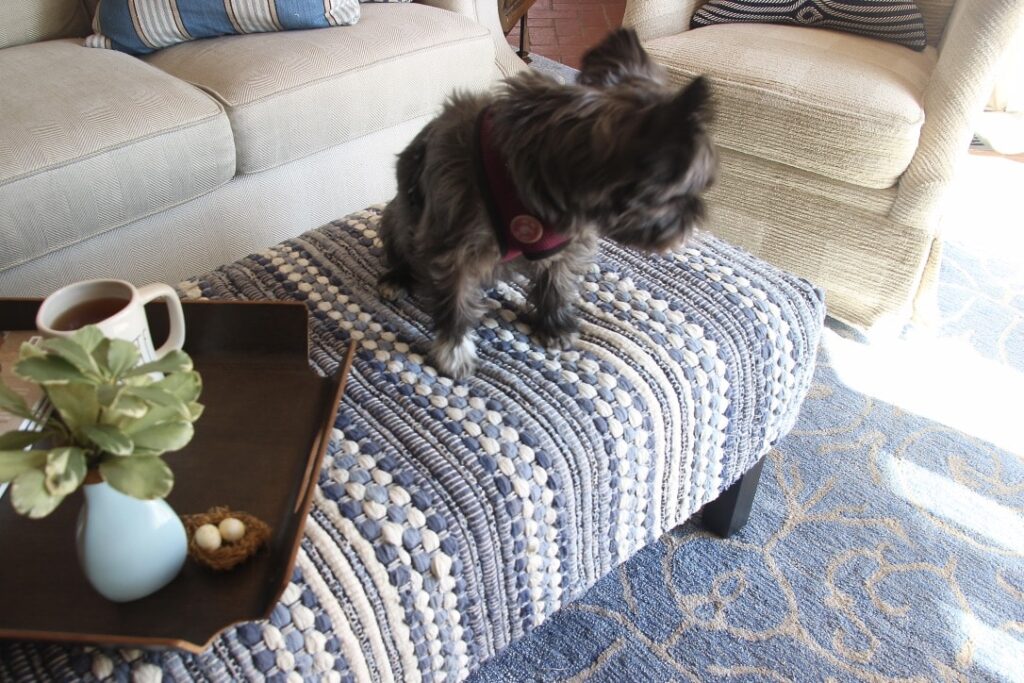
…. by which I mean claim as my own.
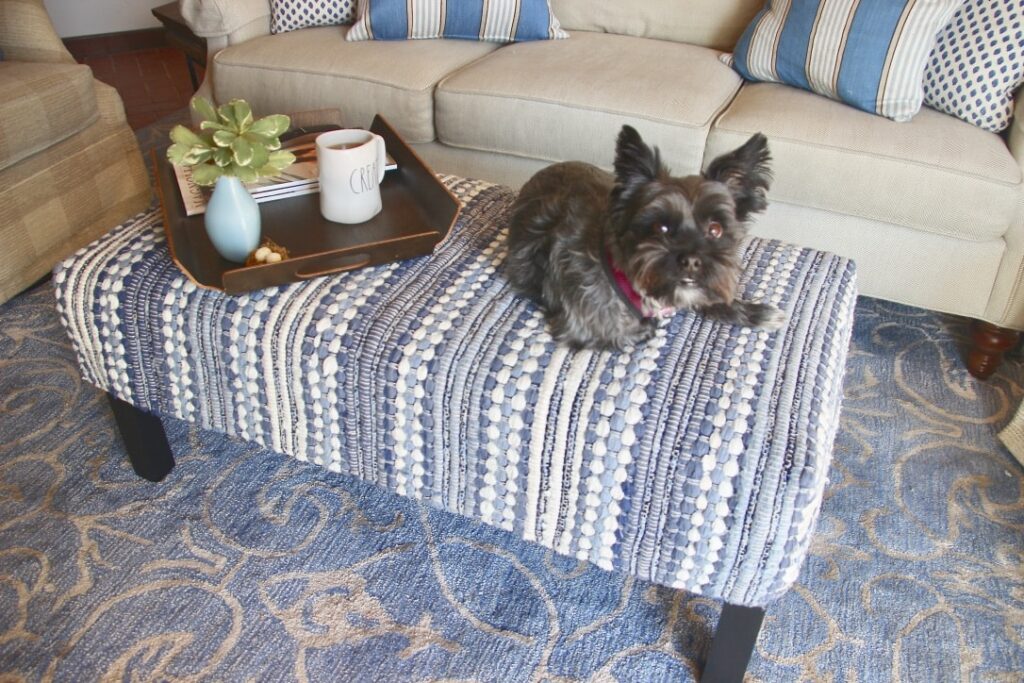
Do you have a problem with this?
Too late! She’s mine!!! Now if you could move that ray of sunshine over here, I’d really be a happy pup.
Me: SIGH!

Wouldn’t this be cute in bright colors for a playroom?
This worked so well, I am keeping my eye out for a well-priced vintage kilim for our entry hall bench — afterall, I won a pair of these benches!
So this is the absolute easiest ottoman. But if you are wanting a tufted ottoman, check out the one I made from a ceiling box that used to house tube lighting. No, really! It turned out super cool — and huge and sturdy!!!
I hope this inspires you to think beyond traditional decorator fabric slip covers. By using a throw rug, I greatly simplified the process.
Just like my super simple Low-Sew Soft Fold Roman Shade. By using a ready made shower curtain (not the plastic liner), the hems were already done. U saved myself a lot of sewing and time. Or even simpler, check out this window treatment.


")


This is so cute, very inspiring. Like the well written clear steps to follow. Got me thinking about possible projects!
Thanks Jolene! There are so many options here. And so easy!
Diane, I am dazzled! I have a bench/ottoman this would work on! (Can you tell I’m excited about this?) I’m going to have to wait a long time, though, because it’s in my bedroom and will not need covering for a long time. But you could ship yours to me immediately–it is so perfect for my family room just as you’ve made it! Pinning. #CharmingHomesAndGardens
Love your excitement Jean!!!
Maybe you don’t need to wait too long for your bedroom bench. I think she’s crying out for a warm weather cover and a cool weather cover ;).
Well you definitely make it seem simple so I guess I’ll try it. Our ottoman upstairs needs a slip cover something awful but I’ve hesitated due to size. It’s about 2-1/2 times larger than yours. Ugh. Thanks for sharing this. Saw it on TTA. Pinned.
Thanks Cindy! Seems like finding the right textile or rug will be the starting point for you. Carry your measurements on your phone and keep an eye out. Hopefully the perfect piece will appear soon — once we are out and about again, anyway!
Send a pic when you have her done. And don’t hesitate to reach out with any questions.
I love how your rug slipcover turned out! You make it look so easy following your tutorial. Pinned.
Thanks Allyson!
It truly is surprisingly easy.
It turned out beautifully! You made it look so easy! Thank you for sharing this with Charming Homes & Gardens!
Thanks Kim! I hope you give it a go. Any questions, don’t hesitate to reach out.
I love this look and how it turned out! So inspiring! Thanks for sharing at Charming Homes & Gardens!
Thanks bunches Kristin! We love it.
This is gorgeous–the texure and color are amazing. Who would have thought to use a rug? Great job!!
Thanks so much! I do love the vibe it brought to our cozy family room.
This is the cutest ever! I am ready to do mine now! I have a need of a point of clarification, I don’t understand what happens to all of the fabric at the corners when you turn it right side out….
Hi Lauta,
Thanks for your kind words! The “wings” extra corners just tuck up on one side or the other and if they want to droop down, just tack it up hiding it behind. I didn’t have any problem and that extra filler kept the cover nice and tight.
Super helpful. Just did a faux leather one to match a mid-century modern chair. You were my inspiration!
Oh Terri, that sounds awesome! I’d love to see it. Do you have pics to share?
Hi Diane, First of all.. Blue & White… my favorite. Love this idea ! Really a great tutorial & photos with easy-to-follow steps. I did a similar project turning a medium-large area rug into a seat cover for the rear seat in our truck. Just like your project, it turned out nice, sturdy & protects the seat from our 100+ pound dog.
Best wishes & thanks. ~MargieW.