

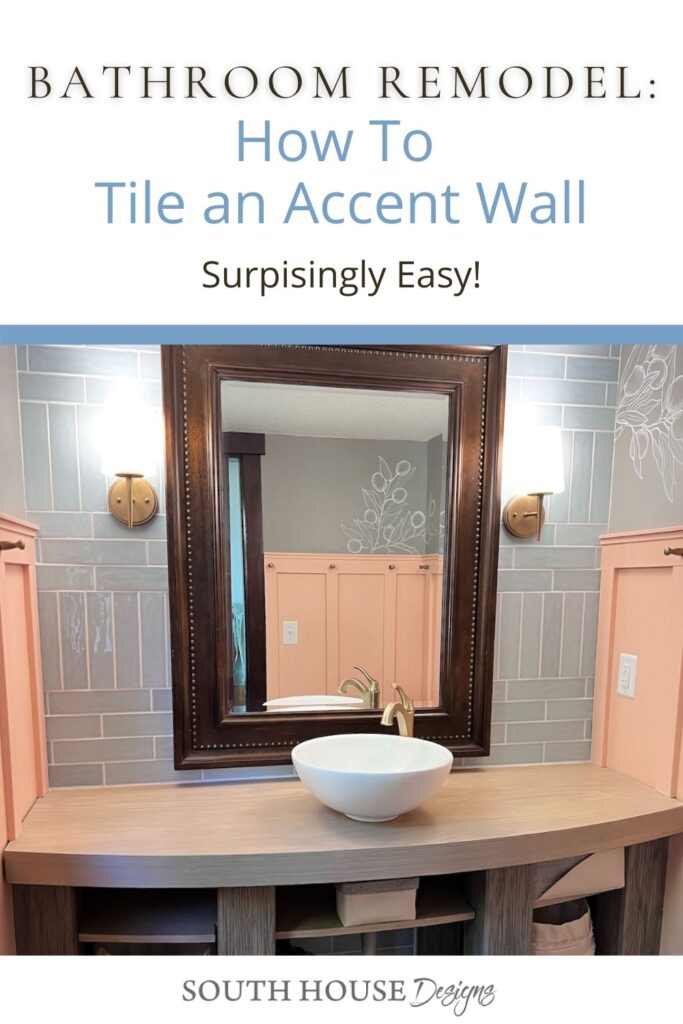
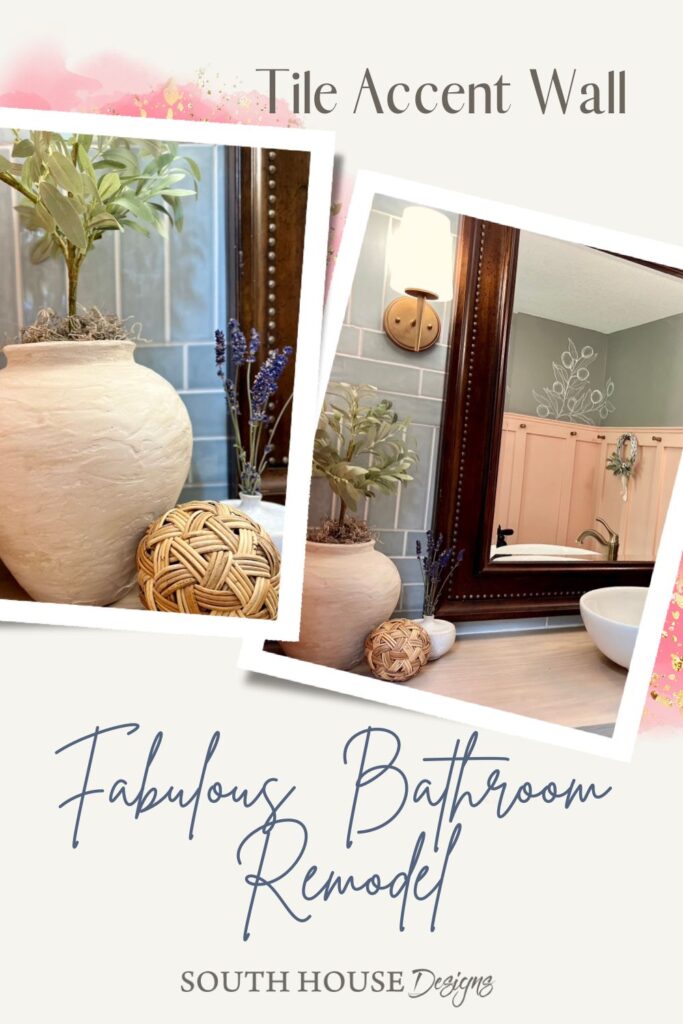
Tile Accent Wall
Surprisingly Simple DIY
This gorgeous tile accent wall was a surprisingly simple DIY even for this total tiling rookie. Here’s everything you need to know PLUS a few tricks!
Are you loving all the beautiful tiles available now? Would you love to add a tile accent wall to a bathroom, a sunroom, a bar area, the laundry room, behind a potting table, etc, but you’ve been holding back because tiling is intimidating?
I was right there with you!
Complete 180! Now I’m wondering why I waited so long.
So let’s talk rookie tiling today.
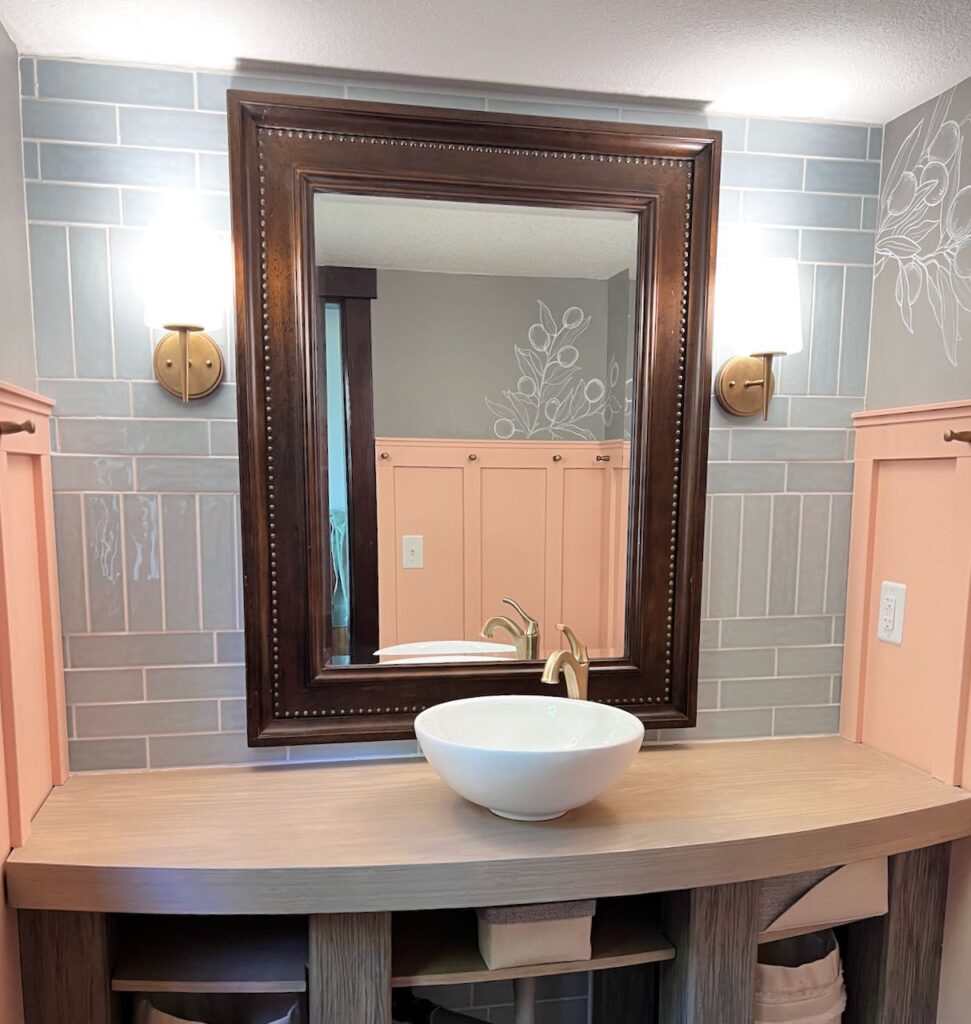
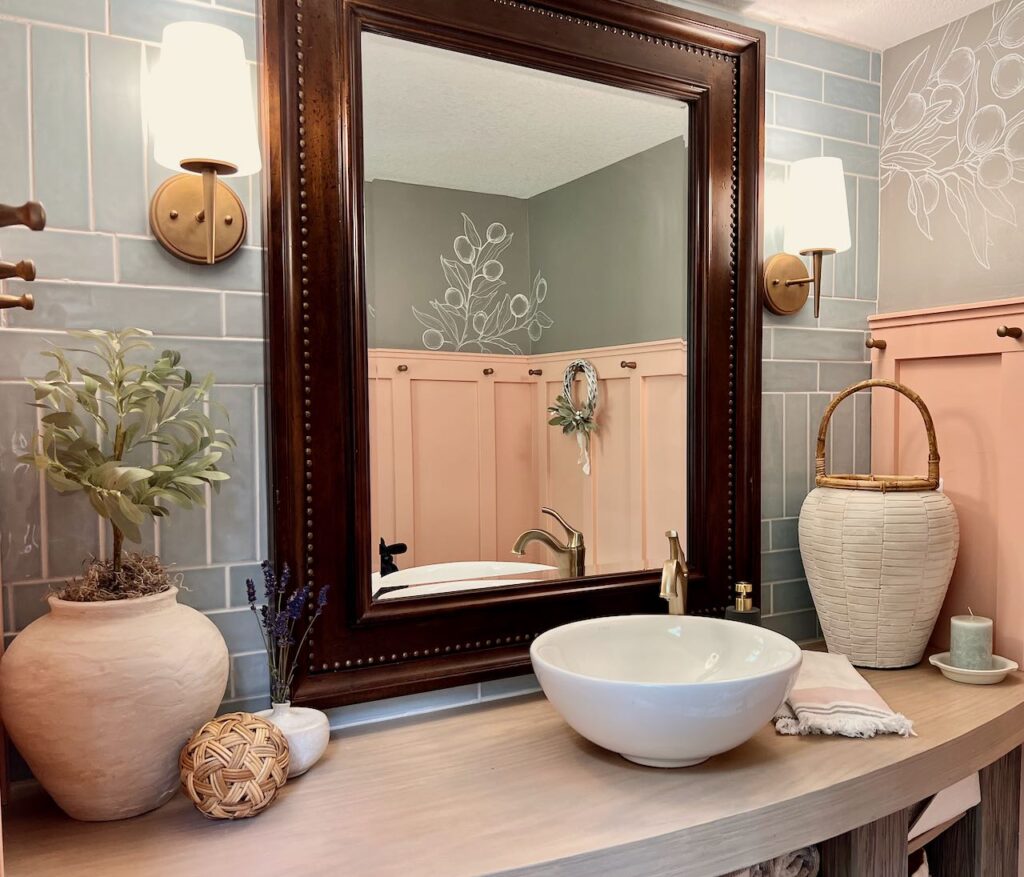
Doesn’t look rookie, does it? (as she asks rather proudly)!
YOU can do this too!!!
But First, a Bit of Background:
We remodeled our Powder Room for our first One room Challenge.
- Here is the before and the our inspiration board.
- Here is a post about all the decisions that need to be made before starting a wood accent wall.
- Here are tips to help when choosing the “right” paint color.
- The reveal is here.
- How we built the open shelf vanity and countertop is here.
- Then how I finished and sealed the vanity is here.
- Here are all the tricks I learned tiling for the first time.
- Here is the line art wall mural I added for a modern take on an old Mediterranean fresco.
Now you’re all caught up!
Let’s Talk Tile Accent Wall-
I could give you a very detailed step by step, but that is already out there.
I used this guide from Rich & Donna of An Organized Season. This blog post is about installing a backsplash, but it was easy to adapt to a whole tile wall.
Easy Tip # 1-
My “Tile Guy” at my local Home Depot clued me in on this one:
a crayon works just as well as the $6 tile marker.
I think a dry erase marker should work, but I went with a crayon since that’s what he recommended.
You’re busy right now. I totally get that.
So be sure to save this pin to your
Tile Board,
to your Powder Room Board
to your Accent Wall Board
to your Dream House Board
Thank you so much, in advance!
Adapting For Unique Installation Requirements-
Every tile job is probably going to be somewhat unique. So once you have a general idea of the tiling process, be study your situation and plan for any quirks before you cut even the first tile.
The Quirks & Adaptations of my Installation–
Here are my real-life examples. Hopefully they’ll help you look for your own.
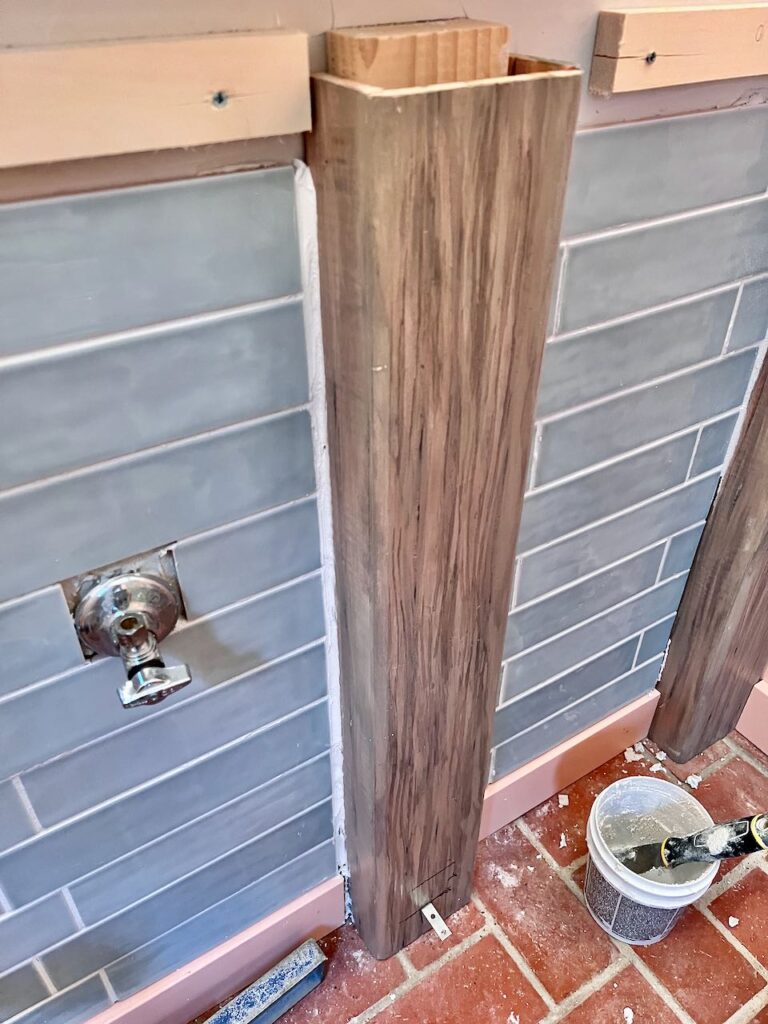
FIRST THE VANITY LEGS – Our tile wall will also have a large open shelf vanity attached to it. Four chunky legs will be bolted into that wall. That would have been very difficult for us DIY novices to know exactly where to drill holes in the tile and then get the screws to line up through the 2×4’s into those precise holes.
So instead, we determined the placement of the legs, drew lines on the wall just outside the legs.. I then tiled between the lines, leaving the wall open where the legs will be. Once the tiling was done and the legs installed, I caulked the gap between the wood legs and the tile. Same as you would do with backsplash around kitchen cabinets.
Countertops are installed first, and then tile above. I knew I would have trouble reaching up the wall and preferred to tile first. So while we were dry-fitting the vanity together to mark the wall for the legs, we also marked the top of the countertop on the wall.
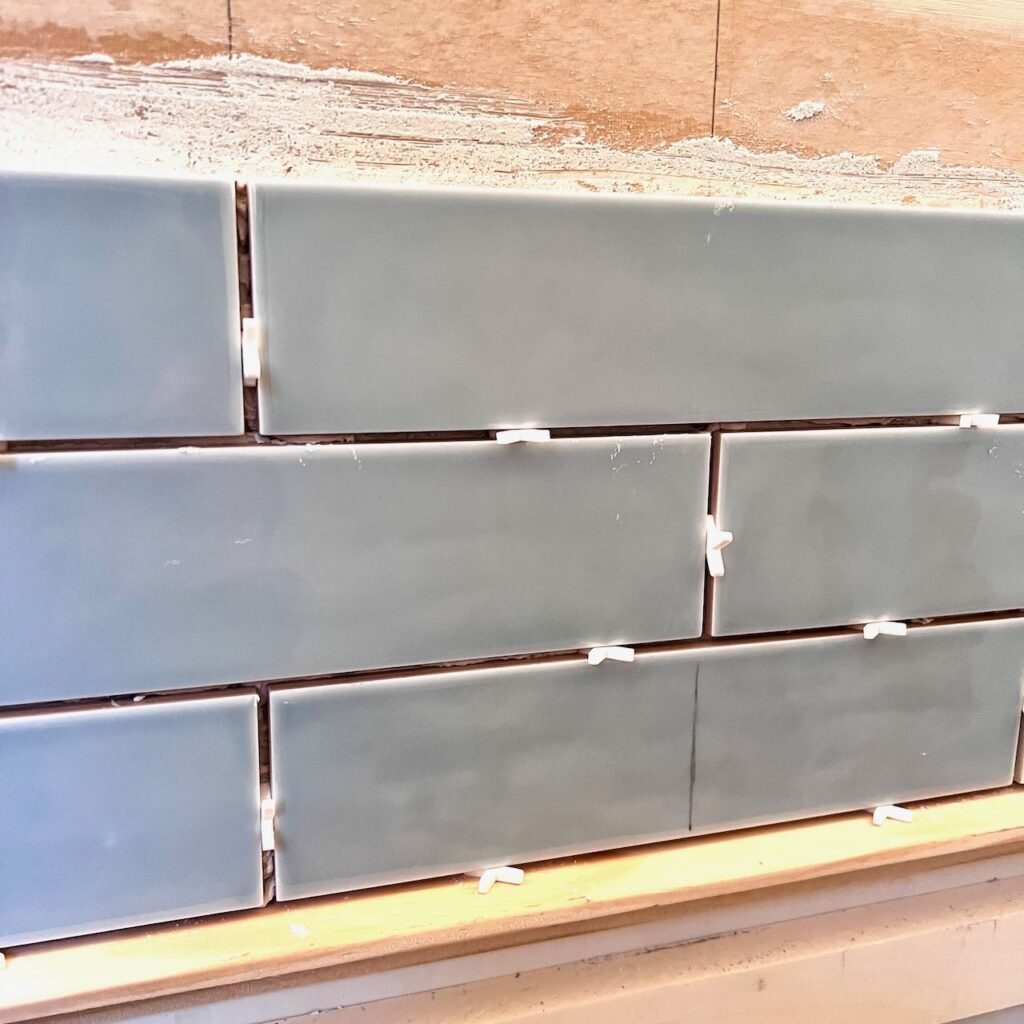
A WAY TO SUPPORT THE BOTTOM ROW OF TILE was needed. So I temporarily added some scrap trim along the countertop line. Of course double checking with a level line. I used tile spacers between that trim and the bottom tile to have space for caulk.
We were tempted to not tile behind the vanity shelves and just color match the tile with paint.
I’m so glad we didn’t. It is surprising how much the tile shows. But I did take a few shortcuts.
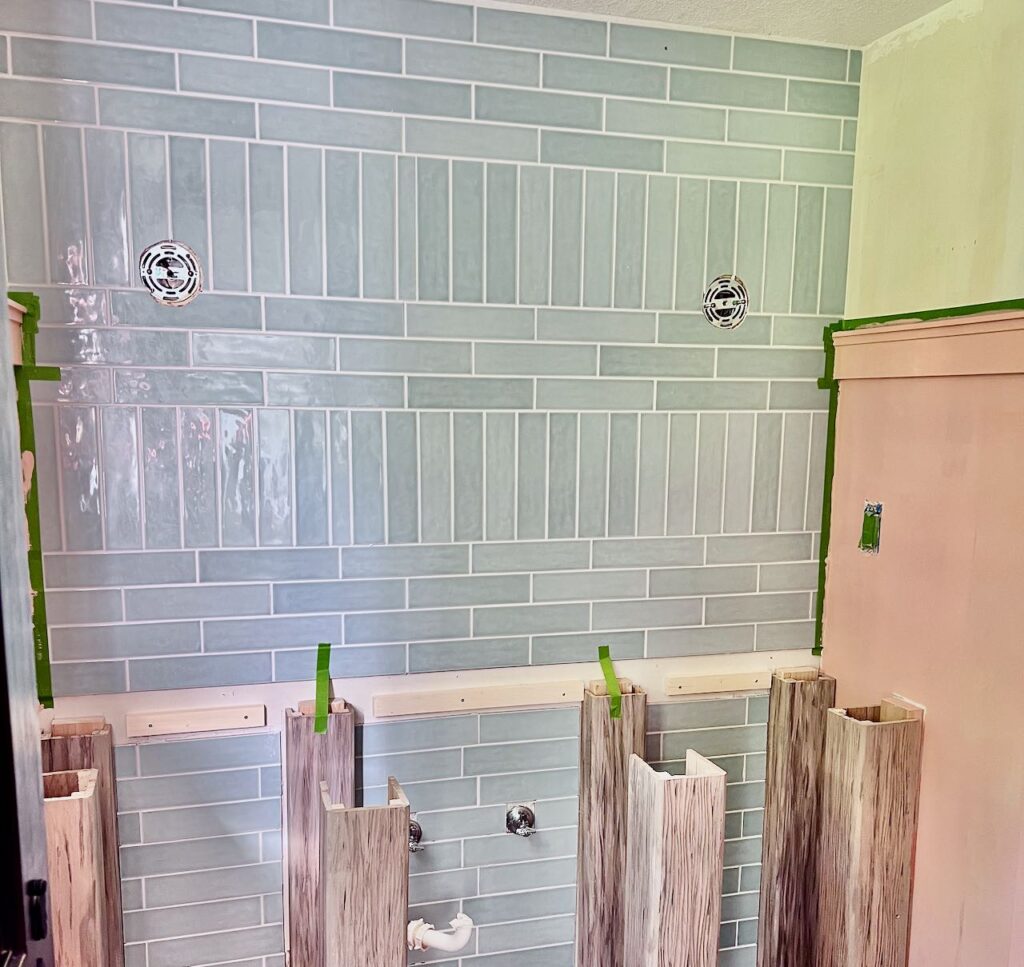
FIRST SHORTCUT- I did not follow the same pattern below the counter as I planned for above it. Below, they are all horizontal. In each section between the legs, I used one full length tile and one cut to fit the remainder of the width. As I went up, I alternated the full and the short pieces.
Three advantages:
- This greatly reduced the number of cuts
- Reduced the amount of tile I used
- Served as a great training ground and confidence booster for this novice
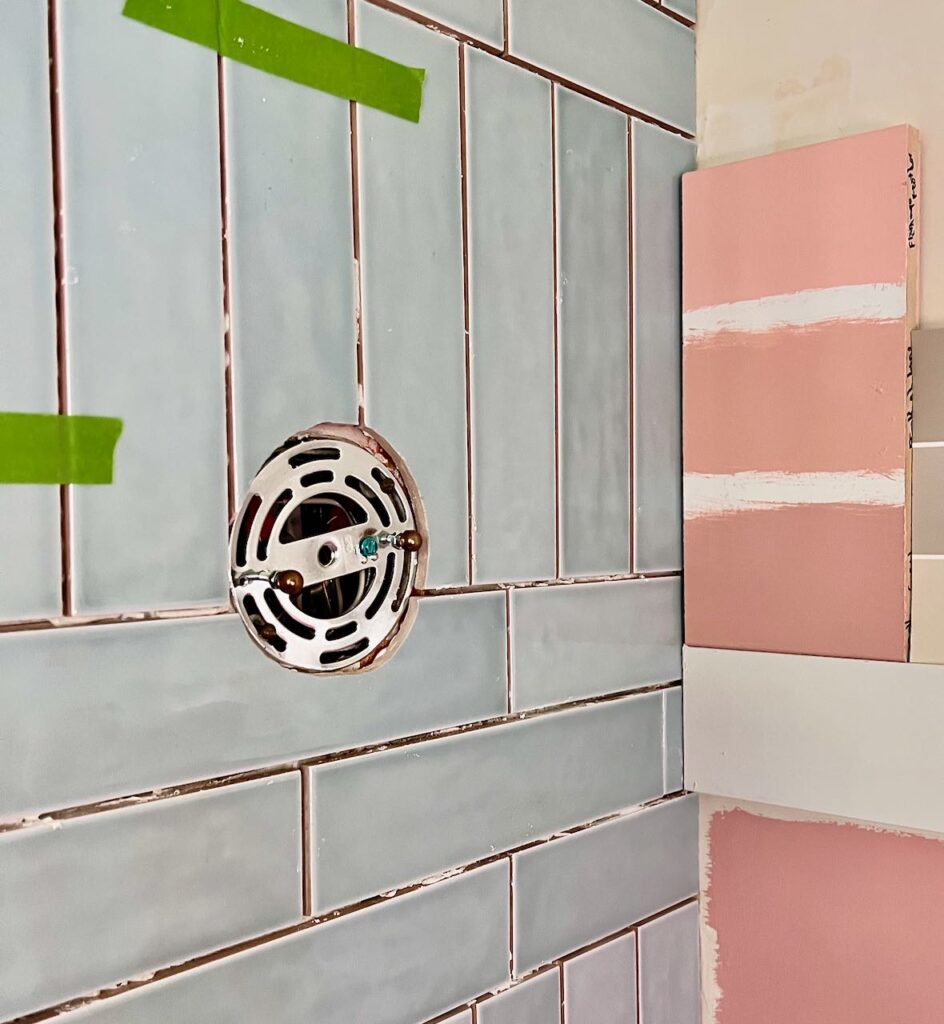
ANOTHER SHORT CUT was to not make curved cuts around the plumbing lines. I really wanted/needed to get this section done that night and I didn’t have the right tools for curved cuts. I decided they wouldn’t show with the bins I had planned for the shelves. This bought me a bit more time to research and get the right tools before I got to the light fixtures that I wouldn’t be able to fudge on.
FRIENDLY REMINDER: this is a judge-free zone!
ONE MORE OBSTACLE to plan for pre-tiling was how we would hang that huge mirror. Looks heavy doesn’t it? I dare say it’s even heavier than it looks!
We definitely wanted to screw it into two studs. Yes, you can use anchors on a tile wall, but we felt better about bypassing the little plastic anchors due to the insane weight.
We found the studs before tiling and marked the line all the way up the height of the wall. We will need these stud locations when it’s time to hang the mirror after the wall is completed, so we transferred the stud marking onto the face of the top tiles with crayon, per the aforementioned tip.
What Held Me Back–
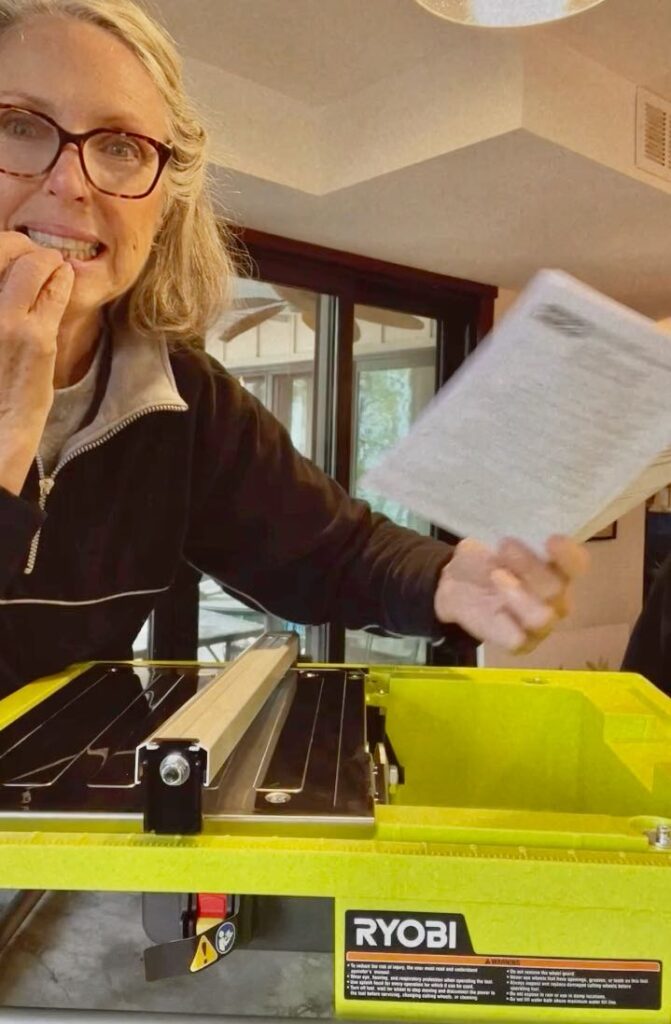
The wet saw! Or just my idea of the wet saw totally intimidated me.
They look like such intense pieces of equipment, and messy! Mucky water flying everywhere.
And it seemed like your fingers have to hold small pieces of tile mighty close to the blade and everything is wet, which means slick, which means slipping and sliding — and I really love my fingers! I didn’t handle gel fingernails very well, how on earth will I handle prosthetic fingers!
See where my head went!!! Yep, total intimidation.
Whatever saw you choose, just be sure to read the instruction manual!
We chose this Ryobi wet saw. (this is not an affiliate link – just sharing).
Reality of a Wet Saw-
NOTE: This is not a sponsored post. Just sharing what worked for me.
- The Ryobi tile saw I bought has a safety shield that encompasses the blade. The only exposed blade is just the depth of the tile. and the shield prevented me from even coming close. Phew! Such a relief!
- I wore a nylon jacket to try to stay dry. That was overkill. The only thing that got wet were my fingertips and I solved that by having an old shop towel on the table next to the saw.
- Clean, easy cuts were the standard. When I got tense, I found I tended to pull slightly to one side as I pushed the tile through and the last tiny bit would sometimes chip slightly on the cut corner. Practice and relaxing solved this.
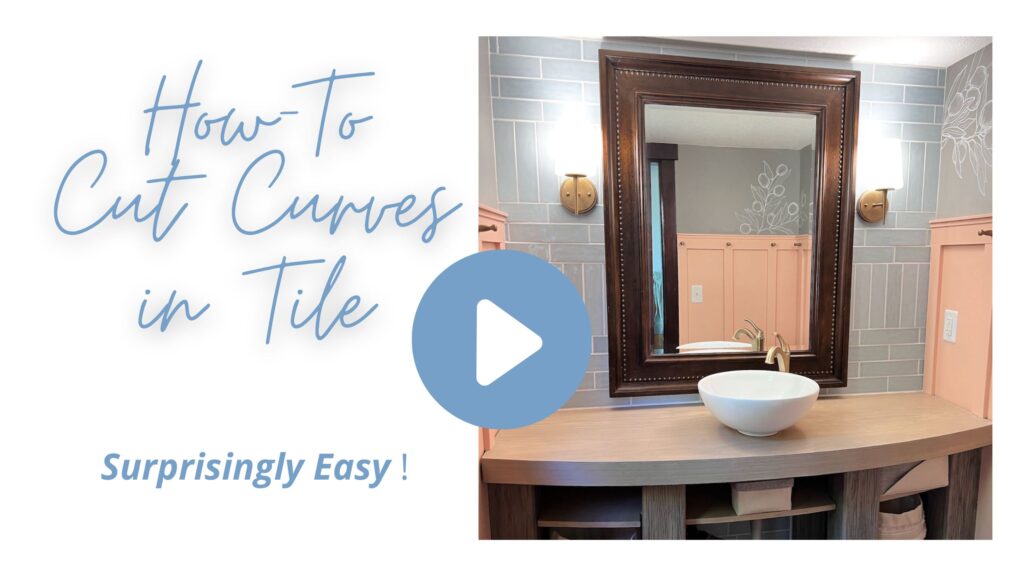
How To Cut Curves-
What didn’t work:
- After researching further, I was not comfortable cutting small curves on 2-inch wide tile using an angle grinder!
- My tile was too thick for the tile nipper method to make smooth and exact enough cuts for my fixtures.
What did work:
- Dremel tool with a tile cutting bit!!!
I took my old Craftsman Dremel type tool to Lowes and found a tile cutting bit with the proper sized collet.
Cutting the curves was not difficult if you keep a couple of things in mind:
- A layer of painters tape on the face of the tile will reduce the cutting bit from slipping on the first pass or two while you establish a groove on the cut line
- Always clamp the tile and a piece of scrap wood to a stationary work surface. You want two hands to help guide the Dremel
- Guide the Dremel with light pressure. Let the Dremel do the work
- Keep water handy, pouring some on your cut line as you go
Here’s a short video of the process:
How To Drill Holes in Tile-
Next hurdle for a tile wall might be hanging a mirror, or artwork, or even a floating shelf.
You need to drill a hole through the tile for a screw into a stud or for a screw with an anchor.
HINT: If you go the anchor route, keep in mind that you need to drill the hole larger to accommodate the lip of the anchor. The entire anchor needs to pass through the tile before you tighten the screw which expands the anchor and can crack your tile.
In our case, the mirror had two triangle loops on the back to hang over nails. Since we were hanging it so close to the ceiling, the hanging triangles. would not be seen. We calculated new placements for these triangles on the frame based on the location of the studs from the center point of the wall.
Then we were able to mark the spots on painters tape on the tile where the holes needed to go,
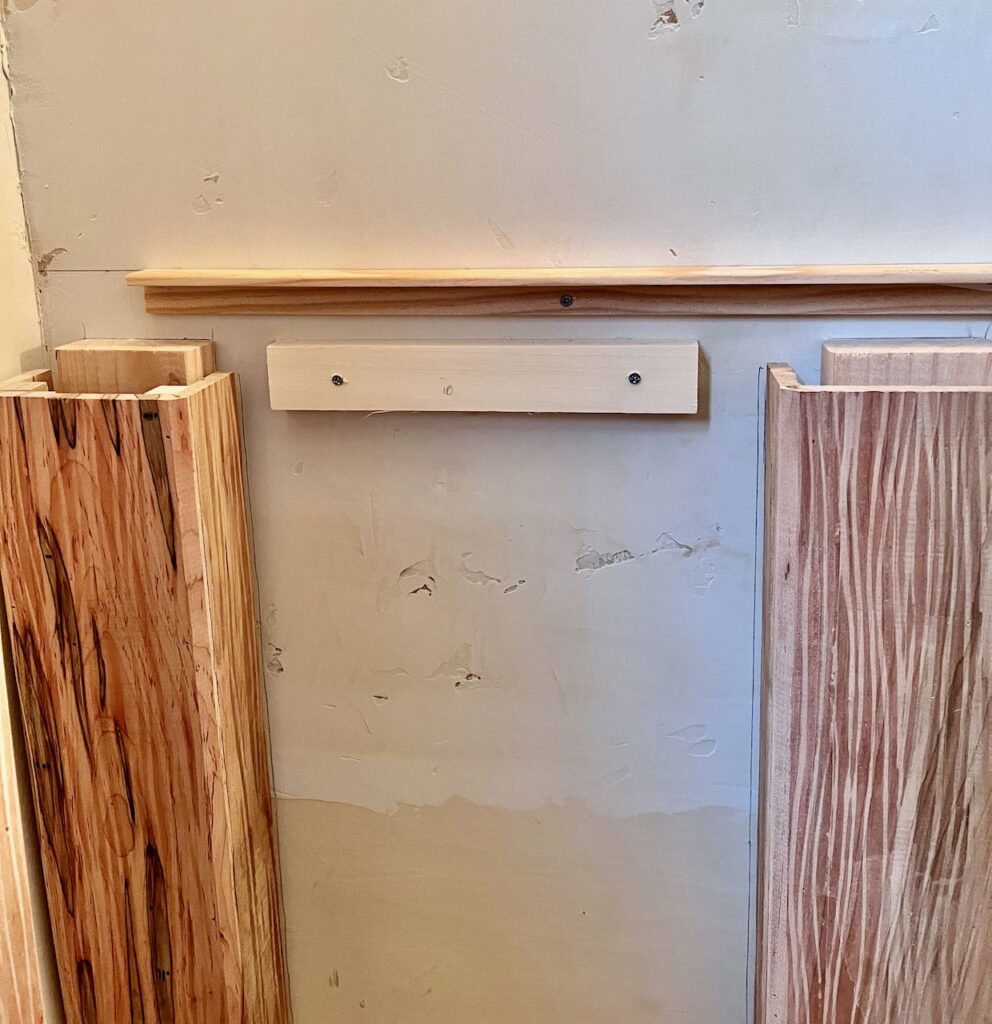
SUPER TRICK: Make a jig to hold your drill bit in one spot, because it is darn near impossible to do so on vertical tile. Build a jig? Just like in this short (less than a minute) video:
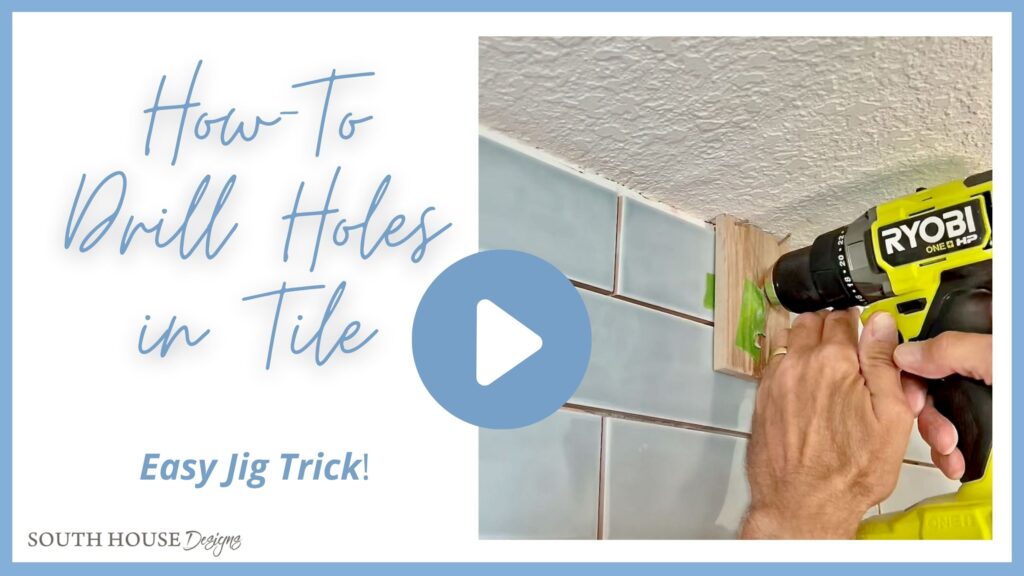
It’s important to drill holes before you grout. This way, you can use nails between the tiles to hold your jig in place while you drill.
The holes themselves are not difficult if you:
- use a diamond drill bit
- dip the bit in water frequently
- go slow and steady

Please consider pinning this, or sharing with a friend.
Pin it wherever you will find it again when you need some tiling tips.
My Favorite Tools and Supplies For Tiling:
The links in this post may include affiliate links, which means if you purchase anything using these links, you pay no extra, but I may receive a small commission that helps keep this blog running. I truly appreciate you using affiliate links whenever possible. Please know that I will never recommend a product I do not believe in!


Great drill! Just be sure to grab a battery + charger if you don’t already have one.
This drill bit worked great for us!
Dremel version of my old Craftsman. Great starting kit for all kinds of projects and crafts.
The tile cutting bit I used. Worked like a dream.


Our adhesive.
Perfect spreader to get the mastic right.
A soft float is best! You can go smaller if your tile is smaller.
Treat yourself! Great for all your caulking!
I hope you found this information helpful! I hope it empowers you to try something that you had always found intimidating. And to look for creative problem solving when you run into hurdles.
Don’t hesitate with any questions or feedback you might have.


")


Diane, you did such a fabulous job installing the tile! I love how you placed some tiles vertically and others horizontal! It gives the wall so much interest! I’m glad you found our post on installing tile helpful and I wanted to thank you for sharing it with your readers! I am so impressed with this bathroom makeover! You did an awesome job! Happy Day, Donna
Thanks Donna! Your guide really helped me, now I hope it helps others!
I’m thrilled with how the tile turned out.