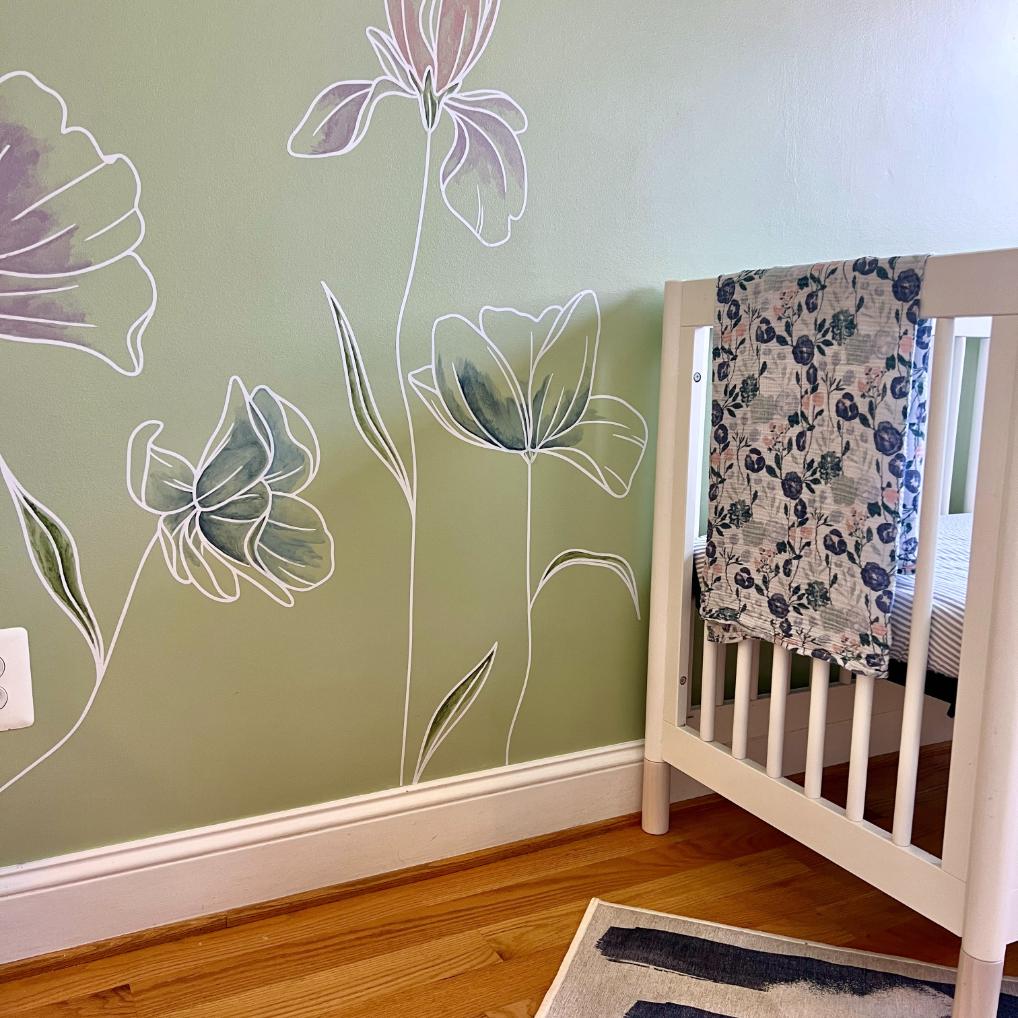
How to Add Watercolor Style to a Decal to Create a Truly Unique Accent Wall
Nervous to try something you’ve never seen done before? Grab a paint sample and a decal — I’ll walk you through exactly how we pulled off ours. Mantra included: it’s only paint.
Small nursery, big personality — that was the assignment.
A room this size doesn’t have square footage to spare for much furniture or patterns piled on everywhere, so the personality had to come from somewhere else: one wall, doing most of the work.
Once an accent wall was the plan, decal vs. wallpaper wasn’t even a debate.
A decal is a fraction of the cost, a fraction of the effort, and — important in a hundred-plus-year-old rowhouse — it doesn’t need smooth, even walls and straight corners to look right.
Our walls have character! Which is a polite way of saying they have “attitude,” and wallpaper wants a flat surface with none.
A decal shrugs all of that off. It’s also fully removable, so when this baby grows into an opinionated toddler with strong feelings about her own wall color (inevitable, given whose granddaughter she is), swapping it out won’t mean stripping paste off plaster.
Home Gym to Sweet Nursery Series:
- The Plan — planning the transformation
- IKEA Pax Closet Wall — turning wasted closet space into real storage
- Mini Attic Storage Space — claiming the space most people leave empty
- Decal + Paint Accent Wall — (you are here) adding a playful “watercolor” touch to a simple decal
- MCM Dresser to Changing Table — a vintage dresser gets new purpose
- Peekaboo Stenciled Drawers — a surprise hiding inside the changing table
- X & O Drawer Pulls — oversized, playful, and made by hand
- Scalloped Roman Shades — solving light and privacy in style
- The Nursery Reveal — the whole room, start to finish
The links in this post may include affiliate links, which means if you purchase anything using these links, you pay no extra, but I may receive a small commission that helps keep this blog running. I truly appreciate you using affiliate links whenever possible. Please know that I will never recommend a product I do not believe in!
Once decal-vs-wallpaper was settled, the real hunt began — which decal?
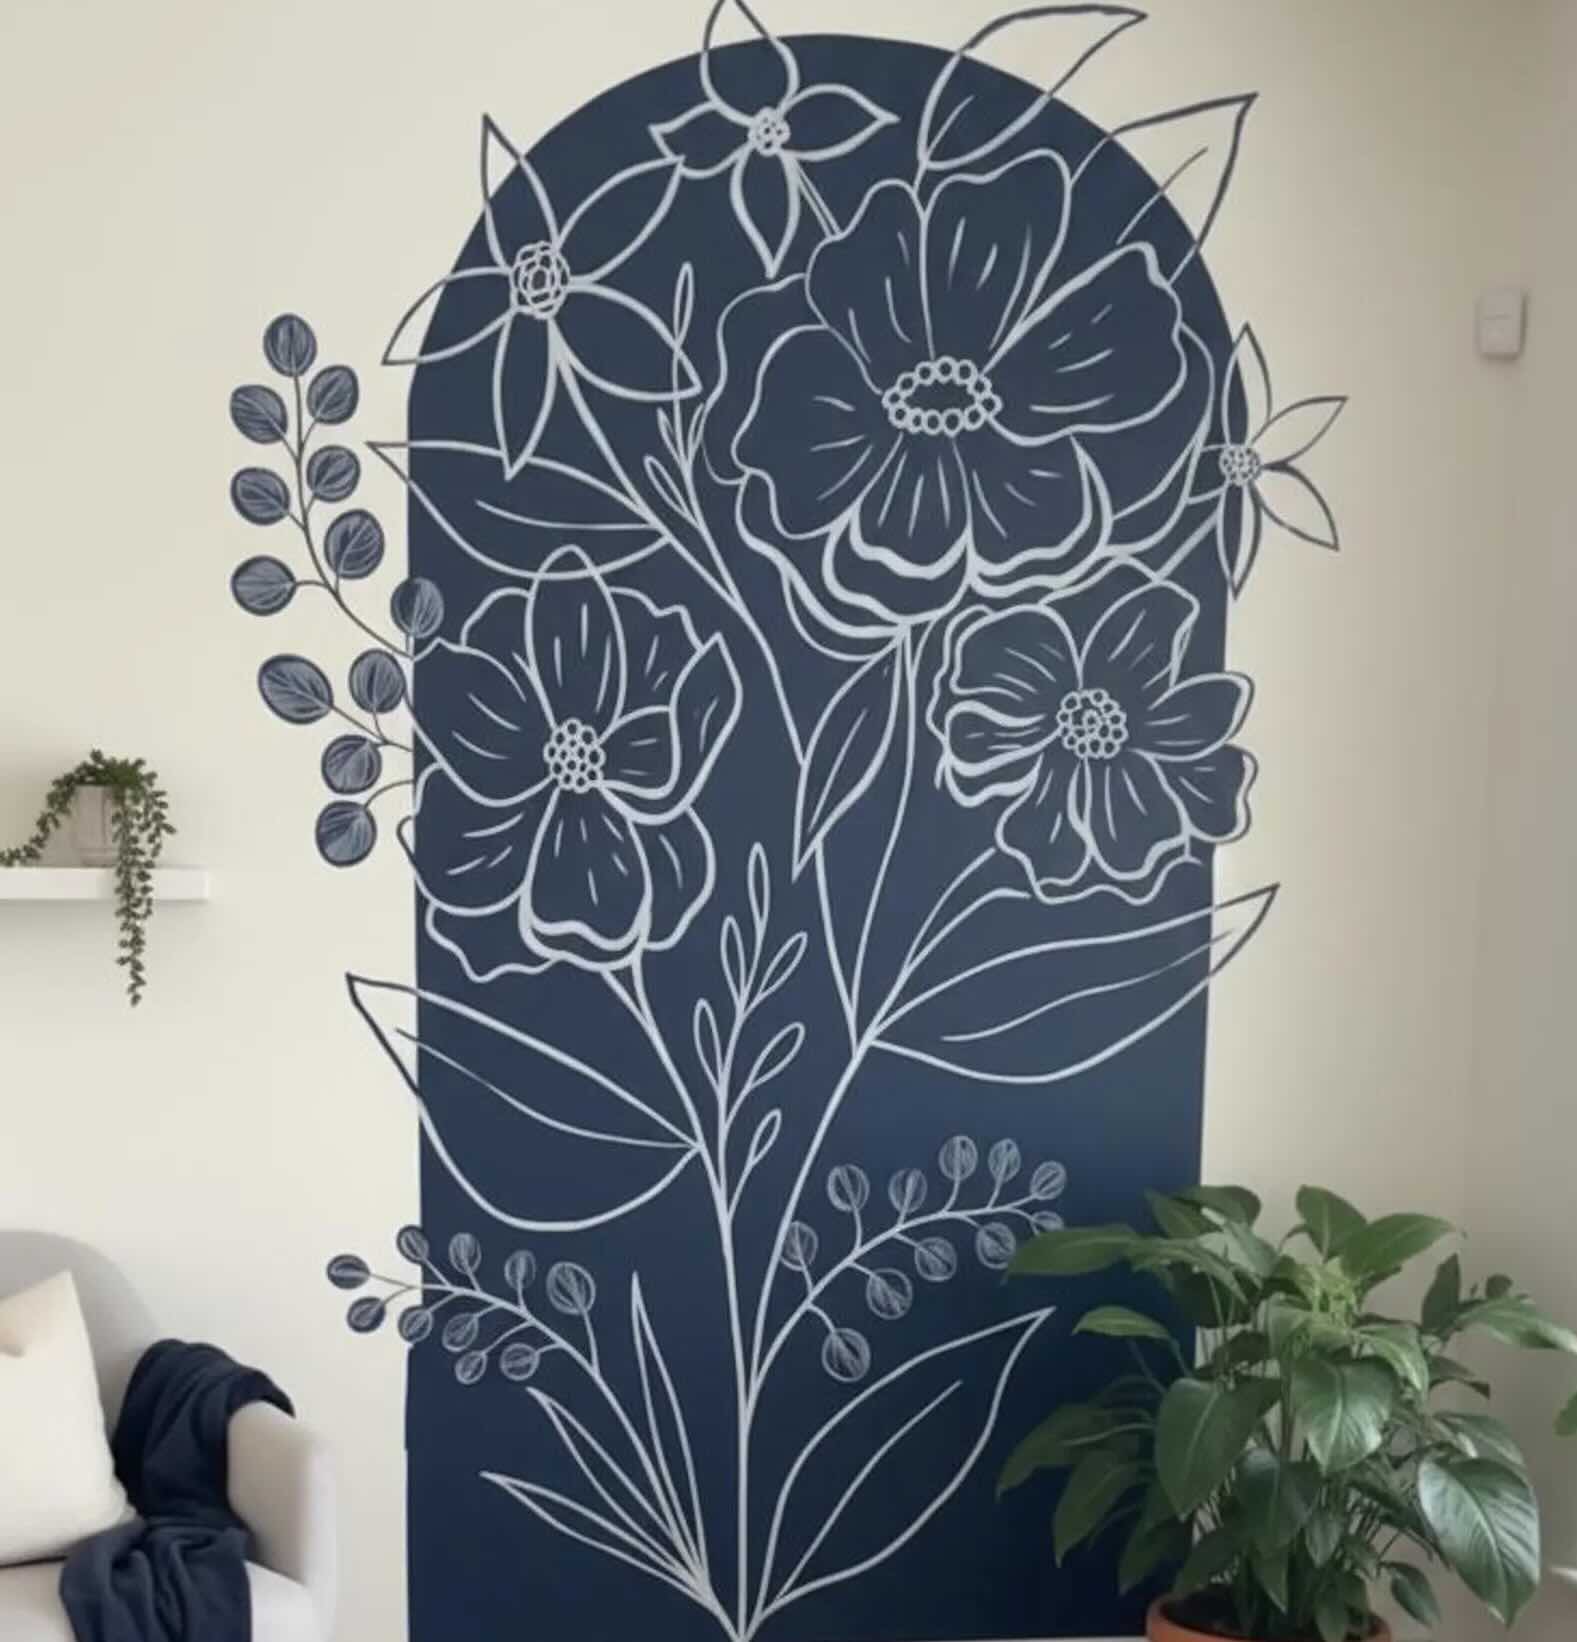
We fell hard for this minimal line-art floral decal I found on Etsy.
One catch: it only came in blue. Gorgeous blue. But completely, utterly wrong for a room meant for sage green walls. The sage was staying. The blue decal was not.
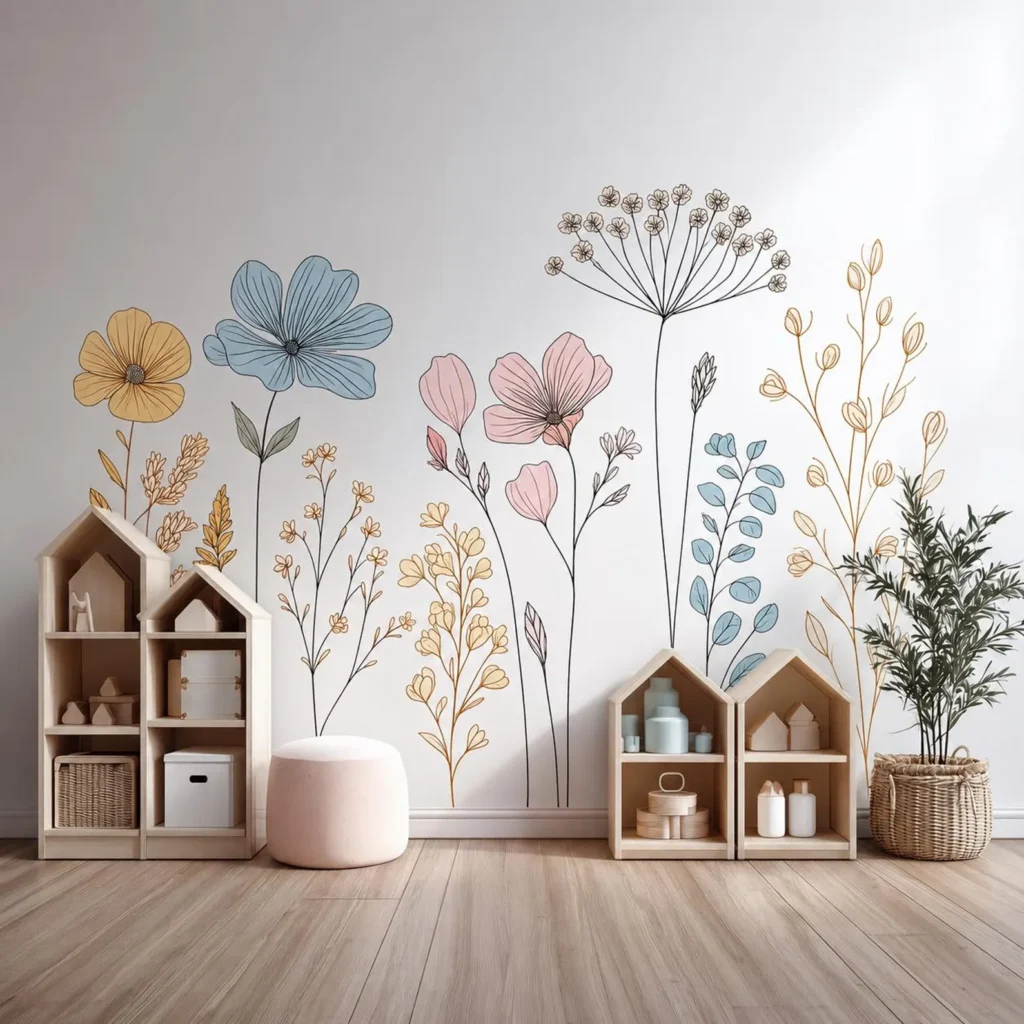
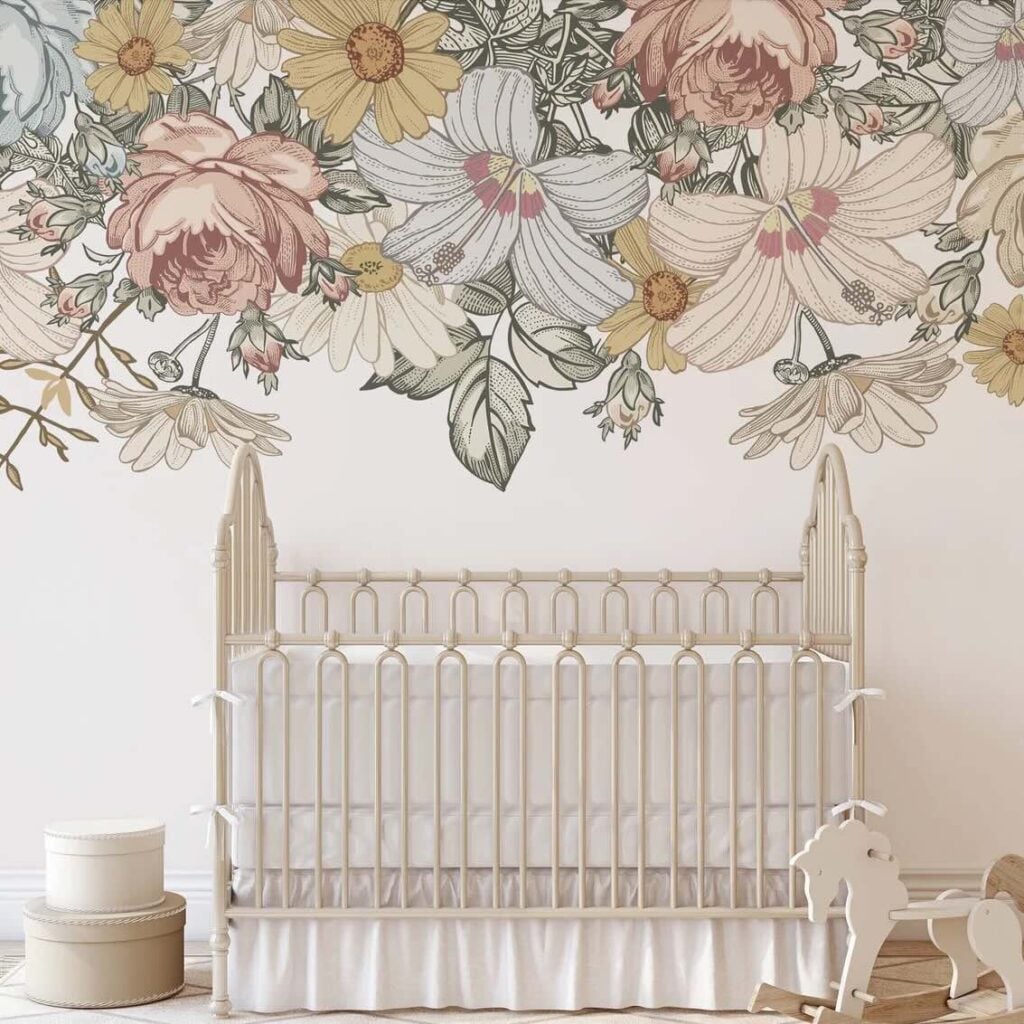
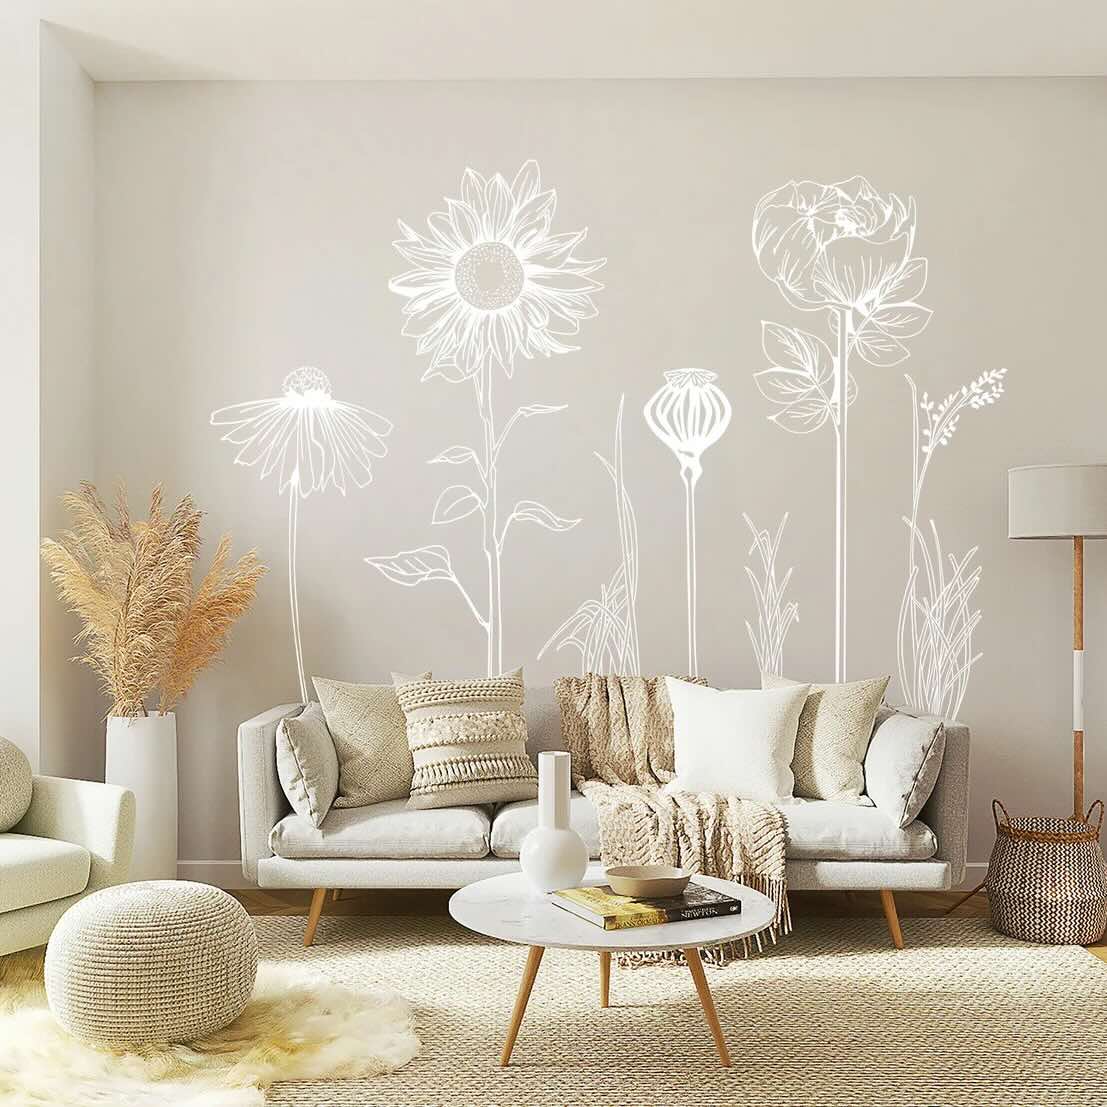
So I kept looking.
Above are three more decals we considered (click on each image to visit the listing). Each one had something going for it, but none of them were it.
If you’ve ever fallen down an Etsy rabbit hole at 11pm “just browsing,” you already know how these things go. SOooo many great options.
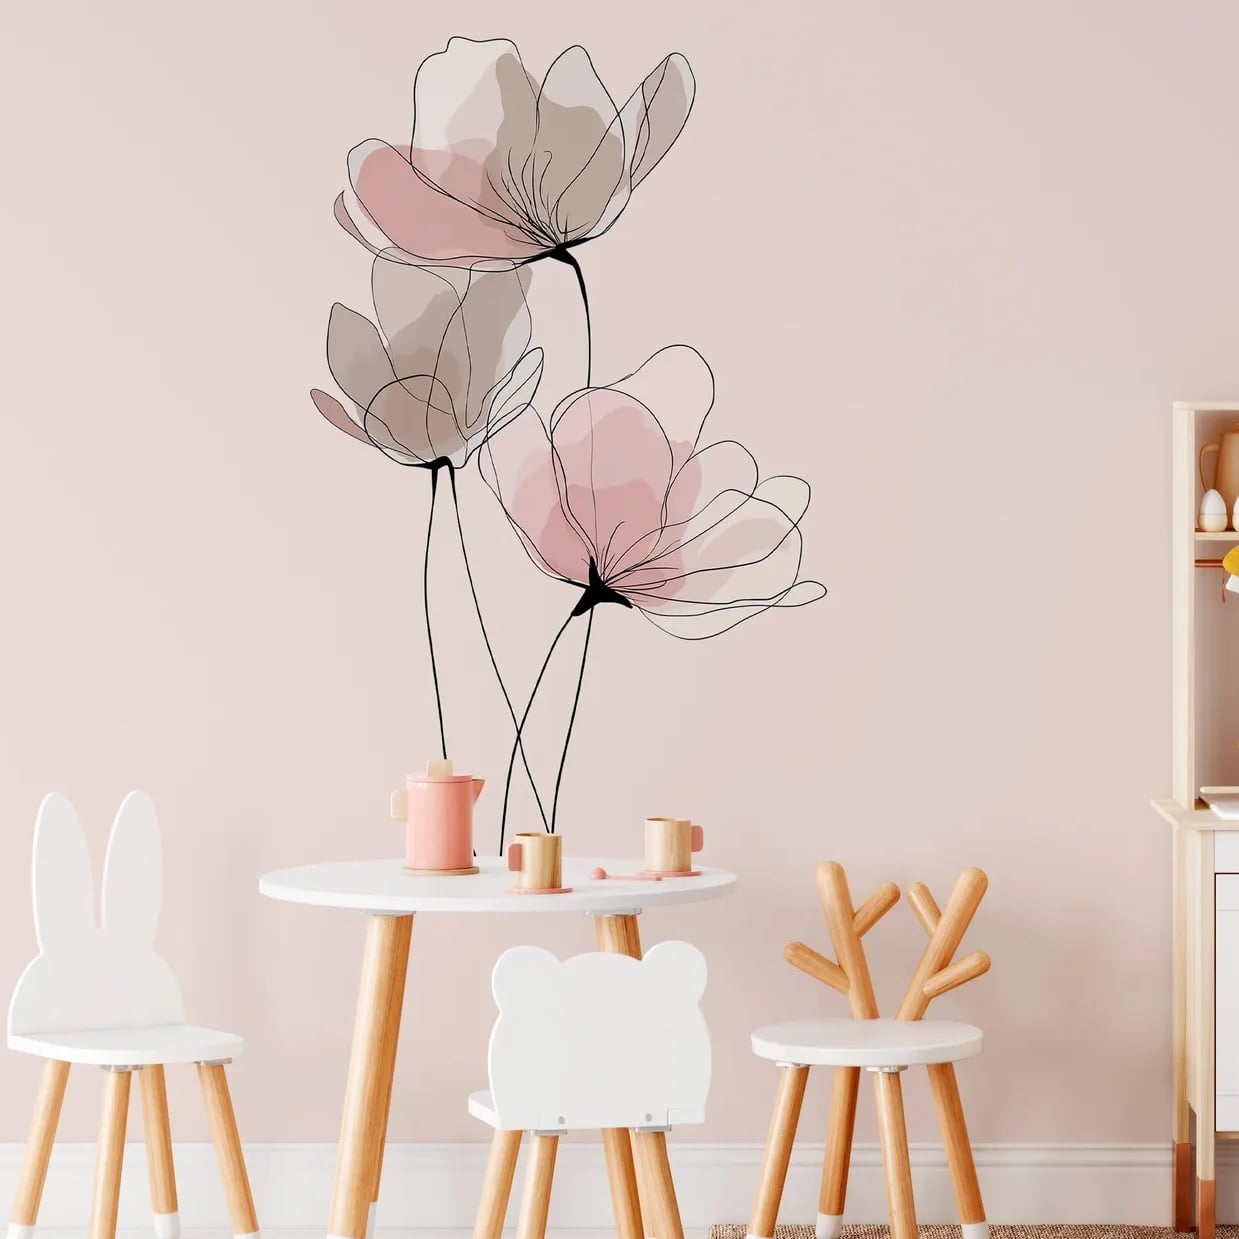
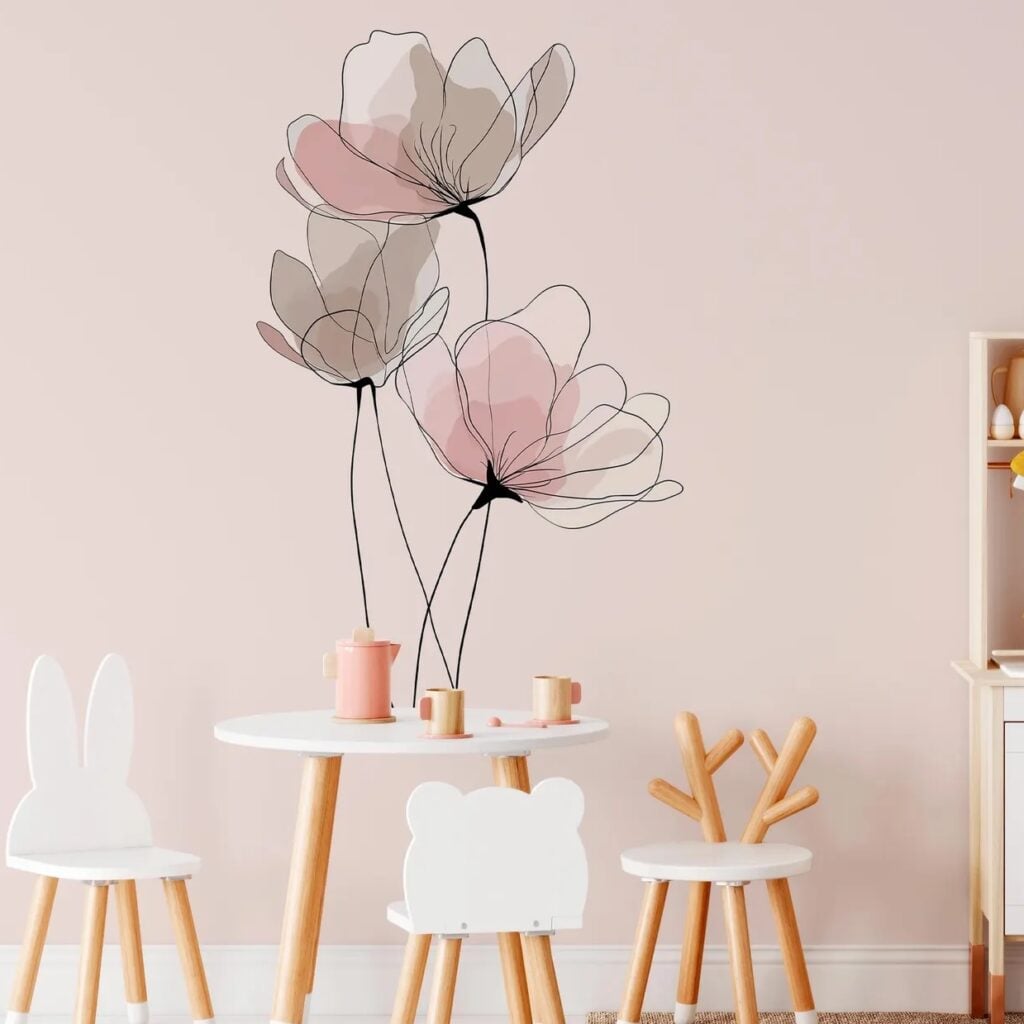
Then I found this one that stopped my scroll cold. A decal with layered soft watercolor pools of color. That was the feeling.
But my daughter’s vision was different: color that stays inside the lines, with lots of shading, movement, and soft transitions, and less ‘art class layered torn tissue paper.’ Fair.
And with our sage running so much deeper and bolder than the soft taupe in that inspiration photo, this decal, as is, was never going to translate anyway.
My head started lighting up, doing its thing that warns I’m about to go rogue — radically reinventing an inspiration, or multiple inspirations!
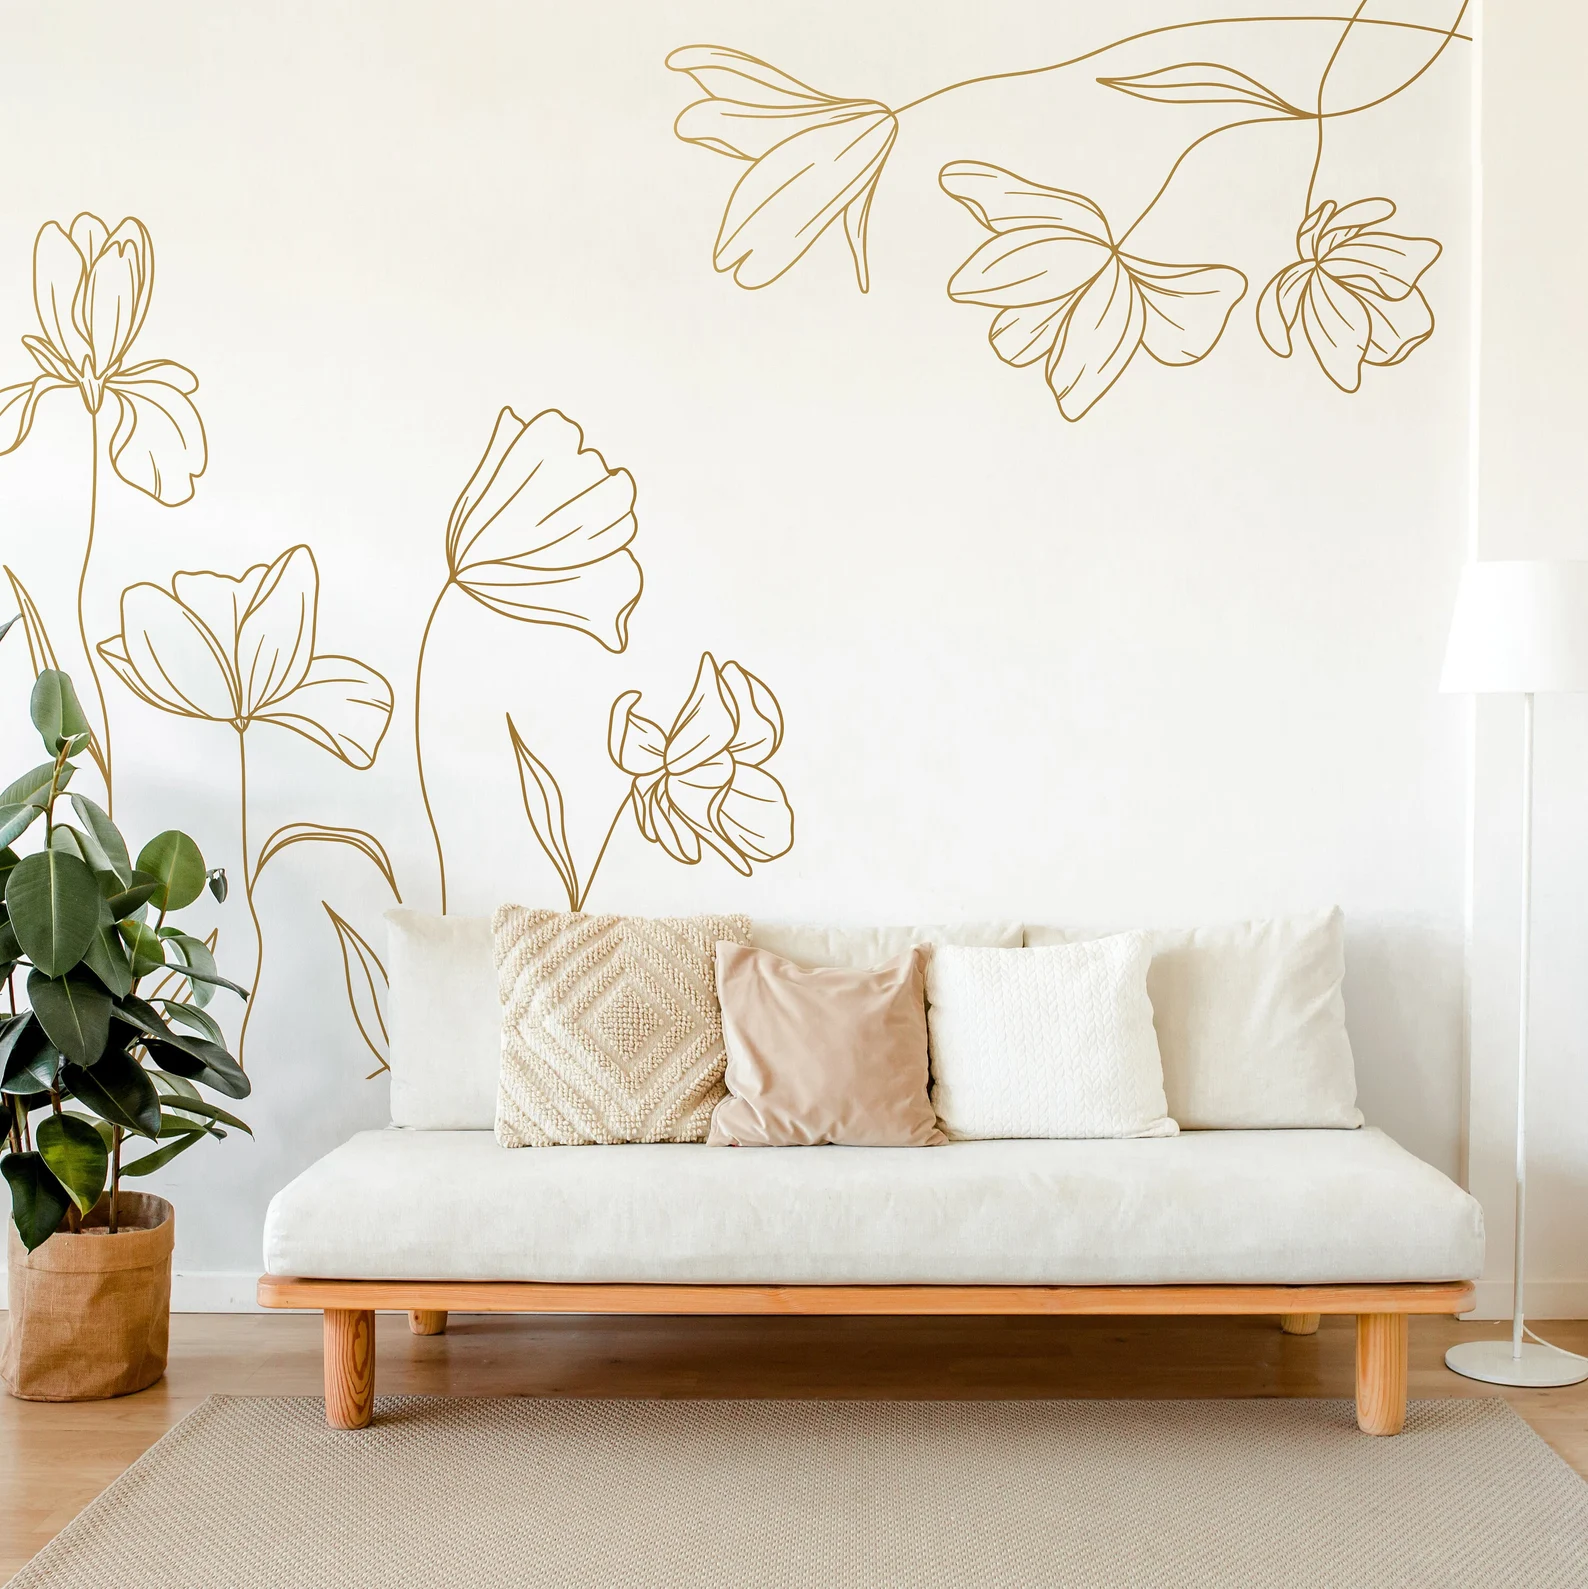
Great height and movement. Modern and moderately stylized.
Love the growth from the floor and the ceiling!
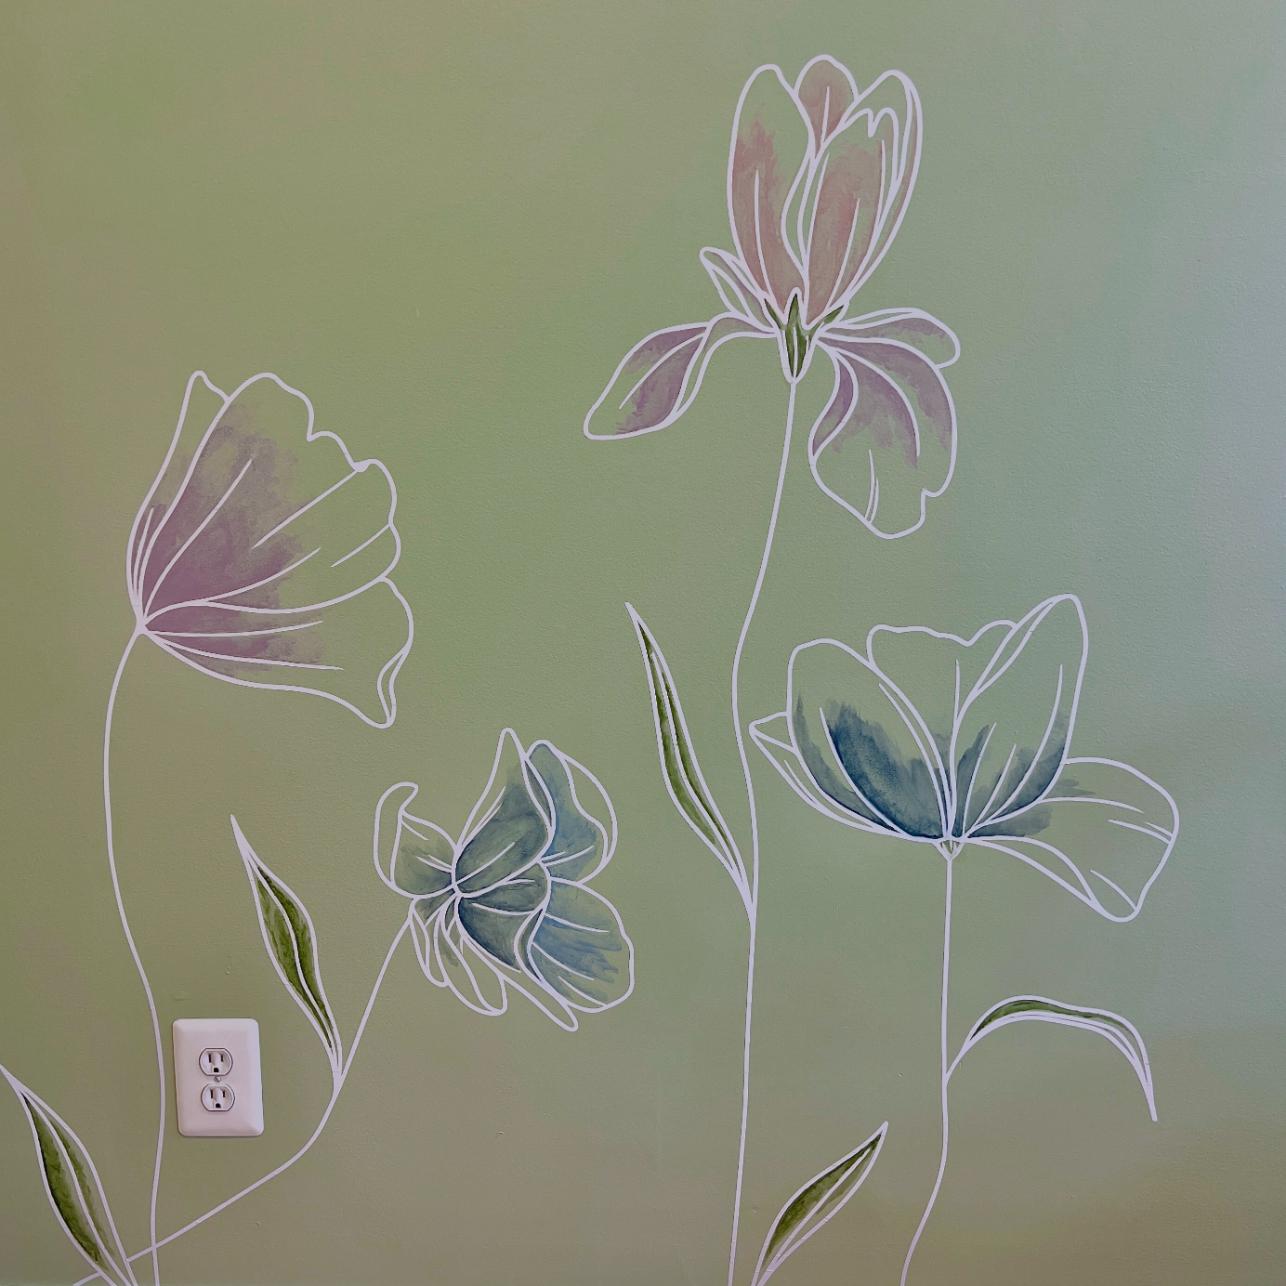
I’d genuinely never seen anyone do what I was picturing in my head. But I was compelled to take a line art decal — no built-in color — and hand-paint our own watercolor effect directly onto the wall behind it.
That way we control the colors . . . the painting style . . . the placement. All of it!
My stripes are showing, aren’t they? You guessed it!
I’m picky about details and I want nothing more than to fulfill my daughter’s vision.
I dreamt up a few ways to pull this off, eventually landing on what turned out to be the simplest version of all of them, and it worked like an absolute dream.
I basically became a chemist for an hour or two, and I am not mad about it.
A Quick Note: If you’ve got a wall that’s begging for something more custom than “pick a wallpaper,” this accent wall paint idea is worth filing away.
It works with almost any line art decal and whatever colors are already living in your room — no special skills required.
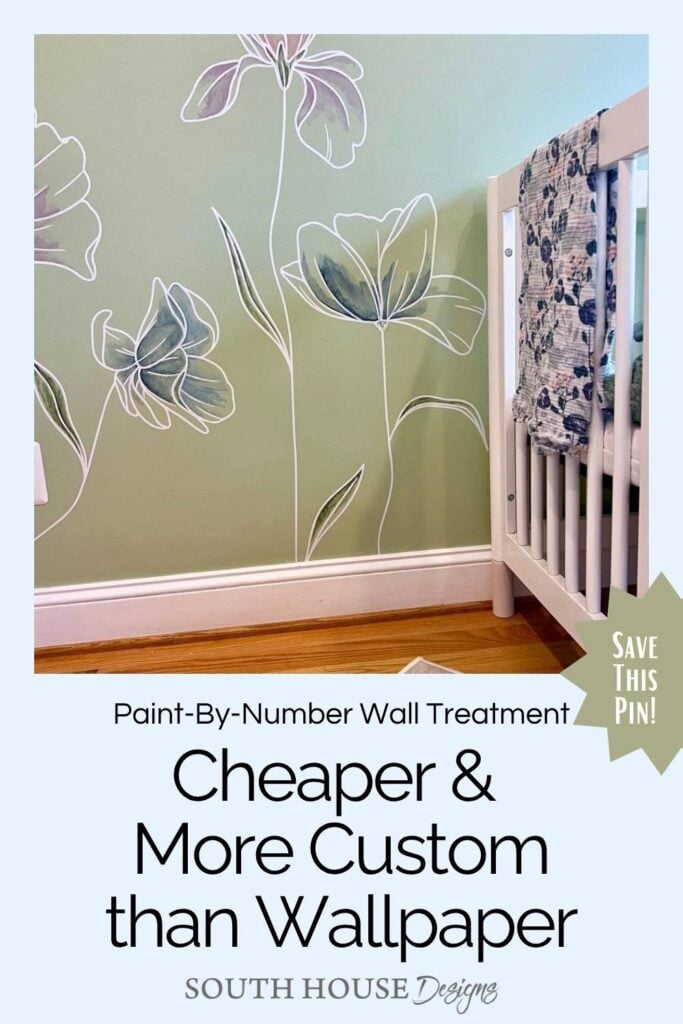
Ready to jump right to it?
Here’s a Quick How-To Card
For the “Just Hand Me the Paintbrush” Crowd
If you’d rather feel like I’m right by your side, stepping you through it — no problem, keep scrolling.
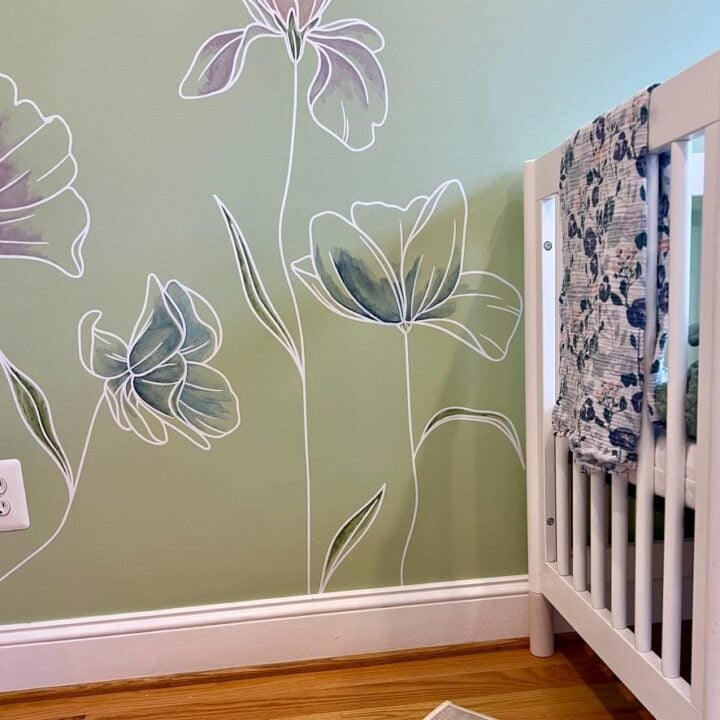
Truly Unique Accent Wall DIY Using Wall Decal + Paint
Way easier than it looks, infinitely customizable! Take the concept and make it your own!
Materials
- Wall decal of your choice — ours was a Minimal Line Art Flower Wall Decal from Etsy, ordered in white
- Painter's tape
- Sample-size or leftover paint in your accent colors
Tools
- Ladder or step stool, as needed
- A rigid plastic scraper — a library card, old credit card, or student ID all work perfectly if one didn't come with your decal
- Artist paint brushes
- Nibs from Water pens
- Or Alternative: Sponge eye shadow applicators
- Disposable cups and water
- Lint free rag (old t-shirt scraps work great)
Instructions
- Install your decal per the manufacturer's directions
- Let the decal cure in place
- Paint your accent colors around the lines of the decal
- Immediately wipe excess paint off the decal — steps 4 and 5 happen back to back, in small zones
Notes
Pro Tip — Plan Your Timeline First: If this is a newly painted wall, let the paint cure for 2–3 weeks minimum before applying your decal!
Keep scrolling for all the details and tips for this project
Detailed How-To With All My Decal and Paint Tips:
PRO TIP: Plan Your Timeline First: If this is a newly painted wall, it’s important to let the paint fully cure. This will vary by paint, but plan on 2–3 weeks minimum, watching the proverbial paint dry.
Once the decal is up (step 1), give it another 48–72 hours to fully adhere before you introduce any paint. Skipping either cure time risks lifting the vinyl or dulling your finish — build both into your calendar before you start.
Step 1) Install your decal —
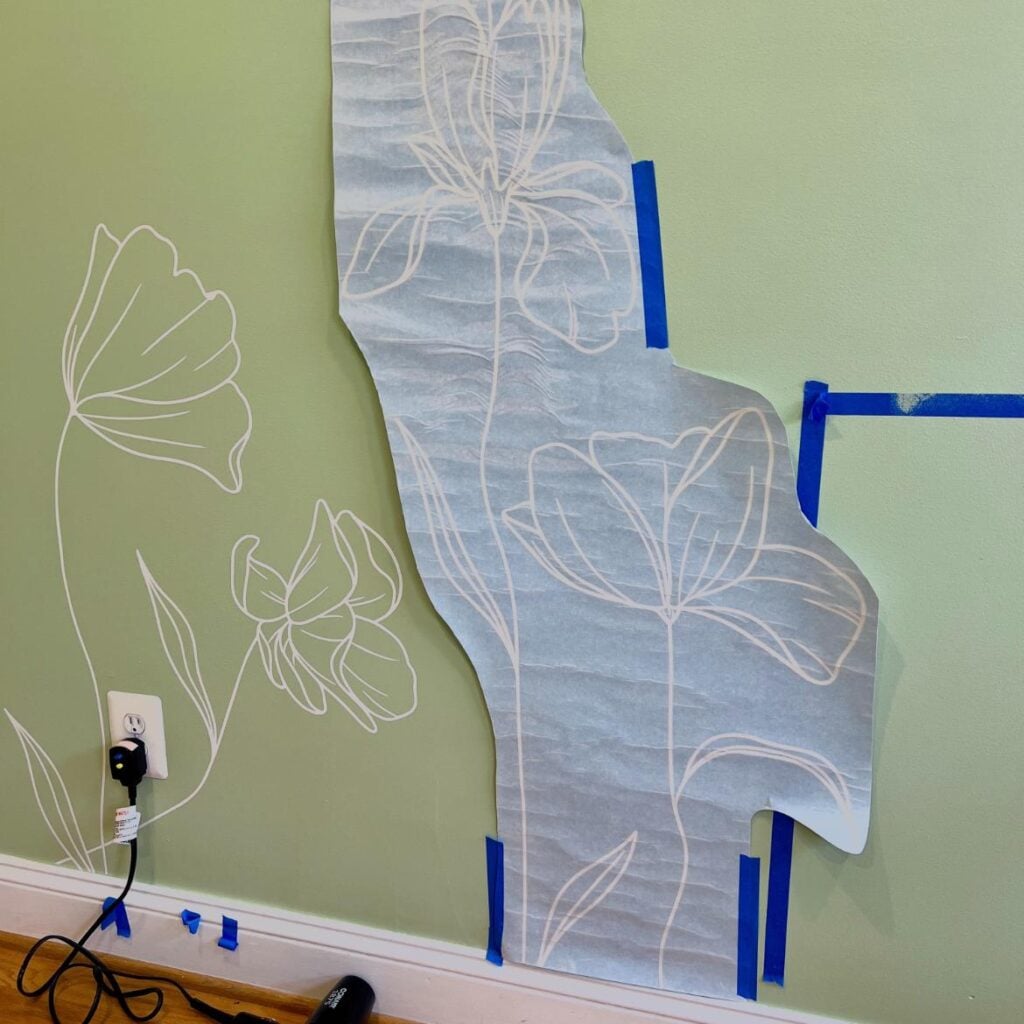
Follow your decal manufacturer’s directions exactly — every brand’s application process is a little different, and this is not a step to freehand, however tempted you are to just “eyeball it.”
Most decals come with a little scraper for pressing the vinyl down. If your’s didn’t, an old library card or credit card works beautifully.
PRO TIP: If your vision is for your wall mural to spill out from behind or over the top of a piece of furniture, mark the furniture placement with painters’ tape before placing your decals.
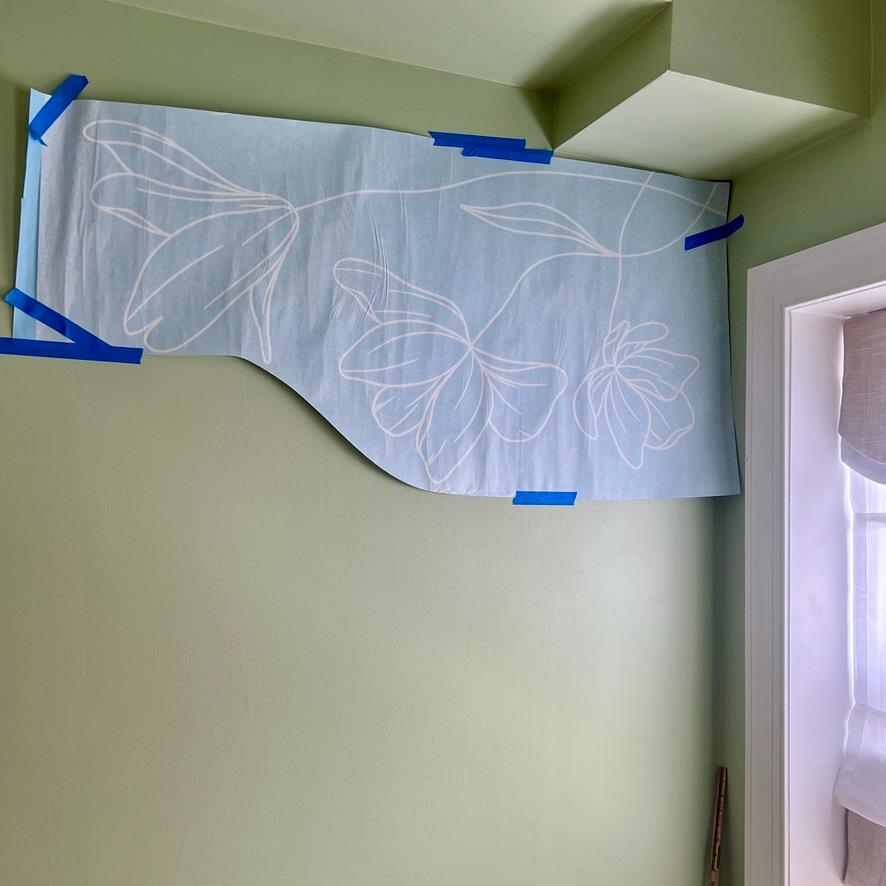
Take your time getting placement right; once it’s down, that’s your map for everything that follows.
PRO TIP: Upon arrival, take your decal out of the box and lay flat to help minimize wrinkles. Look closely and you might be able to pick out how I now know this. You’re welcome!When applying your decal, if you have wrinkles, you can use a heat gun on low or a hairdryer on high heat/low blow to soften the vinyl, while being careful not to stretch it. Honestly, I didn’t see much change with that.
I did find that as I went along applying the decal, I got better and was able to work many of them out. So if I were doing this over, I would do my ceiling decals first and my lower, more noticeable ones last.
Also, if your decal is one where you can cut large pieces into smaller sections, it is easier to apply.
Step 2) Wait! Adhesive Curing Time —
Now for the hardest part of the whole project: doing nothing.
Walk away for a few days.
Yep, truly walk away! Go binge something and ignore the wall entirely.
The adhesive needs time to bond, and rushing it is the fastest route to lifted edges once paint and moisture show up. Your decal’s instructions will give the exact cure time, usually 48-72 hours.
Don’t just sit there. Put the wait to work.
Play in Canva first (optional). I took photos of the decal clusters and dropped them into Canva. Then I swiped translucent color right over the images to test placement, style, and color combos. Canva has an undo button. Your wall does not.
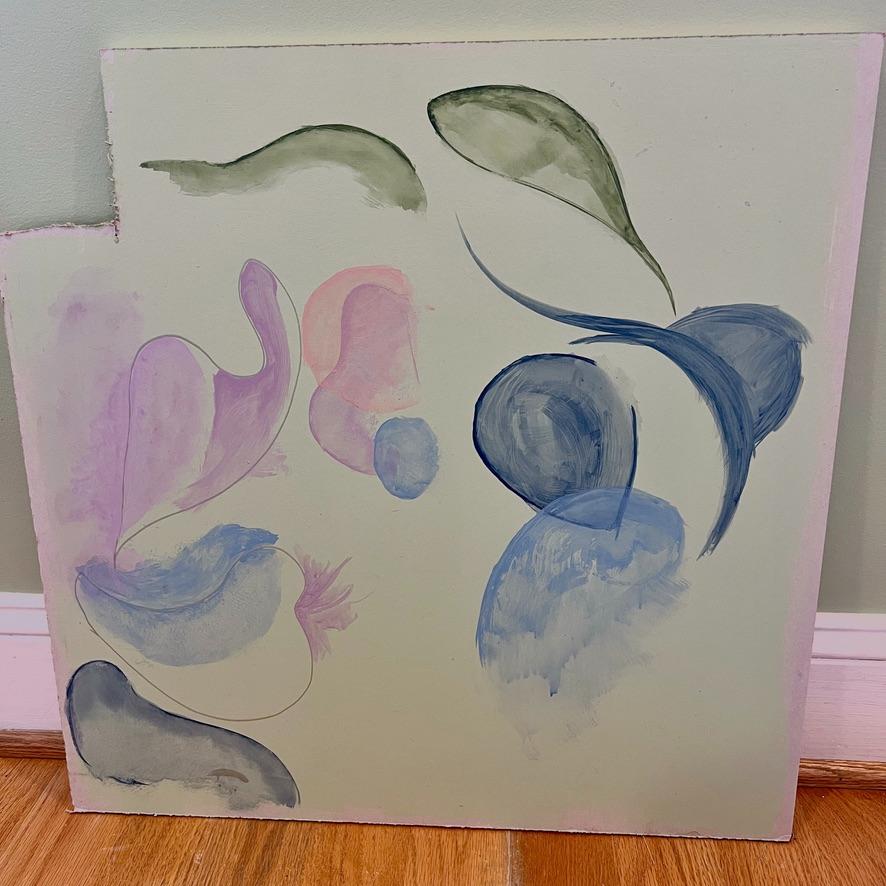
Then meet your wall’s stunt double. Paint a scrap board (or a hidden patch of wall) in your wall color, then play on top of it with your sample paints.
Go vertical if you can, so you see how much paint one swipe holds before it runs. You’ll want small, absorbent, lint-free rags close by.
The stunt double takes the drips, the “oops, that’s rather neon,” and any questionable brushwork, so the star, your real wall, doesn’t have to.
That one scrappy square turned my “what if I ruin it?” into “oh, I’ve totally got this.” Cheap, low-stakes, and nobody’s judging.
Mixing your colors.
I wanted the permanence of real wall paint and/or chalk paint, but the translucent, layered look of watercolor. So I mixed sample jars and leftovers, one color per disposable cup, and thinned each with water. A little water goes a long way, so add it gradually.
No wrong shades here. Dab a bit on your test board. Does it make you smile? Then it’s a winner.
Line your winners up side by side to see how they play together, and lighten or darken one or two to build your all-star team.
PRO TIP: Experiment With:
- How much to dilute the paint
- Brush techniques
- Layering the same color
- Layering multiple colors
- Imitating watercolor’s signature pooling, movement, and soft edges
(Remember There’s No Wrong Way)
Once you’ve got a feel for it, it’s decision time . . .
Choose Your Painting Style
You don’t need to blend like a watercolor artist to pull this off. Pick the level that fits your confidence and your style:
Level 1: Color between the lines. Fill the decal with a solid color. No shading. No blending. Simplicity wins here. And the decal does the heavy lifting. (This is the look of the first inspiration decal above.)
Level 2: Overlapping pools or random blobs. Brush on semi-transparent pools of thinned paint that overlap each other and spill past the lines. The overlaps create the layered look on their own, with no blending skills required. Happy little accidents welcome. (Like the blush and taupe inspiration decal.)
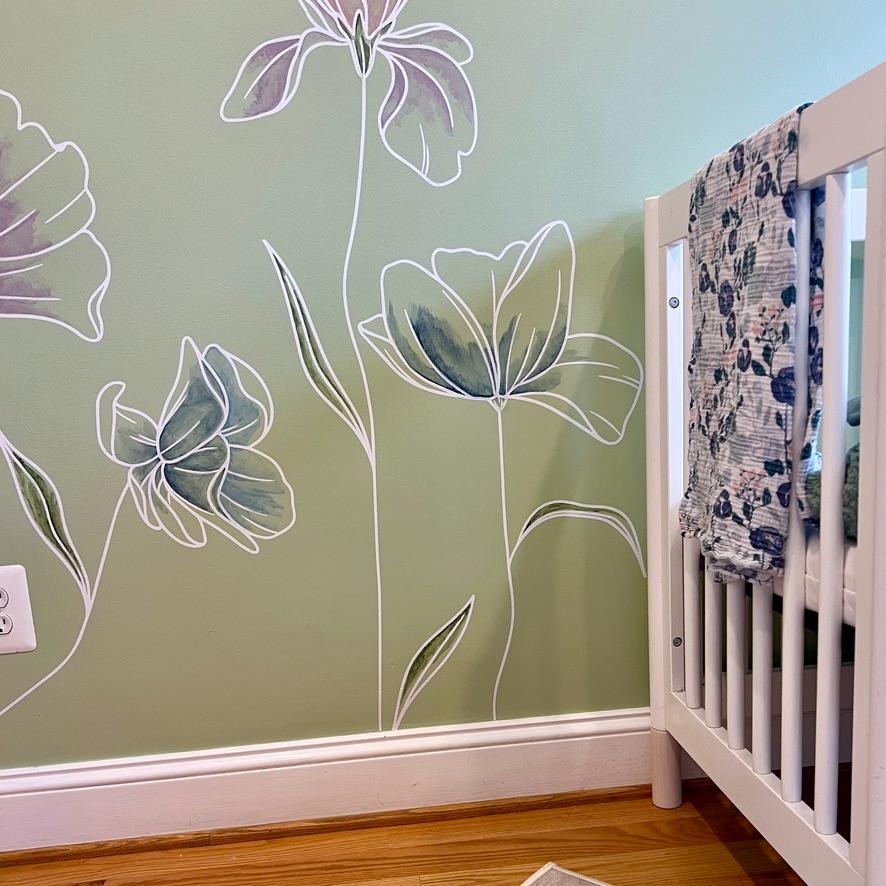
Level 3: Shading and movement. This is what we did. Our daughter wanted lots of shading, movement, and color transitions, with non-traditional color combinations. So I painted inside the lines and blended colors within each segment. Some blooms got tea rose (leftover from the dresser in the next episode) with a purple left over from E’s nursery. Others got two shades of blue, with dark green for the leaves.
Canva and your test board are your sketchbooks; the wall is your canvas. Ready?
Step 3) Paint your accent colors —
SAFETY TIP: Working from a ladder or step stool while also managing wet paint and cleanup tools means both hands are rarely free. Keep your footing stable, don’t overreach, and have your cleanup supplies staged within arm’s reach before you start each zone.
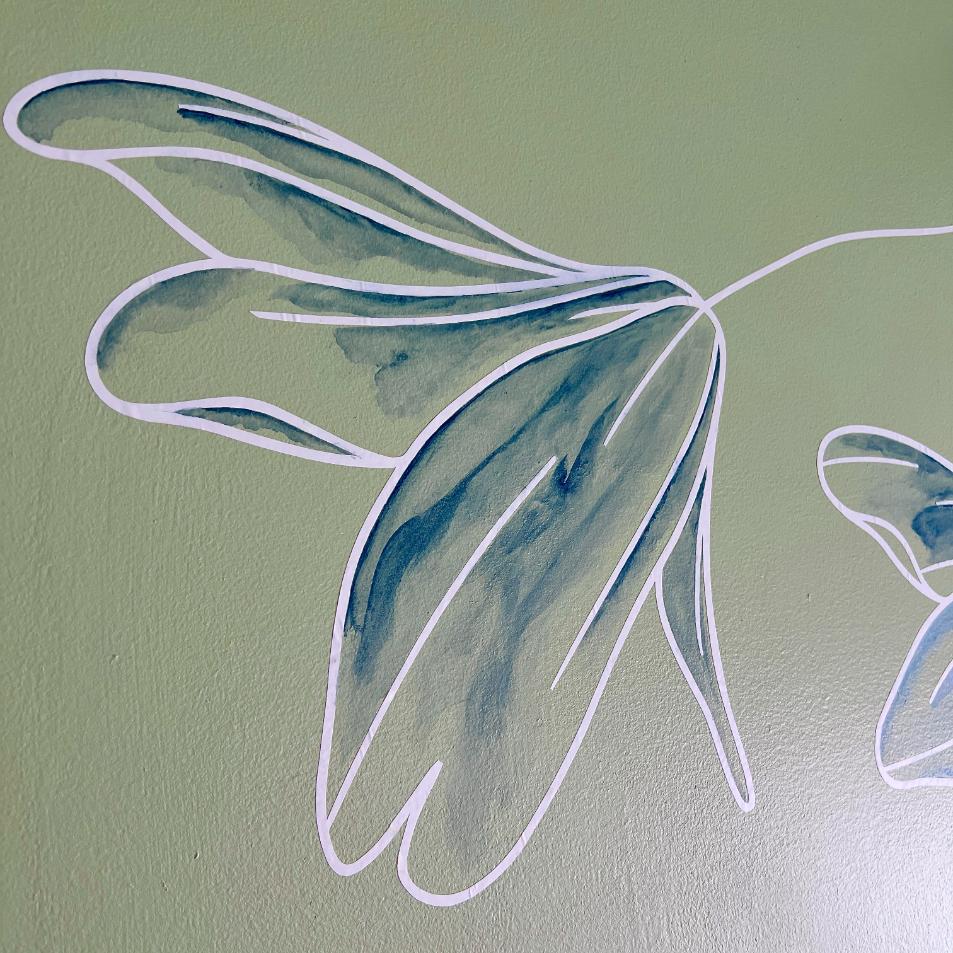
Now think paint-by-number, or a coloring book, but with a very forgiving paintbrush.
The decal gives you the lines, and you bring the color.
Bring in your all-star colors and paint one small zone at a time, then hop straight to Step 4.
PRO TIP: Wet vs. Dry. Thinned paint behaves like watercolor. To keep overlapping pools distinct (like Level 2), let the bottom layer dry before layering on top. For a soft blend (Level 3), add the second color while the first is still wet.
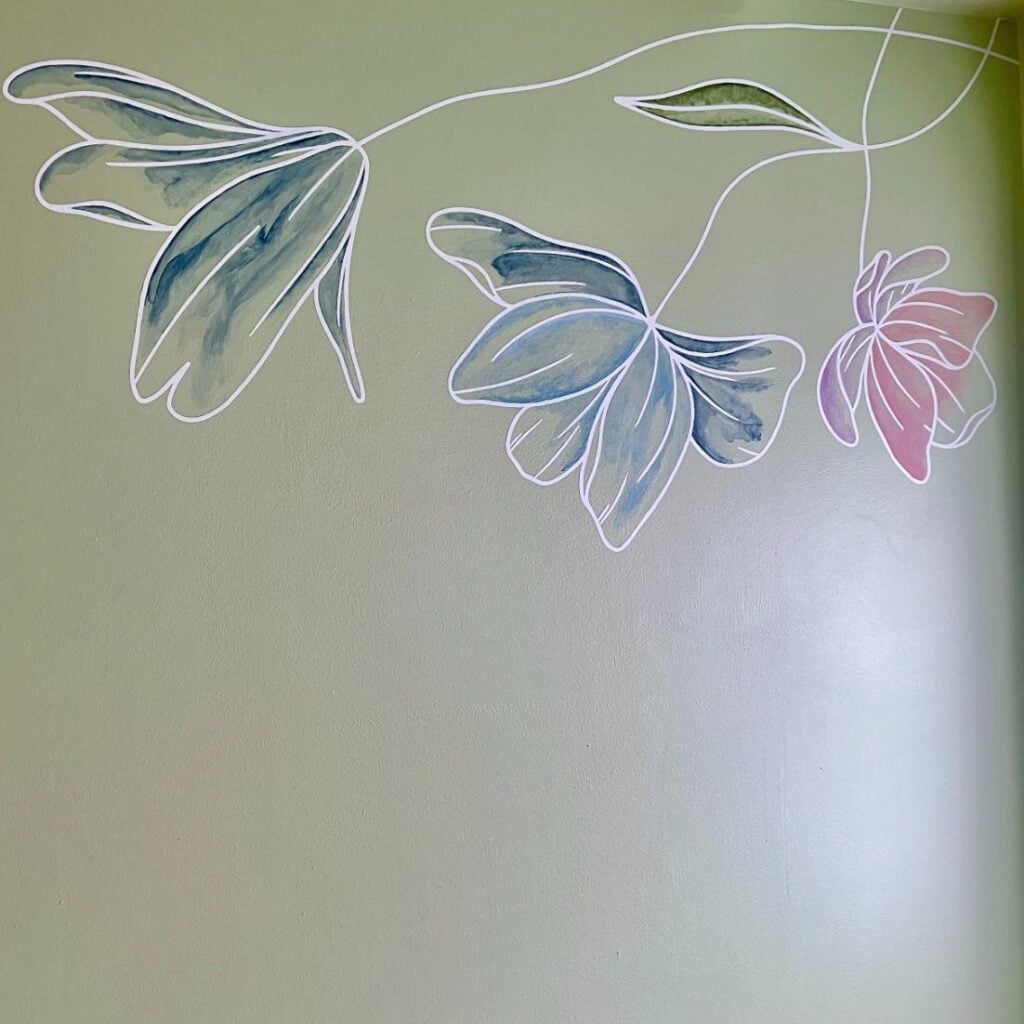
And if your brush is hovering a little too long, repeat after me: it’s only paint . . . it’s only paint . . . it’s only paint.
Step 4) Clean the paint off the decal — immediately!
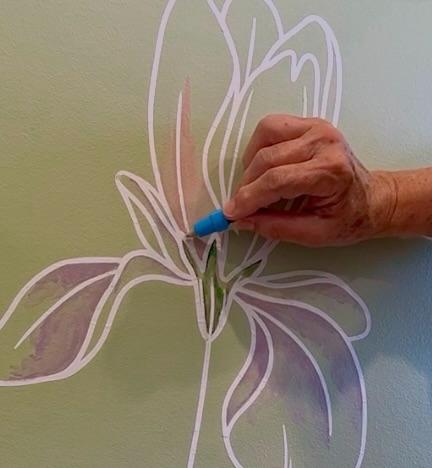
This is the step that makes or breaks the effect, and it has to happen before the paint starts to dry.
You want the paint to stay on the wall but come completely off the vinyl.
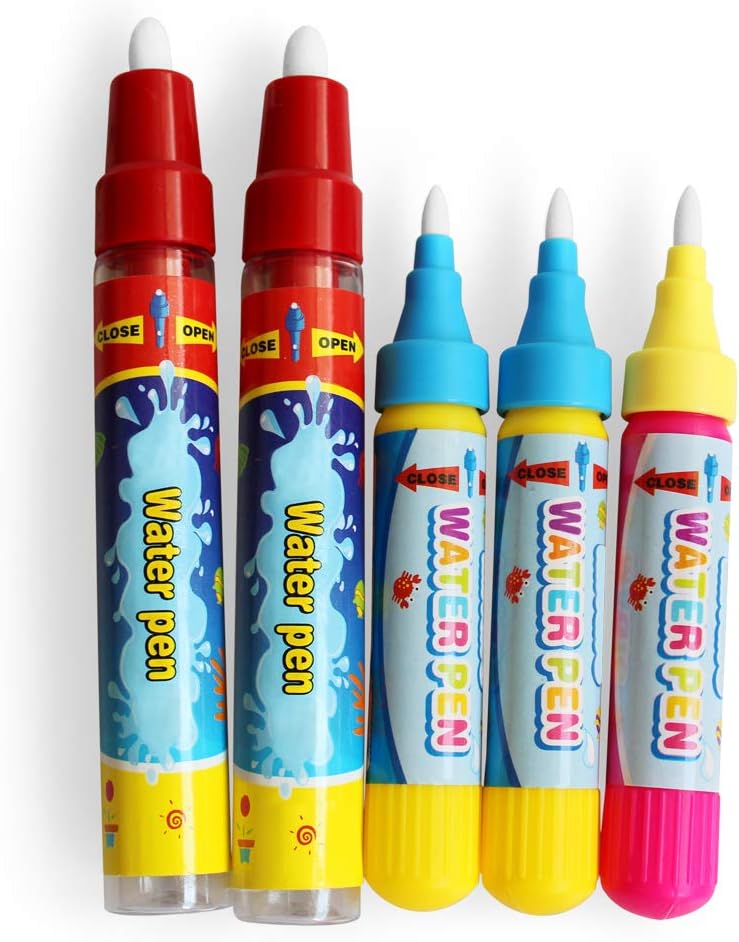

Our decal’s linework was pretty narrow in most spots, so it was a given I’d smudge a bit of paint onto the vinyl. No worries. Here’s my slick little erasing trick (yes, I’m a little smug about this one): while the paint is still wet, wipe it right off. A damp water marker nib or a sponge eye shadow applicator gives the most control. Often I followed with a final wipe from a clean rag.
NOTE: I did not use the barrel of the water marker. I dipped the nib in a cup of water just to get it damp.
PRO TIP: Because Steps 3 and 4 need to happen in quick succession, work in small zones at a time. No painting the whole wall and circling back.
It’s tempting to move fast and cover more ground, but a section you can paint and immediately clean beats a wall’s worth of color racing to dry on you while you’re still hunting for a clean applicator.

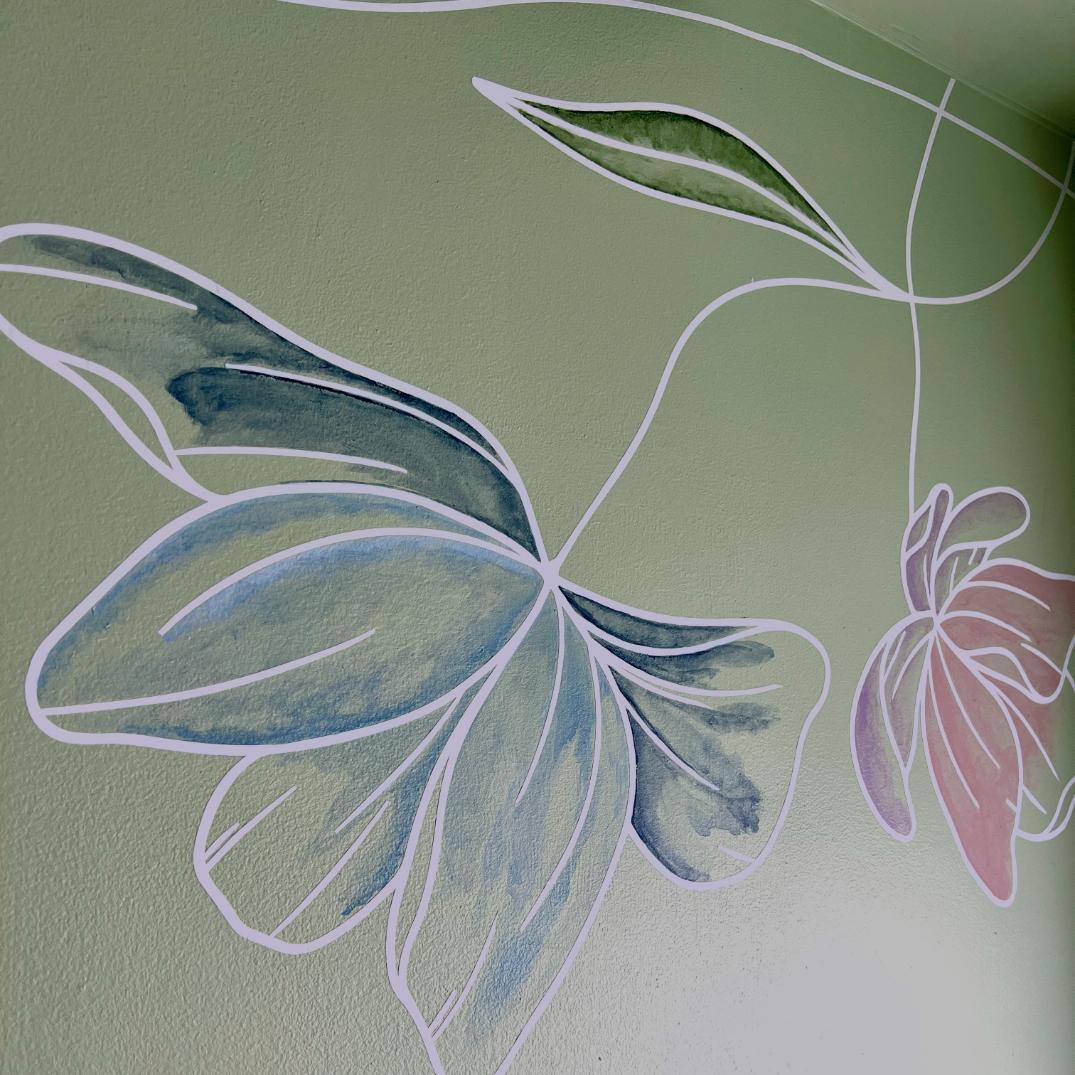
What started as “the decal only comes in blue” turned into something better. This is exactly what I love most: a “what if,” a pile of paint samples, and a custom process nobody handed me directions for.
This wall is one-of-a-kind — a decal with custom colors that exist nowhere but on our nursery wall, and none of the wallpaper expense or temperament.
Small room, big style! Exactly what we were after.
Now Picture It in Every Room
(well, not the bathroom)
Here’s where it gets dangerous, in the best way.
Once you know this trick, every blank wall starts looking like a canvas.
The technique doesn’t care what the decal outlines: florals, dinosaurs, ocean waves, origami animals, whimsical streetscape. Swap the design and the colors, keep the same four steps, and you’ve got a whole new room.
Nurseries, bedrooms, playrooms, hallways, the dining room, even a home office. The only room I’d skip is the bathroom, because steam and decal adhesive do not get along, and nobody wants a drooping wall.
Need a little inspiration? I’ve curated a collection of decals I’d happily hang tomorrow. Browse my curated decal collection and start dreaming up the possibilities.
Now you’ve got the whole process. put it to work for your own custom version. But, please, share it with me through email (Diane@southhousedesigns.com) or tag me (@southhousedesigns) and use hashtag #wowwall.
BONUS: it’s a pretty great photo backdrop too. Just enough soft background as we capture our little loves enjoying tummy time, learning to roll over and then sitting up, reading and playing on the floor.
Next up, we’re heading across the room to add a bit more color with a transformed dresser.