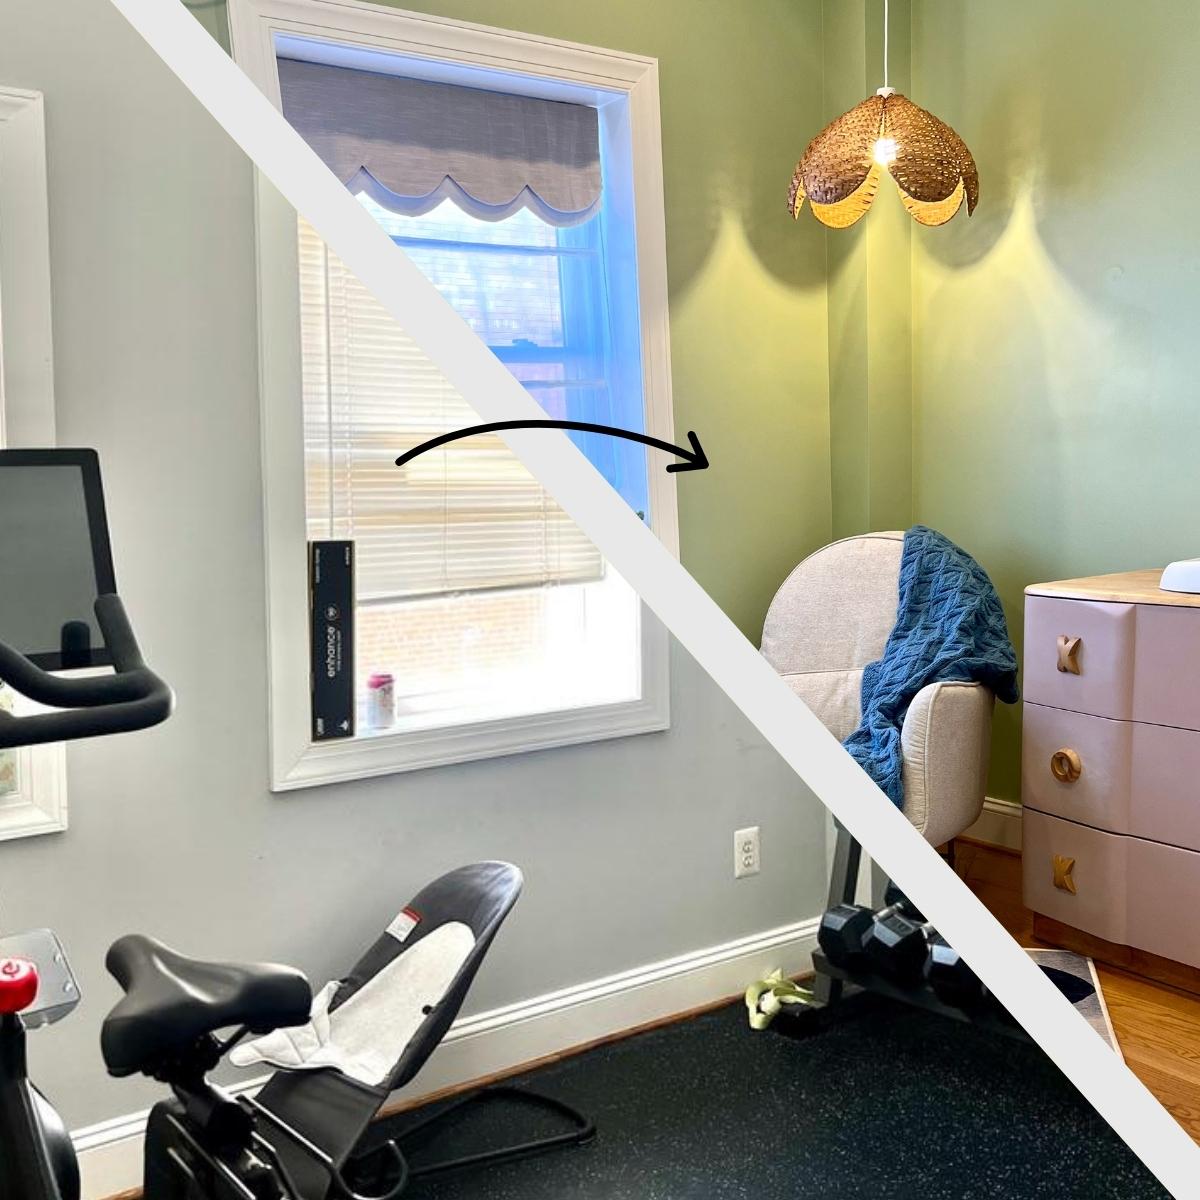
Home Gym to Sweet Nursery: Design on a Budget
Weight rack out, sweet dreams in! Start here for the plan behind our home gym to nursery makeover, with a little assignment at every step so you can plan your own.
A few months ago, our daughter and bonus son called with a project: downsize and relocate their home gym to make room for baby #2. Would I fly out from Kansas City and help them pull it off?
Obviously, YES!
And now this room — once dominated by a weight rack and a Peloton bike, pulsing to the Eurythmics’ “Sweet Dreams (Are Made of This)” — now gently rocks to “Dream a Little Dream of Me.”
If you’re new around here, my daughter and her husband live in a historic rowhouse in DC, and I’ve had the fun of helping them turn a few rooms in that house into something special — that dining room feature wall, the library wall in the living room, the powder room makeover, and the home office to nursery no. 1 — catch up on any of those any time.
Our granddaughters, L (the new Little one) and E (the Elder one), are only 22 months apart, and their rooms sit just down the hall from each other — so yes, I’ve already got plans brewing for that hallway too.
One thing at a time.
No strict dollar budget on this one, just smart trade-offs where they counted (more on those below).
A Quick Note: Here for the eye candy and the story? Stick around, because that’s exactly what this is. But if you’re quietly rethinking a room of your own, I’ve tucked a little assignment into each step to help you build your own plan, one decision at a time.
So let’s start where every good transformation does: with the plan.

The Nursery Series
- The Plan — (You’re here now) planning the transformation
- IKEA Pax Closet Wall — turning wasted closet space into real storage
- Mini Attic Storage Space — claiming the space most people leave empty
- Decal + Paint Accent Wall — adding a playful “watercolor” touch to a simple decal
- MCM Dresser to Changing Table — a vintage dresser gets new purpose
- Peekaboo Stenciled Drawers — a surprise hiding inside the changing table
- X & O Drawer Pulls — oversized, playful, and made by hand
- Scalloped Roman Shades — solving light and privacy in style
- The Nursery Reveal — the whole room, start to finish
The links in this post may include affiliate links, which means if you purchase anything using these links, you pay no extra, but I may receive a small commission that helps keep this blog running. I truly appreciate you using affiliate links whenever possible. Please know that I will never recommend a product I do not believe in!
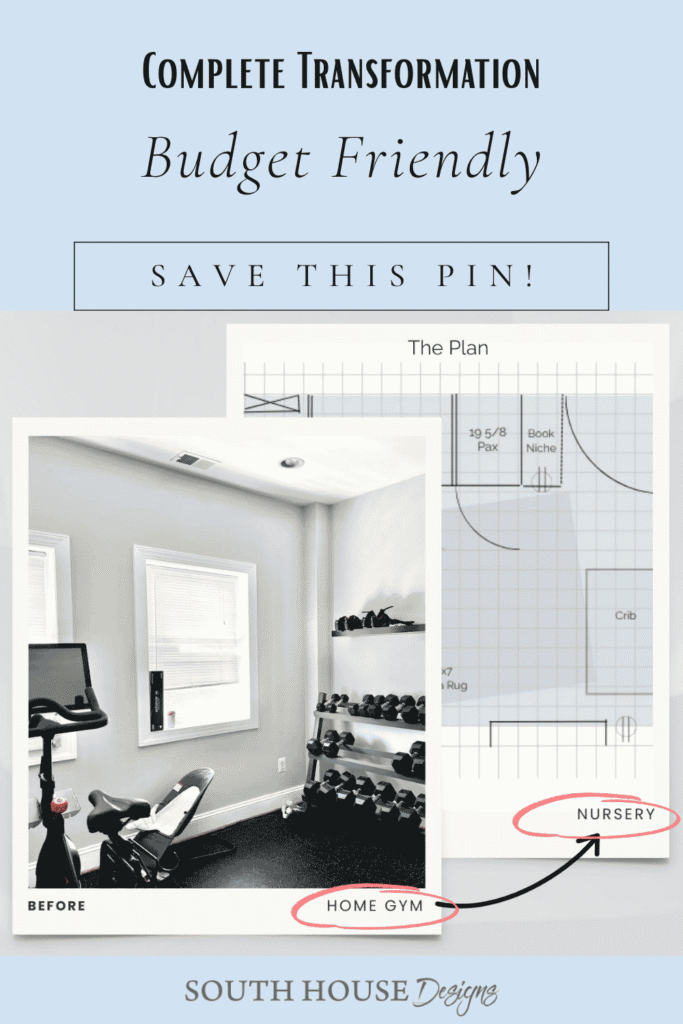
The Before
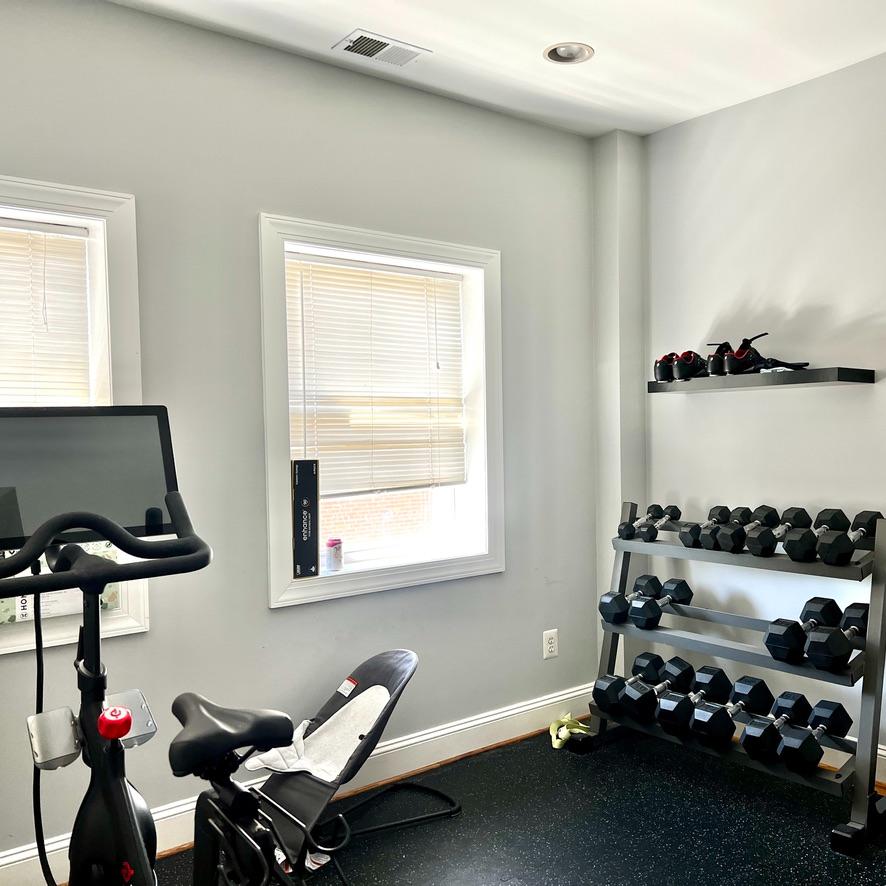
Here’s what we were working with. A weight rack against the far wall, gym floor tiles underfoot, that Peloton parked by the window — function over form, through and through.
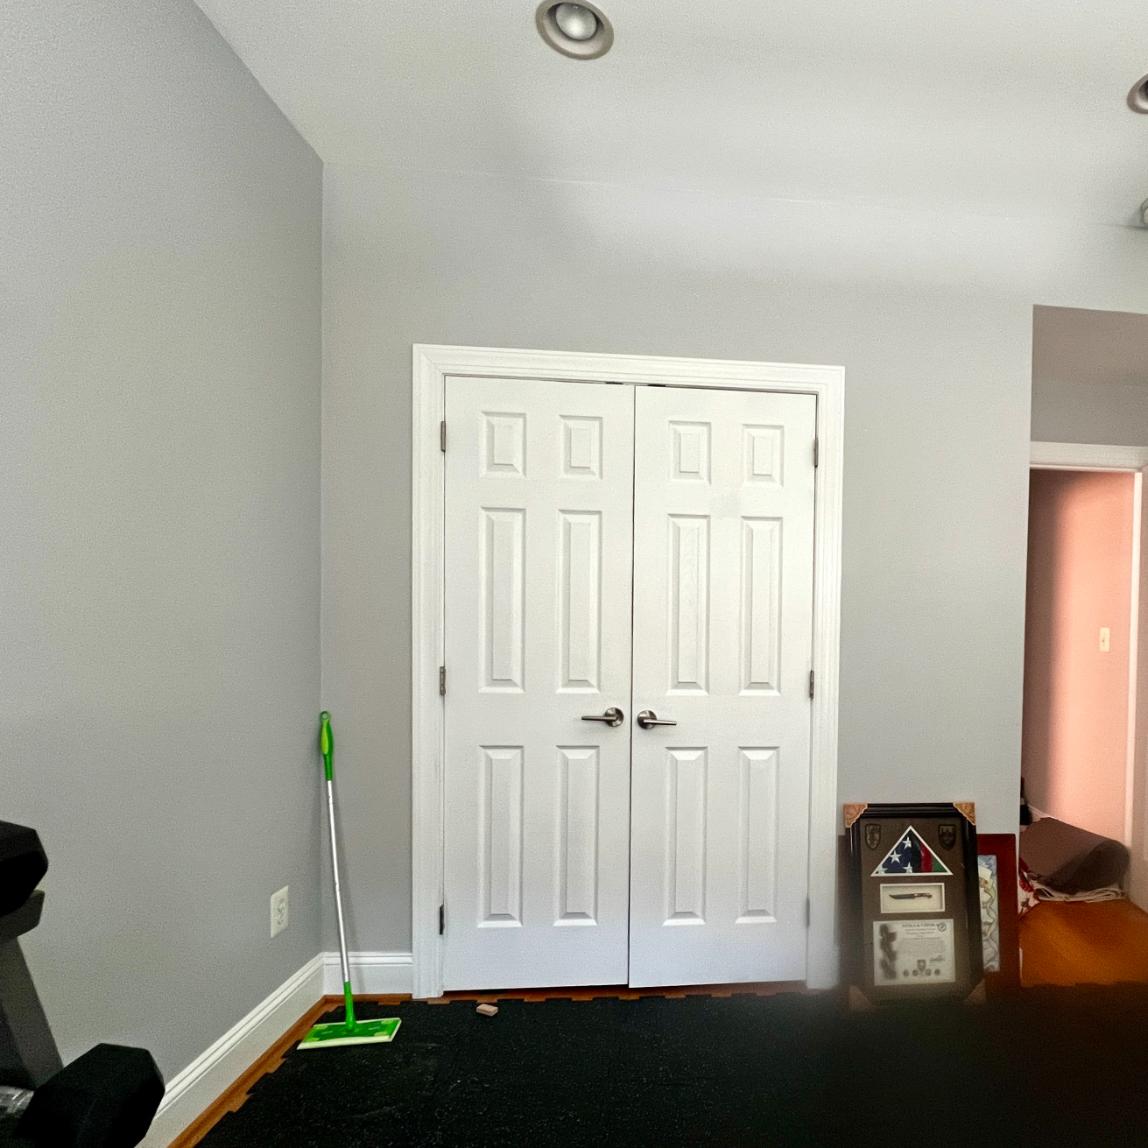
The closet was its own story. At some point, a previous contractor had boxed one in and the kids had fitted it with free standing metal shelving — functional, sure, but it was hoarding space rather than making it. Camping gear, empty guitar cases, odds and ends nobody had touched in years, all sitting under a ceiling’s worth of wasted air and unused space on either side.
So the kids brought in a contractor to demo the whole closet wall — all the way back to studs, and up to the ceiling. (That closet wall alone is worth two full posts later in this series — Post 2 and Post 3 — so consider this the trailer.)
Two other things jumped out the moment we started measuring. A chunk of ductwork running right through the space we needed, and the floor had the gentle slope you’d expect from a century-old house.
Welcome to a 100+-year-old rowhouse.
Pro Tip: Once a wall is open, it’s the cheapest moment you’ll ever get to think about power. Decide where you’ll want outlets, lighting, or a future switch, and have a licensed electrician rough it in before anything gets closed back up. Hang onto this one — it pays off in Post 3.
🎯 Your Turn: Walk through your own closets — is anything in there “somewhat functional” but not actually working hard for the space? What could that square footage do instead?

The Real-World Constraints
If you’ve never worked in a 100+-year-old rowhouse, here’s the thing nobody tells you: nothing is square, nothing is level, and every wall has an opinion. Ours came with a gently sloping floor and a chunk of ductwork running right through the space we needed, and that ductwork ended up shaping the entire footprint of the built-ins.
So if you notice a shim here, a scribe cut there, a design choice that seems oddly specific — that’s the rowhouse talking. This being our fifth room renovation, we’ve learned to just listen to it.
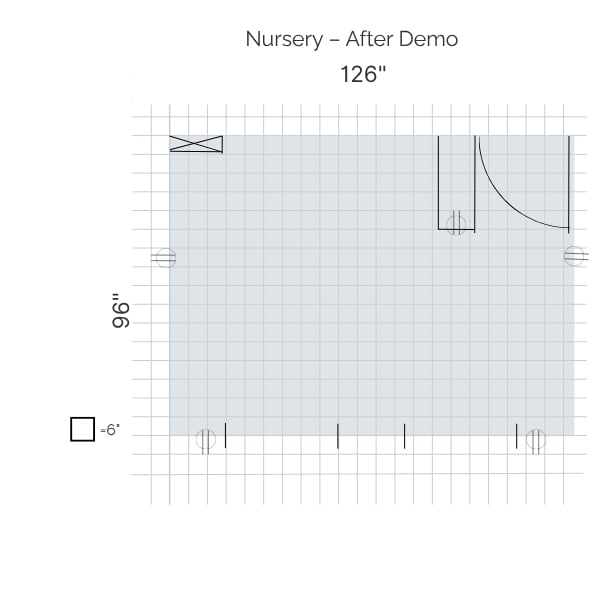
Here’s the other lesson a small room teaches fast: measurements matter more than you’d think. In a room this size, half an inch isn’t a rounding error — it’s a door that clips the dresser beside it, or maybe the crib.
That’s where our floor plan earned its keep. Before any furniture moved, we mapped the room — walls, windows, outlets, and every swing radius, including closet doors, the room door, and each drawer front. If you’re planning a small space, grab a pencil and graph paper (or a floor-plan app) and sketch it out before you fall for a layout on Pinterest. It’ll save you from a gorgeous plan that simply doesn’t work.
⚠️ Safety Tip: Here’s something that doesn’t show up in a single glossy nursery photo: nothing goes on the crib wall, within 2 feet of the crib. Not a shelf, not art, not a mirror — nothing a baby could eventually use as a ladder. It happens faster than you’d think; before you know it, they’re standing in the crib and reaching. The safest crib wall is a bare one.
The same goes for anything mounted above a changing table. It looks beautiful in photos, but before your baby can even sit up, they’re kicking — happy kicks, frustrated kicks, all of it! And then they’re sitting. And standing. It’s a full out race — right into whatever’s within reach.
All furniture in the room become ladders. Bolt or strap them to the wall. No exceptions.
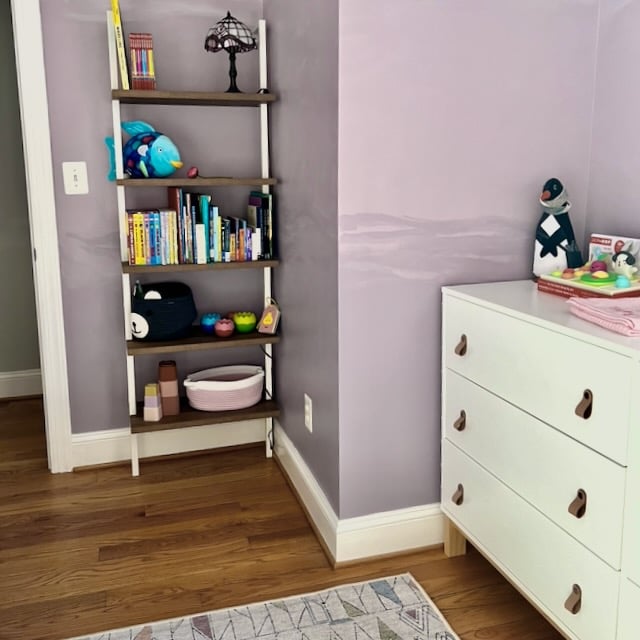
We used a pair of these bolt-to-the-wall shelves in E’s nursery. This one on the corner wall by the door and the other on the opposite wall between the closet door and the rocker.
Your Turn: Sketch your own room to scale — walls, windows, outlets — and account for every door swing and drawer opening. Half an inch matters more than you’d think.
The Mood Board / Design Direction
Neither of us wanted to commit to a rigid theme, but rather a mood.
The feeling we were chasing was whimsical, imaginative, soothing, and joyful, all at once — a room that feels safe and nurturing. This provided us with guardrails of generality rather than a strict rulebook.
We wanted colors that play well together without falling into the expected matchy combinations.
Every room redesign needs a spark — a theme, an idea, an image or even an item. Something that just moves you.
For us, our spark was this washable rug from Tumble, chosen in part because the kids loved the one they’ve been using in big sister, E’s nursery.
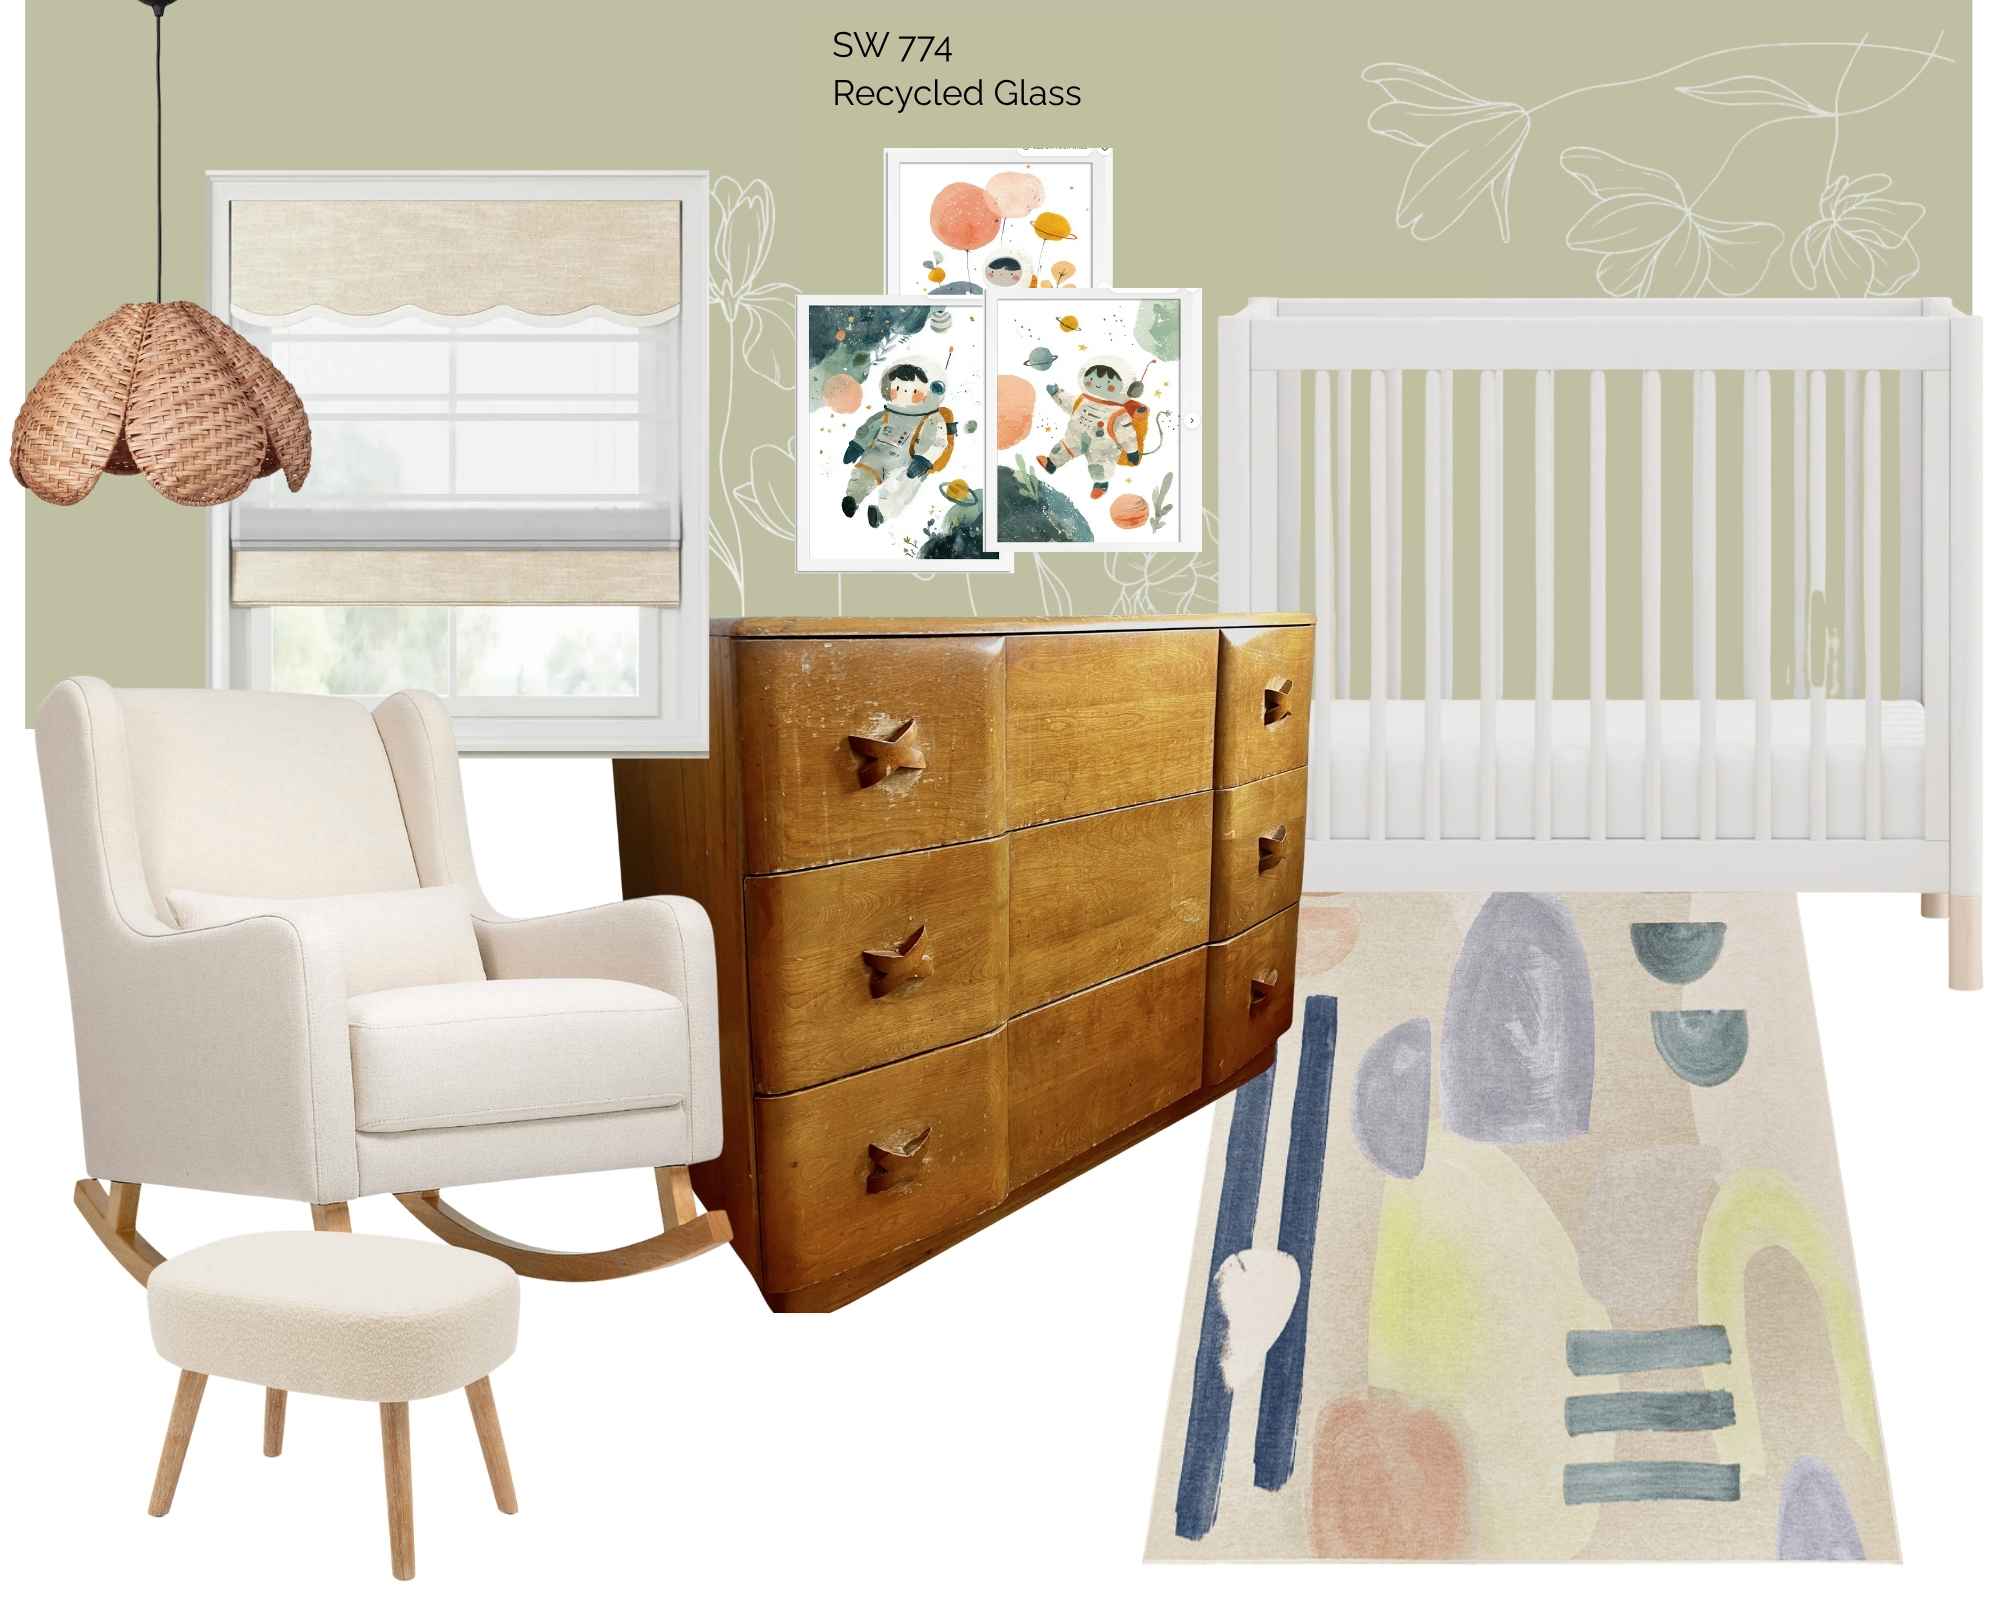
From there, we built out our board — but not by matching. Instead, the rug became a reference point.
When our daughter looked at it, she pictured sage green walls. Not moody, not bright, not pastel, not overly green or overly grey — just right.
Pro Tip: Make the specific paint decision last! It’s one of the most powerful tools in a room, so it’s tempting to start there — but paint can be custom-mixed to nearly infinite possibilities, while your rug, couch, or crib can’t. Start with the largest investment piece, especially anything that’s hard to change later.
It’s great to have a color idea — “sage green,” or “the color of the switch grass out back” — just don’t commit to the exact shade until the big pieces are locked in.
Our “sage or mossy” green evolved into more of a celery green, specifically SW 774 Recycled Glass at 75%.
Little L will sleep in this small crib (from Pottery Barn) or (from Wayfair) handed down from Katie’s goddaughter — white and beautiful in its simplicity. And very, very similar to the one they had purchased for E.
Our original plan was a vintage dresser refinished with walnut top and sides, and soft dusty-blue drawers. (Spoiler: we pivoted once the wood was sanded down — more on that surprise in a future post. Remember guidelines, not rules!)
Beyond the rug, crib and changing table, we needed one more critical piece. A soft comfy rocker in the corner. (Our daughter’s firmly Team Rocker over glider — noted for anyone debating that one themselves.) They love the one in E’s room (used for my photos) but it is no longer available. Still searching for the right one for little L’s room. I’ll update when we have one they love.
Your Turn: What’s your inspiration piece — a rug, a piece of wallpaper, art, an item you already love and want to build around? And what’s the largest, hardest-to-change item in your room? Start there, and let the specific paint color wait.
The Decor Extras
LIGHTING — so important for function and for mood. Ambient and task lighting are both requirements in a nursery. Then you can look at adding accent or decorative lighting, too. But definitely have a plan for ambient and task lighting.
The home gym came with great ambient lighting via a set of recessed can lights. Fresh lightbulbs is all we needed for play time, getting dressed and such. We’ll be adding a mellow, but bright hanging light over the rocker for bedtime reading without the bright ceiling lights on. That same light will also offer enough task lighting for night time changing table needs.
WINDOW DRESSING — Take the time to truly analyze your window situation, privacy and room darkening needs as well as style!
Our nursery has two west facing windows for some pretty extreme afternoon sun. These windows are on the back of the house which looks out over the alley and the side of another house. Ideally during play time, a sheer to soften the harsh sun and the not so attractive view would be great. But we also wanted some room darkening for naps and at bedtime due to a streetlight right across the alley from this room.
You won’t believe the brilliant two-in-one solution we discovered.
BOOK & TOY STORAGE — A lot of this depends on your room size and how much time your little one spends playing in their room.
Books are a priority in this house, so a built-in book niche in the side of our closet wall was high on my daughter’s wish list. She had the contractor build that in while he was reframing the wall that had been demo’d.
But we will be adding additional book storage by the rocker. The right closet door opens with three pullout wire baskets in the bottom. Those will be perfect for all the toys and stuffies this little one will accumulate.
Honestly both girls’ rooms are very small. The girls go to day care during the day and their evenings are spent downstairs until bedtime. On the weekends, they spend most of their time outdoors, with family friends or on adventures. So large play spaces are not high on their lists. For now anyway.
WALL ART — Wall art does not have to be framed prints or paintings. It can also mean a wallpaper mural or a wall decal or a hand-painted mural.
Here we went with a combination hand-painted mural and wall decal for a truly one of a kind accent created specifically for this room, for this little girl. And it is so much easier than it looks — I promise!
I’ve never seen or heard of anyone doing this, but I couldn’t get the idea out of my head. I came up with a process and am so grateful our daughter gave me the thumbs up to try.
Honestly, I wasn’t real sure it would work. But we are thrilled with the results!!! Don’t miss that post coming up soon.
A slight pause in the planning: Now is a good time to subscribe so you don’t miss a single project in this series — and so much more!
Thanks bunches! Now back to the plan:
The Budget
We didn’t sit down with a spreadsheet and a hard number. What we had instead was a simple filter for every decision. Asking ourselves, where can we save without sacrificing the function we need and the feel we’re after, and where is it worth spending?
That filter showed up everywhere. Built-in Pax wardrobes instead of a fully custom closet — same polished, made-for-the-space look, without custom-carpentry pricing. A decal-and-paint wall instead of wallpaper — similar wow factor, a fraction of the cost, and way more forgiving on out-of-square walls (more on that when we get to it). A vintage dresser refinished into a changing table, instead of buying a dresser and a changing table brand new. A secondhand crib in place of buying new.
None of those were choices made for “cheap” sake — they were the right choices, each one freeing up a little more room in the budget for what actually mattered most to us: quality paint, a rug we loved, a rocker that would earn its keep for years.
Pro Tip: Spend where a piece will keep earning its place. Our rug is washable, built for a toddler and not just a newborn. The changing table is really a dresser wearing a temporary hat.
Both E’s and L’s cribs convert to toddler beds. I’m sure you’ve heard this advice, but it’s worth repeating: A piece that grows with the room isn’t an expense, it’s an investment.
That’s the real trade-off equation. Spend where it’s hard to fake it, save where a smart alternative gets you 90% of the look for a fraction of the investment. But don’t skimp on critical function.
Your Turn: Make two lists for your own room — one for pieces where you’re willing to spend to get exactly right, and one for pieces where a clever alternative could get you most of the way there for less. That split is your budget, even without a single number on it.

And to keep our DIY expenses in line, we borrowed tools. Lots of tools from a kind, generous friend!
The Plan
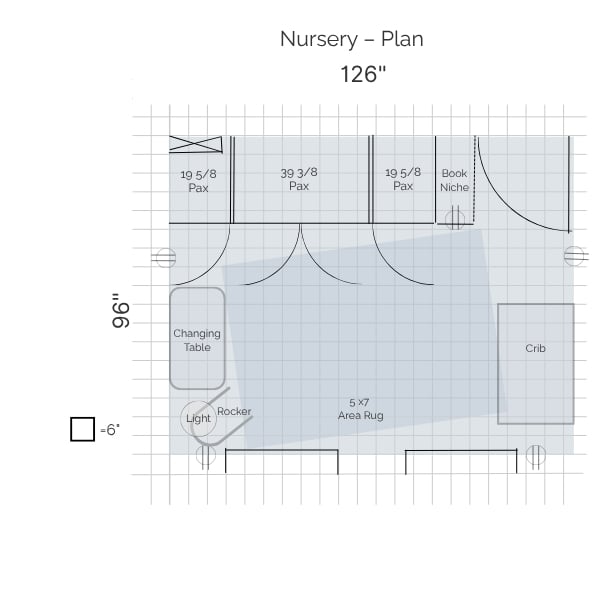
So here’s where we’re headed — eight more stops between “gutted home gym” and “sweetest nursery ever.”
We’ll tackle the closet wall first, since it set the shape for everything else. One early decision is worth flagging now (full story in Post 3): we didn’t default to the tallest storage option, even though that’s the “obvious” choice.
That closet had to hold a lot more than baby things. Remember the camping gear and guitar cases? If your nursery needs to pull double duty as family overflow storage, factor that in now. It can shape everything from closet height to how big a dresser or changing table you choose.
Each post stands on its own, but they build on each other, just like the decisions did in real life. If you’re working through your own room alongside us, bookmark this post. Your mood board and plan will be the touchstone for every decision ahead.
Your Turn: What’s the first big decision you need to make before anything else can fall into place? And does this room need to serve a second function, like guest space or an office corner? Note it now, before you finalize furniture sizes.
That’s the plan: messy, imperfect, made from trade-offs and a little guesswork, but a plan all the same. I hope today gave you a place to start, even if your “sage green” turns out to be something else entirely.
Next up: the closet wall! Spoiler: it is so great!