
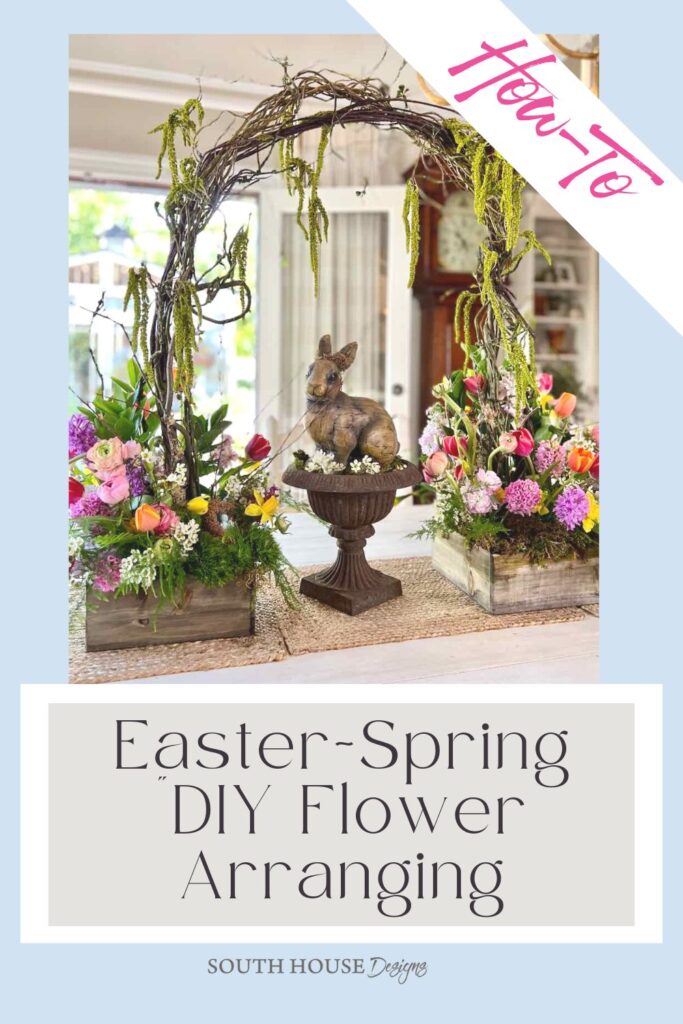
How to Make the Most Charming of Easter Flower Arrangements
This show-stopping, charming Easter or Spring flower arrangement is easy to make with fresh Spring florals for a natural, casual garden look.
Spring is here! After a long winter, it’s that time of year when we celebrate new beginnings.
New life is literally sprouting up all around us — whether in your own yard or in your local grocery store. So is there a better way to embrace the spirit of Spring than with fresh flowers?
I truly appreciate the impact of monochromatic floral centerpieces or any beautiful fresh flower arrangement done in a single color.
However, during the Spring season, I am all in on colorful blooms. The more the better!!!
After the grey months of January and February, I crave Spring arrangements and Easter arrangements full of a variety of colors, bright Spring colors.
You too? Great!
Then you’re going to LOVE this post!
And don’t be intimidated by it. Its casual vibe means no strict rules. And I’m including lots of options to modify based on what you have on hand, any budget or space limitations.
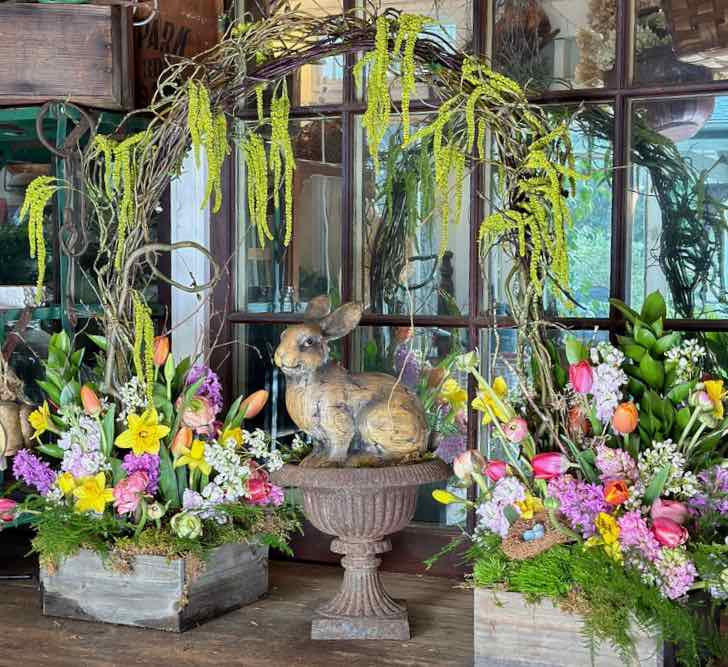
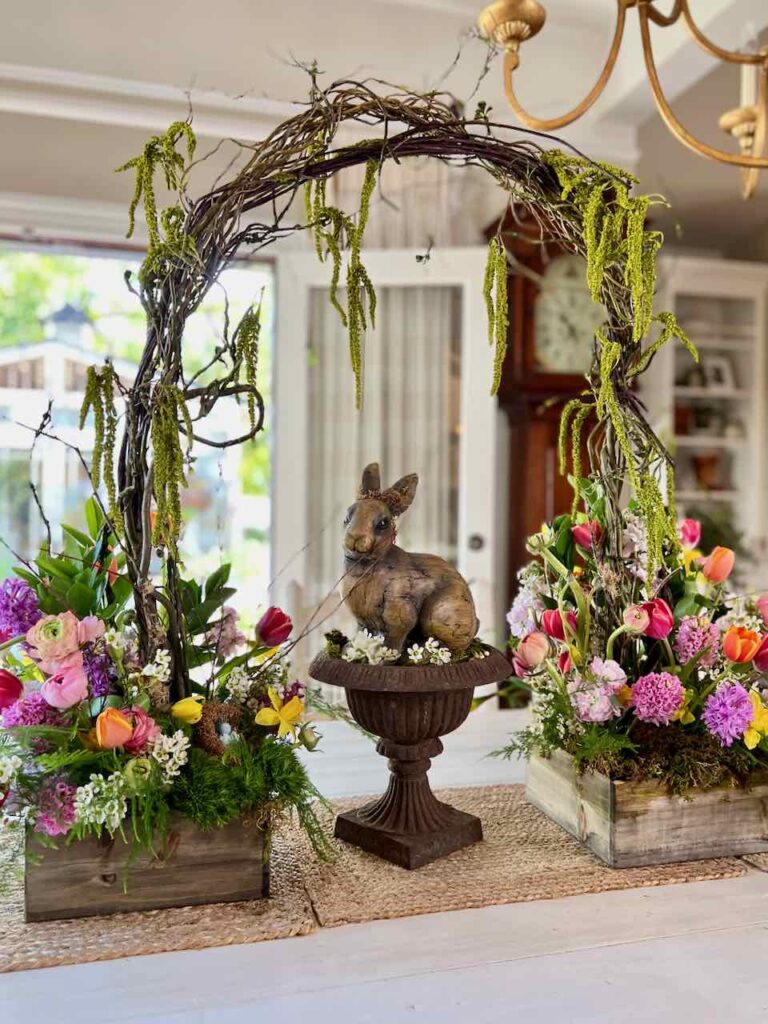
Isn’t this the most charming Springtime flower arrangement? Of course, it’s perfect for an Easter celebration too.
A bit of background:
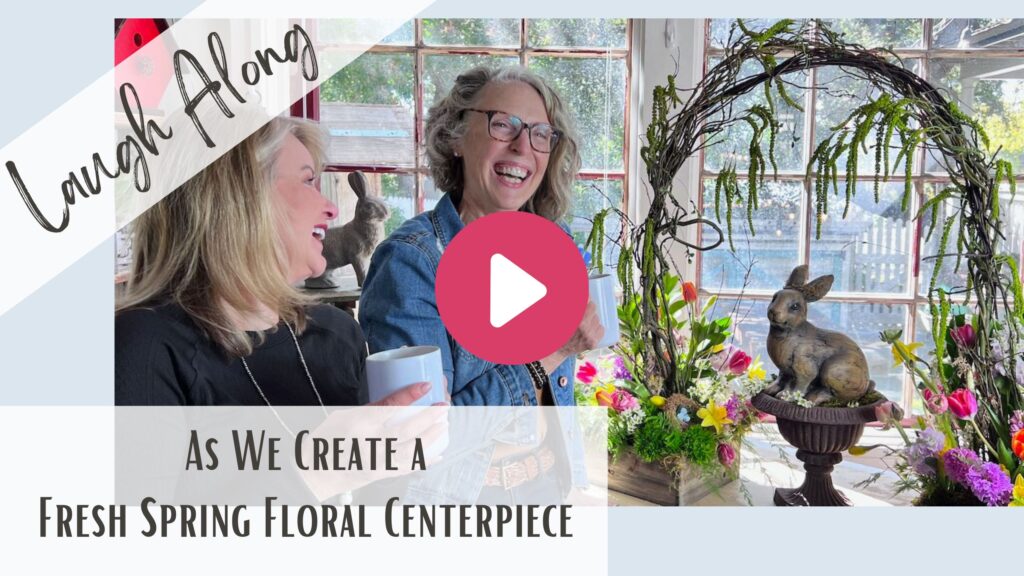
I, a Midwest girl, was in California for a Reunion-ation with my “High School girls”. When that stay was over, I made my way to Pasadena for a couple of days with a dear blogging buddy, Wendy of WM Design House.
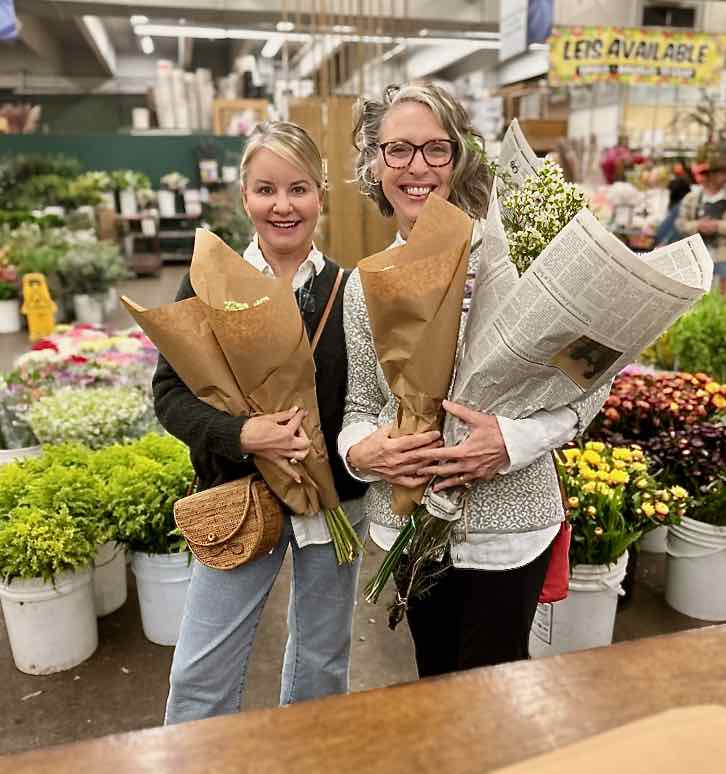
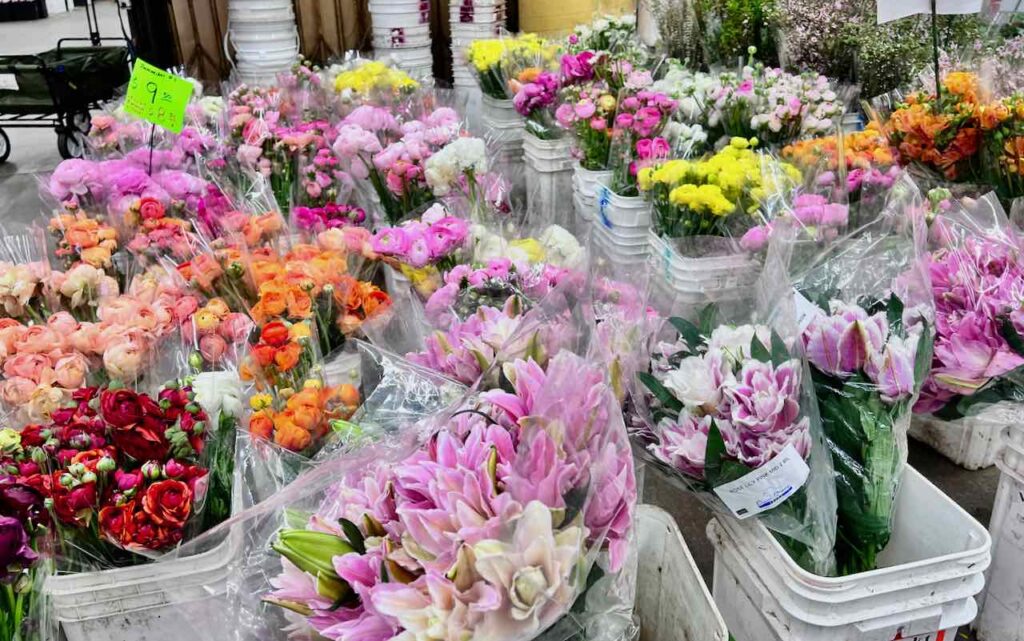
Wendy flaunted /shared her access to year round flowers by taking me to the LA Flower Market. Ohhhh My!!!
We went with one project in mind. But we listened to the flowers (and our hearts) and returned with arms full of beautiful blooms for an entirely different vision.
We prepped our flowers that afternoon. Because, well you know it’s best to prep your flowers right away and get them in water, right?
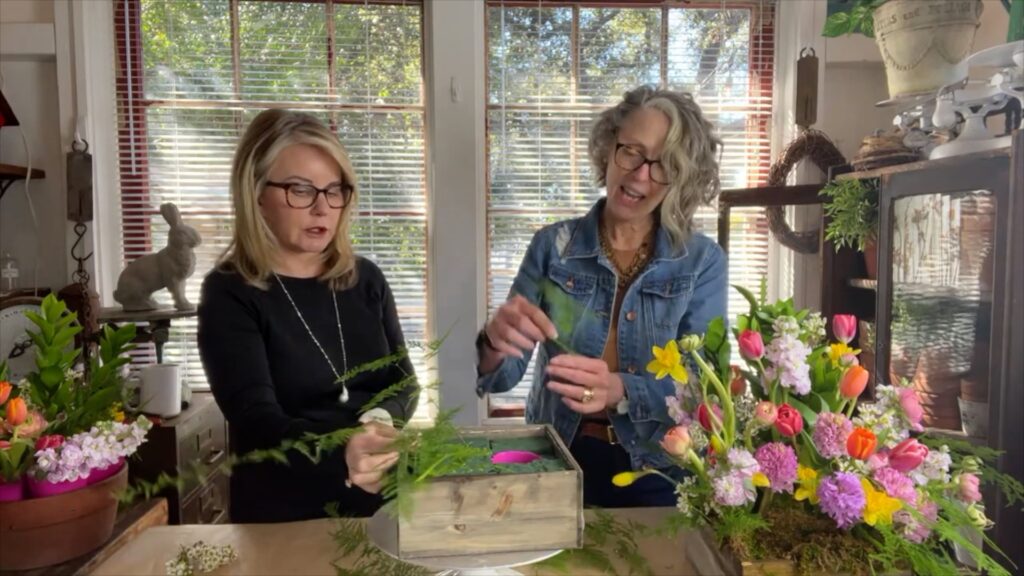
Then the next morning, we set up in her garden She Shed (yes, her infamous She Shed) and set to work videotaping while we made our Easter floral arrangements — and laughed a lot!
So yes, if you prefer video format, there is a link to my video further along in this post.
Table of Contents:
Let’s Make Easter Flower Arrangements Joined by an Arbor
But first, it’s a good idea to determine placement and scale before you get started:
Where will you place your Easter table decor?
In the living room? Or on the dining table perhaps? How about in the entry on a console table?
A miniature version would be an easy way to bring Spring decor to a large coffee table.
Now How About Scale?
How much space you have for an Easter tablescape will significantly impact the planters you use.
Our display is about 3-ft wide. But you can certainly make it smaller.
What you showcase in the center will also make a difference.
HINT: If you use square or rectangular planters, then think about using something round or oval in the center to balance the sharp corners and visa versa.
This could be a charming Easter dinner centerpiece if you keep it more compact and low so the arch does not cut off conversation. Maybe a bunny or cluster of bunnies on some moss. Or a low, small riser with some moss and a couple of pretty Easter eggs. Or how about a pretty nest of eggs with a watchful momma bird close at hand.
Or scale it wide and tall, but shallow front to back if this is destined to become your mantel Easter decor.
Supplies:
- All the beautiful fresh cut flowers you want
- Pair of matching vessels
- Wet floral foam or Oasis
- 2 small blocks of styrofoam
- 2 Plastic cup cut down. in height
- Knife to cut foam
- Snippers to cut stems
- Moss
- Twigs, optional
- Fresh cut Spring flowers
- Small nest with eggs, optional
- Fresh Curly Willow, can substitute faux if it’s wired to be bendable
- Faux Green Amaranthus, or drippy moss
- Florist wire
- Wire cutters
- Hot glue gun and glue stick or heavy adhesive like E6000
Some of the links in this post may be affiliate links. That means you will not pay a penny more, but I may receive a small compensation for sending you to the shop. Please know that I will never recommend a product I do not fully trust.
Step 1) Create The Foundation –
Choose the pair of vessels to create your matching Easer floral arrangements in. We used 9-inch natural wood boxes. But you can use clay pots, tin buckets or other more unusual containers. The key here is to have a matching pair of something low and wide.
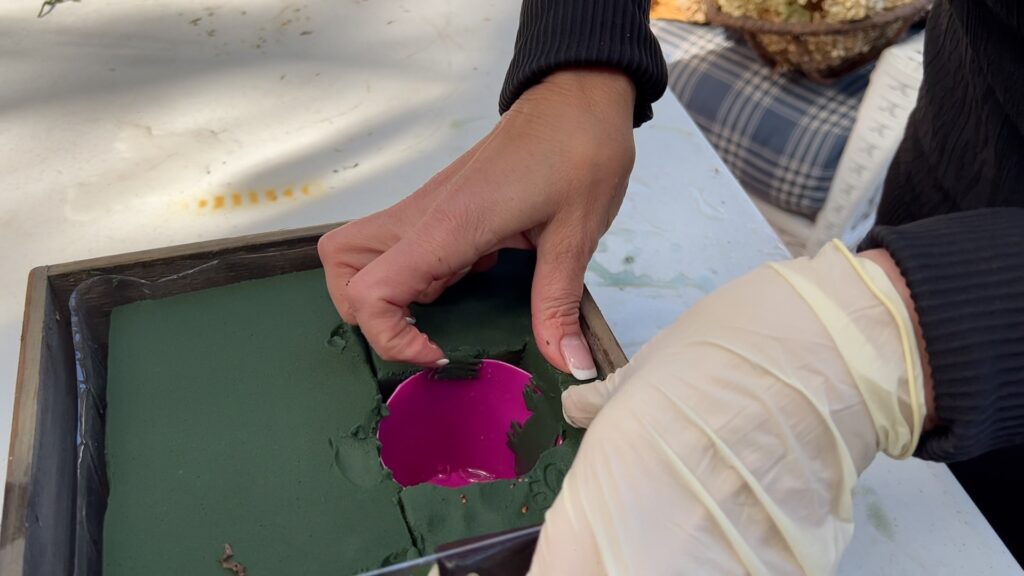
- Soak the blocks of wet foam, or Oasis, in a bucket of water.
- While the wet foam is soaking, trim two plastic cups to the height of the planters.
- Cut a piece of styrofoam to fit snuggly in each cup.
- Determine the location in each planter for the ends of the arbor. Glue the cups in place.
- Once the cups are secure, cut your blocks of wet foam to fit tightly in your planters.
Step 2) Make the Arch/Arbor –
Determine about how much distance you want between your two planters. Take into consideration how much space you have and what do you want to highlight under the arch between the two planters.
Divide your willow branches in two bunches.
Stick one branch from each bunch in the styrofoam filled cup in each planter .Determine how much you want the ends to overlap to create the arch of the height and width that you want.
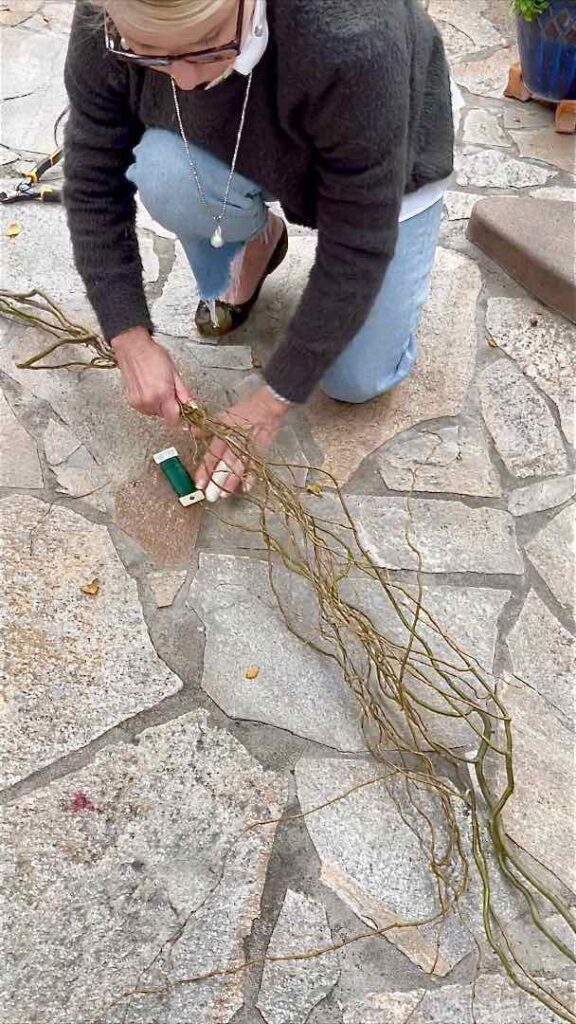
Now remove those two stems and lay them on the floor or work surface overlapping as desired. Add the two bundles with them and wrap with wire from end to end.
It’s up to you whether you want to do step 3 now and then come back and add your arch.
I prefer to place the willow arch in the planters and then arrange around it. In this case, you’ll need to walk around the table to get a balanced placement of florals.
In our video, we arranged the florals first and then added the arch so that you wouldn’t be looking at our backs for a lot of the video.
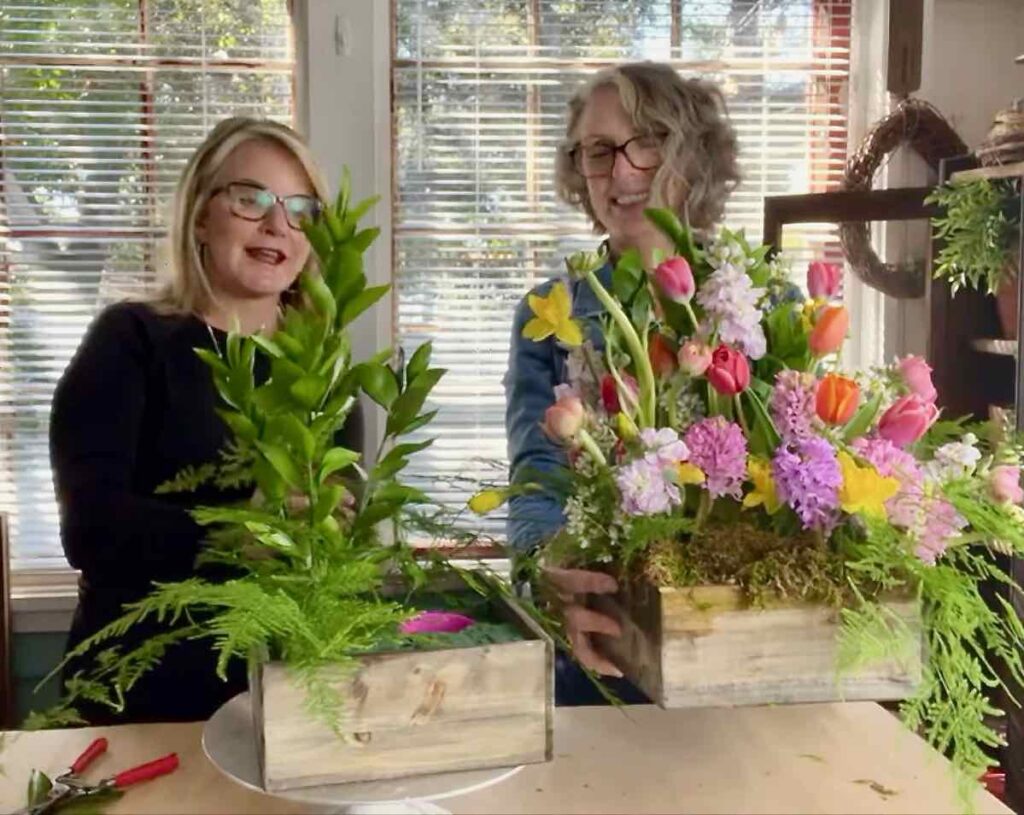
To help us evenly decorate all sides, we placed our square wood planter box on a Lazy Susan to easily spin it around.
Step 3) Add Your Flowers –
Start with your florals prepped and waiting in buckets of water.
This is the order we used for arranging our florals:
- Green Base
- Tall Greens
- Largest Flowers
- Mid Flowers
- Filler Flowers
For our natural garden look arrangement, we started with our green feathery leafy base
Then added our tall greens around where our willow branches will be.
NOTE: With a pair of planters joined like this, mirror your arrangements. So the inner sides are similar and the outer sides are similar.
TIP: When you want arrangements to be the same height, be sure to check them side by side when you are putting your tallest florals in place.
Since we were arranging one box on the Lazy Susan, I held the finished arrangement next to it so Wendy could trim the stems of our tall greens to the right length.
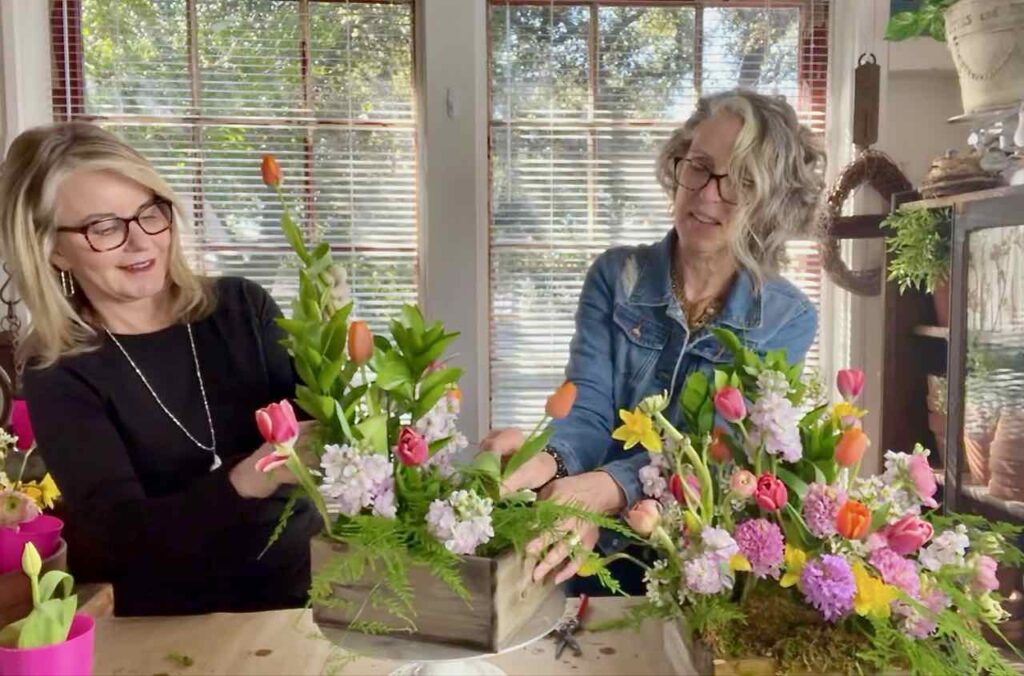
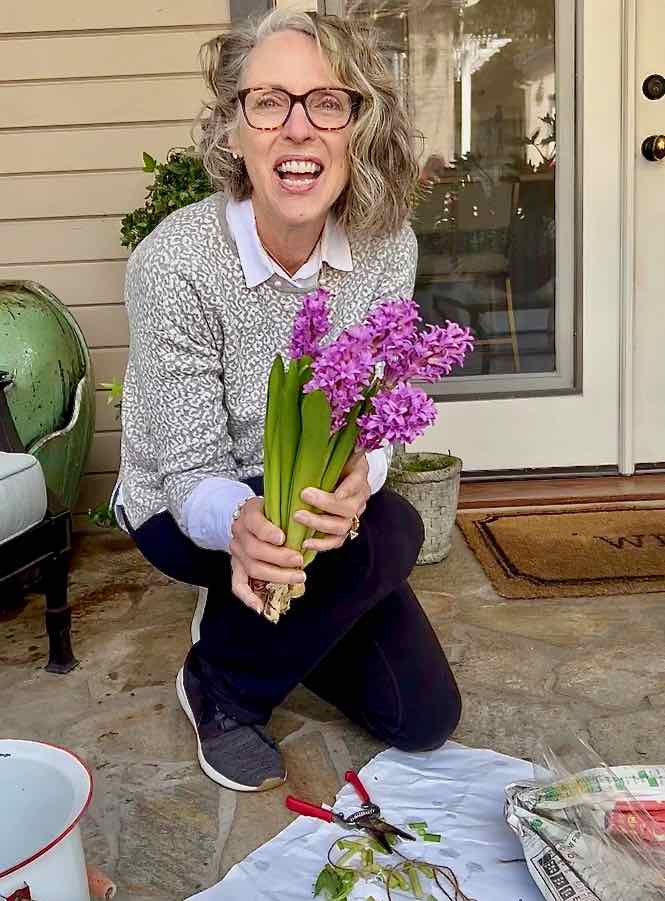
We intentionally mixed lots of colors and varieties of blooms for a very casual, garden-like arrangement:


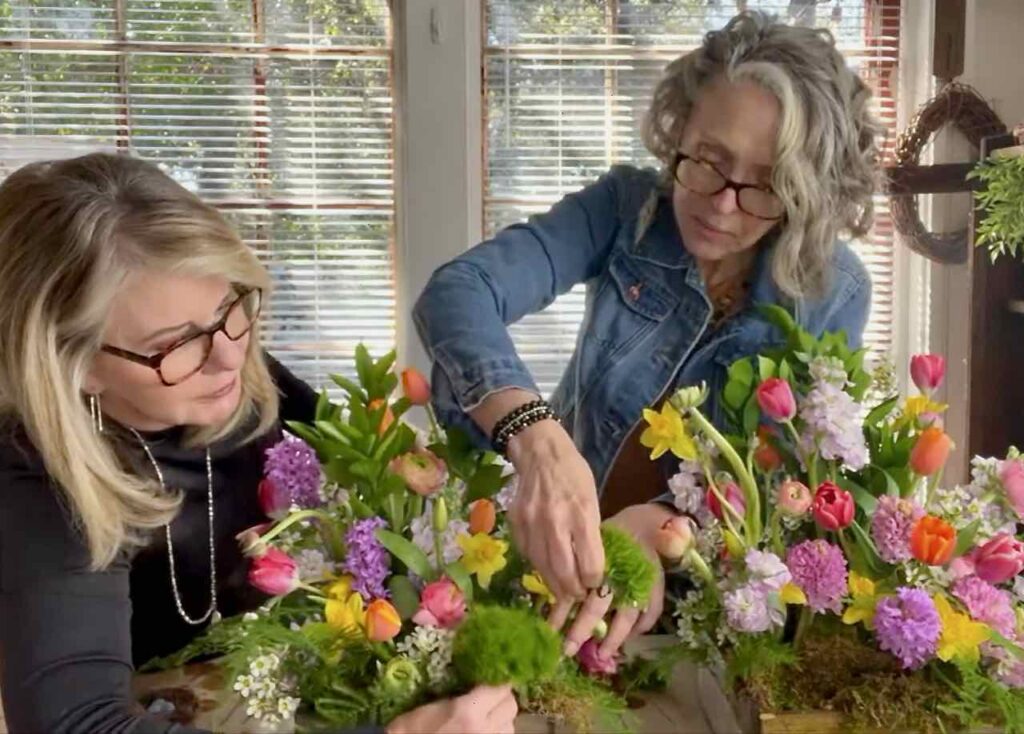
Then start adding flowers at different heights. Start with your largest or showiest blooms, then work with the middle blooms, then the smallest or filler blooms.
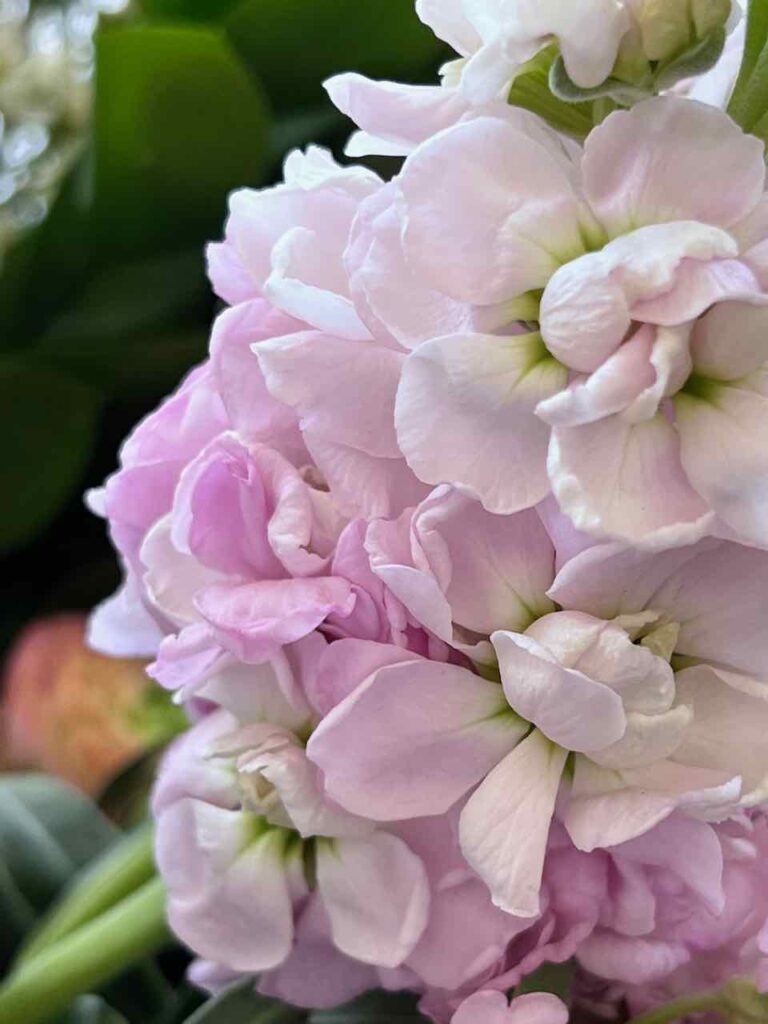
For this arrangement, we started with the stock as they have the largest visual weight, then the tulips because they are our tallest blooms.
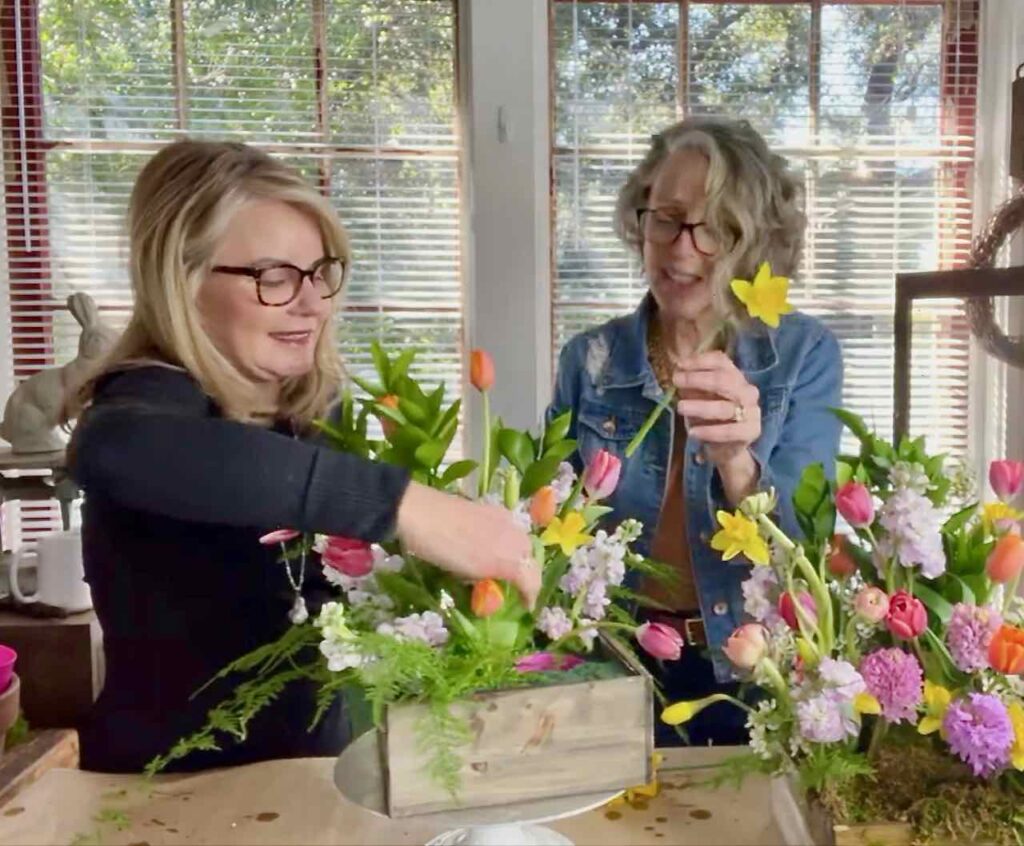
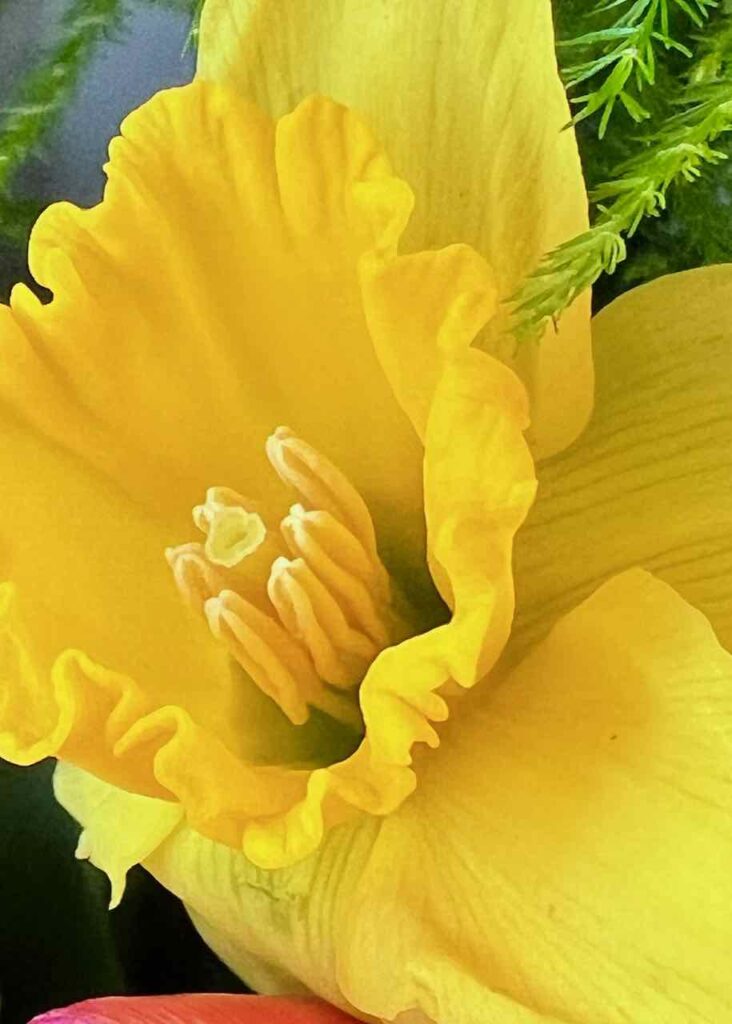
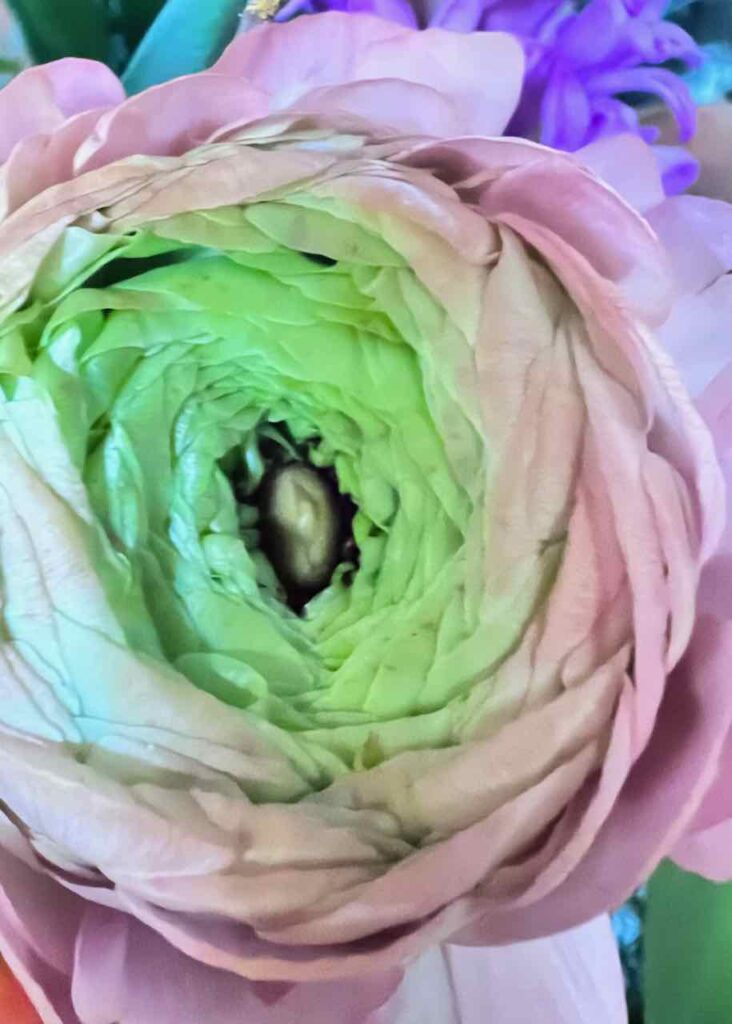
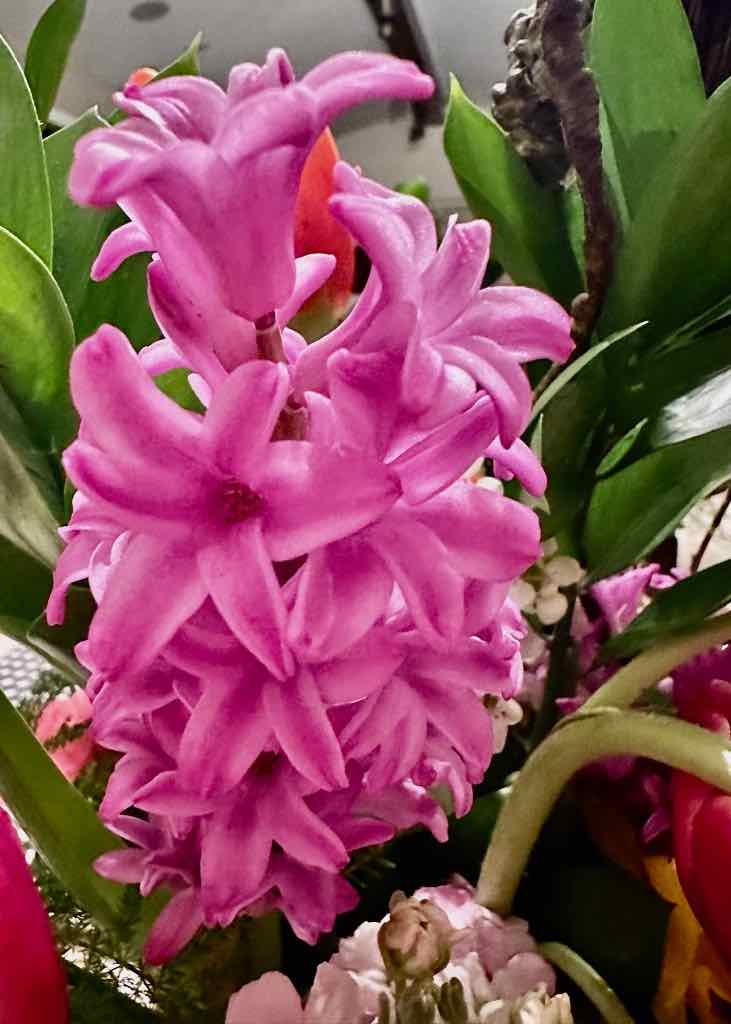
Then the daffodils. Followed by the Ranunculus, Hyacinths, and Wax Flowers.
REMINDER: Always freshly cut each stem at an angle to the length you want for your arrangement.
Neither Wendy or I are fond of complete symmetry. So we left one corner of one box empty on purpose. We had a little something special planned for it.
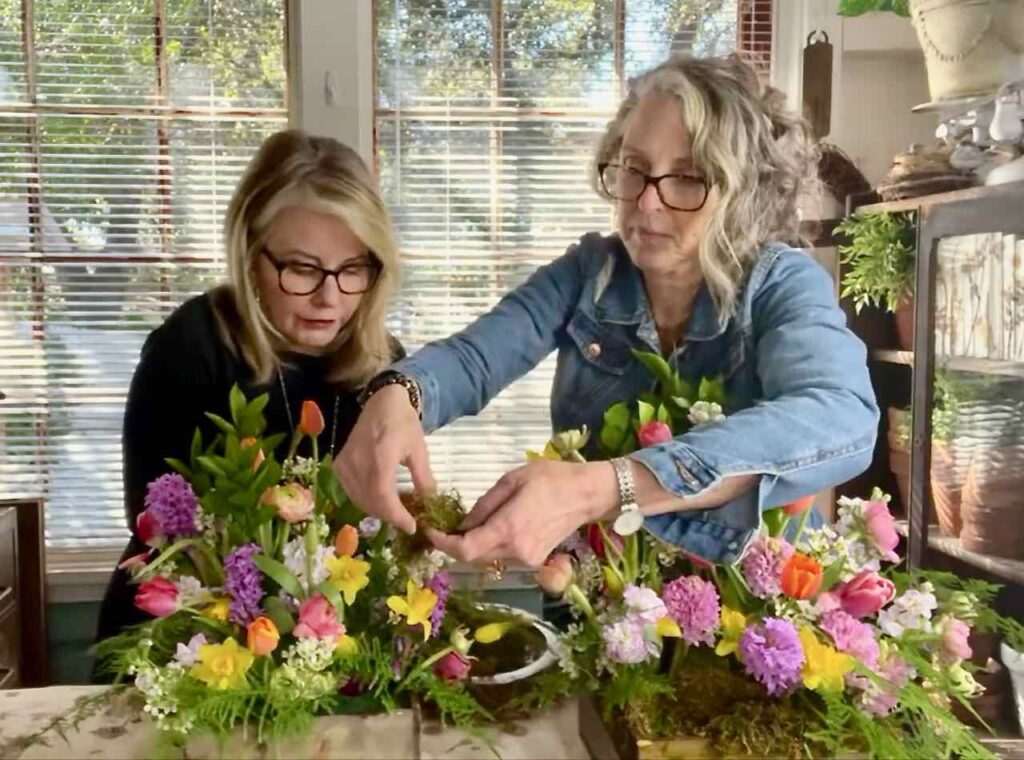
Step 4) Cover Your Mechanics With Moss –
Now it’s time to make sure all the mechanics are covered. Dried green moss is my favorite for this.
TIP: Dried moss, Spanish moss and others like these can be saved and reused over and over again.
I have a tub for all my mosses and foam pieces that can be used again. It’s full of odd pieces of foam and many old produce bags with various varieties of moss. When I take apart a display, I add the moss to the bag that matches it best.
Tuck the moss under the first layer of greens and let it spill over the edge of the box here and there.
This helps soften the sharp edge of the box and give it a more organic garden look vs. a more structured, formal arrangement.
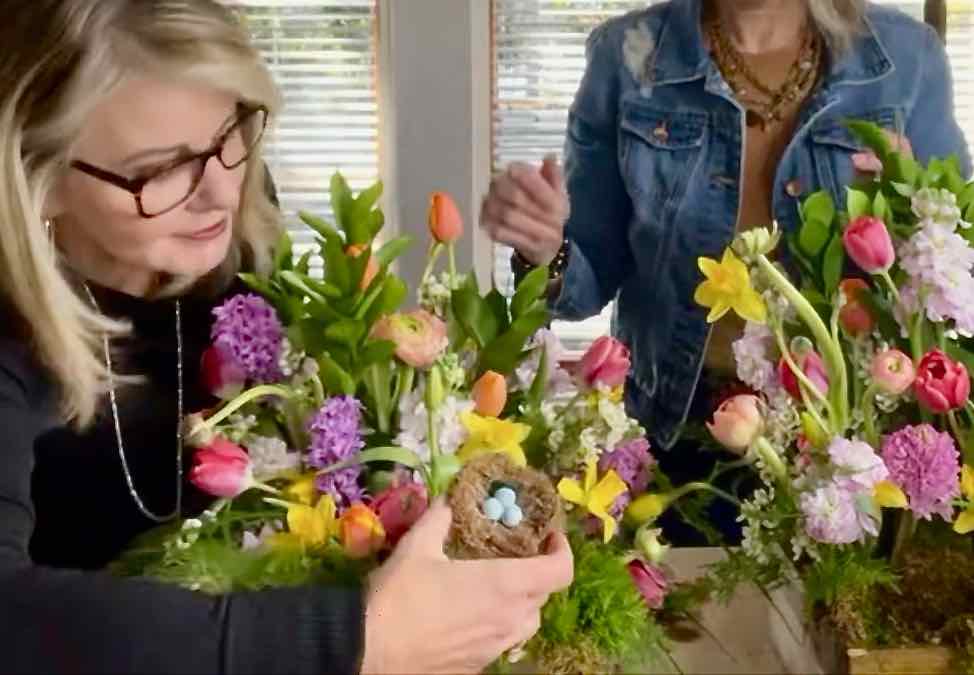
Step 5) Add Optional Nest With Eggs –
That empty corner? It was prime for a sweet little nest with eggs.
But first, we added in tufts of a sweet green stemmed moss like grass. Think of this as a grass pad for our nest.
TIP: It’s easy to make your own nest. But even easier to amend a boring nest by add a few twigs from your yard and a bit of green moss.
It’s amazing what a bit of variety in texture and color will do!
A brief pause before we get to the show-stopping final bit. If you are enjoying this post, please subscribe, so you won’t miss a thing and have access to all my subscriber-only goodies.
Step 6) Add Your Arch –
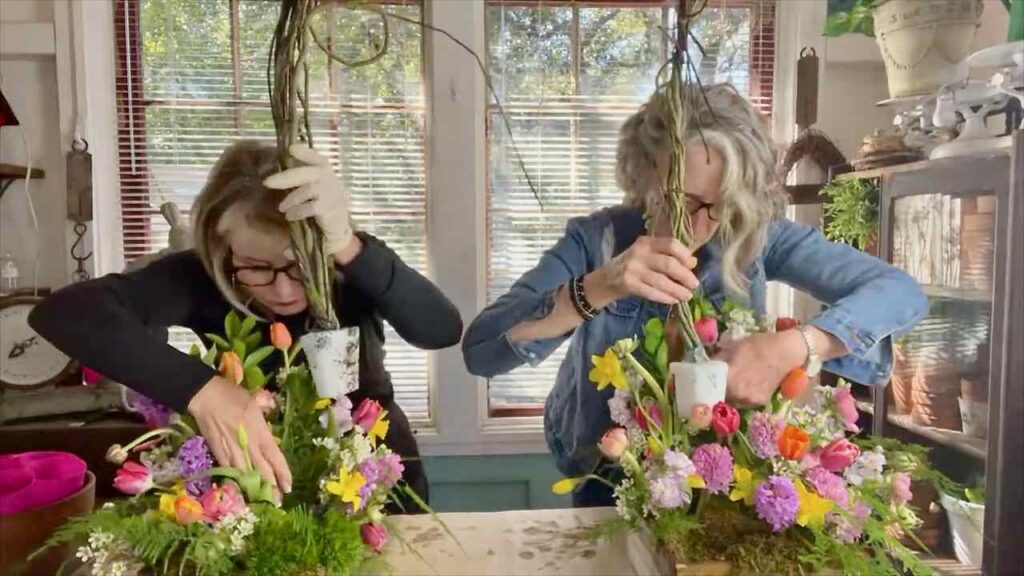
If you didn’t already add your arch, now is the time.
Your cups should already have a piece of styrofoam wedged in them.
Force one end of your arch in each cup.
We wedged our arch in our cups before recording the video and then removed it to be able be to arrange to flowers on the Lazy Susan. Then it was just a matter of replacing them in the cups and adding a stick or two to tighten them up.
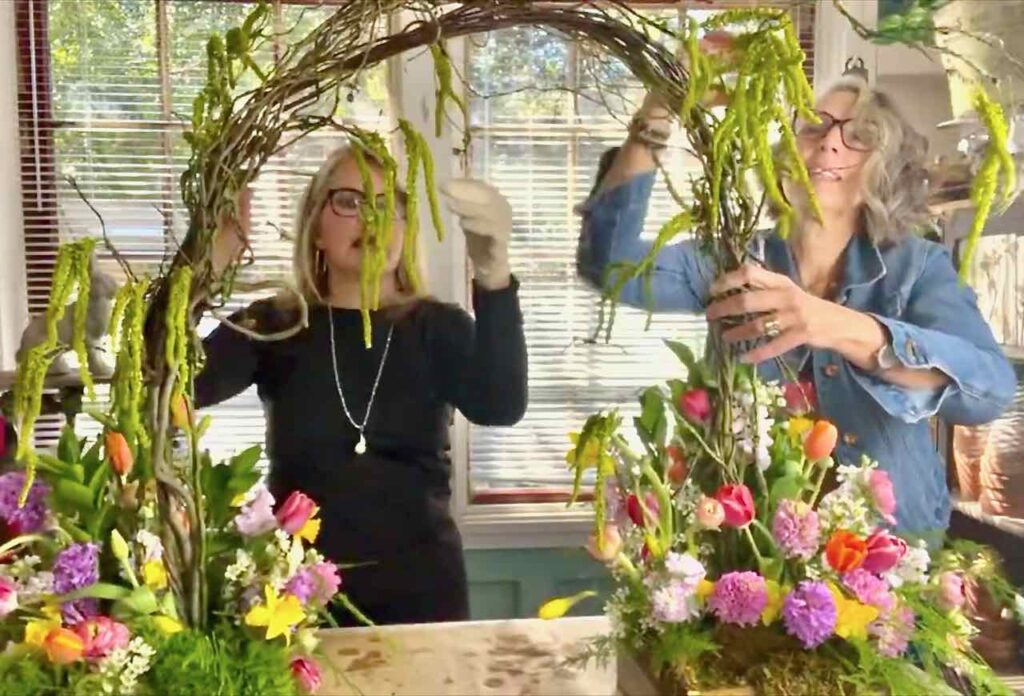
We embellished our arch a bit more by adding two branches of faux Amaranthus. Any drapey moss-like vine would work.
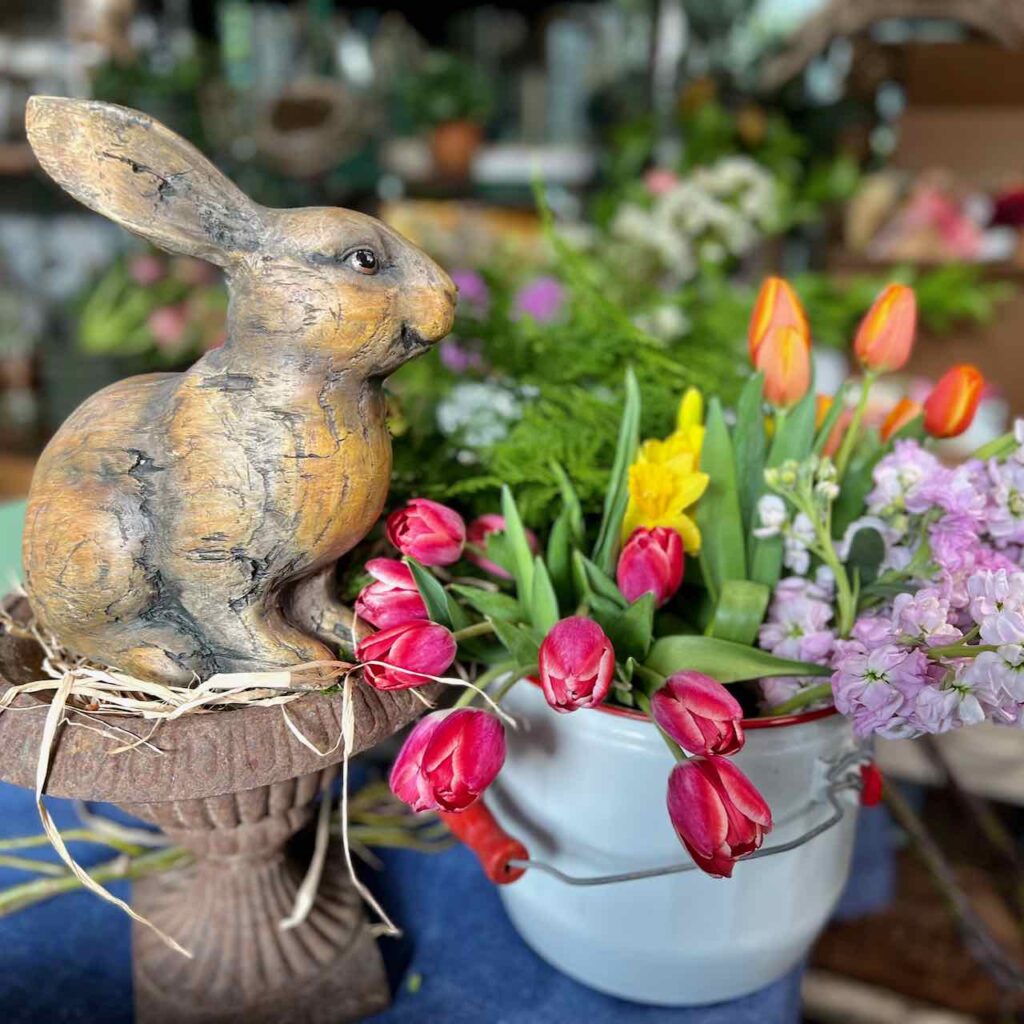
Step 7) Add Your Center Display –
Have fun with this!
It’s best to add variety:
- If your planters are round, find something more square. If square like ours, go for round in the center
- vary the height from the planters
- If your star is tall and you don’t want it on a riser of any kind, set it on a bit of moss as its “stage”. What’s a star without a stage, right?
- Add a tie-in to the planter arrangements. We repeated the moss and a couple of wax flowers for our tie in.

I have to say, this is one of the most beautiful tabletop displays I’ve ever made. Have you ever seen so many colorful tulips and gorgeous Spring flowers?!?!!!!
And now on Wendy’s dinner table — with the She Shed standing proudly out in the garden.
Are you familiar with Wendy? If not, you need to hop right over to her blog and check out all her amazing posts. She is one of the sweetest and most talented gals I know!

If You Prefer Video, I’ve Got Ya!
Thanks for joining me today! As always, don’t hesitate with any questions.
Favor: Please share this with someone you think would enjoy it. I would really appreciate it and so will your friend!

So great you were able to visit Wendy on your trip! Sounds like you all had a fun time together! The flower arrangement is absolutely amazing! Great job!
Thanks bunches Donna! We sure had fun with it.
What a fabulous post Diane, I love how we both wrote the same post from different angles.
I think how you covered all of the details so well and gave people such great options. WE will have to do this again. Sooner than later.
So true Wendy and you covered the principles of good design — so between the to of us, our readers get the whole course ????. Looking forward to our next get together.
Absolutely stunning! I would love to share this on my newsletter. Hugs to you, my friend.
Oh thanks bunches Renae! I so appreciate the share! Back at ya friend!!
Beautiful flower arrangements Diane! Love all of the vibrant colors, and the arch is quite the icing on the cake! Thank you for sharing with Whimsy Home Wednesday!
This is GORGEOUS!! I love love love all these flowers. You both look so happy in the photos.
Thanks Anna! How could we not be? It was such a fun day!
Wow, Diane!!! This is a show stopper for sure. It’s gorgeous. All of the pretty fresh flowers are just stunning and that arch!!! You guys knocked this one out of the park. Thanks so much for sharing at Home Imagined today!!!
Absolutely gorgeous–and y’all look like you’re having so much fun! The arrangement is fabulous as you show it, but I’m thinking that your tips for creating the flower boxes are good even for a small centerpiece.
Thanks so much for joining the Grace at Home party at Imparting Grace. I’m featuring you this week!
Lovely tips and ideas. Beautiful flower arranging is not normally my thing so this is a great help! Thank you for sharing with us at Handmade Monday 🙂
Such a gorgeous display .Love the arch between the two flowers displays. Definitely a showstopper. Thanks so much for sharing your talents at Love Your Creativity. I am happy to feature your charming Easter Flower arrangement on Sunday. Happy spring.
That is a showstopper piece. Thanks for sharing at Coastal Bohemian. Pinned and you are my feature this week.
I love so much about this post. Not only that you are encouraging readers to try out arrangements with fresh flowers, but the fun you had creating something beautiful with a friend. Thanks for sharing the post and it will be a feature this week. #HomeMattersParty