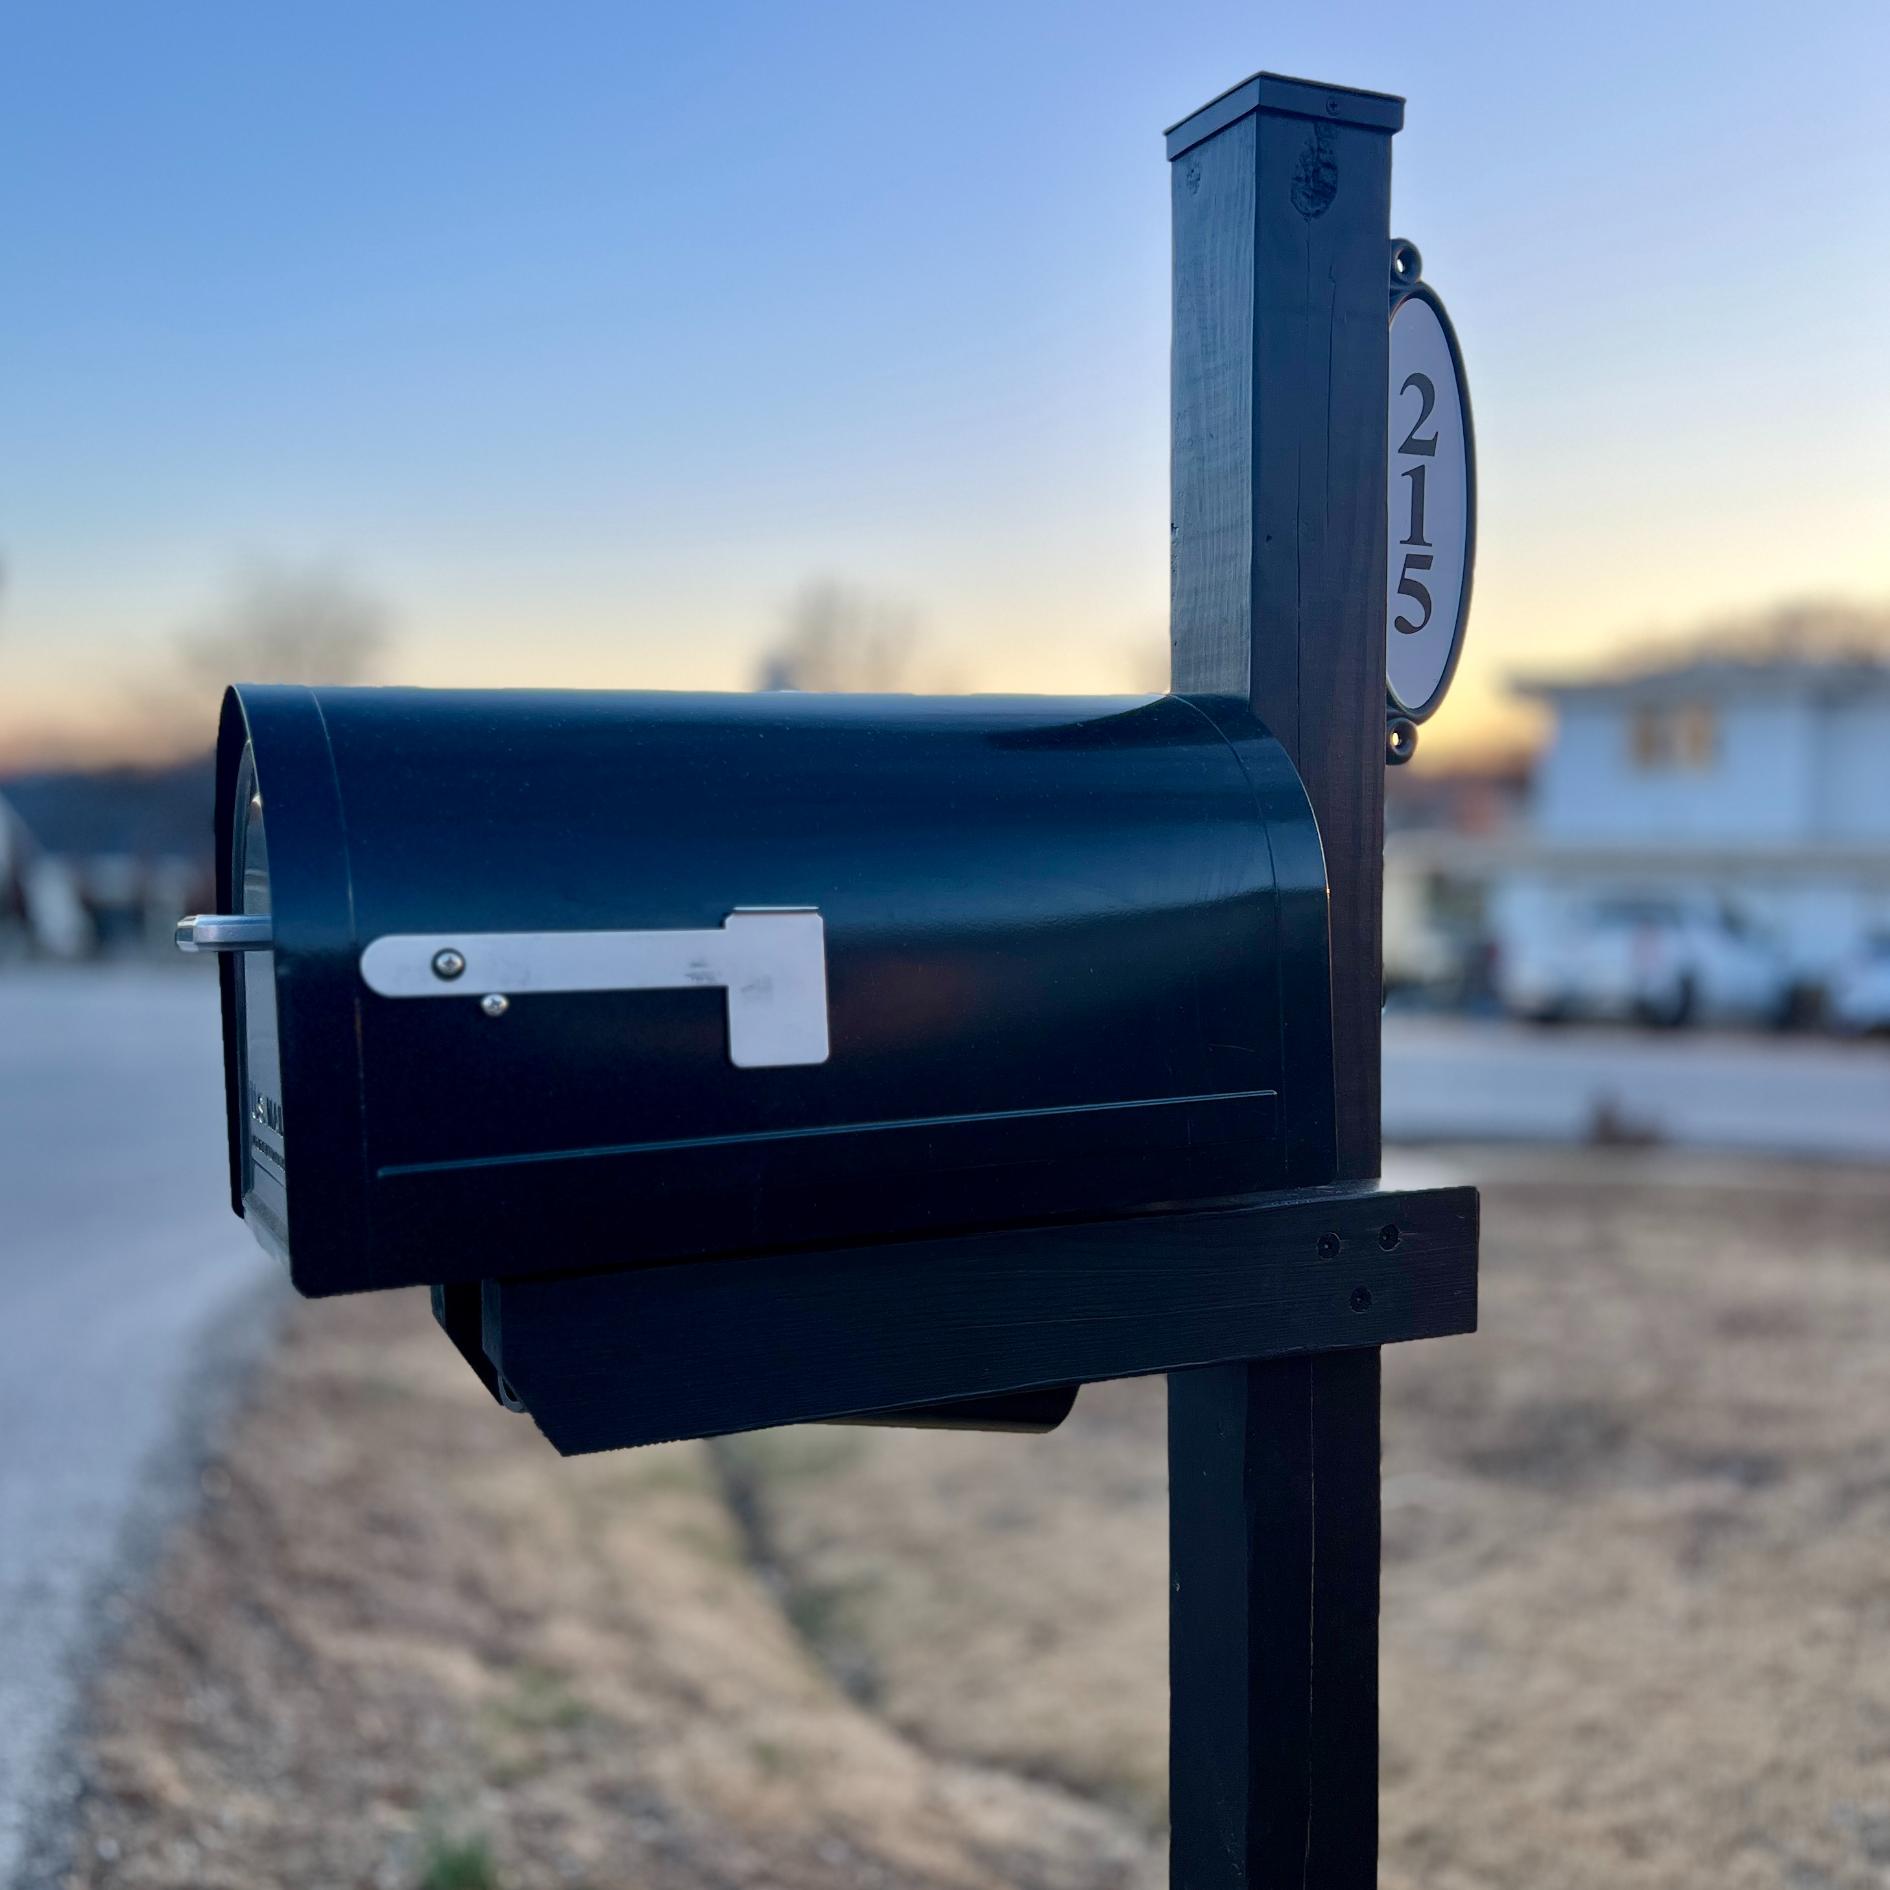
How to DIY an Upscale Mailbox Post for a Locking Mailbox (Free Plans)
Here’s how to build an upscale DIY mailbox post for a locking mailbox, including USPS height rules, design details, and free plans.
Replacing a mailbox isn’t exactly the most glamorous DIY project. . . until you realize how many boxes out there are either ugly, flimsy, or just not designed for how we actually live today.
Mail theft is becoming more common, so if we were replacing our mailbox anyway, a locking mailbox felt like a non-negotiable. The problem? Most locking mailboxes lean very modern or commercial, and many of the posts that come with them feel undersized or plasticky.
So we did what we usually do around here:
We built our own.
And happily, this one turned out to be a very approachable, very forgiving DIY.

Before You Start: USPS Requirements You Need to Know
Before getting into materials or design choices, there are a few non-negotiables set by the USPS. These are important — and easy to meet.
- Mailbox height:
The bottom of the mailbox must be 41–45 inches above the road surface. - Setback from curb or road edge:
The mailbox face should sit 6–8 inches back from the curb or road edge. - House numbers:
Address numbers must be at least 1 inch tall and clearly visible from the street.
Once you work within those parameters, everything else is fair game.
My Personal Requirements (Because Aesthetics Matter)
I also had a few non-USPS requirements of my own:
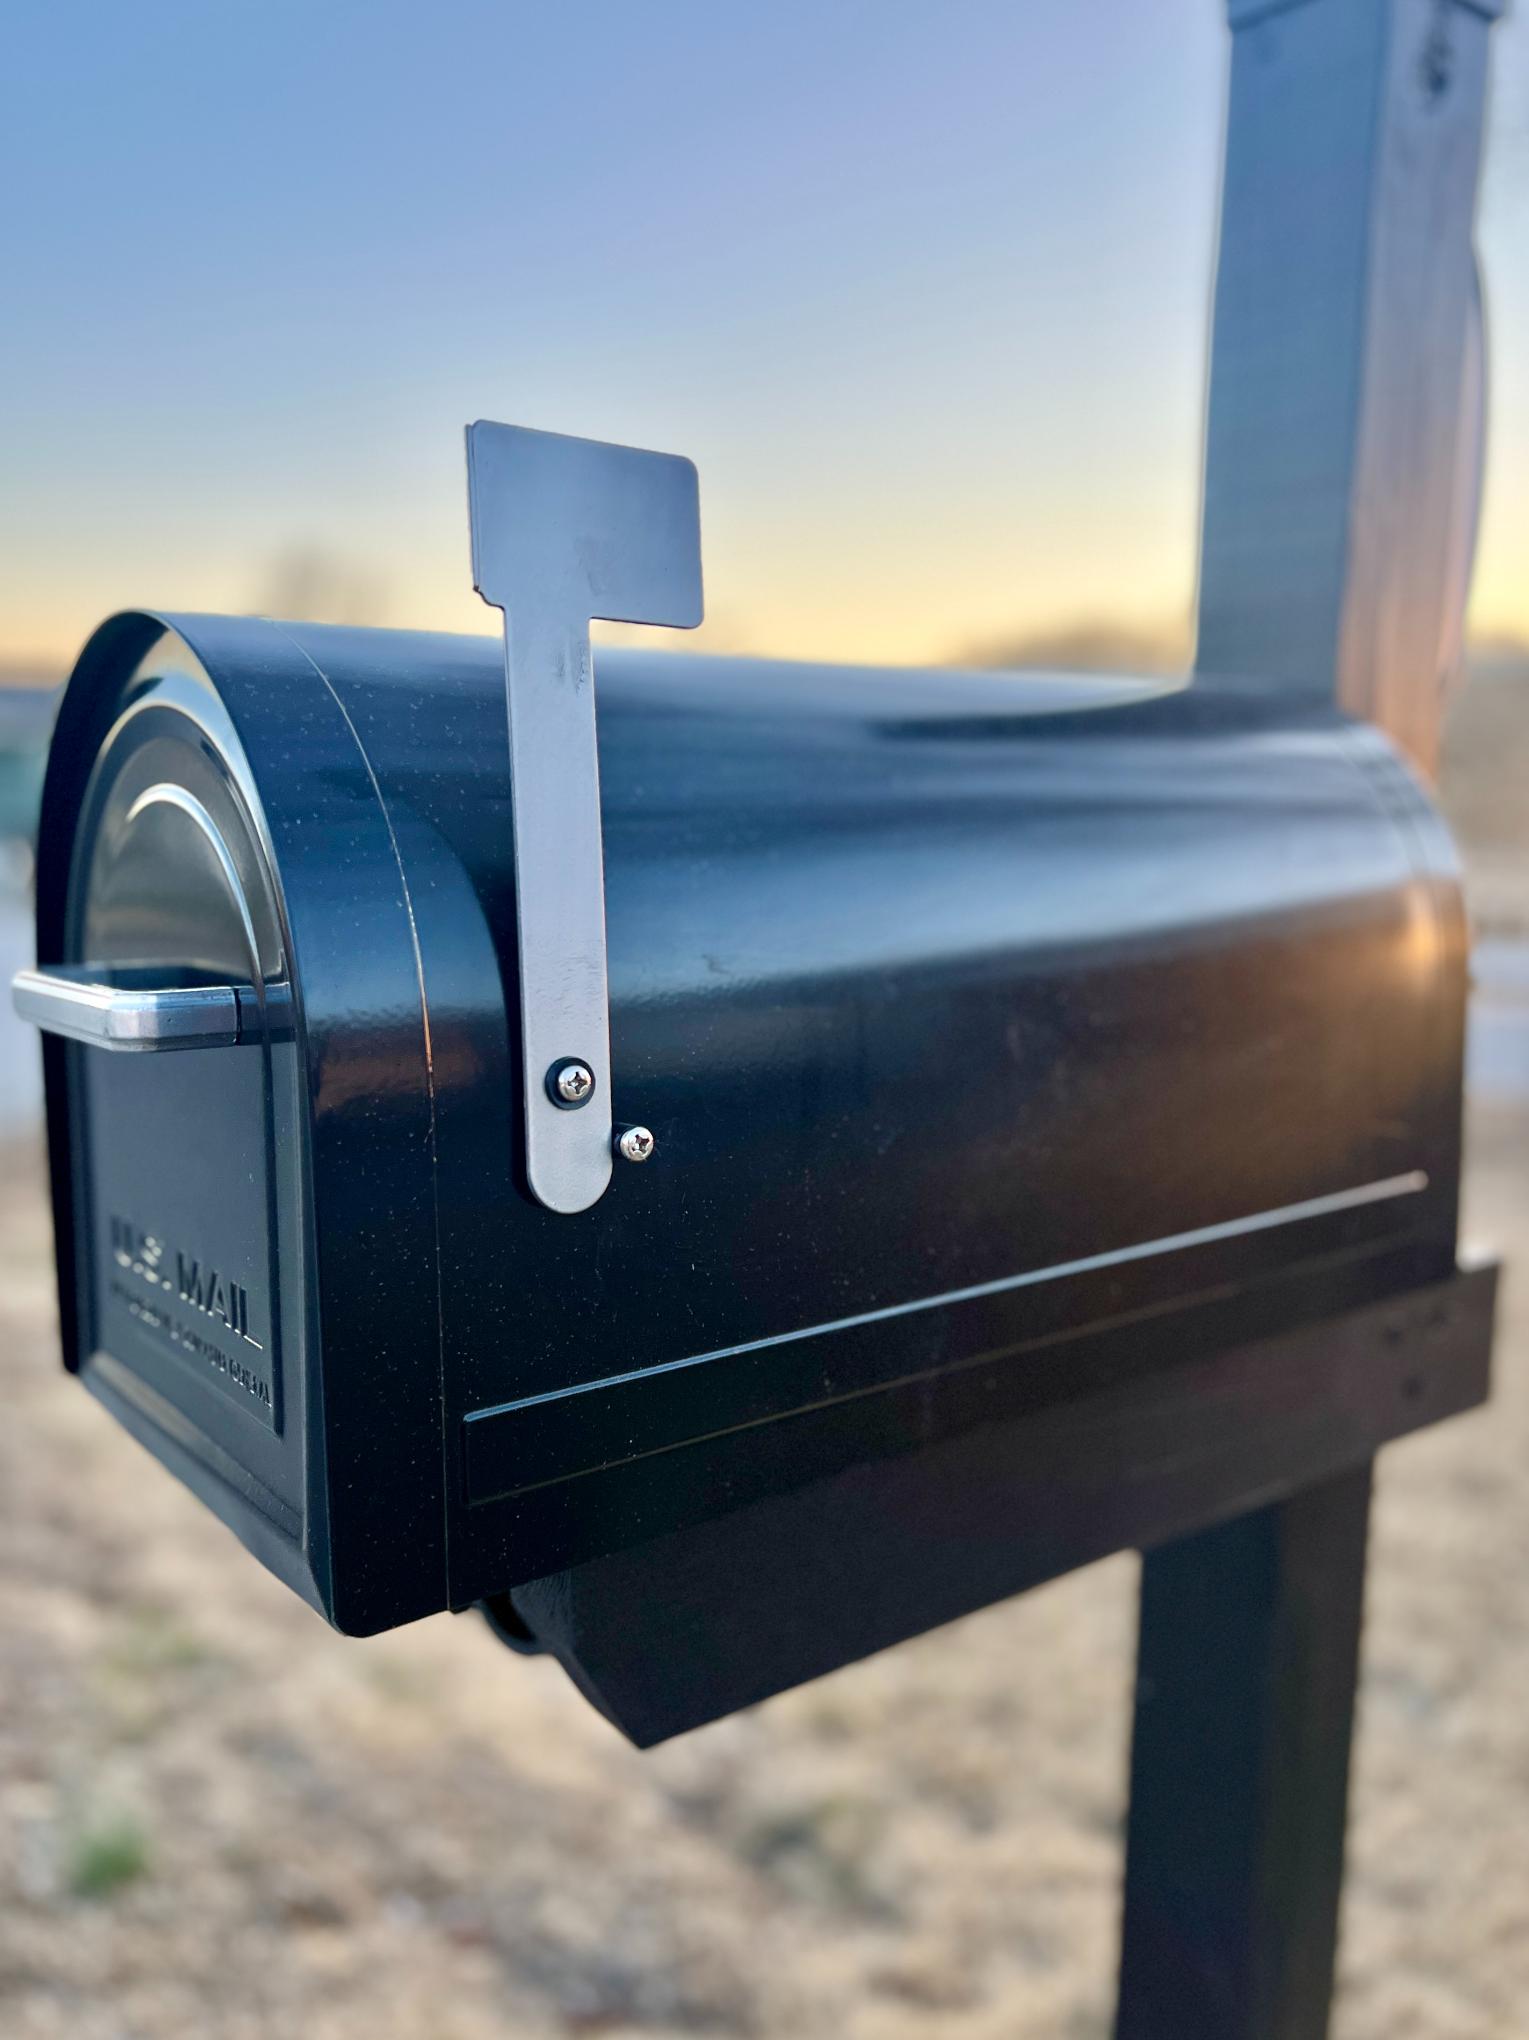
- A locking mailbox
Sadly, this is becoming more and more necessary.
(And no — your mail carrier does NOT carry a ring full of keys. Soon, I’ll insert a short video here showing how the locking mechanism works.) - Front access to the locked compartment
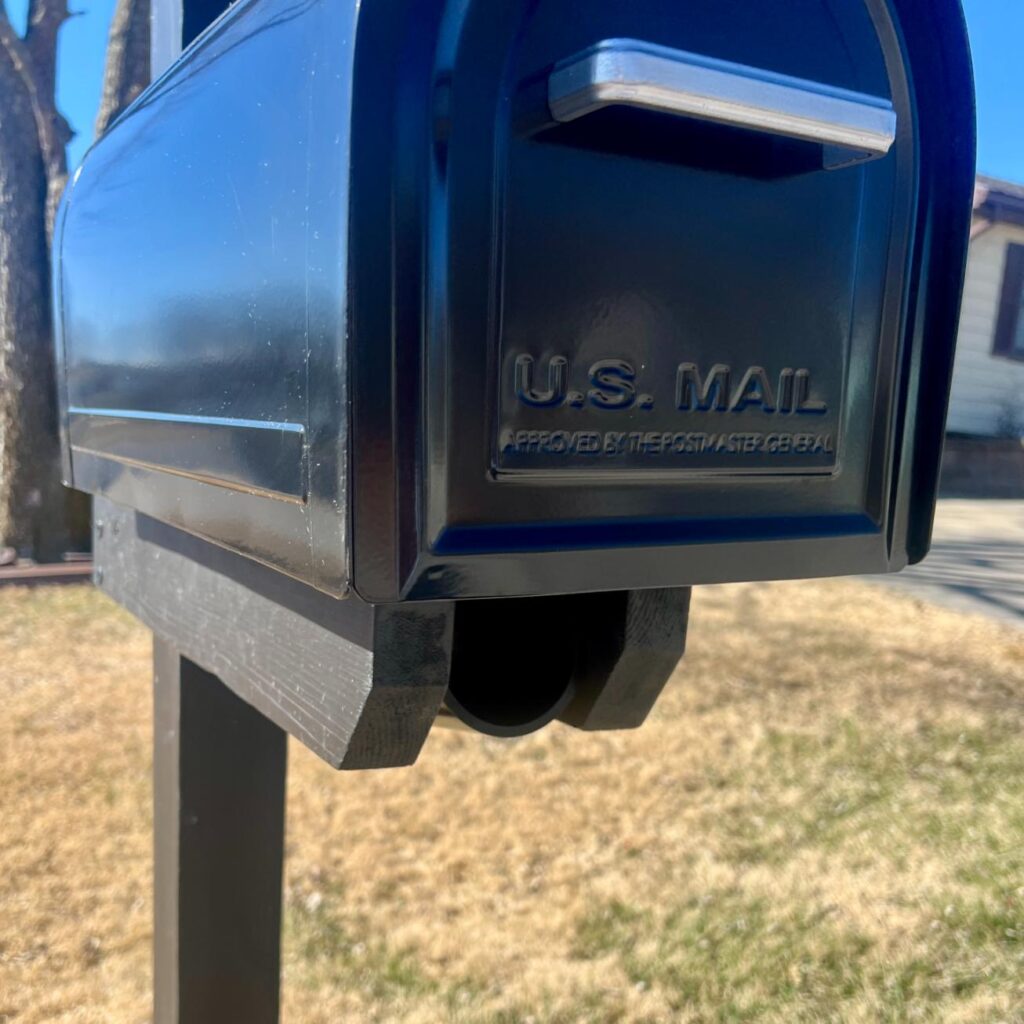
Because of the slope of our yard, many locking boxes would have required access from the back — which wasn’t practical for us. - Traditional shape
I didn’t want a flat-top, commercial-looking box. A rounded, classic mailbox was important. - Wood or metal — no plastic
This mailbox sits front and center. I wanted something that felt substantial. - House numbers on the post, not the box
This is purely practical — I decorate our mailbox seasonally (especially at Christmas and the 4th of July), and greenery can easily obscure numbers mounted on the box itself. - Proper scale
The locking mailbox we chose is fairly large, and every premade post I found looked undersized next to it.
Which is how this became a DIY project.
Materials & Supplies
Lumber & Hardware
- 4×4 treated post (8 ft)
- 2×4 treated board (6 ft is all you need, but hard to find so we went with an 8 ft))
- Large locking mailbox (this is ours — love it!)
- Mailbox mounting plate (this is ours — worked well)
- House number sign or individual numbers (this is ours — perfect for this)
- Lag screws (exterior-rated)
- Exterior screws
- 4×4 post cover (optional, for added longevity) (this is ours — first one we tried was awful. This one functions and has the traditional, clean look I wanted)
Concrete & Finishes
- 50 lb bag fast-setting concrete mix.
- Exterior black stain or paint (this is the one I highly recommend)
- Exterior black spray paint (for flyer tube + hardware or black zip ties as we used, if needed)
Tools
- Miter saw
- Drill
- Proper drill bit (Phillips or star, depending on screws)
- Ratchet set (for lag screws and tight mailbox hardware)
- Levels (three recommended, time to borrow from that friendly neighbor)
- Measuring tape
- Post hole digger or auger
- Spade
- Bucket of water
PRO TIP: Save your back!!! Order all your supplies online for in store pick-up. Lowe’s will have everything on a cart waiting for you — and they are great about helping you load it too! Just double check your lumber before leaving the store, but my store usually pick good ones.
Step 1) Cut the Post to Finished Height-
Before anything goes in the ground, cut the 4×4 post to its finished length.
How to Calculate the Cut Length
Add together the following measurements:
- 24 inches below ground
- Difference between ground height at the post location and road height
- 41–45 inches from road surface to bottom of mailbox (USPS requirement)
- Height of the mailbox itself
- 6–8 inches extending above the top of the mailbox
Our Example
- 24″ below ground
- 8″ difference between yard and road height
- 43″ road surface to bottom of mailbox
- 11″ mailbox height
- 6″ extending above mailbox
Total: 92 inches
Since a standard post is 96 inches, we cut 4 inches off the bottom.
Take the time to do this math carefully — it ensures the mailbox ends up at the correct height and looks properly proportioned.
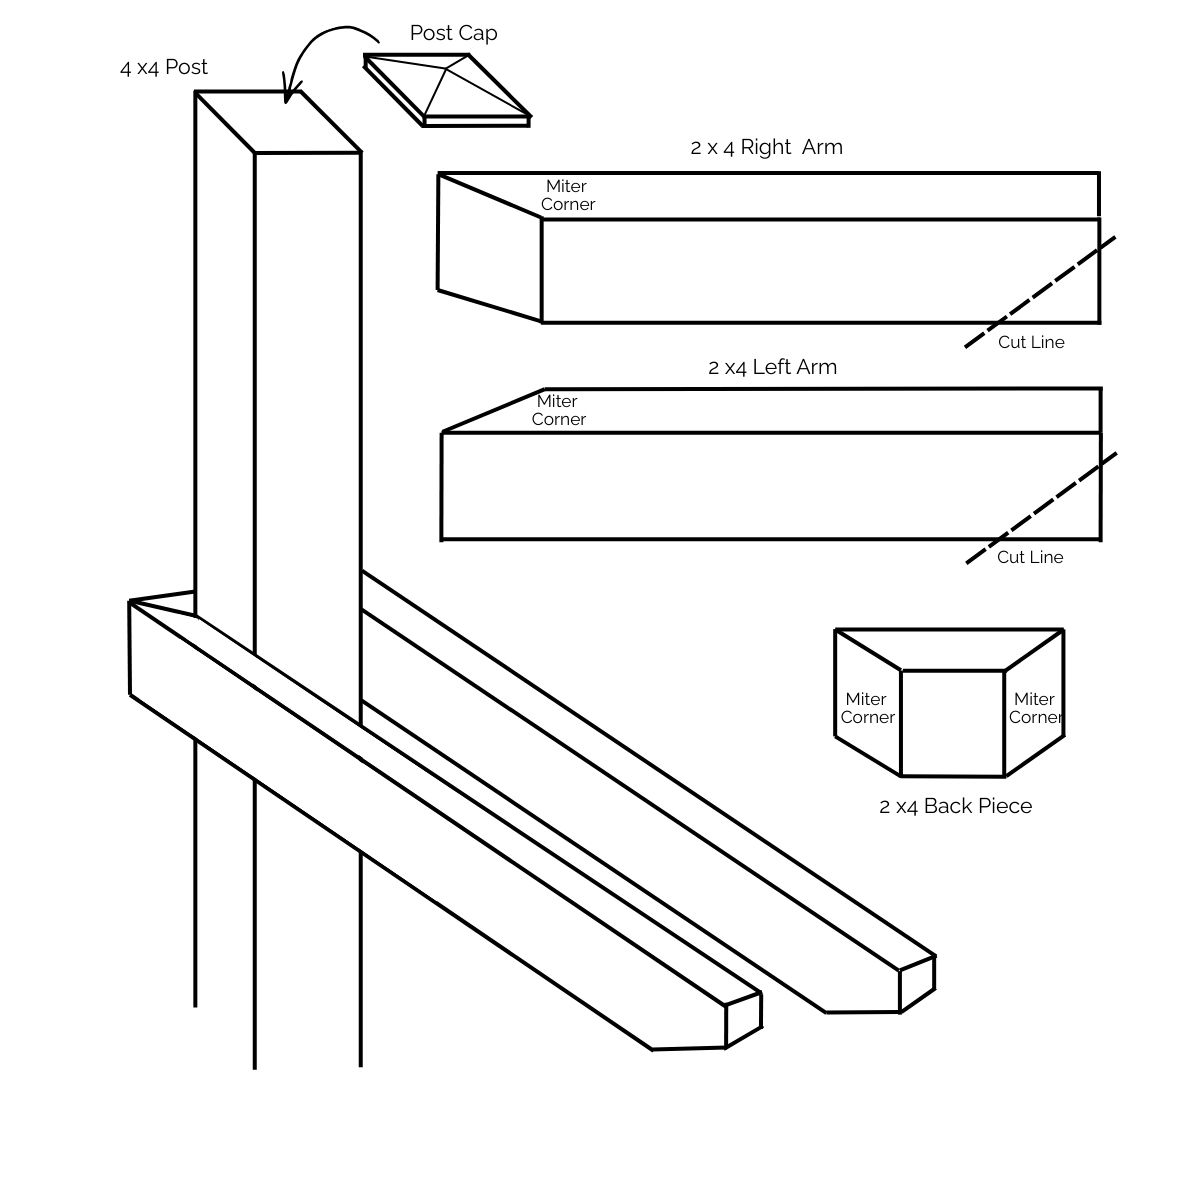
Step 2) Cut the Horizontal Support Boards-

We built the U-shaped 2×4 support for the mailbox before setting the post in the ground. This makes assembly and alignment much easier.
Cut List
- Two side arms: 22.5 inches each
- One back wrap piece: cut to fit, with 45-degree mitered ends
Our mailbox is 22.3 inches deep, so the side arms stop just about 5-inches (the width of the 4 x 4 post + the depth of the back 2 x 4 piece) shy of the front face of the mailbox.
Dry-fit all three pieces to ensure:
- Clean mitered corners
- Even arm extension on both sides
- A balanced look relative to the mailbox size
Step 3) Paint the Post Components-
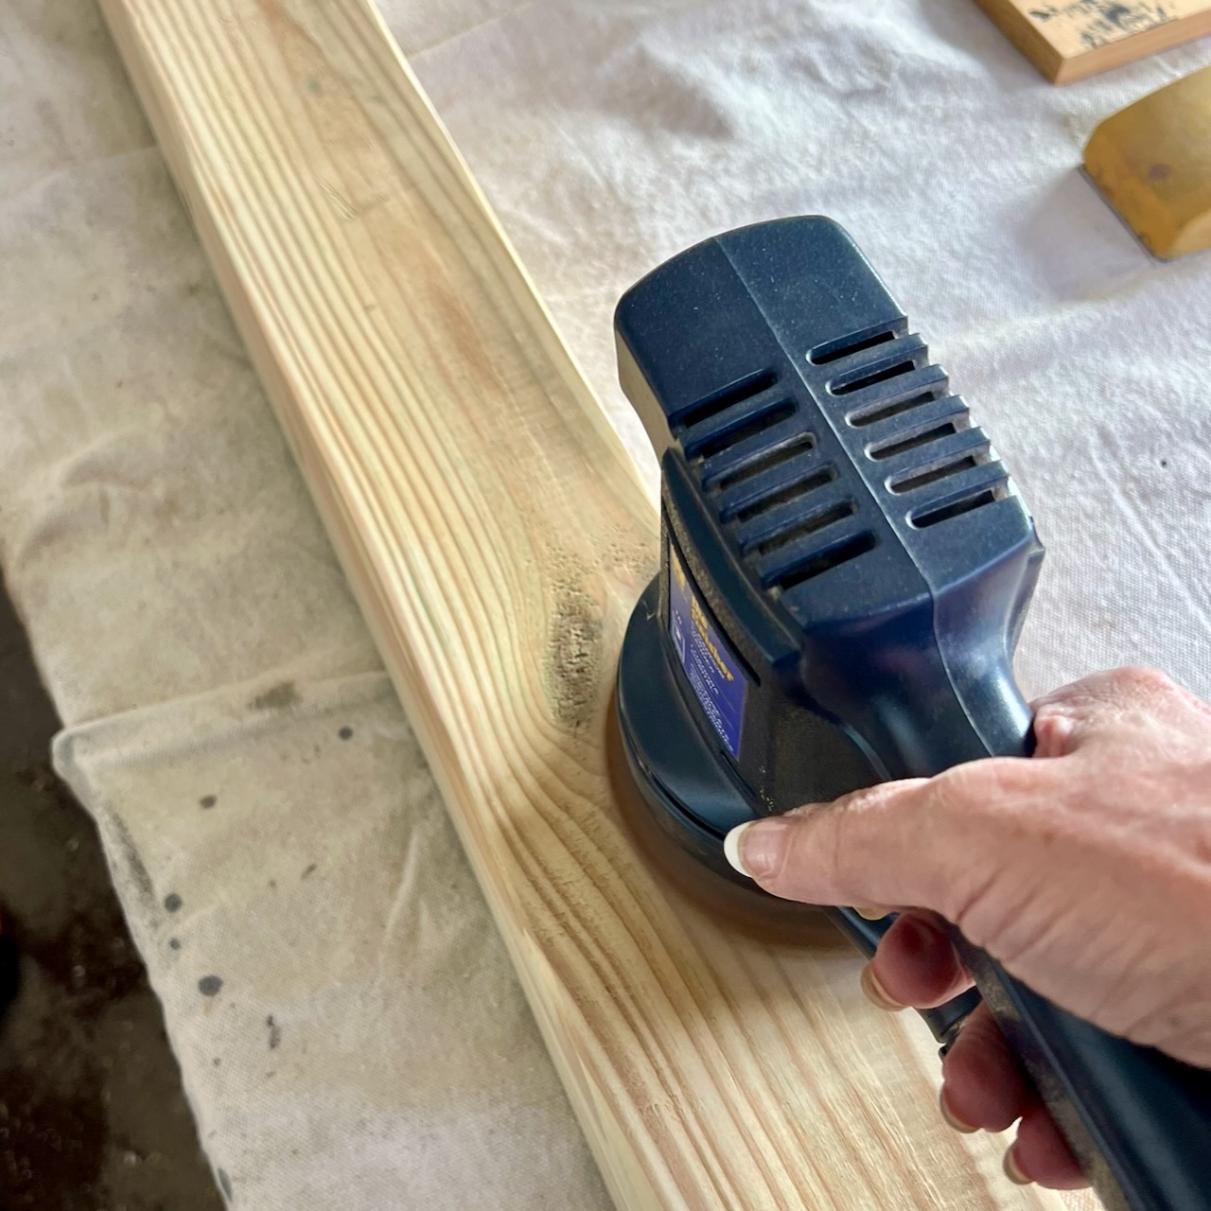
I like to paint before assembly and installation whenever possible.
- Apply exterior black paint to:
- The 4×4 post
- All 2×4 horizontal support pieces
- Allow paint to dry fully
This gives better coverage and avoids awkward touch-ups later.
Just like all other painting projects, two thinner coats are much better than one gloppy, thick coat. I also sanded everything down first, wiped it clean and then lightly sanded agin between the two coats.
Step 4) Attach the Horizontal Support Pieces to the Post-
Attach the horizontal arms to the post using exterior-rated lag screws.
Lag Screw Placement
- Three lag screws per side
- On one side:
- Two screws near the upper corners
- One centered closer to the bottom
- On the opposite side:
- One centered toward the top
- Two toward the lower corners
This alternating pattern prevents lag screws from opposing sides from landing too close together inside the post.
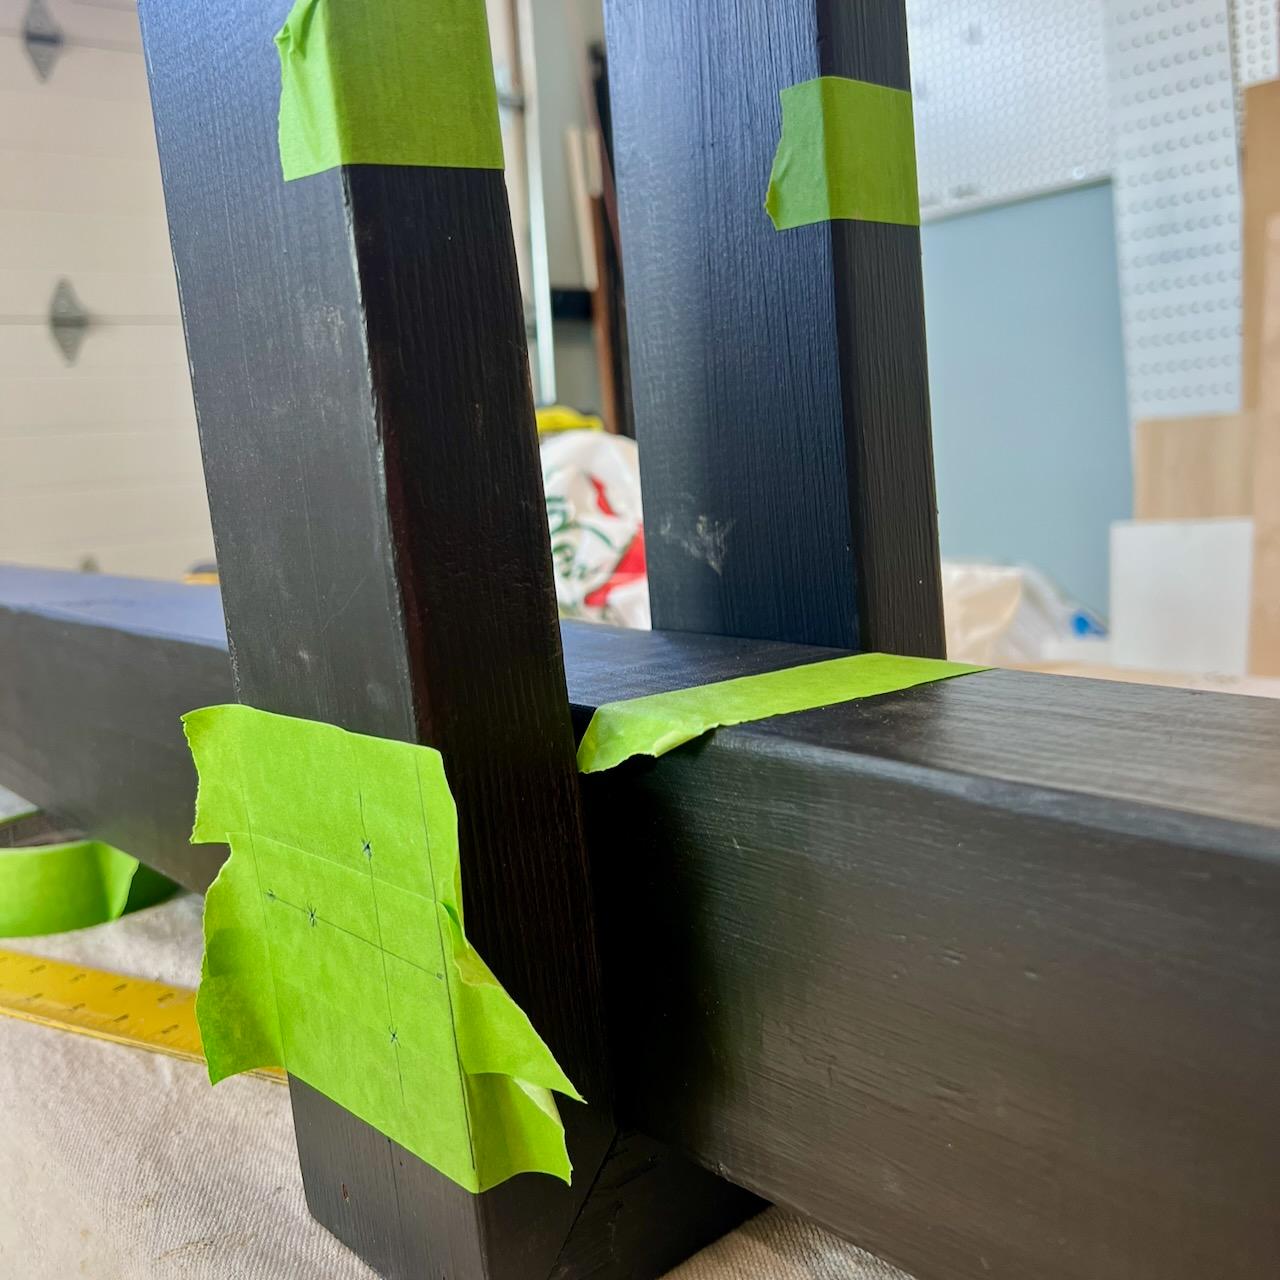
Alignment Matters-
- Use two long levels on the post to ensure it is perfectly level horizontally (since it’s laying down here)
- Use a third short level on the 2×4 arms to confirm they are perfectly vertically
- Double-check all 90-degree angles with a carpenter’s square
Take your time here — this step determines how professional the finished post will look.
Step 5) Install the Post-
Dig the post hole to the proper depth and position the post so that:
- The face of the mailbox (not the post) sits 6–8 inches back from the road edge
- Depending on mailbox depth, the post itself will sit farther back
Once positioned:
- We poured the Sakrete in the hole dry around the base of the post. Checked the post with a long level on both the back and one on the sides, and a short level resting on one of the arms.
- When all levels looked good, we gently added some water from a watering can.
- We repeated this three more times, all the while eyeing the levels.
- Use a trowel or hand tool to slope the concrete up toward the post and away on all sides
PRO TIP: Peaking the concrete around the base of the post encourages water to drain away from the wood, significantly extending the life of the post.
Allow the concrete to fully set before proceeding.
Step 6) Install the Mounting Plate-
With the post solid and the horizontal arms level:
- Position the mounting plate on top of the arms
- First identify the holes needed to attach the mailbox
- Then choose additional holes that align with the horizontal arms to secure the plate itself
Double-check level before tightening everything down.
Step 7) Attach the Locking Mailbox-
This step requires the most patience due to tight working quarters.
- Position the mailbox on the mounting plate
- Tighten fasteners carefully
Standard screwdrivers often won’t fit inside the locking compartment.
A ratchet and pliers work well in these confined spaces.
Take your time — it’s awkward, but completely doable.
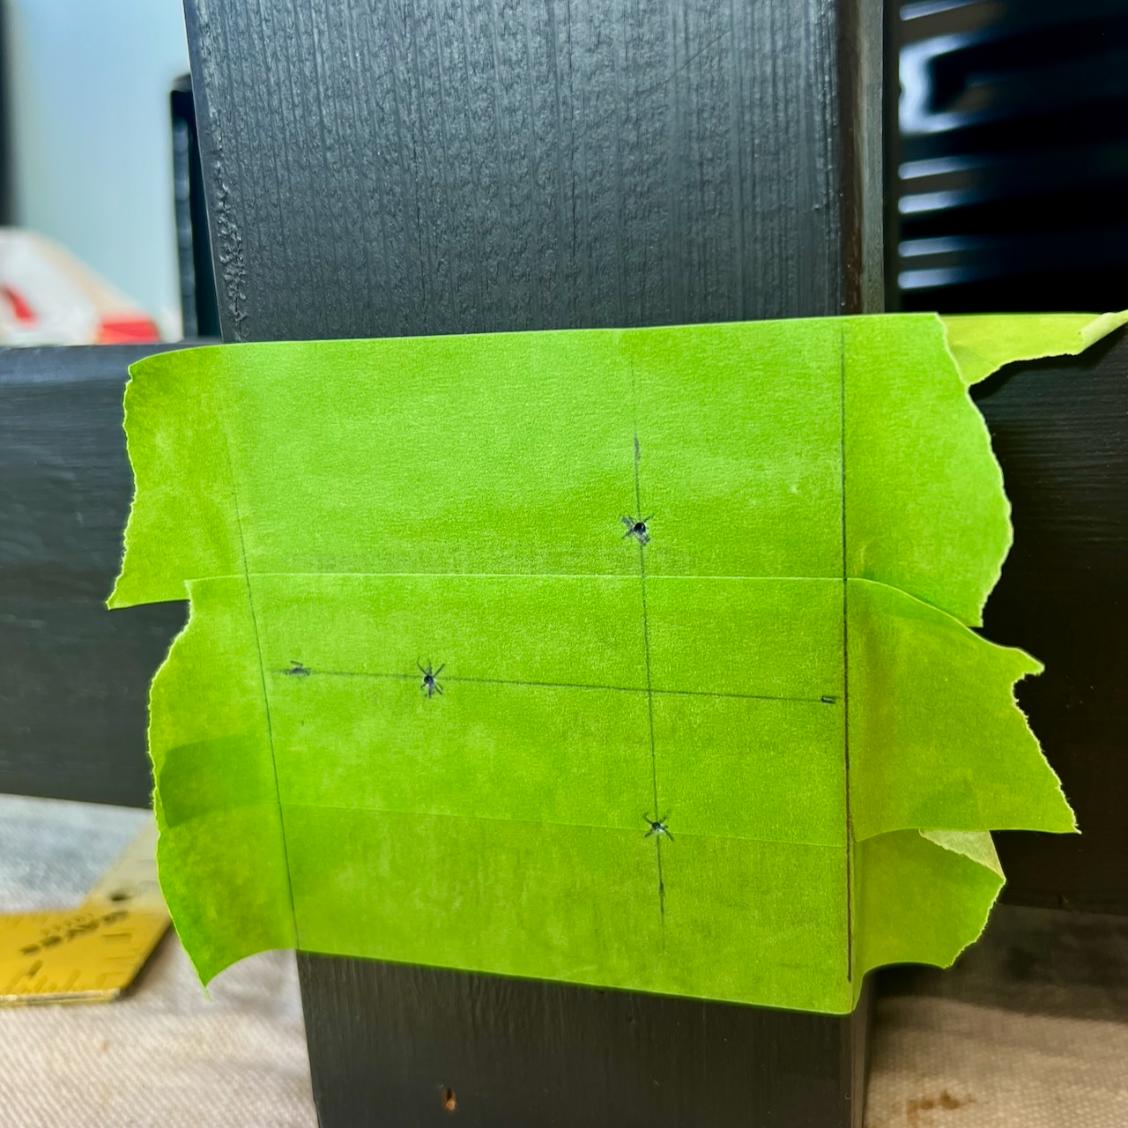
Step 8) Install the House Numbers-
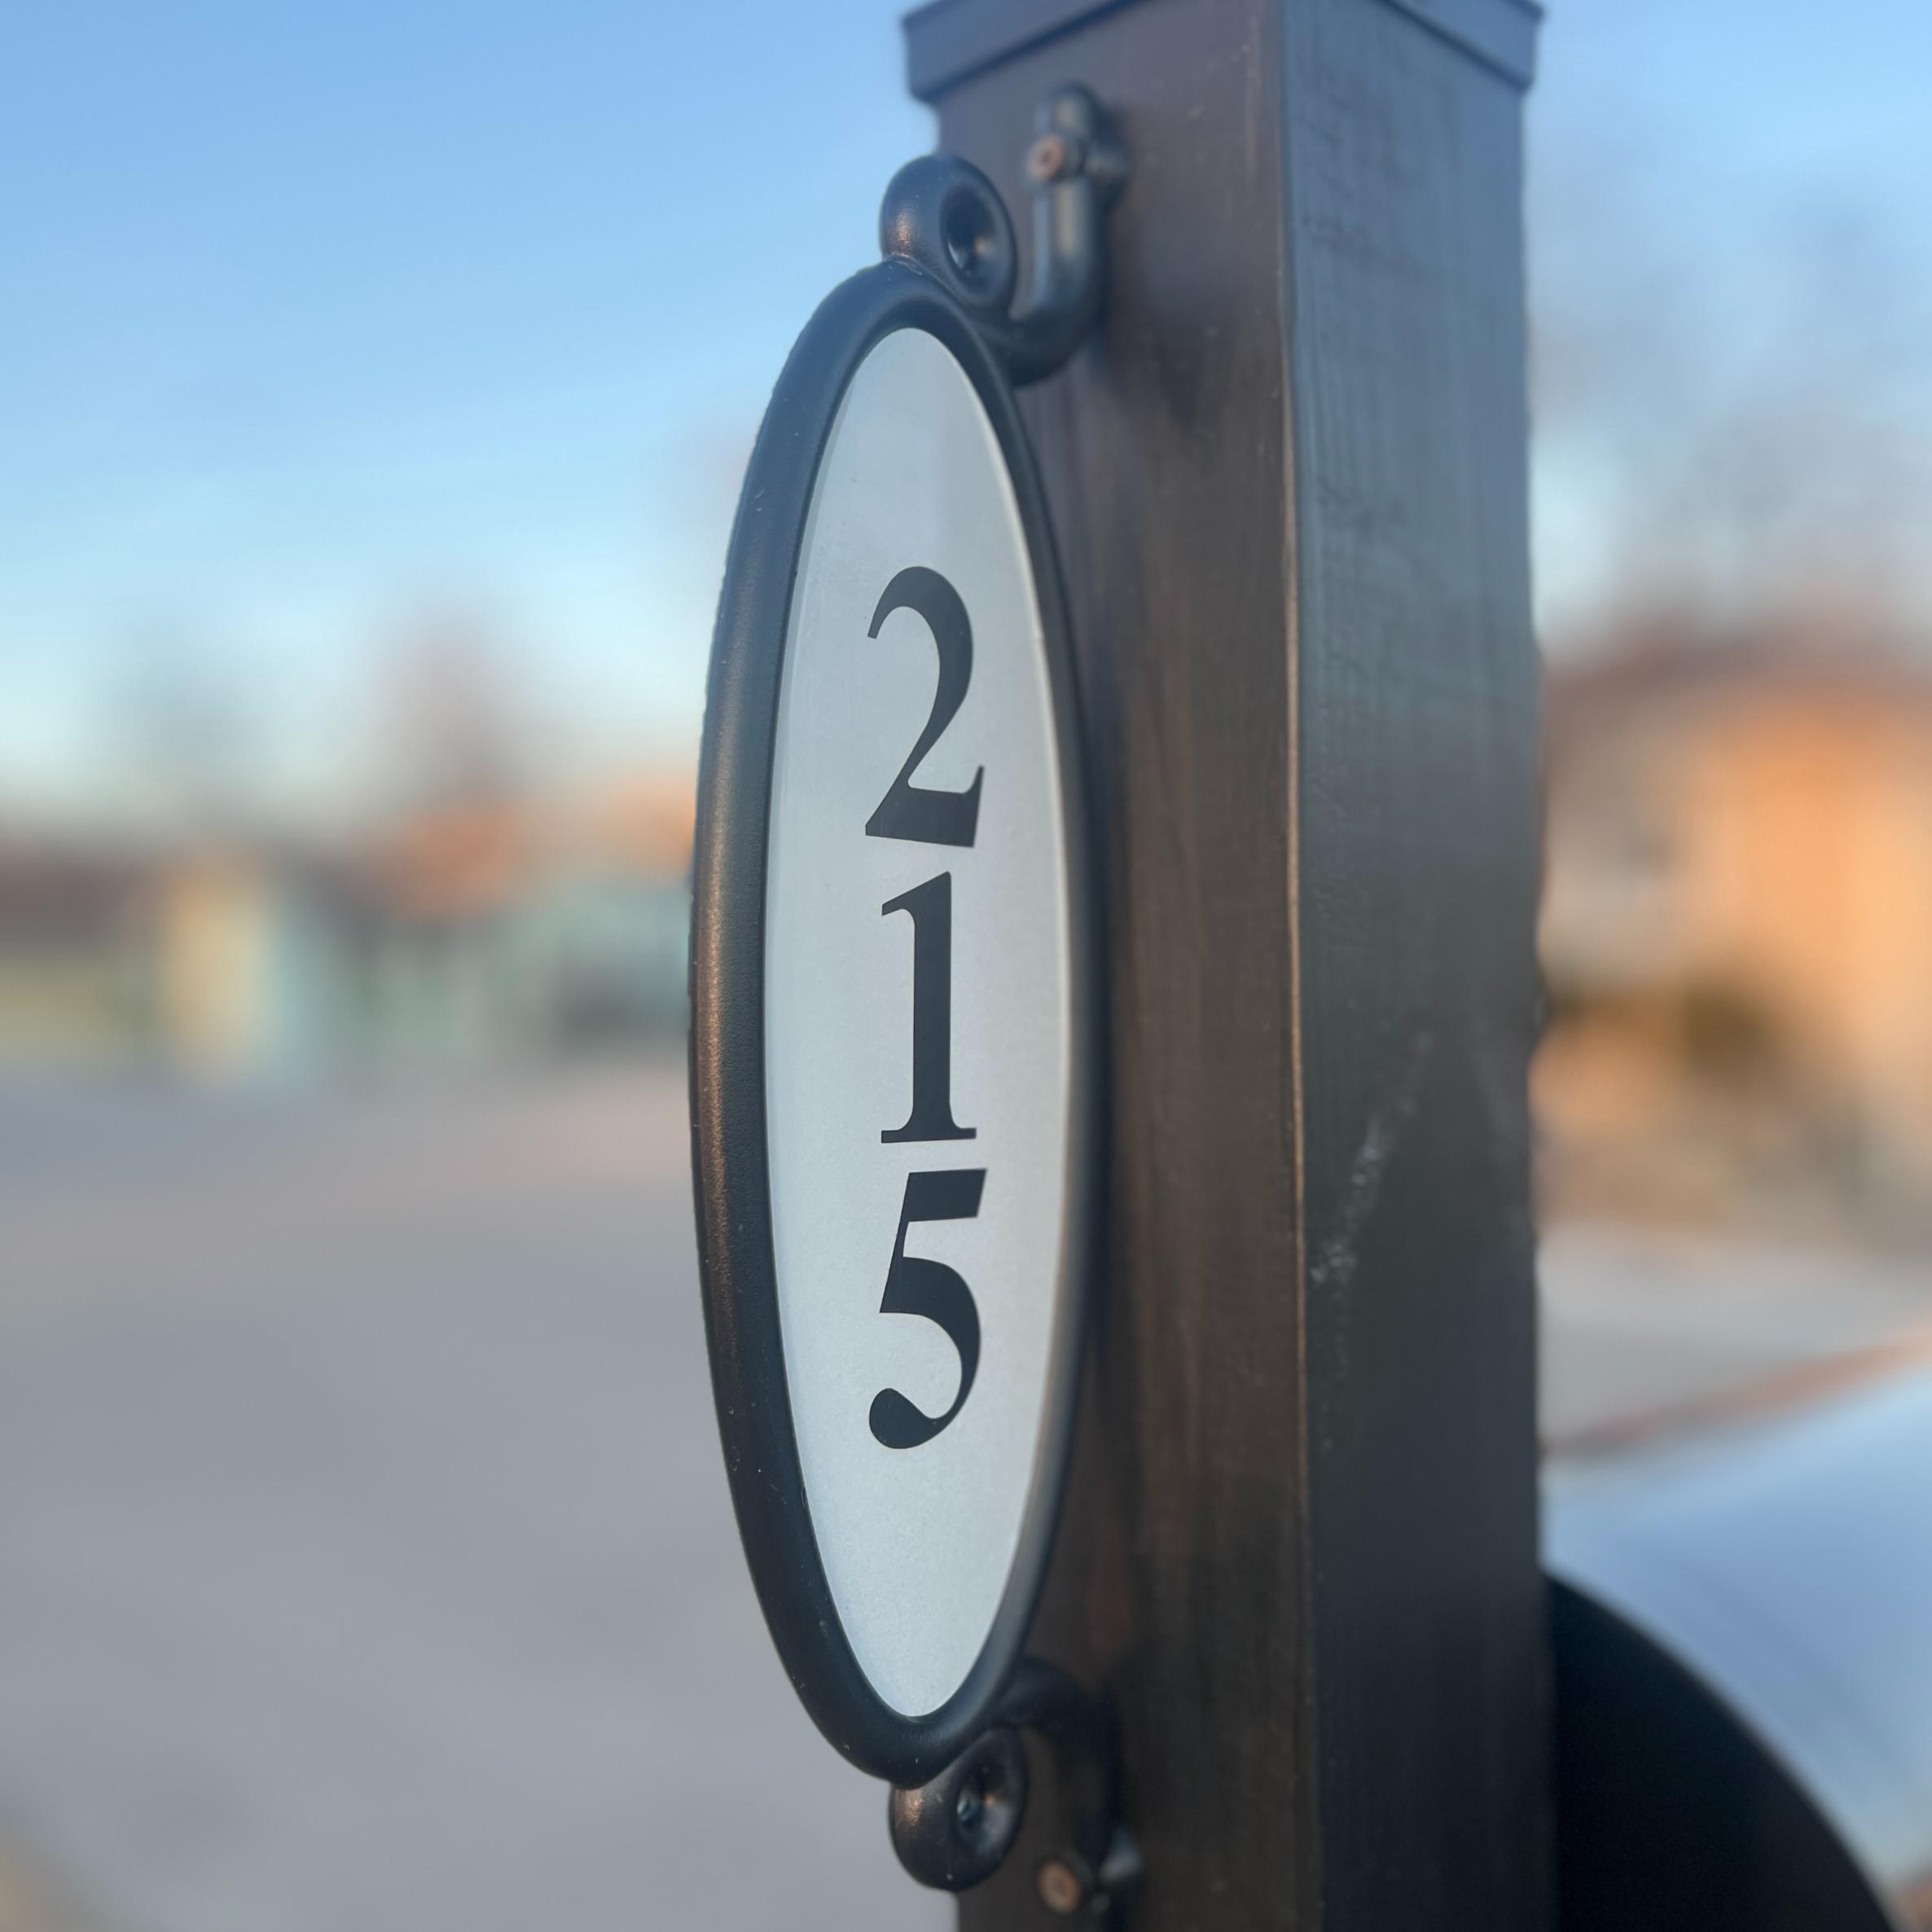
With the placard we used, this step is straightforward:
- Center the numbers on the post
- Check for level
- Secure according to manufacturer instructions
Keeping numbers on the post (not the mailbox) ensures they stay visible year-round — even with seasonal décor.
Step 9) Add the Post Cap–
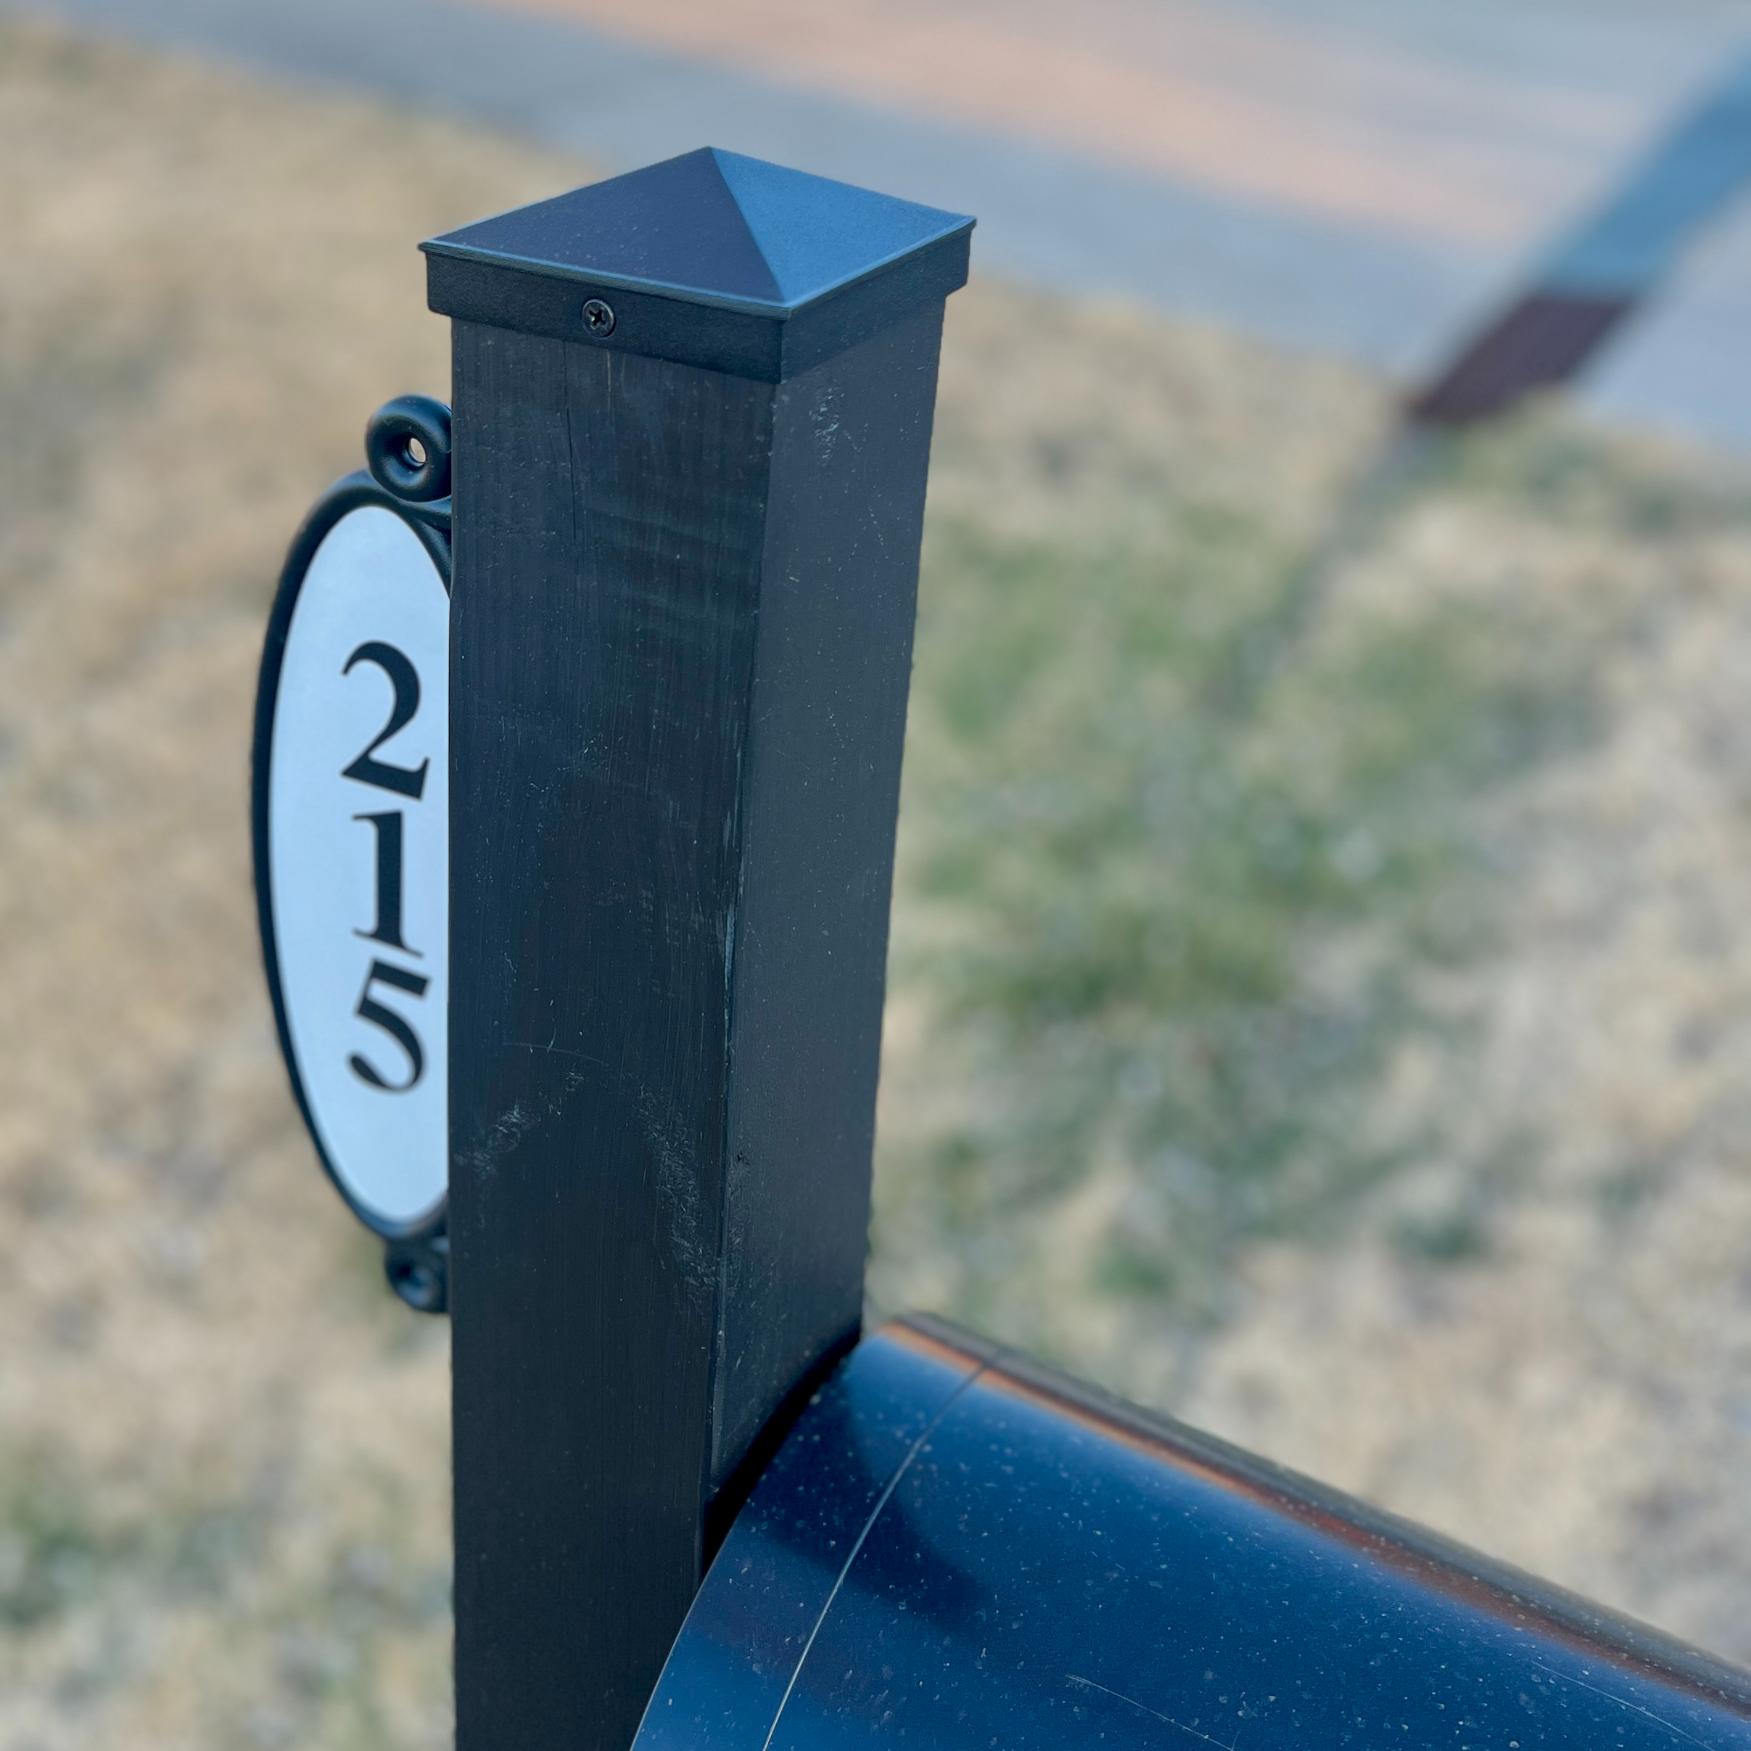
The one I chose just requires screws (provided) through 2 sides into the post.
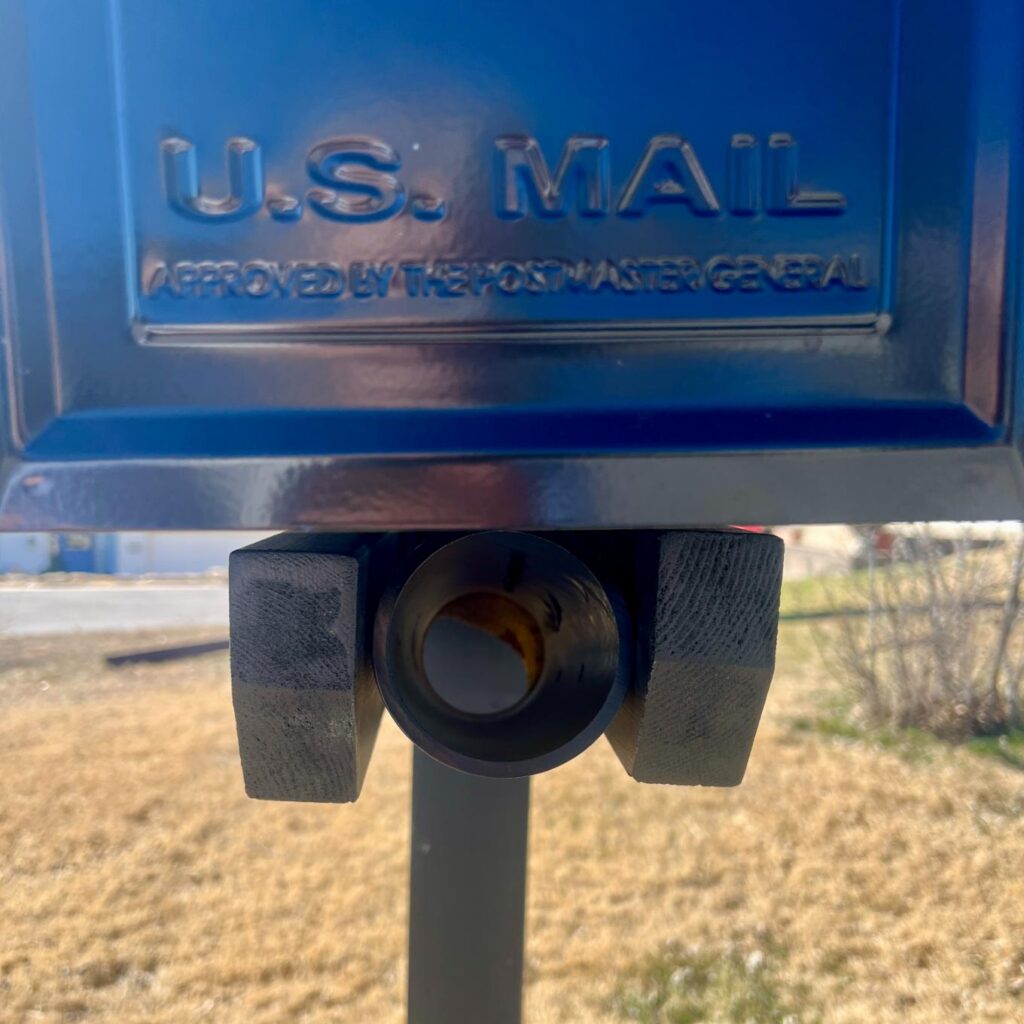
Optional Final Step) Install the Community Flyer Tube
In our neighborhood, PVC tubes are used to deliver flyers and monthly newsletters.

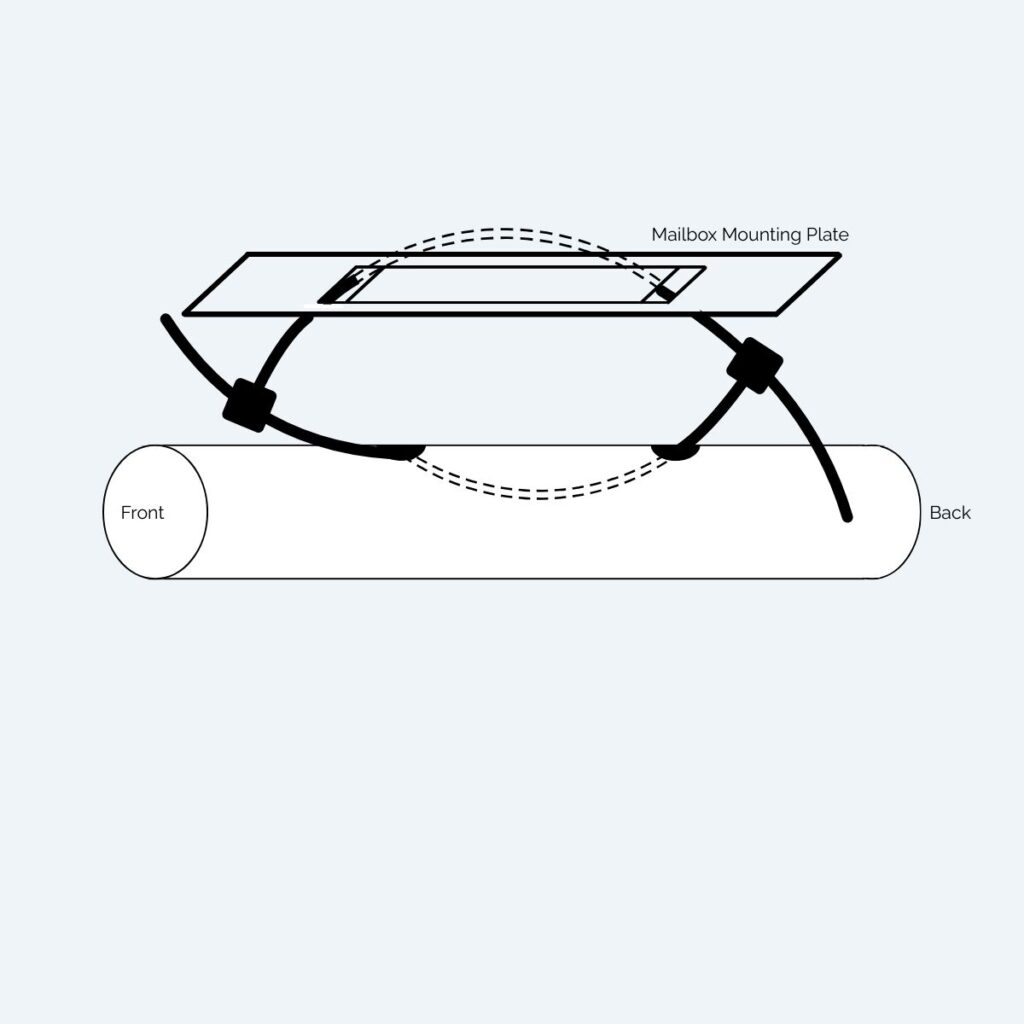
- I spray painted the PVC tube black to match the box and post
- Once dry, we used two 14-inch black zip ties, to suspend the tube between the horizontal arms of the post.
- We ran one zip tie through the two holes in the tube with the connection end at the back of the tube and the pointed end coming out the hole at the front of the tube. Hold tight to that end so it doesn’t slip back into the tube.
- We then connected the second zip tie through the other tie’s connector at the back.
- Then we fed that pointed end over a section of the mailbox plate and back down.making sure both connections are on the outside of the tube.
- Now the original pointed end you’ve been holding tight to, gets plugged into the connector of the second zip tie.
- Pull both connections tight to elevate your tube snuggly between the horizontal arms.
PRO TIP: Arrange the zip ties so the front of the tube is higher than the back to allow water to drain out.
I hope this inspires you to not restrict yourself to the standard mail ready-made box posts that don’t really fit your needs or your style.
Sometimes, our mailboxes are the first impression of our homes. And we know the importance of those first impressions.
And if you have never experienced identity theft, consider yourself lucky. A new locking mailbox might be just the investment you need for piece of mind and financial security. But it doesn’t have to mean an ugly vault out front!
