How To Hang Anything — Frames, Vases, Plates — With Perfect Spacing
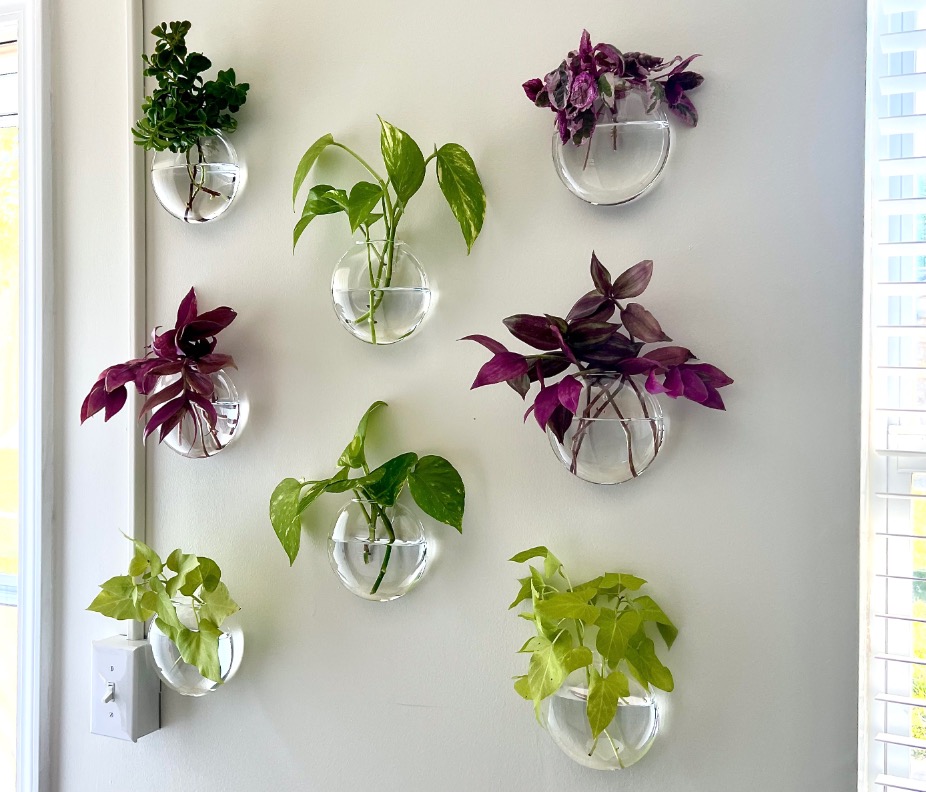
Here’s an easy way to hang wall planters or also create a perfect picture wall — no do-overs, no mistakes. Just flawless spacing every time.
Because Sometimes You Only Get One Shot
Ever start hanging a group of frames or vases and realize halfway through that nothing lines up? Yeah, me too — until I came up with this easy way to hang these wall planters (or anything!) perfectly the first time.
You know what they say about necessity!
I had an off-site installation I needed to do quickly, with minimal fuss, and have it turn out perfectly in one go.
So I got inventive — and it worked soooo well, I just have to share it with you.
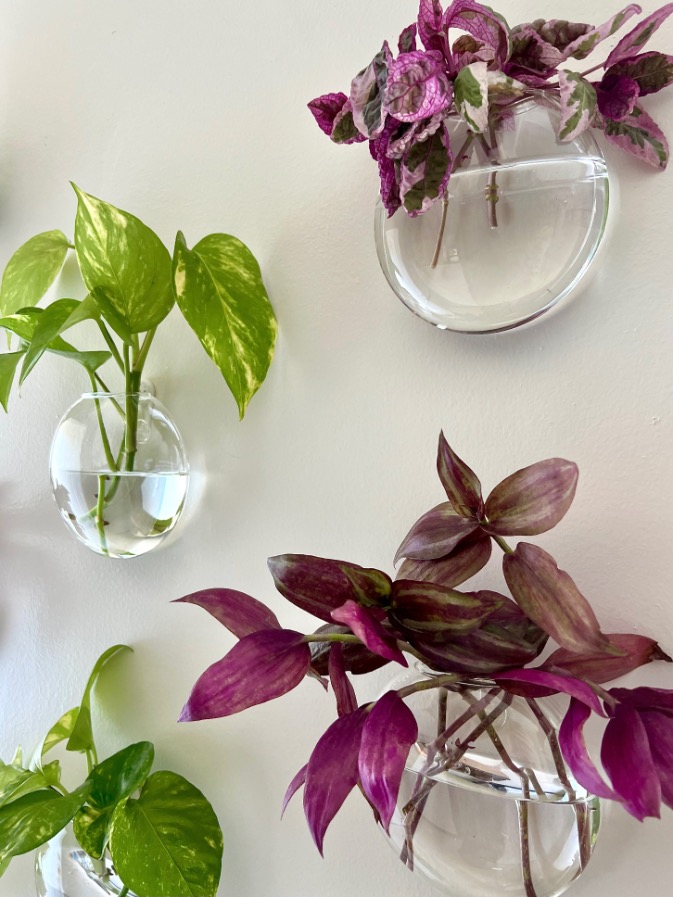
TABLE OF CONTENTS:
- Because Sometimes You Only Get One Shot
- Step 1) Paper Is the Planning Savior-
- Step 2) Mark the Gallery Wall Grid on Paper — Not the Wall-
- Step 3) Add the Vertical Spacing-
- Step 4) Customize for Variation-
- Step 5) Double-Check the Layout-
- Step 6) Nail It — Literally-
- Step 7) Remove the Paper & Admire-
- Bonus Ideas: Beyond Plant Walls
- Perfect Wall Spacing Every Time, No Guesswork
The links in this post may include affiliate links, which means if you purchase anything using these links, you pay no extra, but I may receive a small commission that helps keep this blog running. I truly appreciate you using affiliate links whenever possible. Please know that I will never recommend a product I do not believe in!
Projects That Shine With This Easy Gallery Wall Hanging Method
This paper grid layout works best for repetitive or symmetrical arrangements — when you’re hanging several items that are all the same (or very similar) in size and shape. Think:
- A gallery wall of matching picture frames
- A plate wall with uniform dishes
- A series of small mirrors or shadow boxes
- Or, like mine, a plant propagation wall with identical glass vases
If your project involves larger or irregular shapes — like an eclectic mix of mirrors or artwork — I’ll have posts for those layouts coming soon!
Whether you’re hanging a series of botanical prints, a wall of small baskets, or a set of sleek glass planters, this grid method guarantees straight lines, even spacing, and zero extra nail holes.
And all you need is… paper! (Okay, and a ruler and pencil.)

Feeling confident and anxious to just hop right to it?
Here’s a quick How-To card for all the highlights.
But if you’d rather some personal coaching,
keep scrolling for all the details, tips and hints.
Perfectly Spaced Grid Wall Hanging (The Paper Trick)
This version of the paper trick is designed for grid-style or repetitive layouts — perfect when you’re hanging several identical or similar items, like picture frames, plates, or wall planters, and want flawless spacing the first time.
Materials
- Large paper (newsprint, packing paper, or kraft paper)
- Painter’s tape
- Hooks, nails, or wall-safe hangers
Tools
- Pencil
- Ruler or tape measure
- Marker (optional)
- Hammer
- Level
Instructions
1) Make a paper wall.
Tape sheets together to match your wall area — this becomes your full-size planning guide.
2) Sketch what’s already there.
Draw outlets, switches, or anything you need to work around.
3) Mark your layout on paper.
Find the center, draw vertical lines for columns, then decide your spacing.
4) Test your spacing.
Lay your items directly on the paper, adjust until it feels balanced, and trace their outlines if you like.
5) Tape the paper on the wall.
Use painter’s tape to hold it flat and step back to double-check the look.
6) Add hooks or nails.
Place them right on your paper marks — be consistent about whether your mark is for the nail or the hook position.
7) Peel & hang.
Remove the paper, hang your pieces, and admire your perfect spacing!
Notes
Keep scrolling for all the details and tips you might need.
Step 1) Paper Is the Planning Savior-
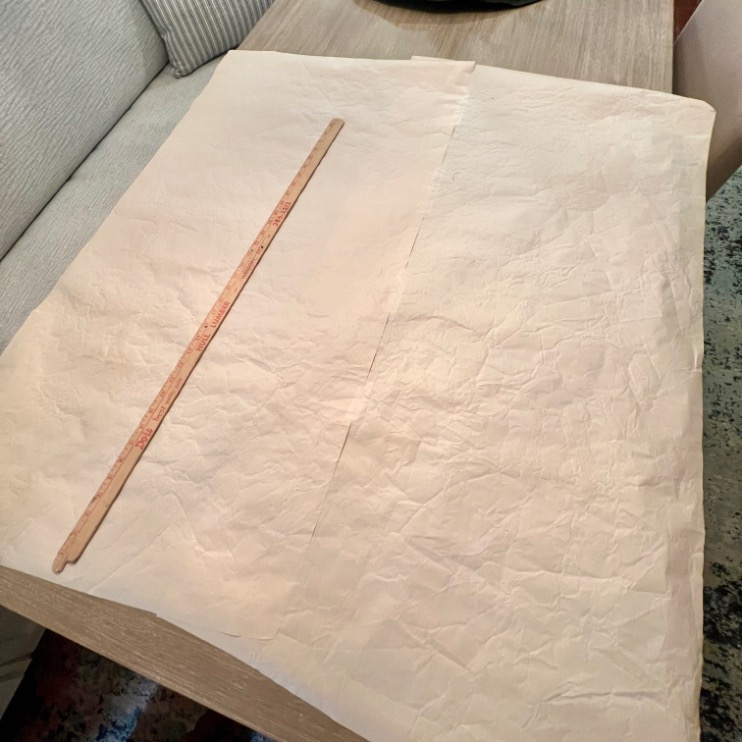
Grab large sheets of paper — newsprint, packing paper, or even old wrapping paper — and tape them together until they match the size of the wall area you’re working with.
For my propagation wall, I needed paper about 42 inches wide by 40 inches tall — two pieces of newsprint taped side by side.
PRO TIP: If there’s something awkward on the wall (like my electrical conduit and light switch), draw it right onto the paper to help you can plan around it.
In my case, I wanted that conduit to disappear, so instead of avoiding it, I centered my arrangement on that entire wall — making the conduit blend into the background, by basically ignoring it and not working around it (although really I did).
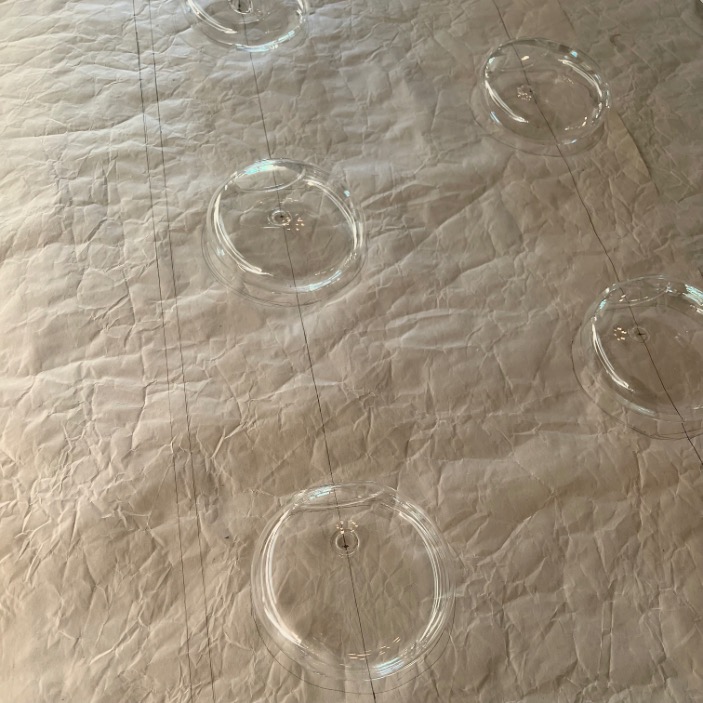
Step 2) Mark the Gallery Wall Grid on Paper — Not the Wall-
You’ll use a pencil and ruler to draw your layout directly on the paper.
Start with a vertical center line, then determine your desired width between columns and add lines for the other columns.
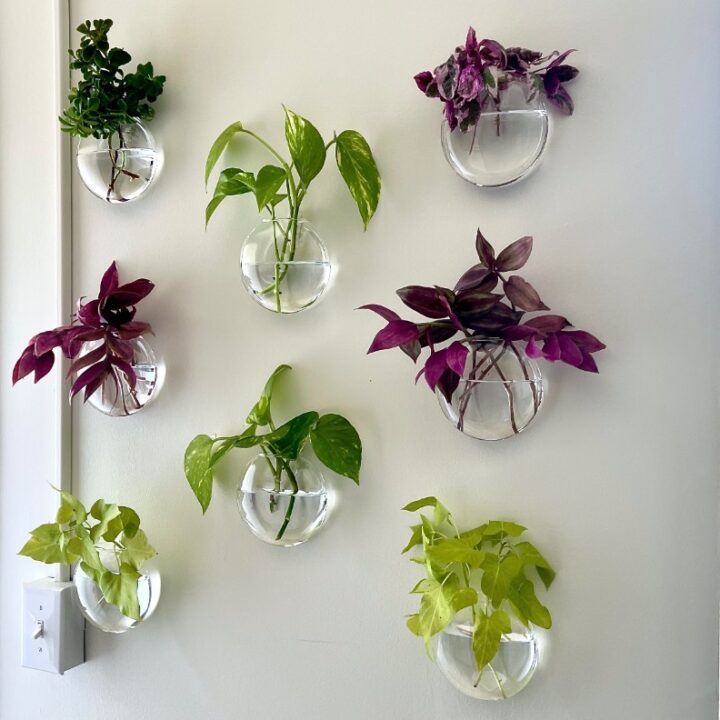
For example, I wanted three evenly spaced columns for my glass propagation vases.
So I laid a vase on the center line and then determined the best placement for the one next to the pesky conduit. That distance set my column width, so I drew the two outside lines.
Measure from your first column to the center line, then repeat that distance on the opposite side. Now you’ve got three perfectly spaced columns.
PRO TIP: With a grid-style arrangement, a rulers your best friend! Measurements are critical, this is not the time to eyeball it.
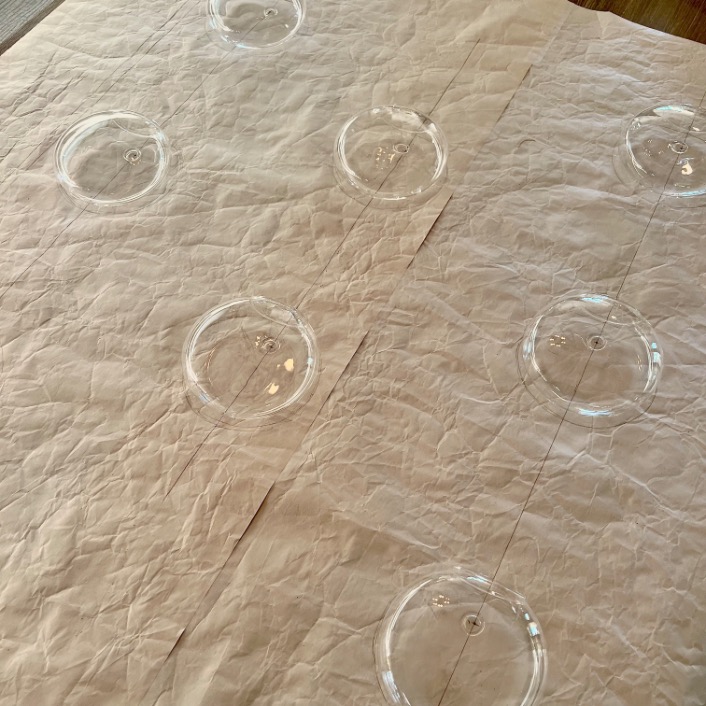
Step 3) Add the Vertical Spacing–
Next lay two of your items on the paper to determine vertical spacing between horizontal rows of wall vases. Consistency matters here — equal spacing keeps everything symmetrical.
I used 12 inches between my hooks.
Step 4) Customize for Variation-
Not everything needs perfect symmetry — a little variation adds interest.
For my plant wall, since the vessels came in sets of four, I decided the center column would only have two vases, positioned halfway between the rows of the outer columns.
It created a bit of movement while still maintaining a rhythmic and cohesive feeling.
Step 5) Double-Check the Layout-
Before you hang anything, lay out your objects directly on the paper to see how it looks.
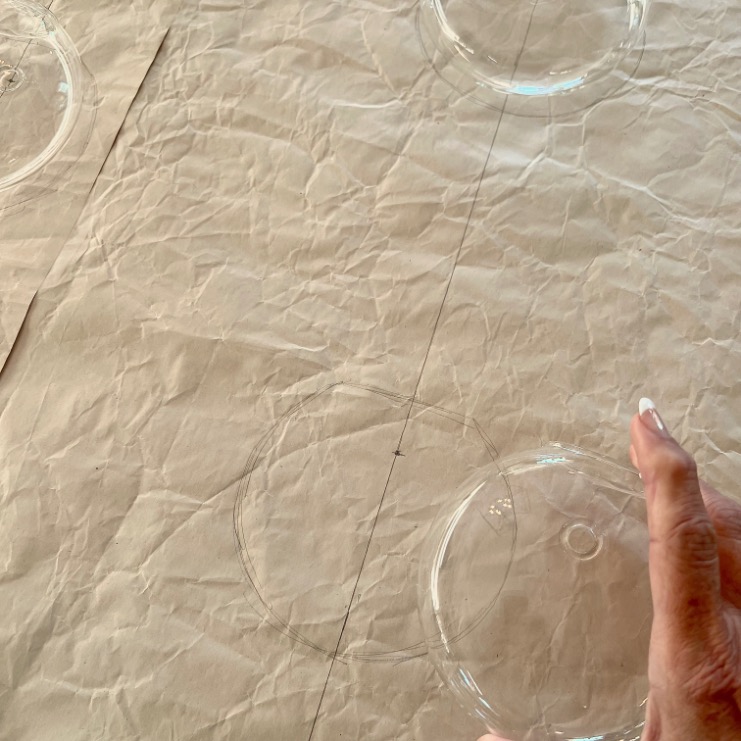
Still unsure?
Trace around each item with a marker (not a pencil as I did) — then tape the whole paper to the wall using painter’s tape.
Step back, squint a little (you know you do), and decide if you love it. You’ll know right away if something feels off. Adjust until it’s right.
Step 6) Nail It — Literally-
When you’re happy, keep the paper flat, use a level to make sure it is square on the wall and hold in place with extra painter’s tape.
Use your marked spots to place your nails or hooks.
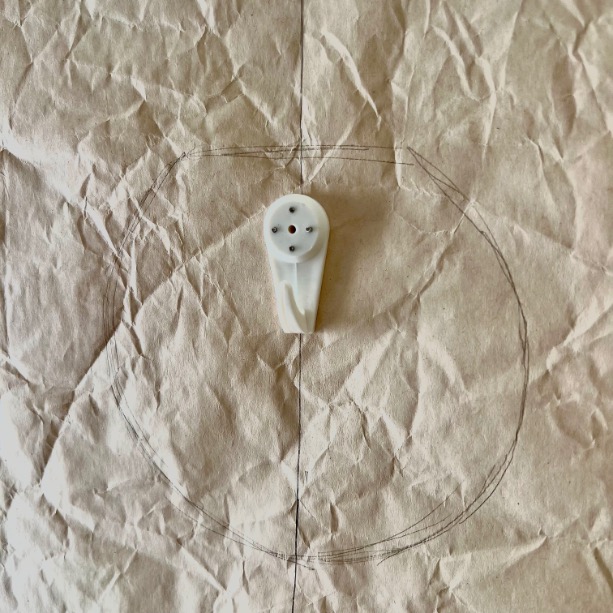
For my plastic hooks, I lined up the center hole on my mark — making sure the hook sat right at the bottom of the line.
If you’re using traditional picture hooks or wire-backed frames, be consistent:
- Either make your mark for the nail or for the top of the hook — not both.
- And if your frames hang from wire, check that all wires are the same length.
PRO TIP: If you’re using wall hooks with multiple spikes (like mine), only tap them in partway at first. Then remove your paper guide before finishing the pounding. Trust me — pulling paper from behind four tiny spikes is not a picnic!
Step 7) Remove the Paper & Admire-

Once all your hooks are in, gently pull the paper off the wall — no extra holes, no patching, no redoing.
Now for the fun part. Hang your items and admire your glorious, perfectly spaced wall!
Bonus Ideas: Beyond Plant Walls
This paper grid trick works beautifully for:
- Gallery walls of photos or art prints
- Collections of mirrors, baskets, or hats
- A wall of floating bud vases or test tubes
- A plate display in your dining room
- Small shelves or sconces for layered décor
Perfect Wall Spacing Every Time, No Guesswork
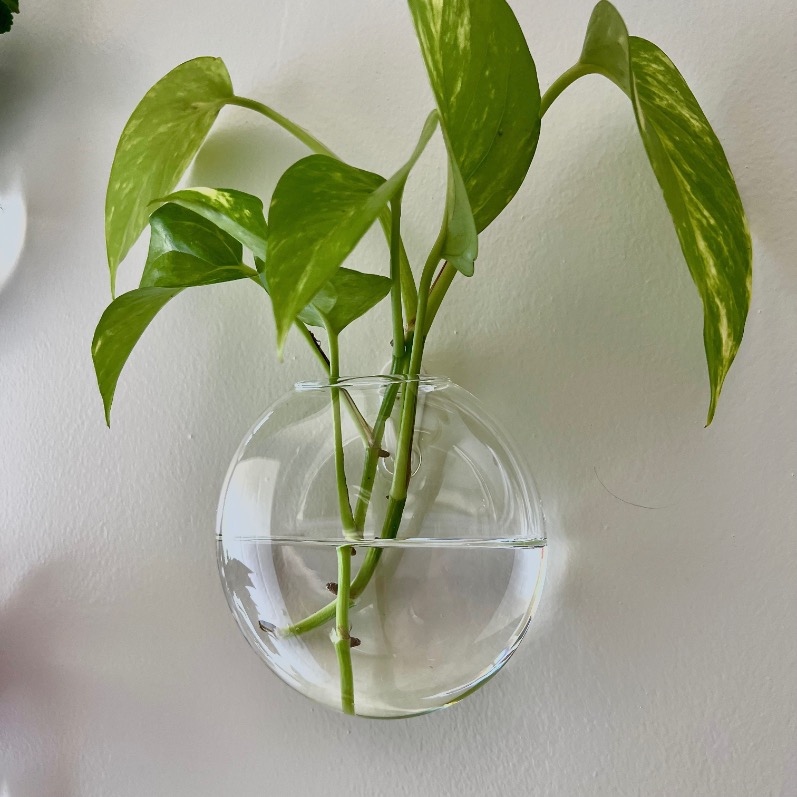
SIDENOTE: Are you loving these wall propagation pots like I am? They are absolutely fabulous.
Beautiful, pristine glass without seams (hallelujah).
Arrived quickly and safely (with great packaging).
This simple paper-planning trick takes all the frustration out of hanging multiple items — whether it’s eight glass vases (like mine), six matching frames, or three decorative baskets.
You’ll get perfect spacing, balanced alignment, and a wall that looks completely intentional — on the first try.
I’d love to see your take — whether it’s a propagation wall, gallery wall, or something completely new. Send me your photos. I’d love to add them to this post (with your permission of course)!
Don’t forget to PIN THIS where you’ll be able to find it quickly:

