
Make These Great Stars for Your Gift Wrapping – Save Money + Go Green
Here’s a clever and eco-friendly embellishment to make for your gift wrapping, or use as place cards or even as ornaments for the holidays.
Who doesn’t love getting a beautifully wrapped Christmas gift and giving one too? It feels extra special, doesn’t it? And it just plain fun!
Looking for an easy way to jazz up your gift wrapping for all the special people on your list? A personal touch is the best thing! It tells the gift recipient just how special they are.
We are in our week of bringing Christmas Cheer and Holiday Inspiration to one and All
There are five of us blogging together this week and today we are all in on gift-wrapping.
At the end of this post, you’ll get a peek of what each of these gals came up with along with a link to their full blog post.
Me, I went back to some crafting basics. Sometimes, that can be the best, right?
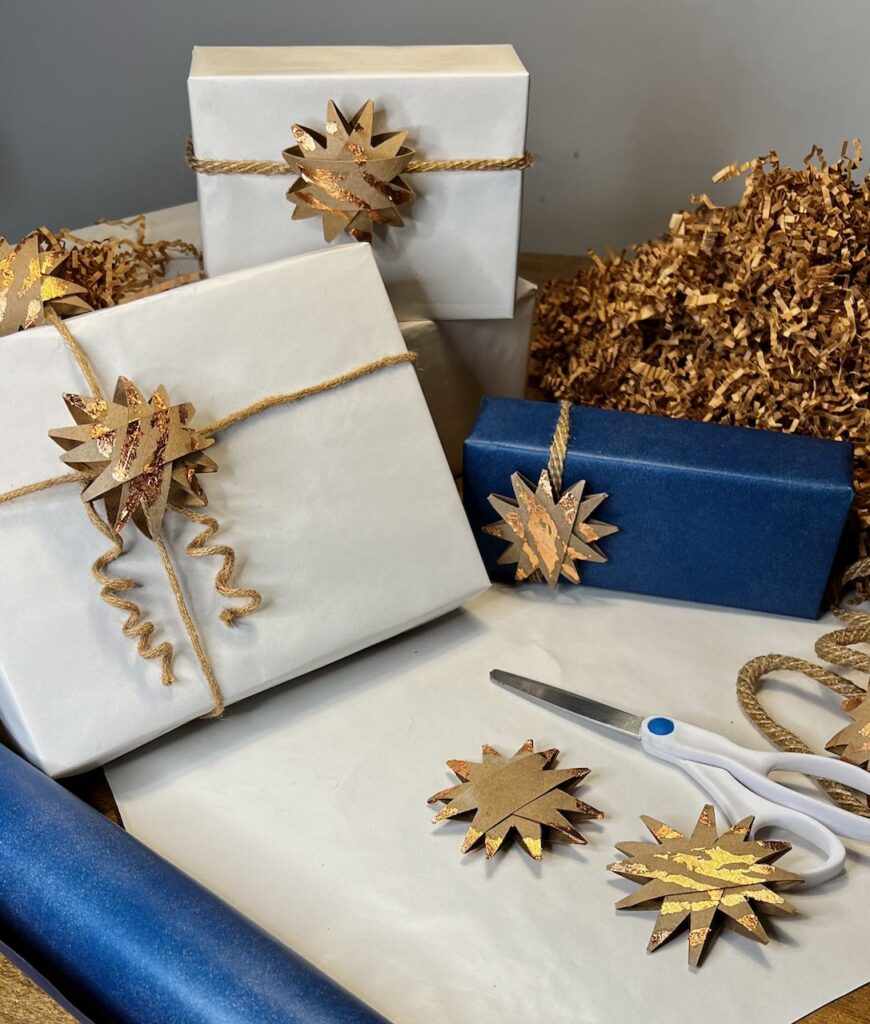
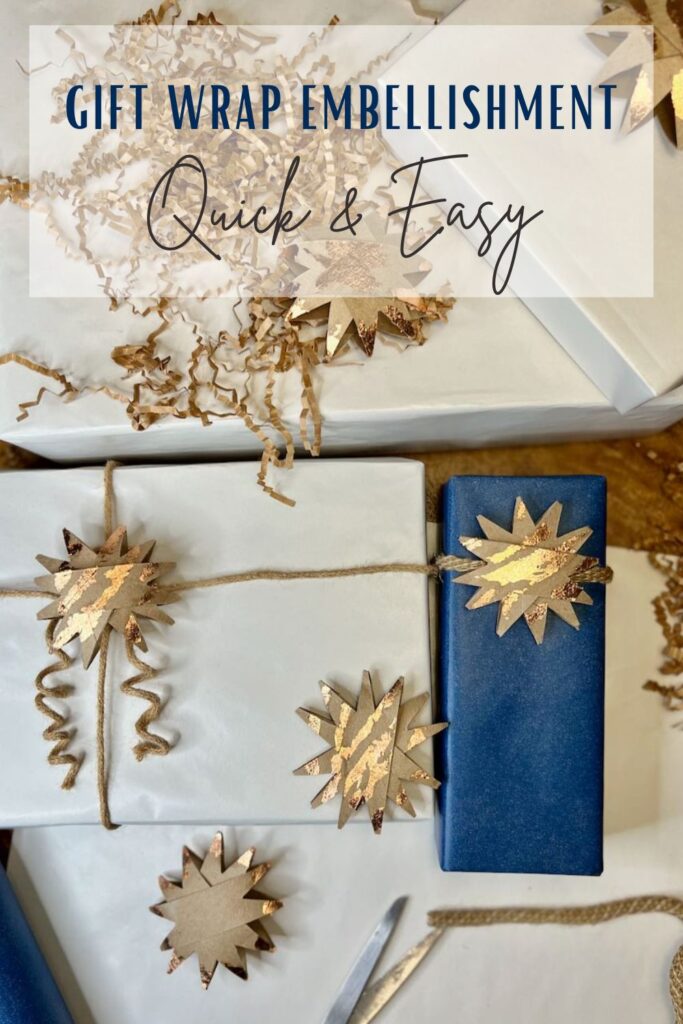
These stars are simple and fun to make, and they add a festive touch of whimsy to Christmas presents of all different sizes.
It’s a simple idea with simple steps that you can customize and personalize to match your style, the recipient’s style or your Christmas decor.
They are a great way to save a bit of money while complimenting your holiday decor. And don’t forget you’d be doing a bit to help the planet by recycling — always a bonus!
So read through this tutorial, gather your materials and get started – your gifts will look amazing wrapped up with these stars!
Oh, and while you’re at it, these stars as place cards would make charming additions to a holiday tablescape. And for another great idea, how about using them as a garland or even ornaments?
They are one of my favorite ways to dress up craft paper, tissue paper or plain wrapping paper or (which I happen to be quite partial to). All those holiday gifts under the Christmas tree seem all the more special when wrapped in such a festive way.
- Let’s Make Some Upcycled Stars
- Materials:
- Supplies:
- Step 1- Slice Cardboard Tubes Into Rings
- Step 2- Cut the Pointed Ends
- Step 3- Assemble Your Stars
- Step 4- Embellish Your Stars
- Let’s Talk About Alternatives to Embellishing Your Stars
- Different Ways to Use Your Stars When Wrapping Gifts
- Other Ways to Use Beyond Gift Boxes
Let’s Make Some Upcycled Stars
The materials are so simple you may have all the craft supplies and not even need to make a trip to the craft store.
Don’t have any metal leaf on hand, you can substitute some metallic paint. Or skip the metallic look all together and add some fresh herb clippings or a snip of greenery, cedar perhaps behind your stars.
Don’t have a glue runner on hand, hot glue will be a fine substitute.
Materials:
- Cardboard tubes — toilet paper tubes and traditional wrapping paper tubes
- Glue — I used a scrapbooking glue runner, but hot glue will work also
- Your choice of embellishment — I used copper metal leaf
Supplies:
- Rotary Cutter and mat or scissors
- Ruler, preferably clear
I told you there wasn’t much!
Once We Get Through the Quick How-To, We’ll Talk Alternative Creative Ideas
Step 1- Slice Cardboard Tubes Into Rings
You will use three rings per star.
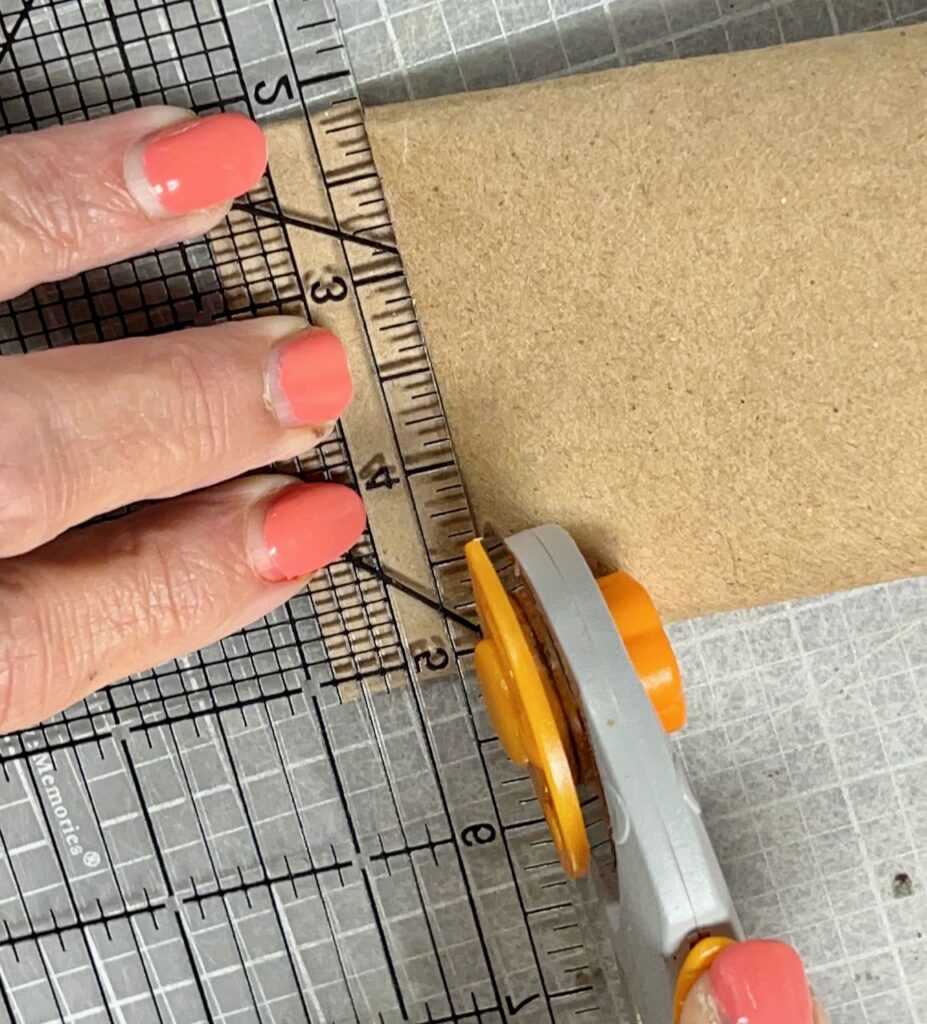
I used a rotary cutter with a clear ruler so I could see the width easily.
No rotary cutter? You can mark cut lines on each side of the the flattened tube and then cut between the marks with long scissors.
Experiment with one to get the width you like. Most of mine are from. a wrapping paper tube cut in 7/8-inch widths. One is from a toilet paper tube and it’s cut at 3/4-inch widths.
Step 2- Cut the Pointed Ends
Notice the each ring will have a “good” side and a side that has a bit of a seam showing. I made the seam sides all the back sides of my stars.
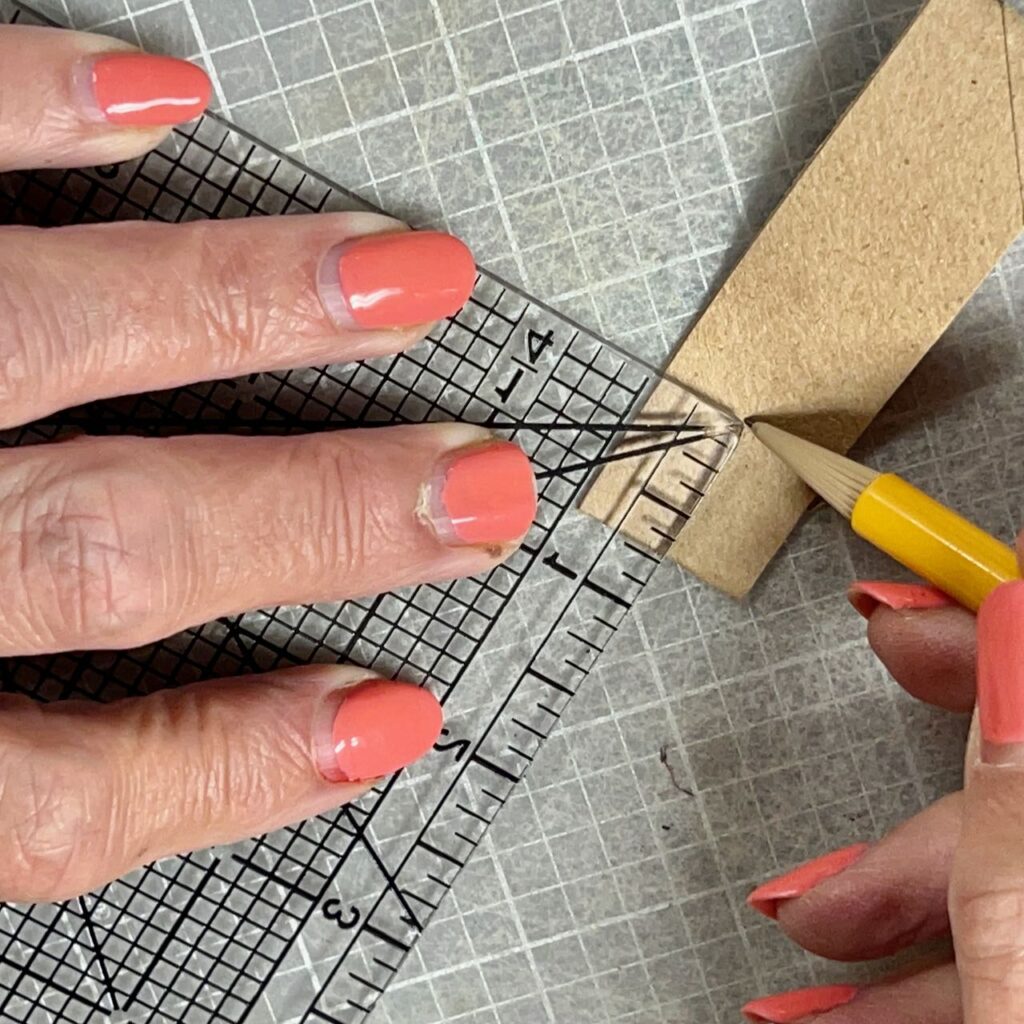
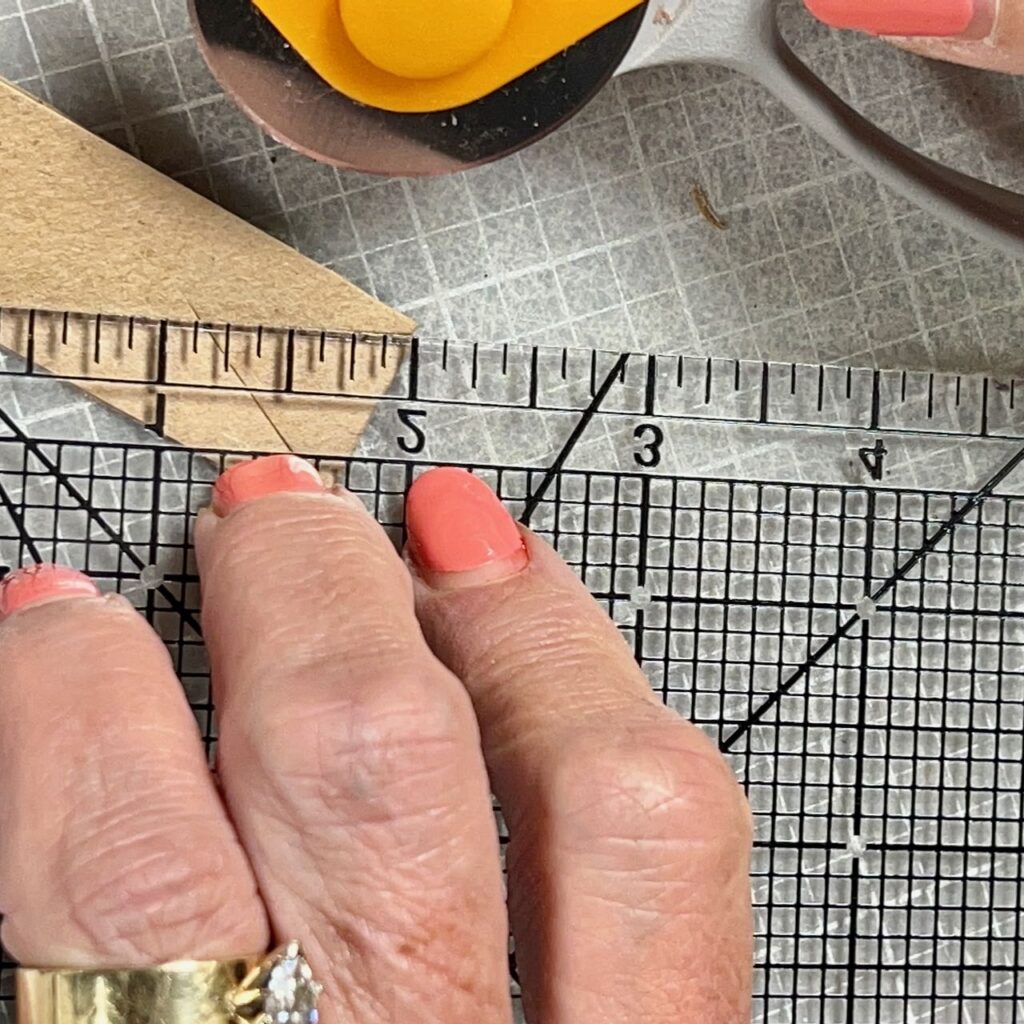
Left: So on the backside of your rings, mark the center of the tube a consistent length from the fold. I liked 3/4-inch from the fold best.
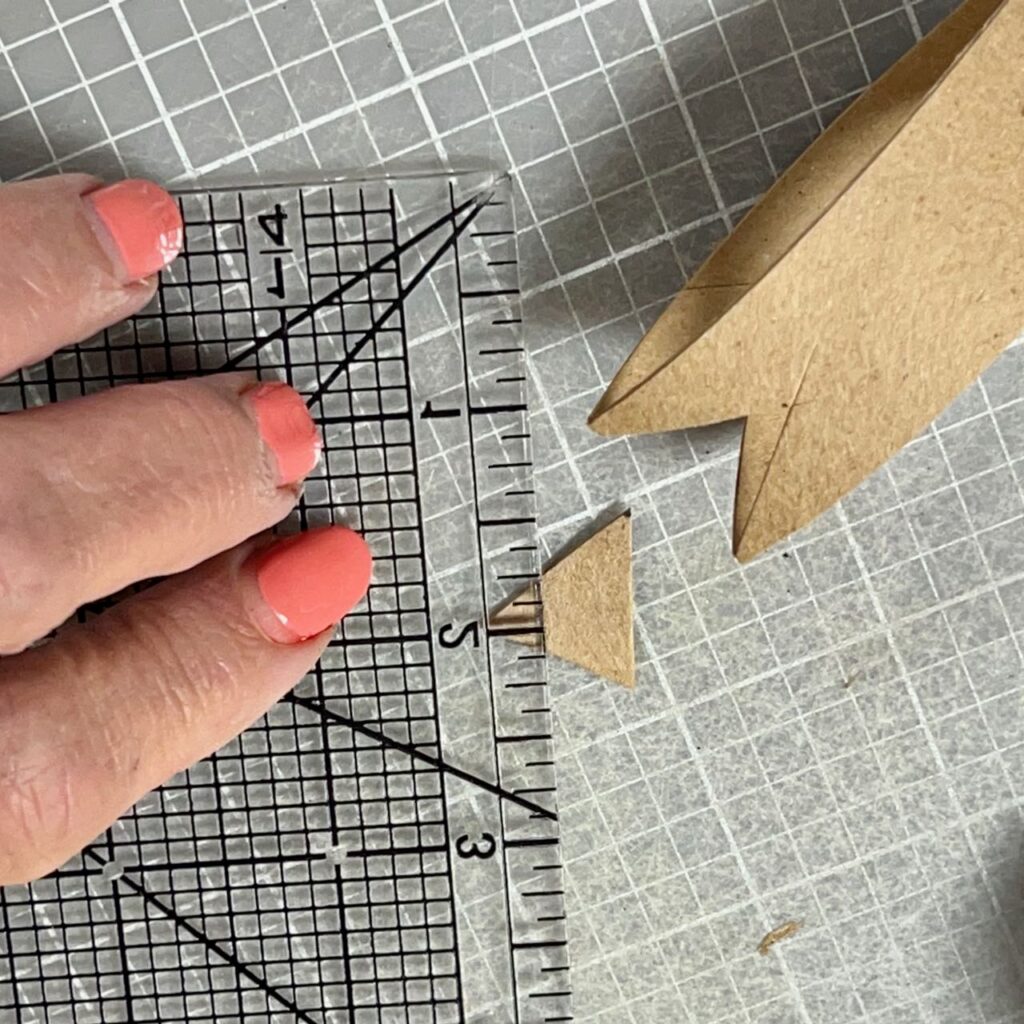
Center: Cut a straight line from just inside the corner to your center mark. Then cut the other side corner to the center mark. Make sure you do not clip off the corner by mistake. The corners need to be intact.
Right: Remove the V-shape.
Step 3- Assemble Your Stars
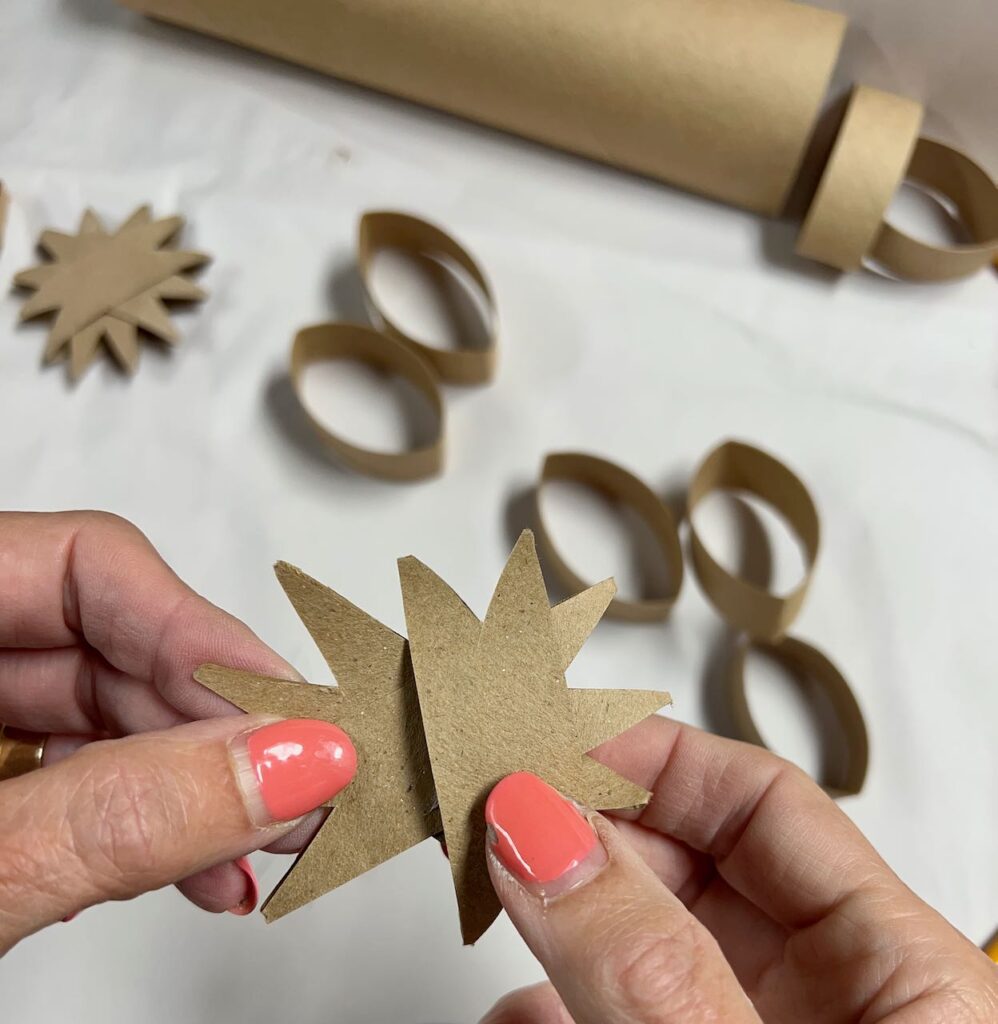
Slip one ring over another and then slip the third one over both of those. arrange them evenly and take note of the spacing of the first two. How much room you need to leave for the third one.
TIP: It’s not necessary, but I arranged, but did not glue, my first one and held it flat on my work surface while I drew around it making a template. I used this template as my guide for the first two or three stars, and then I was comfortable eyeballing it after that.
Hold the first ring with your index inside under the center of the “good side”. Apply glue to the center of the top and the bottom.
Now carefully, with the “good” side up, slip the second one over this without touching either glue. Get them aligned as you like and press them all together. Hold tight for a minute.
Now repeat with the third ring. Put glue on the center of the top and bottom of the outside ring, the second ring. With the “good” side up, carefully slip the third ring over the first two. Align and then press down. Hold tight for a bit.
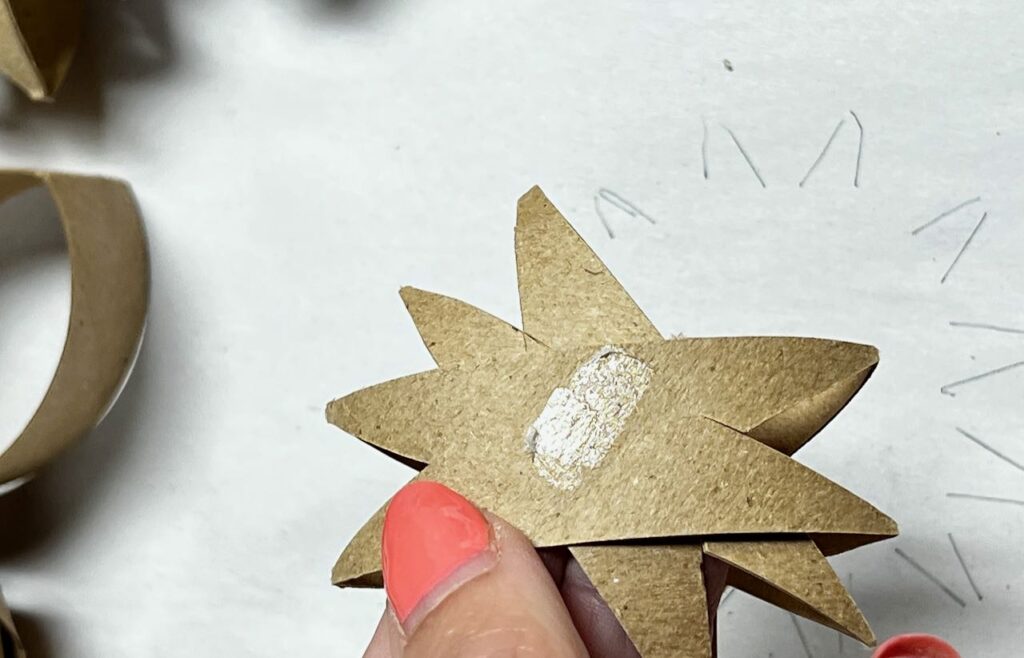
Step 4- Embellish Your Stars
I was inspired by shooting stars and wanted to add irregular metallic streaks for my stars. So I broke out my metal leaf supplies.
If you’ve never metal leafed, you owe yourself a treat!
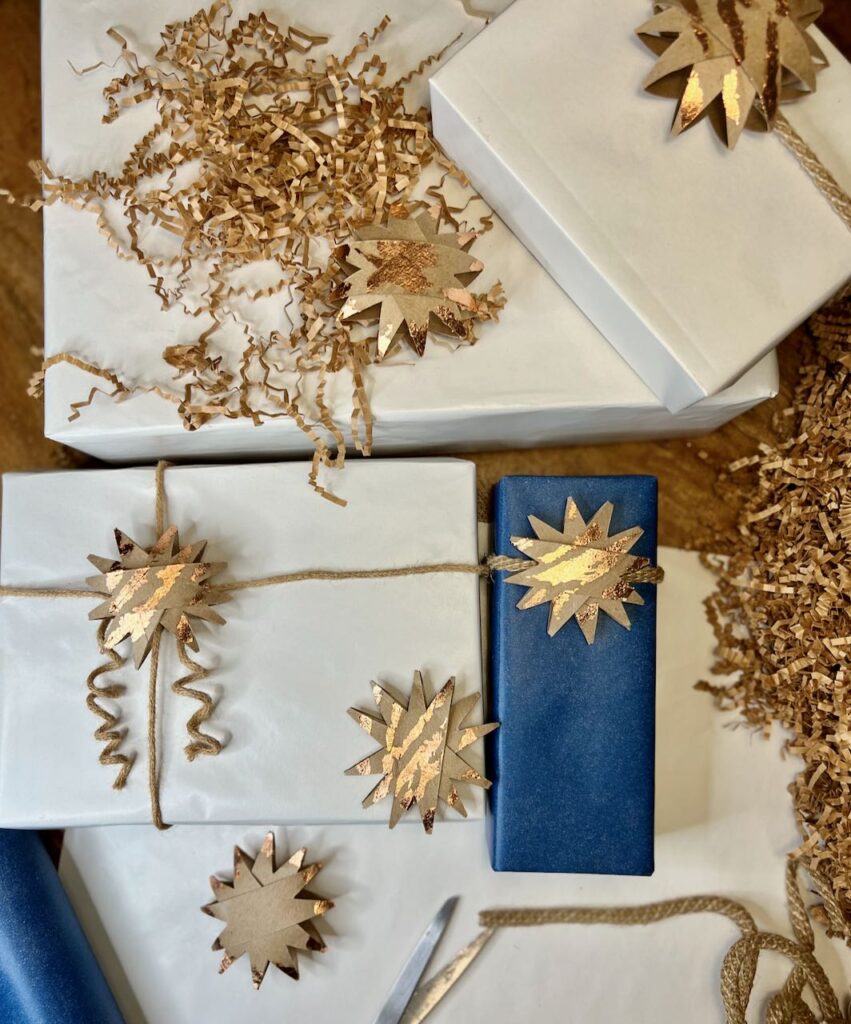
Along with my “shooting stars”, I decided to do two with the points copper leafed, and one of those also go a center explosion of leafing.
However, this took a bit of experimenting. Typically, the surface you might metal leaf is not porous, or certainly not as porous as cardboard. I needed to add two pretty good layers of leafing adhesive and it did not need to sit as long as usual before adding your leaf. But I do love the way it turned out.
Let’s Talk About Alternatives to Embellishing Your Stars
But first, are you enjoying this post? We are just heading into “my” season. So hang on, there’s so much more coming! Don’t want to miss a thing? May I suggest subscribing? You pick how much!
Now back to alternatives instead of metal leafing:
- decoupage a fun paper napkin on the cardboard tube — use only the top layer of the napkin, cover the whole tube with two layers of decoupage medium. You can even use napkins of different patterns for a fun look. Then proceed with step 1
- embrace the natural look and glue a sprig of fresh herbs to the center
- again, embrace the natural look and tuck some greenery, cedar perhaps behind star
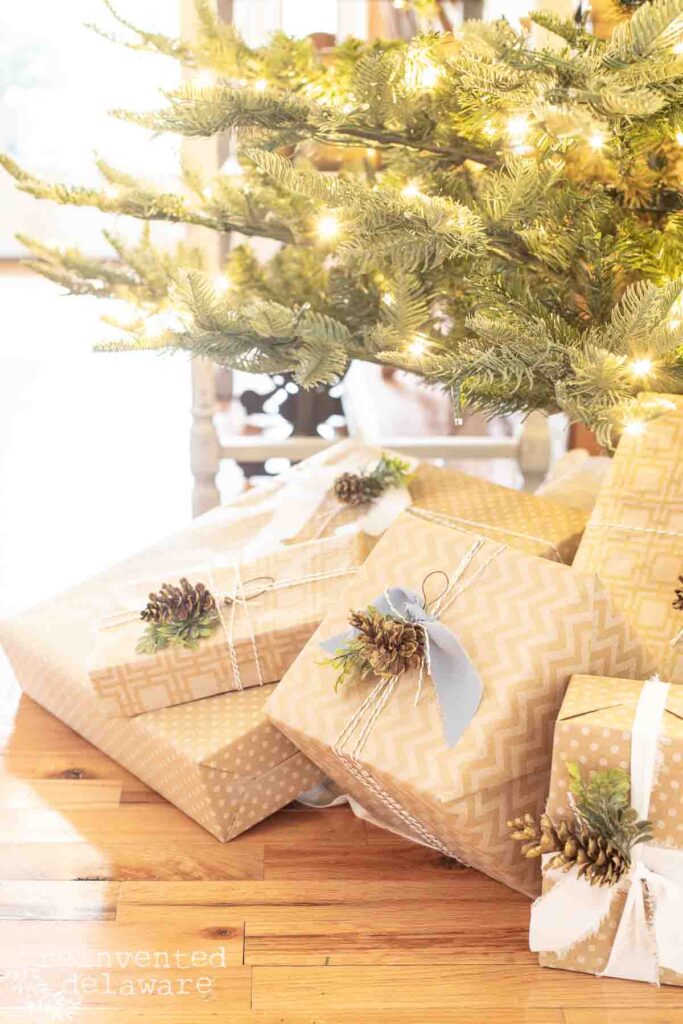
- frost it with snow and glitter, perhaps adding a small pinecone to the center
- Instead of straight lines, try cutting wavy lines to resemble more of a snowflake
- Attach a charming vintage button with a bow of thin silk ribbon or embroidery floss by drilling two small holes through all layers of the center where you want the button holes to be. Thread both ends of your ribbon from the back through to the front and through the button holes. Tie a bow.
- You can accent the edges of the rings by rubbing ink pads along the edges. It’s a subtle detail that really takes it the extra mile
Different Ways to Use Your Stars When Wrapping Gifts
The good news is that there’s no wrong way! Try any of these or make up your own:
- Thread a simple ribbon through the star and tie in back
- For really small items, wrap them in tissue paper and slip it inside the star, so the star becomes the package. Y0u can write the recipients name on the star, or add an adorable gift tag. Or these could even be stocking stuffers.
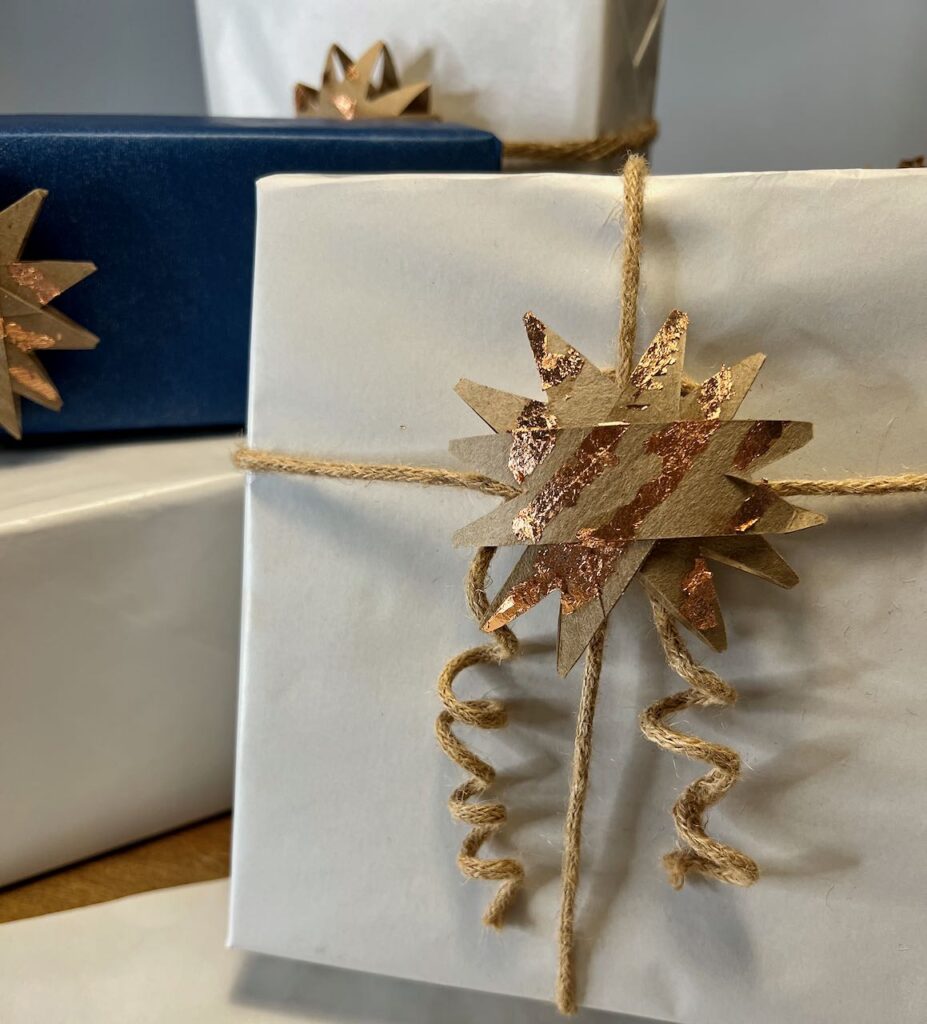
- Christmas gifts come in all sizes. In the case of a large gift, wrap in plain paper and hang three stars with different lengths of red ribbon attached to the top of the package
- For a wine bottle or mason jar, slip them in a fabric sleeve or bag. Cinch at the top with ribbon and thread the ribbon through a point or two of the star
- Thread the star through any ribbon, cording, twine or string y0u mat be using and let it sit where a bow normally would.
Other Ways to Use Beyond Gift Boxes
And this is just a start:
- As name cards for your holiday table settings
- String from a length of twine, rope or ribbon to make a garland
- Use as ornaments, on a tree or hanging in a window
- Make 24 and use them as an Advent or Christmas Countdown Calendar — place a little trinket, a note, a goodie wrapped in tissue paper inside the star before you glue the last ring in place. Make number discs 1 thru 24 and glue to the front center. Each day a star gets broken open to reveal the surprise.
- Use at Thanksgiving. each guest receives a star and a marker to record a favorite blessing from the year. These become the centerpiece of the dinner table or hang from a branch in a vase close by
The links in this post may include affiliate links, which means if you purchase anything using these links, you pay no extra, but I may receive a small commission that helps keep this blog running. I truly appreciate you using affiliate links whenever possible. Please know that I will never recommend a product I do not believe in!
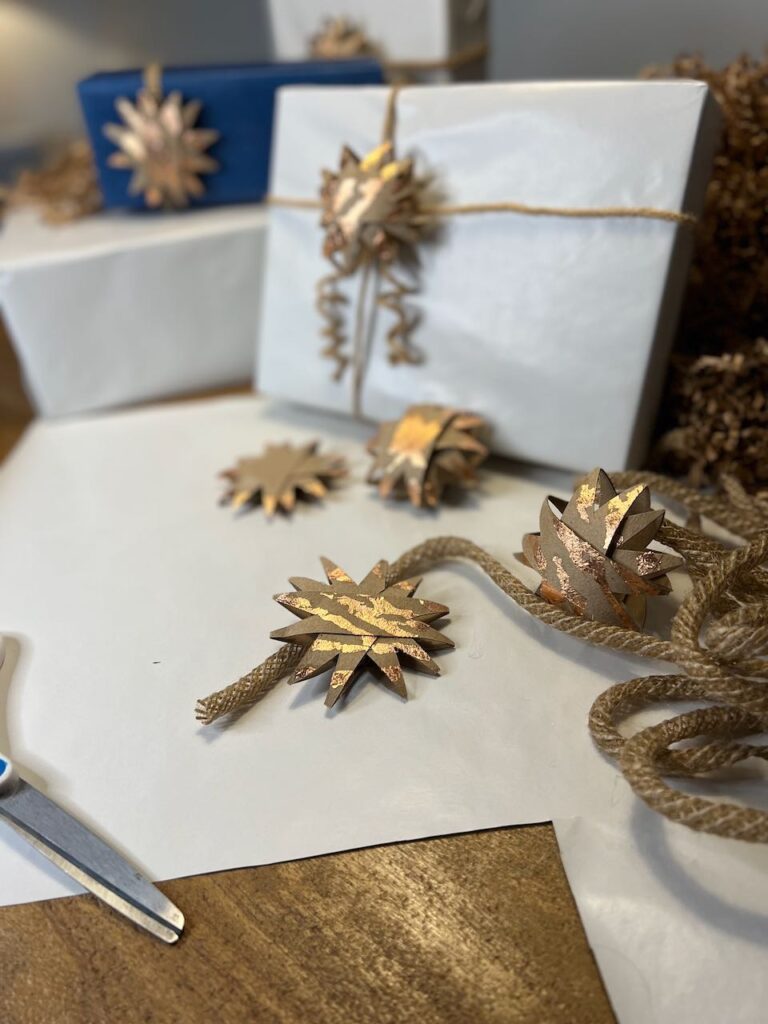
One more pic for the road.
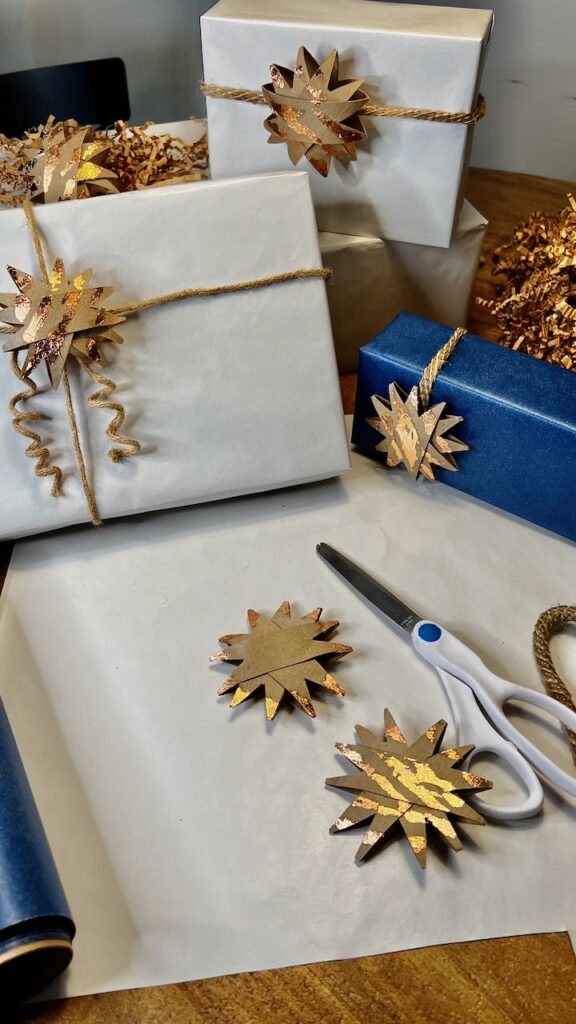
I just love how they turned out.

So You Won’t Forget It!
To Your Gifting Board
Your Christmas Board
Your Crafts Board
Your Gift Wrap Board
Your Christmas Theme Board

Michele – Vintage Home Designs
Michele is sharing so many fun, creative and inexpensive ways to wrap your holiday gifts. By thinking outside the box and also using some things you probably already have on hand, you can easily create beautiful packages to put under your tree!
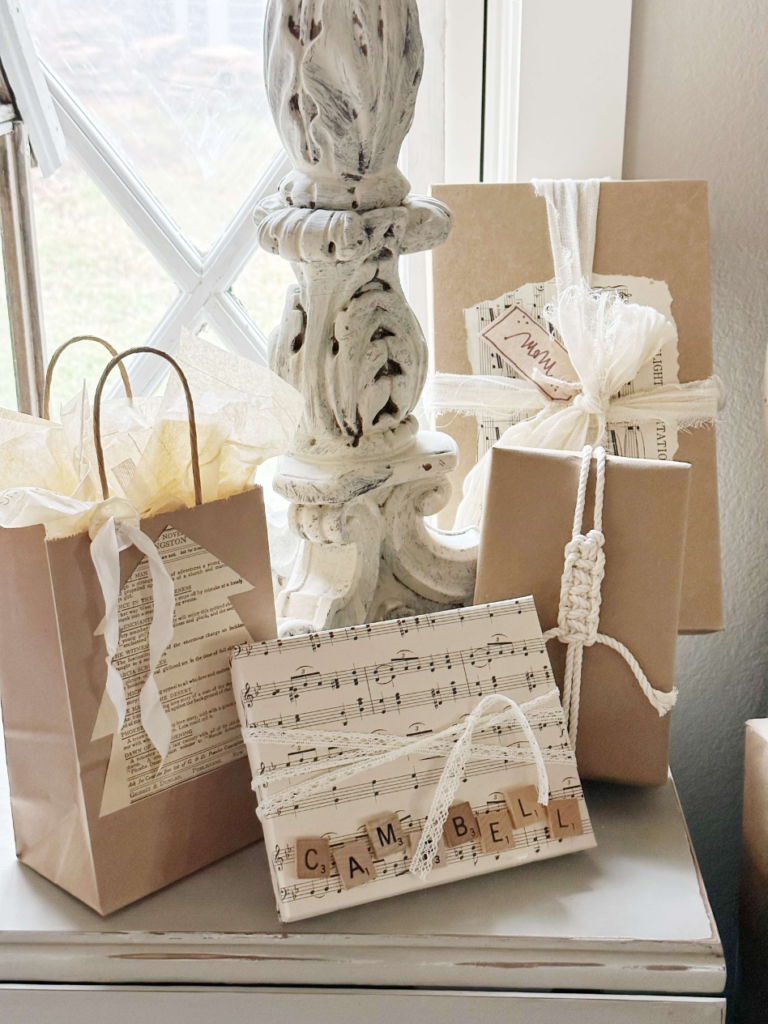
Lynn – Living Large in a Small House
Beautiful gift wrapping doesn’t have to cost a lot of money. Using kraft paper is an economical option and now it’s available in all different colors.
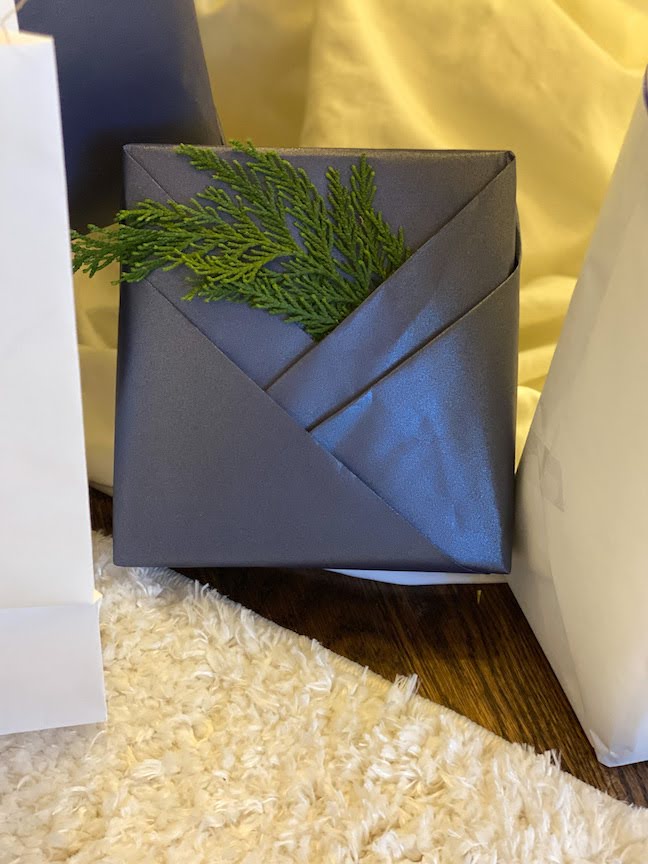
Cindy – Reinvented Delaware
Simple Christmas Gift Wrapping Ideas that are creative and won’t break the bank! These easy and unique ideas are fun to create and won’t take much time. Slow down and enjoy this Christmas Season!
I hope these ideas have inspired you to consider taking this simple craft and adding your own spin to it.

Gorgeous! I’m a sucker for anything sparkly. Blessings to you, my friend.
Those stars are great Diane – what a beautiful way to jazz up your gift wrapping, and other holiday decor! Thanks for the easy tutorial and wrapping ideas. 💛
This is such a great idea and I love how you used them on your gifts. You can use these for other occasions too!
You’re so right Anna! Lots of occasions!