How to Start a Neighborhood Cutting Garden Full of Zinnias and Joy
Gift your block smiles all summer long with a neighborhood cutting garden that builds community one bouquet at a time.
Every neighborhood has that one yard that makes you smile as you pass, maybe it’s the tidy garden beds, the cheerful window boxes, or the porch swing that begs you to stay awhile.
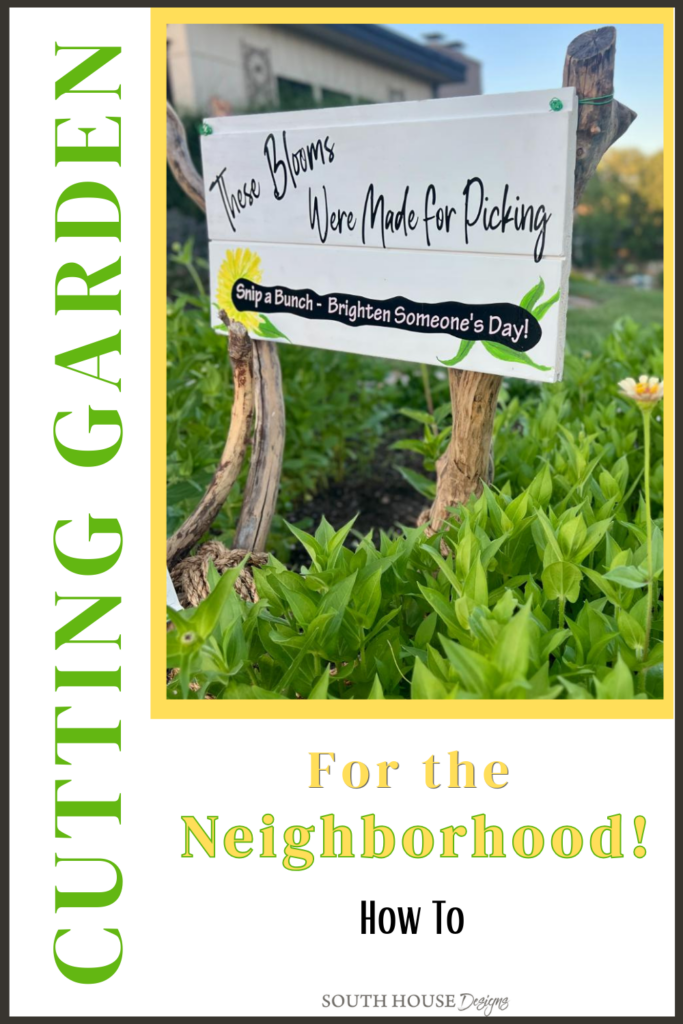
This summer I decided to make that yard ours — with a zinnia cutting garden designed for the whole street to enjoy.
Well, if you know me at all, and I think you do, you knew I couldn’t stop at a sign stuck in the ground.
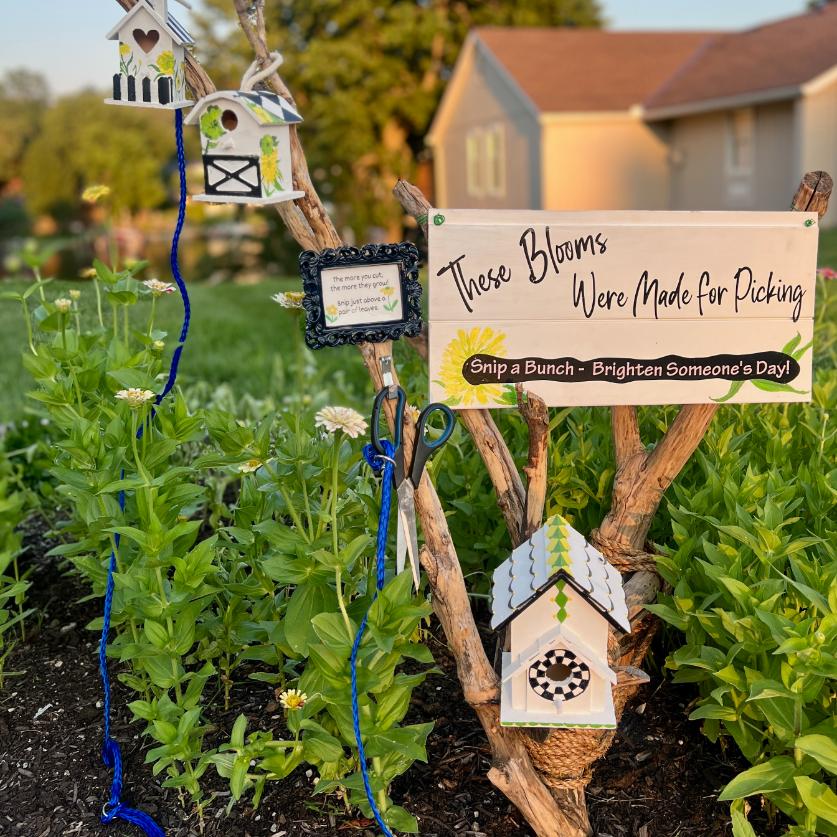
So there may also be stripped tree branches, hand-painted birdhouses with a little MacKenzie-Childs inspiration, and yes, a pair of scissors hanging from a knotted dog leash. Because of course there are.
Bring your block joy all summer long with a neighborhood cutting garden that builds community one bouquet at a time.
PLUS, this is the Handcrafted Society July challenge where we were to make something useful or beautiful for the garden! The other ladies projects are, as always, fabulous! And so different from each other.

Psst — if you’re reading this in the middle of summer, grab a cold one and settle in anyway!
This is very much a dream-and-plan-for-next-year kind of post.
Pin it, save it, and come back to it when the seed catalogs start arriving in January. You’ll be so glad you did!
Ready to jump right to it?
Here’s a Quick How-To Card for Confident Crafters
If you’d rather feel like I’m right by your side, stepping you through it — no problem, keep scrolling.
How To Start a Neighborhood Cutting Garden
A street-side zinnia garden is one of the sweetest gifts you can give your neighborhood — and it's easier to create than you might think. Here's the quick overview, with all the details and Pro Tips waiting for you in the full tutorial below.
Materials
- See the full materials and supplies list in the detailed tutorial below.
Tools
Instructions
- Choose your location — street-side is best so neighbors never have to set foot in your yard
- Prep your bed — till, clear weeds, and build up your soil
- Sow your seeds — direct sow works beautifully for zinnias
- Build your branch display — two uprights, one horizontal, anchored and wrapped in jute
- Make and hang your sign — Cricut, stencil, or hand-painted all work great
- Add your welcoming touches — scissors, tip frame, and birdhouses
- Invite your neighborhood! — start with your block, and when the blooms really hit their stride, spread the word further!
Notes
Keep Scrollong f for the Complete Material & Supply List, and Detailed Steps and Tips

Why Zinnias Are the Perfect Cutting Garden Flower
I’ll be honest with you — I am not a master gardener. Not even close. So when I decided to create a community cutting garden, I needed a flower that would do the heavy lifting on their own. Enter zinnias.
Here’s why they are absolutely the right flower for this project:
-They are ridiculously easy to grow. We’re talking direct sow the seeds, water, and step back. Zinnias are not fussy, not fragile, and not intimidating. If you can poke a seed into the ground and aim a hose at it, you can grow zinnias. This is my kind of gardening!
-They bloom and rebloom all summer long. And here’s the magic part — the more you cut them, the more they grow. Every stem a neighbor snips is actually doing the plant a favor, triggering it to branch out and produce even more blooms. A cutting garden that gets better the more people use it? Yes please!
-They have a wonderful vase life. A neighbor who snips a fresh bunch on Monday morning is going to be enjoying those blooms well into the following week. That’s a lot of joy for one little stem!
Still not convinced? Ask any gardener you know which flower they’d recommend for a beginner cutting garden. I’d bet my jute rope stash they say zinnias every single time.
A quick pause to ask if you are enjoying this post. Are you wanting more? The best way is to subscribe to my emails so you won’t miss a thing.
Detailed How-To With All My Cutting Garden
Hints & Tips:
What You’ll Need-
Materials-
For the Garden:
- Zinnia seeds
- Garden soil (we used 10 bags)
- Cobbles or edging (optional but recommended)
For the Display:
- Tree branches (2 upright, 1 horizontal)
- Round solid steel stakes (2)
- Black zip ties
- Jute rope
- Scrap slatboard or shiplap
- White paint
- Cricut vinyl, stencil, or paint for sign text
- Coated wire
- Cardstock for tip frame
- Small resin frame for tip card
- Dog leashes (2, connected end to end)
- Scissors, garden snips, or scissors with a hook
- Large picture hanging hook
- Small and medium craft birdhouses (3)
- Exterior craft paint (bright and whimsical!)
- E6000 adhesive
Supplies-
- Tiller (borrow from a neighbor!)
- Garden gloves
- Trowel
- Drill
- Wire cutters
- Cricut or stencils and paintbrushes
- Scraper or putty knife for bark removal
- Sandpaper
1) Pick the Location-
Okay, first things first — location is everything with a community cutting garden. You want your neighbors to feel genuinely welcome, not like they’re sneaking into your yard!
So get that garden as close to the street as you can. Our’s starts right at the street on our side lot — which means neighbors don’t even have to set foot in our yard to help themselves to a fresh bouquet. How great is that? No hesitation, no wondering if it’s okay — just walk up, snip, and smile.
We also bordered ours with leftover cobbles from another project, and I loved how it defined the space and created a clear separation from the rest of the yard. Not necessary at all — but it gives the whole thing that this was planned with love look that I’m always chasing.
And it tells your neighbors exactly where the cutting garden begins and ends, which makes them so much more comfortable helping themselves.
PRO TIP: Any kind of edging — cobbles, garden border, even a simple row of river rocks — gives your cutting garden a finished, welcoming look and helps neighbors feel invited rather than uncertain.
2) Prep the Garden Bed-
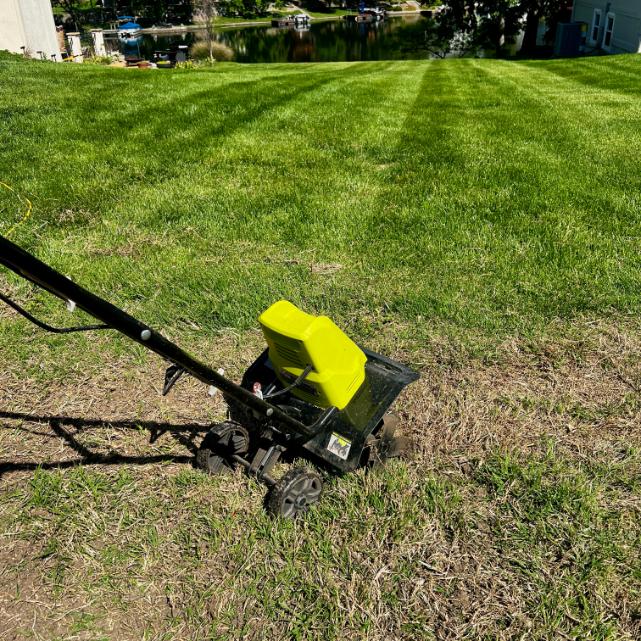
I’m not going to sugarcoat it — this was the least glamorous part of the whole project. But it’s also the most important, so roll up your sleeves and let’s get into it!
Our side lot strip had never been properly rehabbed after being the staging site for some earlier hardscaping, so we were starting from scratch. We borrowed a tiller from a neighbor (pro tip right there — borrow before you rent!) and got to work breaking up that sad, neglected soil. Tilling also gave us the chance to pull out as much as we could of the weeds, rocks, and that awful spreading runner grass that just never seems to quit.
Once the tilling was done we built up the soil with 10 bags of garden soil worked right in. Zinnias are pretty forgiving, but they do love well-draining, nutrient-rich soil — so this step is worth doing right.
3) Sow Your Seeds–
Here’s where it gets fun — and where my story gets a little real with you!
Most of my zinnia seeds were a gift from a dear friend who had harvested them from her own garden last fall and passed them along. Is there anything sweeter than that? I supplemented with three packets of seeds from Lowes just to make sure I had plenty to work with — because when it comes to a community cutting garden, more is absolutely more!
My plan was to sow the gifted seeds nice and thick and then thin them out as needed. Well — the best laid plans, right? I ended up being away for several weeks helping our daughter with their new baby, and by the time I got back those little seedlings were way too established to even think about thinning. So I just let them do their thing!
Fast forward to this morning. On the advice of my master gardener friend, I ended up carefully thinning and transplanting some of Lynne’s seedlings to give them a little more breathing room. They were just that prolific!
So far, it worked out fine, but if I’m being honest with you — I’d recommend the simpler route and just thin by snipping the weaker seedlings at the soil line rather than transplanting. Less stress on the plants, less stress on you!
I’ll update here when I see how the transplants fare.
TIP: When your seedlings get crowded, resist the urge to transplant — zinnias really don’t love having their roots disturbed. Instead just snip the weaker seedlings right at the soil line to give the stronger ones room to thrive.
4) Build Your Branch Display Structure–
Okay — this is where things get really, ummm. . . creative.
And where I learned a few things the hard way so you don’t have to! (you’re welcome)
I wanted the display to feel organic and nature-inspired, so I turned to some old tree branches I had saved — because of course I had saved them.
They happened to be from an old Japanese Maple, which as it turns out is extremely hard wood. Good to know for later!
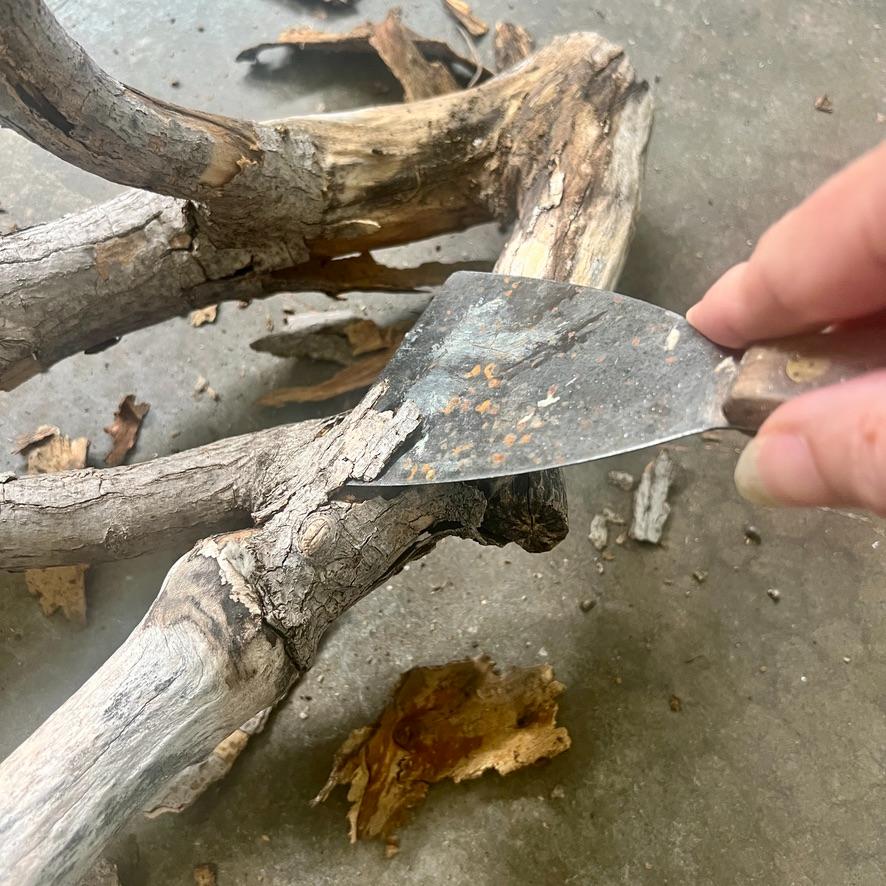
Start by stripping the bark from your branches. A scraper or putty knife gets the bulk of it off, then follow up with sandpaper until the branch feels smooth and lovely in your hands.
Ours got a finish coat of Weathered Oak stain which gave them that perfect warm, natural tone.
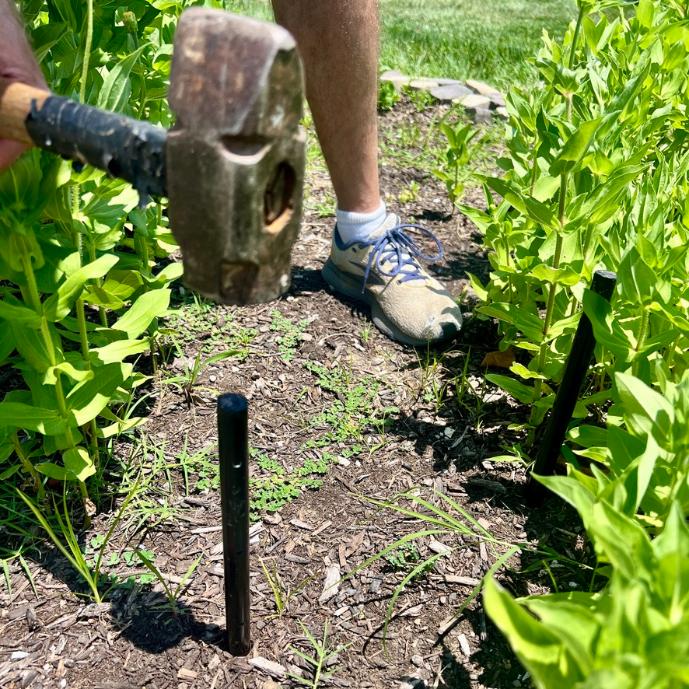
To anchor the two upright branches I used these round solid steel stakes from Lowes — the kind with pre-drilled holes through them. My original plan was to attach them with #8 screws right through those holes and into the branches.
Well. . . . . . .
Every single screw broke! Remember that Japanese Maple wood I mentioned? Extremely hard.
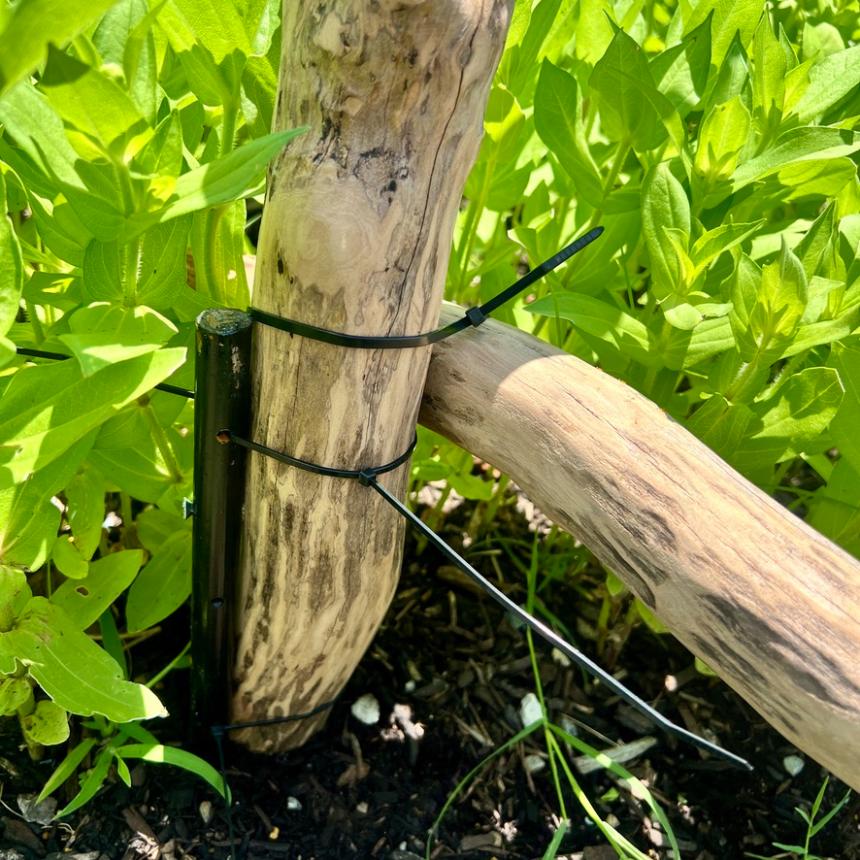
So we pivoted — fed black zip ties through the holes and around the branches instead and pulled them tight. Problem solved!
Then we added a third branch horizontally across the two uprights for stability.
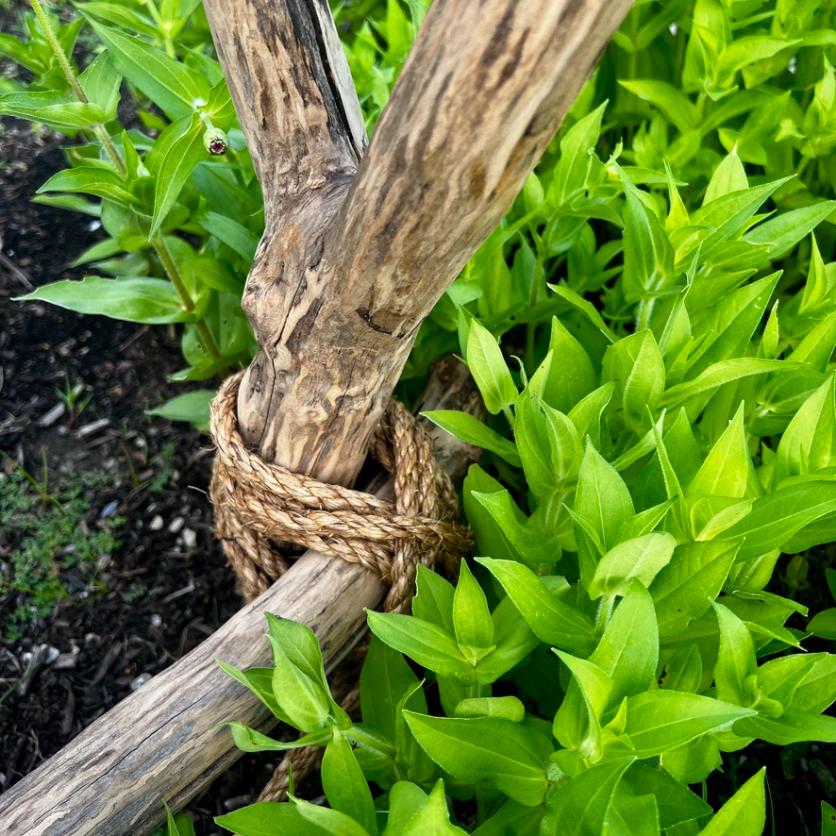
Of course, I didn’t want those black zip ties showing. So I wrapped everything in jute rope from my rope stash to hide the zip ties and give it that finished, organic look.
PRO TIP: Don’t stress if your first anchoring idea doesn’t work — this is outdoor rustic decorating, not fine furniture making! Zip ties are your best friend and the jute covers everything beautifully.
5) Make and Hang Your Sign–
Every community cutting garden needs a sign — it’s the official invitation, the personality, the welcome mat of the whole display. And honestly? This is the part where you get to make it completely your own.
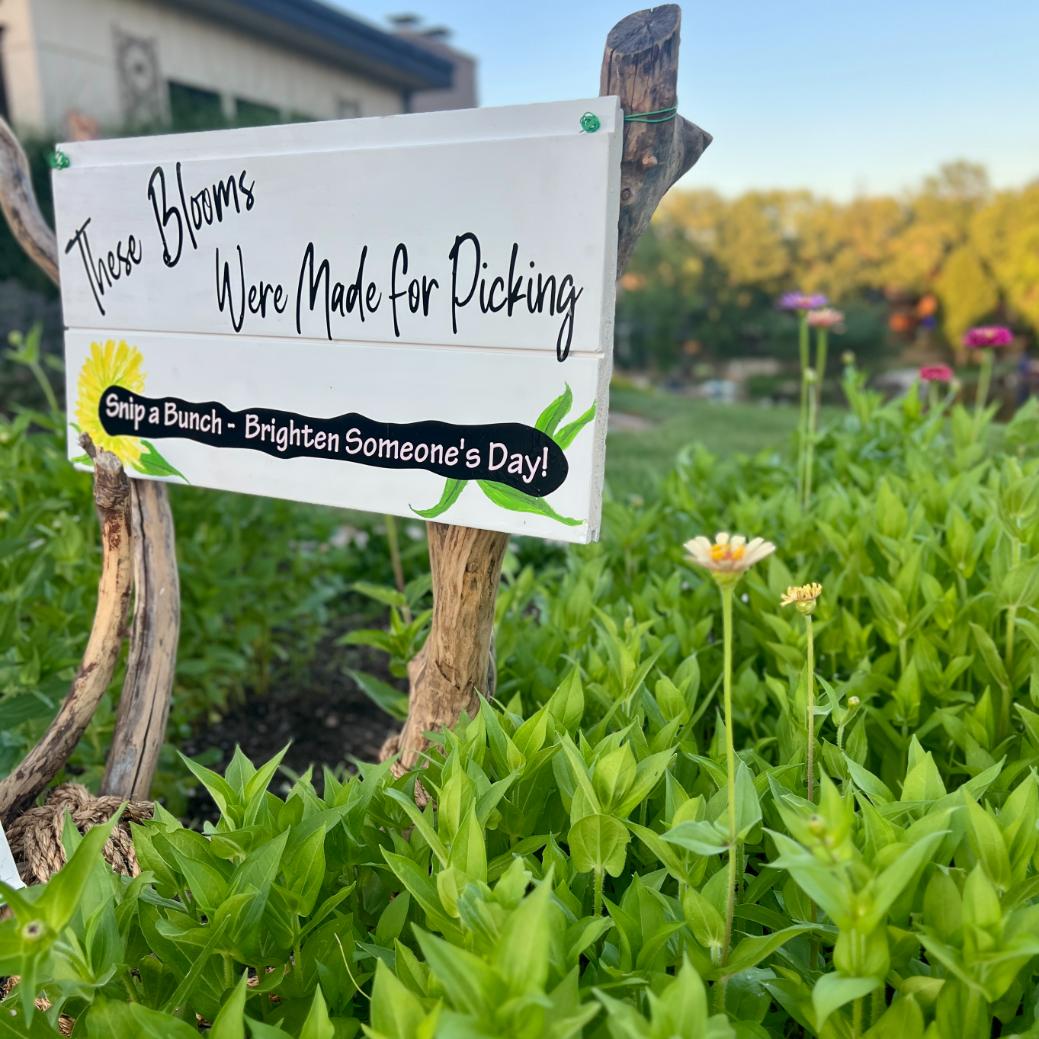
I used a scrap piece of wide slatboard that I had on hand, already painted white — because you know I always have something like that in my stash!
I cut my text using my Cricut and I went with two distinct looks to make the tagline really pop: the main text in a classic style and the tagline in pink vinyl on a shiny black background.
Don’t have a Cricut? No worries at all!
A stencil works beautifully, or just grab a paint pen or brush and do it freehand. This sign is meant to feel handmade and charming, not perfect.
Then I added a quick hand-painted flower and leaves because — well, why not?
PRO TIP: If you’re using slatboard or shiplap for your sign, make sure to hang it with the indented channel facing DOWN. If it faces up it collects water and can rot your board prematurely. One little detail that makes a big difference!
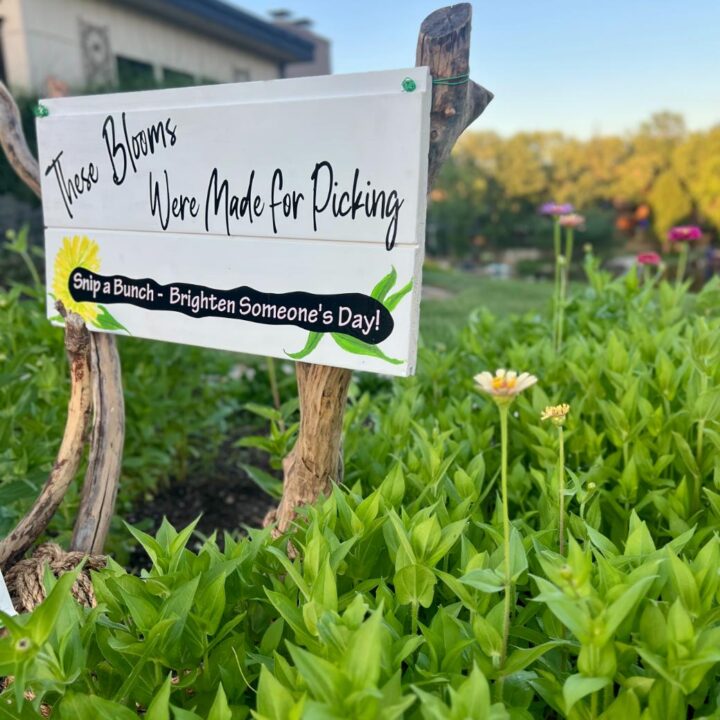
We landed on These Blooms Were Made for Picking with the tagline Snip a Bunch. Brighten Someone’s Day. — but we had a lot of fun getting there! Here are some ideas to get your own creative wheels turning:
Punny & Playful
- Snip Happens — Help Yourself!
- Cut Above the Rest — Please Do!
- A Little Snip of Sunshine
- Take a Cutting. Leave a Smile.
- Blooms with Benefits
- Free Clippings — No Strings Attached
- Petals to the People
- Zinnia Believe It — These Are Free!
- Clip, Clip, Hooray!
- Snip It Good
Warm & Inviting
- These Blooms Were Made for Picking (our pick!)
- Cut Flowers, Carry Joy
- Help Yourself to a Little Happy
- Grown with Love — Taken with Thanks
- From Our Garden to Your Table
- Neighbors Welcome. Scissors Encouraged.
- Pick a Bunch. Brighten a Day.
Alliterative
- Snip, Smile, Share
- Blooms for Borrowing
- Cut, Carry, Cheer
- Free Flowers for Friends & Folks
- Pick, Please, Pass it On
- Gorgeous, Generous, Growing — Just for You
Short & Punchy
- Just Take Some.
- Seriously. Cut Them.
- Free Flowers. For Real.
- They’re Yours. We Insist.
- Pick Me.
- No, Really — Help Yourself.
Neighborhood & Community Feel
- Community Blooms — Everyone’s Welcome!
- A Little Something from Our Corner of the Block
- This Garden Belongs to All of Us
- Good Neighbors Grow Good Things
- Made for This Street. Meant for You.
Zinnia Specific
- Stop and Snip the Zinnias
- Zinnias for Everyone!
- Zinnia Be Happy — Take Some Home
Whatever you choose, make it yours — handwritten, stenciled, Cricutted, or painted. The words matter, but the welcome behind them matters even more.
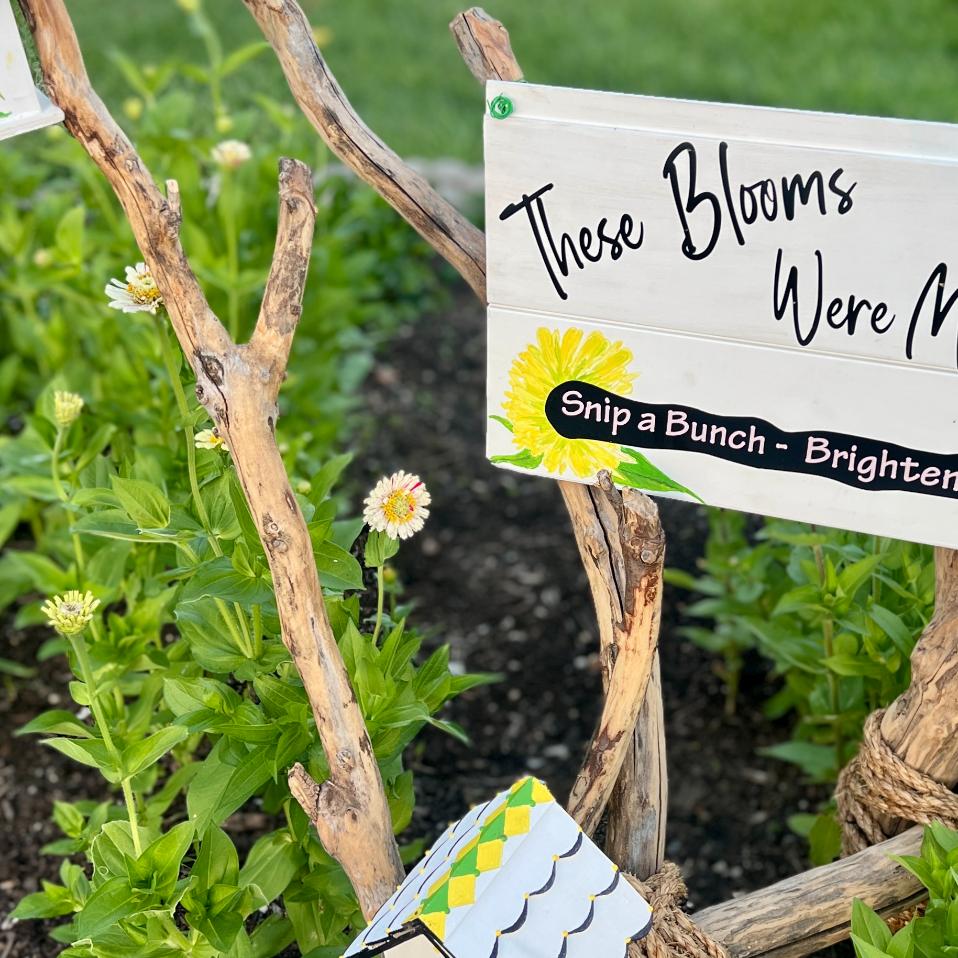
To hang the sign I wrapped a good length of coated wire tightly around the two branches several times and secured it, then fed both ends through the drilled corner holes from back to front.
On the front side I twisted the two ends together and then curled them into a sweet little curlicue tight against the wood. Functional and pretty — my favorite combination!
The Tip Frame
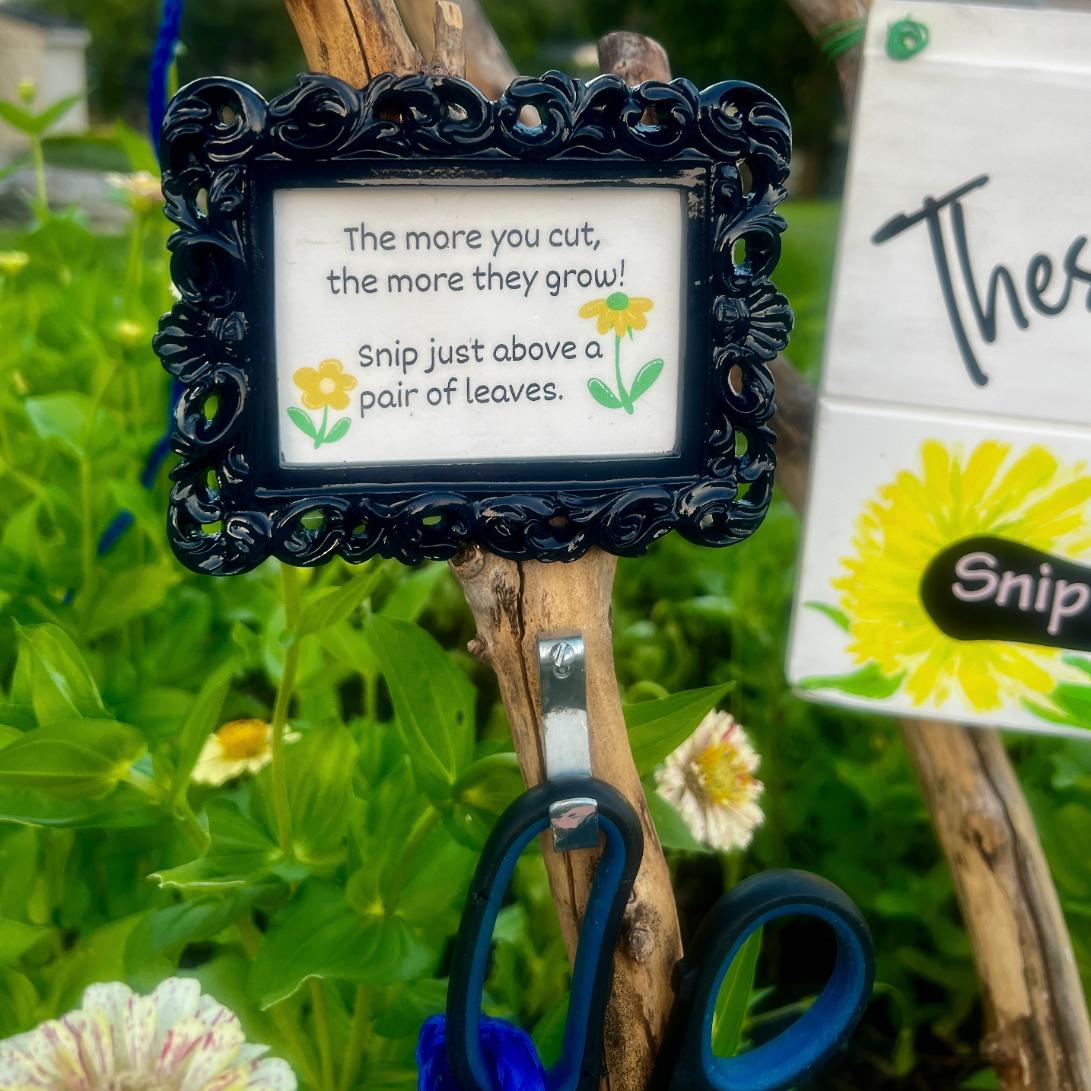
Why a tip frame? It’s all about being a great host.
When friends come to your home you show them where to put their coat and make sure they never feel like they’re fumbling around wondering what’s okay.
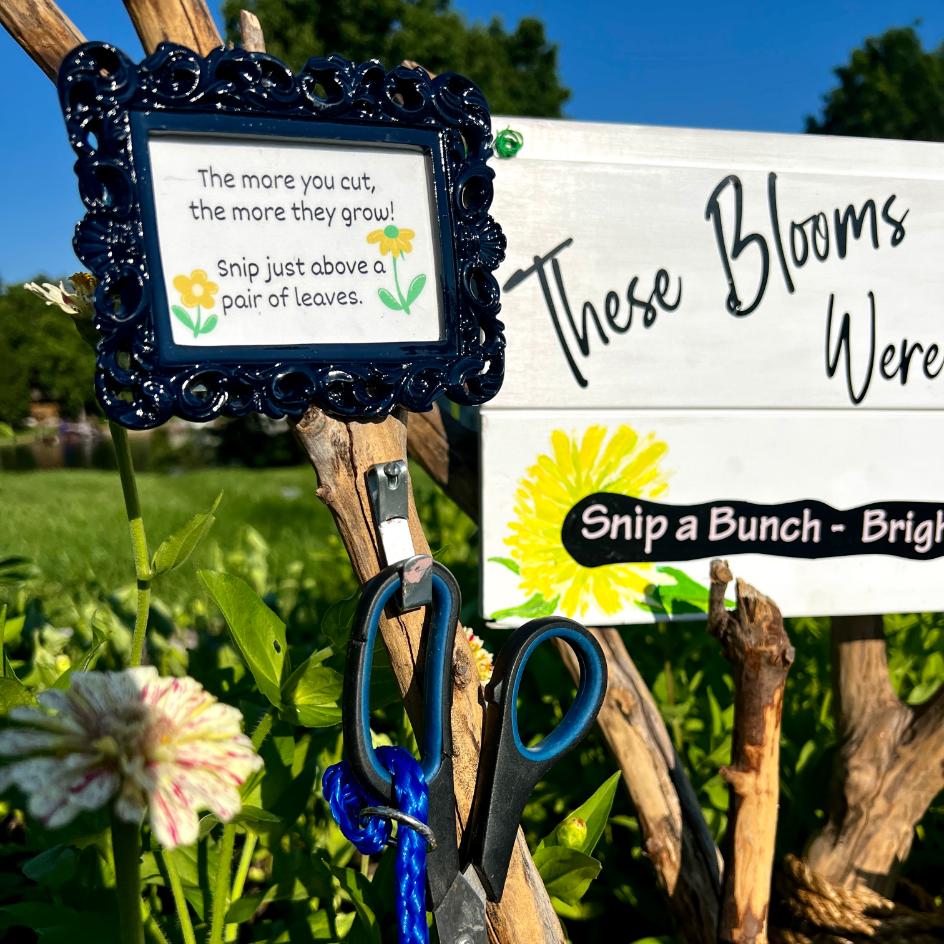
Welcoming neighbors into your cutting garden is no different. A first-time flower cutter might hesitate, wondering if they’re doing it right or whether cutting actually hurts the plant. So we answer that before they even have to ask:
The more you cut, the more they grow!
Snip just above a pair of leaves.
Two sentences that say you’re doing something good here — and here’s exactly how. Best. Host. Ever.
I printed my insert on cardstock and had it laminated at my closeby UPS store for just a couple of dollars — totally worth it for something that needs to hold up outdoors all season long.
Then I used E6000 glue to glue it to the back of the frame. I threw out the cardboard back because we know what water does to cardboard
More E6000 and it is hanging right above the scissors.
The Scissors Station
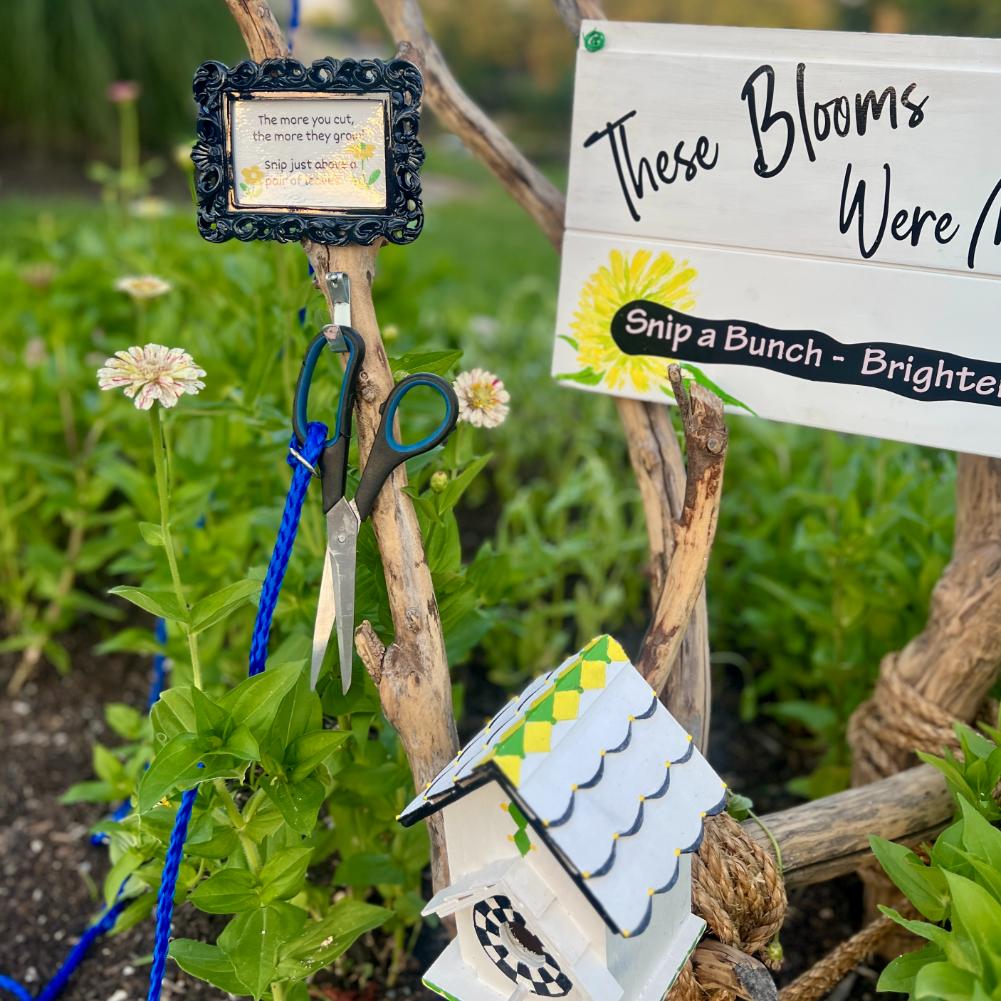
This might be my favorite detail of the whole display!
I connected two nylon dog leashes end to end — you know, the ones that accumulate from vet visits — and attached them to a branch.
The double length was important so the scissors could reach all the way to the far corners of the garden with ease.
Then I added a hook (I used a large picture hanging hook) below the framed tip, for the scissors to hang from.
Now any neighbor who wanders up on a whim has everything they need for a spontaneous bouquet.
6) Add Whimsy and Personality–
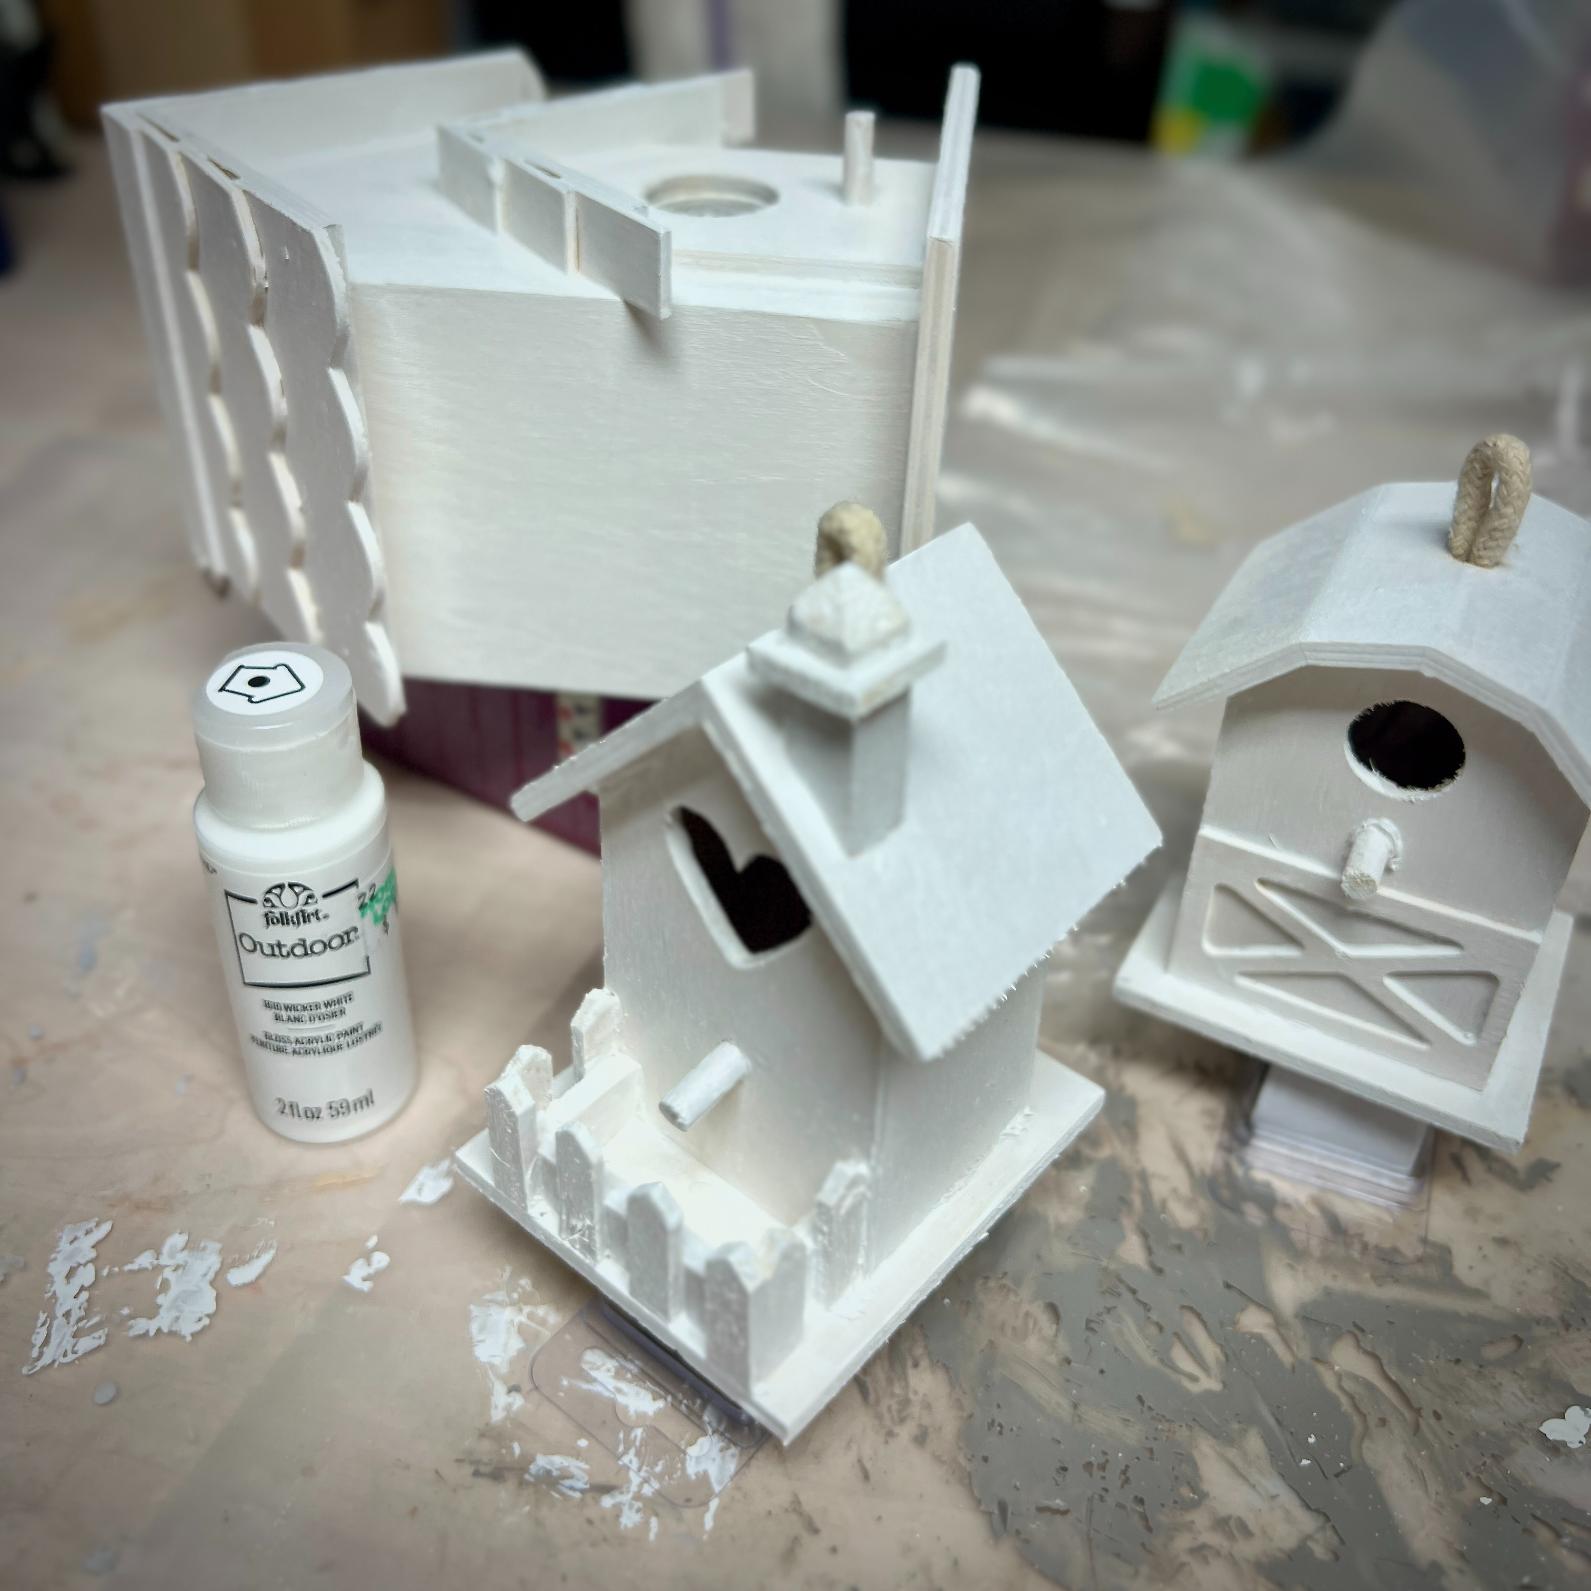
This is the step where your cutting garden display goes from functional to oh my goodness I need to stop and look at that.
And it’s honestly the most fun part — because this is pure personality.
I had three craft store birdhouses — two small and one medium — that were just waiting for their moment.
I painted them with all the joy and whimsy I could muster, drawing inspiration from MacKenzie-Childs pottery. If you’re not familiar, think bold colors, cheerful patterns, and that feeling that whoever made it was just having the absolute best time.
That’s exactly the energy I wanted for this little community garden corner.
PRO TIP: Use exterior craft paint for your birdhouses — regular craft paint will fade and peel quickly once it’s exposed to sun, rain and humidity. A little sealer coat on top doesn’t hurt either for extra longevity!
Once the exterior paint dried completely I attached them to the branches with E6000 adhesive. If you haven’t used E6000 before — it’s basically a miracle in a tube for outdoor craft projects.
I used clamps to hold them in place while the glue dried. Best to give it a full 24 hours to cure before you put any stress on it.
There are no rules here beyond this — make it yours. Bright colors, a favorite pattern, something that makes you smile every time you look at it. Because if it makes you smile, it will absolutely make your neighbors smile too.
7) Invite Your Neighborhood!–
This is the moment you’ve been working toward — and it is so worth it.
Start small and let it grow organically. Your immediate neighbors will notice the display long before you say a word — and that’s part of the magic.
There’s something wonderful about watching someone slow down, read the sign, and then actually reach for a stem. That first spontaneous snip is everything.
When your blooms are really hitting their stride — full, lush, and practically begging to be cut — that’s your moment to spread the word further. I’ll be announcing ours on our lake community Facebook page and Nextdoor when the time is right. A simple, warm post is all you need. Something like:
“Our street-side zinnia cutting garden is open and free for all! Stop by, snip a bunch, and brighten someone’s (or your own) day.”
Short, sweet, and irresistible.
Okay, can I let you in on a little secret?
I actually put up our whole display before the zinnias were ready for cutting.
And honestly? I’m glad I did — it gave everything time to settle in and look like it belonged there.
But I’m holding off on the big neighborhood invitation until the blooms are really putting on a show. Right now our immediate block can see it and help themselves — but I’m saving the wider announcement for our lake community Facebook page and Nextdoor until it a full sea of zinnia blooms bursting open.
I mean, we don’t invite everyone to come to the party before the food will be ready, right?
And while we’re talking party. Don’t forget to visit my crafting buddies and see what each of these talented ladies came up with for their gardens. As always, tell them I said “hi”.
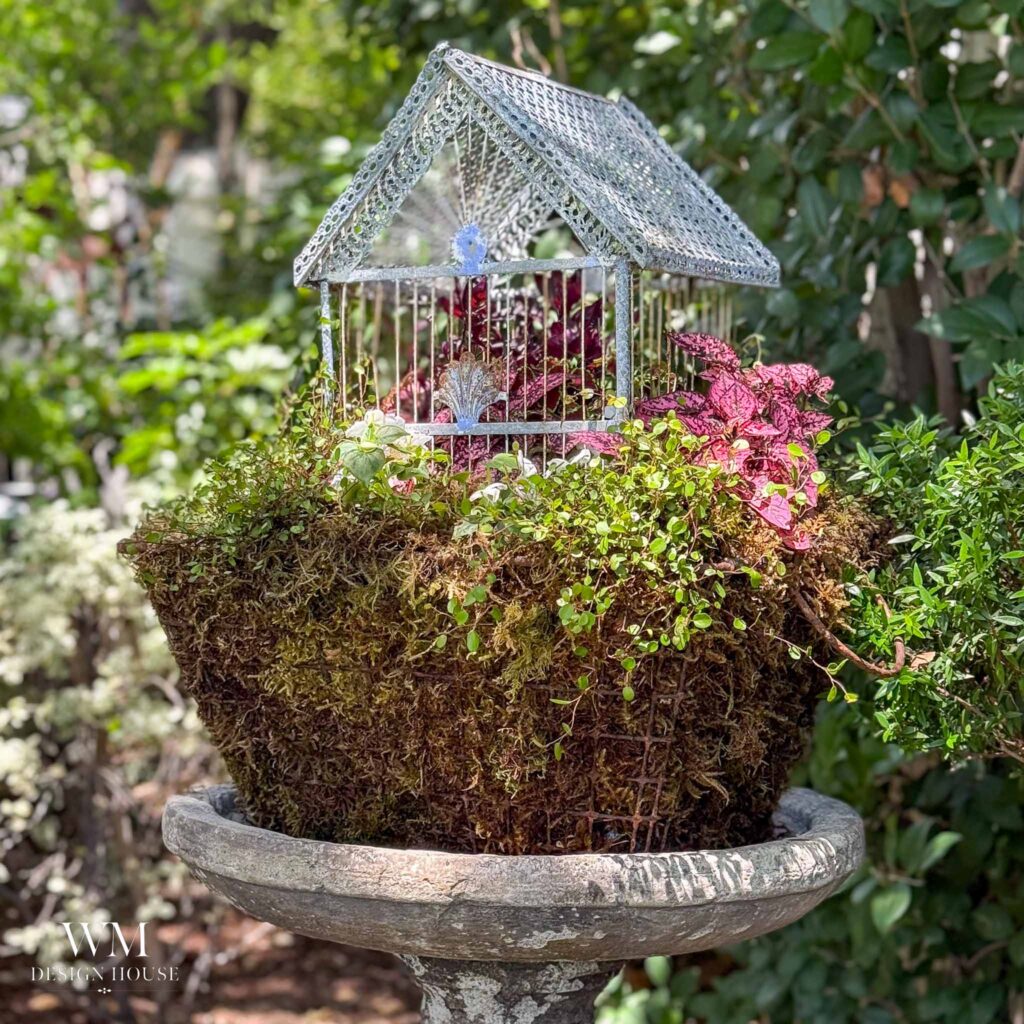
Wendy @ WM Design House
How to Turn a Vintage Birdcage into a Whimsical Garden Planter
What a charming garden planter! Wendy gave this old treasure a new life in the garden complete with a mossy nest and trailing plants.
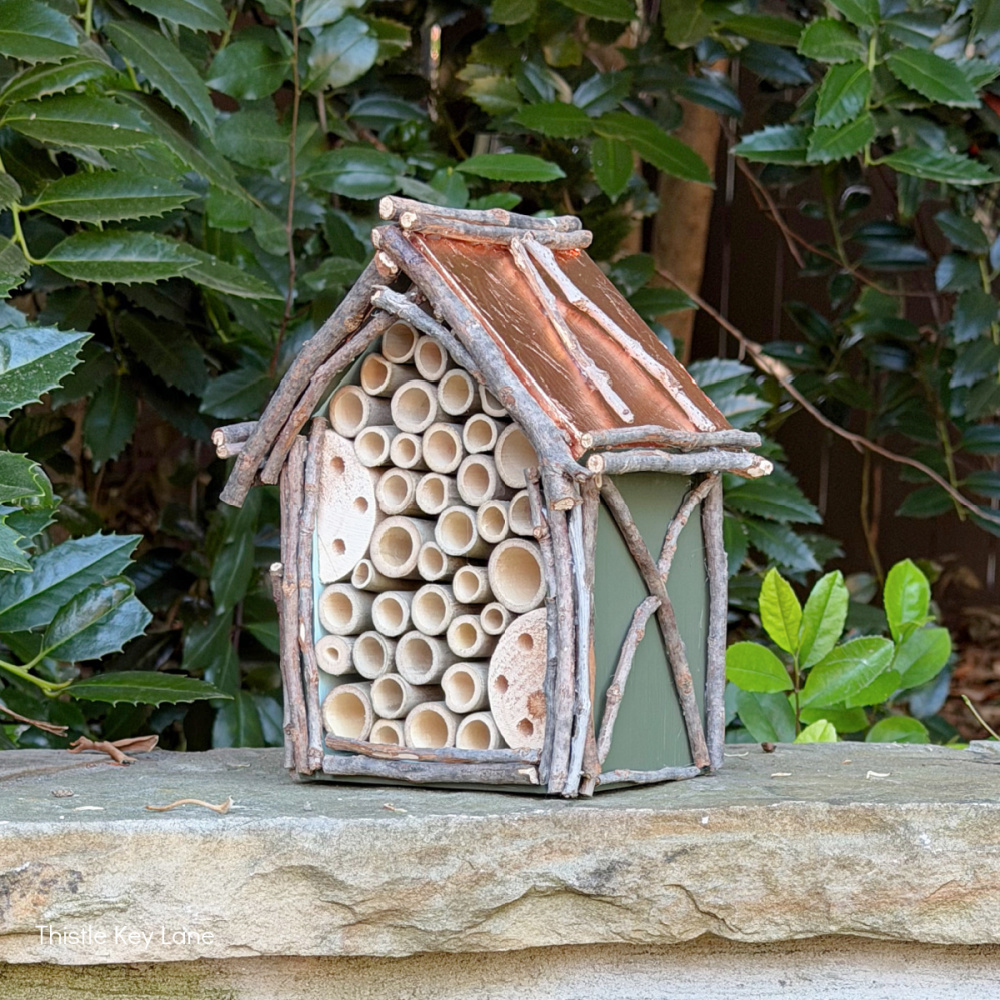
Michelle @ Thistle Key Lane
Michelle teaches us how to build our own solitary bee hotel or update a ready made one that will blend in with our gardens.
Missy @ Sonata Home Design
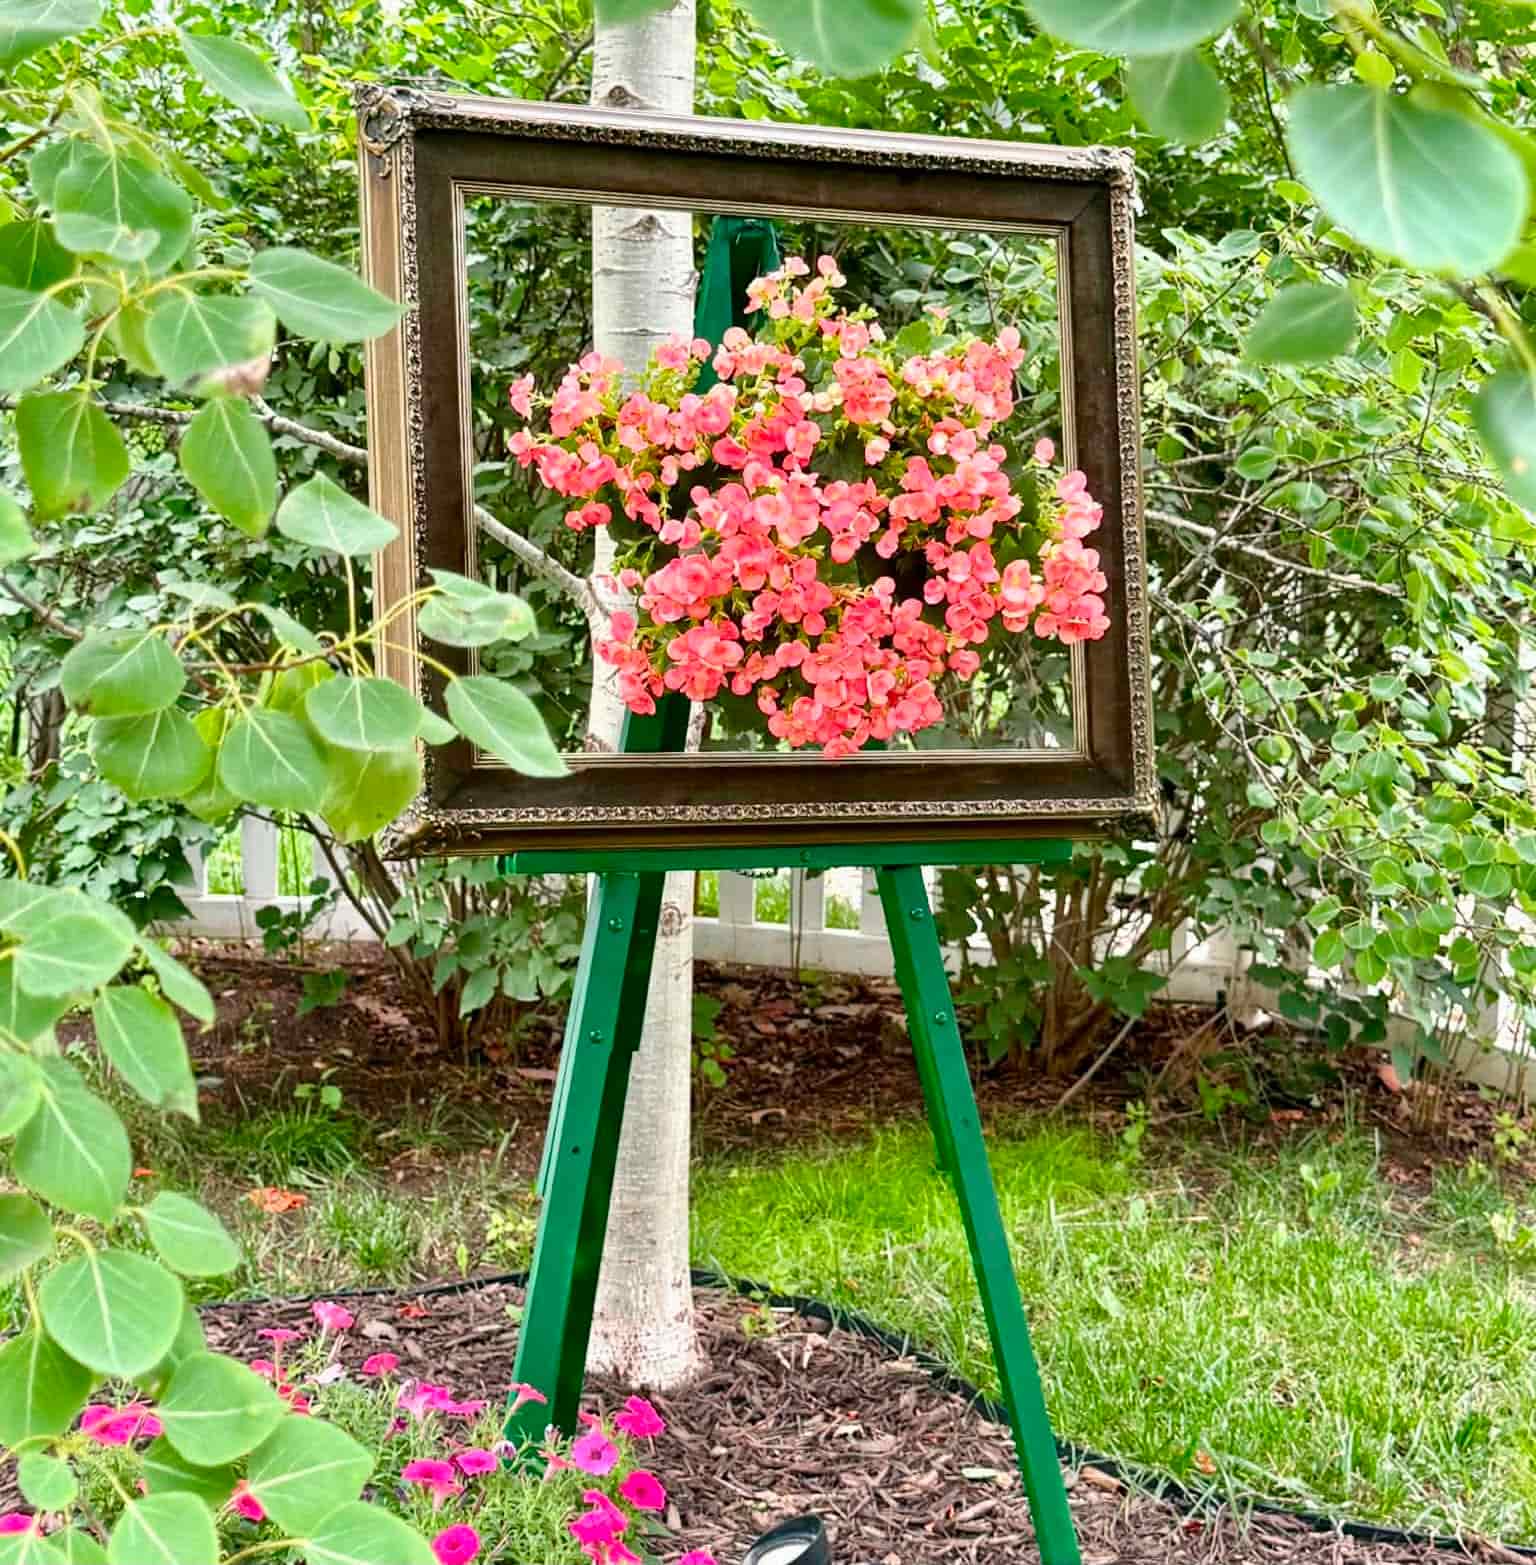
What to Do With Old Picture Frames in the Garden
That dusty old frame you have laying around? Infinitely clever Missy shares a great idea for putting it to work in your garden.
Anna @ Sky Lark House
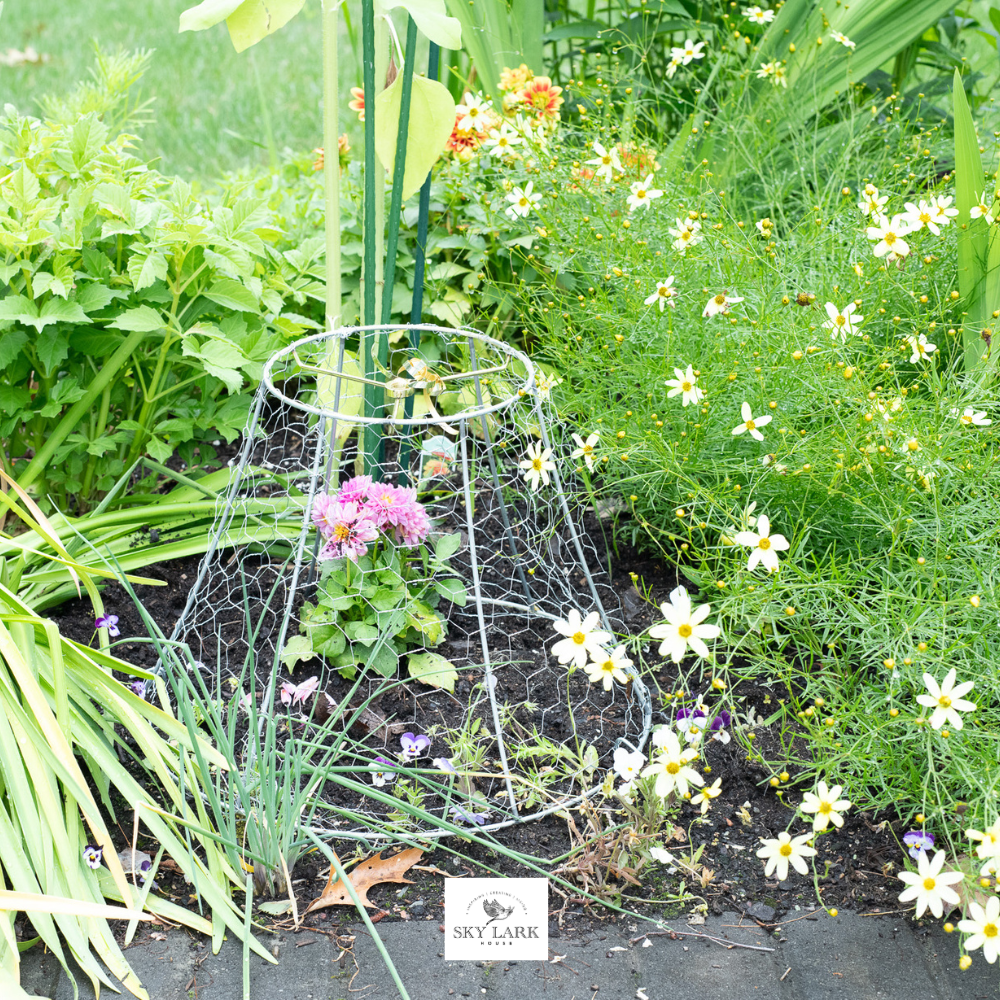
Create an Affordable Wire Cloche For Plants in Your Garden
Is this not the cutest?!? Anna shares the most charming garden cloche. Ha! Now those adorable bunnies will be thwarted by an equally adorable cloche.
Donna @ An Organized Season
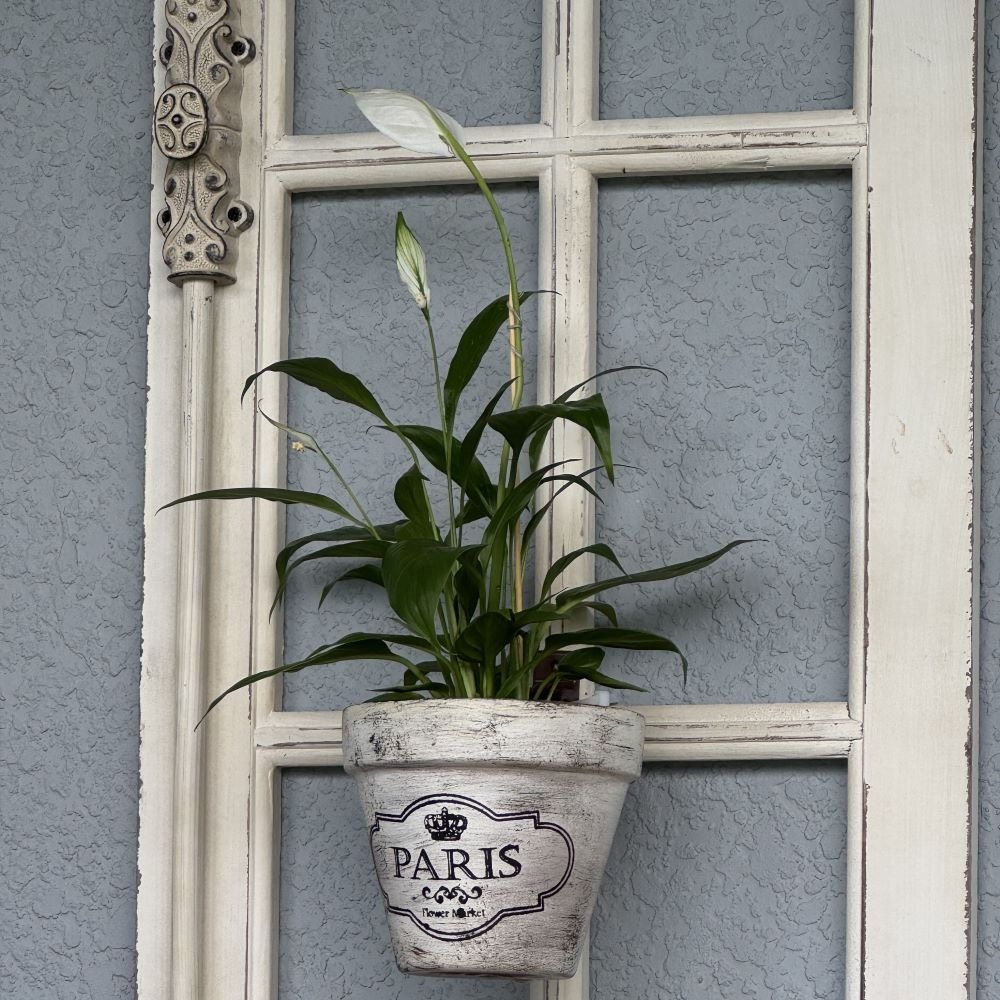
How To Hang Flower Pots For A Charming Outdoor Display
Donna is sharing her easy way to hang flower pots to create a charming outdoor garden-inspired display.
CoCo @ The Crowned Goat
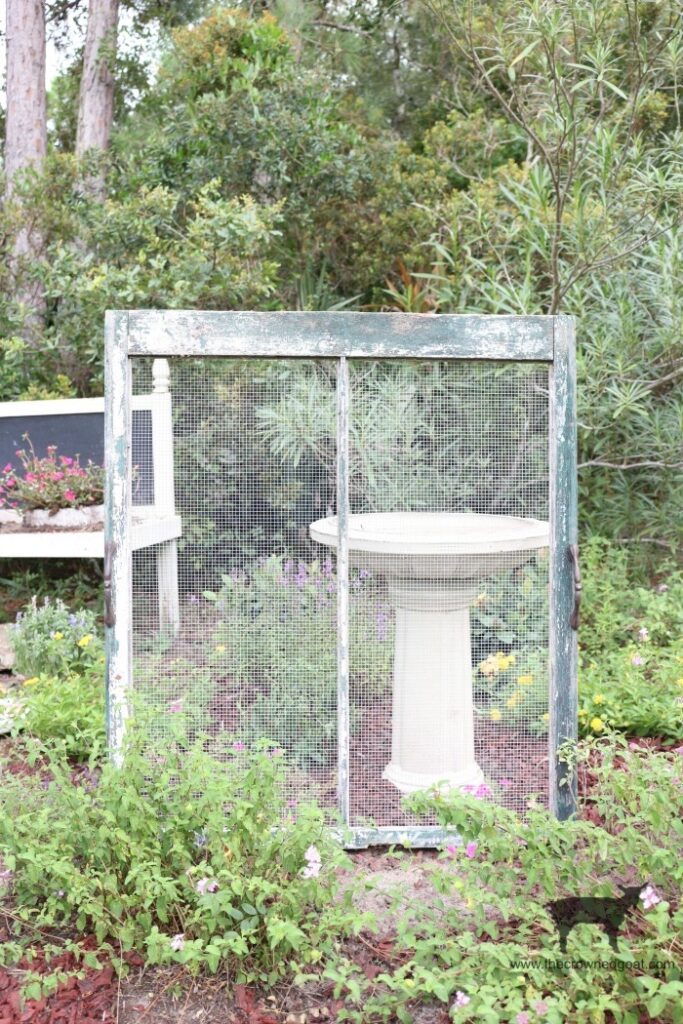
How to Make a Plant Tray From an Old Window
This DIY plant tray is simple to create and comes in handy while weeding container gardens, garden beds and more.
I hope you are inspired by several of these projects for your current garden or perhaps next year. So be sure to pin them where you will easily find them again!

I LOVE this idea! The world needs more positive community opportunities, and this project delivers. Thank you for including all of the friendly sign ideas. This could not be more amazing!
YES, Missy! That is so true. More opportunities to build community and bridges. We love our neighbors and thought this was jus a fun way to celebrate how awesome they are.
This is such a fun idea, Diane! I love living on this tiny little island, but this post makes me wish I lived in a neighborhood. I’ve never tried growing zinnias before, but you make them sound so easy that I definitely want to give them a try. Off to check to see if they grow in my zone now! Hugs and happy summer, CoCo
Zinnias are definitely the flower to start with, CoCo! Consider this a sign to head down that path — it is such a delightful path. How cool that you live surrounded by water. In my lake community, together we surround the water and it draws us all in — our shared playground and sanctuary.
Hats off to your hard work and ingenuity in creating such a wonderful cutting garden for your neighbors! I hope they will drop off delicious baked goods or a bottle of wine on your doorstep! I sure would, if I were your neighbor! Loved your signs and birdhouses. Just adorable!
OOooooo! There’s a house for sale one cove over — perfect for you Michelle! I’ll add extra seeds for you next year. My porch will be waiting for your baked goodies and wine!
Diane, I just love this idea, what a way to spread joy to the entire neighborhood. I wish I had space to do this, but you have o’sure given me food for thoght here…. Thanks for all the inspiration. You did a marvelous job.
I’m rather embarrassed to share my little flower garden plot with you, the master gardener who can grow flowers bigger than your head!!!! Thanks for the encouragement.
You are so amazing, Diane! I love that you created a garden to share with your neighbors! You did such a fabulous job with the planting, helpful signs, and cute decor! Enjoy all those pretty blooms, and I hope you and your neighbors have a wonderful summer!
I LOVE this idea Diane! Zinnias are some of my favorite flowers to grow for all the reasons you listed. Sharing fresh flowers with your neighbors is a lovely way to build a sense of community. Thanks for all tips and information too. Happy floral arranging!