Easy to Make Ric Rac Flowers For Fun Retro Whimsy
Turn classic ric rac trim into charming dimensional flowers with this quick, beginner-friendly tutorial. Add retro whimsy to pillows and more!
Hello crafty friends (and those of you who claim you’re “not crafty” – stick around, I promise you’ve got this)!
I’m excited about this project I’m sharing for the Handcrafted Society April Challenge featuring those delightful scallopy gems: Rick Rack (or Ric Rac, depending on who you ask) and Pom Poms

The Return of Ric Rac: Not Just for Your Grandma’s Apron Anymore
Before we dive in, can we talk about how ric rac is having a serious moment right now?
This wavy little trim that probably adorned your childhood dresses has strutted its way from kids’ clothes right onto the fashion runways.
And if it’s good enough for high fashion, it’s definitely good enough for our living rooms!
TABLE OF CONTENTS:
Today’s Project: Whimsical Ric Rac Flowers

When I spotted this month’s theme, my mind immediately went to creating something that would bring that playful, vintage vibe into home decor.
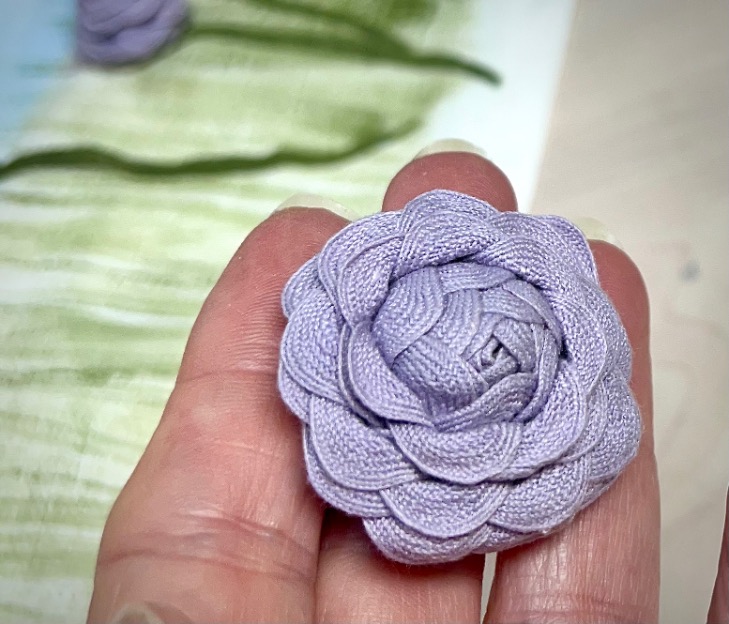
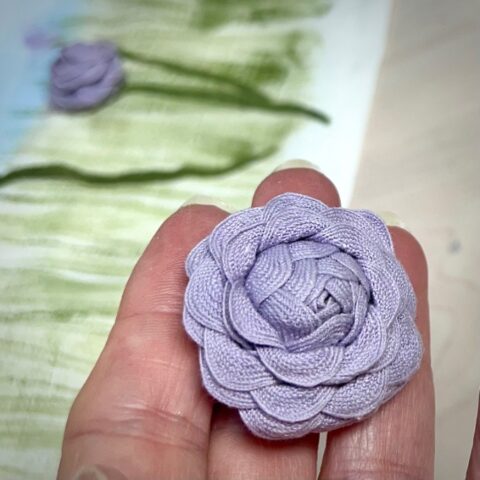
The result? Gorgeous dimensional ric rac roses; although, I think they look more like peonies.
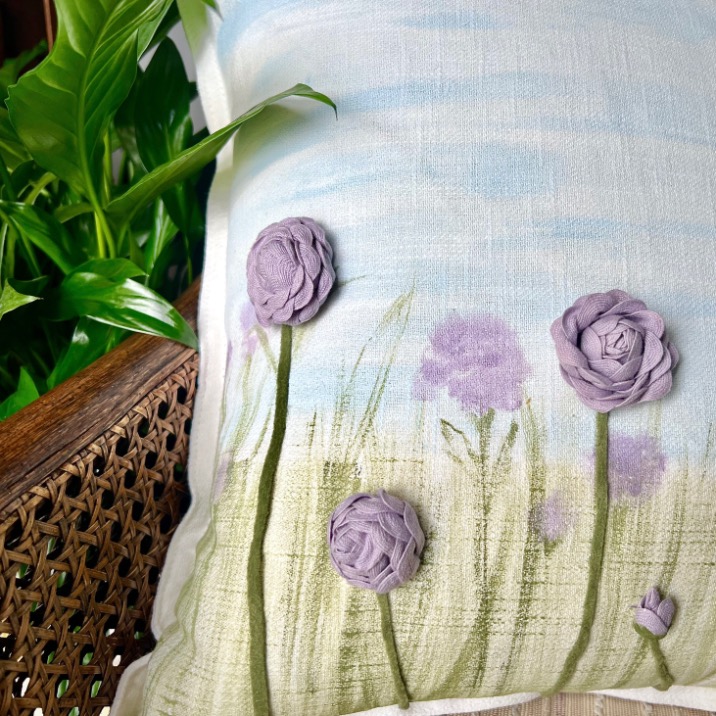
I decided to add mine to embellish a decorative pillow. Remember too many seasonal pillows is NOT a thing.
But once we have our flowers made, we’ll talk about all kinds of ways to use them to add charm to your decor.
(And yes, I started with pre-made white pillow covers from Amazon because sometimes life’s too short to drive to IKEA. No shame in smart shortcuts, friends!)

Let’s Make Some Rick Rack Flowers!
Crafting at Your Comfort Level
For the “I’ve got this” speed crafters:
Quick how-to card below gives you the essentials to run with!
For my “Talk me through it like we’re crafting besties” friends:
Keep scrolling for all the details, tips, and hand-holding you could want.
I’m right there with you!
The Sweetest (and Easiest) Ric Rac Flowers
Materials
- Ric Rac, Medium or Jumbo
- Needle and matching thread
Tools
- Iron
- Pins
- Scissors
- Hot glue gun and glue stick, optional
Instructions
Step 1) Interlock ric rac: Fold length in half, twist rows together with bumps fitting into valleys
Step 2) Press flat: Use hot steam iron to smooth the interlocked ric rac
Step 3) Create flower: Start rolling tightly from folded end, securing with stitches every circle or two
Step 4) Secure and finish: Tack the end in place and trim excess
Step 5) Open the Bloom: Gently fold outer petals back and press with iron to hold shape
Notes
I have seen instructions for a similar flower include a step of stitching the intertwined rick rack down one side to hold it while rolling the blooms. I have not found that necessary or even any real help. It's just extra time and effort that isn't needed.
For all the details and tips, keep reading below.
Okay, craft-curious friends! Let’s break this down step by step with all the tips and tricks I wish someone had told me when I first made these adorable flowers.
What You’ll Really Need
For Creating the Magic Blossoms-
- Ric rac trim: Medium or jumbo size works best (those tiny ones are cute but will test your patience and eyesight)
- Needle and thread: Nothing fancy, just something that somewhat matches your ric rac
- Hot glue gun (optional): For those “I need this done yesterday” moments
- Scissors
- Pins: To wrangle your ric rac ends
- Iron: With steam capability – trust me, you’ll thank me later!
For the Pillowy Canvas-
- Plain pillow cover: I grabbed some from Amazon
- Felt or thin ribbon: For adding stems and leaves if you’re feeling extra fancy
- Craft paints & textile medium: If you want to go all out with a painted background
- Misting bottle: because it truly makes a difference with just about every paint project
- Paint brushes & palette: For your inner artist
- Beverage of choice: Crafting is thirsty work, friends!
Step 1) The Magic Interlock-

Take about 18 to 24 inches of ric rac (longer for statement blooms, shorter for dainty ones). Fold it in half lengthwise. Now here’s where it gets fun – twist these two rows together, making sure the bumps of one piece nestle into the valleys of the other.
Think of it like they’re hugging! Each zigzag should interlock with its partner. Don’t panic when it looks like a wrinkly mess – that’s perfectly normal at this stage. Just pin those free ends together to keep them from unraveling one you’re done twisting..
Step 2) Smooth Operator-

Grab your iron, crank up the steam, and press that lumpy, bumpy ric rac sandwich until it lies flat and behaves itself. The heat and steam help train those fibers to stay in their new interlocked position.
Pro tip: Use a pressing cloth and a more moderate temperature if your ric rac is synthetic – melted ric rac is definitely NOT part of this craft!
Step 3) Roll With It-


Now for the transformation! Start with the folded end – this will be the center of your bloom.
Begin wrapping the ric rac around itself, keeping it tight for the first few turns to form a nice bud center.
Thread your needle with a double length of thread, knot the ends, and tack through the bottom of the flower every circle or two. This keeps your creation from springing open like one of those joke snake-in-a-can pranks.
PRO TIP: If you’re struggling to keep it tight while stitching, a tiny dab of hot glue can hold things in place while you sew. I won’t tell the craft police!
Step 4) Keep on Rolling


Continue spiraling your ric rac outward, maintaining even tension. As you reach the outer layers, you can loosen up a bit to create a more “blooming” effect. Keep securing with stitches every circle or two.
You say when it’s done!
When your bloom is looking good, cut off any excess trim. Fold under the raw edge and stitch securely.

Step 5) Let Your Flower Bloom-


Now for the magical transformation! Gently fold the outer petals back away from the center, creating that perfect “just bloomed” look. You can open as many or as few petals as you like – some flowers are shy, others like to show off!
Once you’ve arranged your petals just so, use your hot iron to encourage those open petals to stay that way. A quick press will help them remember their new position, standing open, proud, and beautiful.
STYLE TIP: For a more dramatic flower, open more petals and press them flatter. For a younger bloom look, just open a few of the outermost petals while keeping the inner ones tightly spiraled.
Moment of truth: Is your flower looking a bit lopsided? Embrace it! Real flowers aren’t perfectly symmetrical either – it’s called “character”!
Creating Ric Rac Buds (Because Every Blossom Needs a Friend)
For these adorable little buddies:
- Use just a single layer of ric rac
- Press so the bumps fold up onto the center of the trim – these will be your tightly closed petals
- Start by tacking that first tiny fold in place with your needle and thread
- Roll 3-4 more “petals” tightly around the center one
- Secure this group with a few stitches
- When it looks just right, as plump as you want, cut your trim at a valley (dip), fold it under, and tack in place
Make it botanical-

Paint the bottom and about halfway up the sides with leaf-green craft paint thinned with textile medium.
Or wrap a skinny green ribbon around the base and down to create a stem. So cute you might actually squeal!
Beyond the Bloom:
Creative Ways to Use Your Ric Rac Flowers

Now that you’ve mastered making these charming blooms, let’s talk about all the ways you can use them! These versatile flowers can add retro whimsy to so many projects:
- To embellish the ends of a table runner
- Napkin rings: Attach to plain napkin rings for custom table settings
- Scatter a handful as part of a Spring Blooms centerpiece
- Wreath accents: Cluster on a small grapevine base for a year-round door decoration
- Garlands: String together for party decorations or children’s room decor
- Gift toppers: Secure to packages for a handmade touch that recipients will keep
- Add as a handle for the lid of a box or basket
- Add a cluster to the front of a basket
- Stitch some to the front of a straw bag for summer
- Turn two into the cutest pair of shoe clips
- Broaches or pins: Add a pin back for wearable art
- Hair accessories: Attach to clips or headbands for instant vintage flair
- And the of course there is always the option of a decorative pillow — because too many seasonal decorative pillows is not a possibility!
Be sure to Pin this post, so you’ll find it again!

Transforming Plain Pillows with Ric Rac Blooms
Step 1) Design Your Pillow Vision-
Decide on a design plan before attaching your flowers.

For my project, I started with a creamy white pillow cover and added an impressionistic-inspired background of a sunny sky over a meadow of flowers.
PRO TIP: If you are painting your pillow, don’t forget to insert a piece of cardboard to hold the fabric tight and to keep the paint from seeping through to the backside.
Step 2) Consider Your Style–
Your choice of colors and arrangements ca dramatically change the vibe of your finished pillow:
- Cottage Charm: Cluster dusty-hued flowers in one corner of a softly striped pillow
- Mid-Century Modern Bold: Arrange geometric patterns of flowers in vibrant, contrasting colors
- Shabby Chic: Pair pale pink and cream flowers with lace trim accents
- Scandinavian Minimalist: Keep it simple with just one or two statement blooms in muted tones
- Boho Eclectic: Mix different sizes and colors with other textured elements
Step 3) Arrange and Attach-
Decide on placement for your ric rac peonies—random scattering, a border design, or one statement bloom in the corner. Play with the arrangement before committing!

Once you’re happy with the layout, pin each flower in place, then secure with small stitches around the base. Take your time with this step—proper attachment ensures your flowers will survive many pillow fluffings.
If you are needle and thread adverse, you can always fire up the hot glue gun.
PRO TIP: If you’re using glue, slip a piece of wax paper inside the pillow cover first. Nothing ruins a craft high faster than accidentally gluing your pillow cover shut!
Step 4) Add the Finishing Touches-

Want to kick your flowers up a notch? Try these embellishments:
- Intersperse a few small ric rac “buds” among your open blooms
- Start with a small pom pom as the center and build your petal circles around it
- Add felt or ribbon ribbon embroidery leaves between the flowers
- Enhance with a few seed beads or tiny buttons in the flower centers
FINAL TIP: Take a photo of your finished pillow in good light before you give it a permanent home on your entry hall bench.
Nothing boosts crafting confidence like documenting your beautiful work—plus, it makes for perfect social media sharing!
Taking It to the Next Level
- Add stems and leaves cut from green felt or with ribbon embroidery
- Paint a simple background on your pillow first (flowers in a vase? trailing vine?)
- Mix different sizes of ric rac for varied flower textures
- Combine with other embellishments like buttons or tiny pom poms in the centers
Show Off Your Blooms!
I’d love to see your ric rac flower creations! Tag me in your photos or drop them in the comments below. And remember – if yours don’t look exactly like mine, that’s not a fail, that’s called “artistic interpretation”!
Happy crafting, friends! Until next time, keep those scissors sharp and your glue guns hot!
Why This Project Works
What I love about ric rac roses is how they bring together nostalgic materials with contemporary style. They’re unexpected, three-dimensional, and add just the right amount of playful texture to a space without screaming “craft project.”

Plus, they’re incredibly forgiving to make. No measuring, no precision cutting—just twisting and securing. If you can twist a bread tie, you can make these roses!
Have you been overlooking ric rac in your crafting adventures? Give these peony style flowers a try and let me know how it goes in the comments!
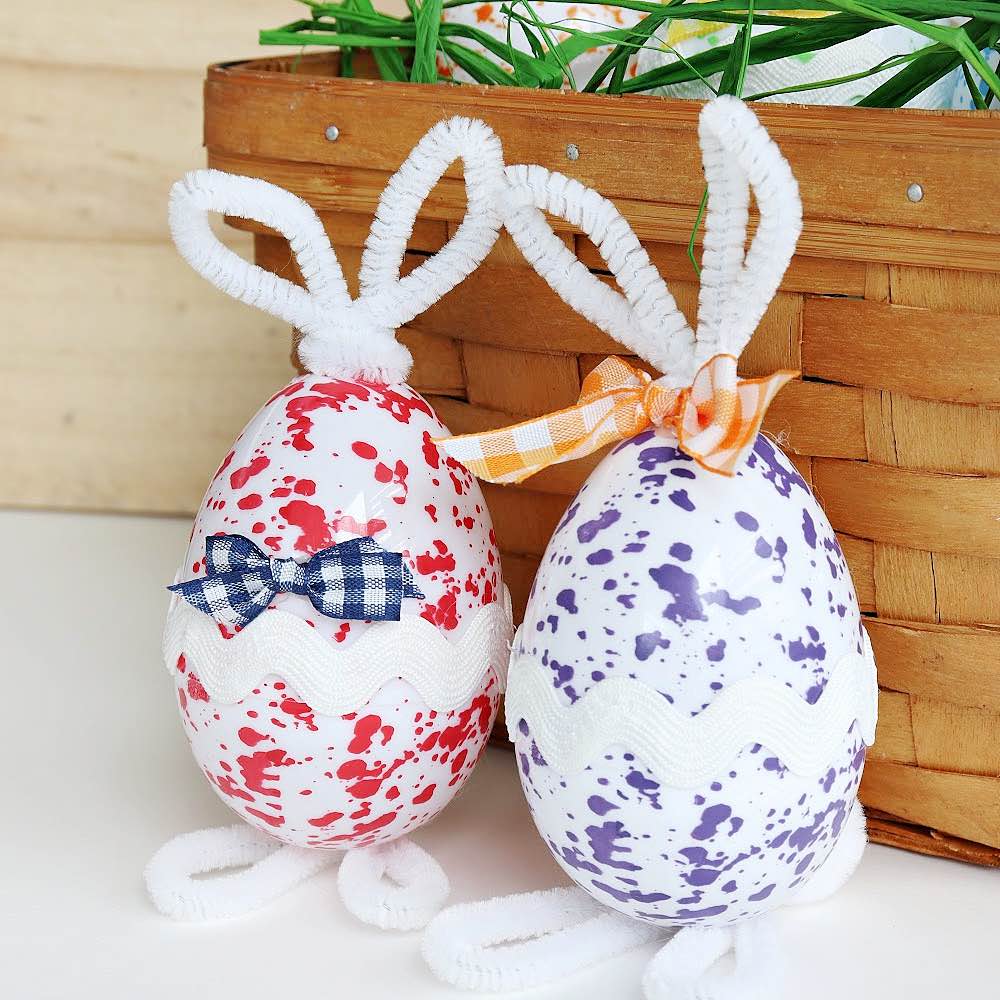
And this is just the start of the ric rac and pom pom possibilities!!! Take a look at what seven of my blogging buddies created.
This is one of the reasons I love crafting so much — we all had the same challenge, yet look at all the different directions we all took.

I’d love to see your creations and hear what other retro materials you’d like to see transformed for modern homes.
Until next time, happy crafting (yes, even you “non-crafty” folks—I saw you eyeing that ric rac)!

Diane, your pillow turned out fabulous! Those rickrack flowers are so adorable, and I’m very impressed with how you painted the pillow cover! Thanks for sharing your creativity with us! I can’t wait to try this sometime!
Now I know how to make ric-rac flowers, and I can’t wait to make some too! Diane, your pillow is absolutely fabulous! A true work of art! Pinning!
This pillow is incredible, Diane! The ric rac flowers are so sweet and you give such clear instructions on how to make them. I love all of the 3-D details that you give to the pillow. I would pay a lot of money to buy this in a high-end boutique! Beautiful, Diane!
Diane
Such a cute idea. I look forward to sharing your creative idea on my Sunday DRA.
Oh Rachel, thanks so very much. That will be fun to see in your DRA — which are always so fun to read!
Diane, I love the flowers and the hand painted pillow. It turned out so beautiful.
Diane, your pillow is fabulous! Your sweet rick rack flowers are the perfect addition to your beautifully painted pillow! Thank you for this wonderful inspiration!
Diane, your rick rack flowers are so sweet! I am going to try this for sure! These are perfect for a cute sweatshirt for Gigi!
Oh my goodness Diane! These are adorable. I love that you painted the pillow too. Such a creative idea.