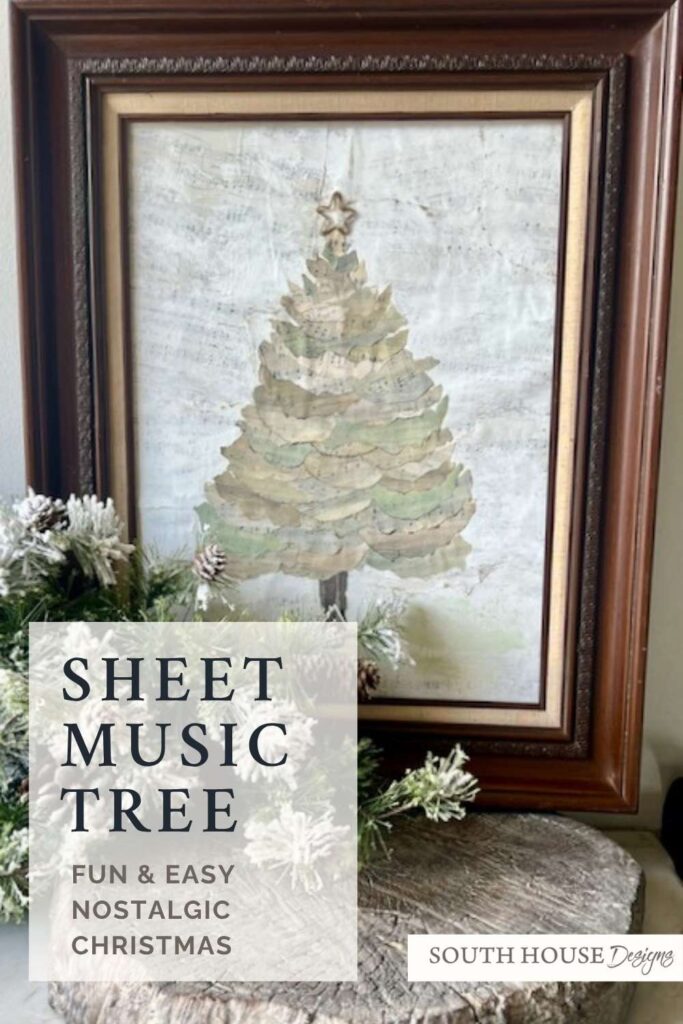
Vintage Sheet Music Meets Wall Art = Results You’ll Love
Sheet music into wall art! Learn to craft a framed tree from old music pages — an easy upcycle that hits all the right notes in your home décor.
November means another Handcrafted Society Challenge — and this month’s theme is Music. That could mean instruments, old CDs, vinyl albums, or sheet music — and as always, each creator interpreted it in her own unique way.
If you’re visiting from one of my Handcrafted Society friends — welcome! I’m so glad you’re here. At South House Designs, I love sharing creative projects that mix beauty and resourcefulness — upcycled décor, clever DIY builds, crafts and seasonal ideas that spark joy (and maybe a laugh or two).
I hope you’ll find something here that inspires you to roll up your sleeves and create. After all, creating and joy are inextricably linked and isn’t that what we all want, more joy in our lives!?!
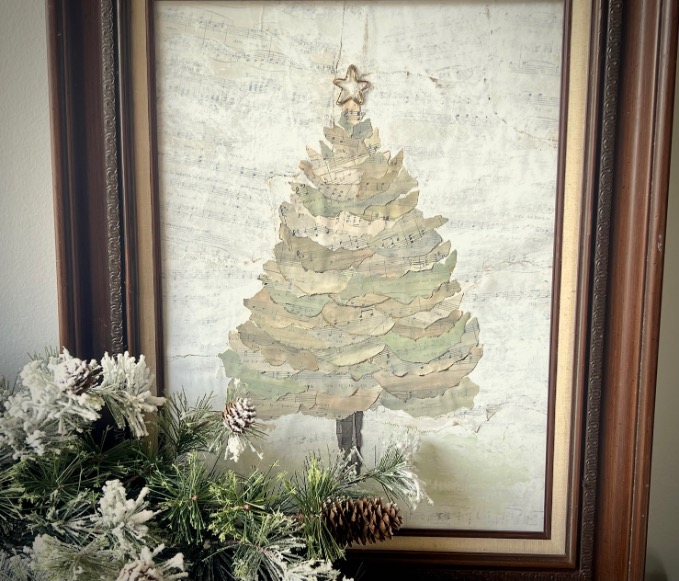
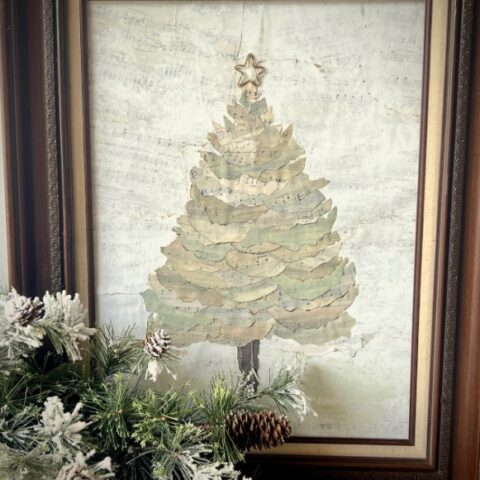
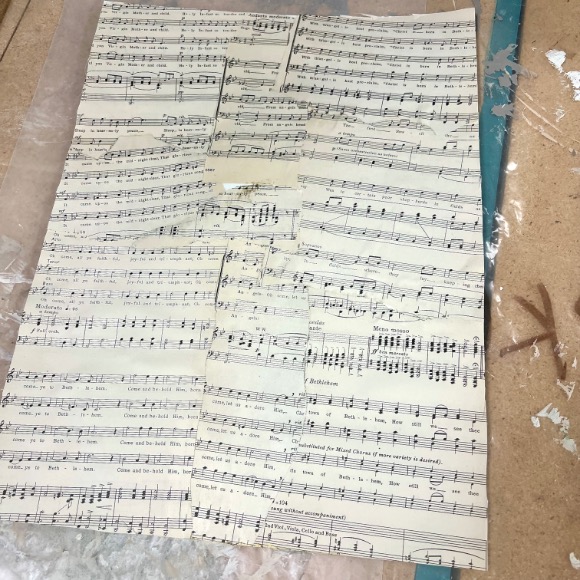
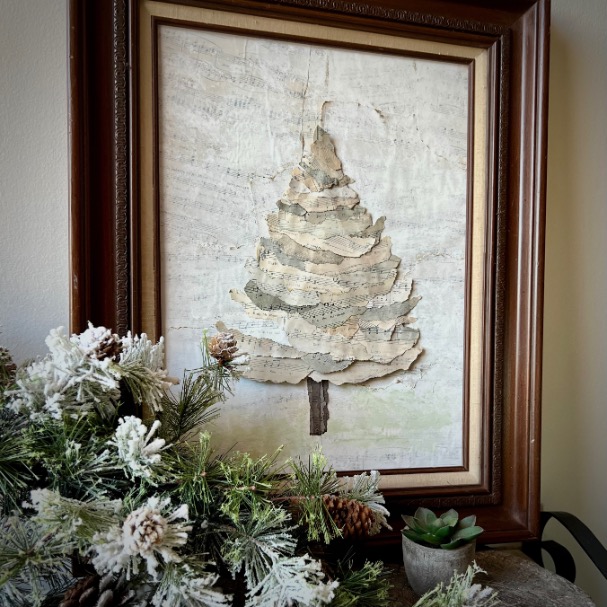
For my take on this month’s Music theme, I went with what makes my heart hum: vintage sheet music. I used pages from an old Christmas choral book, yellowed and soft from time — the perfect dose of nostalgia for the season.
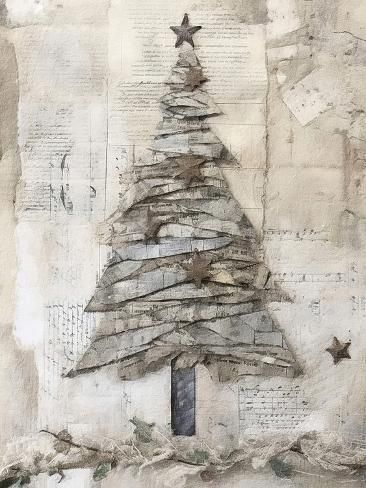
Somewhere recently, I’d stumbled on a simple print of a tree shape made from cut and torn paper. It stuck in my mind, and I couldn’t shake the idea of recreating it as a collage art piece using some vintage Christmas sheet music I’ve been hanging onto for the right project.
I dug through my stash and found a 12 x 16 frame that fit the idea perfectly. It didn’t need paint or updating — just a good cleaning. Its aged finish feels cozy and classic, leaning into that Ralph Lauren-esque Christmas mood that’s stealing my heart this year.
I won’t lie: this project took a few tries. But that’s what makes it fun to share — because every “oops” was just a rehearsal for the finale.
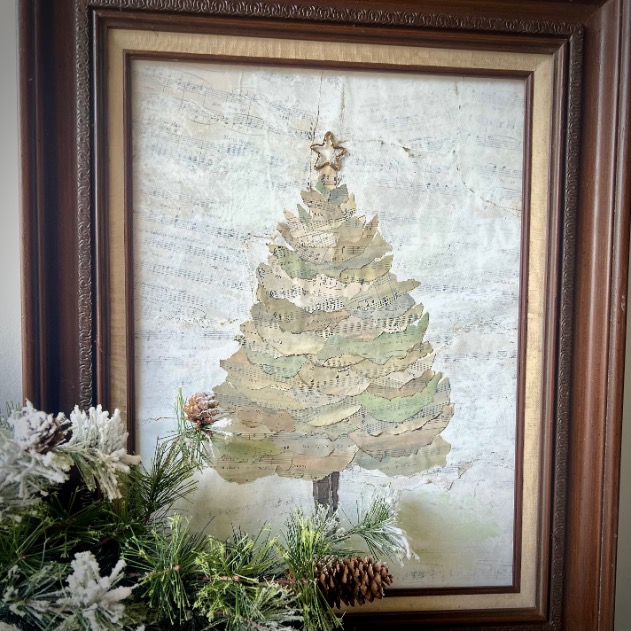

TABLE OF CONTENTS:
The links in this post may include affiliate links, which means if you purchase anything using these links, you pay no extra, but I may receive a small commission that helps keep this blog running. I truly appreciate you using affiliate links whenever possible. Please know that I will never recommend a product I do not believe in!
Quick How-To Card
for you skimmers that are ready to jump right in
Aren’t so confident? Keep scrolling, I’ve got ya!
Vintage Sheet Music Tree Wall Art
Tear, paint, and layer vintage sheet music into a charming tree collage that feels both nostalgic and modern.
Materials
- Vintage sheet music (I used Christmas choral pages)
- 12 x 16 frame and backing board
- Spray Gorilla Glue or favorite adhesive
- Acrylic craft paints: white, ivory, khaki, pewter gray, English ivy green
- Paper towels
- Gold and/or brown ink pad (optional)
- White craft glue
- Thin bronze wire and straight pins (for star)
- Dried flowers or fine branches, white glue, and glitter (optional finish)
Tools
- Artist brushes (large and small round)
- Old "Craft Only" iron
- Palette and small water bowl
Instructions
- Prep the frame – Clean or lightly polish; keep its vintage charm.
- Create the backdrop – Tear sheet music blocks, adhere with spray glue, and softly “dry-towel” white, ivory, and khaki paint for tone.
- Build the trunk – Tear narrow vertical strips, lightly paint, flatten with iron, and glue in place.
- Prepare boughs and branches – Wash sheet music pages with khaki, gray, cream, and soft green; flatten, then tear into branch pieces.
- Make the star – Wrap bronze wire around a pinned star template; adjust and secure.
- Assemble the tree – Layer torn sheet music pieces from bottom to top, overlapping naturally; glue each piece as you go.
- Add finishing touches – Optional: gold or white dried stems, fine glittered branches, or snow-dusted accents.
- Frame and display – Reassemble the frame and show off your music-inspired artwork.
Notes
Keep Scrolling for all the details and my tips.
May I pause for just a moment to ask if you enjoy this project, please consider subscribing so you don’t miss a thing and have full free access to my Resource Library:
Thanks bunches! Now let’s get to the How-to:
Now For Those Step-by-Step Details and Tips
Step 1) Prepare the Frame-
Give your frame a good cleaning and whatever makeover you want. I left mine exactly as it was — a little worn, a little golden — but now clean. It already had that “lived-in” Ralph Lauren-esque feeling I wanted.
If your frame needs it, add hanging hardware now so it’s ready for display later.
Step 2) Create the Backdrop
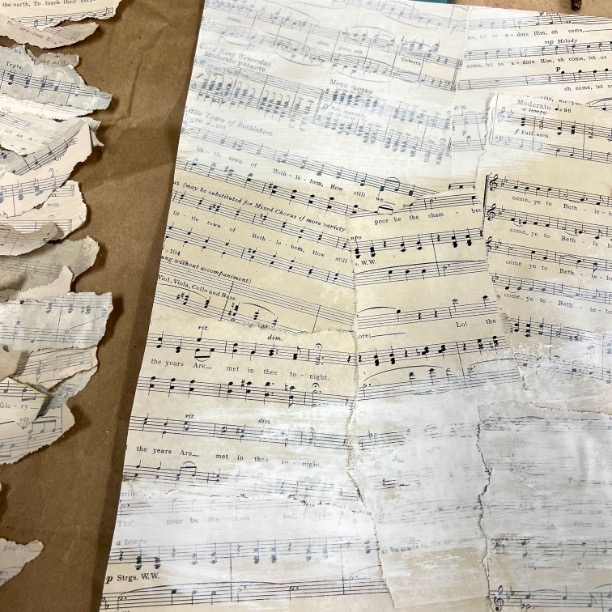
Tear your sheet music into uneven blocks or strips. I wanted the edges to overlap organically, so the background feels like a soft patchwork of melodies.
My first attempt used Mod Podge — and just like so many of my past adventures with it, everything warped and wrinkled. Not the smooth look I wanted. I even tried dry-brushing white and ivory over it, hoping to disguise the ripples. Oops. Still not my vision.
So I started again. On a new backing board, I sprayed the back of each piece of torn sheet music with Gorilla Glue spray and layered them, slightly overlapping. This method dried beautifully — no wrinkles, no bubbles.
To tone down the contrast, and create a more subtle backdrop, I dabbed a paper towel into a mix of white, ivory, and khaki acrylic paints (wiping most off before touching the paper). Then I softly wiped and pounced the towel over the background, letting some areas stay more covered than others.
Think of it as dry-toweling — like dry-brushing, but faster and a little unpredictable in the best way.

Optionally, you can run a gold ink pad lightly along some seams to highlight them just a touch.
Step 3) Build the Tree Trunk-

Tear very thin vertical strips of sheet music — these will mimic bark. Using a dry paper towel again, lightly dab on khaki and gray paint, blending them together for variation. You want texture, not coverage.
Once dry, flatten each strip using your “craft-only” iron on a low, dry setting. I overlapped four strips to create the trunk, brushing glue onto the back of each with a small round artist brush. Then I painted on another very thin layer of glue to the whole trunk and placed it on the backdrop.
Step 4) Prepare the Boughs and Branches-
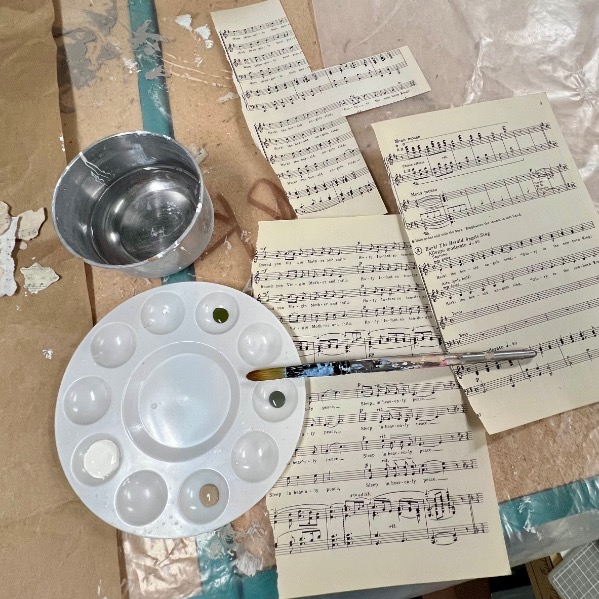
Lay three or four sheets of your choral music on a protected work surface. Using your brush, blend thin washes of khaki, pewter gray, linen cream, and a tiny bit of English ivy green across the pages. Keep a bowl of water nearby — it helps soften the brush when the paint feels too dry.
The goal here isn’t to hide the notes and text, but to calm the contrast and create gentle shifts of tone, like the natural variation you see in real branches. Once the pages are painted, set them aside to dry completely. Then flatten them with your iron just as you did with the trunk pieces.
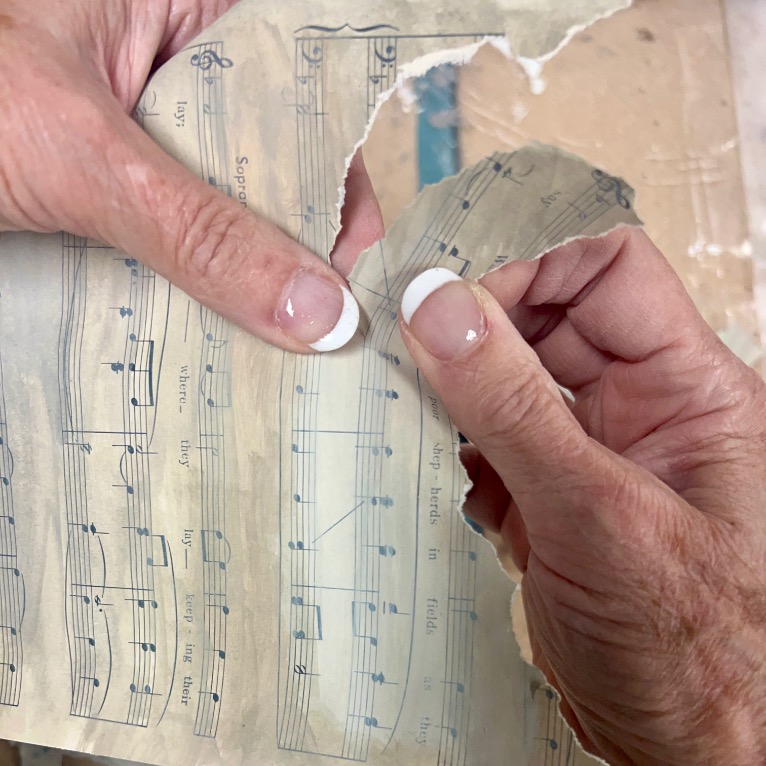
Now tear these painted pages into the boughs and branches of your tree.
PRO TIP: Notice the direction of the tearing — one way produces an ivory edge, the other a painted edge. Be consistent throughout.
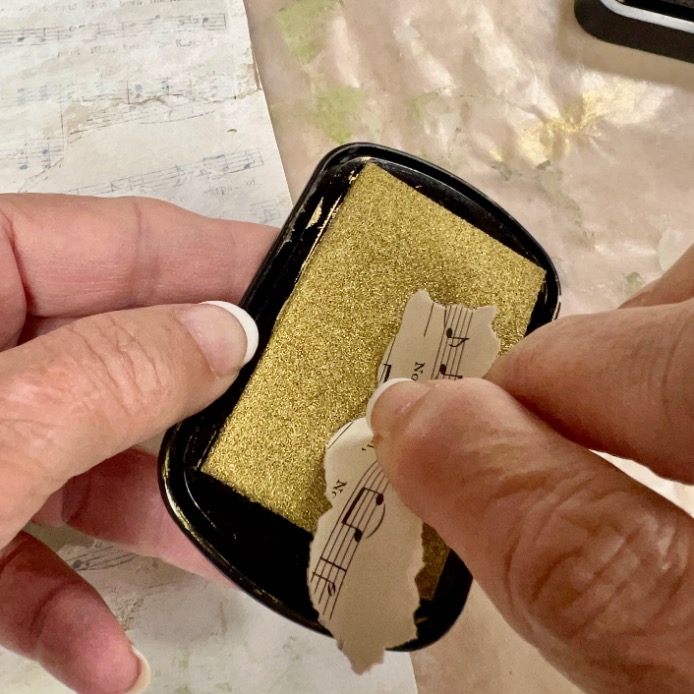
Optionally, you can highlight some of those torn edges by running an ink pad across them. I alternated between brown and gold accents, adding just where I thought a touch of contrast or warmth was needed.
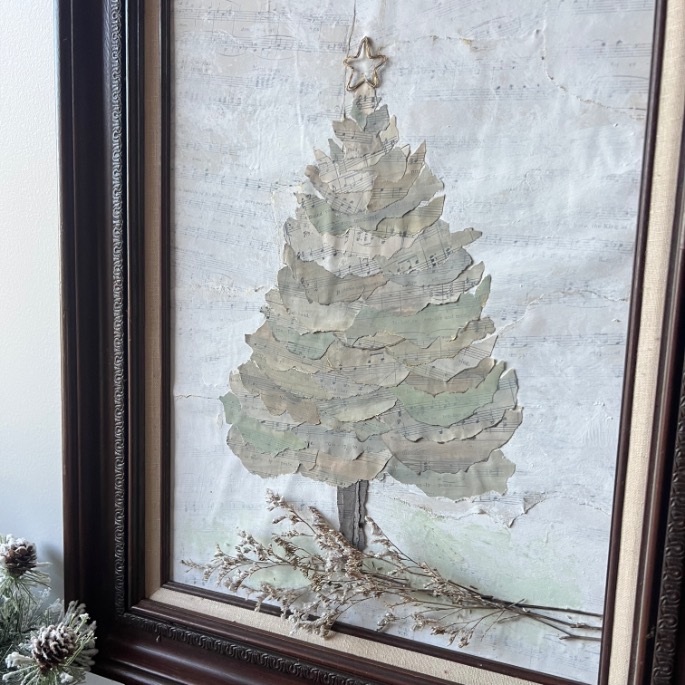
Step 5) Make the Star Tree Topper-
Every tree deserves a bit of magic. I made mine from a length of thin bronze wire I already had (about 24–26 gauge).

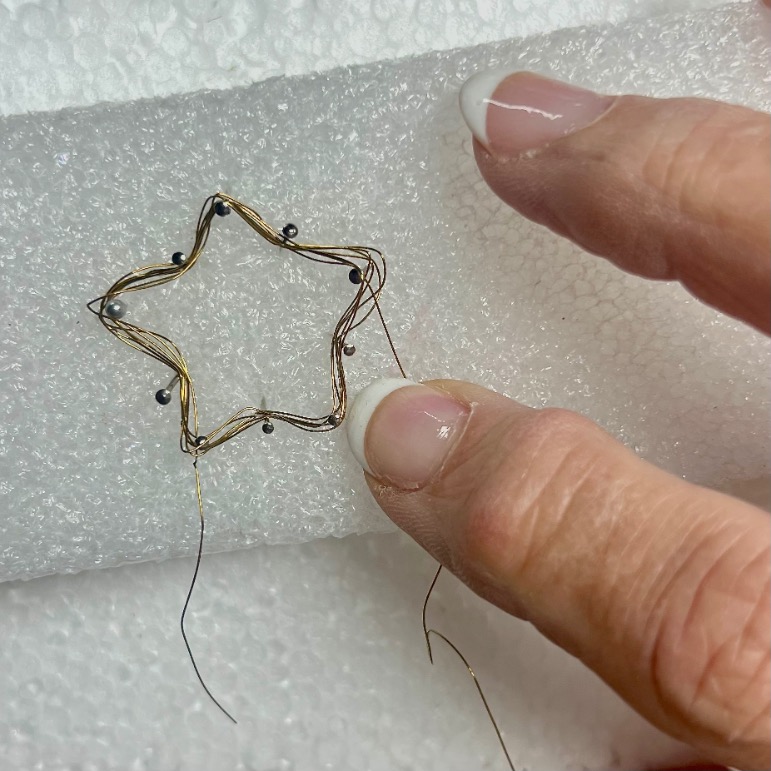
I placed a star I liked on top of a piece of foam and added straight pins at each point and valley. Then I wrapped the wire around the pins five times and secured the ends together at the start and finish.
PRO TIP: Print out a star in your chosen size, place it on foam, pin through the points, and wrap your wire around the pattern for a perfect shape every time.
With a little adjusting and squeezing, I had a delicate star that will bring just the right shimmer atop the tree.
Step 6) Assemble the Tree-
Begin by laying out the bottom two or three rows of torn sheet music pieces. Move them around until the spacing and curve feel balanced.

Once you like the look, brush a thin layer of white glue on the back of each piece and press it into place. Continue layering upward, narrowing the shape as you go to create your tree.
True confession: the first background had to be redone, well so did my first tree!!!
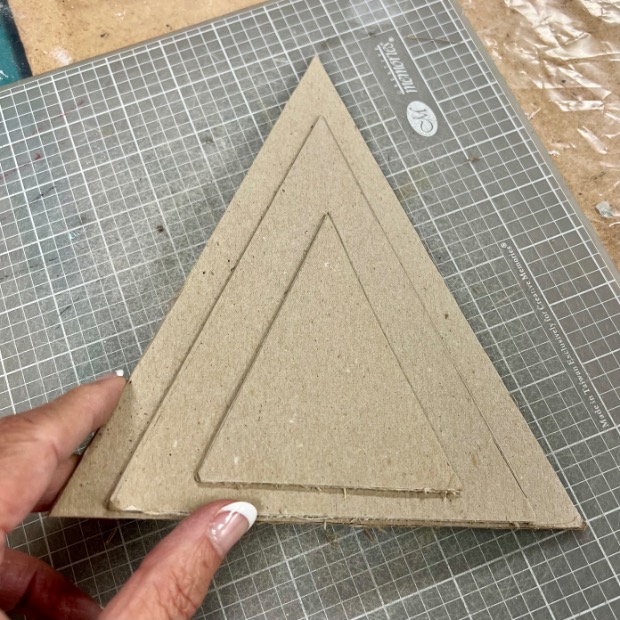
I wanted to give my tree some extra depth, so I built up some “structure” hoping for a slightly rounded shape.
It looked great flat on the table, but when I hung it up, the light revealed all those triangle outlines underneath. Lesson learned — sometimes flat really is better.
It looked so much better without the triangles shapes underneath!
Step 7) Add Finishing Touches-
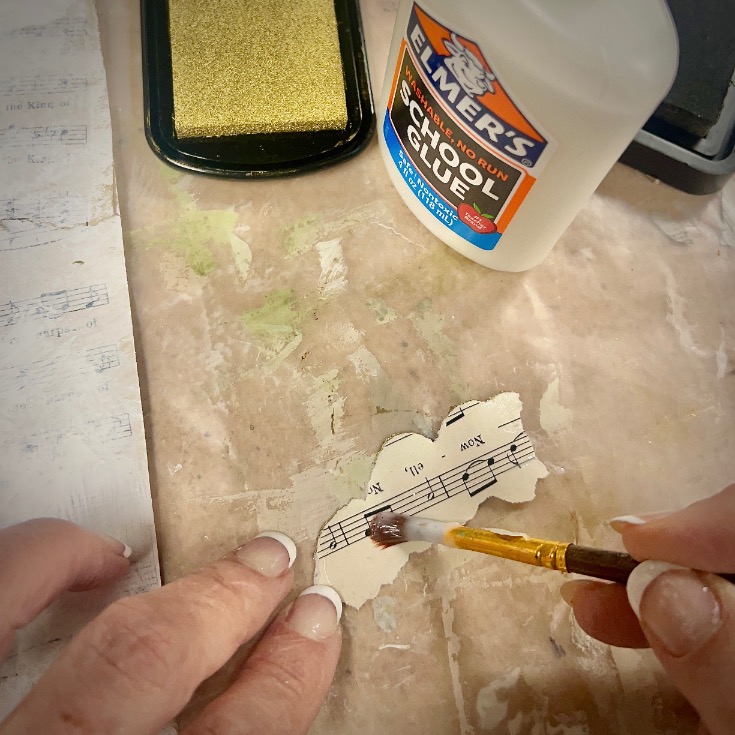
The inspiration piece I saw had some foliage or snow elements near the bottom. I experimented, and everything I tried looked too big or heavy until I remembered a few dried flowers I’d saved.
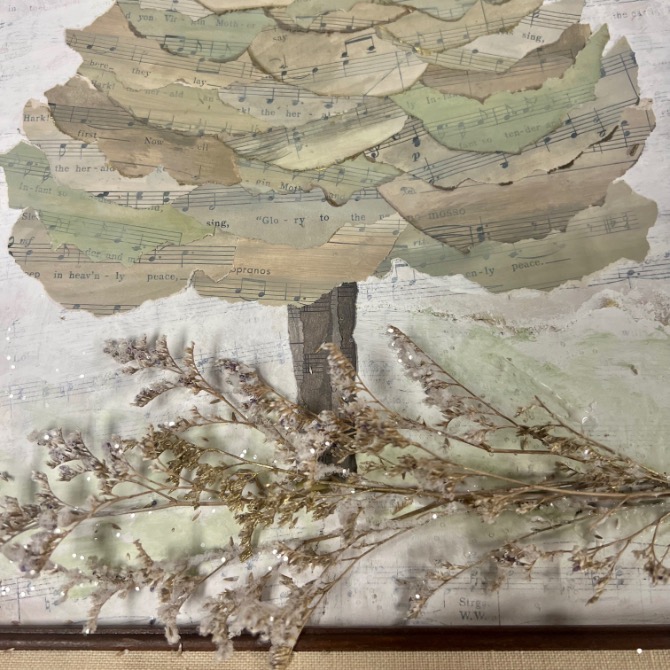
I sprayed some gold, some white, and while they were still tacky, dipped them into clear glitter. When that didn’t hold well enough, I brushed on a bit of white glue and re-dipped. Perfect — a gentle sparkle, like frosted branches around the base of the tree.
You can tuck in similar dried bits or fine branches dusted with glitter if you want that extra texture.
Step 8) Frame and Display-
Once everything’s dry, carefully place the artwork back into the frame and secure the backing. Hang it up or stand it on a shelf — over a piano, on a mantel, or in a hallway where it can catch the light.
This simple framed tree carries all the warmth of music and memory, with just enough shimmer to feel special.
Wrap Up
And there you have it — my Vintage Sheet Music Tree for this month’s Handcrafted Society Challenge.
It took a couple of do-overs, a few lessons learned, and one trusty “craft-only” iron, but I’m thrilled with how it turned out. Creativity isn’t always perfect on the first try — and that’s half the fun.
Now it’s your turn to see what the other talented Handcrafted Society gals dreamed up for our Music theme. From instruments to records to more sheet-music magic, you’ll find plenty of inspiration waiting for you.
But before you hop over, please PIN This (it helps me AND you):
In case you aren’t into making one, I found this great option on Etsy available in multiple sizes and multiple frame options:
Now the other gals are waiting for you! Think of it as your own personal serenade:


So tell me, when you make your sheet music tree, will you add the branches on the bottom, or keep it more streamlined?
Hope this is a great kick start for your holiday decorating.

Diane – Your tree is beautiful, and I love how you can customize the colors to fit any holiday or winter decor. Thanks for always sharing the most creative projects.
Thanks Lynn! And I’m thinking with the kids. Next snow day –> a family forest.
Love the collage tree you made with the sheet music. This piece of art is perfect for the holidays and can stay up through the winter months. A great low-cost project to create. Love it, Diane.
Thanks Tammy! You got it — Christmas inspired, but not Christmas restricted. At least that’s what I’m planing.
Diane, your sheet music collage tree is not only beautiful, but looks really fun to make! I love how you created the background, plus the little trick to give the tree some dimension, Brilliant! What a wonderful piece of holiday artwork to enjoy before and after the Christmas holiday!
Oodles of thanks Michelle! Yes, fun. I think it would be cool to do with the kids — maybe even a family forest!
This looks like something that would have been picked up in Europe, Diane. It’s so beautiful! I love how you made the paper feel perfectly patinaed yet also preserved that rustic meets refined element that RL is known for. It’s fabulous and I can’t wait to see your vision come to life! Hugs, CoCo
Thanks CoCo! Yes, my Ralph Lauren obsession is front and center again this year.
What can I say, I’m a traditionalist with a rebel heart.
Your perseverance paid off, my friend, because your tree turned out gorgeous! I adore the dimension from the subtle colors you used, and that star is genius! It’s so pretty and will be fabulous to enjoy all the way through winter!
Wowza Diane, this is magnificent. The detail is honestly spectacular.
I am glad to see I am not the only one that struggled with the ripples of Mod Podge,
I too ended up using spray glue and then used the spray Mod Podge for the sealant.
You are one creative gal! Thanks for being my trusty partner in this adventure.
Strugglers Unite! I love being your trusty partner!
Diane – I love the subtle variations of colors in your music tree. It’s so beautiful and is such a wonderful nod to nature. I like that you added branches on the bottom. Wishing you a wonderful holiday season!