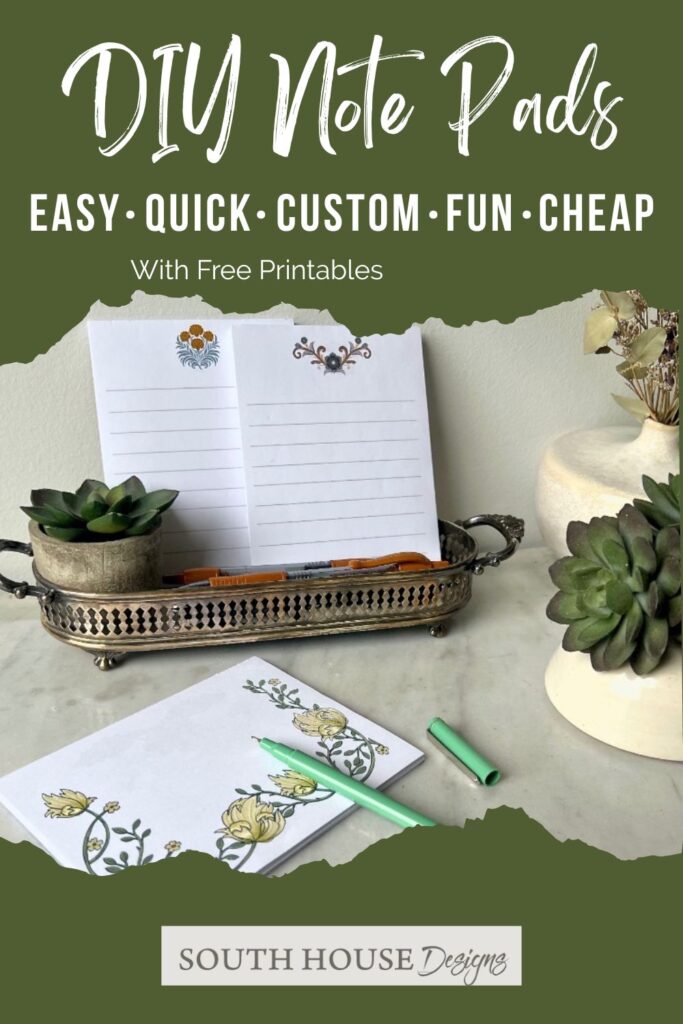
Make These Ridiculously Easy And Cute Note Pads — Free Printables
Turn printer paper into adorable custom notepads with this crazy easy DIY tutorial + Free printables! Gifts, party favors, or a self treat.
Friends, I’ve had some real struggles last month! First, I couldn’t find a scrap of paper to write down that amazing recipe my neighbor shouted over the fence. And then I needed a couple of cute little gifts for some girlfriends — nothing big, but something personal, a bit practical and very budget-friendly.
Well, I came up with a 2-for-1 solution.
Don’t we all love a good BOGO, or in this case MOGO?!?!
So, pull up your crafting pants (yes, mine have glue stains and clay embedded in them, don’t judge), because we’re about to solve these problems forever!
These DIY notepads are so easy to make that our dog could probably do it if he wasn’t so busy squeezing 17 naps into one day.
Cute? Check.
Practical? Check.
Personal? Check. Cheap . . umm, Frugal? Check.
Quick and Easy? You bet!!!
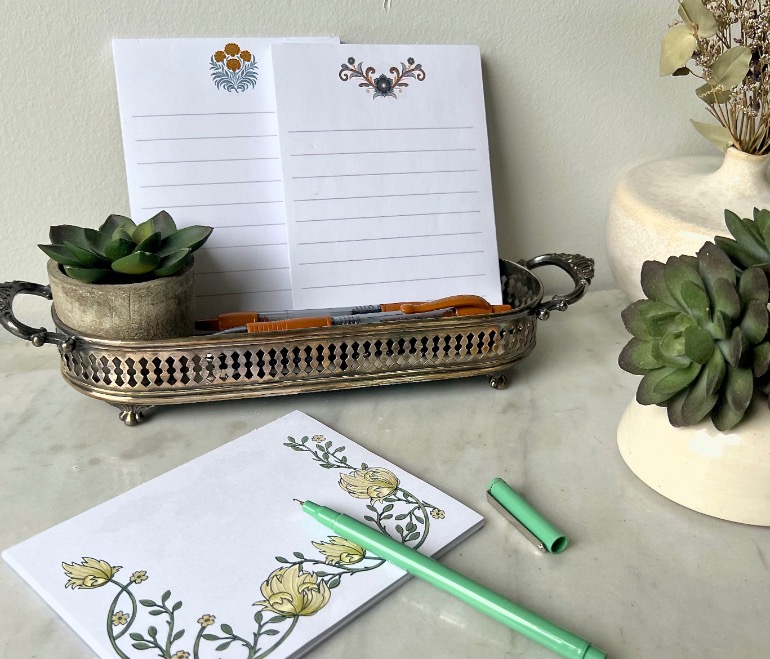
TABLE OF CONTENTS:
The links in this post may include affiliate links, which means if you purchase anything using these links, you pay no extra, but I may receive a small commission that helps keep this blog running. I truly appreciate you using affiliate links whenever possible. Please know that I will never recommend a product I do not believe in!

Before we dive into all the fun details, here’s the super-quick overview
for my crafting pros looking for the basic idea:

How To Make Custom Memo Pads or Note Pads
The perfect gift doesn't exi— OH WAIT. These DIY notepads are cute, practical, customizable, AND cost less than $2 to make!
Materials
- Free Printable
- Printer paper
- Chipboard or cardboard for backing
- Padding compound adhesive
Tools
- Paper cutter, Rotary cutter and mat, or scissors
- Binder clips
- Brush for applying adhesive
- Large craft sticks, paint stirs, 12-inch rulers, or long chipboard scraps
Instructions
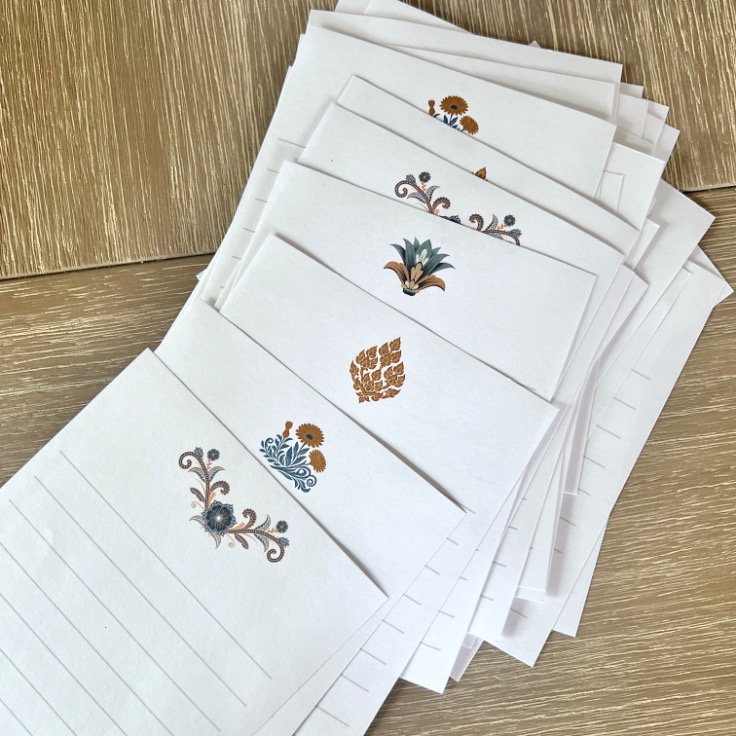
Step 1) Download (or design) and print your favorite designs
Step 2) Trim paper and a piece of chipboard or cardboard to size
Step 3) Stack with top edges perfectly aligned
Step 4) With a craft stick or substitute on the front and back, add a binder clip on each end
Step 5) Apply paddig adhesive to the top edge
Step 6) Add more binder clips across the middle
Step 7) Let dry
Repeat steps 5, 6, 7 for a second coat of adhesive
Notes
Keep Scrolling for additional details and tips for these steps.
Now for the details, tips and tricks:
Let’s Make Some Ridiculously Cute Notepads!
Alright crafting besties, gather ’round! We’re about to transform boring paper into something that’ll make your Type-A friend actually squeal with delight. (You know the one—she color-codes her spice rack and has a label maker named “Bertha.”)
Materials and Supplies-
- Your favorite printable designs (free in my Resource Library because I love you like that!)
- Printer paper or cardstock (those random sheets you’ve been hoarding “just in case” can finally fulfill their destiny)
- Chipboard or cardboard for backing (empty wine box? Cereal box? Who’s judging? Not me!)
- Paper cutter, rotary cutter, or scissors (if your scissors can’t cut paper anymore because someone—not naming names, CHILDREN—used them on slime, now’s the time to upgrade)
- Binder clips (the unsung heroes of the crafting world)
- Craft sticks or paint stirrers (yes, those free ones from the hardware store—I won’t tell if you grab extras)
- Padding compound adhesive (sounds fancy but it’s just special glue for making paper pads, available online)
- Small paintbrush (not your good one, we’re not monsters)
- Optionals: Thin magnetic strip, ink pad for distressing, decorative elements (go wild, this is YOUR show)
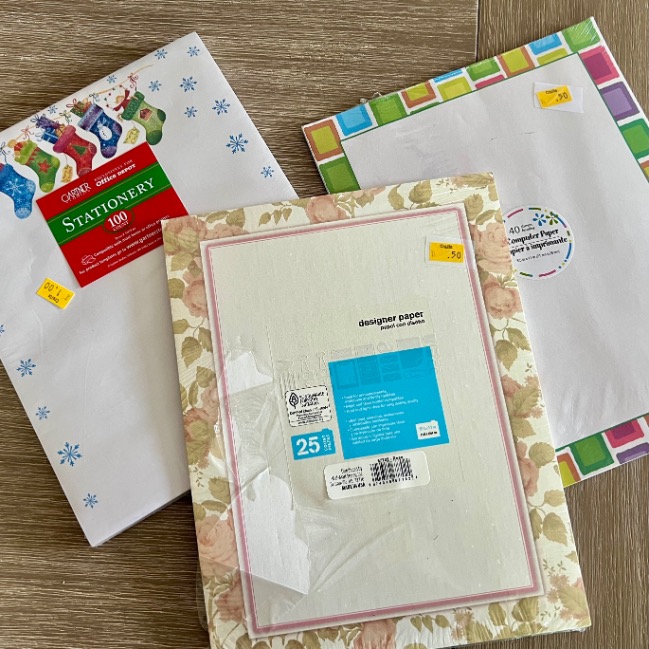
THRIFTING TIP: Keep an eye out for packages of printed paper. I found these yesterday in the Craft section of my favorite thrift store. Scroll to see how they turned out.
PAPER CUTTER NOTES: If this is going to be your excuse to finally treat yourself to a paper cutter, I strongly suggest only getting one with a rotary blade. I highly recommend this one from Fiskars that I have. It cuts by a rotary blade for a cleaner cut; not by a sharp tip that can tend toward shredding your paper. If you can splurge a bit, I’d even upgrade to this one that is rotary and has a larger surface.
Yes, you can use a rotary cutter on a mat, but it will take you longer and not be as accurate.
And technically, scissors will work if you want to embrace the imperfect — sometimes wabi sabi is best. No judgement here!
Step-by-Step Tutorial:
Step 1) Grab Your Printables and Get Everything Printed–
If you’re a subscriber (and if you’re not, what are you waiting for? An engraved invitation? HERE IT IS!), one of the bonuses you have is access to my Free Resource Library that includes all these gorgeous files you see.
Access the library and download whatever makes your crafty heart sing.
HINT: The library password appears in the library link in every email I send.
Print them on your home printer or you can send them to Staple, Office Max and most shipping stores to have them printed. No judgment if you pretend to be “picking up important business documents” while collecting your unicorn notepad pages.
PRO TIP: If you’re making these as gifts, consider personalizing with the recipient’s name or favorite colors!
Nothing says “I care enough to spend 10 extra seconds on this” like adding someone’s name. It’s the difference between “Oh, thanks” and “OMG YOU MADE THIS FOR ME?!?”
Step 2) Cut Everything to Size-

Cut the pages and a piece of chipboard or cardboard to size.
Using a paper cutter is the fastest and most accurate way. Second choice would be to use a rotary cutter and mat. Of course, you can use scissors if you must.
PRO TIP: If you had them printed at an Office Supply or Shipping Store, they have large paper cutters you can use to cut them to size.
My designs are mostly 4.25 x 5.5-inches, yielding four pages from every sheet. Or 3.5 X 8.5-inches, yielding three pages for every sheet.
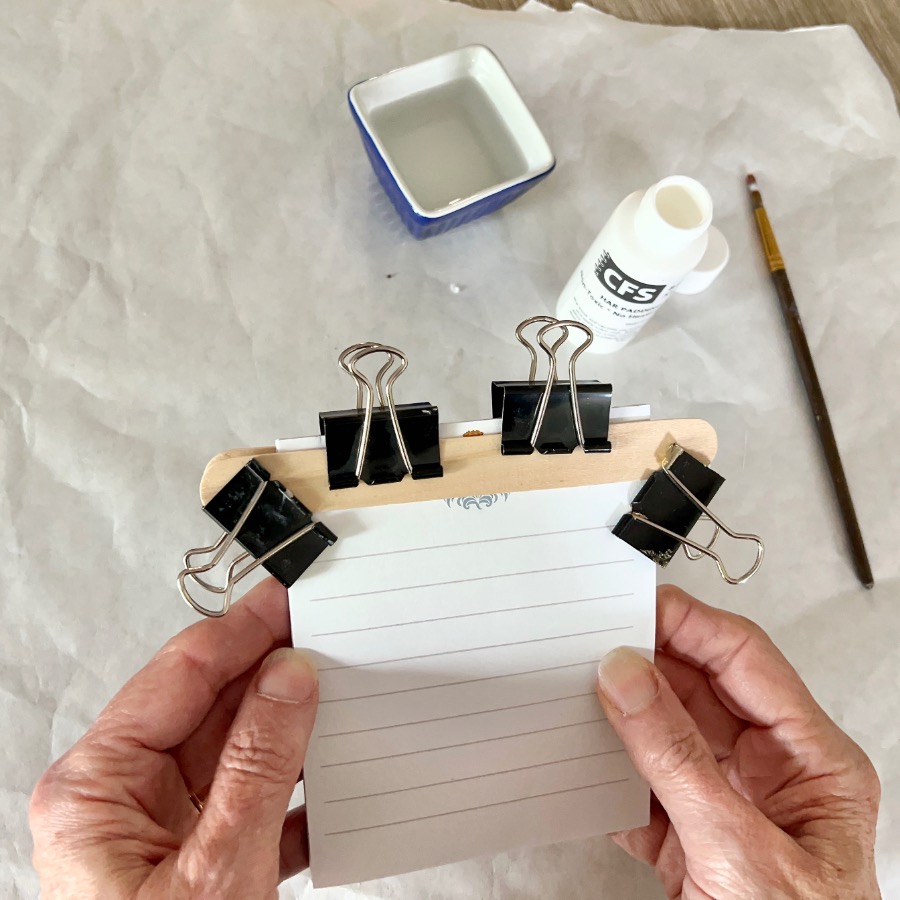
Step 3) Stack and Align-
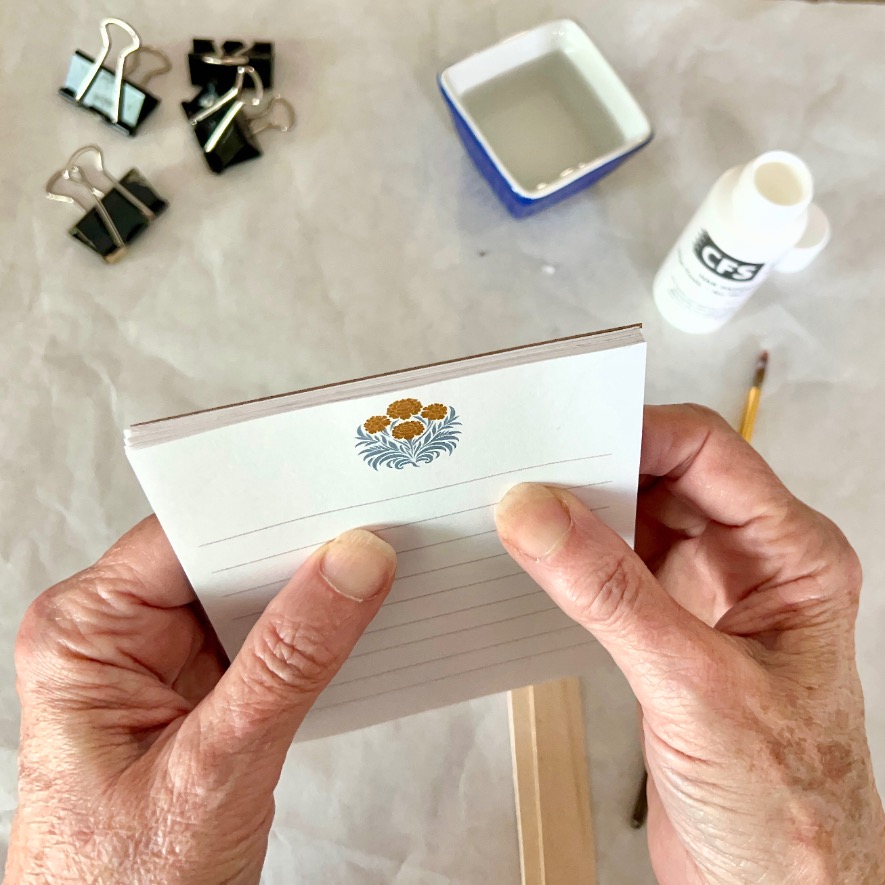
Stack your sheets and your chipboard backer with the top edges perfectly aligned.
Add long craft sticks, paint stirrers, extra cardboard, or even two rulers along the top on the front and back.
Pro Tip: Take your time with this step! The neater your stack, the more professional your finished notepad will look.
Step 4) Secure Your Stack-

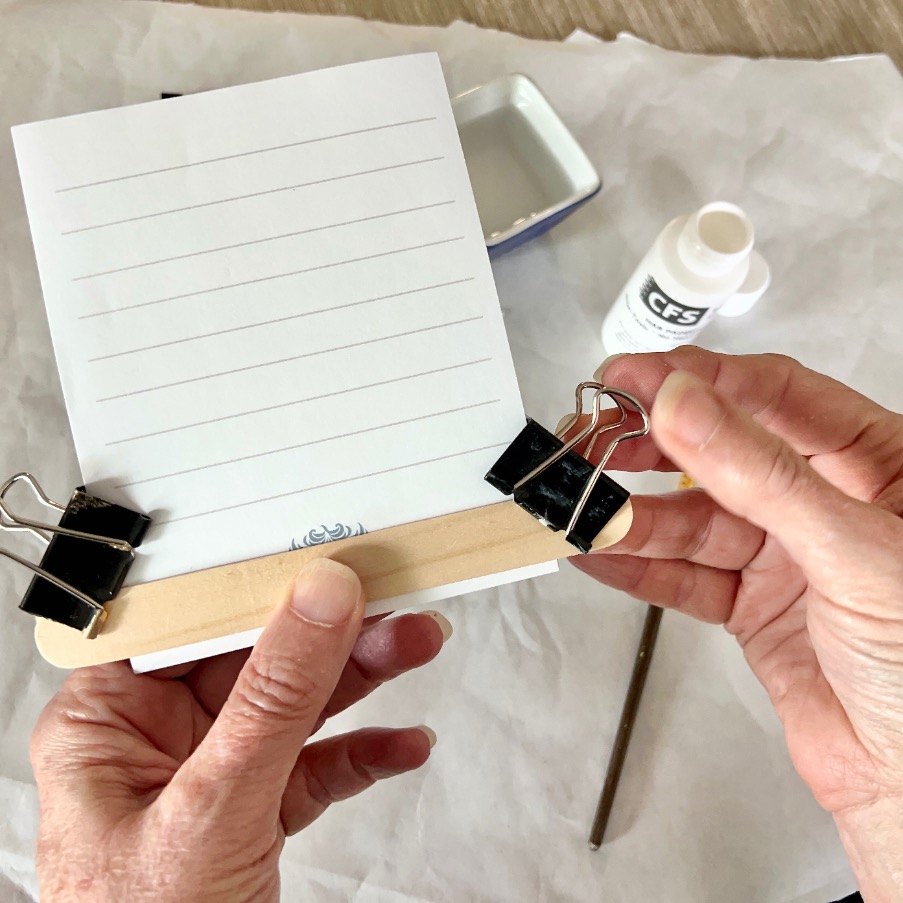
Place binder clips on the two outer edges to hold it all tightly together. This is like giving your notepad a firm hug so it doesn’t wiggle around during the next step.
PRO TIP: Tempting, but don’t clip without the craft stick or substitute between the clips and the paper. Clips alone will leave marks and lacks consistency!!!
Step 5) Apply the Padding Adhesive-
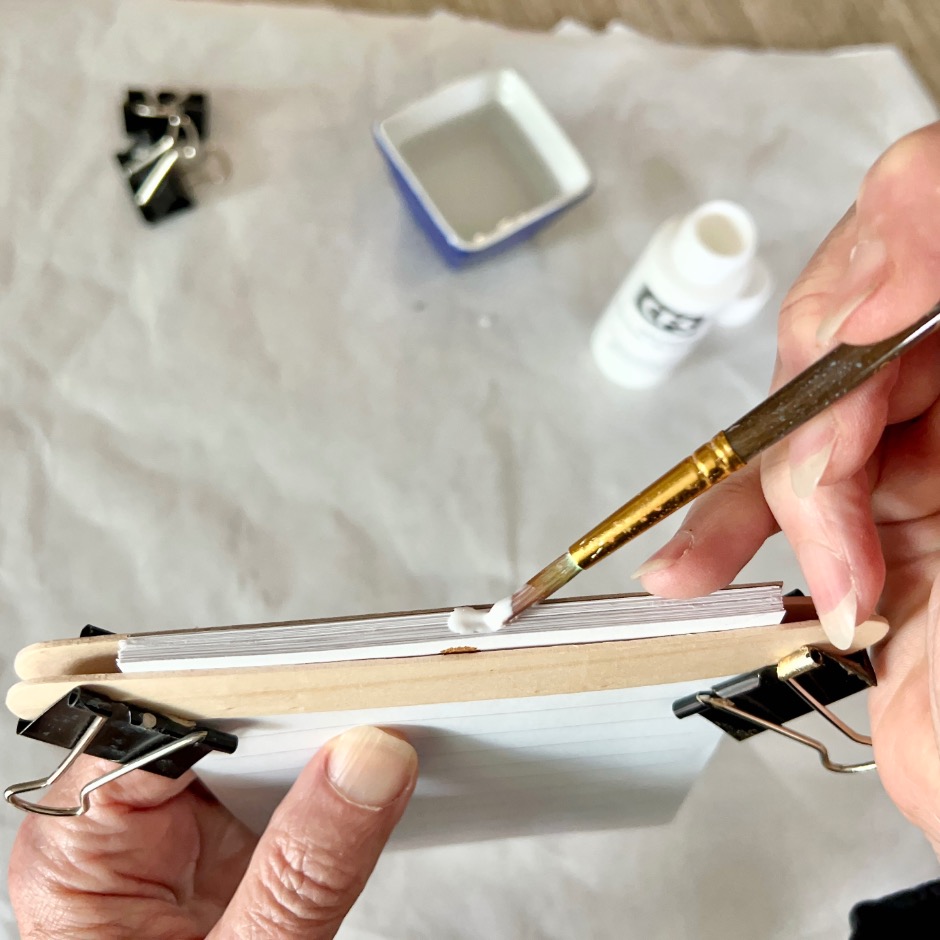
Working from the center, apply the padding adhesive all along the top edge with an artist paintbrush. Make sure it is fully covered.

Now add more clips between those two while the adhesive dries — about 15 minutes.
Want to take your notepads from “Oh, that’s nice” to “OMG WHERE DID YOU GET THAT?!”
BONUS FUN TIP: Here’s my secret weapon: The padding adhesive is naturally white, but you can transform it by adding a drop or two of acrylic paint to tint it ANY color you want!
Match your bestie’s bedroom colors, coordinate with party themes, or just go with your favorite shade.
2nd BONUS FUN TIP: And for those of us who believe glitter is a lifestyle choice, not just a craft supply? Yes, you can add fine glitter to the adhesive too!
Nothing says “I made this with love” like a notepad that leaves a trail of sparkles wherever it goes. You’re welcome. 💁♀️✨
Step 6) Let It Dry-
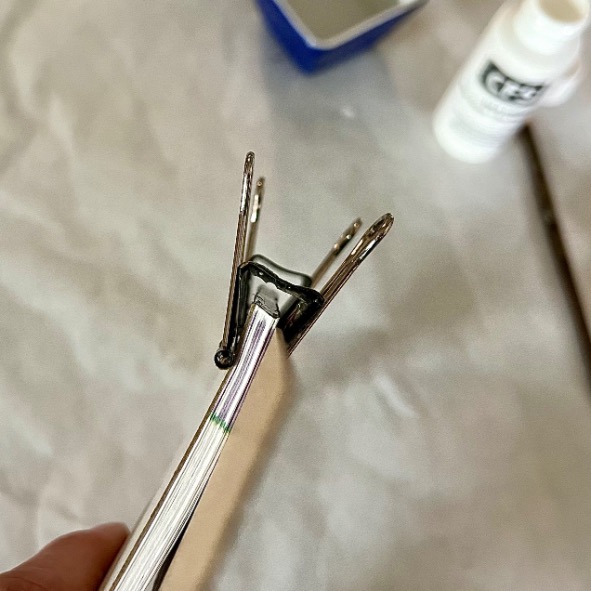
This is what your binder clips should look like. Nothing touching where the adhesive is.
Let dry completely.
Remove the center binder clips and add a second layer. Place the clips back in service and then let it dry completely again.
Step 7) Optional Extra Touch-

Add a thin magnetic strip to the back so your notepad can live on the refrigerator!
Please consider pinning this before you forget and then you can’t find it when you next need it — I know, been there, done that:
Make It Your Own: Creative Variations
The Rustic Charm Notepad–

Consider hand tearing the bottom edge of the pages as I did with the lace memo pad. And then I even added a bit of distressing to the top edges with an ink pad.


Once the pages are all printed.
1) Stack four or five full sheets and using the paper cutter make a clip at the halfway point on both of the short edges.
2) Working with one page at a time, line those clip marks along the edge of a table or counter and tear along the table edge.


3) Distress those tor edges more by running them lightly across an ink pad. And you thought your scrapbooking days were over.
4) Now cut them in half at the 4.25-inch mark.
5) Stack and proceed with your tablet or memo pad.
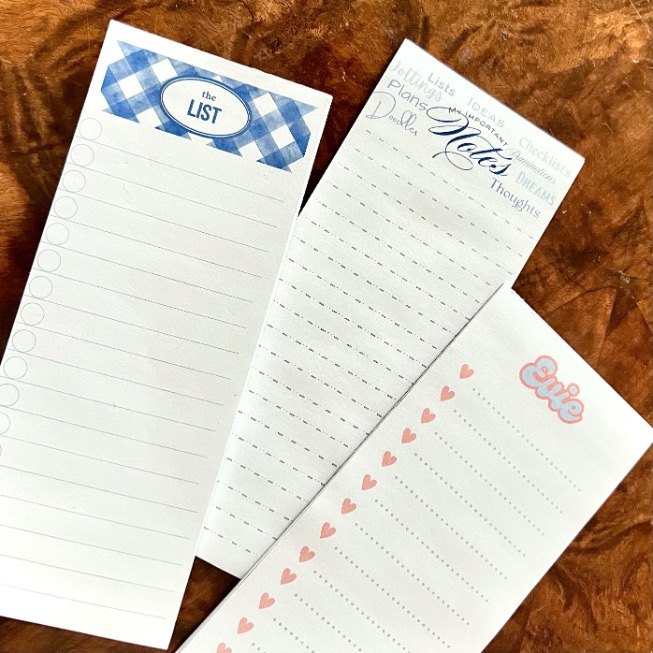
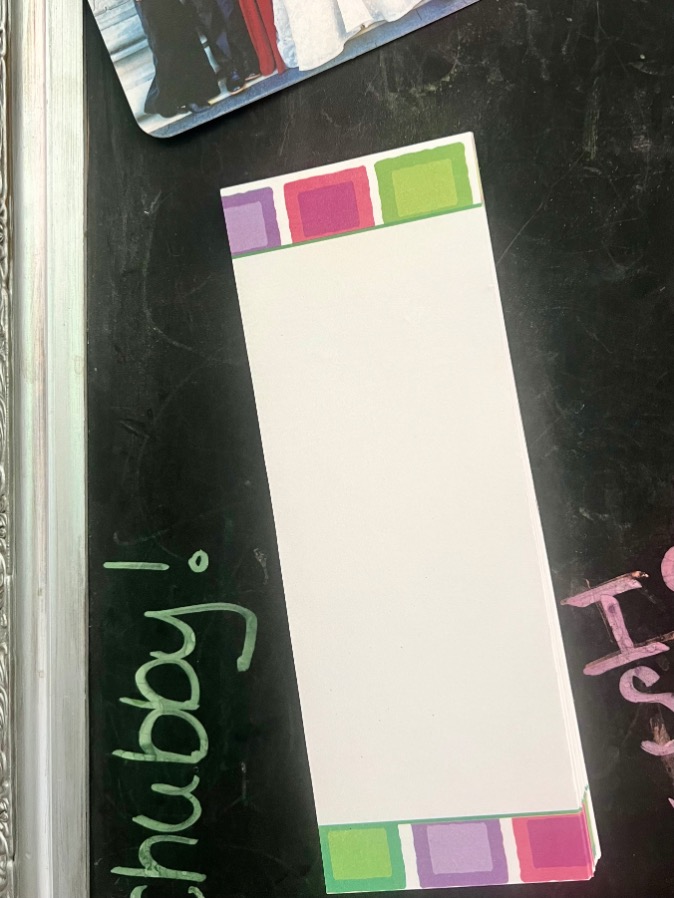
The Pattern Mixer–

Combine many different decorative pages to your pad as I did with the “Block Print” pad.
There are eight different patterns. You can make eight notepads each with one pattern, or two notepads each with four patterns (like I did), or one large pad with all eight patterns — like a Block Print Shuffle!
Clipped Corners-

For my watercolor clouds pad, I alternated four color ways of the same design. Looked really cool as is.


But then I decided to clip the corners at varying distances to create a rainbow look .
The Eco-Friendly Option–
It can be very fun and kitschy as well as very earth-friendly to make a notepad of all scrap paper you collect around the house. Just cut everything to one size, bundle the pages and glue them up, and you are set! And in this case, use a cereal box as your backer board!
PRO TIP: Kids’ artwork makes for especially memorable scrap paper notepads – perfect for grandparent or aunt and uncle gifts!
Thrifty Fun Finds-
Remember the three sets of printed paper I stumbled onto at my favorite thrift store?
The color block one, I thought would make great notes to leave a middle schooler who has to get ready for the day after you’ve already left for work. So for these, I kept the tablets large, cutting the pages just in half. I added “Let’s Make Today Amazing!” on both halves. It would be a great place to leave encouraging notes and reminders to help them stay on top of things.

This paper was thinner, hence the top edge rippled a bit from the moisture in the adhesive. I wouldn’t give it as a gift. But for .50, it made great tablets for our family command center. I also cut the remaining pages in 3 x 8.5-inch for a long, thin tablet for all kinds of list making.
This one also received a magnet on the back and hangs in the family Command Center — Yes, even empty nesters still need a Command Center.
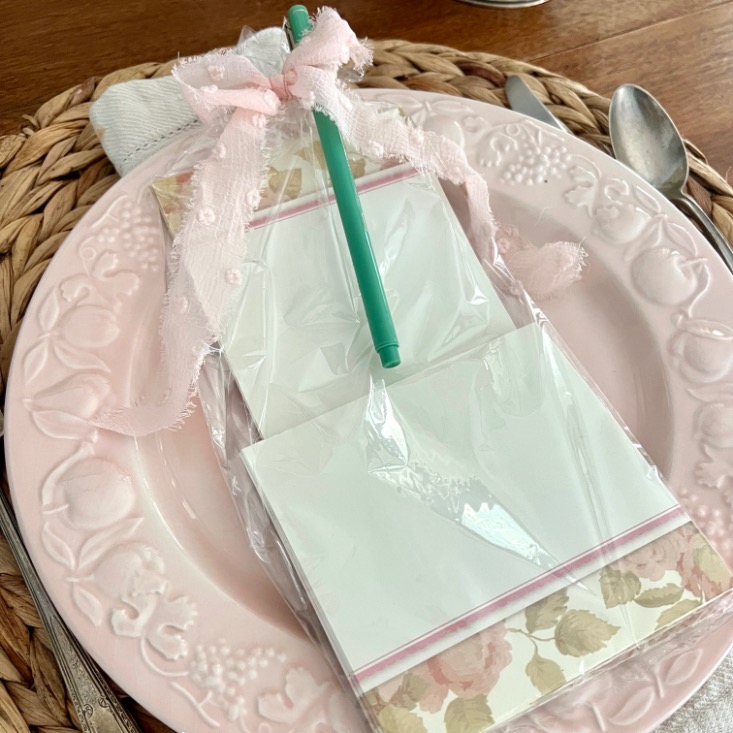
The rose-bordered paper became a gift of a long list tablet and a memo pad along with a pretty pen that writes so smoothly and in a lovely coordinating green!
The two pads in a cellophane bag tied with a strip of chiffon makes a lovely party favor or Galetine’s Day gift.
And the third set — the Christmas letter paper? I’m just going to use the blue snowflakes around the edges as bands on several pads. I may include them with cookies for the neighbors. Or each of the kids may find a pad in their stockings. Stick around and find out.
In fact, there’s no better time to become a subscriber if you haven’t already. Plus you’ll have access to all the notepads I’ve shown here, plus a few more:
Many thanks! Now back to our memo pads:
Wrapping It Up
Let’s be real, these notepads are basically a crafting mic drop. They’re the perfect balance of “I totally made this” and “it actually looks professional enough that people won’t immediately recognize it as homemade.” WIN!
These DIY notepads are perfect for:
- Last-minute hostess gifts
- Party favors everyone will actually use
- Teacher appreciation presents (because they deserve better than another mug, y’all)
- Galentines – Let your ladies know they are The Best!!!
- Office Secret Santa exchanges (finally, something your coworker can’t regift!)
- Just because “I was thinking of you” surprises
You can whip up a batch of these in an afternoon and have thoughtful, personalized gifts ready for the next several months. It’s like your own personal gift bank! Future You will high-five Present You for being so darn smart.
Have you made your own notepads before? What designs are you excited to try? Drop a comment below and show off your creations! I promise to ooh and aah appropriately and not be jealous if yours turn out better than mine (okay, maybe a little jealous).
FAQ:
Q: What if I don’t have padding compound? A: Many will tell you to substitute white glue. I’m here telling you they are NOT the same! I would not want to gift a pad made with white glue. That 2-oz bottle of padding adhesive is just $7 and arrives tomorrow from Amazon. Order it today and have it on hand, for when the need for a gift strikes. That 2-oz bottle will cover a 120 square inches — that would make about 200 of my size note pads!!!
Q: How many sheets should I include in each pad? A: 25-50 sheets make a nice notepad. For shopping lists or daily to-dos, I like to go with around 30 sheets.
Q: Can I use cardstock instead of regular paper? A: Maybe! Cardstock makes sturdier notepads. But I cannot get cardstock to feed through my printer, so most of mine are made with 24lb weight paper rather than the usual 20lb printer paper and I think it feels like quality, even a bit luxe!
I hope you find this project solves some of your problems and brings a bit more joy to you.
Happy crafting, friend!

Brilliant Diane!! I can’t wait to make some of these – so perfect for lots of gifts I give regularly. I love your instructions and Q&As – I had several of those questions myself. And thanks for the templates – you RULE!!
Yippee Barb! You are the queen of gifting so I very happy you approved. Be sure to send me pics of ones you make that I might share.
Brilliant Idea, Absolutely Brilliant!!! I can see how you would go down a rabbit hole for hours and hours with all the ways this could be customized and done! You just solved my dilemma on gifts ai needed to come up with for an event this weekend! Thanks for that! 😀💛
Thanks Michelle. Glad you were inspired. Sed me pics that I might share.