How to DIY the BEST Overhead Garage Storage!
Do you need extra space, with great storage options? Overhead storage is a perfect way to maximize your garage space. And here is the easiest way to use and access that space.
Fair warning: I am serving up a heaping helping of storage envy today!
But because you are my friends, my buddies, my people, I’m also serving up the How-To so you can DIY your own.
This overhead storage rack — conveyor belt style — is the B.E.S.T.!!!
The best garage storage solution ever (can you tell I’m a bit enthusiastic about this)!!!
If you’re new here — I’m glad you found your way here!
I’m Diane and I’m all in on creative problem solving and creative doings of all kinds, including doable DIY’s.
It’s all for bringing more joy to our lives — whether that be making our homes cozier, our tables prettier and our money stretch further. We want to live joy-filled lives.
And today, let’s talk Overhead Storage!
Table of Contents:
The Vision for my Overhead Storage Space
We all know, when you need more storage look up! Vertical space is an ideal place to add storage capacity
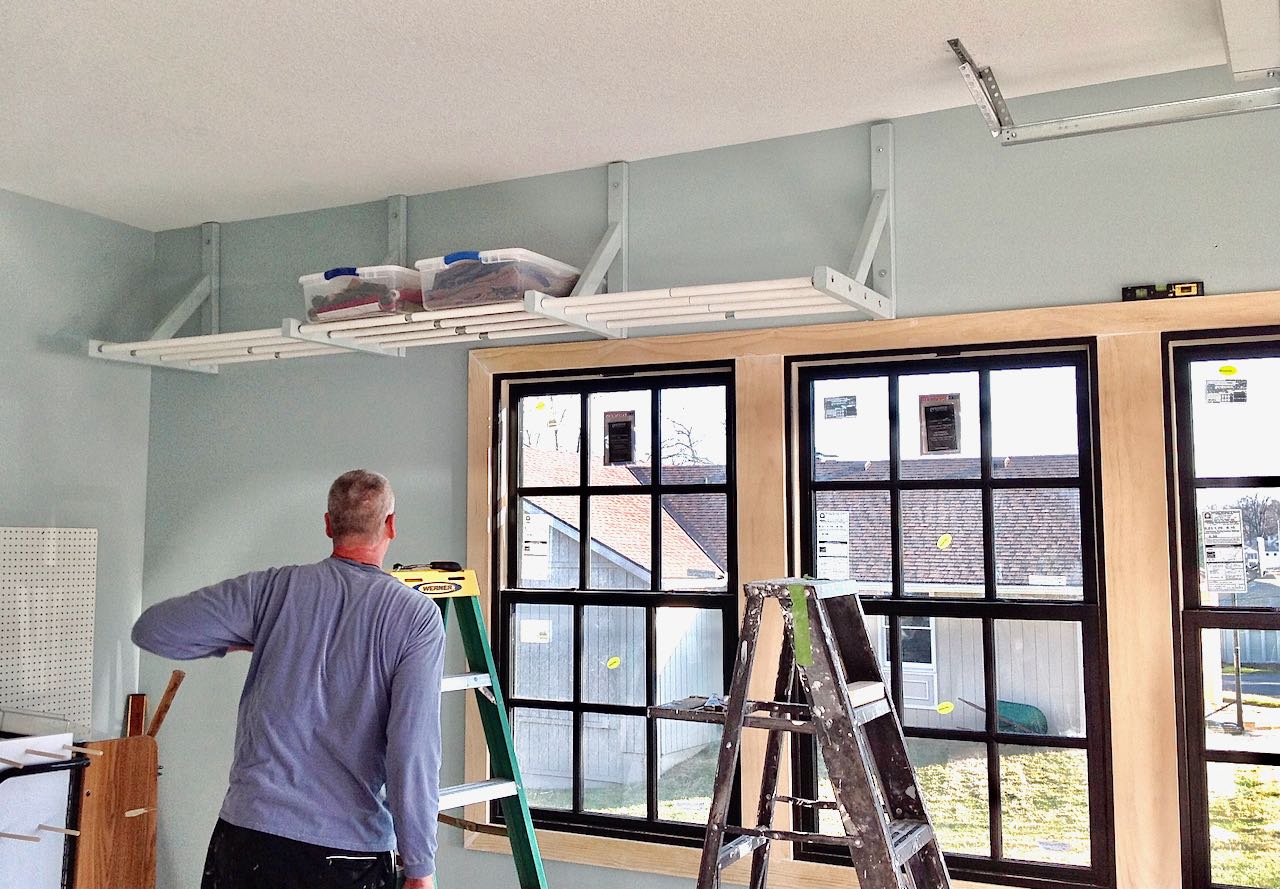
My new studio (actually a carport we had converted into a garage before moving in) has wonderfully high ceilings which makes for great light and great storage!
In a working studio, space is always tight and I need to maximize my floor space and keep the garage floor clear for production.
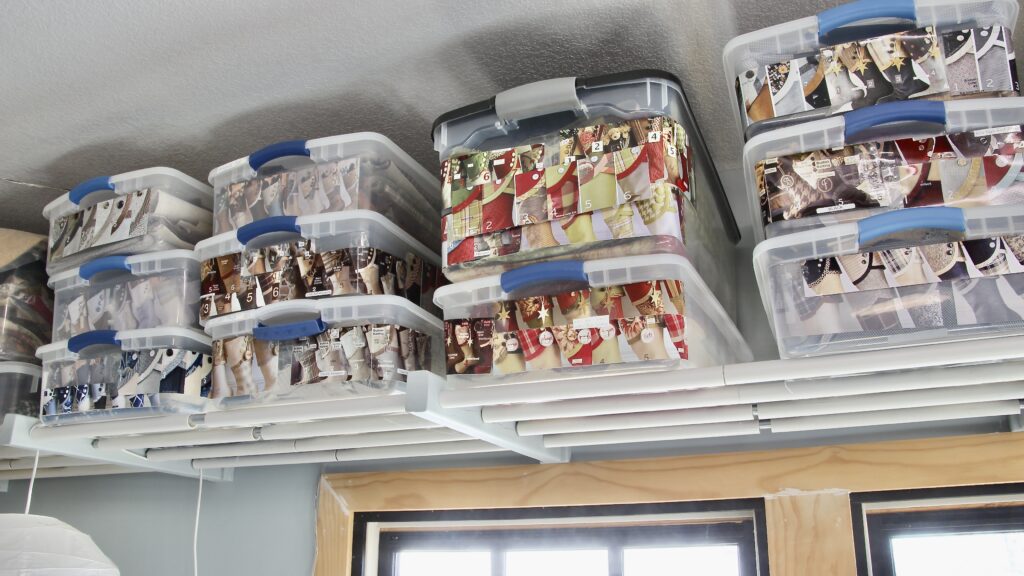
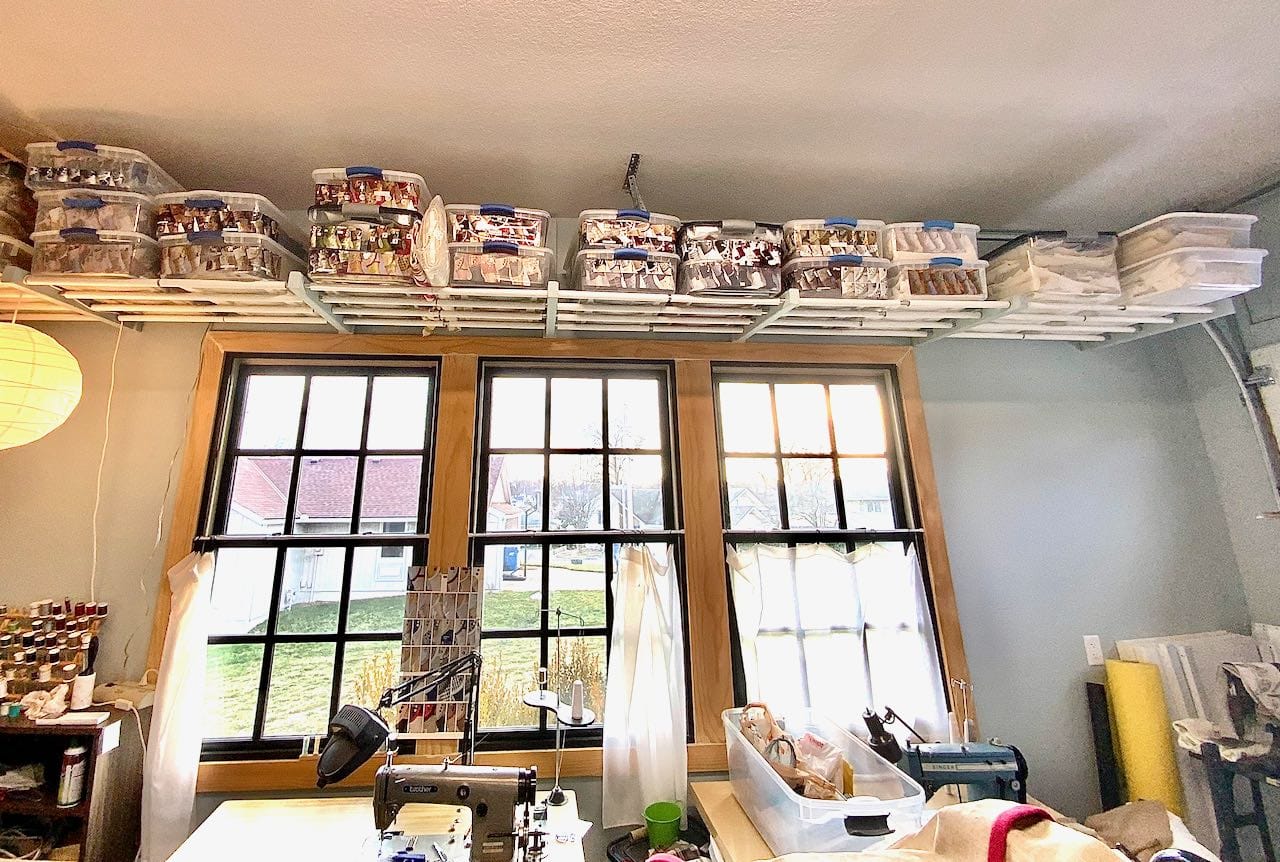
I needed overhead racks for the storage bins full of fabric remnants from all the retired Christmas stocking groups over the years.
See, I like to offer my “Stocking Families” the added value of continuity. I protect their investment by offering Add-On Christmas stockings. As their families grow, I will craft a stocking for each new member that blends right in with their original stockings. To do this, I have to hang on to all those remnants and scraps. And keep them organized and somewhat accessible.
However, these tubs are heavy! And I’ll need to climb a ladder. So this was going to require something special. Something custom.
There are many overhead storage ideas, I couldn’t find anything for purchase that met my needs.
Definitely a DIY project.
The Plans for our Overhead Storage:
In the middle of my brand new exterior wall is a bank of three big, beautiful windows. So this feature dictated how low I could start my storage.
I knew I did NOT want a solid base. A solid base tends to collect dirt, dust, debris and potentially creepy crawlies. I do NOT like creepy crawlies!
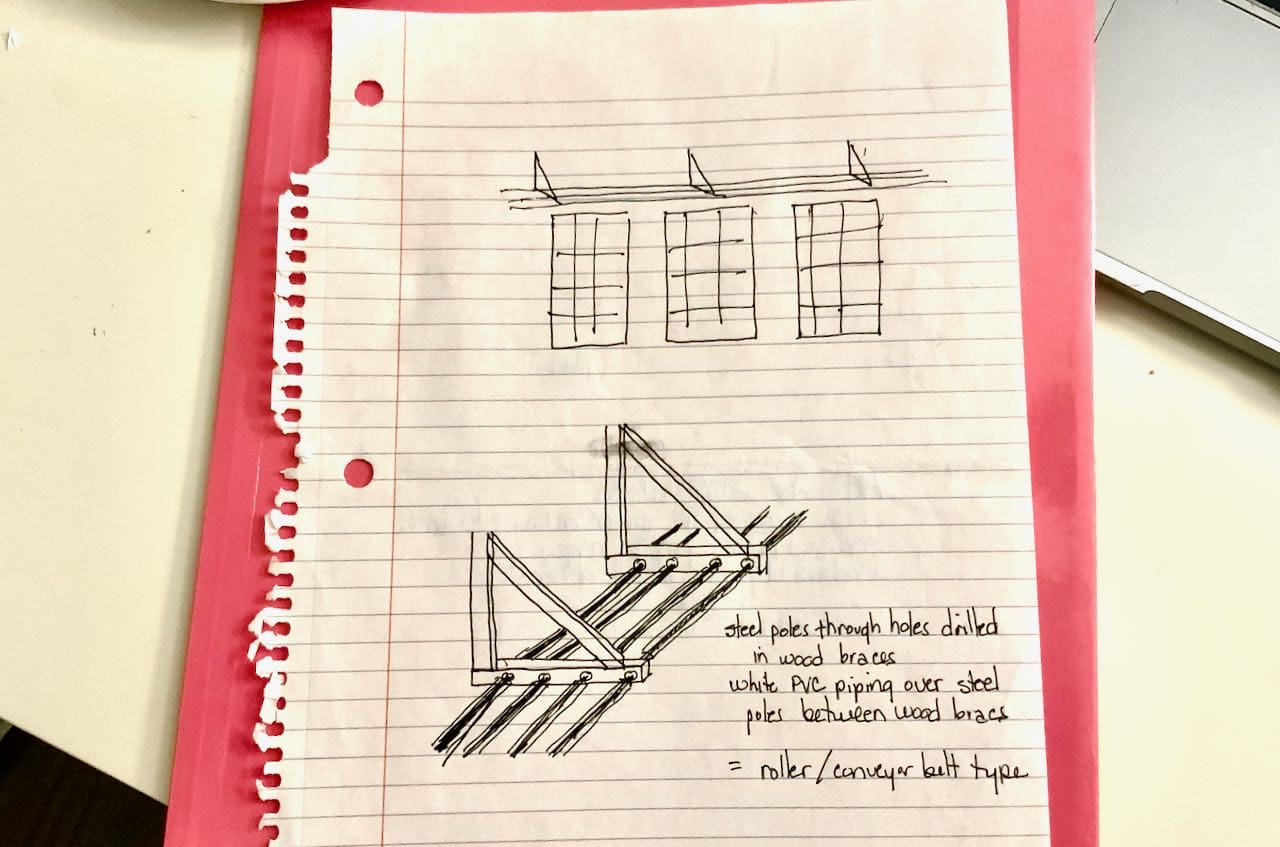
When I thought about steel pipes to act as the base, it got me thinking of conveyor belts. I fixated on how boxes just seem to roll on and off them so easily.
That’s exactly what I wanted. The ease of a conveyor belt for loading and unloading my heavy fabric tubs.
And that’s what I got!
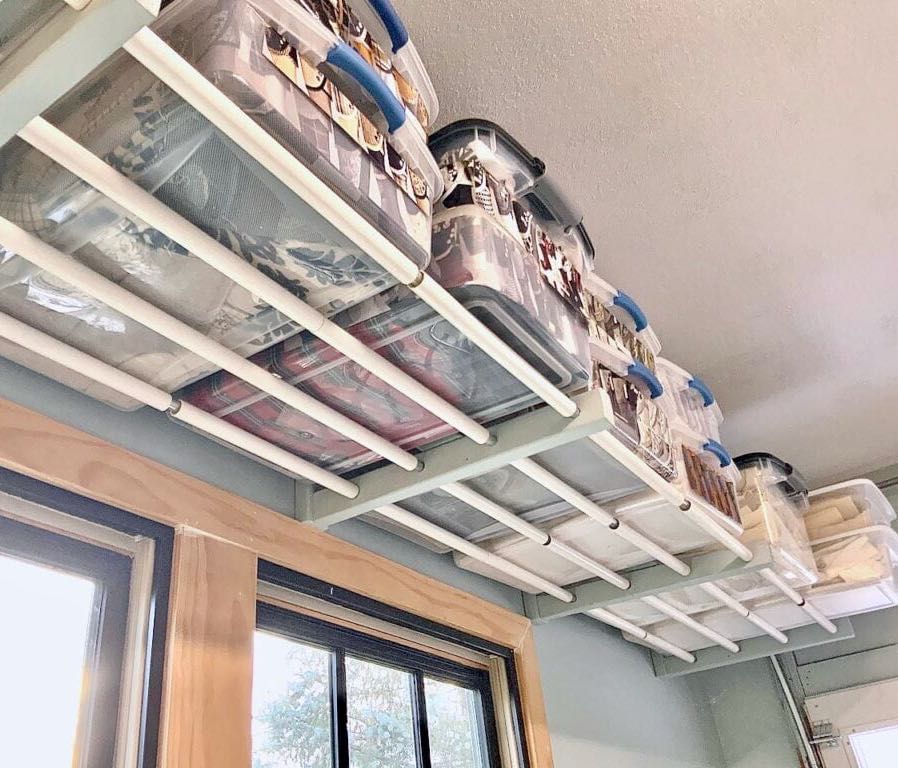
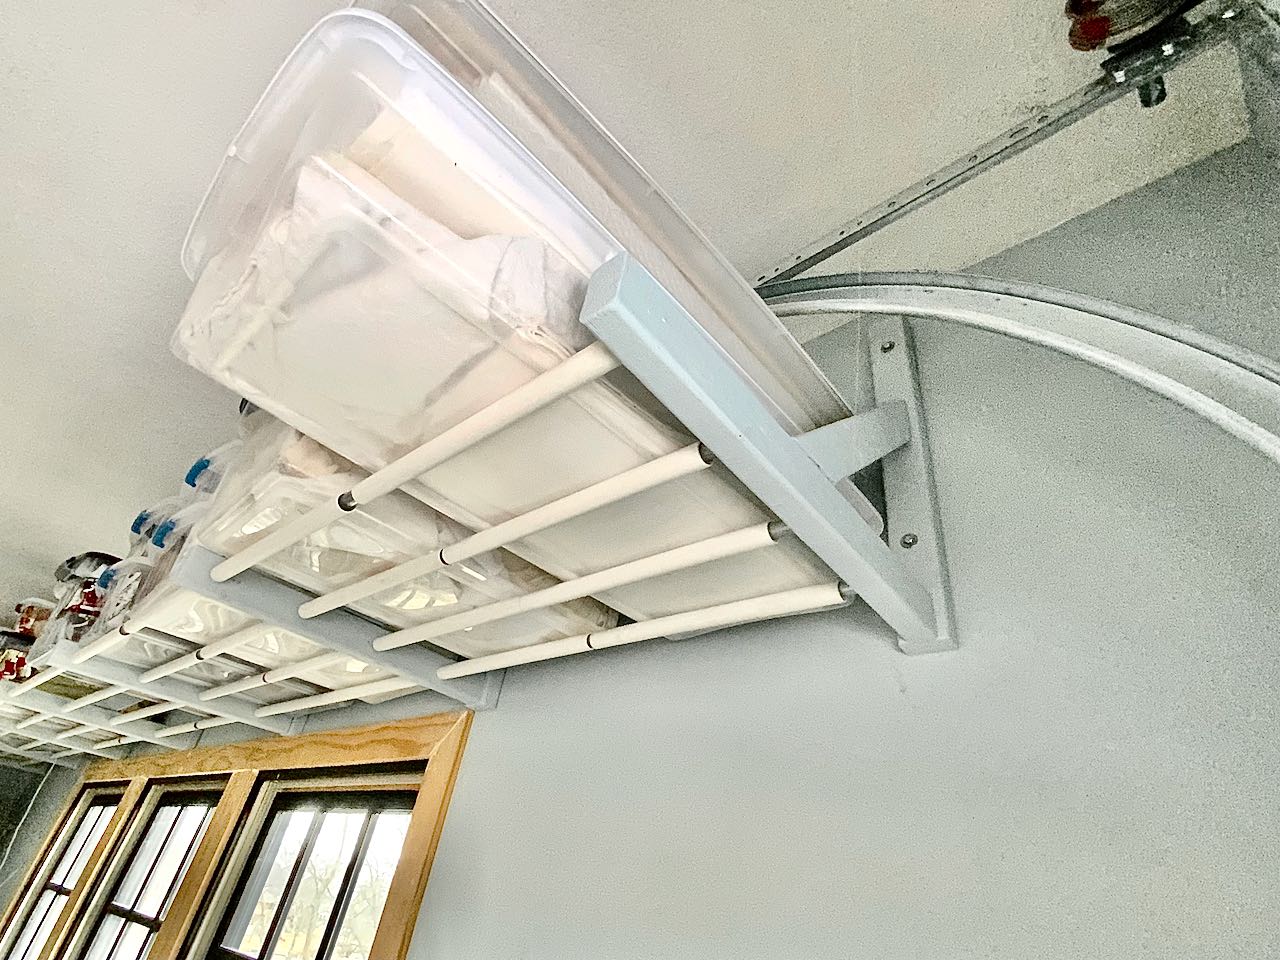
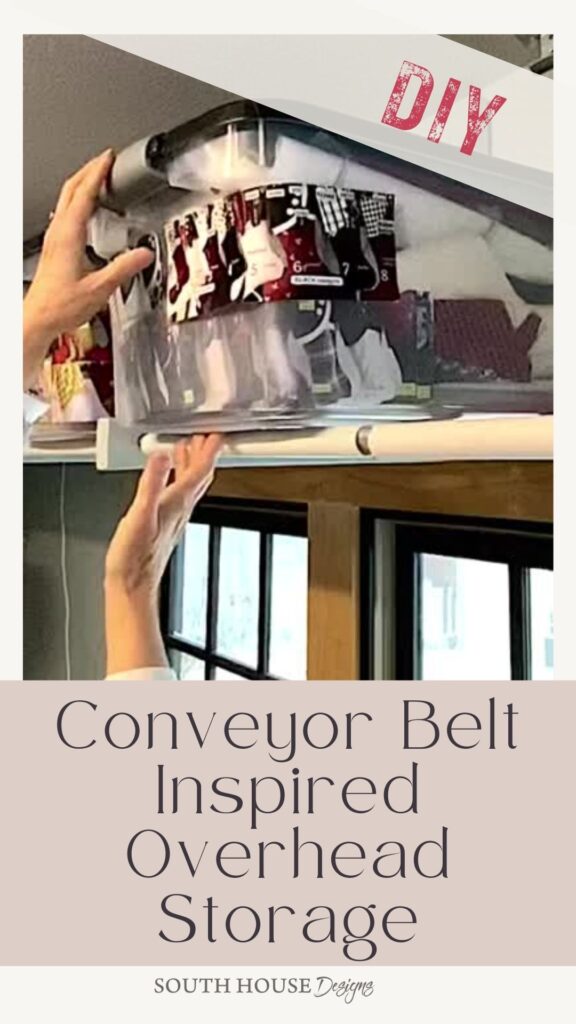
How? By adding loose sleeves from PVC pipes over the stationary steel pipes.
Now I have my own conveyor belt system. It’s a great helping hand for all the heavy lifting that goes on here.
Brilliant, right?
And when the day comes, and our garage is no longer my studio, we’ll actually park our cars inside.
Plus use this great solution for an overhead garage storage rack to store all the things we need to hang onto, but don’t use regularly.
I’ll be storing seasonal items, bulky items, all the holiday decorations. And lots of smaller items in clear bins with pictures attached like I do now. You know the usual — a lot of things! Camping equipment? Coolers? Outdoor cushions during the off season?
And while we’re on the subject of brilliant storage hacks, you must check out what I did with our hulking HVAC unit to solve another storage dilemma. And don’t miss how I hacked these Ikea cabinets for extra depth. And two more organizing posts for the kitchen, one maximizing and organizing a walk-in pantry and another on the best way to organize spice jars.
How to Build Your Overhead Garage Storage
Materials & Supplies:
- Framing Wood
- Steel Pipe (from the plumbing department)
- Construction screws
- Lag blots and washers
- PVC pipe
- Paint, optional
- Tape Measure
- Saw
- Pipe cutter
- Drill and bits
- Driver
- Ratchet set
- Level
Step 1) Measuring and Planning –
First thing, it’s a matter of taking measurements — of the space, AND the tubs I want to store on them.
With the curve of the overhead door track, the most I could fit with wiggle room for loading and unloading would be twelve stacks of tubs. Two tubs each under the track and three tubs each once we are beyond the track.
Next, we used a stud finder to locate each wall stud.
Then we determined the placement of the brackets assuring that two stacks of tubs would fit between each. We increased the needed width an inch or two to keep the brackets on the joists.
Yours will probably be different lengths depending on what you want to store up there. Like a Christmas tree perhaps.
If your wall studs do not line up well with what you need to store, You can mount ledger boards on the studs and then your brackets to those.
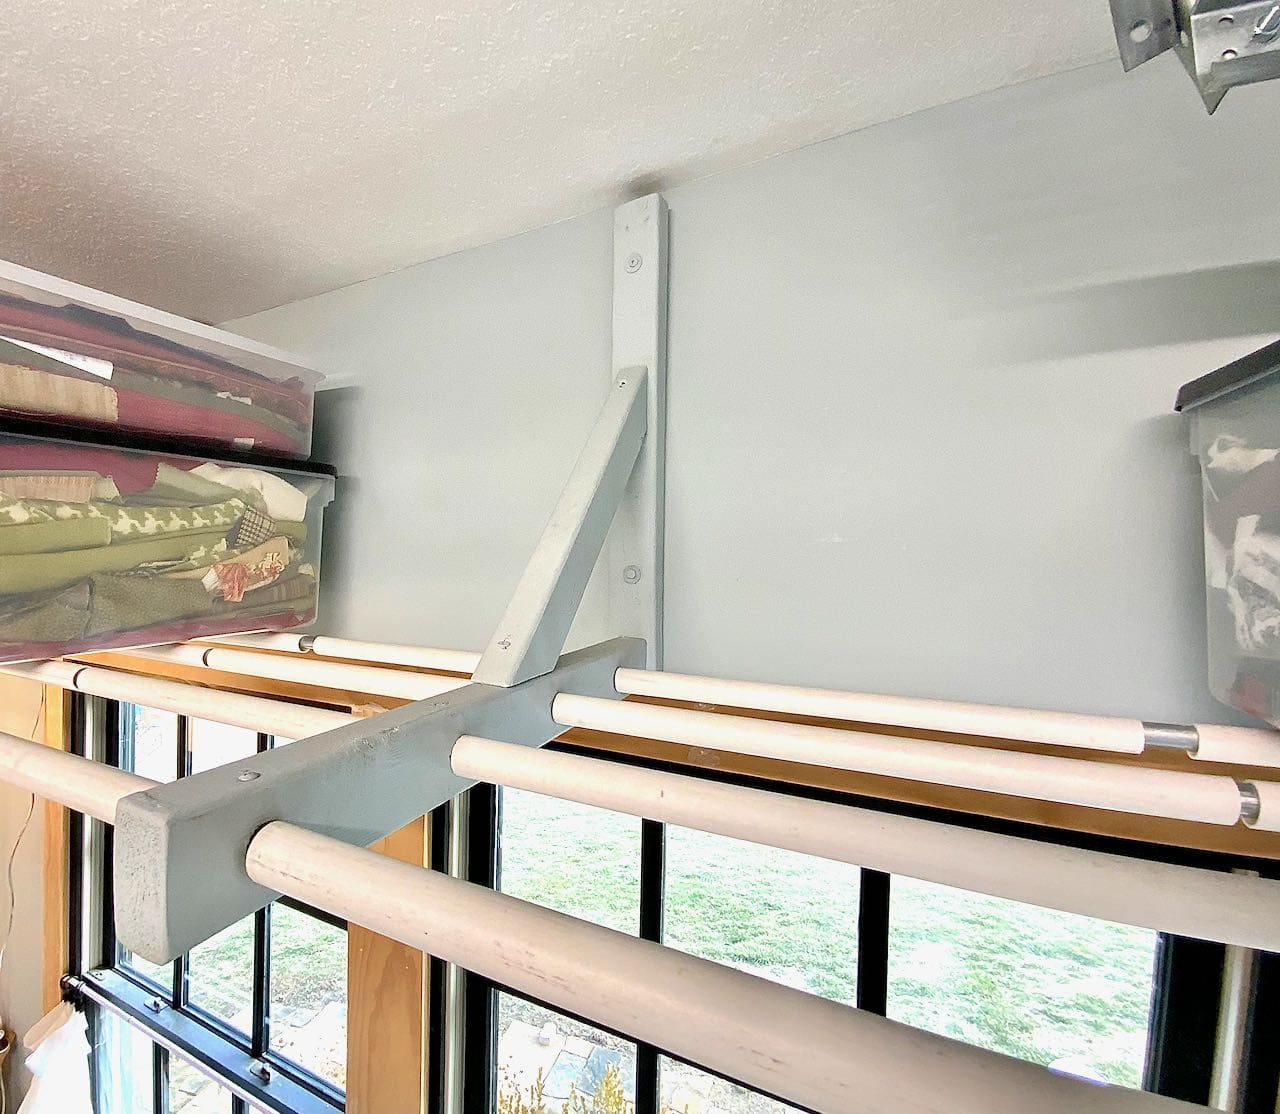
There are many overhead garage storage systems that tie into ceiling joists. I just felt more confident with vertical supports tied into the new wall studs with lag screws.
Step 2) Cut and Assemble Brackets –
Based on your space and what you want to store on your shelves, start with figuring the height, the length and the depth of your storage. You probably don’t have these large windows in your garage, so your overhead storage systems may start quite a bit lower than mine.
My brackets are 24 x 24″ and are installed with 36″ between centers.
Then figure the number of brackets you need. I have six sections holding twelve stacks, so I needed seven brackets.
Cut your horizontal pieces, vertical pieces and the diagonal support pieces for your brackets.
Determine the hole placement in the horizontal pieces for your steel pipes.
PRO TIP: Your holes need to line up exactly, so create a jig out of a thin board.
Use the jig to drill through all the horizontal boards EXCEPT two of them.
Your two end brackets have their four holes drilled just partway. This will keep your steel rod held taut.
NOTE: Make sure to drill the partial holes on opposing sides of the two brackets — one for the right and one for the left ends of your run of shelving.
Assemble your brackets.
Optionally, sand and paint them. Mark the placements on the wall.
A quick pause to ask if you are enjoying this post? Intrigued? Would you like to see more? Easy, just fill out this quick form to subscribe. You control how much is right for you!
Thanks! Now back to our storage . . .
Step 3) Assemble Your Conveyor Belt Inspired Overhead Storage Shelves–
Based on the length of our shelves (18′ total), we used two 9-ft sets of four steel pipes.
Start at the end furthest from the overhead door. Install the first bracket with the partially drilled holes. Install the next bracket and the next (in our case). Test with a steel pipe as you go to make sure the holes line up as needed.
Thread the steel rods through each bracket adding your PVC pipe sleeves between each bracket.
Then add another set of PVC sleeves and the next bracket (the middle one in our case).
This is where we attached the second set of steel pipes.
We connected the two lengths of pipe with a snugly fitting piece of wood dowel forced into the ends that meet.
We installed the fifth bracket to help support those pipes while we worked the dowel into them. (couldn’t get a pic of this because my hands were busy supporting the four rods.
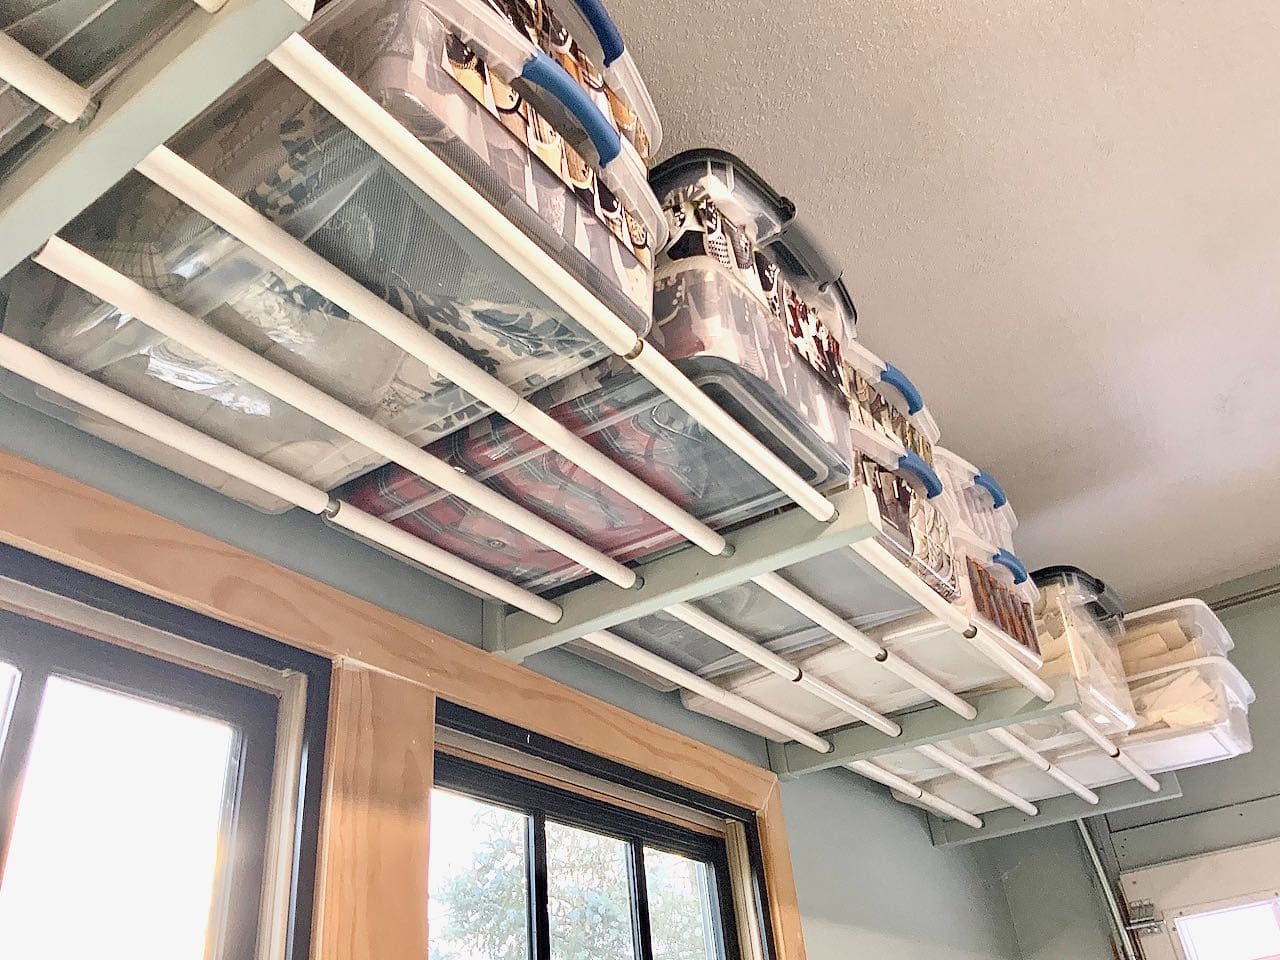
Look closely below and you can see screw heads in the horizontal arm above the outer two rods. Rod, our construction helper and friend, added those to keep the steel rods from turning and potentially pushing away from each other. Not sure they were necessary, but I like being extra cautious.
The PVC sleeves provide much easier access without a lot of extra cost.
PRO TIP: we used two shorter lengths of PVC between each bracket because of two stacks of tubs. One set of sleeves rolls smoothly while the other set of sleeves and its stack stays stationery.
Your end bracket should be like this (above) with the holes drilled only partway through the horizontal part of the bracket. This keeps the steel pipes firmly in place.
I’ve been using these for almost 5 years now and they are exactly what I needed. Easy access to these yet out of the way tubs.
I am four steps up the ladder and these tubs are heavy, so the conveyor belt system has been amazing for me. The heavy tubs roll on and off with ease!
Maybe if I could come up with a robotic crane, I could eliminate the ladder all together. Stay posted. You just never know ?

I can hear you oooo’ing and awww’ing. So be sure to pin it to remember it.
Thanks! You’re also helping me and I truly appreciate it!!!
Thanks so much for stopping in. I hope you found inspiration to help organize your home which for me is all about the extra joy I feel when I know right where things are and when our home is decluttered and clean. Ahhhh, life is just better that way. And that’s my wish for you too!

Diane, I love your garage storage. Perfect to keep the floor clean. The photos on the front are very useful too.
You know it Tammy! Gotta have a clean clear floor. Butt I have to be able to get to all those tubs.
Diane, What a great idea to keep dust and creepy crawlies away!!! You’re a genius! Thanks for sharing your innovative storage solution! Pinning now!
Thanks Donna! But I don’t think my freshman accounting teacher would agree with you. But we can all agree on dust and creepy crawlies!
Diane – It looks amazing! I’m having serious garage envy right now. Not only is your organization system functional but it’s also attractive.
But you have a beautiful boathouse! And my husband also has serious garage envy — for his car! ????????????
Thanks bunches!
Diane, what a great project. It looks attractive and is so useful!
Thanks for inviting me to participate this month. I am honored!
Niky
Such a great idea. I love it.
Love this Diane! The pvc pipes are ingenious and make it so much easier, I’m sure.
Wow. This system is awesome, we finally got shelves in our garage but this is over the top – literally. Great directions for sharing your how to.
Diane, Your overhead storage is brilliant! I can imagine how much easier it is to roll the totes out now. I have a space in my garage that a shelving unit like this would work out perfectly. Thanks for the ideas and great pictures to go along with it.-Meagan
Diane, what a fantastic idea to use the PVC pipes! I always love it when I can maximize vertical space, and your design makes it so much easier. Thanks so much for sharing!
I’m so jealous of your garage storage Diane! This is brilliant! I’m going to share this with the Mister to motivate some serious garage organizing!
This is amazing! What a wonderful idea to make this “conveyor belt style”–just brilliant!
Thanks so much for joining the Grace at Home party at Imparting Grace. I’m featuring you this week!
Oh Richella, how great! Thanks so much for the feature. AND for hosting a lovely link party.
What a great idea to use the tubes for easier access. I have never seen that idea ever but it makes so much sense. Thank you for sharing!