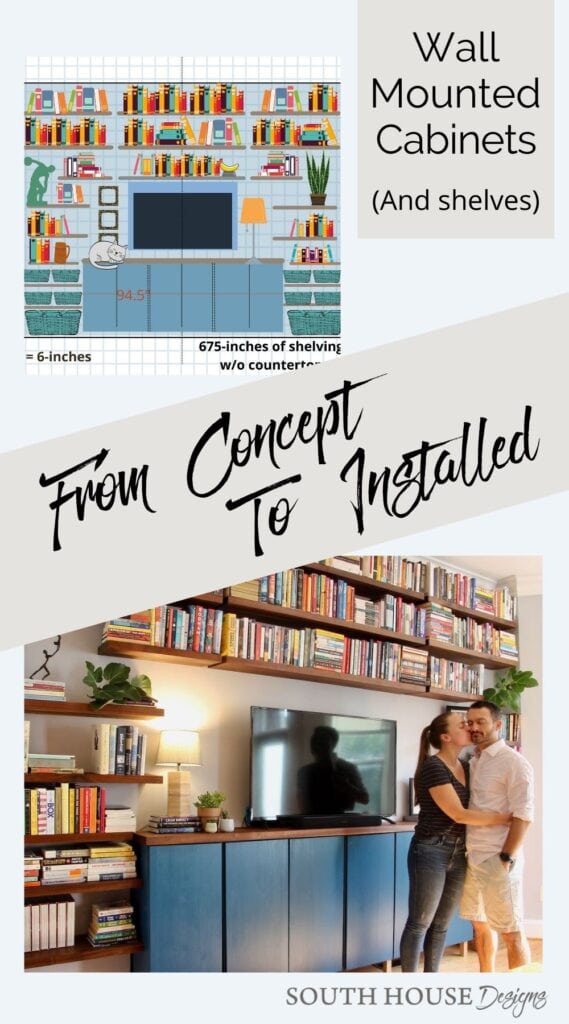
How to Hack Best Wall Storage Cabinets for the Money
These wall storage cabinets are the best for all your rooms that need some closed storage customized for your style, your every room!
Were you with me last week when I shared our kids’ wall of books?
Oh, if you missed it, you probably need to start there. No worries, I’m happy to wait for you to catch up.
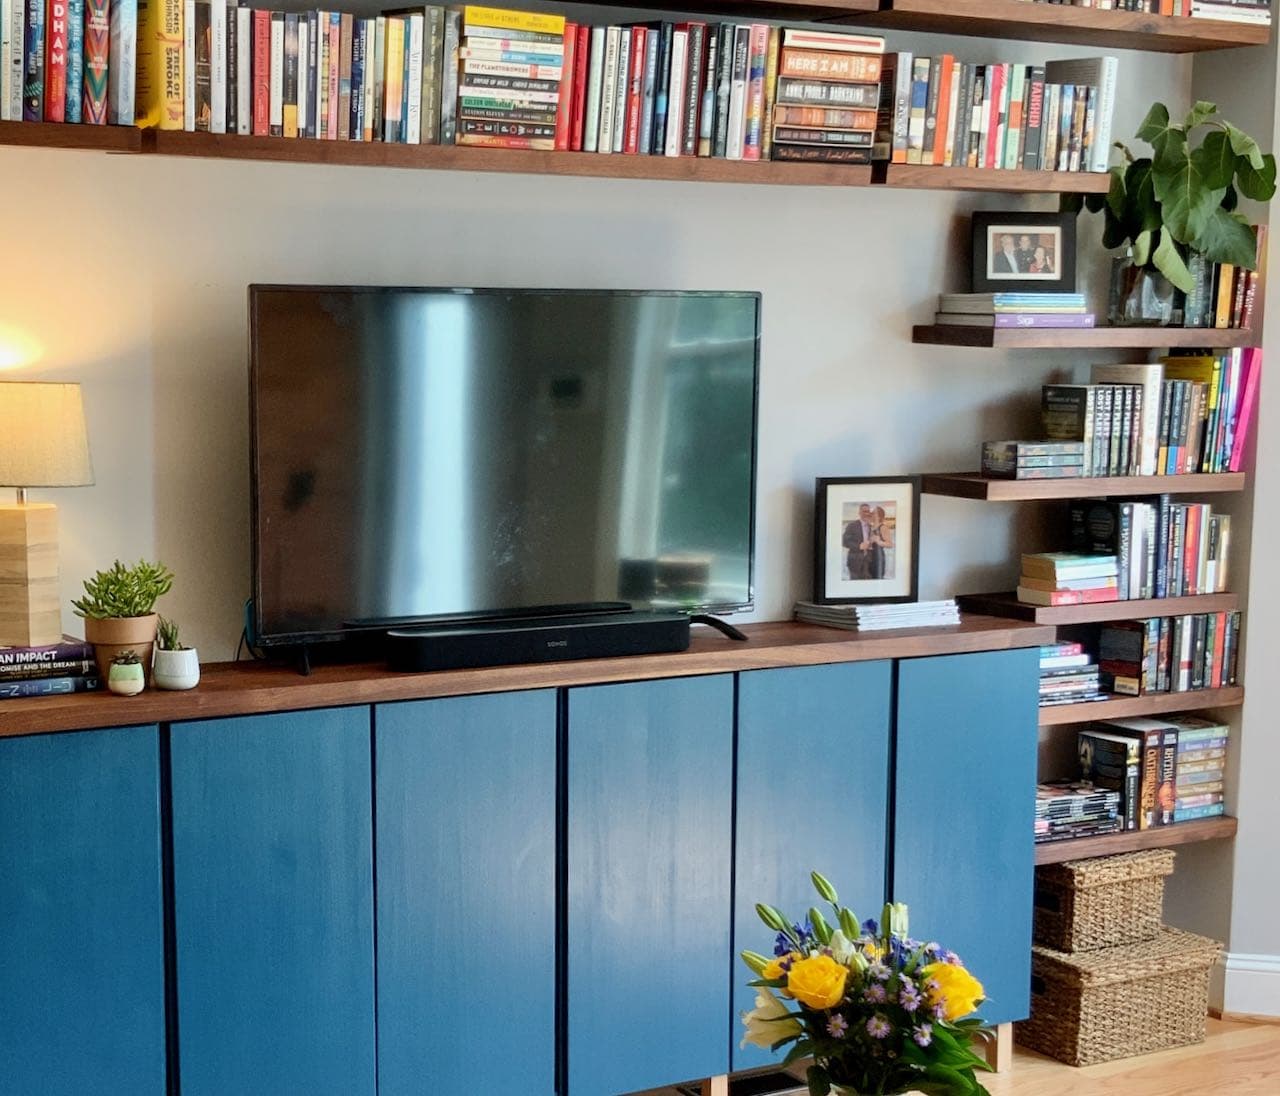
So now this is where we are:
This is where we ended because our April trip was over and the Ivar cabinets were still out of stock.
But when I was back for a solo visit, the cabinet had arrived and we were ready to finish the wall.
Now It’s Time To Add Some Wall Storage Cabinets — Specifically Wall-Mounted Cabinets.
And when you are looking for storage cabinets that can be customized to a specific room, a specific style, Ikea is so often the winner.
And they won here!
Keep in mind there are different grades of Ikea. Katie chose these from the beginning for their “real wood” construction. They are made of pine vs. the traditional Ikea fiberboard.
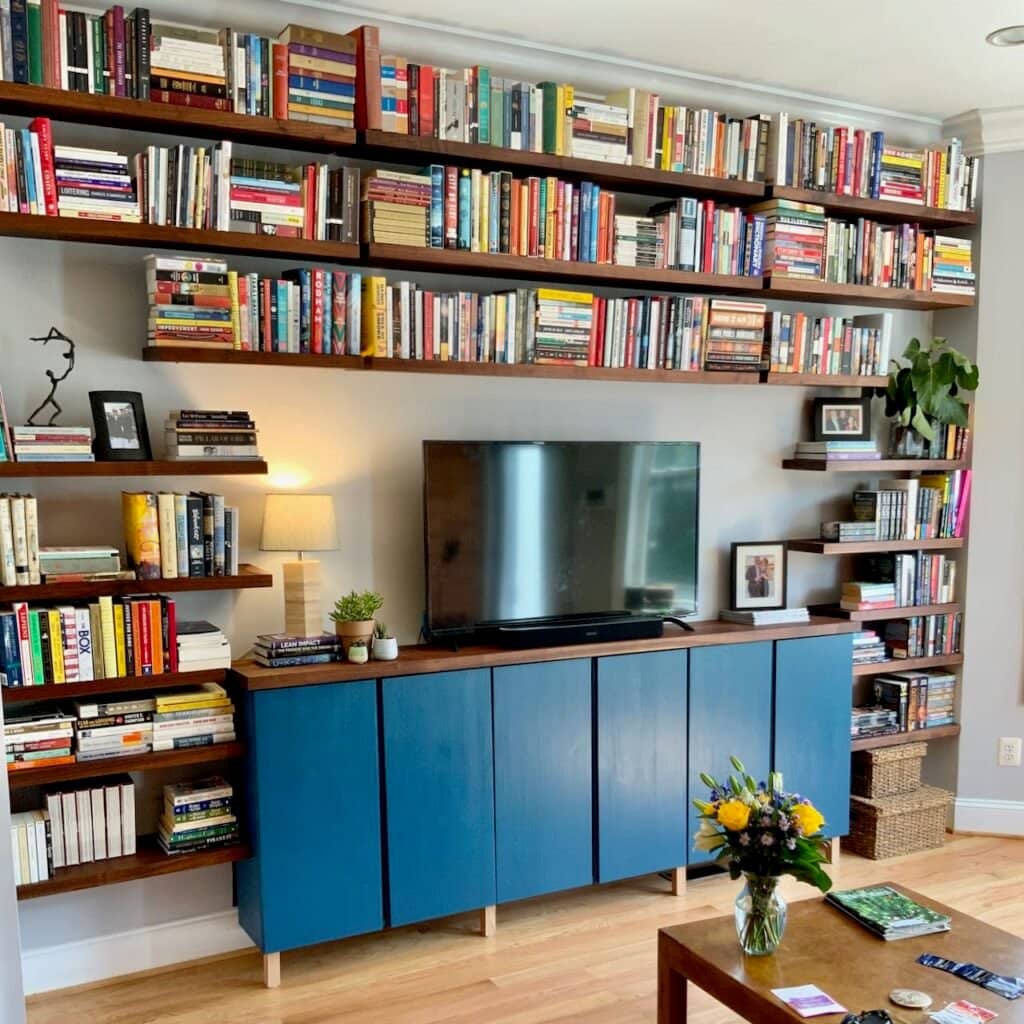
She loved the flat face of them. Nothing distracting. Remember this wall was to be all about the books — and the TV. But we all know a young family needs closed storage, too.
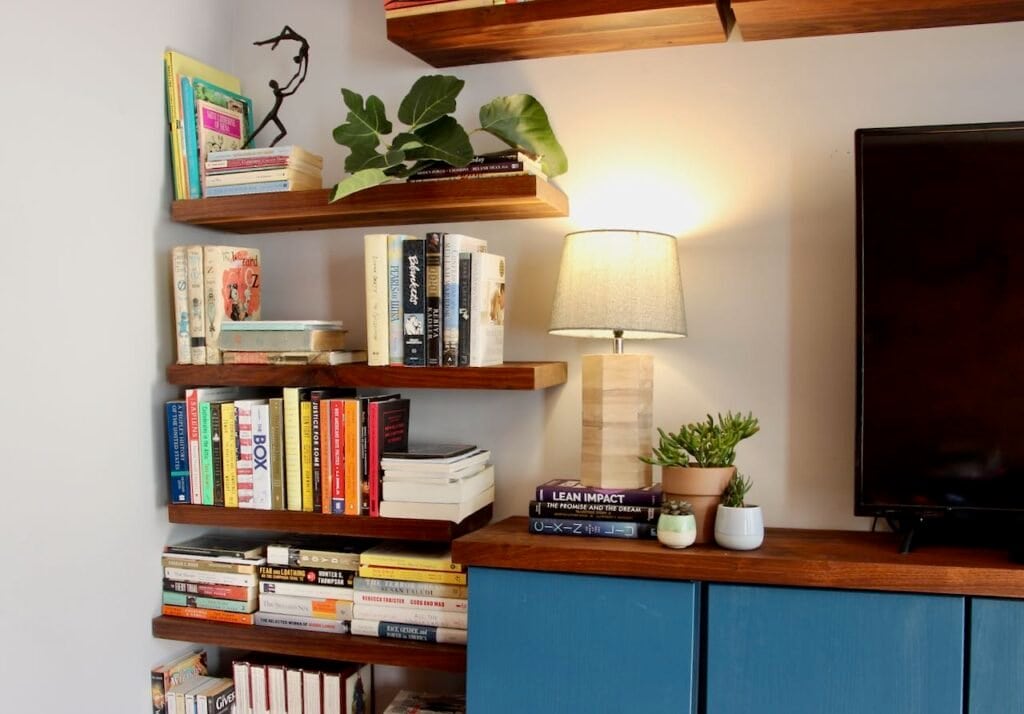
They are easy to customize. In this case a fresh, modern blue paint, no hardware and they wanted floating like all the shelves. They also wanted a walnut countertop that they ordered from the same Etsy maker of all the shelves.
If your style calls for a bit “more”, you should check out how I used colored stain on a cabinet on our covered patio.
Here’s How We Hacked Ikea Ivar Cabinets To Meet The Style and Needs of This Young Family
1) Finish the Wood
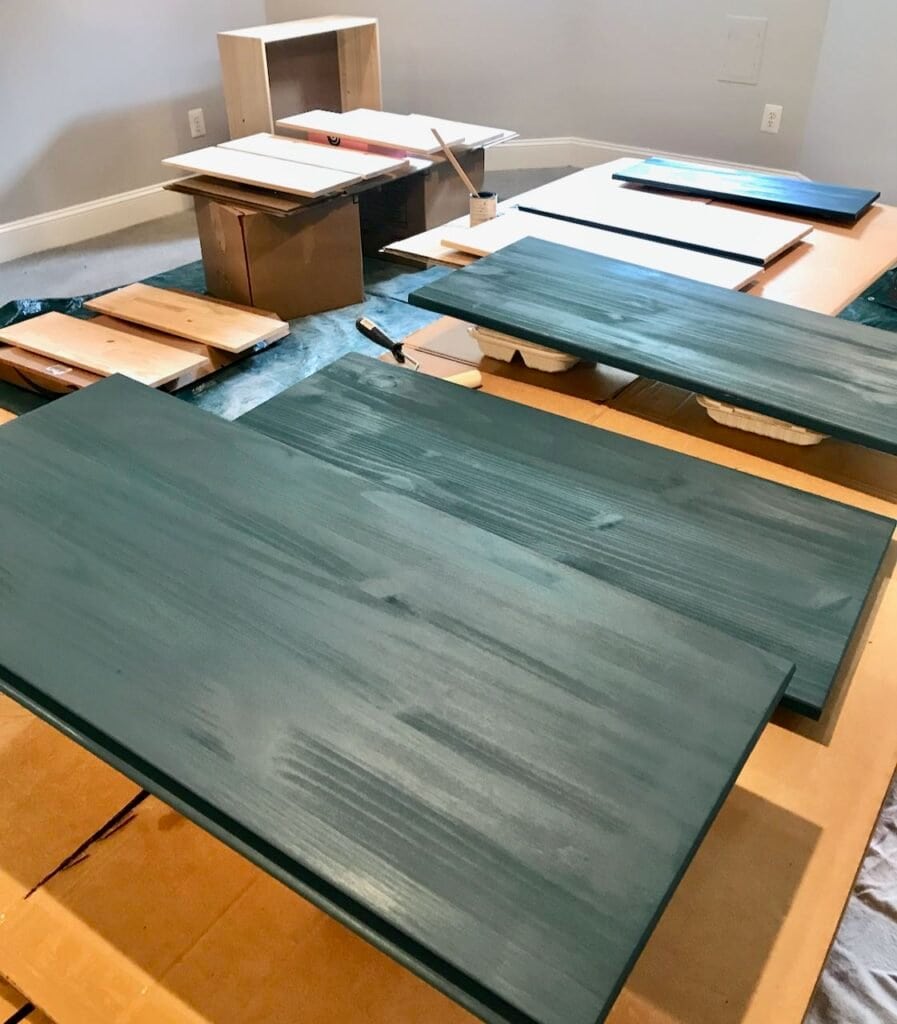
In this case we painted all the component pieces of the IVAR cabinets with our blue latex paint.
The pine is porous and the liquid in the paint will cause the fibers of the board to rise up. Once the first coat is dry, it’s best to lightly sand with a fine sandpaper, 220 or higher between coats of paint. Then topcoat as you choose.
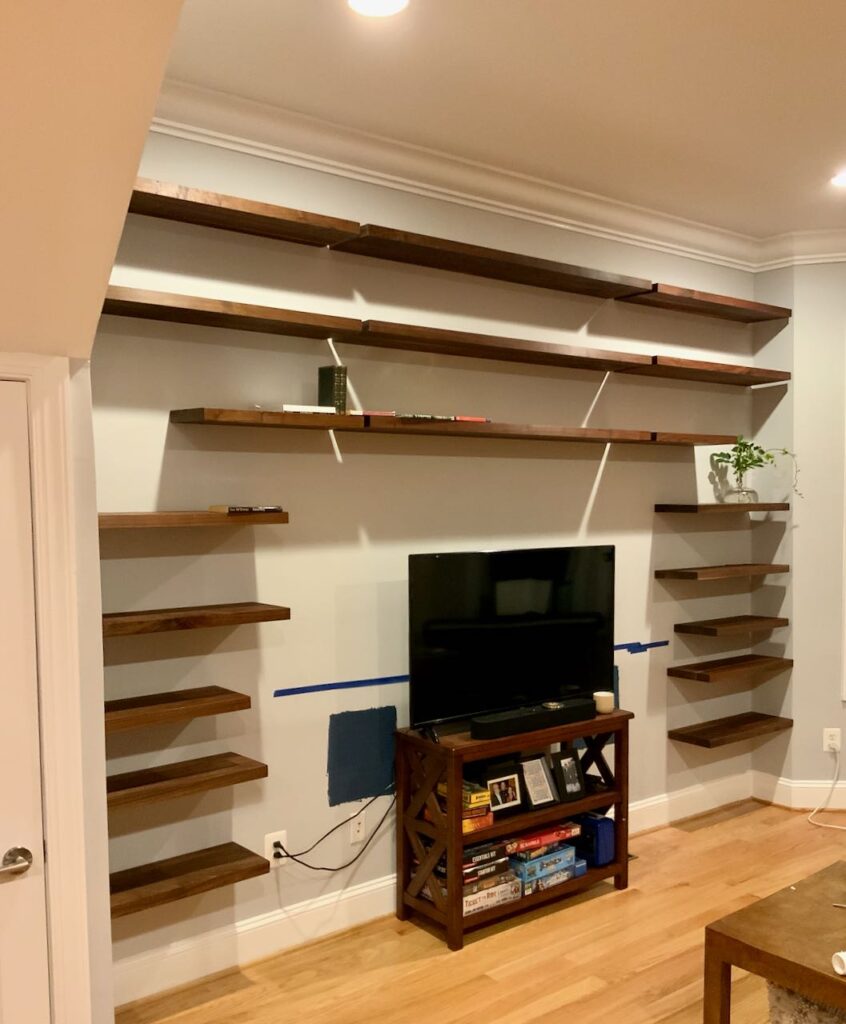
Step 2) Install the Mounting Boards
We had two 2 x 4’s cut 94-inches long. One board will be attached low for the cabinets to sit on and the other will be attached flush with the top of the cabinets to bolt into.
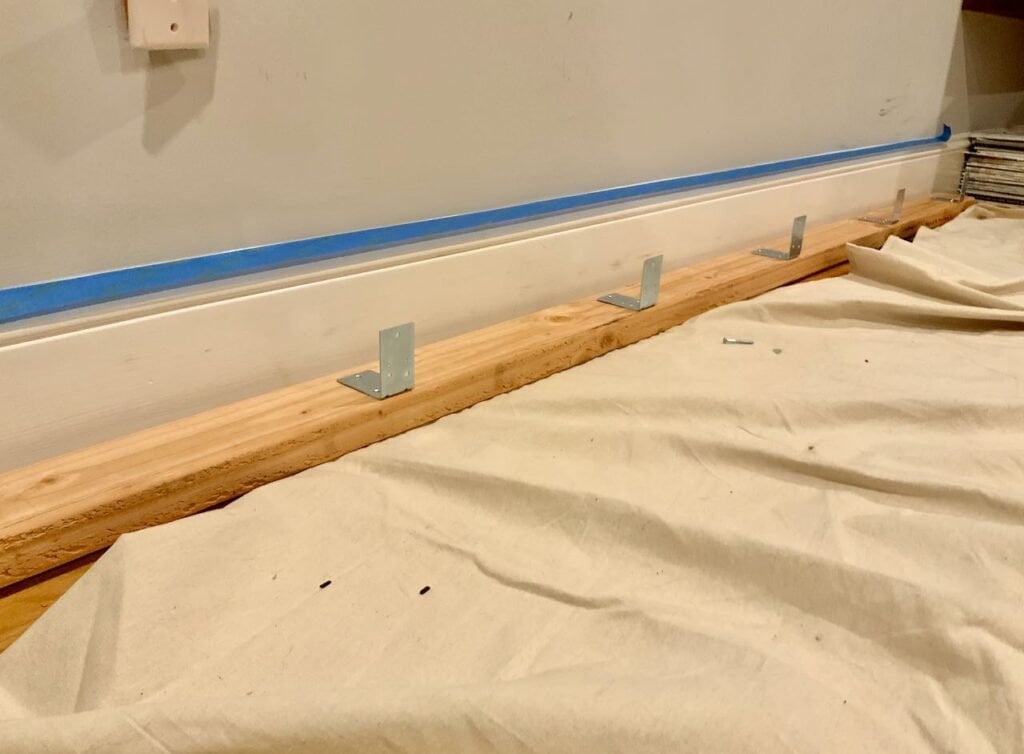
Start by laying one 2 x 4 along the wall where the cabinets will be. Attached L brackets at each wall stud location.
HINT: You’ll want an extended phillips bit for your drill to attach this board if you are down low to the floor like we are.
In our case, we are also going through the baseboard, so when mounting this board to the wall, we used extra long screws to go through the base moulding and still hit the wall studs.
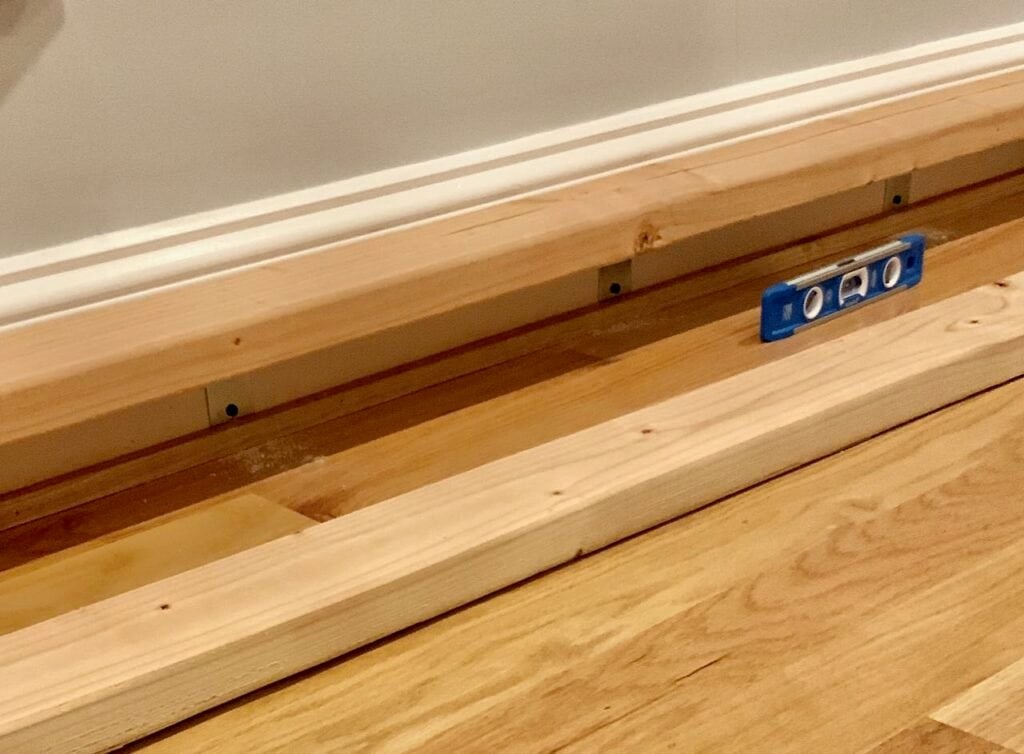
The top mounting board is attached with the wider side, the 3 1/2 inch side flush against the wall. This top mounting boards is a bit thicker than the base moulding, but we adjust for that difference when we attach the cabinets.
Step 3) Install the Wall Storage Cabinets
This is where we get into a bit of an Ikea Hack. The customizable attraction of these cabinets.
We wanted deeper storage. They have a lot of board games for one. And the dining room becomes her office when Katie is working from home. So storage of laptops and paperwork, and associated accoutrements was also needed.
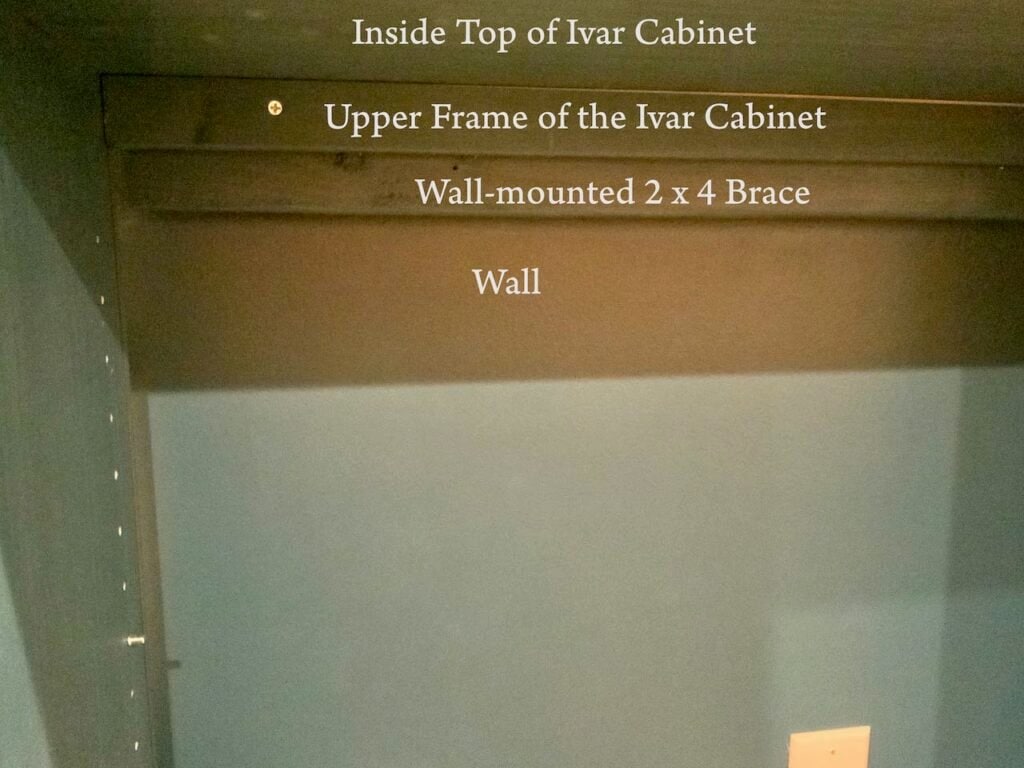
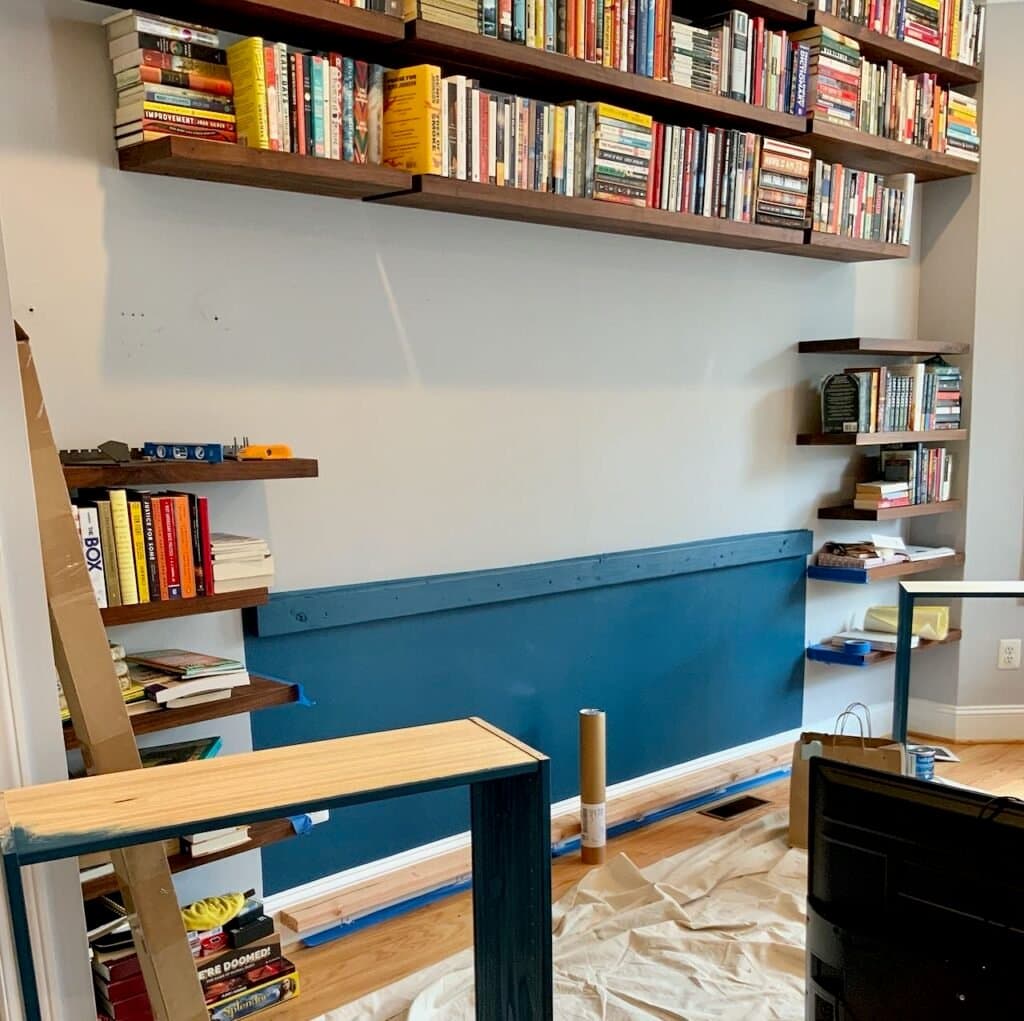
When we assembled the Ivar’s, you can see we left off the thin fiberboard backings. The mounting boards were planned so the cabinets will not sit flush against the wall. This is how they will gain those extra precious inches!
The countertop was ordered 3-inches deeper than the cabinets so it hangs over a bit in front and fully covers the extra inches to the wall.
We painted the wall and the upper mounting board the blue cabinet color. This isn’t necessary, but when the doors are open, it does give a cleaner, more finished look.
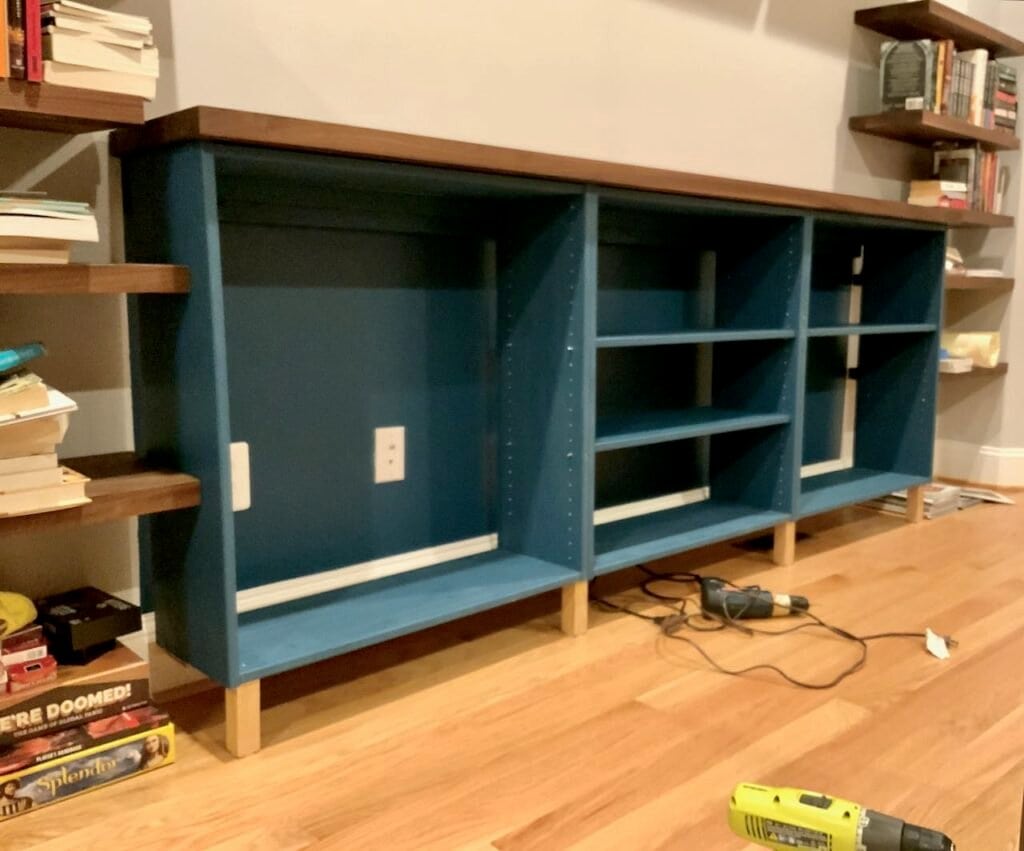
We used a level to make sure the cabinets sat vertically level (not leaning forward or back) since the base moulding and the upper support board were not the same thickness. We simply screwed through the base of the cabinet along the back into the supporting mounting board.
Did you notice the legs? You’re right. The kids wanted floating wall mounted cabinets, but as we got into it more Katie realized that a little extra safety in the long run would be better. Those are just cut from remnant of wood from Home Depot. The corner ones are screwed in place.
We debated on painting them the blue, staining them to match the countertop or going natural to blend with the floors. Any of the three options would have been great. Katie thought this was the least noticeable.
See the light line on the far right side of the cabinet? That’s how much depth we gained. We could have taken it a step further and cut new shelves that are the full depth, but the kids didn’t think it was necessary. And it’s always an option down the road.
4) Add the Doors and Fill It
These cabinets are sooo customizable. Is this is a bit too plain for you, take a look at a cabinet on our patio where I used colored stain for a unique design.
What more is there to say? This wall turned out perfect for Katie & Jon and the life they’re building here.
Interested in more organization ideas and hacks? Then check these out: extra shelves and additional storage hacks for a walk-in pantry. and how to best organize your spices, how to add conveyor belt-ish storage in the garage, and even a fun trick for storing your faux florals.
I hope you enjoyed this two-part installation of this one large project.
Don’t hesitate with any questions you may have. Happy to fill in more details for you.

Love the color of the cabinet. Great job!
It looks amazing, Diane! Well done!
Thanks Marieza! It was a fun build. A bit challenging, but I love puzzles!
The end result of this project is amazing! I love the blue paint that you used on the cabinet.
I love this and especially the color. I use a lot of Besta from Ikea.
This project came together beautifully, Diane! Pinned!
Love the colors you chose for this cabinet. It turned out wonderfully.
Thanks so much Janet! The kids are thrilled, so I am too!
What brand and color is that blue paint? I love these cabinets! The whole wall! It’s perfect!
Hi Tori, Thanks for your kind words!!! Our daughter is looking for the can of paint to see if we can come up the name for you. I’m so surprised I don’t have it noted anywhere, but we’ll come up with it.