
Wood Cabinet Refresh
With Colored Stain
Here’s how to use colored stain on a wood cabinet (table, sign, etc) to add a fun, interesting pattern. It’s a great quick + easy makeover!
This is the tale of a beloved, but rather homely furniture friend that gets a makeover! And how to apply colored stain to add an interesting pattern to a piece of boring furniture that might be lurking in your corners.
It’s quick and easy — provided you learn from my mistake!
We’re friends, right? ‘Cause I’m counting on you NOT judging me when you see this before picture!
It’s embarrassing. I admit it.
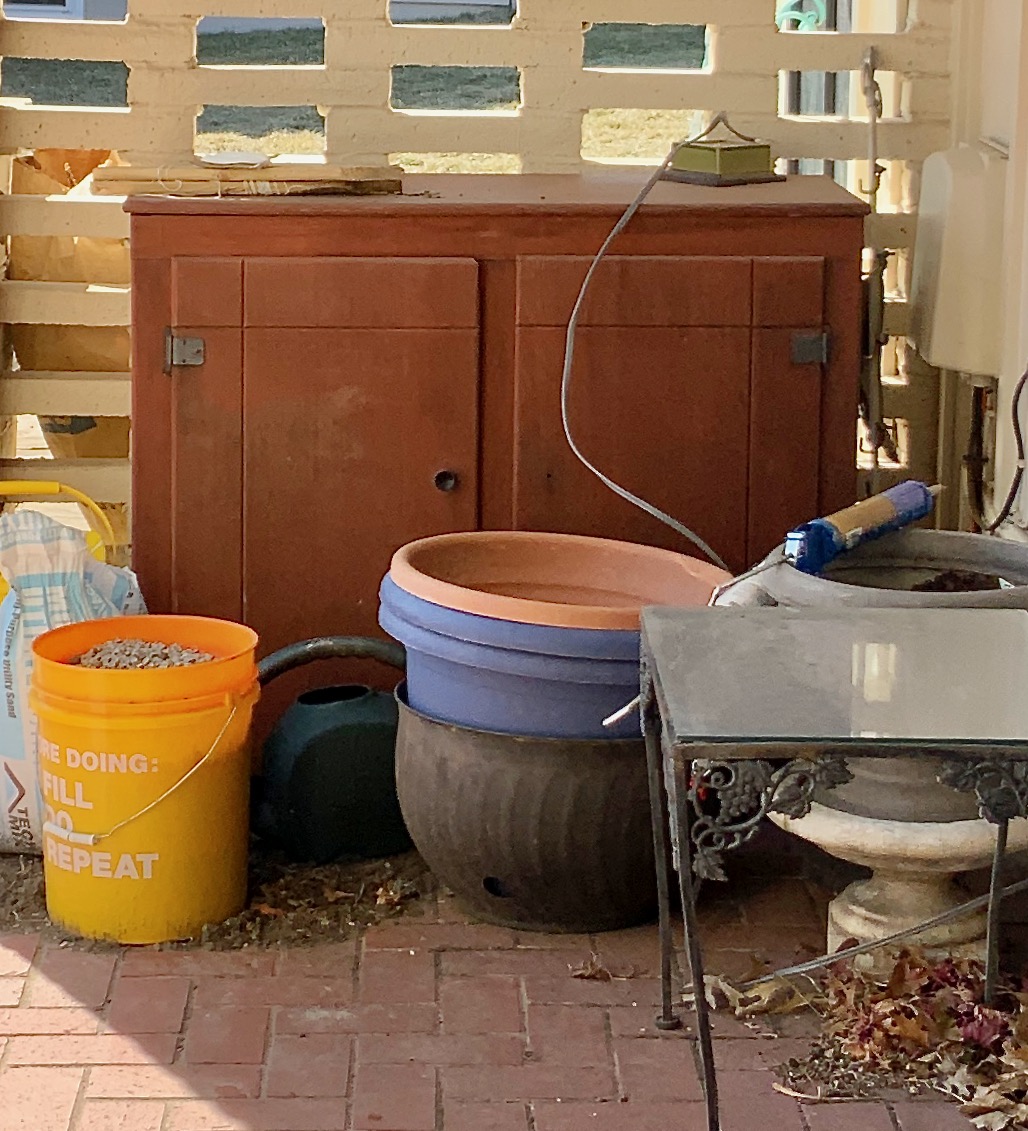
had this great old cabinet from some dear old neighbors. It was the perfect size and had soooo much service left. It sat on our screened porch in the last house for 17 years holding all the fun outdoor decor pieces I needed for entertaining. I always meant to update it, but it worked, and it actually looked good there.
Somehow, I even grew blind to the fact that it never had both knobs.
But in our new home, this cabinet needed some love just like the rest of the house. Living on a lake translates to living outdoors and I am putting every last corner of our outdoor living spaces to work.
This cabinet’s little corner of residence is getting some style, so it needs some too!
It’s a Cabinet Makeover Using Colored Wood Stain:
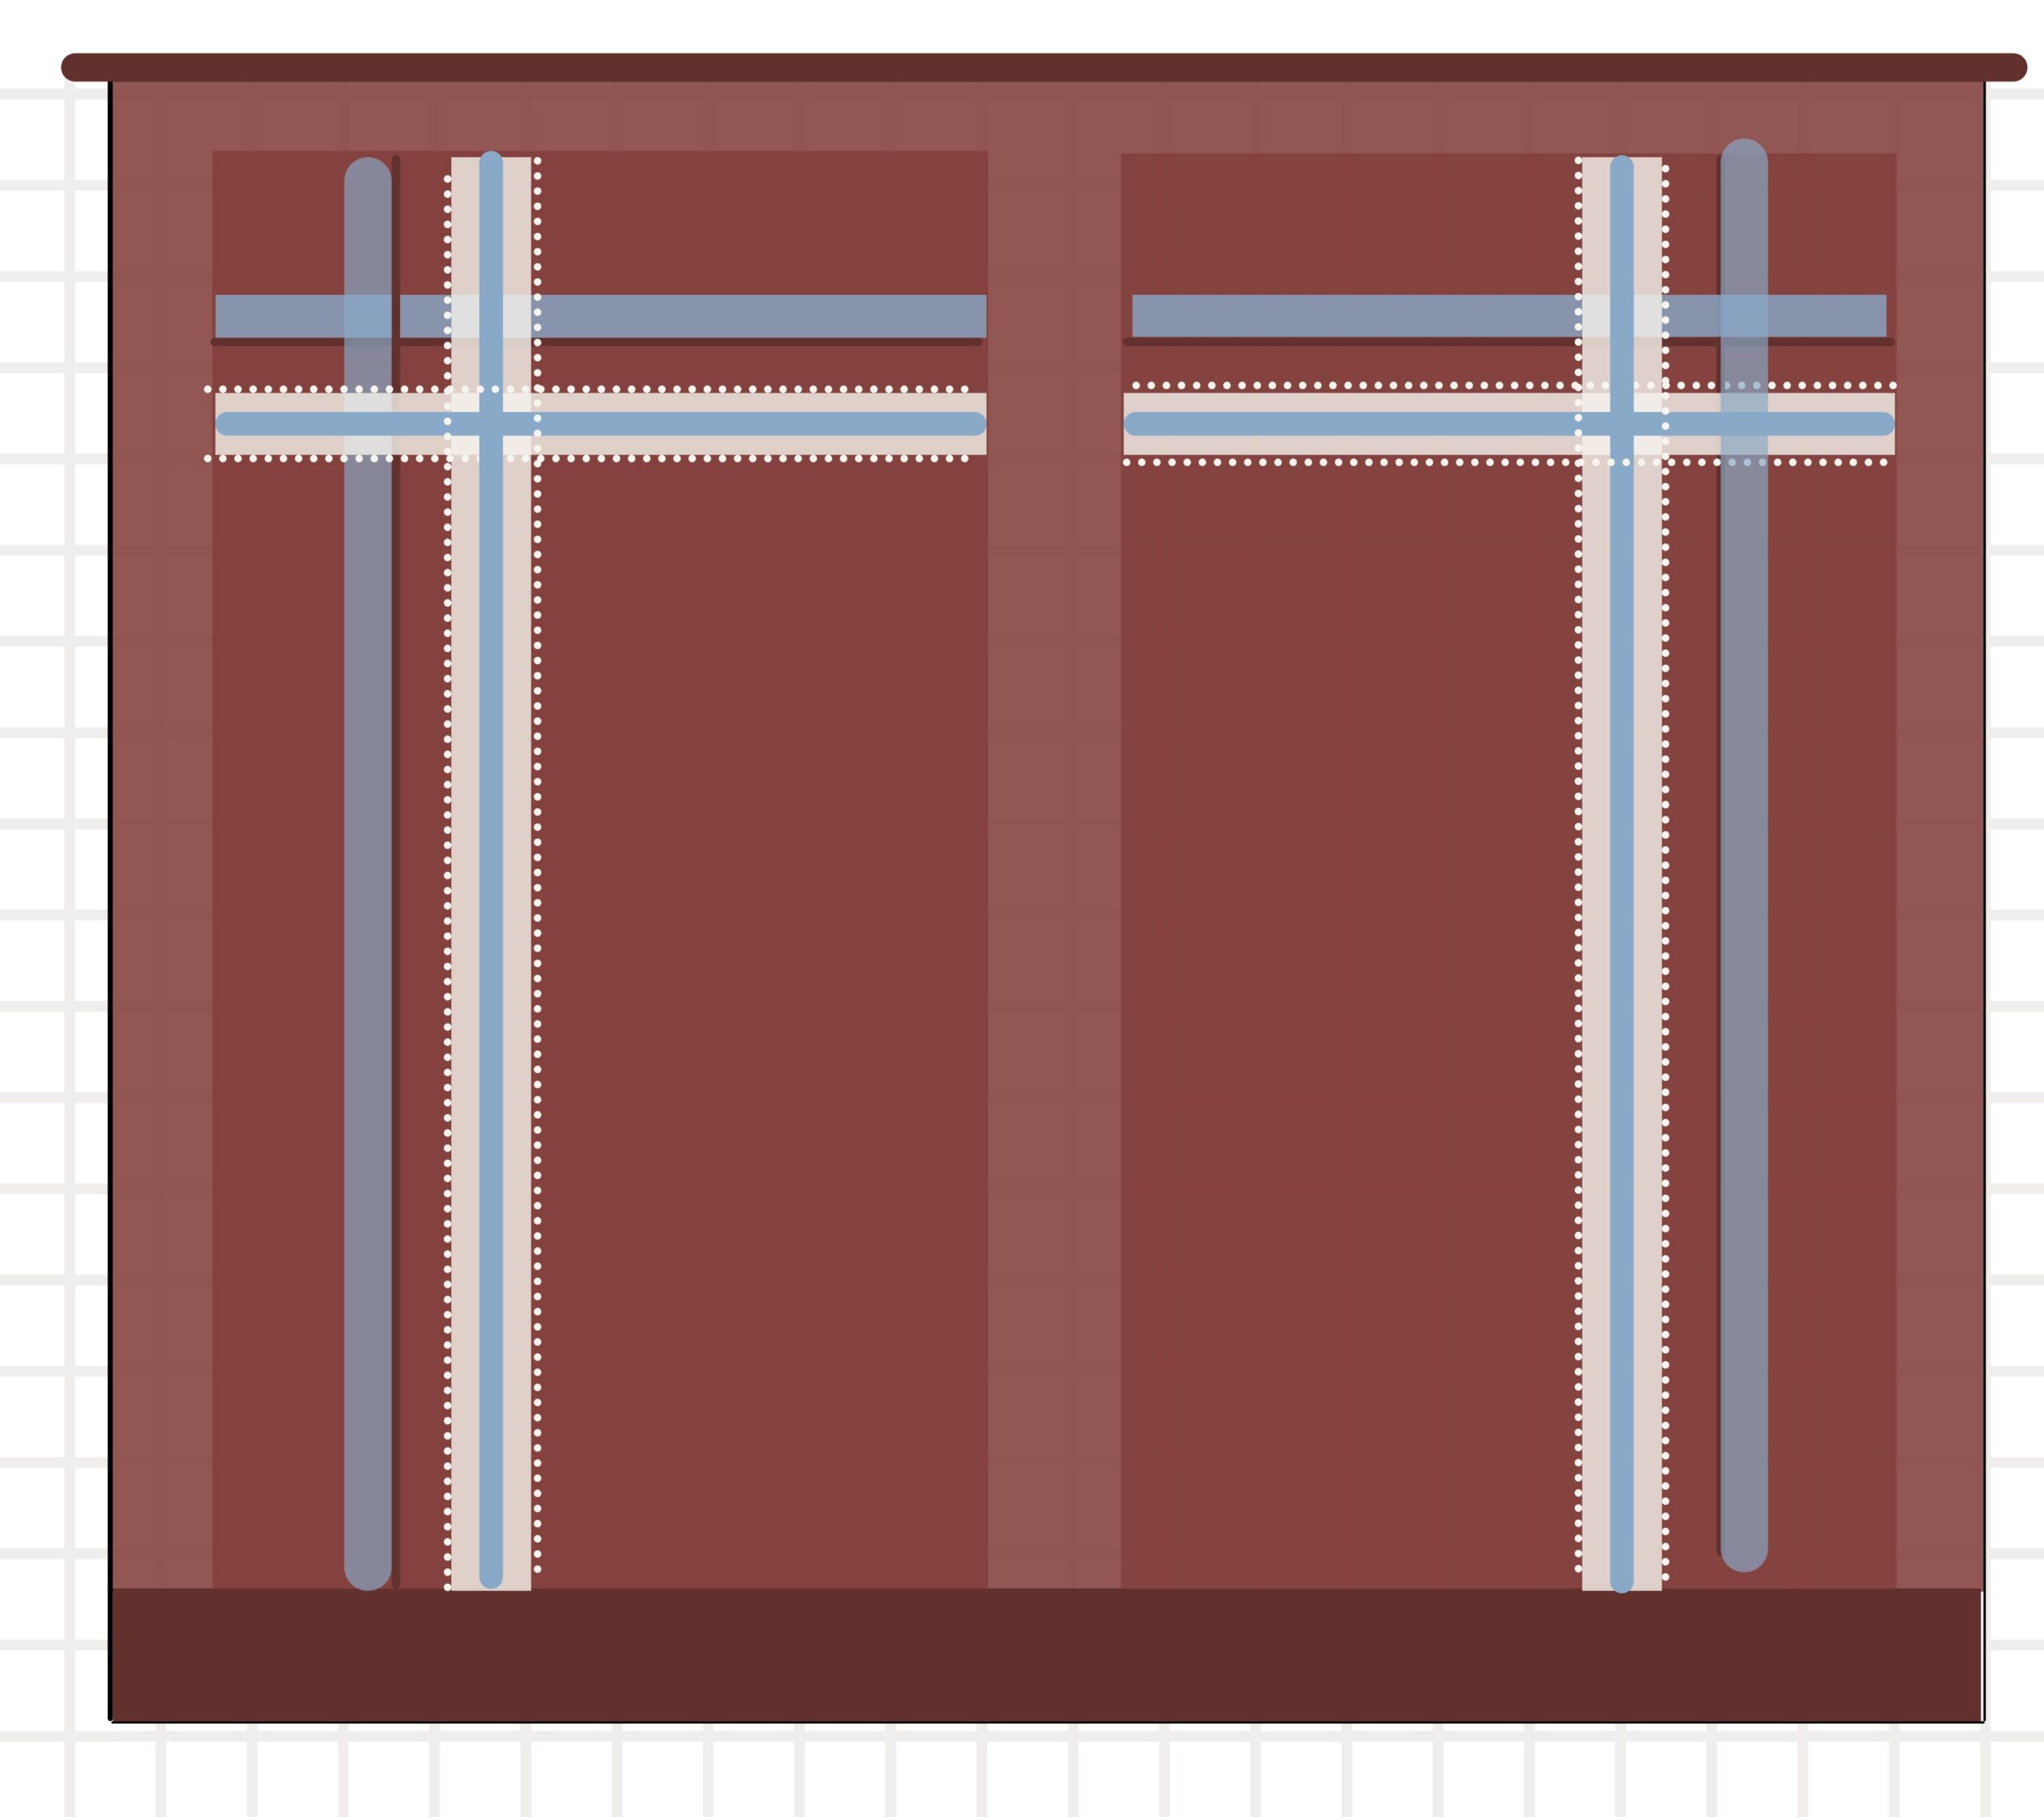
When I start a project, I usually like to have a concept drawing.
It can be a doodle on the back of a stray receipt in my purse, a loose drawing in my sketchbook, a more measured drawing on graph paper or; as this one, a mock up in Canva.
If you don’t know about Canva, you need to! There’s a great free version. with mobile options. It’s easy to use! And particularly helpful when you’re playing with color. It gives a much better representation than I could get with colored pencils. Check it out.
Scroll back up and plant that before in your head, then the mock up and now . . . .
So How Did I Use Colored Stains On My Wood Cabinet Her Makeover?
Supplies:
- Sand Paper
- Tack Cloth
- Painters Tape (I used Frog Tape)
- Colored Stain (I used Cabot)
- Ruler
- Pencil
- Screwdriver
- Small Zipper Bag (for the hardware)
- New Door Knobs/Handles, optional
Step 1) Sand and Wipe Clean
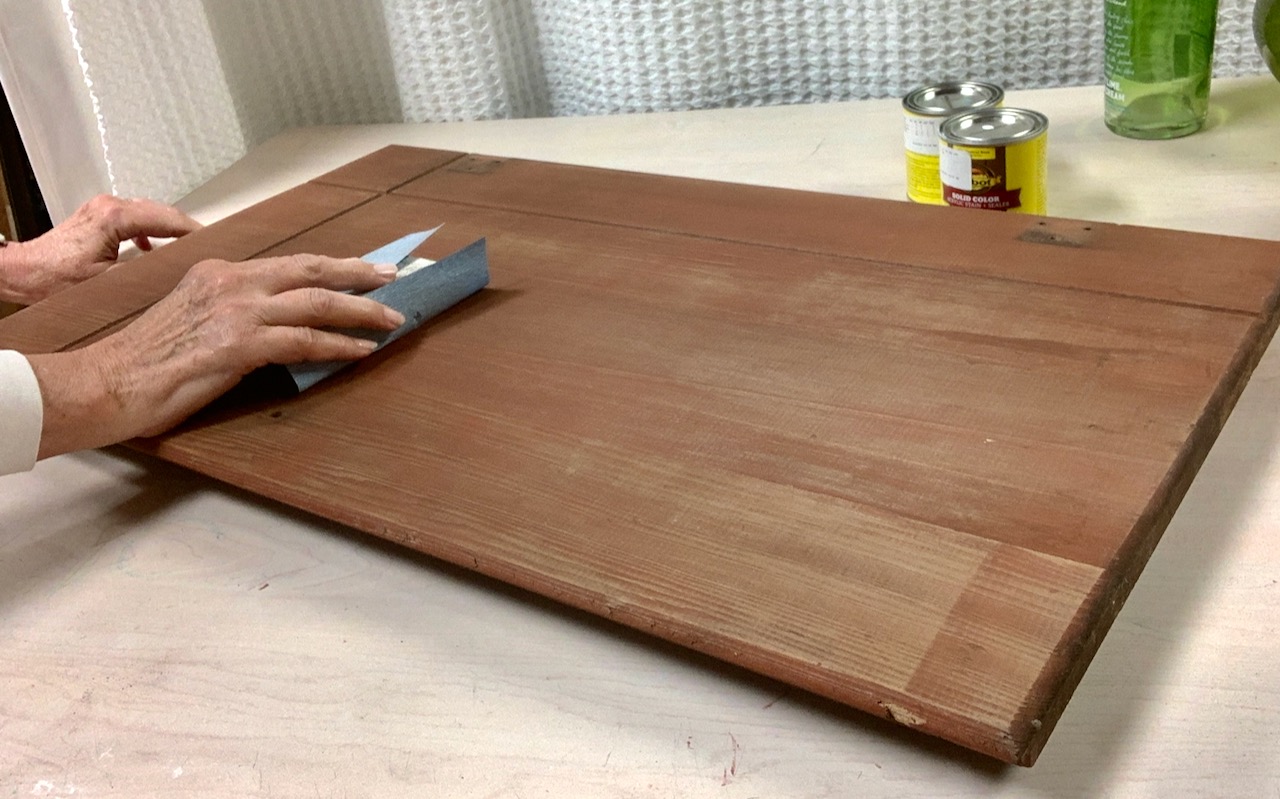
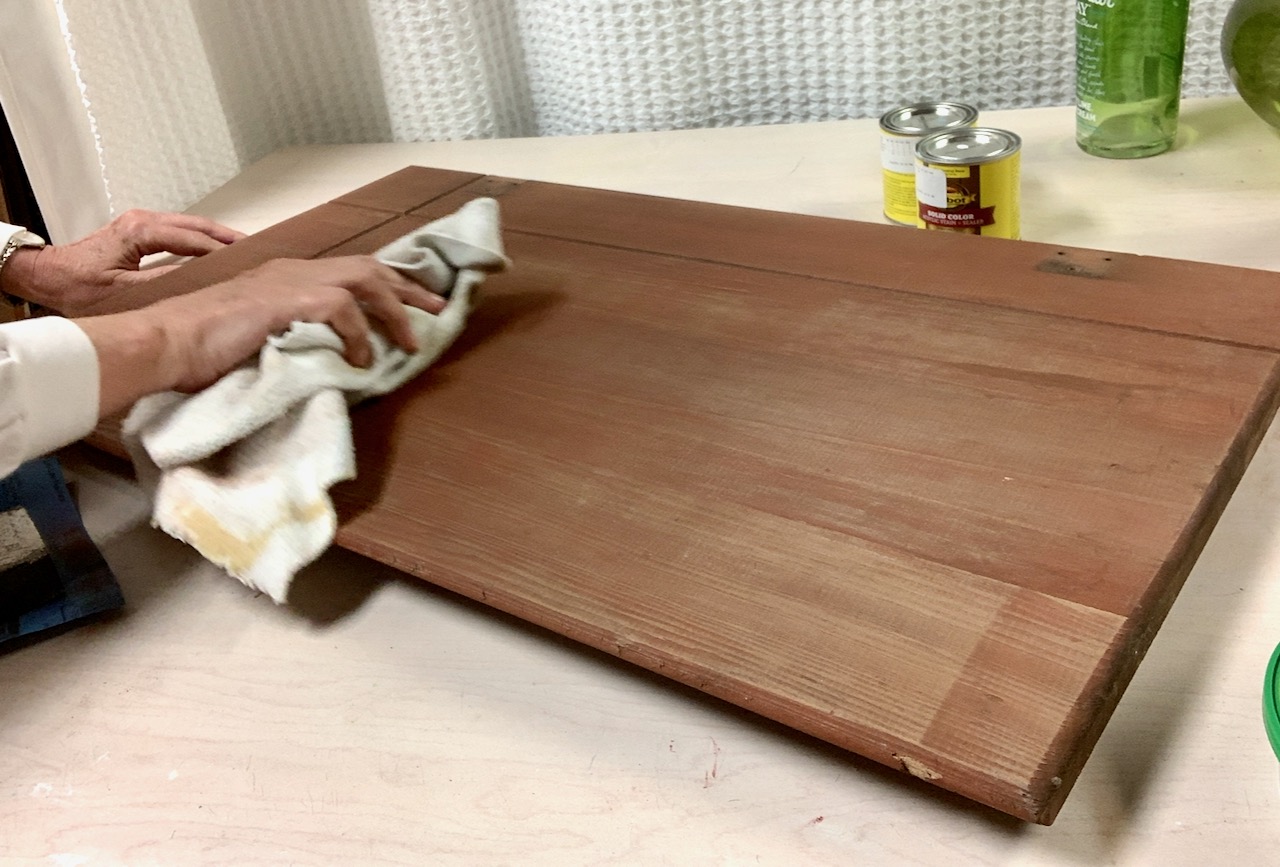
As with all staining and painting projects, start with your surface prep.
In this case a very light sanding. I wanted to preserve the old character and just remove any “yuck” or film from its years of service. And use a tack cloth or damp cloth to remove the dust.
Step 2) Test Style of Stain Application
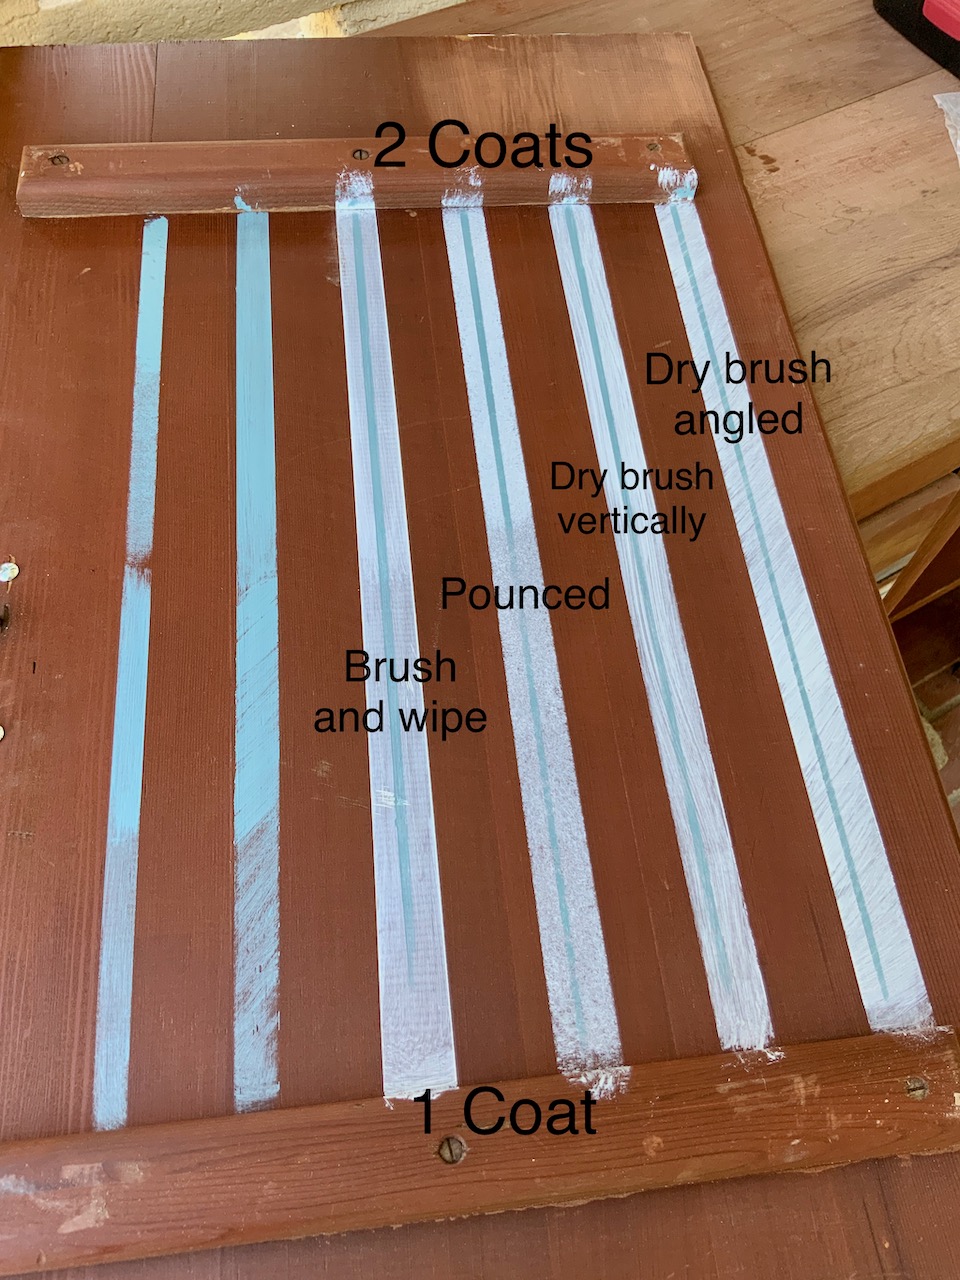
On the inside of one of the doors, I tested the colored stains to see what kind of coverage to expect.
Really i ended up testing the style of how to apply the stain. I wanted an aged look — somewhat transparent. That’s one of the reasons for using stain vs. paint. I wanted the stripes to look like they had been there forever and were part of the cabinet’s aged past.
Somewhat paradoxical, I know! Aged and original, but a fun update. Hhmmm.
We immediately liked the dry brushed at an angle best. And determined that it would need two coats of the white to support the blue pinstripe.
Step 3) Tape and Stain the First Lines, Possibly Two Coats
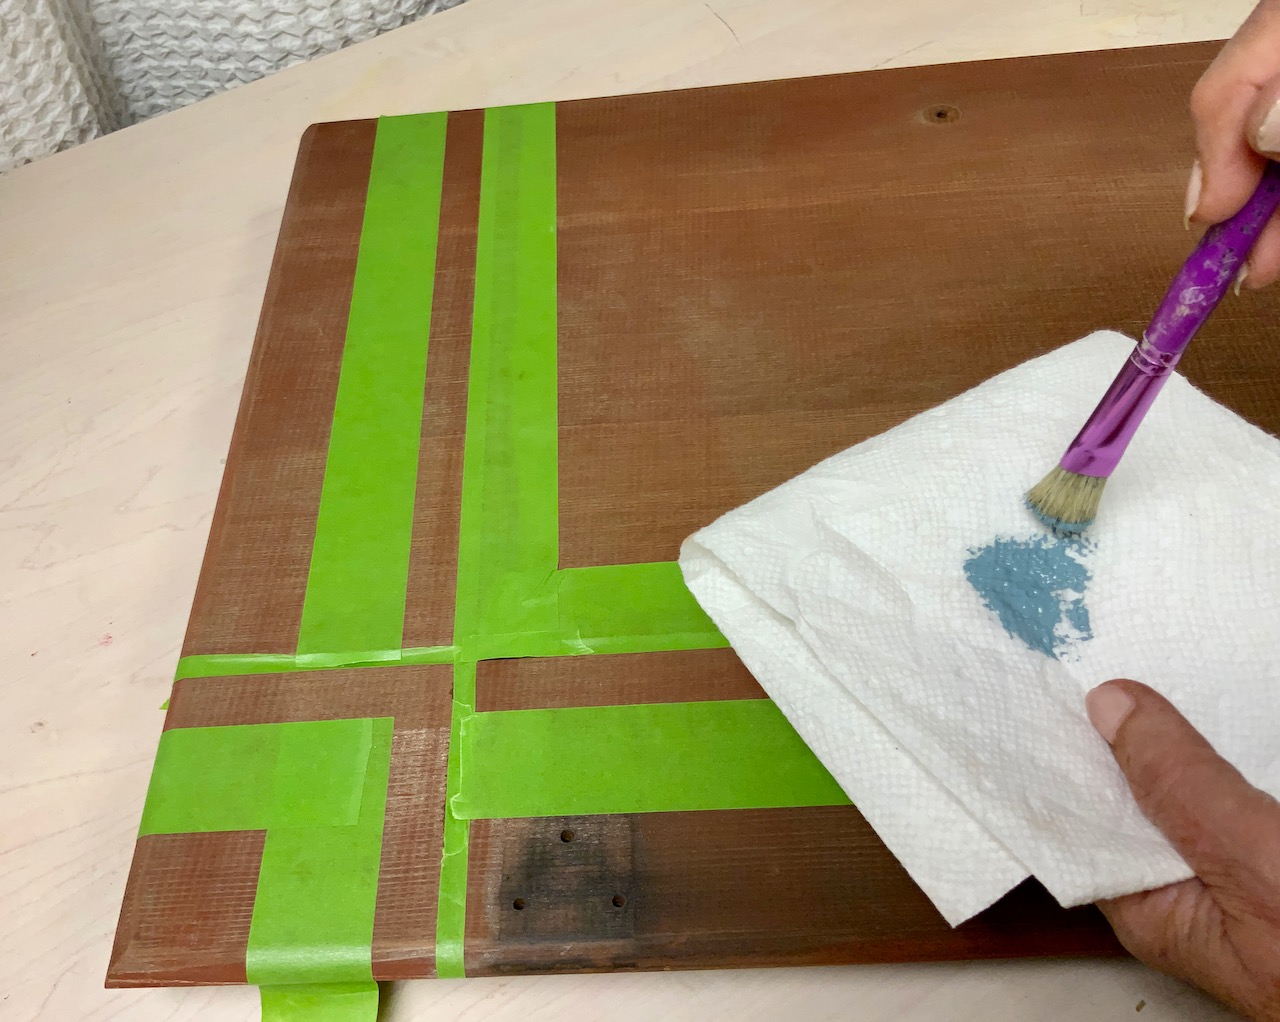
Determine which lines should be the background lines. Those need to be stained first.
Notice that my doors had an extra groove cut into them. This is actually what inspired the plaid design.
These grooves also required a bit of extra taping to make sure the stain didn’t ooze down in the grooves as I planned to paint them black.
To dry brush, dip your brush into the stain and then dab most of it off before very lightly swiping the stain across the stripe. And I did my swipes at an angle.
As the stain dried, it became clear that I needed a second coat. (Glad I didn’t pull all that tape right away.) After the second coat, remove the tape.
Step 4) Stain, Stain & Remove . . . Again
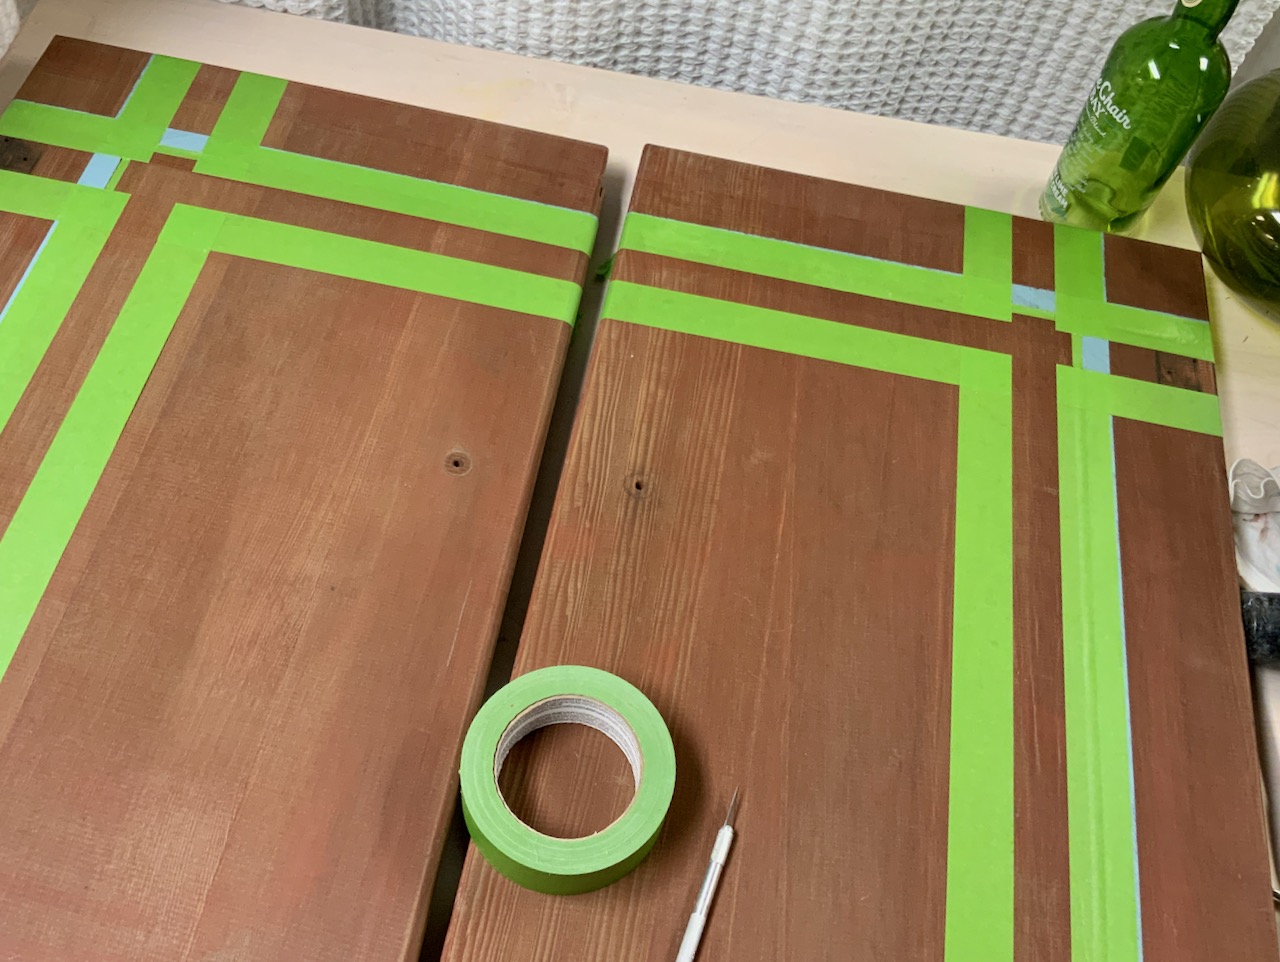
Once the first lines are completely dry — like overnight dry — tape the second set of stripes to over lap. Again, I had to work a bit more because of the grooves.
Apply two thin coats of stain using your preferred method.
Remove the tape and let dry overnight.
Step 5) Tape, Stain & Remove . . . Yes, Again
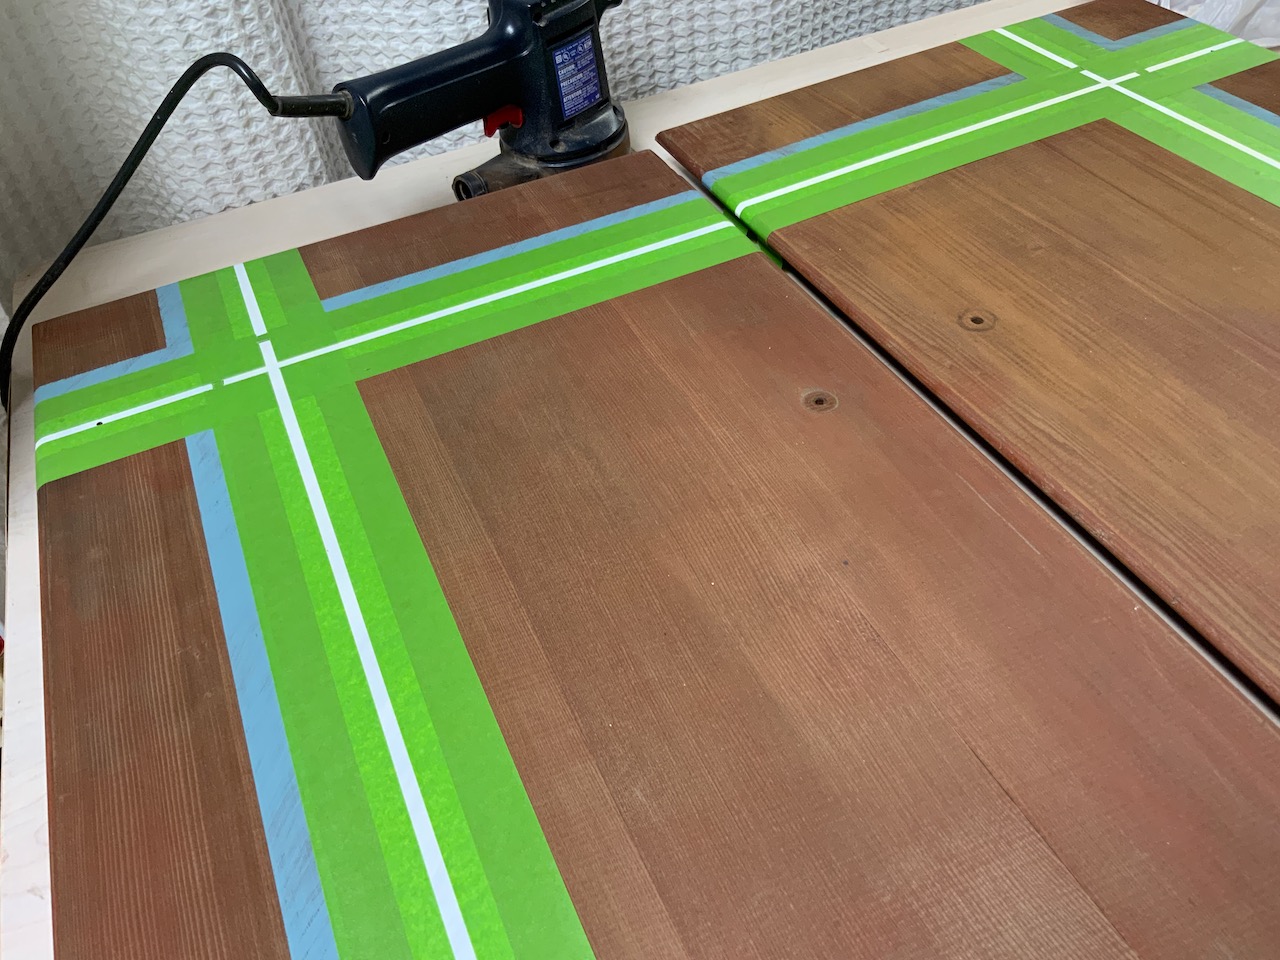
Basically, you need to tape and stain for each layer of your design. How intricate your design is determines how many times you need to repeat this step.
For me, that’s four times:
- the wide blue stripes
- the wide white stripes
- the thin blue pinstripes on the white
- the black accent of the groove
Step 6) Distress Your Stripes, Optional
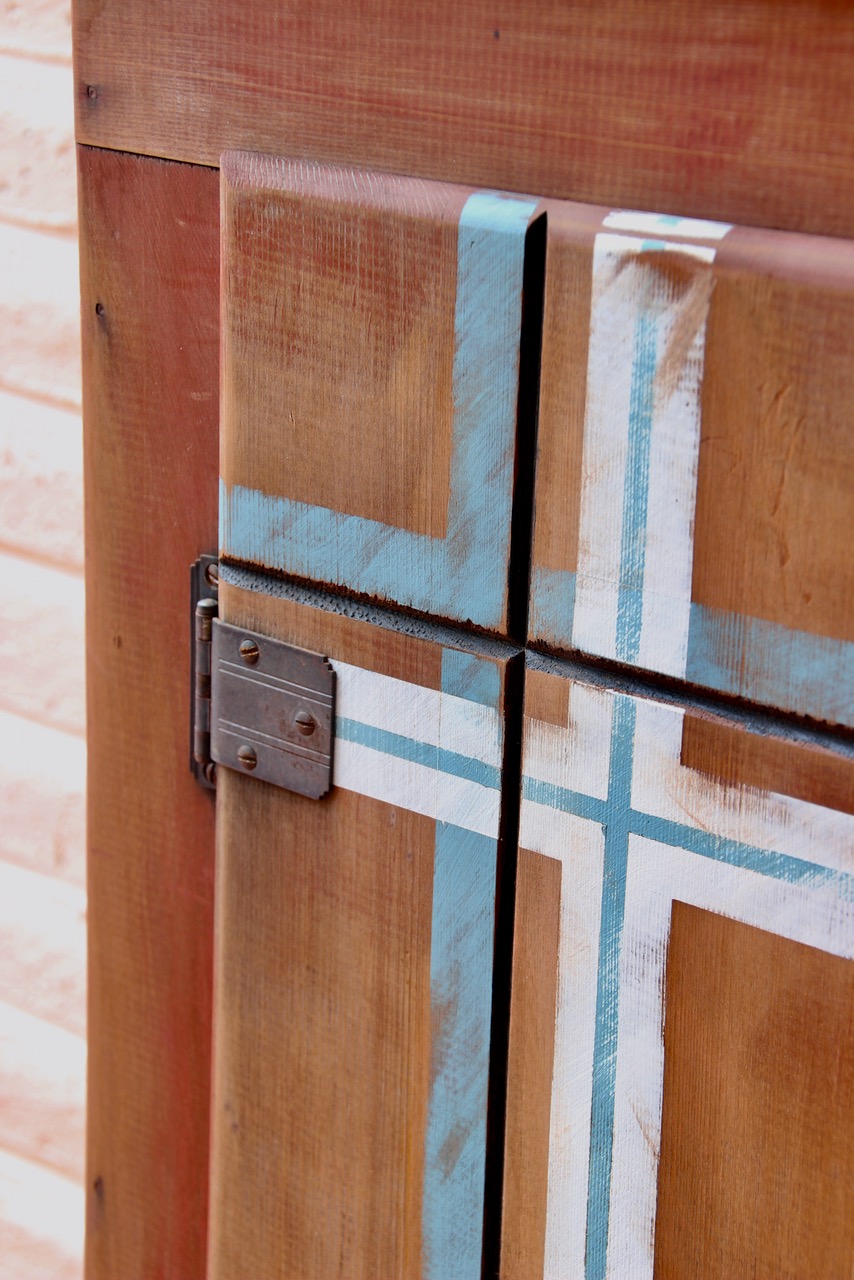
Break out the sandpaper, optionally a power sander, and play with the edges of the stripes. Since I wanted the original, aged look, I really needed to soften the sharp edges that wonderful Frog Tape gives us. I didn’t want bleeding, but in this case I didn’t want sharp either. So I really concentrated my sanding along the edges of the stripes.
So happy with the results!
Step 7) Rehang Doors, New Hardware
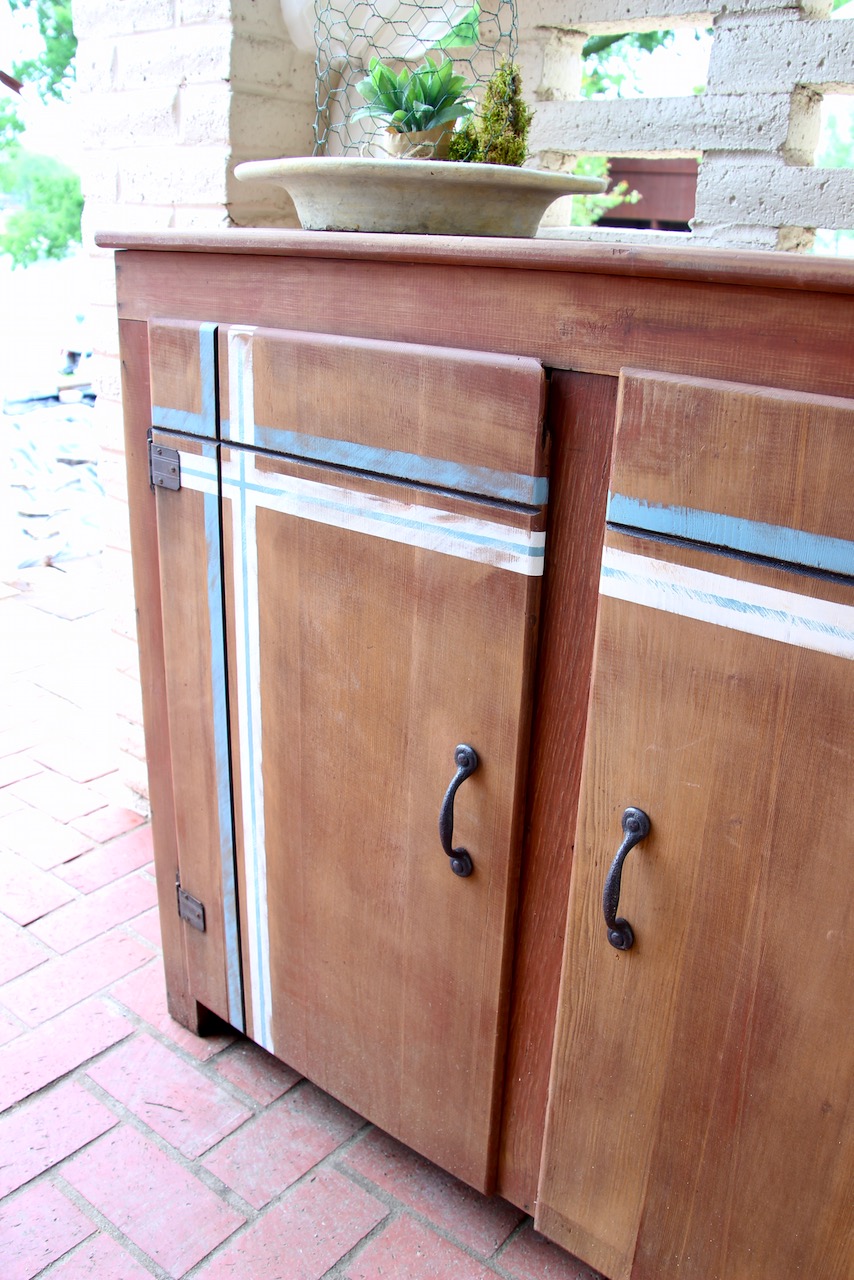
This is where you’re so happy you took the extra minute to grab a baggie for all the loose hardware!
You’re Wondering: Where did she go wrong with her colored wood stain?
It wasn’t evident until the second set of stripes, the white ones.
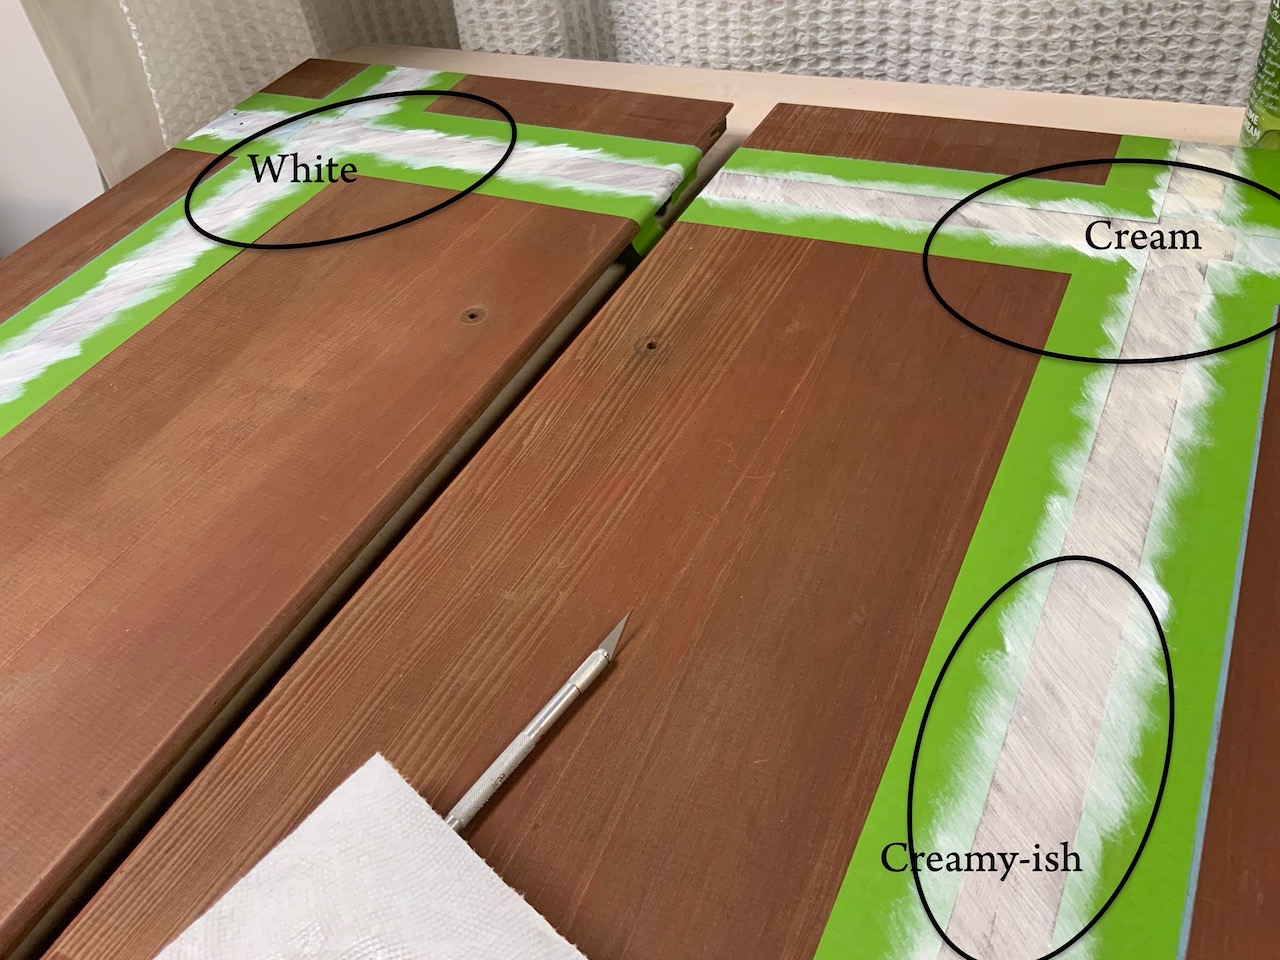
The left door was nice a white. The right door varied, with the upper corner particularly “yellowed”.
I decided that a second coat might take care of it. However, this is stain, NOT paint. The second coat idea would work with paint. But stain inherently will reflect the wood that it is being applied to.
Either I had not sanded the doors the same on my initial light prep sand, or I had not cleaned the dust off the right door and it was picked up in the stain, or the doors were made from different woods and one had more intrinsic color to it. To correct this, I ended up sanding most of the stain off the right door and started over.
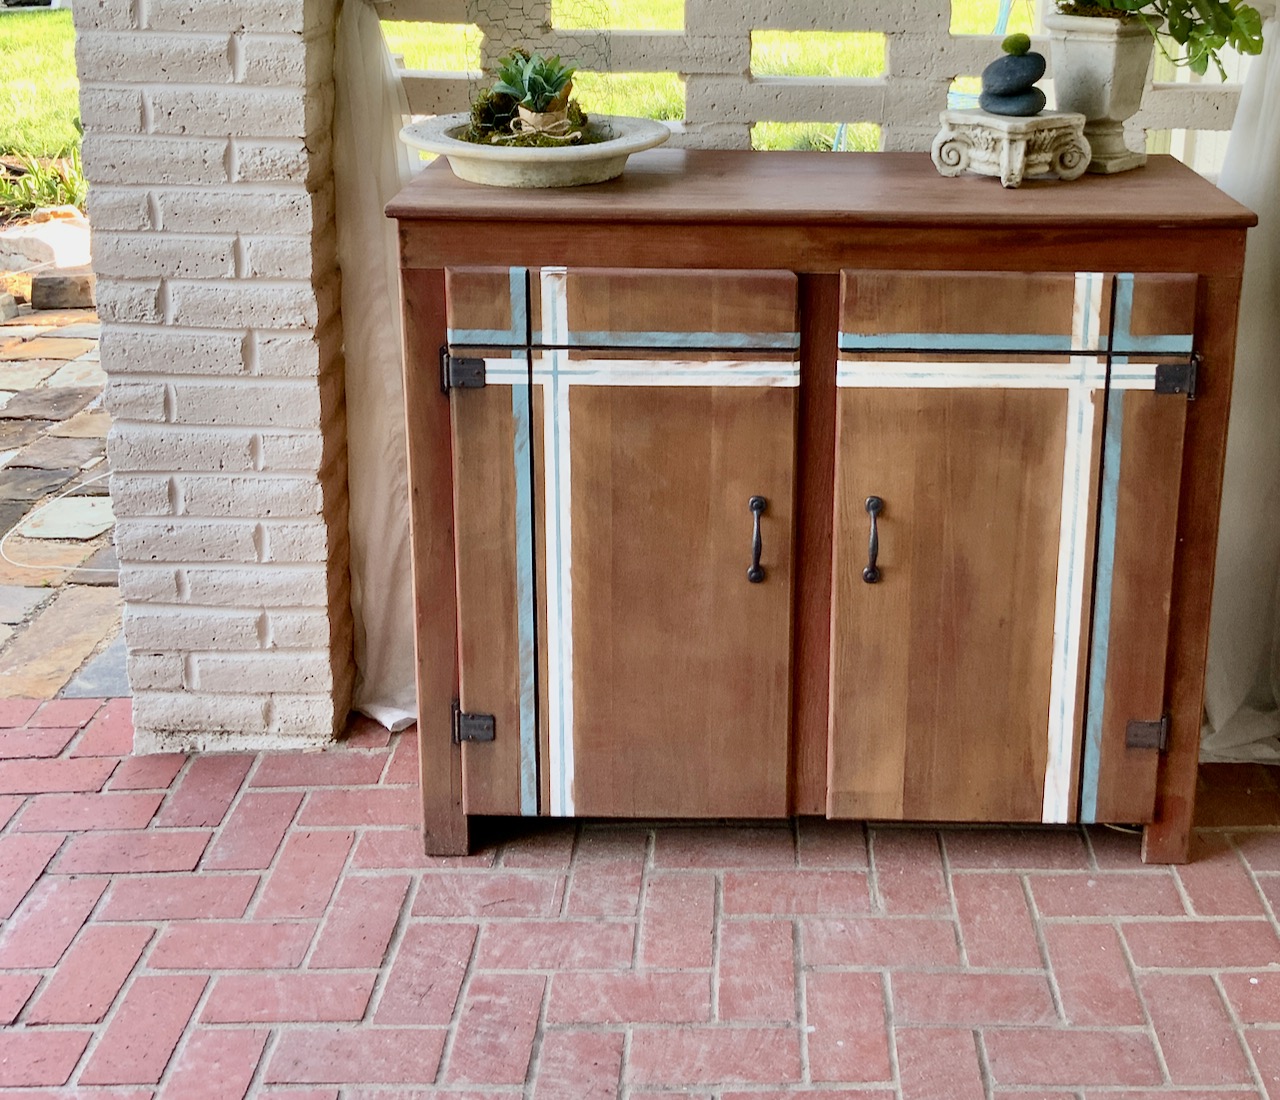
Now of course this means the left door is darker than the right, so I factored that in when I was doing the distress sanding, bringing the center part of the door to match more with the right. This is truly and aged cabinet now!
So keep min mind how important the prep is when you are working with stain.
Why colored stain vs. paint?
My goal was to give this old cabinet some new style, but not make it feel new. I wanted to marry some modern design with some aged character.
I wanted to accomplish this with just some accents, not a total refinishing. I wanted the original wood to show through the stripes. I wanted the stripes to be somewhat transparent. Stain accomplishes this better than paint ever could.
This cabinet sits outside — under the balcony, but not totally protected. I think stain holds up better than paint in this kind of environment. Stain will fade a bit, but that is good for this application.
What Do You Store in a Patio Cabinet?
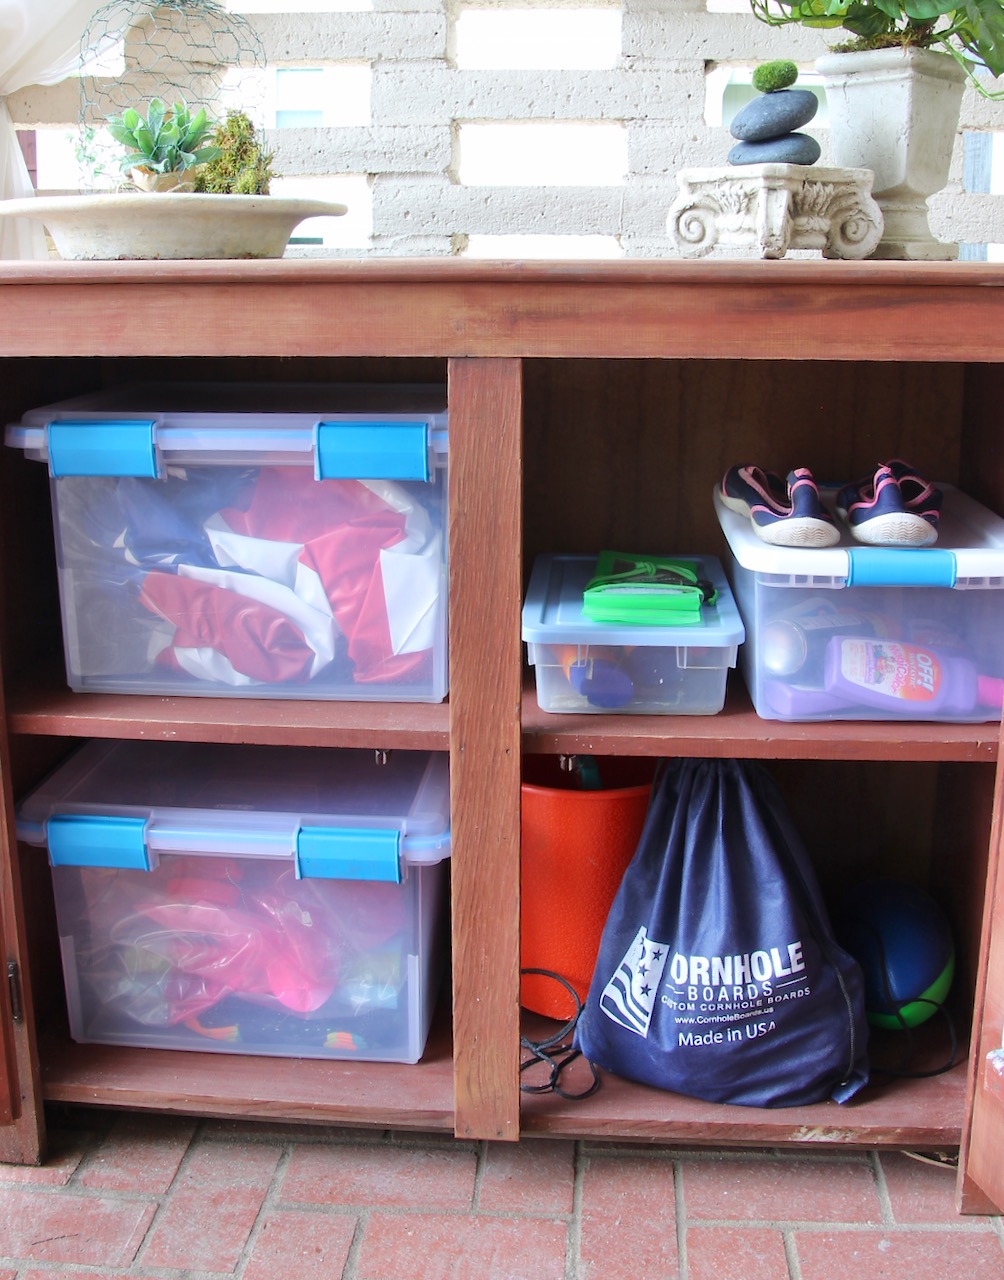
In the last house, this cabinet was on our screened porch and held all the decor items I used on the porch for entertaining.
In this house, it now holds all the water supplies:
- tub of sunscreens and such
- tub of bug sprays and such
- tub of inflatables
- tub of small inflatables, pumps, patches, etc.
- my water shoes
- waterproof phone pouch
- key floats
- nerf football
- cornhole sacks
You know, all those lakeside playing essentials (the bigger items are in the cabana shed)
I hope this inspires you to try some colored stain — particularly these from Cabot. I’m going to be using them for signs coming up soon, I hope.

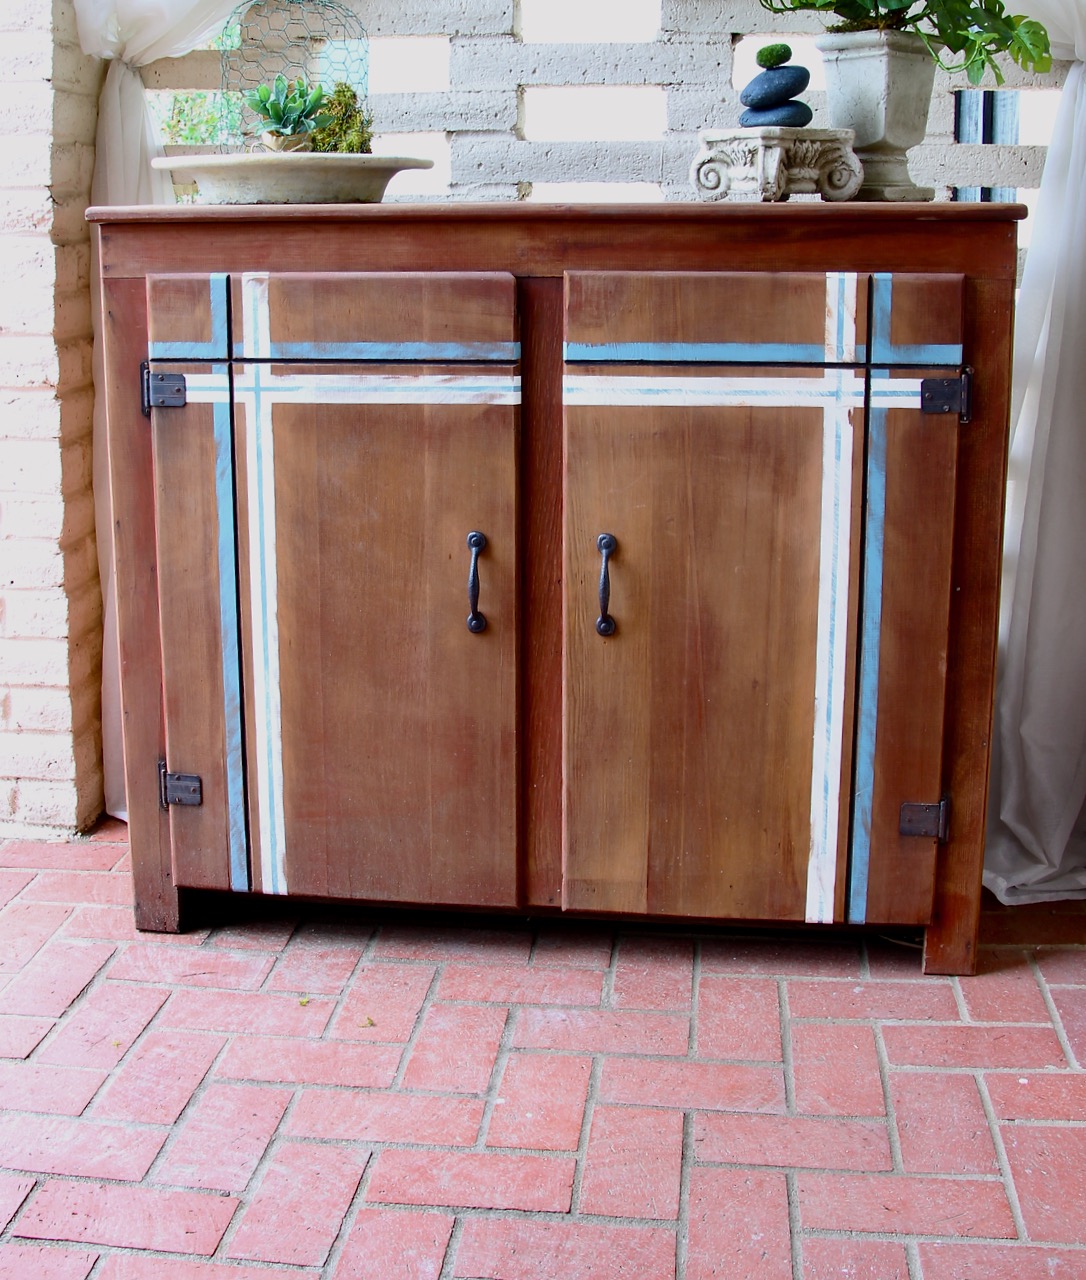
And one more parting shot. Thanks for indulging me! I’m just so happy with the results.



I love the way this turned out! It looks so pretty and I feel like this is such a do-able project. Even for me! Lol.
Absolutely doable! Nothing like painters tape and a soft touch. Bonus, no need to do the rest of the piece!
You did an amazing job with this makeover. I love the design you created.
Thanks Paula, so kind of you!
Love everything about this transformation!
Oh Melba, you are so kind!!!
Love the design you did on this piece. We don’t judge, love that you gave an old piece new life.
Always love resuscitating sad, old pieces.
How fun! I love, too, that you tested on the inside! Brilliant!
Oh Leslie, Thanks so very much.
What a great way to add interest to a pretty standard piece. Great job.
Thanks so much Carol!
Beautiful makeover, it’s perfect, and thanks for the technique tutorial!
Thanks bunches, Kim. It was a fun one to do — just some accent lines, rather than the whole enchilada, (as my Dad would say).
I’ve never hear of this product! How fun to update an old wood item. Thanks for sharing.
Hope it inspired you. Glad you learned something new. It’s a great product — not sponsored, just sharing good products when I can.
That’s such an improvement on that cabinet! We have an outdoor bench with a lid that we store those sorts of things in. I kinda like the cabinet idea better! Pinned!
It’s one of those things that I didn’t go looking for, it just kind of happened. But so very glad it did. With a bit of updating it has fit in at both of our last two houses. BONUS: since it’s not a “nice” piece of furniture, I can use it outside, in a covered spot and not worry.
Great Job!
Thanks Rebecca!
You did a great job! It’s fun to try different techniques, and using different stains instead of paint colors is new to me. I like that it’s a utilitarian piece but you have definitely made it look like a girl going to a party! Well done!
I LOVE that. It’s like a cargo short sundress mash-up.
You made this looks so easy with cute results!
Thanks Linda! It really is easy!!!