
How to Hang Outdoor Sheer Curtains the Easy Way
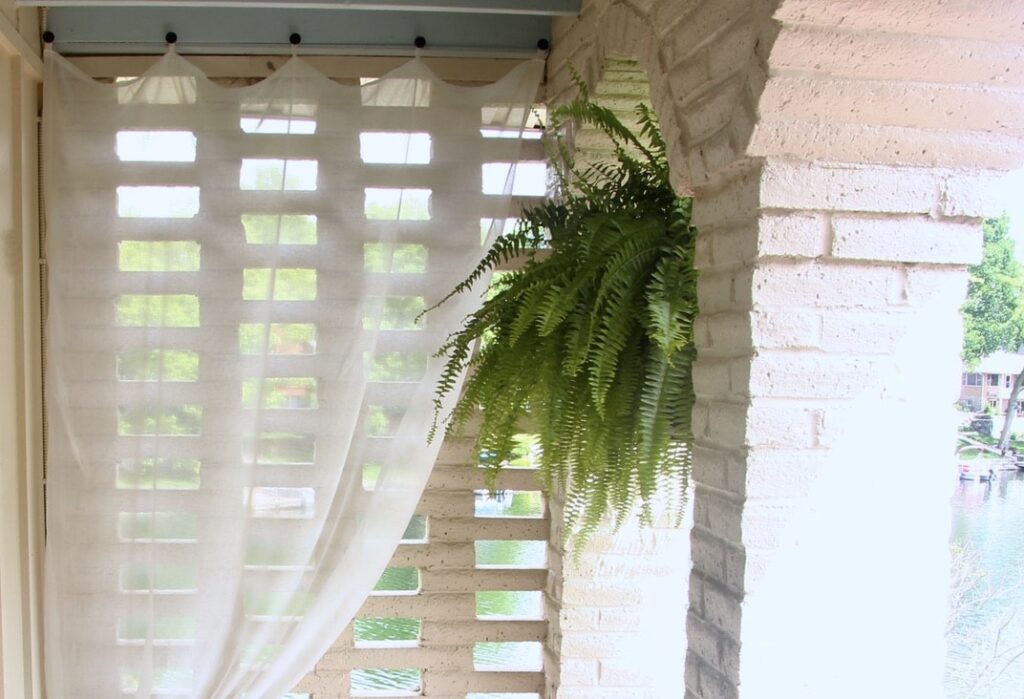
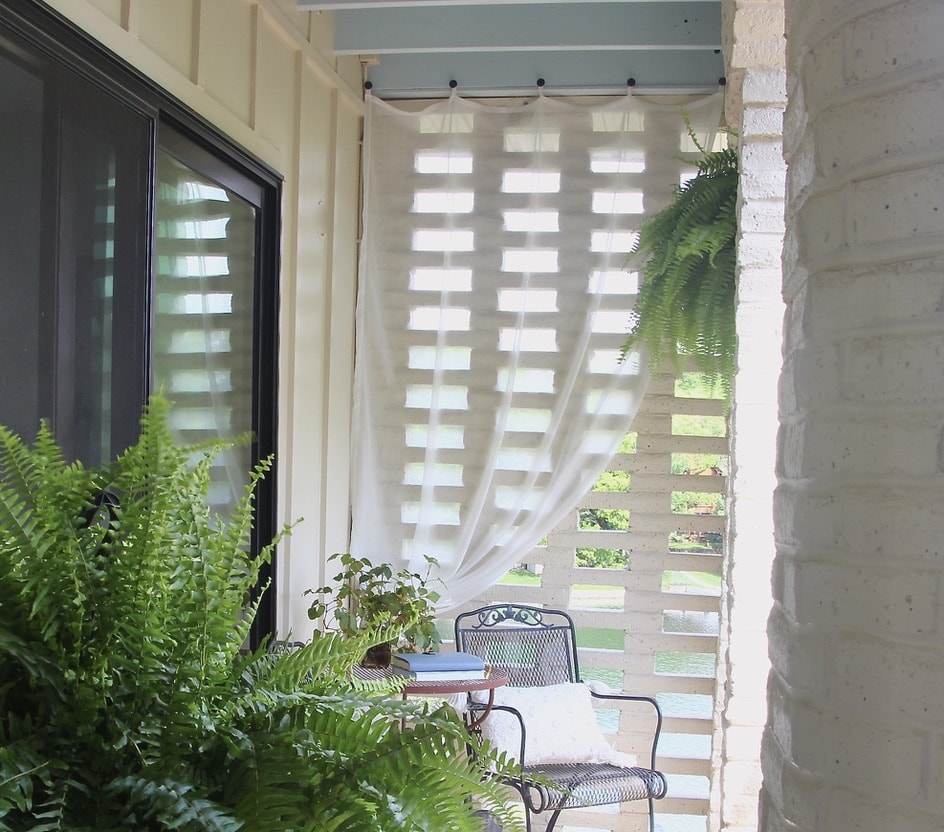
Turn your outdoor living space into an oasis with sheer curtains hung on knobs, not rods. They frame a view or obscure a less desirable one.
Just by hanging outdoor curtains your space is instantly elevated.
It’s special…
it’s charming
it’s intimate
it’s romantic
It has ambiance … and attitude! It becomes an oasis … your private resort!
Sheer curtain panels can obscure a less than desirable view and they can frame a stunning view. They say “special, cozy & private”.
They’re such a simple way to make a big statement!
And it’s not expensive. We’re talking sheers here, rather than heavy drapes and no expanse of outdoor curtain rods are needed.
Adding indoor elements to outdoor spaces; think area rugs, lamps, wall art and yes, curtain panels, elevates the outdoor space to the same level as your indoor rooms.
Let that patio-deck-balcony proudly throw back its shoulders and carry the same entertaining weight as any indoor room!
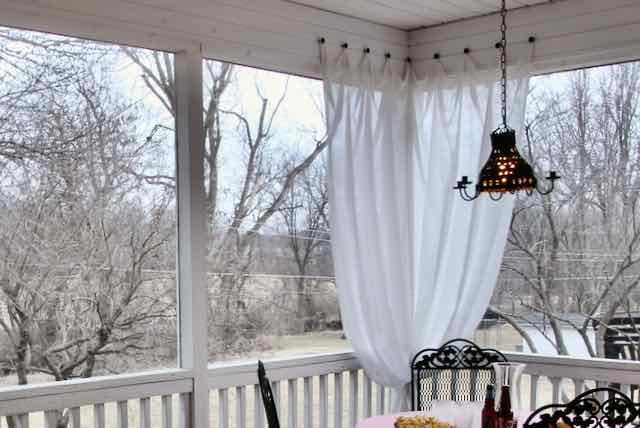
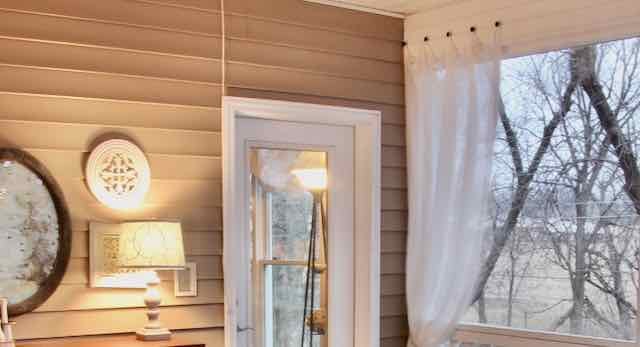
Our screened porch certainly carried the entertaining weight in our last house. (sorry I don’t have good pictures of the sheers with the trees all green)
That table lamp? It served us so well out there — made the porch a room, a very special room. That lampshade post is getting a rewrite at the moment.
But this blog post its about how to hang outdoor curtain panels. Don’t have time right now? No worries. Pin this to find it when you need it:
=
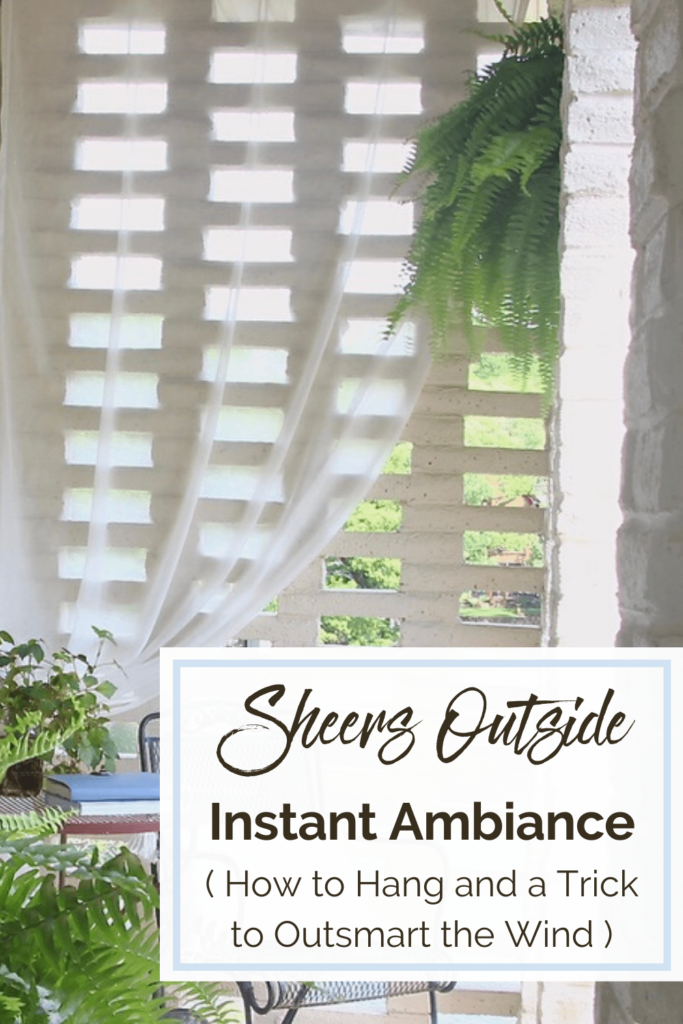
TABLE OF CONTENTS
The links in this post may include affiliate links, which means if you purchase anything using these links, you pay no extra, but I may receive a small commission that helps keep this blog running. I truly appreciate you using affiliate links whenever possible. Please know that I will never recommend a product I do not believe in!
Let’s Get Started Adding Ambiance
Materials and Supplies:
- Lightweight curtains (more info below), These have great texture and lots of sizes at a great price! These are crazy cheap for a window scarf.
- Curtain tiebacks
- Tape measure
- Pins
- Scissors
- Thread
- Ribbon (I used white grosgrain)
- Sewing machine, optional
- Curtain weights
- Cabinet knobs, these are the ones I used
- Hanger bolts, or dowel screws
- Drill, small bit
- Ladder or footstool
- Locking cup hook or eye hook
Let’s Talk Outdoor Fabric-
Since we’re talking outdoor use, choose a fabric that is machine washable and dryable. Any rain will dry quickly and you can throw them in the washing machine between seasons like I do. Yes, in this case, you can use indoor curtains in your outdoor spaces.
Keep in mind, these sheers are not privacy curtains or protection from the weather. This type of curtains is for ambiance, filtered shade and maybe filteriing a view.
My original outdoor curtains on the screened in porch were made from the cheapest white sheer window scarf Walmart had in stock at the time — those were the dark ages before online shopping.
Typically window scarf valances are 216″ long, yielding two panels. But be careful because some of them are not very wide.
You can use individual panels, if the length is right and you don’t mind spending a bit more as trade-off for no cutting and hemming.
In our current house, I’ve made two more pair from window scarves ordered online.
If you prefer no sewing, purchase panels that have thin tab tops.
I prefer a more matte sheer with a bit of texture. With that in mind, I’d choose these curtain panels in lots of size options and this for a scarf (at a crazy cheap price) if you don’t mind cutting and hemming a bit.
NOTE: if you plan to always have your panels tied back as we do, the length does not need to match the height of your hanging space — longer is better because the length will rise up as they are tied back.
And if you have enough extra length, I love the look of the panel tied in a loose knot where my ribbon is.
Let’s Talk Hardware-
Plain and simple, tension rods, sisal rope and adhesive hooks like command hooks, do not hold up in outdoor areas. Even classic curtain rods on traditional curtain rod hardware may not hold up to strong winds (and could become dangerous).
Outdoor drapery rods, whether ready-made or diy, are made to hold up to harsh weather conditions, but the curtains will not stay put. They slide wherever the wind takes them. Plus they can get quite expensive and are just a heavier look than I wanted.
I have found the best way to hang outdoor curtains for decorative purposes is also the easiest method and least expensive! The trifecta of curtain hanging!!!
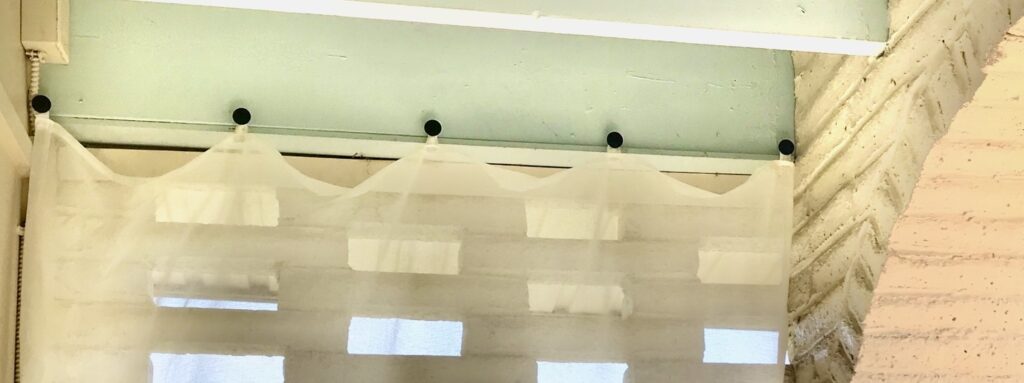
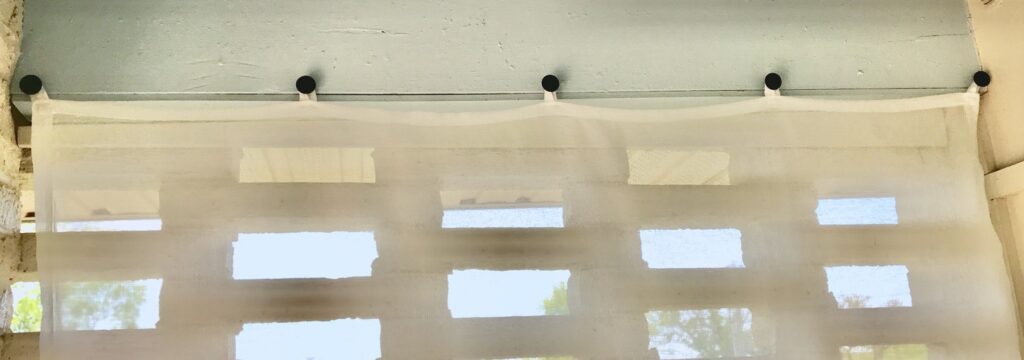
So rather than using rods, I hung the panels from hooks (actually cabinet door knobs) at a spacing that worked for my spaces.
Now, my sheer panels stay where they belong and the hardware is incredibly inexpensive and easy to install.
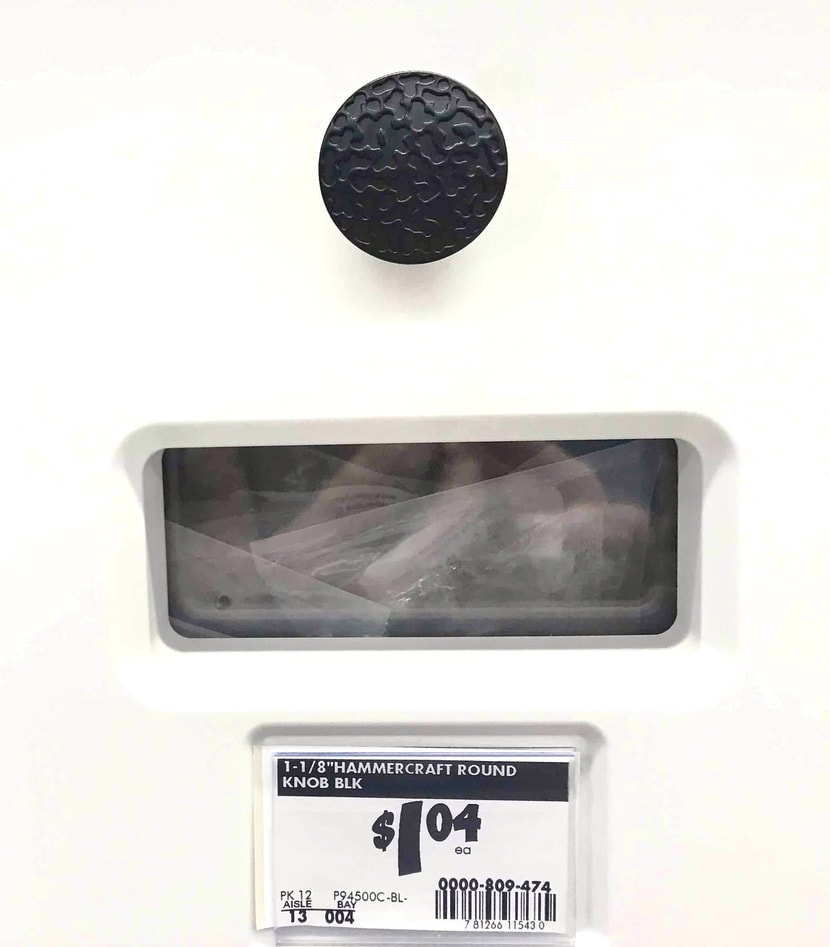
They’re way up high, all I wanted was round and black.
I used the least expensive black drawer pulls I could find at Home Depot. Check! And check!
I suggest five knobs per 54 to 56-inch wide panel.

Then pick up a package of hanger bolts (dowel screws will work in a pinch). You should be able to find them hanging with all the “specialty screws”.
Hanger bolts have machine screw threading on one end and wood screw threading on the other. Dowel screws have wood screw threading at both ends.
These let you screw a drawer pull on one end and the other end screws it into the porch header, wooden beams, the side of the house or nearby structure, or even into a hearty tree branch.
Prepare Your Curtain Panels
If you bought panels with tab tops, then you are ready to go and can jump ahead to installing your hardware.
If you bought a window scarf like I did, you’ll first need to cut it to your desired length plus allowance for a double turned under hem.
I cut that long scarf into two long panels, about 108-inches each.
Then folded and pressed a modest hem, folding over twice.
PRO TIP: Add a curtain weight in the corners of each bottom hem.
Run it through the sewing machine, but you can certainly hand-stitch if the machine terrifies you. This hem will be the bottom of the curtain and hardly show. Don’t stress about its perfection.
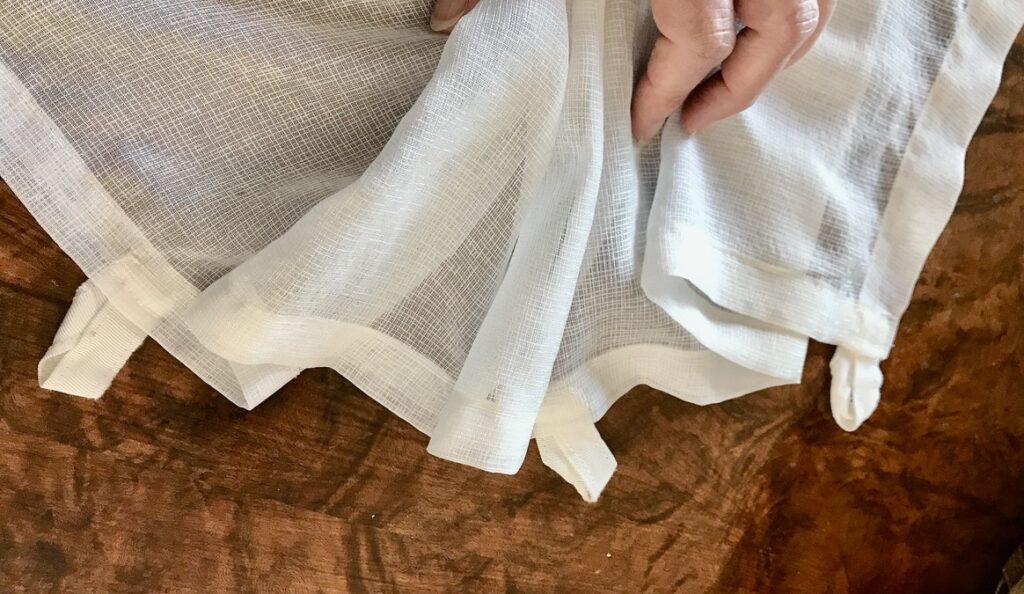
Now For the Ribbon Loops–
Use stout ribbon, such as grosgrain or a soft webbing.
I wanted to stay with white and only had a wide grosgrain piece on hand. So I pressed it in half lengthwise and then stitched down those sides (probably didn’t really need to stitch the sides).
Cut you ribbons to length. For my 1-1/8″ knobs, I cut my ribbons 4-inches long. I suggest doing a zig zag over the ends, or if machine fear kicks in, then heat-seal the ends.
You can only heat-seal ribbons that are of synthetic fibers. (not cotton, wool or burlap) Cut you ribbon and pass the flame from a lighter across the very tip of those cut edges. Watch carefully as the edge melts and shrivels up. Sidenote: it’s really rather fascinating to watch.
CAUTION: Of course, use precautions with open flame. And please do not have any little ones watching, possibly planting the seed to mimic.
Along the top of the curtains, mark where your ribbons will go.
With five there’s no math required. One centered on each of the side hems, fold in half and mark the middle, then line up each corner mark with the middle and and mark both of those middles.
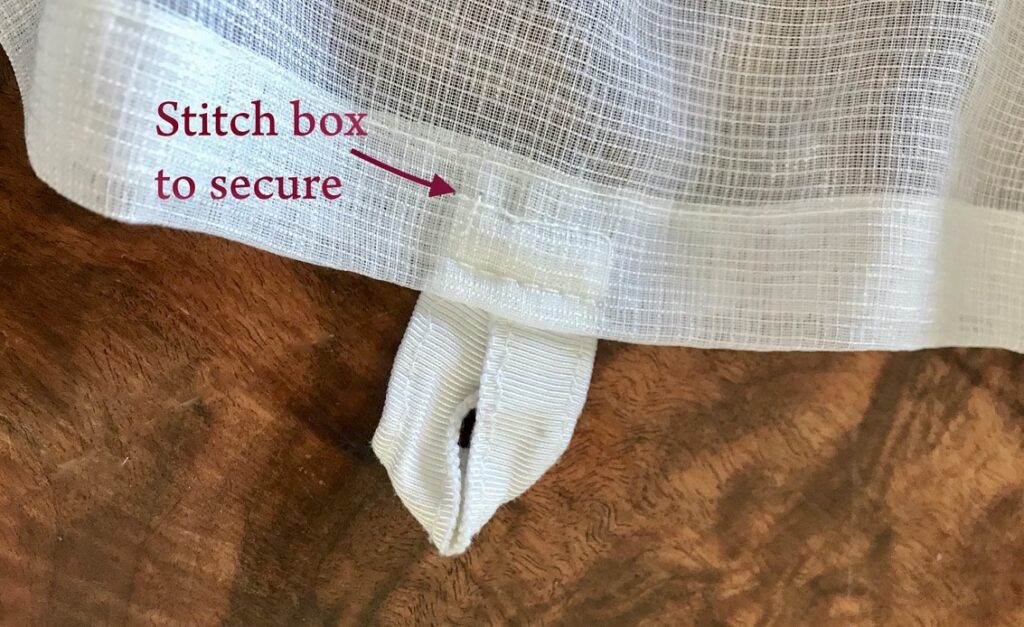
Next, on each mark, stitch a ribbon folded in half with ends lined up a bit below the top on the backside of your panel.
PRO TIP: Pin one of the ribbons in place and test again, making sure the loop is large enough to make it over the drawer pull.
All good? Then stitch these securely!!!
I stitched a box with one edge of the box along the upper folded edge of the hem. This keeps the upper edge flat and hanging evenly. You can certainly do this by hand. Your stitches will barely show.
Install Your Curtain Hardware
Determine how wide you want to space your knobs. You can go as wide as your panel, or space them in a bit to give a more eased look.
Look back up at our screened porch panels, I hung them very drapey — just for a touch of ambiance! And look at the spacing at the very bottom of this post where I overlap two panels.
Go with what works for your style and your space.
Our balcony is L-Shaped with one arm deeper than the other (such is our quirky 60’s nest, sigh).
I hung both panels the full width of the balcony arms, so one is rather taut at the top and one is more eased.
I seem to be the only one that notices this. And here I am pointing it out to you.
Obviously, I trust you with my dirty secrets and consider us good friends!
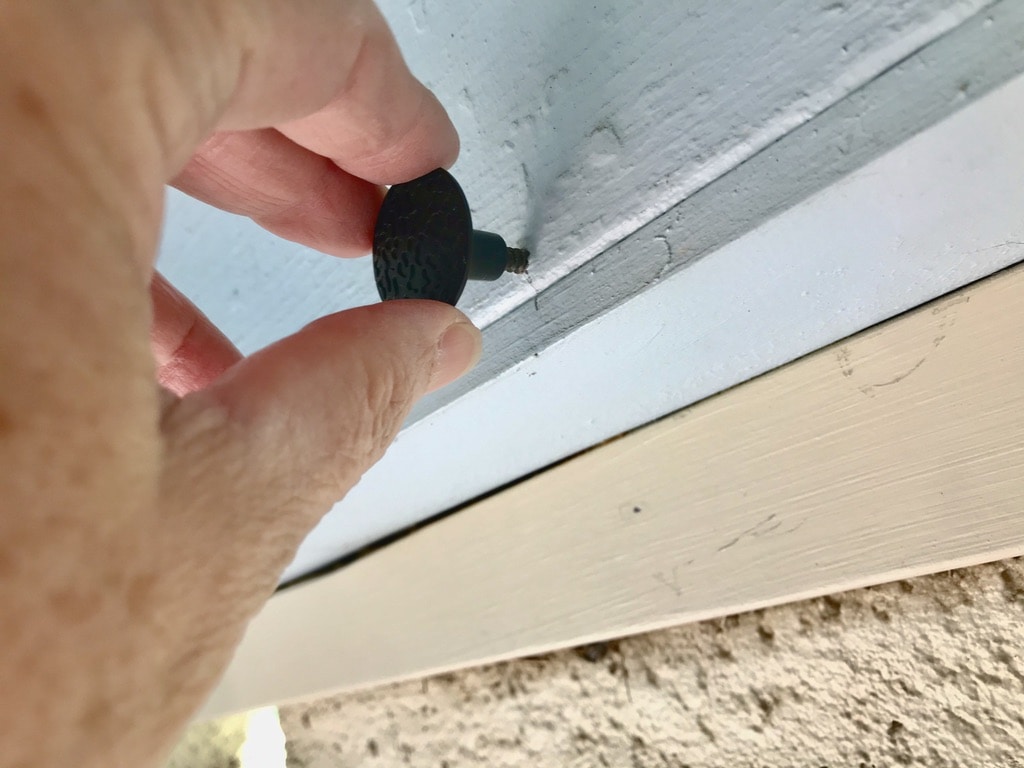
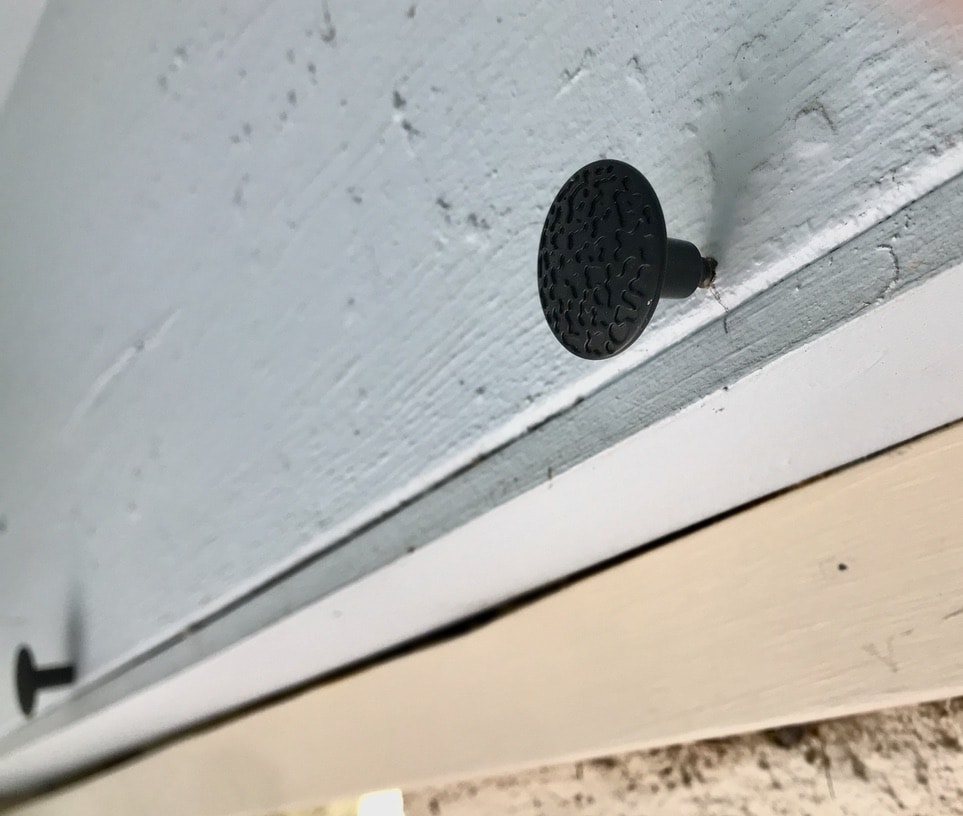
Measure and mark the placement for your knobs.
With a drill (or if your drill battery is on loan to a neighbor when you’re ready for progress, a large nail will do — oh, like that’s never happened to you. Yup, I thought so…..), create a starter hole.
First step, screw your knobs on the dowel screws and then into your starter holes. (Told you it was easy!)
Hang Your New Curtains the Easy Way
So simple there’s not much to say here: just hook each loop over each knob.
Add a Tieback-
Now pull them back to one side and add a locking cup hook where you want a curtain tieback.
Your tie back can be something as simple as a pretty ribbon, but outdoors its is nice to have something with a bit of weight to help hold everything in place during strong winds.
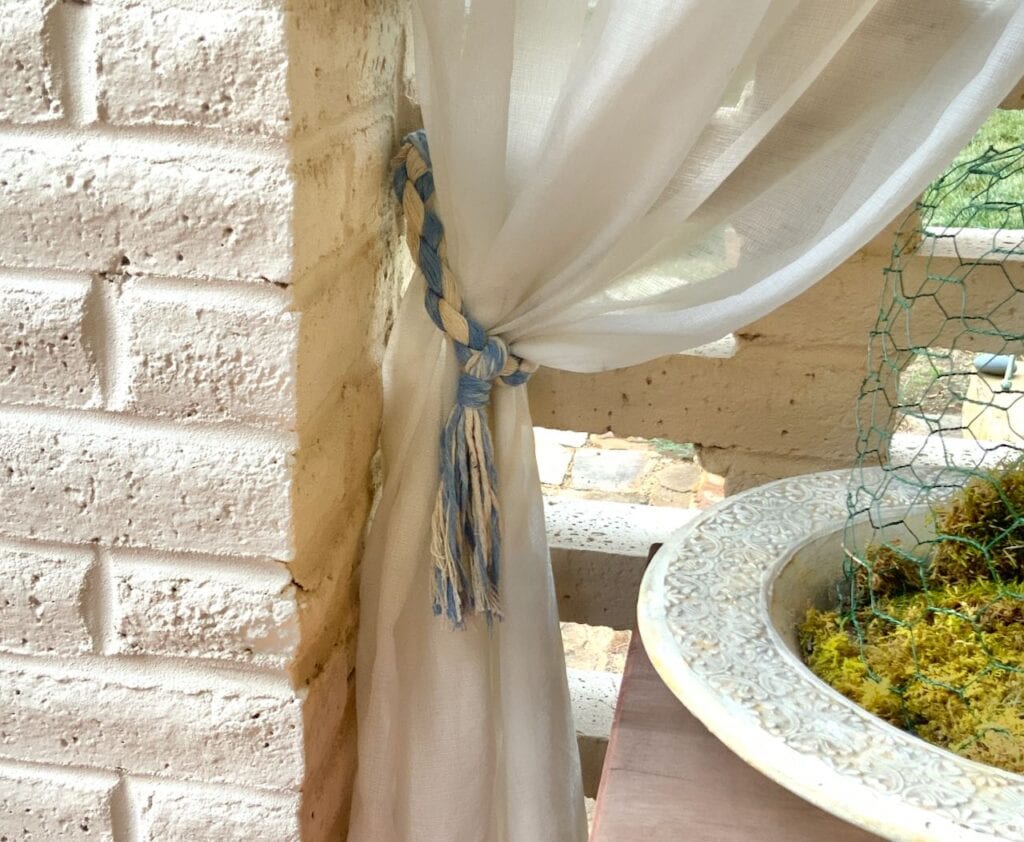
These dyed cotton rope tiebacks I made for our patio curtains work much better than the ribbons I’ve been using on the balcony sheers.
New curtain tiebacks for the balcony are on my current crafting list. Stay-tuned for an update.
Alternative Outdoor Curtain Styling
I also hung a pair of outdoor sheers on one end of the patio under the balcony.
(The other end is a bar area).
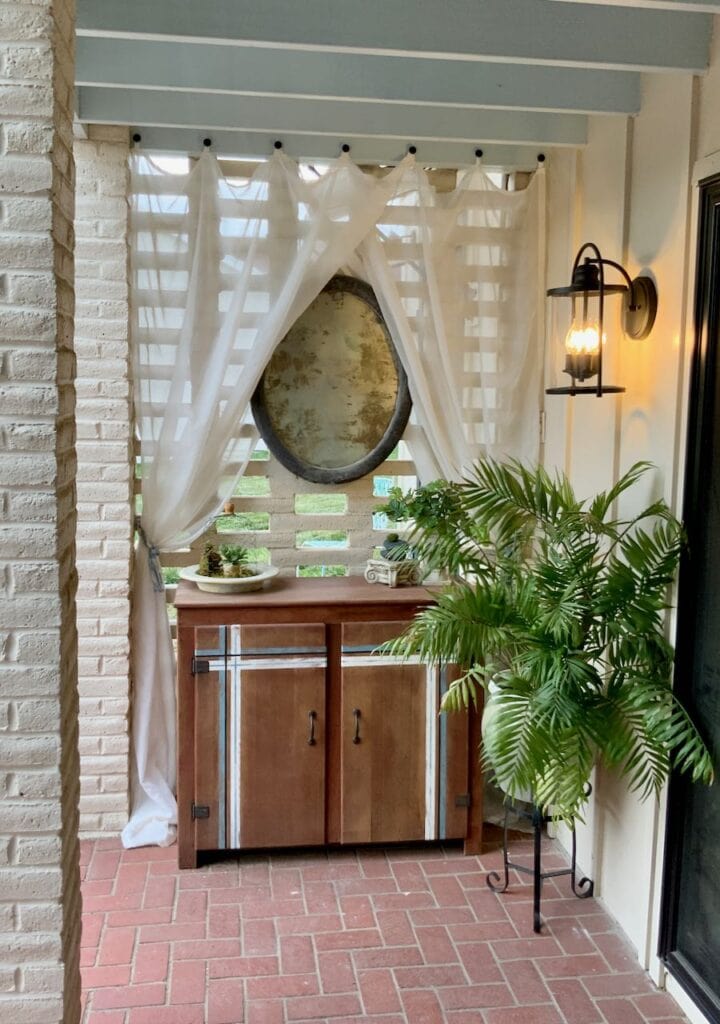
This corner is decorated more like indoors with a fun storage cabinet with a touch of colorful stain, an oval mirror diy, new light fixture and usually some seasonal decor, like this wire cloche.
So here I hung a pair together overlapping and flanking the mirror that’s hung on a 60’s brick screen.
Do you have a spot that needs a bit of resort treatment? I encourage you to go for it!

Diane, I love this! Now if I can just talk my husband into it! Like you, I’m a traditionalist with a twist, so I’m sure to like many of your projects here. Adding you to my list! #CharmingHomesAndGardens
Thanks so much Jean! Would love having you on board!!!
Great idea! I’ve been thinking of making something like this for our outdoor area but was worried about the wind since we get quite a bit! now I know exactly how to to do it!
Yea!! Please send pics when you’re done! Would love to see how your’s turns out.
Love how elevated the outdoor space becomes!
I’ve always loved sheer curtains hanging in an outdoor space! Well done! Thank you for sharing with Charming Homes and Gardens Party!
Thanks Kim! And I truly appreciate the feature in Charming Homes And Gardens!
Your instructions are so complete. Your pictures of the things you need are so helpful. I haven’t seen your blog before but I hope to follow you from now on. Thanks for your inspiration.
Thanks Claudia!
Welcome! I’m so happy you found me. Please share your “discovery”. The more the merrier. ?
Your curtains look great and I love the hardware trick. Pinning this for later!
Thanks Michelle! When you hang yours, be sure to send me a pic!
it was the KNOB IDEA!!! I have notes and notes of ideas and when I stumbled across this pic and clicked the link….WHY didn’t I think of this!! Cannot wait for SPRING!! (getting another 9 inches of snow today!)
These look awesome!! The knobs are a brilliant idea! I think you’ve made a lot of us say “Why didn’t I think of that??” Well, we didn’t have to, thanks to you!
Thanks for joining the Grace at Home party at Imparting Grace! I’m featuring you this week.
Thanks so much Richella!! I hope they inspire others!
And thanks for hosting Grace at Home!
How I wish I could go back and forth in time to read this and not do it the completely wrong way last summer. I used PVC and plumbing hardware to hang gauzy Ikea curtains on my patio in my very windy backyard. Which lasted all of well, no time. If I can convince my husband that this will work, we may give it another go. Or maybe I’ll just do it and he can be in awe of my problem solving skillz.
[…] sheers hanging in the background? Want to know how to hang those so they stay put even in the wind? Here’s the easy way to hang outdoor sheers withOUT expansive and expensive […]
Perfect! I had bought the panels but was struggling with the rod. Now you have provided the solution and it will work wonderfully for our porch. Thanks very much!
Glad this will work for you. Please send pics!!!
Great idea with the knobs! I’ve got my outdoor curtains ready to go up soon so I’m going to look into this!
It’s a great option when you don’t really want to pull the panels open or closed, but just use them to frame — or hide — a view and add ambiance. Glad that it might help you out. Let me know if you do this. I’d love to see a pic!
So happy I found this post! You made my life so easy hanging sheers on my new deck. Thank you for the FABULOUS idea!
I too am so glad you found your way here. Glad this is going to help you out. Please send your friends over too.
I love this idea, Diane; it adds so much charm to your outdoor space.
Thanks Wendy! It really does give me resort vibes. (Now, all I need is a pool boy)
Great tips for securing the curtains! And I am a sucker for a wispy drape beside a hanging fern! Great post, Diane!