Repurpose Satellite Dish – Make A Unique Swing
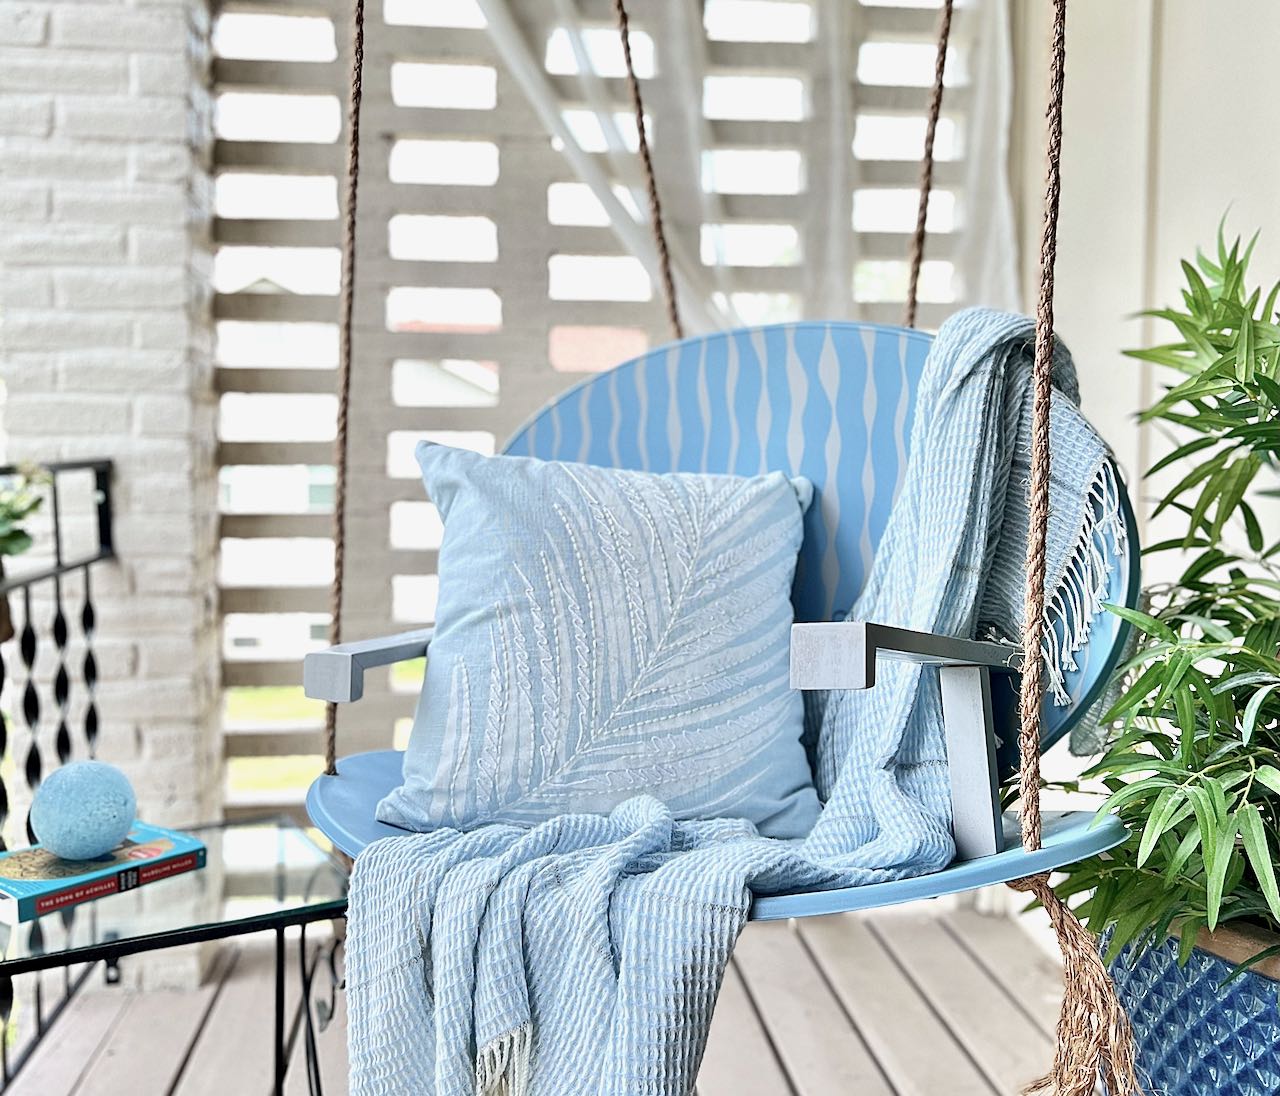
This is so FUN — and comfy, too! Reuse and repurpose satellite dish, your old direct tv satellite dish, into a great swing.
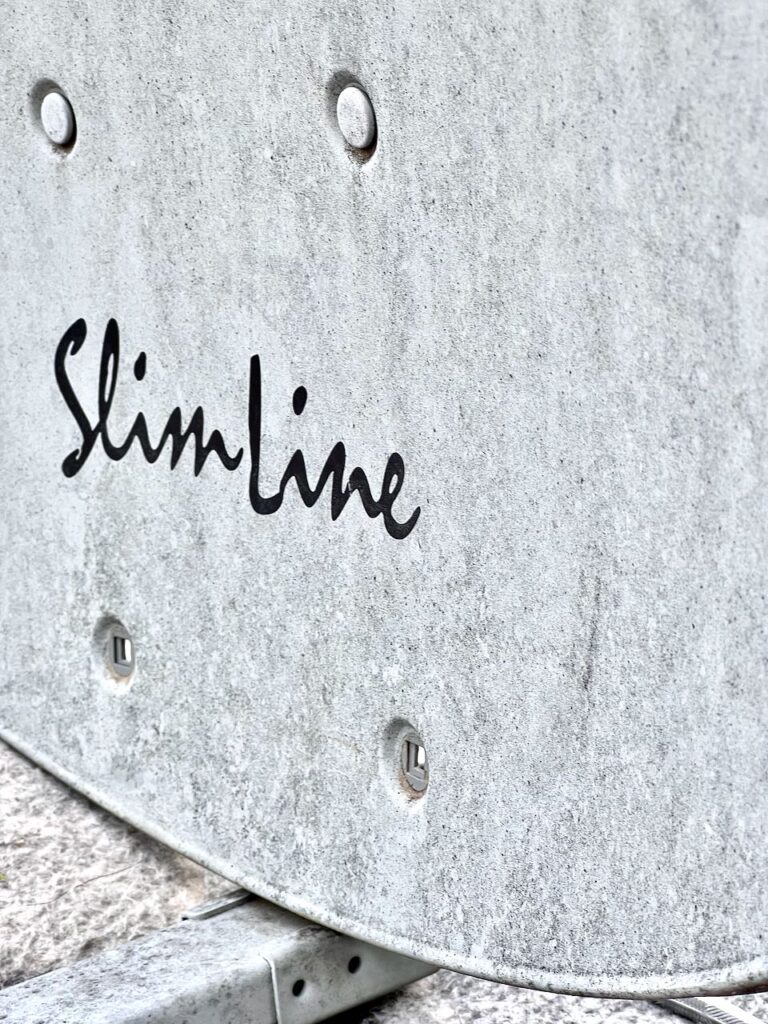
It’s amazing how we all see things a bit differently. What do you see when you notice an abandoned, old satellite dish? What do you imagine? Specifically as uses for an old DirecTV satellite dish?
Did you imagine a swing? Yes, a swing from a repurposed satellite dish. Actually, two repurposed satellite dishes. Truth be told, I had neighbors lining up for me to use their old satellite dishes. You’ll have no trouble locating two to make your own satellite swing.
What else did I imagine? Well, another fun use, but you’ll have to wait on that one for next Spring, Today, we are focused on how to make a unique swing as a great way to repurpose satellite dishes.
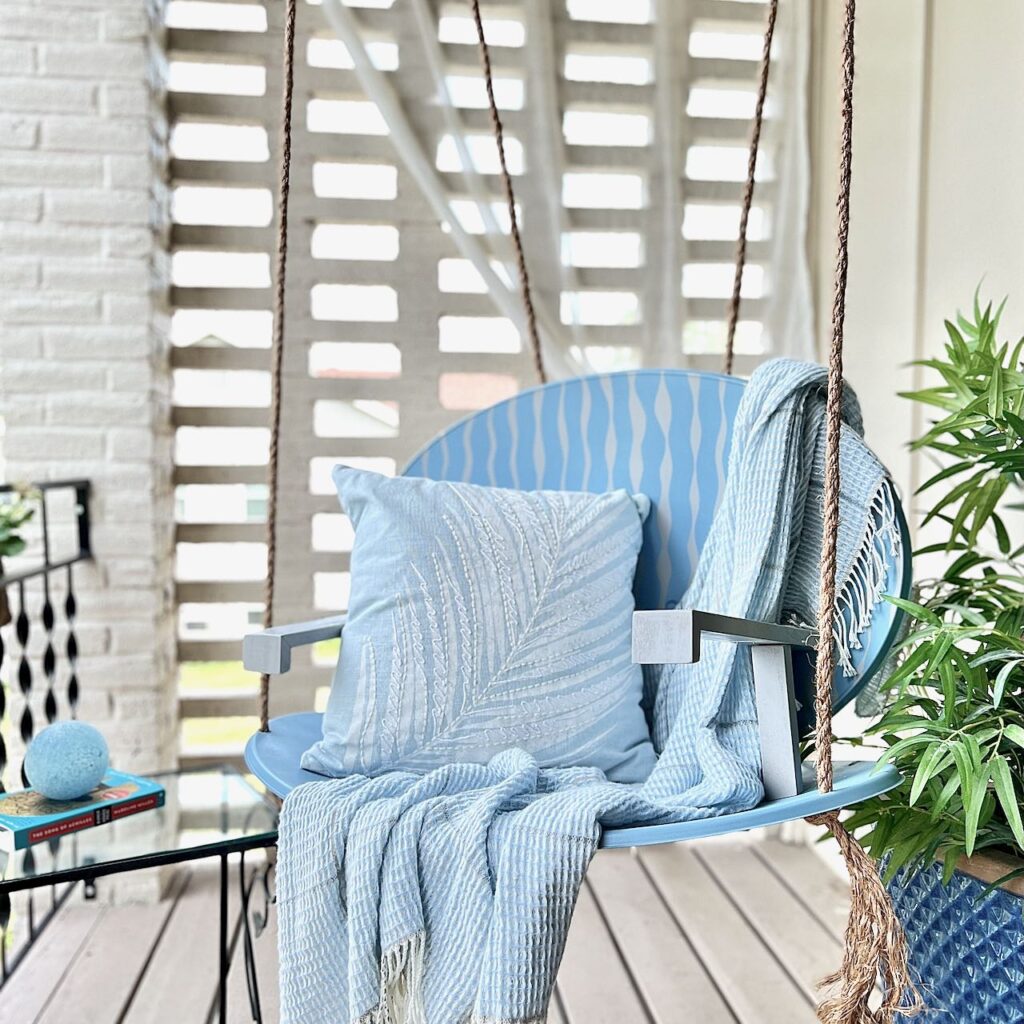
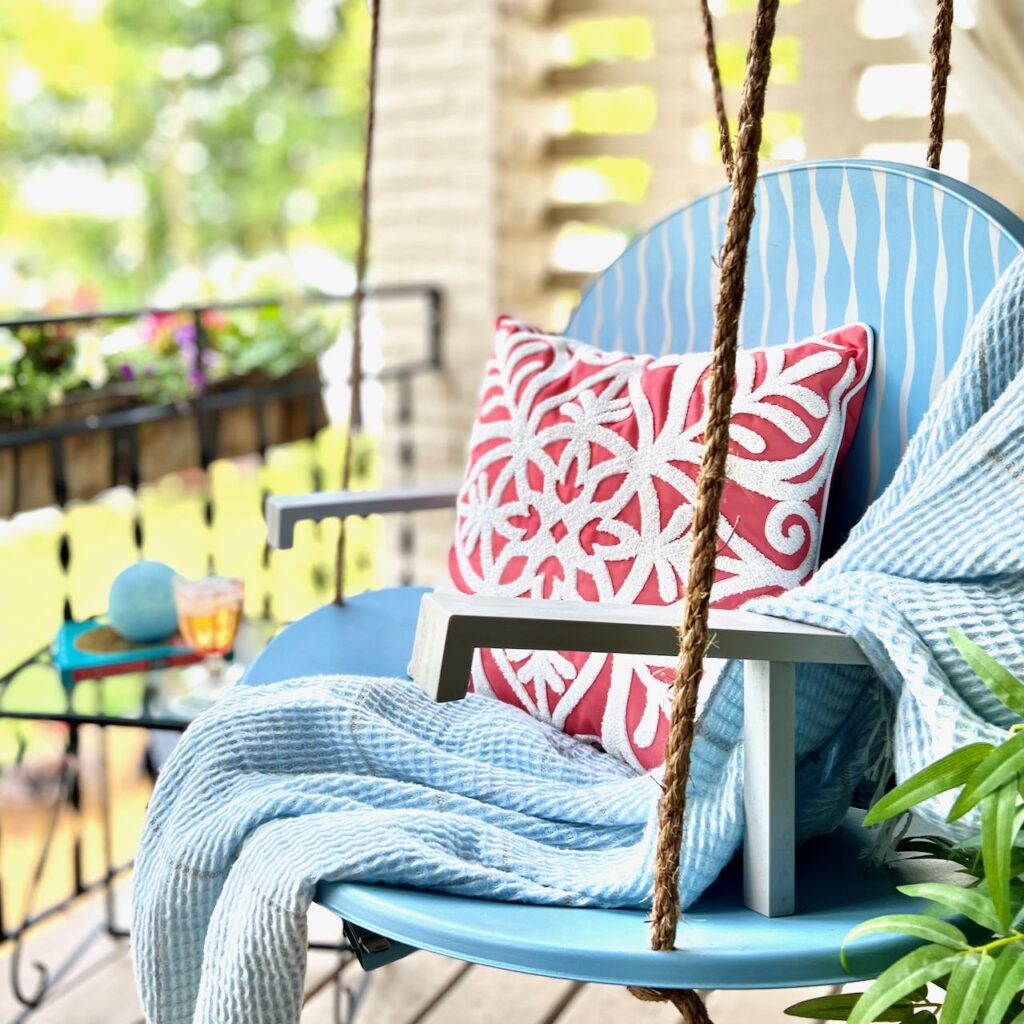
And she’s very comfy too! Lots of room for pillows, a throw or yes the pup that wants it for himself.

SIDENOTE: Wondering about my outdoor sheers? All the details are right here. And the railing planters? All those details are right here.
Now where were we?
You ask: What Can I Do With My Old DirecTV Satellite Dish?
I Say: Make a Swing — a Satellite Swing!
To make it like mine, you’ll need:
- two DirecTV satellite dishes
- Pair of swing hangers
- Rope
- 1 x 3 and 1 x 2 for armrests
- Scrap wood, approximately 6 x 6
- Metal mending plate, 12-inch
- Four carriage bolts, Two 5/16 x 2.5-inches and two 5/16 x 1.5-inches
- 6 wood screws
- Two zip ties
- Painter’s Tape
- Spray paint
- spackling compound
- wood glue
- finishing nails
- sandpaper, sanding block optional
- drop cloth
- Spray can pistol grip, optional
- Miter saw, compound optional
- Drill with metal drill bits, I used 1/2-inch for the rope holes and 3/32-inch for the wood screw holes for the armrests
- Ratchet set or wrenches
- Hammer, or brad nailer (so much easier if you have one)
- Metal file (or I used a dremel tool)
- Level
I know that looks like quite a list, but it is truly a medium level project. I had to make it up as I went along. So now there are directions to follow and tips of what to avoid that will help you significantly.
The links in this post may include affiliate links, which means if you purchase anything using these links, you pay no extra, but I may receive a small commission that helps keep this blog running. I truly appreciate you using affiliate links whenever possible. Please know that I will never recommend a product I do not believe in!
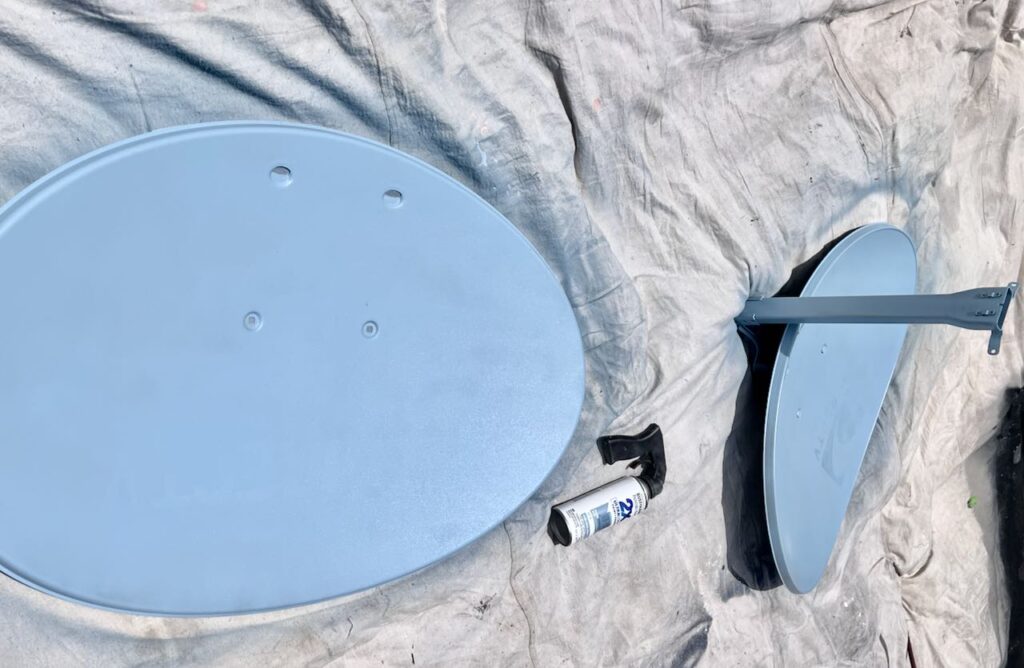
Step 1: Deconstruction–
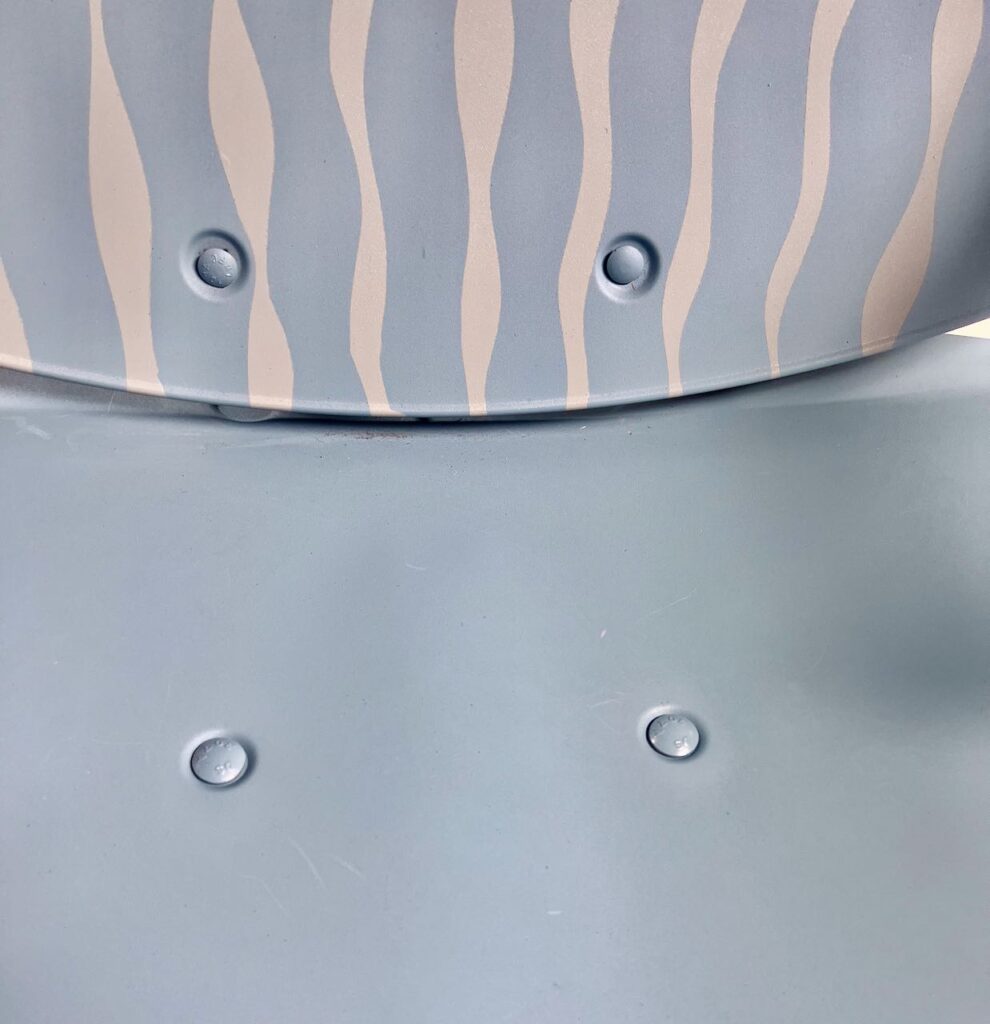
Remove the hardware from the old DirecTV satellite dishes to the point where you have:
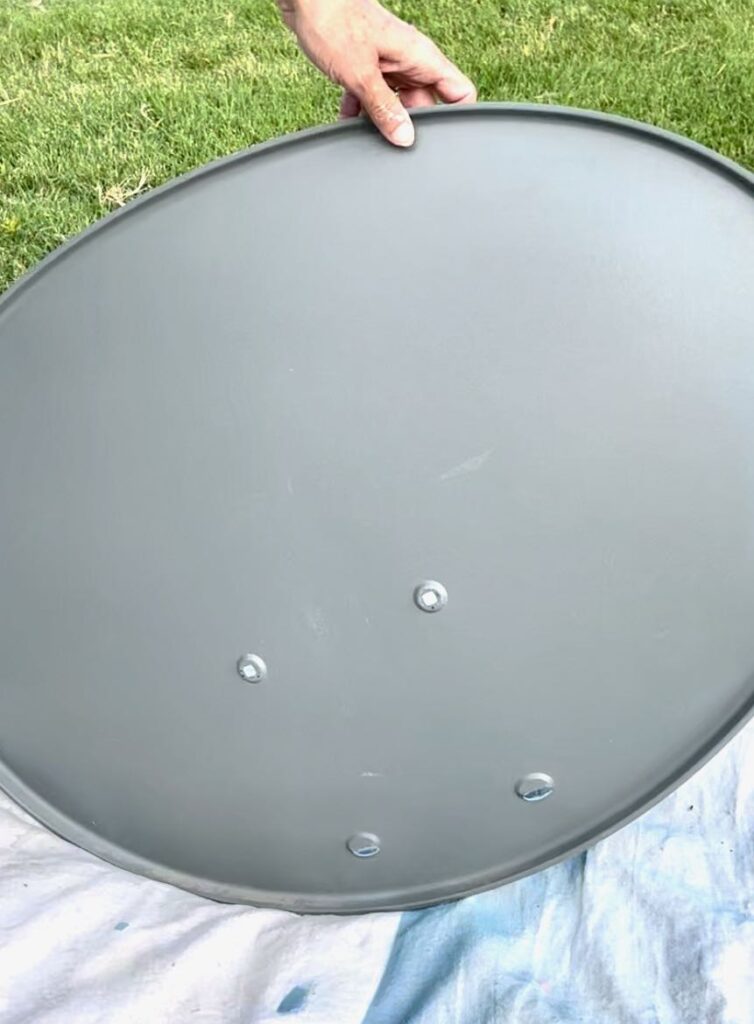
One that will be the seat of the swing that should have no hardware (like pictured above)
One that will be the back of the swing that should have the frame still attached minus the two bottom bolts (like pictured above)
The frame should be just the two arms, minus the large specialty chunk (the piece that is circled).
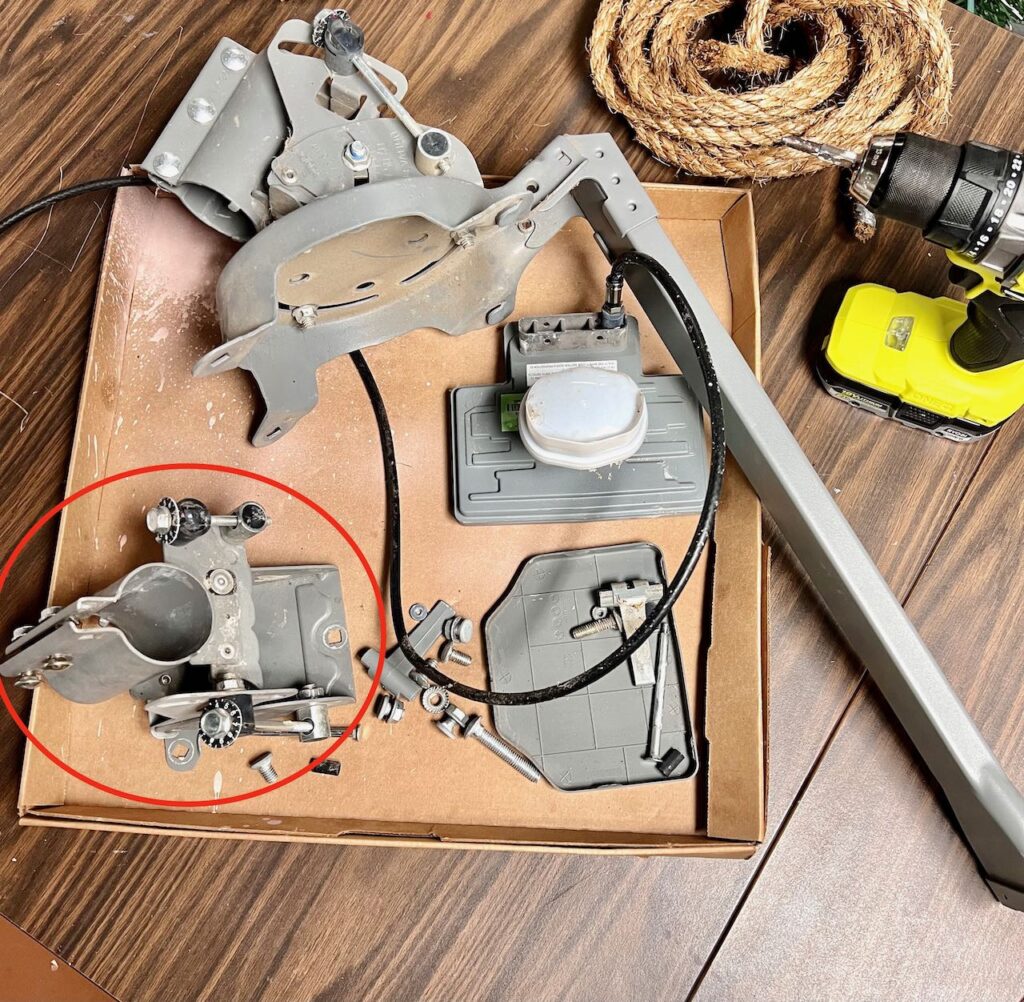
The L-shaped frame with two arms and the circular plate that is attached to the shorter of the arms is all the hardware you will use.
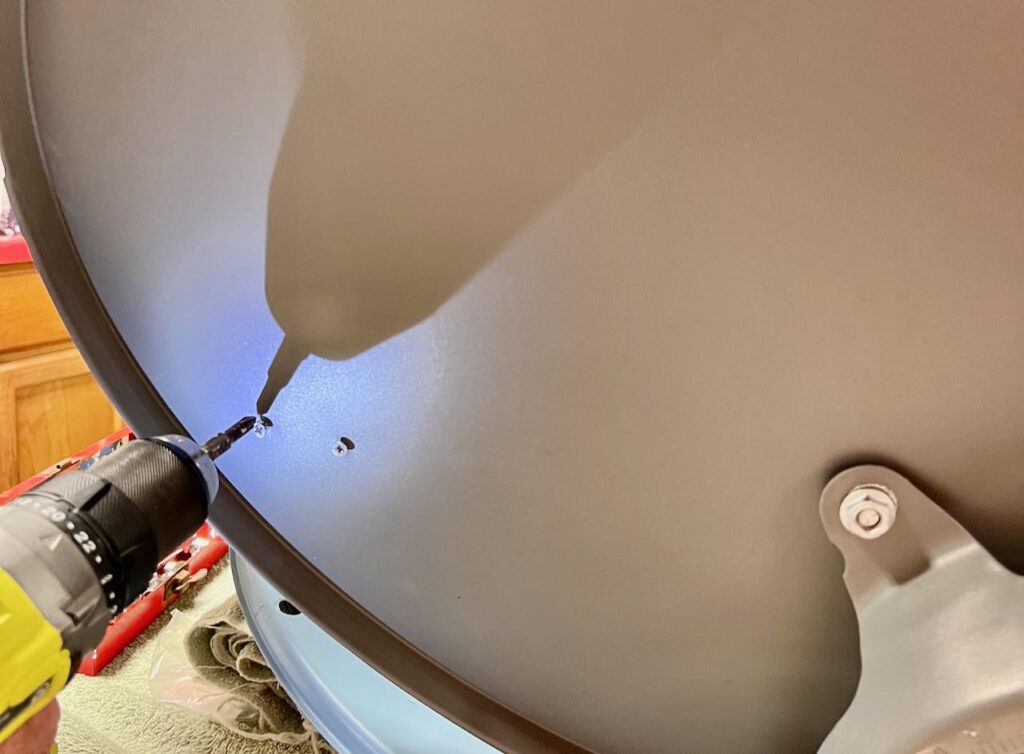
Step 2: Drill Rope Holes & Add Spacer to Slope Back-
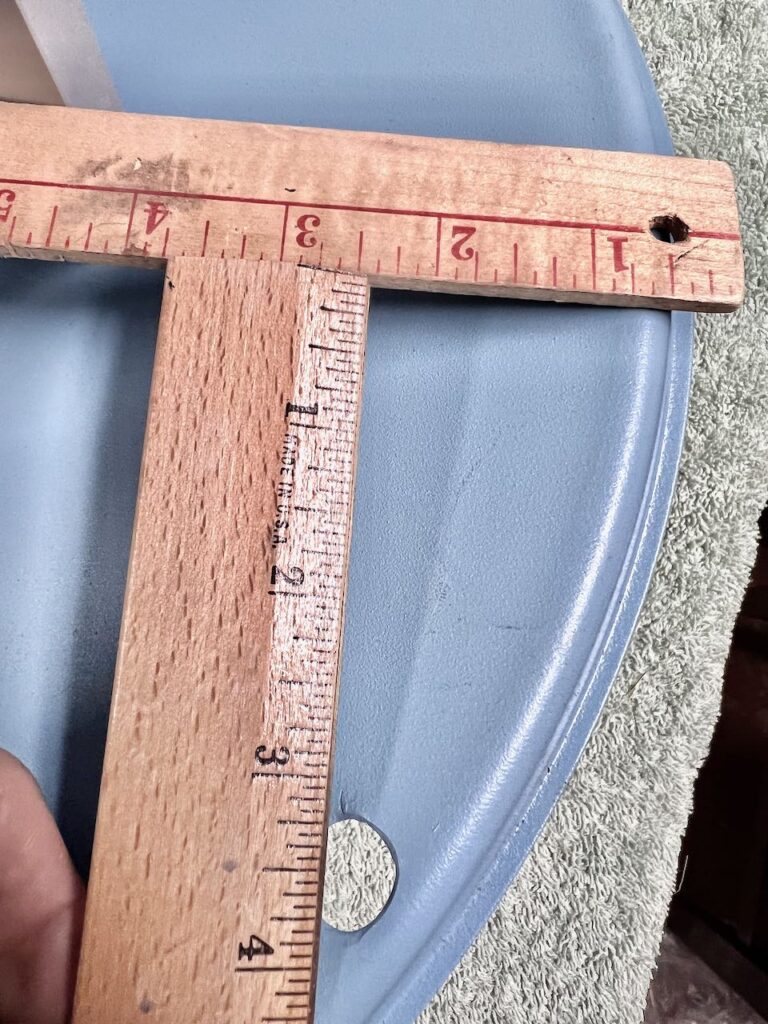
Start by drilling the holes for your rope in the seat dish only. Then file the edges smooth with a round metal file tool. I used my trusty little Dremel and it worked very quickly and easily.
It’s important for these holes to be spaced the same. Meaning the hole on the left needs to match the hole on the right or your swing will not sit or swing evenly. My holes are 3.5-inches forward from the widest spot of the dish. I laid a yardstick across the dish at the widest point, making sure it was even on both sides. Then I marked a spot 3.5-inches from the yardstick on each side.
—NOTE: I drilled mine after painting the dishes. I didn’t realize how much I would need to file the rough edges of the holes. So then I had to go back and paint those spots again. That’s why I suggest you drill first.
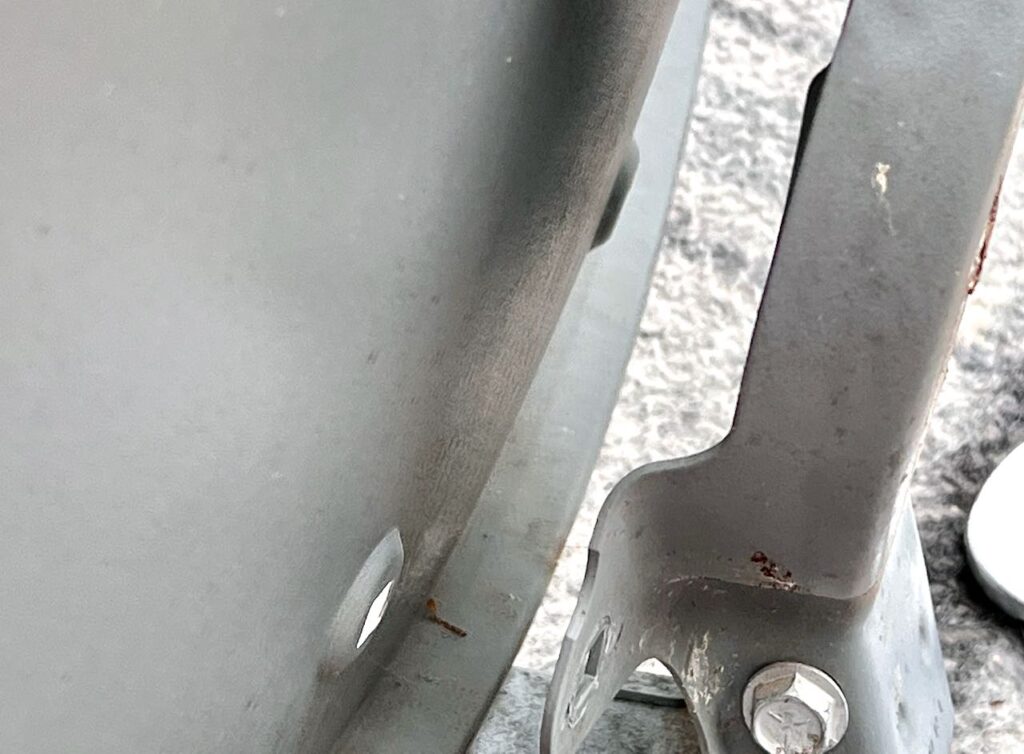

The bottom two bolts on the back dish should be removed and replaced with longer ones — 5/16 x 2-inches. The nuts from your original bolts should fit these new bolts.
Slip tubes over the new longer bolts to act as spacers. I cut some scrap plastic poles to 2 1/8-inch. You could also use two nuts between the back of the dish and the front of the frame.
This forces the swing back into a more comfortable position and allows the swing back to overlap the swing seat a bit. The L-shaped frame has less than a 90-degree angle.
Step 3: Paint-

Be sure to wash your equipment real well first. I used some TSP cleaner and the dirt came right off!
Then paint your swing as you prefer. Of course I recommend a high quality exterior paint with primer. And spray paint is the easiest, so naturally I went with RustOleum.
—HINT: Also paint the heads of the two 1.5-inch carriage bolts. Save yourself from having to go back and do that later, like yours truly.
Let your base coat cure for at least 24 hours. Mine sat for a couple of days while I built the armrests and enjoyed the 4th of July weekend.
I had a whole different design planned, drawn and even cut out using my Cricut. But sady, I could not get the stencil to stick well to the dish. I don’t know if it was the curvature or the slight texture of the dish itself, but it would not hold tight to the dish.
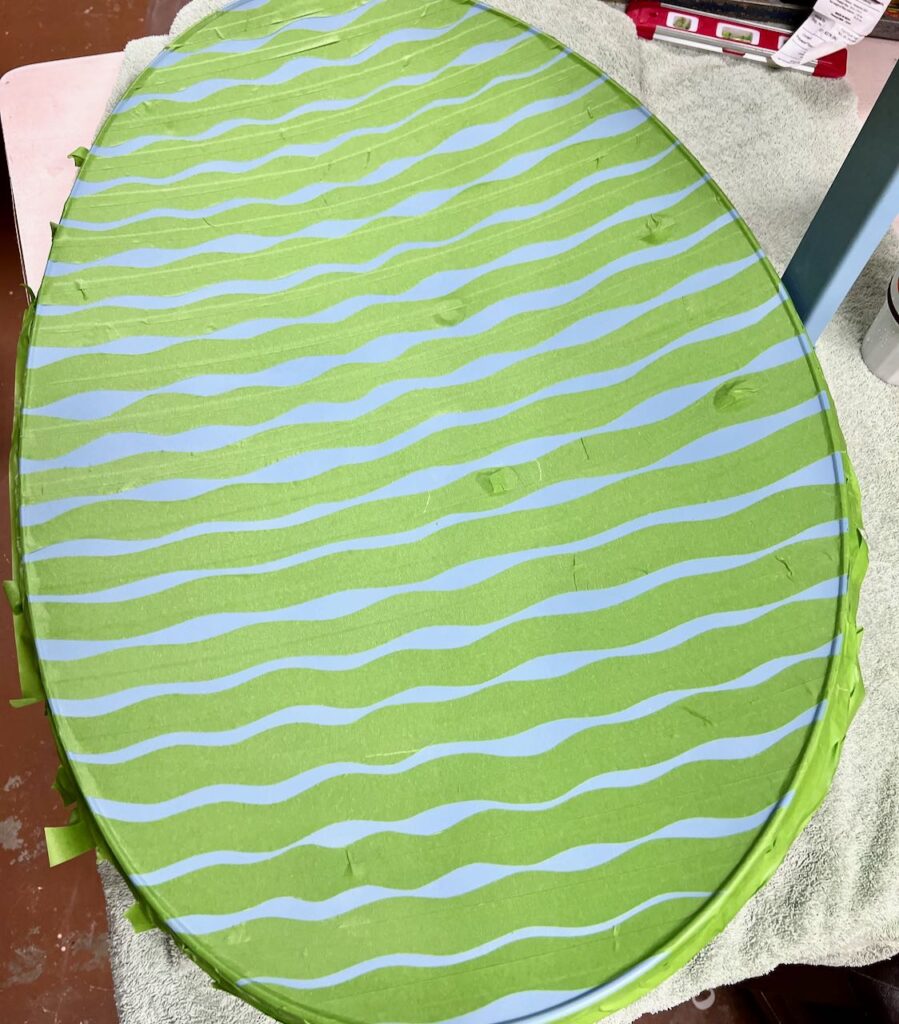
So at the last minute, I pulled out my trusty Frog tape and went to town with squiggly lines. No, this post is not sponsored by Frog Tape, it’s just the brand I trust with my projects.
Using a rotary cutter and a self-healing mat, I cut a freehand squiggly line down the center of the tape. Then overlapped the two straight edges to make one double-sided squiggly line.
Then I taped off the edge,
Be sure to secure the edges tightly to avoid bleeding by burnishing the edges with an old plastic credit card, key card or the like. I used my Cricut scraper.


These are the newer version of my pistol grip.
Frog Tape — can’t go wrong and I always have a roll or three on hand.
Not my exact mat, but I’d buy this one. Great brand and it’s a great price at the time of my writing!
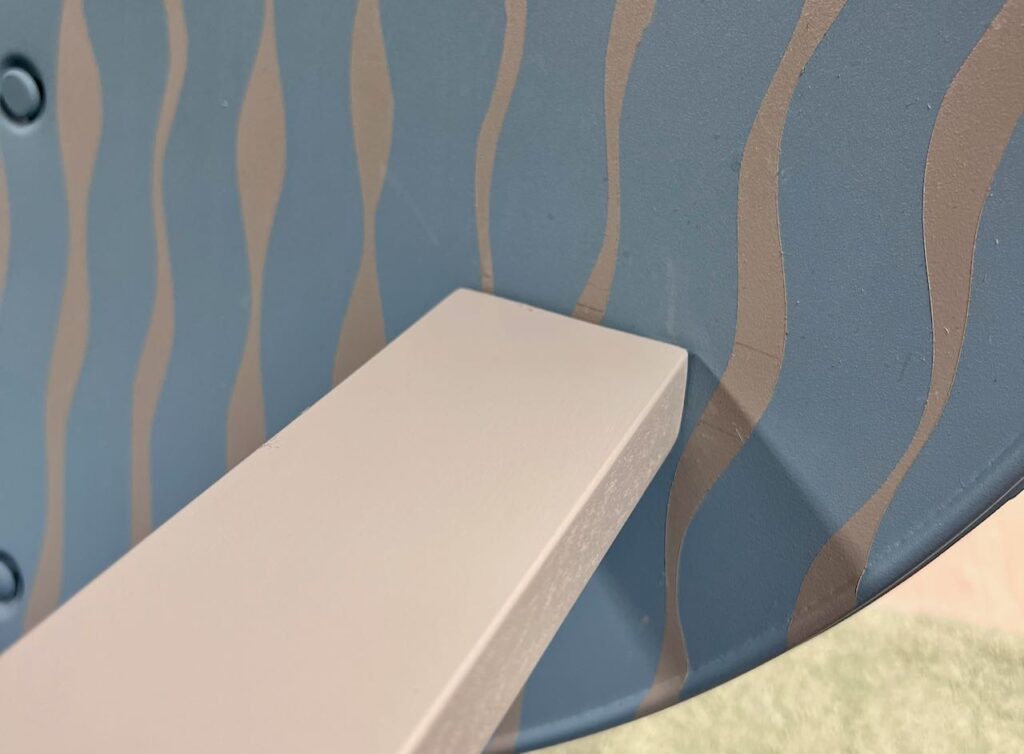
Step 4: Build Armrests-
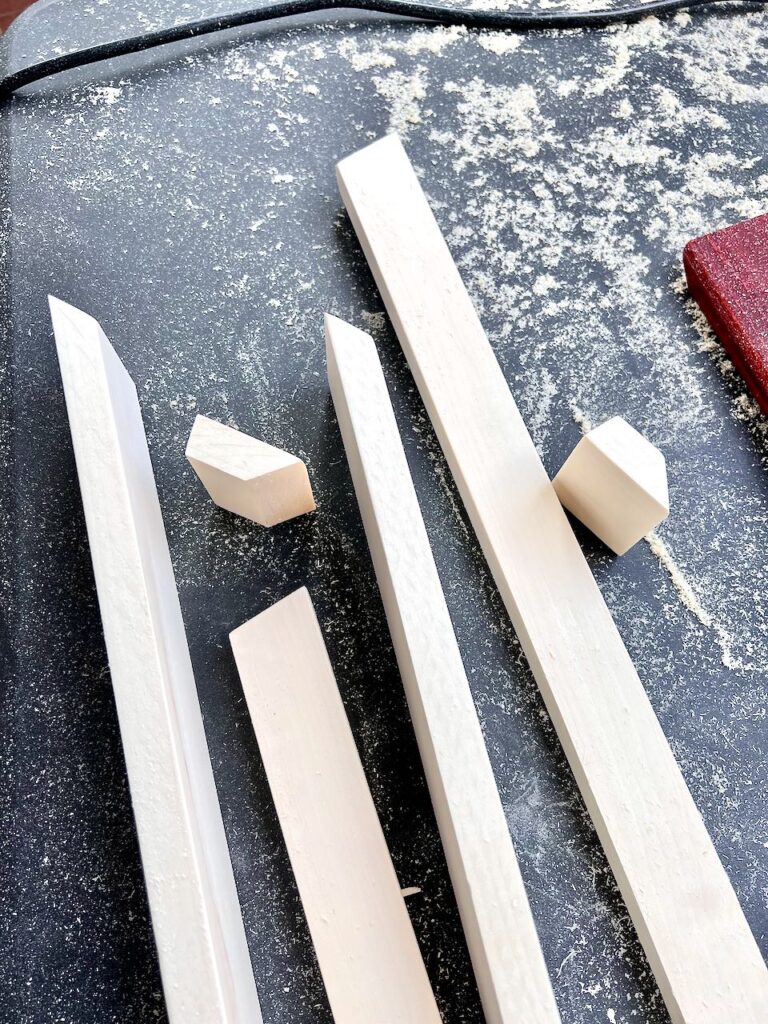
There are many styles and ways to build armrests, but I chose to keep it pretty straightforward here. Used a 1 x 3 for the armrest itself and a 1 x 2 for a bit thinner support.
Start by determining the length and height you want the armrest. Mine are 16-inches long and 8-inches high. I knew i wanted a finished edge on the front. So I also cut 2-inch long pieces for those. But those are truly optional.
Based on the curvature of the dish where you plan to attach these, you will need to cut a slight mitered angle. 15-degrees worked for me. So that should be a good starting point for you.
- Cut the two supports 8 inches long at the longest point with a 15-degree angle on one end.
- Cut two (optional) front ends 2-inches long with a 45-degree compound cut (If you don’t have a compound miter saw, this can be done as a miter cut by standing the wood on its narrow edge, it[‘s just a bit trickier). I also cut a 20-degree compound cut on the opposite end so the underneath would recess back up a bit. It’s a little detail that just feels good to the hand when you cup it around the end, but totally not necessary!
- Cut two armrests, start by cutting the front 45-degree compound cut (or tall miter as explained above) and then with 16-inches as your longest point cut the other end cut a 15-degree miter and 15-degree compound (with a compound miter saw, you can make this cut simultaneously–LOVE my saw)!
- While you have the saw out, Cut your 6 x 6 scrap wood into two triangles you’ll use in the next step.
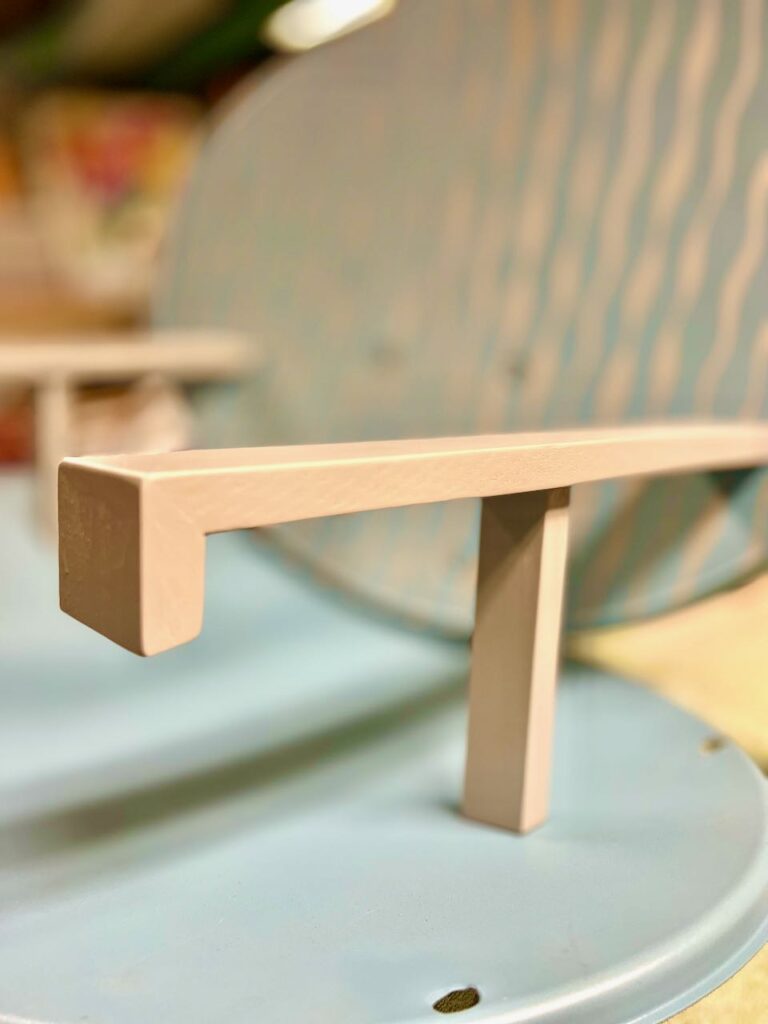
- Glue the short front ends to the long arm rest matching the 45-degree angles.
- Glue the support to the armrest making sure the longest side of the support is on the same side as the longest side of the armrest.
- After the glue has set for a bit, use a brad nailer to secure even more and let the glue dry overnight.
- Fill nail holes and joints with spackling. let dry, sand
- Spray paint one light coat, let dry. This is also when I spray painted the squiggly line on my swing back.
- Sand armrest lightly, wipe clean, spray paint again.
- Add a third coat if needed.
Step 5: Attach Seat to Back-
Now it’s time to bring it all together!!!
The seat should just barely slide under the back while being supported on the long arm of the frame. You may have to tilt it a bit to get it past the lip of the satellite dish.
Now turn it upside down over the edge of a work table.
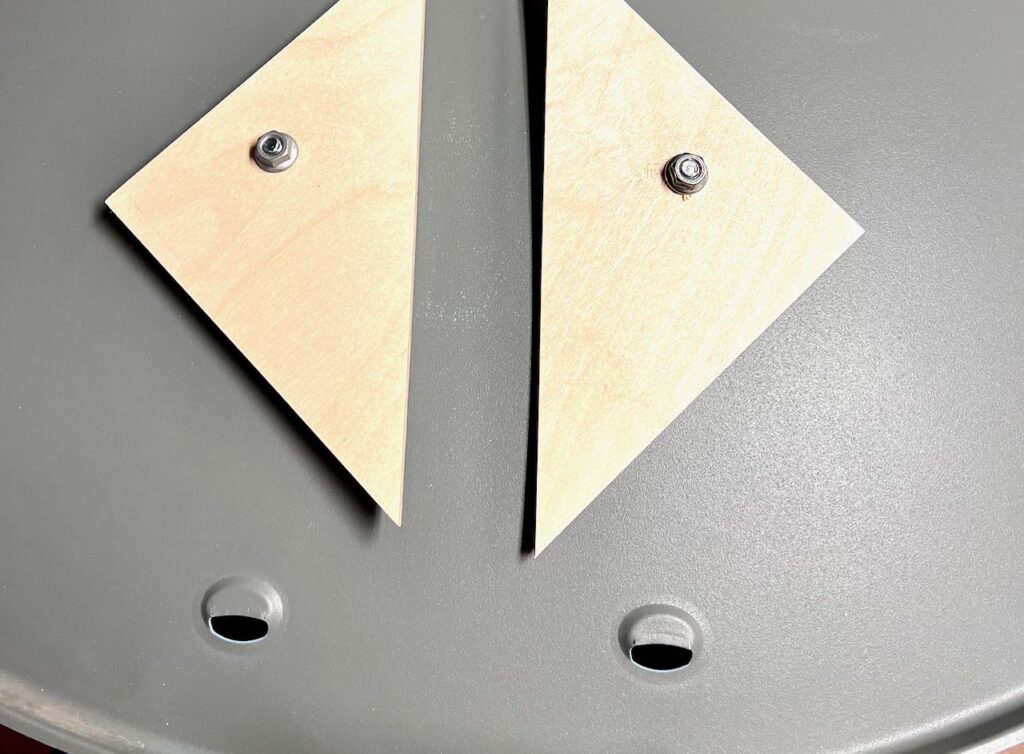
Remember those triangles of scrap wood you cut while the saw was out? Line them up on each side of the satellite arm the seat sits on and mark the location of the bolts. Drill holes and attach with the bolts.
The above picture is taken with the satellite arm moved away so you can clearly see how they make a trough to hold the arm straight so the seat can not slip side to side.
—HINT: add an extra nut on each bolt after the wood to hold it tight to the bottom of the seat then the nuts pictures to hold the mending plate tight.
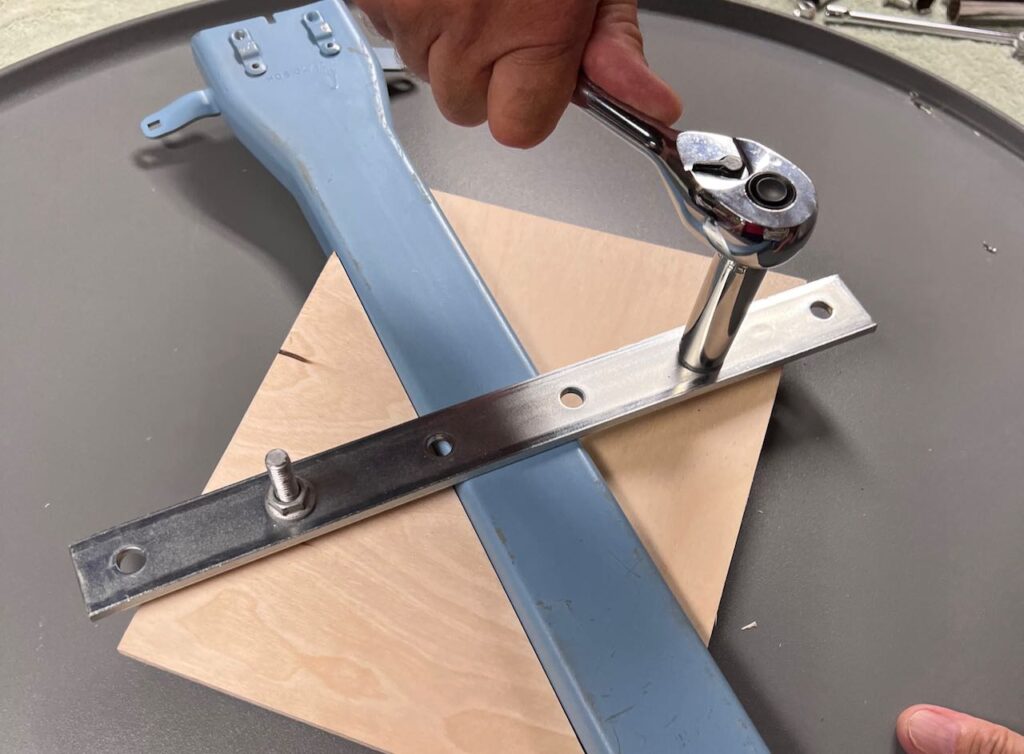
Notice the original bolts are replaced with the new replacement longer 1.5-inch bolts.
And now we have added the 12-inch mending plate. Luckily the predrilled holes, lined up perfectly.
The bolts pictured are 2-inch and too long. Stick with the 1.5-inch in the supply list.
Add the final nuts and tighten securely.
Step 6: Install Armrests-
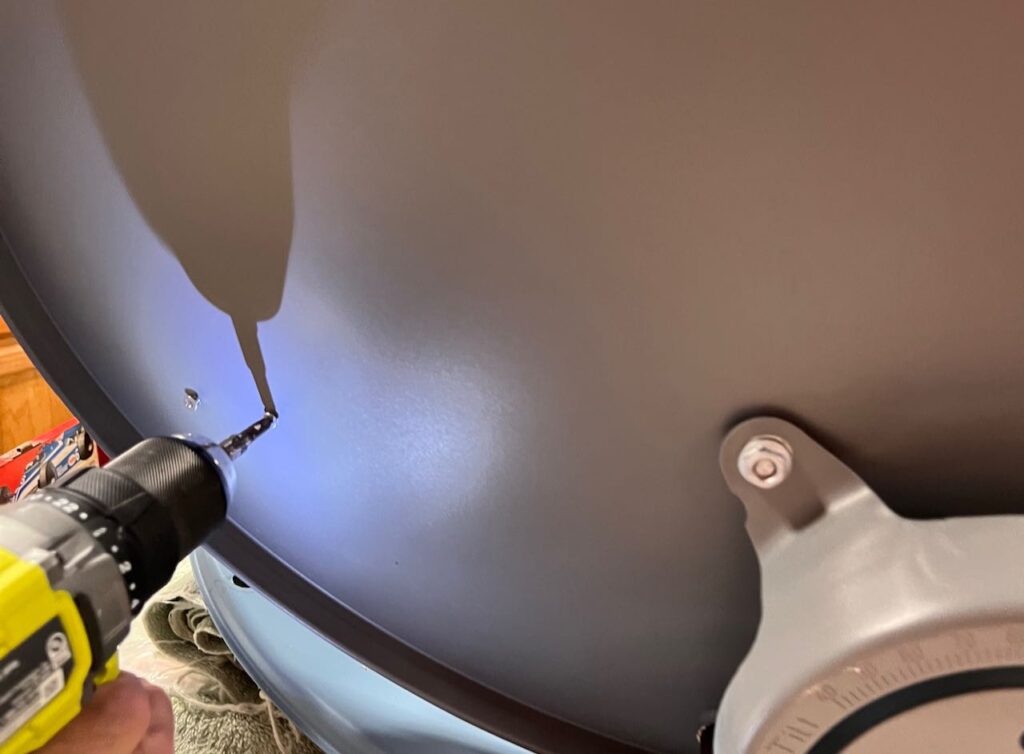

Drill holes through the swing back for two wood screws to attach each armrest.
Align the armrest from the front.
While holding the armrest in place on the front, screw the wood screws from the back
Armrest is secure to the seat back.
Repeat the same process with one screw for each armrest through the seat of the swing.
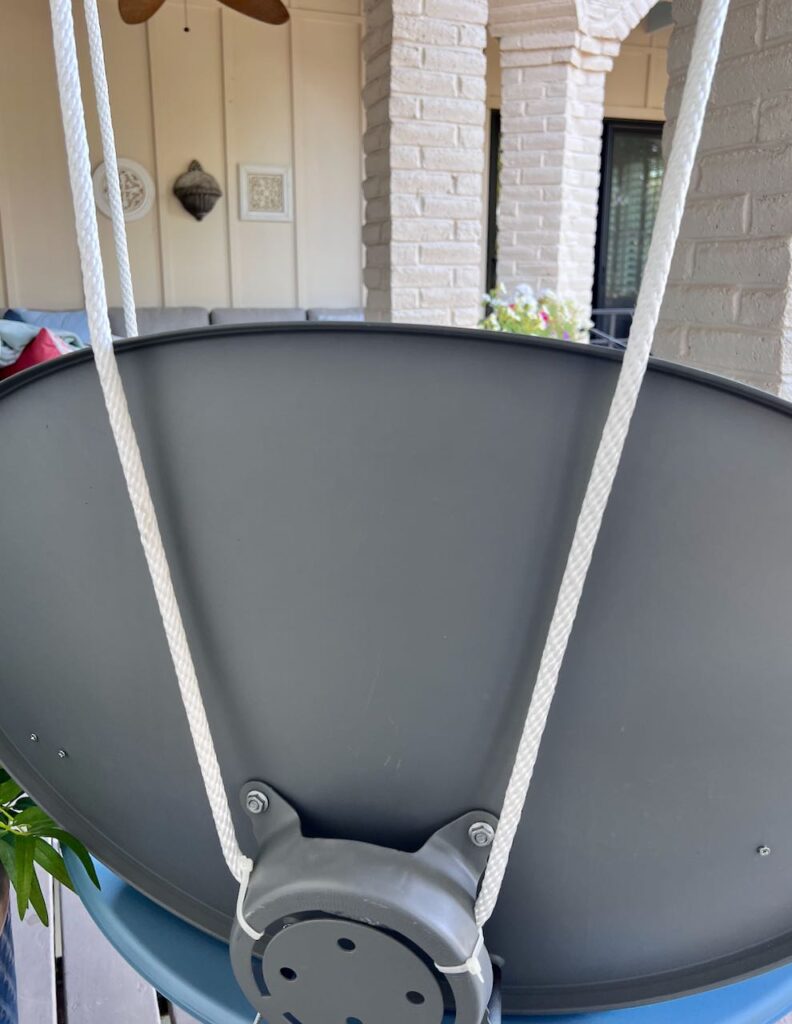
Step 7: Install Swing Hangers-
We decided to stagger them so the swing would hang at an angle in the corner of the balcony It’s a great place to have conversation with anyone on the sectional, and yet still look out over the patio and lake.
We also attached the hangers to the face of the ceiling joists because the hangers were wider than the joists. If you have large beams, they could hang straight down.


These are the ones we bought.
Braided rope is your best for this.
Can never have too many zip ties on hand, right?
Step 8: Thread Rope and Hang-
Initially, I had a sisal rope, but decided it was bit too farmhouse for us, so I replaced it with a white braided rope.
Start with your repurposed satellite dish swing sitting on something at your desired height.
Feed the end of the spool of rope up through one of the front rope holes, then up through the silver carabiner hooks then down through the round satellite frame on the back (like pictured), back up through the second hook and down through the second front rope hole.
Now that you have the general length, tie a slipknot in the rope under the second hole leaving s much fringe as you’d like. Take the silver hook off the hanger, give it a bit more rope and tie a slip knot, and rehang.
Move to the other side and and remove that hanger, give it a bit of extra rope and tie another slipknot, adjusting until a level across the armrests reads as level.
Now wrap tape around the rope several inches past where you think the end will be. Cut through the tape.
Tie a slip knot under this hole matching the height of the first one.
Once you have them even and level, trim the end of the rope to the same length and tassel the end of the rope.
On the back use a zip tie to hold the rope in place against the circle frame (as pictured).
Now it’s Time to Enjoy!

Grab a favorite beverage, a good read and perhaps a favorite pooch.

Finally, I have it to myself!
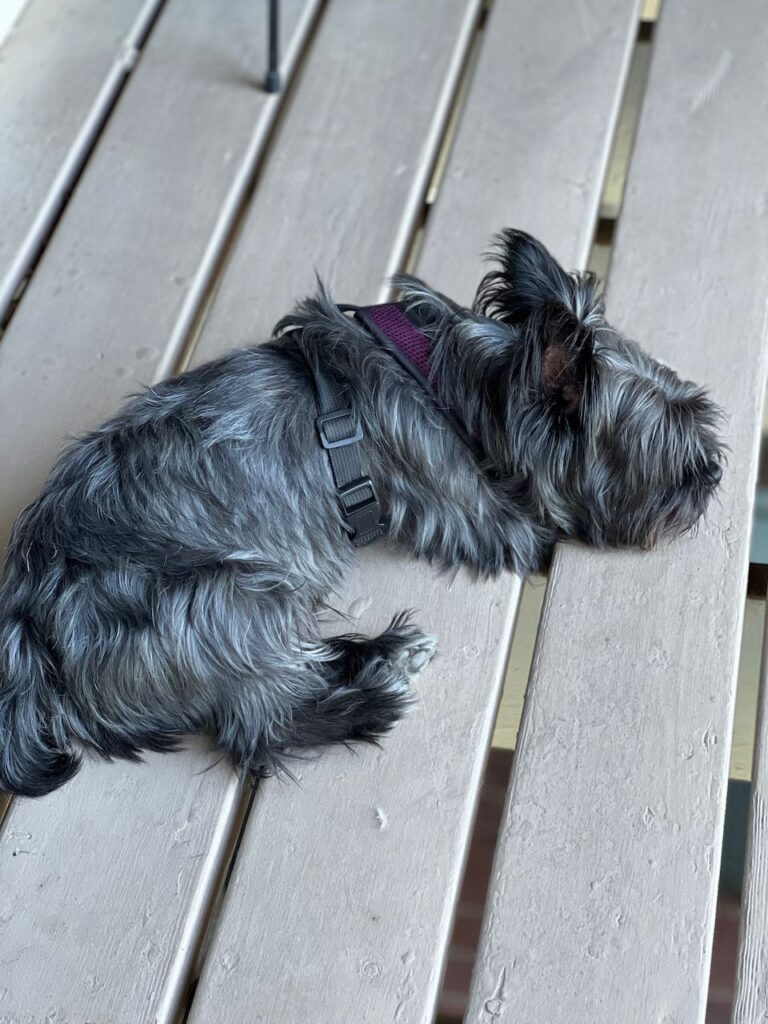
Guess who’s pouting!!!

Omgoodness you are a genius, Diane!! This is just what I need on my front porch which is too narrow for a full-size porch swing! You know I love a good repurpose and this one is one of the best ideas I’ve seen! Pinning!
Thanks bunches Cindy! I would love how you make it yours!!!!
That was exactly the problem with that end of the balcony. I couldn’t fit a traditional porch swing in there. So here’s the next best thing.
Wow this is amazing! What a transformation…I would never have thought to do this but it is amazing! I would love to have you come link up to my weekly party https://karinskottage.com/2022/07/karins-kottage-linky-party-280.html
I just saw that you already linked up! Thank you!
This is just about the coolest flip I have ever seen! I have been stuck with two dishes on my roof since I moved in 16 years ago and now I know what I want to do with them. Thank you!
Thanks so much Crissie! I’m thrilled you are inspired to give it a go. If you run into any issues, don’t hesitate to reach out!! And please share pics.
Oh my goodness! How did you come up with this idea? It looks so amazing and comfy too! I am in awe of your creativity! Great job!
This is the cutest DIY swing I’ve seen in ages and ages. I love how it’s different from so many others! Adore that blue as well. Thank you for linking up at Farmhouse Friday, I’m featuring this tomorrow! pinned
What a creative idea! Using a satellite dish to make a swing is both eco-friendly and unique. I love the rustic aesthetic it brings to the backyard. Can’t wait to try this project myself!
Doing the project exactly as instructed, how much (human) weight will the swing hold?
Oh I don’t know about the limits on that. I’m about 150 lbs and it hold me fine and its very comfortable.