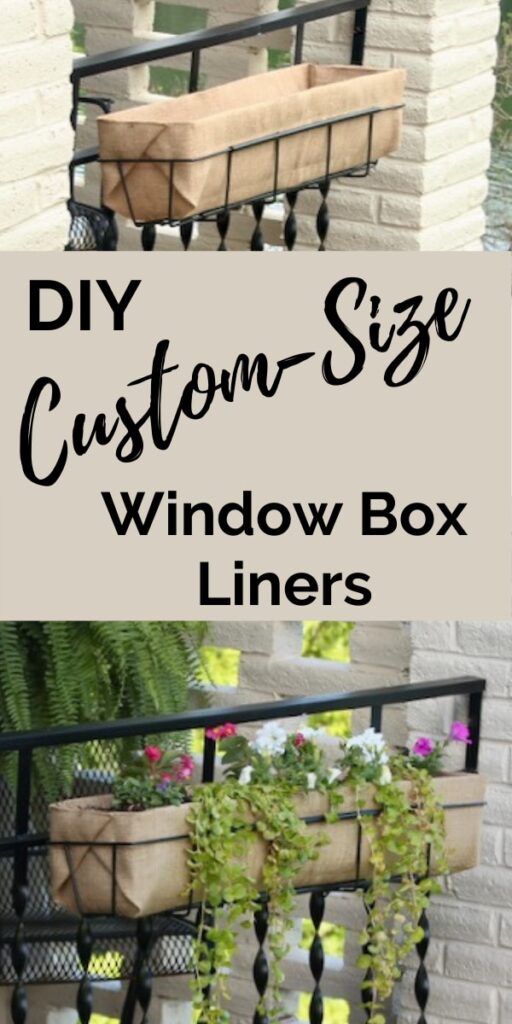
How-To Make Easy Custom Size Window Box, Planter Box Liners
Are you frustrated trying to find a liner for an odd-sized planter? Here’s an easy way to make your own liner from burlap or other fabric, for your fabulous vintage planter, or railing planters, or flower window boxes, or decorative planter boxes . . . . Basically any outdoor planters with an open weave.
So I’d like to know who came up with this concept of One Size Fits All?
Can you remember any OSFA thing, any OSFA at all, that when you tried it on, it actually fit? Fit like in a flattering way that is? Jewelry and scarves don’t count.
At a loss? Yea, me too!
So we’re in agreement on skirts, tops, jeans, etc. These are all meant for curves, our wonderful, challenging curves; and didn’t work out.
But surely a simple rectangle couldn’t be so difficult, right? Think again.
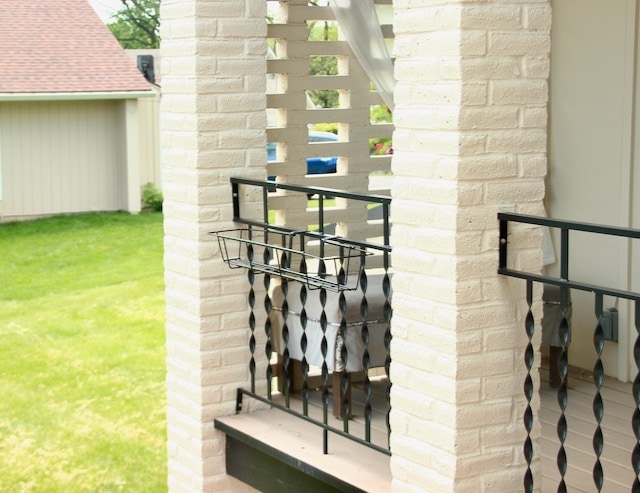
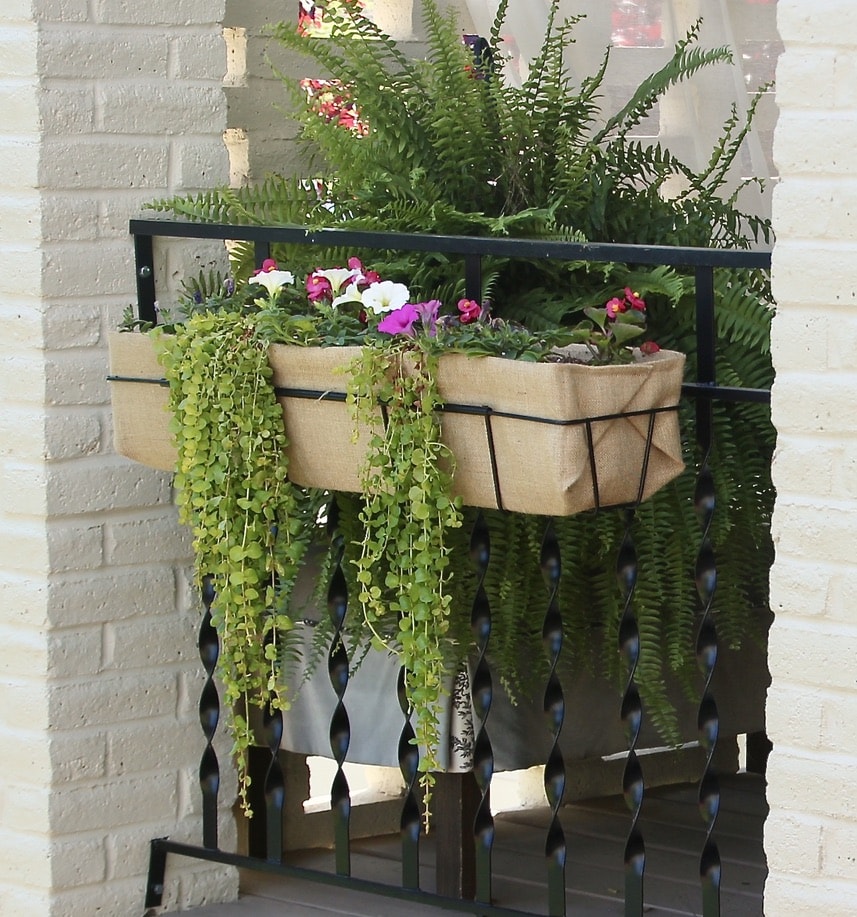
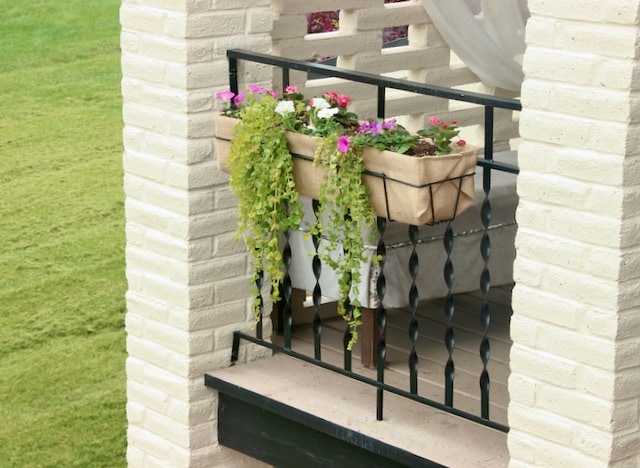
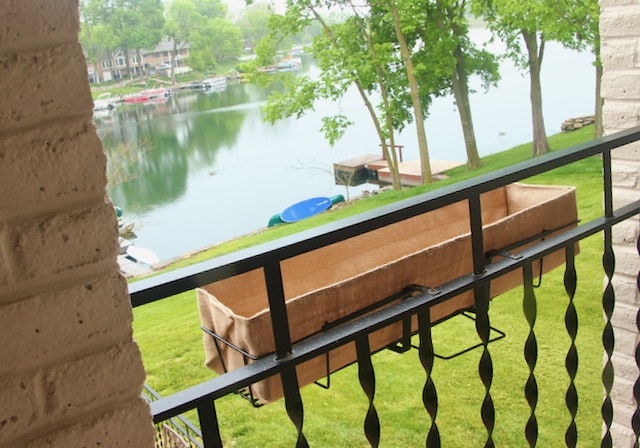
Let’s skip right to it — to the humble window box or in my case, railing planters. How hard can it be to find a liner to fit the three vintage railing planters that were attached to the balcony when the house became ours? I’ll tell you: IMPOSSIBLE!
Odd length and short!
This calls for custom — and stylish, of course! Because we love curb appeal just like we love a beautiful window box planter.
And stylish flower box liners can make such a difference!
Advantages of Custom Made Planter Liners
These custom sized planter liners have many advantages, including:
- Made of biodegradable materials, organic materials
- Custom liner fit
- Easy to make
- Provide good drainage
- Cheaper than coco liners
- Great air circulation for plant’s roots
- Good for the health of your plants
- Can add a waterproof liner to just the bottom
Let’s Make Custom Planter Liners:
Do You Prefer Video?
No worries. I’ve gotcha!
Just click here or the image below:
The supply list is simple:
Materials:
- Burlap, or different materials of your choice
- Matching thread
- Plastic craft mesh, optional
Supplies:
- Sewing Machine
- Measuring tape or ruler
- Scissors or Rotary Cutter
- Straight Pins
- Pencil or chalk
Step 1) Measure Your Window Box-
Let’s make sure we’re using the same vocabulary. For this project:
Length = Side to Side, the long side
Depth = Front to Back
Height = Top to Bottom
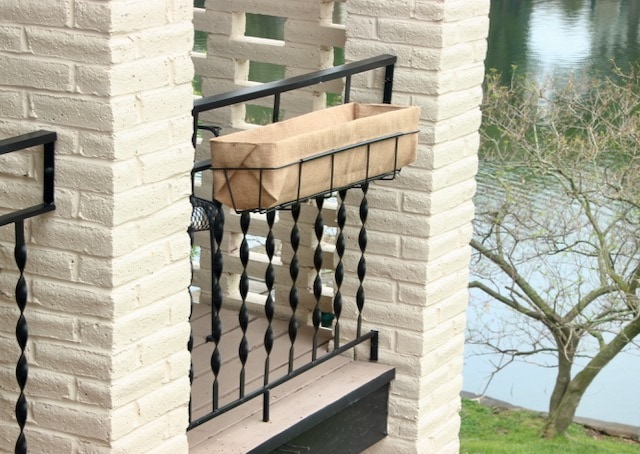
Mine measure 31″ in Length. But the depth varied. At the bottom, they are roughly 6-inches front to back, but at the top of the frame they are 7-inches. They are only 4 1/2-inches tall.
I want my liners to be 31 (L) x 7 (D) x 6 (H).
I’m adding 1 1/2-inches to the height. I add an inch my first year of using these metal planters. The extra height kinda flopped over, particularly on the long front side. A lot of people really liked that relaxed look. But I want to go with a more tailored, clean look this year. Plus it helps to keep the deeper soil contained. So I added the optional plastic mesh inside to stiffen those long fronts and backs.
Step 2) Cut Burlap-
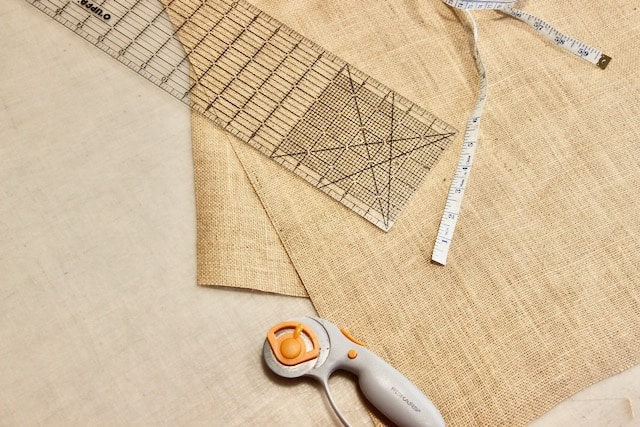
Start by figuring your needed piece of burlap. First measurement:
Side to side calculation = length + height + height + 1-inch seam allowance. [Mine this is 31 + 6 + 6 + 1 = 43]
Front to Back calculation = height + depth + height, now double all that and add 1-inch for a seam. [Mine is 6 + 7 + 6 = 19 X 2 = 38 + 1 = 39]
Now measure and cut a rectangle of burlap that is your side-by-side calculation by your front-to-back calculation. [Mine is 39″ x 43″]
Step 3) Fold, Stitch and Press-
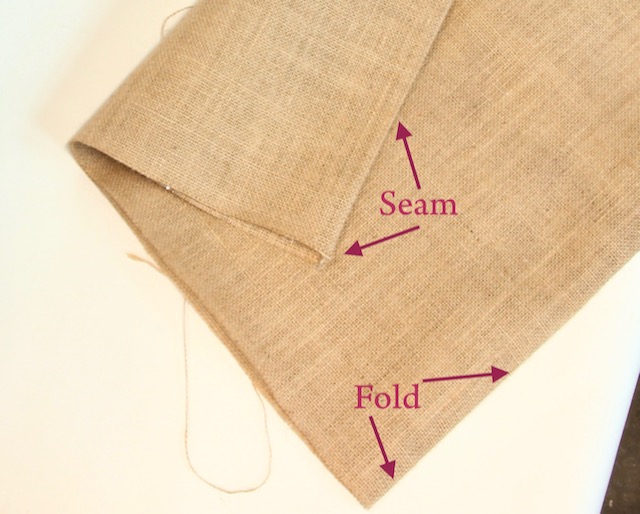
Fold in half down the length of your Side-to-Side measurement [Mine is the 43-inch length, so my folded piece is now 43 x 19 1/2-inches].
Stitch down the long edge, forming a tube. Serge or zigzag is best, but a straight stitch will do.
Turn right side out and turn and press.
Step 4) Mark Corners-
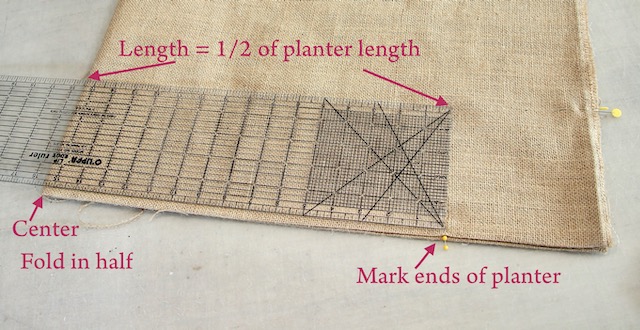
Fold in half with raw edges meeting.
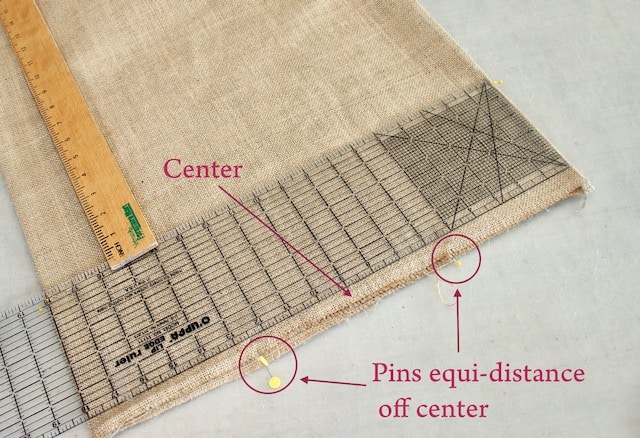
Mark from the center fold, half the length of your finished liner. [Mine is 31-inch length, so I marked at 15 1/2 from the center fold]. Be sure to mark top and bottom layers, and on both ends of the fold. So four marks total.
Now mark the other ends.
Fold the liner the other direction, folding so pressed edge and seamed edge are aligned.
Again the fold is the center. Now mark from the center, half the depth (front to back) of your liner on both sides of center. Both ends of the fold and both layers of fabric, four marks again. [Mine is a depth of 7-inches, so I marked 3 1/2-inches out]
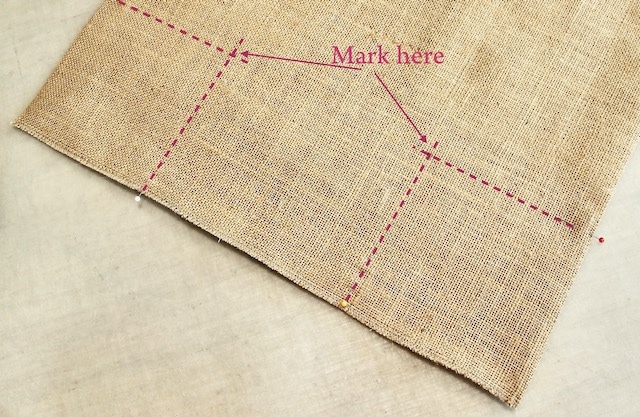
Each of the four corners now has 2 marks. Create two imaginary lines to form a right angle at each corner based on your pins. Like the picture above.
Make sure they are true right angles. Use yardsticks and anything with a right angle you have handy — such as a book or album cover, remember those? Okay then a DVD case, remember those? Geesh, technology! Just grab a book — to help line things up.
Step 5) Totally Optional — Add Plastic Mesh to Sides-
If, and only if, you are making a liner more than 1/2 inch taller than your planter, then you might want to consider adding some support for the front edge. And the long back edge if you are obsessive like me and your planter will hang from a railing rather than up against a house.
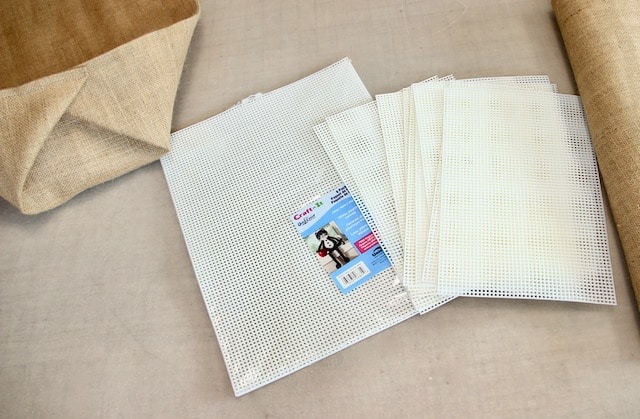
I used these plastic mesh pieces that I had leftover from some old project.
Cut them the height of your liner. [Mine are cut 6-inches tall] Use as many as you need to support the front length between the two corner pins you just placed. [I used 3 allowing them to overlap a bit]
Before closing us the ends, slip your supports inside and pin them in place along the long folded edge and the seamed edge, ending the supports about 1/4 – 1/2 inch shy of the corners.
Run two rows of straight stitch along the row of support mesh. [I ran one row 1/2-inch and another row about 5-inches in from the edges]
Step 6) Finish the Ends-
Close up the raw ends by turning in a half inch and stitching closed. Remove the pins and then replace them as you go or mark their spots with a pencil or faint marker.
Are you enjoying this idea? Would you like to receive more like it? Please subscribe:
Thanks Bunches! Now Let’s Finish your Planter Box Liner–
This Next Step is Where it all Comes Together!!!
Step 7) Make Those Corners-
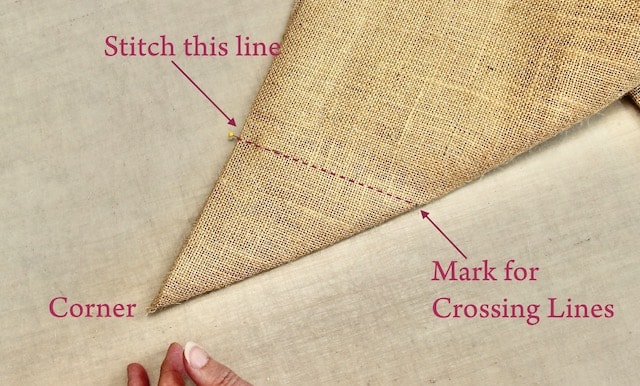
At each corner, form a triangle or wing, by lining up the two pins or marks you have on the edges and the making sure the mark you made in Step 4 is on the fold.
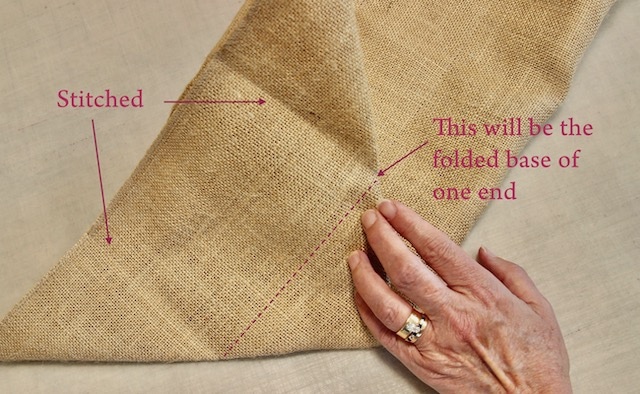
Now stitch a straight line from each pair of pins or marks on the edge to the pencil mark on the fold line.
On each end of your custom liners, you how have a pair of triangles or wings flapping around.
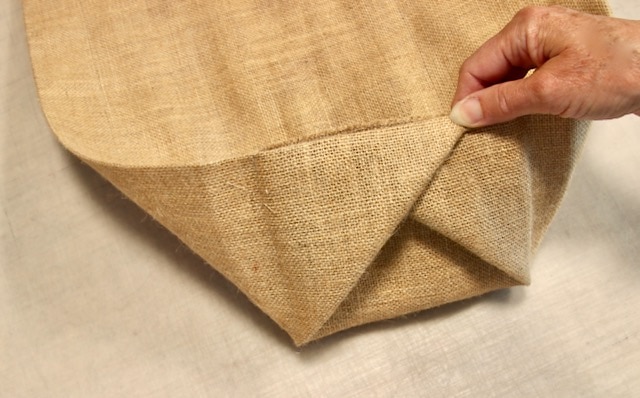
Pull them in together and overlap them as needed.
Because my liner is an inch shorter than it is deep (front to back), my triangle points will be about an inch short of the side stitching. Yours may be more or less of that. Where the points overlap is dictated by the proportions on your planter, so don’t sweat that!
If your liner is significantly shorter or taller than it is deep, your wings may wrap around the corner or barely meet on the sides. It’s all okay. Remember, this is NOT one size fits all!!!
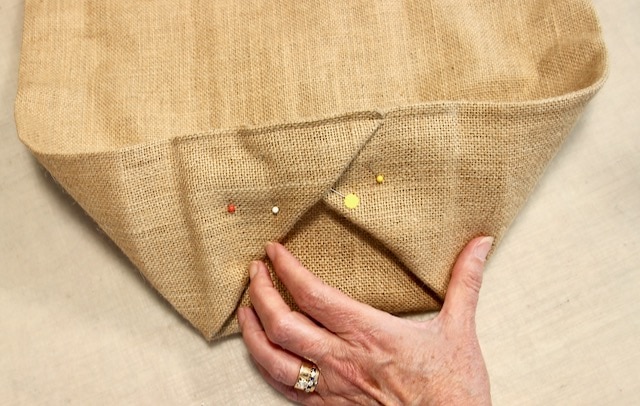
Pin these in place and stitch the ends using a straight stitch.

And there you have it.
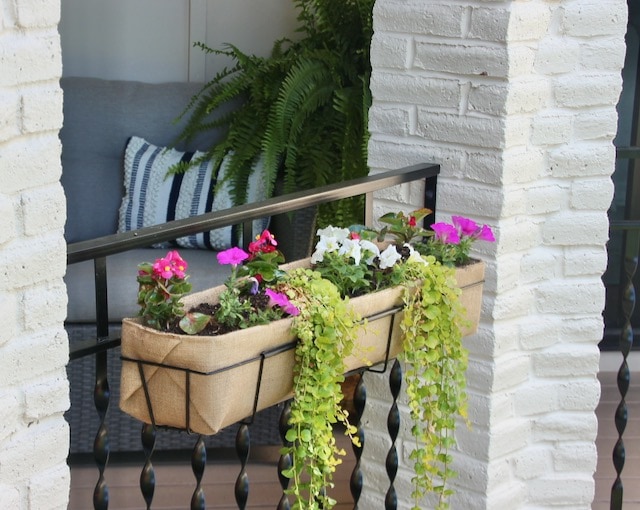
You can use your liner as I am with the crossing “wings” showing on the ends. I kind of like the envelope look.
Or your can flip your liner other-side-out. Because who’s to say which is the right side? And hide the wings inside under all the soil and greens.
You’ve custom-sized your window box liners, now you can custom style them to. Will you go flat sides or envelope sides?

A layer of plastic in the bottom and up the sides just a bit will help your plants retain water — it’s a good thing for our plants, not so much for us!
Usually we want plenty of drainage, but with these planters, they dry out quickly since they are up high and exposed to the wind and they get a lot of hot sun. So the plastic help to keep some of the moisture they need but the air circulating through the burlap prevents root rot.
It’s a style win, a function win and a budget win!!!
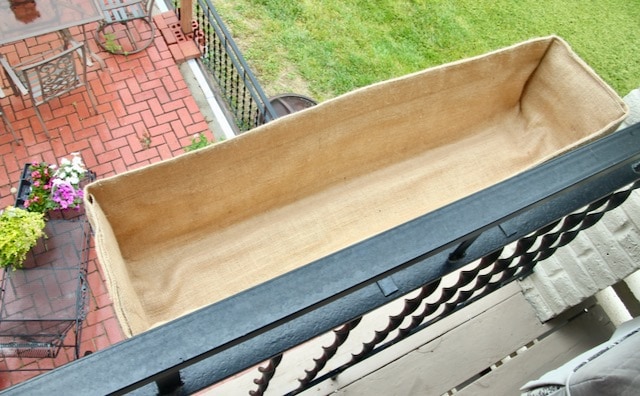
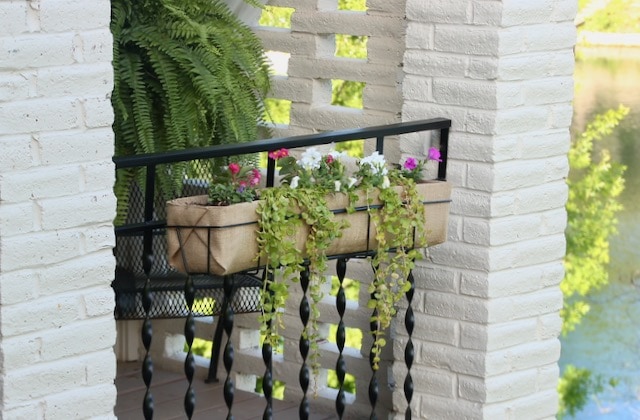
And your DIY-ed custom size window box liner is ready for bright plantings and a summer of beauty!

UPDATE: I actually used these planters for three years. Honestly, I should have replaced them after two. No one else seemed to notice.
But we tend. to be our own toughest critics, aren’t we?
I hope I’ve inspired you to pull out that old charming planter you’ve never been able to use, make her a custom liner insert, fill her with gorgeous flowers and enjoy her debut in your outdoor space!


This is such a great idea! And they look so pretty, too.
Thanks so much Michelle! Hope you give it a try and don’t hesitate to reach out with any questions.
This is so helpful and inspiring! Thanks for sharing at Charming Homes & Gardens!
Thanks so much for hosting Charming Homes & Gardens. I hope it inspires those with “difficult” planters.
Okay, I LOVE this gardening craft! Perfect DIY window box liners. But i wanna know just one thing… How in the HECK did you get your photos from the front view of your balcony?!!!
Ha! Ha! I brought in a boom truck.
No really, our balcony is L-shaped with both the master bedroom and the living room opening onto it. There are five arches and three of them have planters on the railing. So I can stand on one corner and shoot with my zoom across the courtyard below.
It’s a quirky 60’s “Bungilla” — It looks like a small bungalow from the front and a Mediterranean villa from the back.
I just found this wonderful idea of yours. I have a question if this is still an active blog. Should the side to side measurement be length+height+height instead of length+depth+depth for the burlap window box liners?
Hi Sheri, glad you found me! Yes, active, very active!
Oh that’s a good catch!!! I’m editing that post right now. Thanks so much for bringing that to my attention.Yes, side to side measurement should be height + length + height.
Thanks for being my editor!
I’d love to see a pic when you get your done!
Such a great idea Diane! Thanks for sharing – pinning!
Thanks bunches Cindy!
This is a great idea Diane! I have one that is an odd shape, I had an idea, but I think your idea is better! Thank you so much for sharing your inspiration!
Oh great Cara! I hope it works for you!!! Send pics. I;d love to see and share.