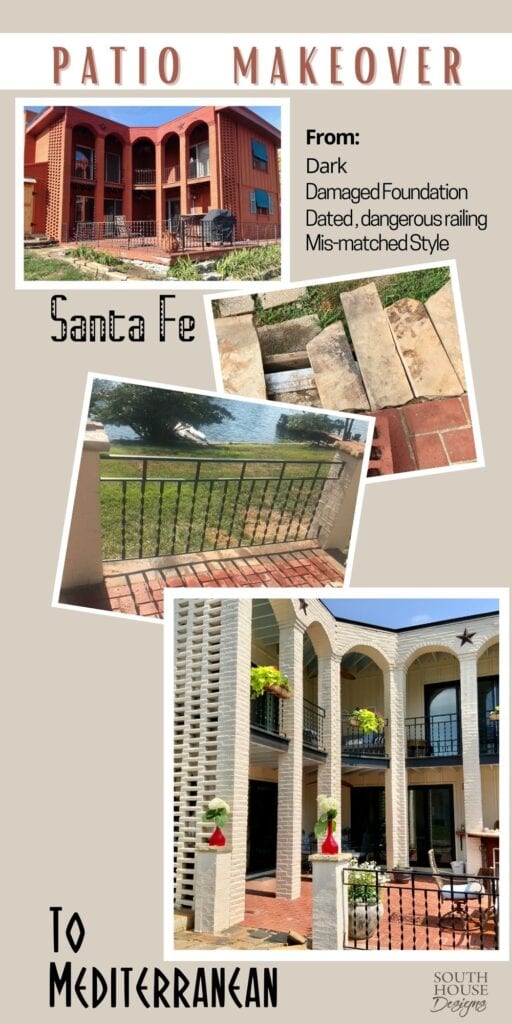
How To Add New Brick Fence and Makeover a Railing
See how we made over our patio, adding brick fence pillars to match the house columns and updating the black iron railing.
Welcome to our series of how we have made over our backyard spaces!
To really appreciate how far we have come and what influenced our decisions, you should really check out the prequel if you haven’t already. You can find it right here.
Don’t worry, we’ll wait for you. Come back as soon as you finish that one.
Then there’s the first chapter where we tackled the outdoor storage shed that the previous owner had made into her “Tool Casita”. And I’m sure you have guessed by now that that is NOT our aethestic. So jump over and catch that first installment of this series.
Series Update:
- The Prequel: Our Problem areas and three mood boards that helped to guide our decisions
- Eps. 1: The Santa Fe Tool Casita and treacherous entry became our Tool Cabana with its own front porch
- Eps. 2: The Original Starting Point – (you’re here now) our vintage red brick courtyard with crumbling foundation and a dated and dangerous railing
- Eps. 3: Planning & Plotting the new Gravel Patio and evaluating pea gravel vs. crushed granite
- Eps. 4: How to Build a Retaining Wall and steps with natural stone
- Eps. 5: Installing the Decomposed Granite Patio
- Eps. 6: Installing a Stone Walkway and Steps from the driveway down to the patio
- Eps. 7: How to Hang Outdoor Edison Style Cafe Lights for a warm, inviting glow
Let’s Start With the Original Patio Foundation-
Today, we’re discussing the piece that got this whole outdoor makeover started. Basically, it’s the cookie we fed the mouse!
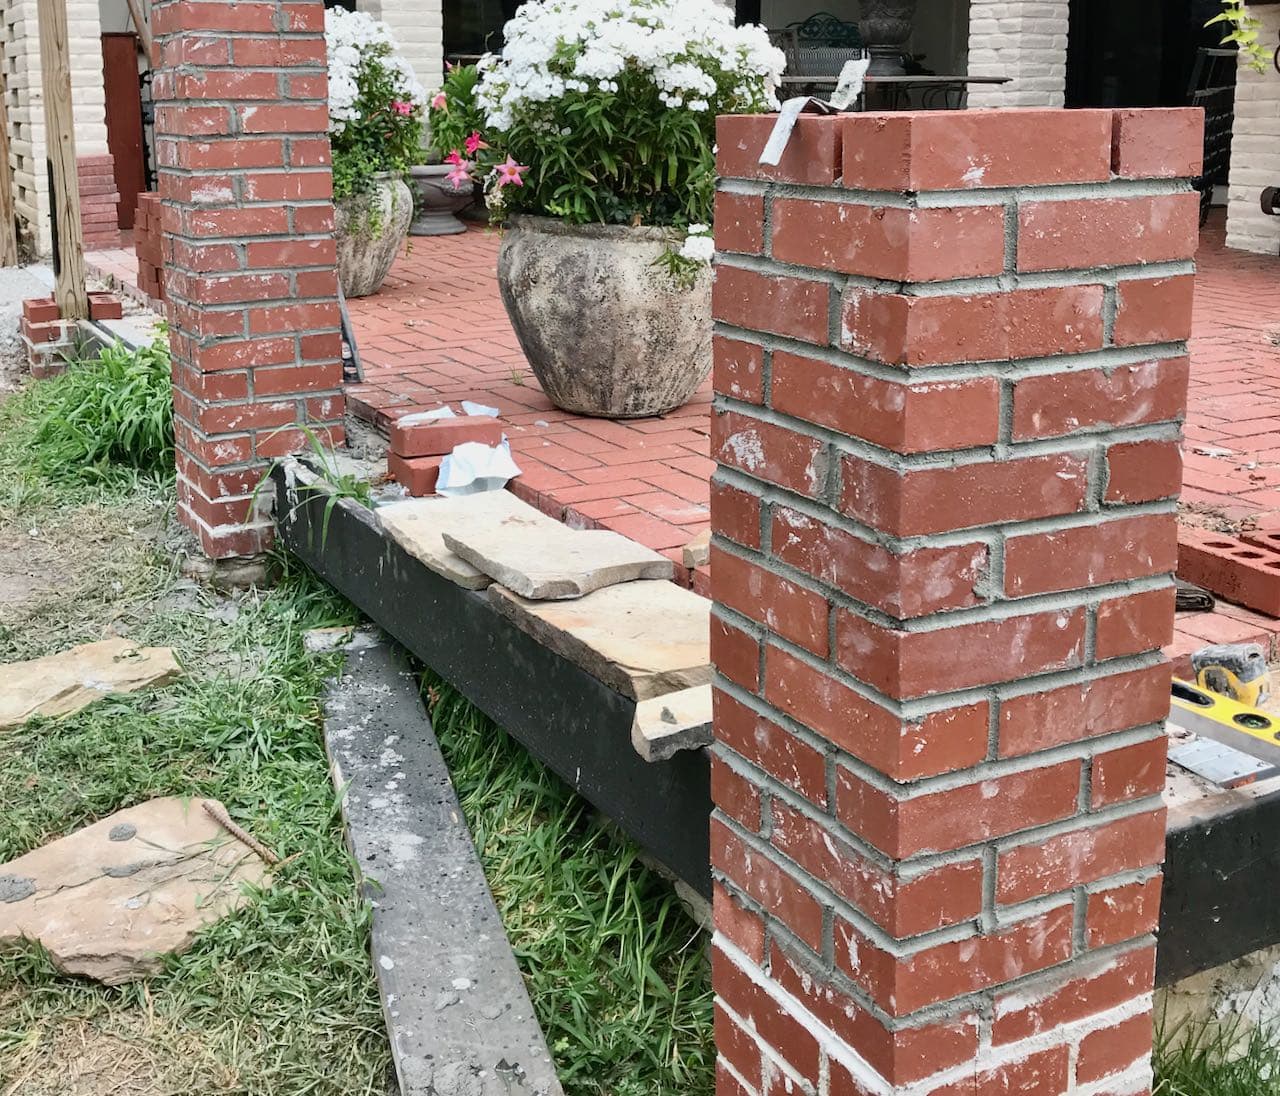
It started when we were preparing to make an offer on the house. The Inspector pointed out that foundation for the elevated brick patio was in bad shape and needed to be addressed. That one little cookie of needing to repair the foundation edge snowballed — as they so often do.
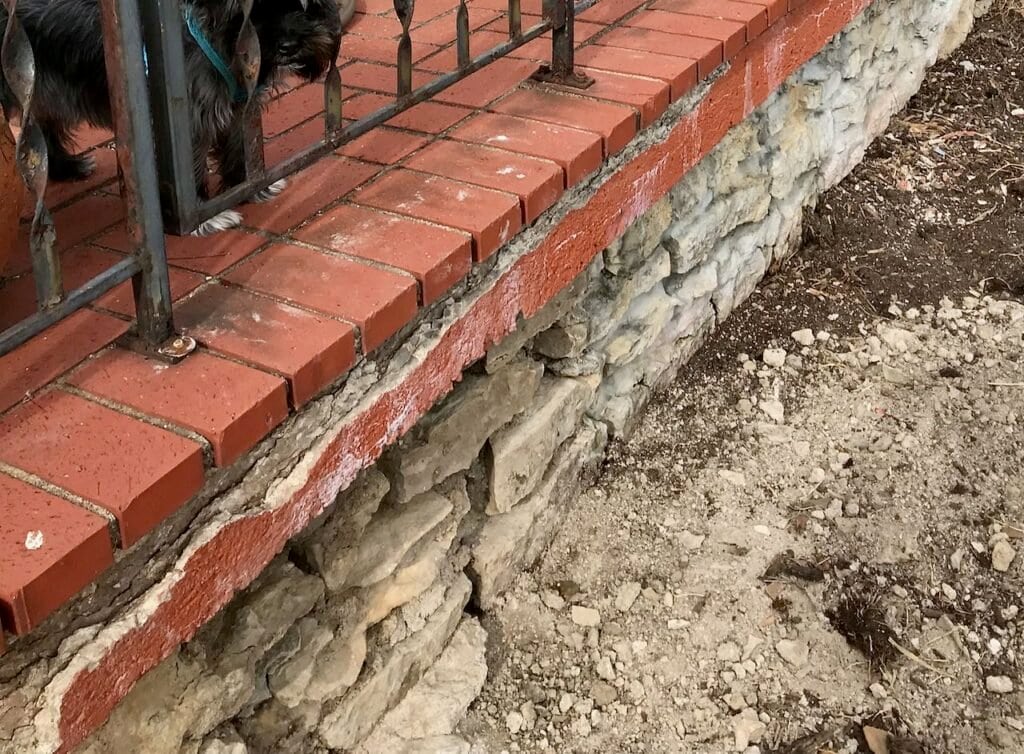
The outer frame of red brick had to be removed and the foundation that held them repaired/replaced/shored up. After talking with many contractors about our options, we settled on a middle of the road plan. The upper edge was reinforced and built out.
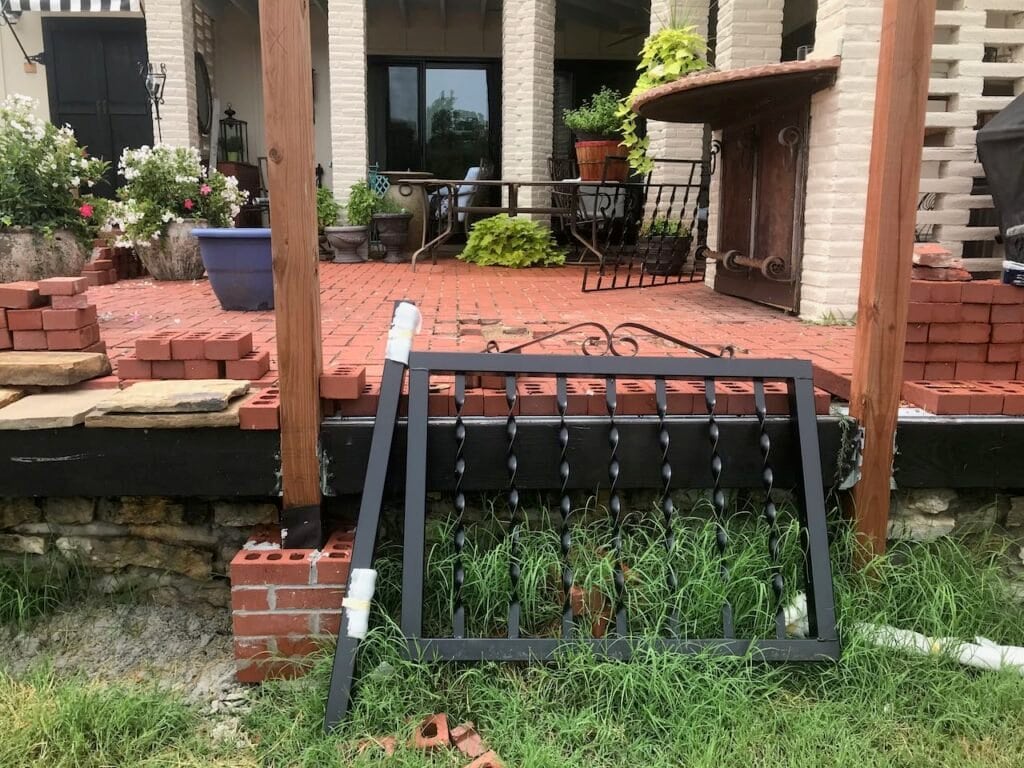
We opted to hide this new edge behind a facing board that we would paint black to reference back to the facing board of the balcony and our black roof edging. The facing boards are suspended between the posts using joist hangers. Then the brick is built up around the this, hiding the hardware.
However, the bricks that came off were not enough in quantity or size to cover this new piece.
It was impossible to come up with any traditional bricks to match (or even look good with) the original. This left us no choice but to have a different stone border. So we went with it and decided to embrace the enforced intentionality of a “different” border.
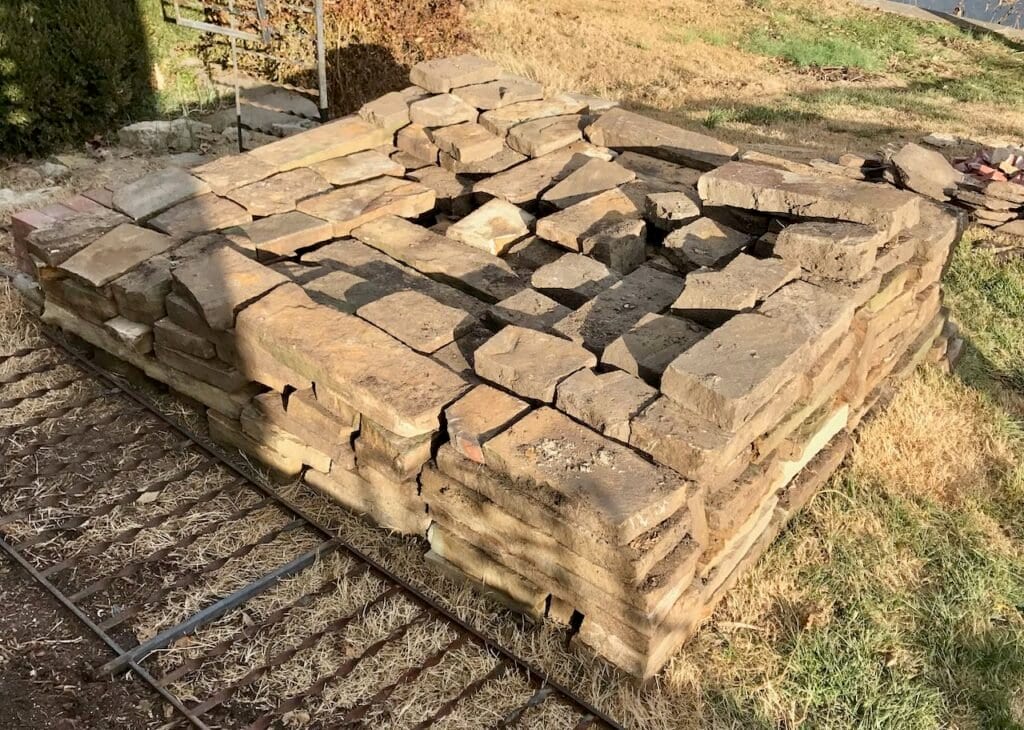
We settled on Black Hills flagstone as the counterpoint. Good thing we liked it since this is what we pulled up when we removed the day lily bed and some from a few other spots.
There’s a LOT here! A LOT to take in!
I get it.
So you can find it when you need it, please pin to your:
Outdoor Spaces board
your Patio board
your Hardscaping board
Your Backyard Makeover board
Your Fencing board
Wherever it makes sense for you.
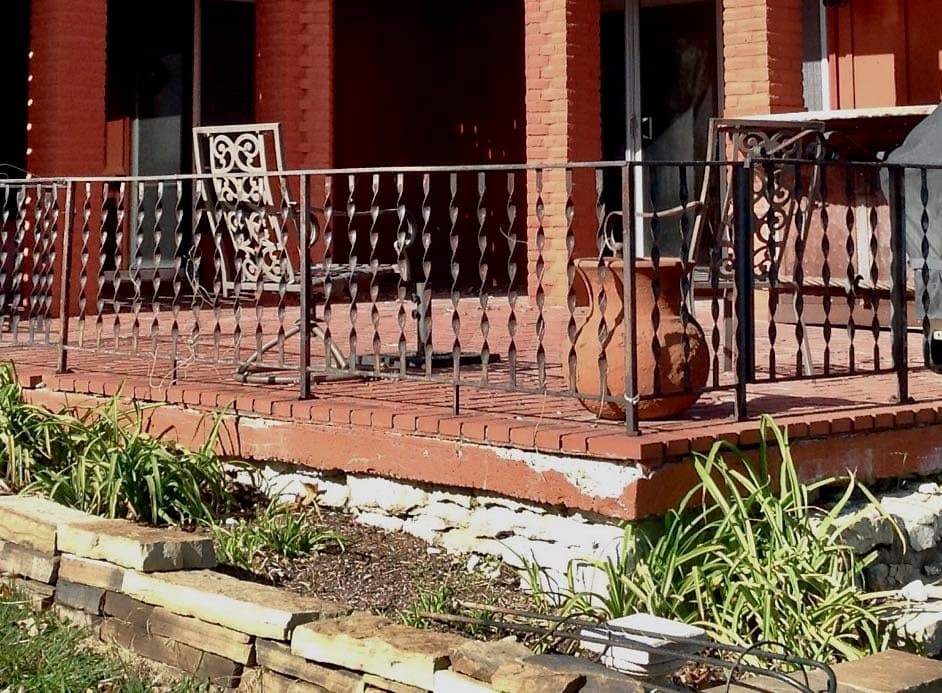
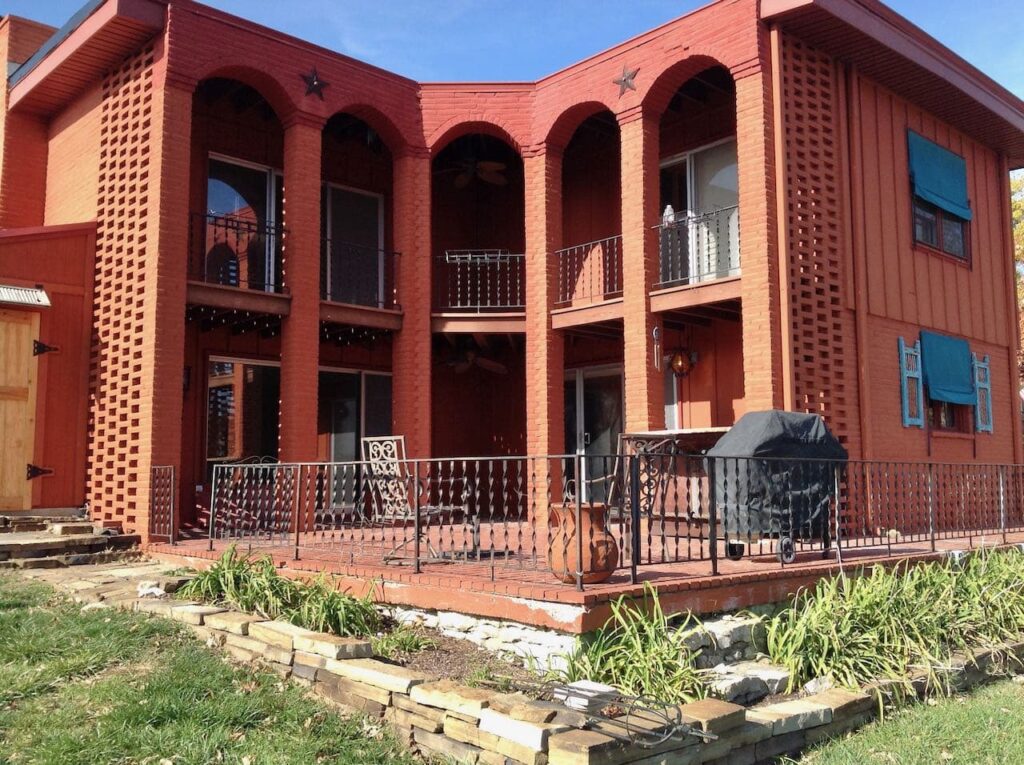
Now, What to do About the Iron Railings?
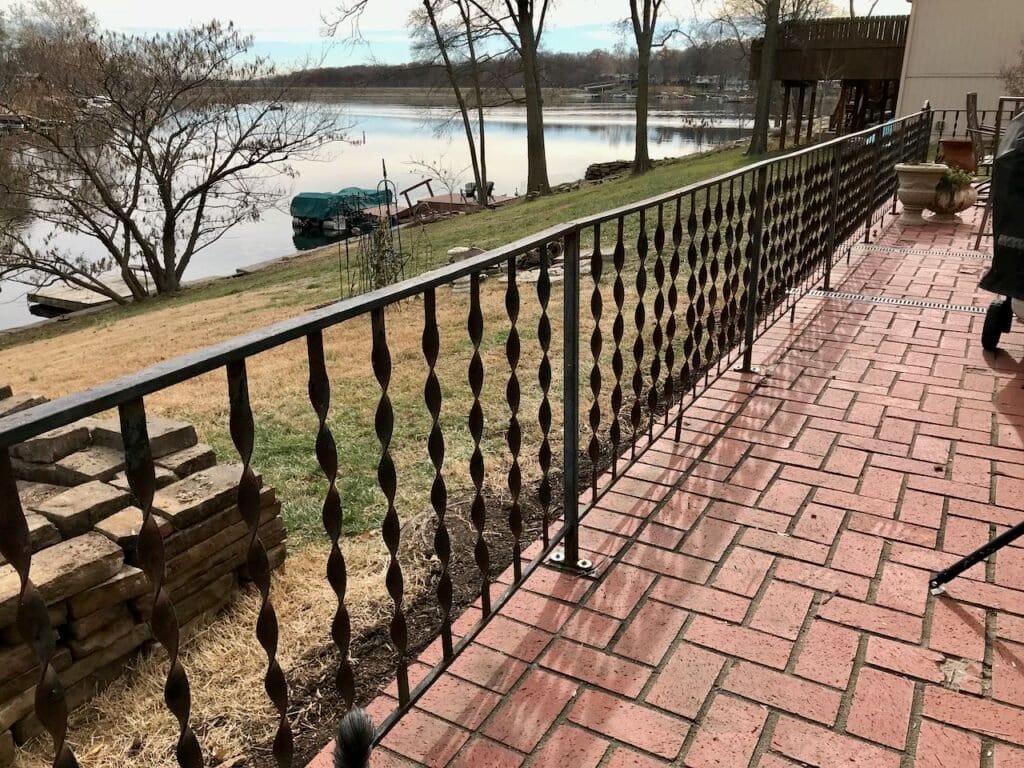
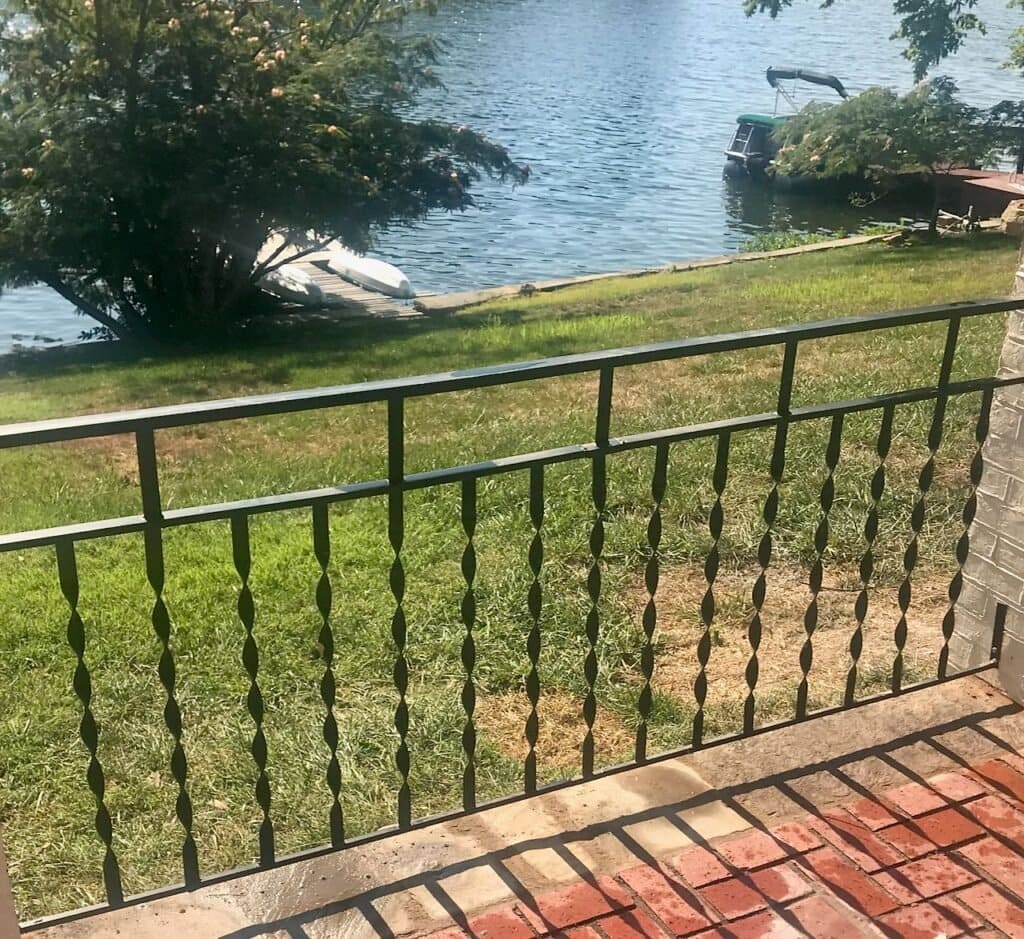
See those railings, all the way around the patio and the balcony?
They are short, I mean really short! They were grandfathered, so we didn’t HAVE to replace them, but too short for this mama’s heart. (I was a nervous wreck!)
Pricing new railing was crazy expensive – more than 10K!
This was going to take some creative problem solving, for sure. I came up with a great solution for us. If we add some height to the existing railing and had them all powder coated, it would solve the safety issue and update them. Win – win!
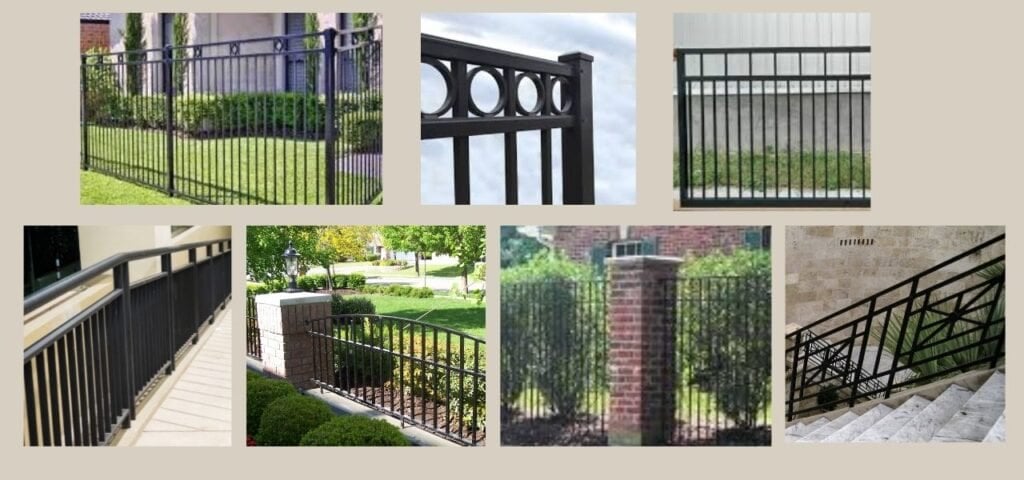
The iron railings that I gravitated to all had a band of some geometric shape along the top, above the vertical balusters. Like those above.
If I added something to the top, that would solve the safety issue. And it could also update this outdated twisted style. I wanted it to have a more streamlined feel. What if I added straight pieces? It would help to modernize the twisting. And if we used the same dimension of iron, it will look like it was all original.

I’m thrilled with how they turned out! Both on the balcony and around the patio.
Mission Accomplished. And for less than 1/3 the cost of replacing them.
SIDENOTE: See that cute planter liner? Yes, that’s an easy DIY. Here’s how I made them.
Could the New Iron Railings Make a Bigger Statement?
Now that the railings were down for the patio repair, it was the perfect time to investigate an idea I had since the first time I laid eyes on the lake side of this house.
FUN FACT: In our city, the lake side of your house is the front of the house and front yard. The back of the house is street side. At least on all the legal documents.
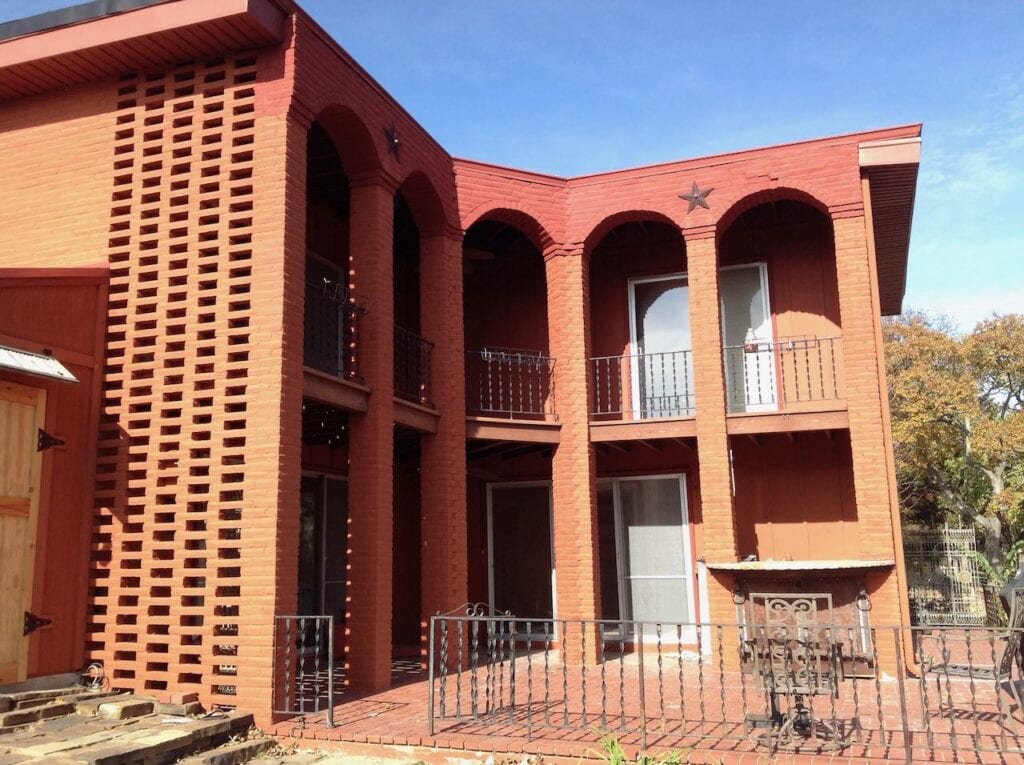
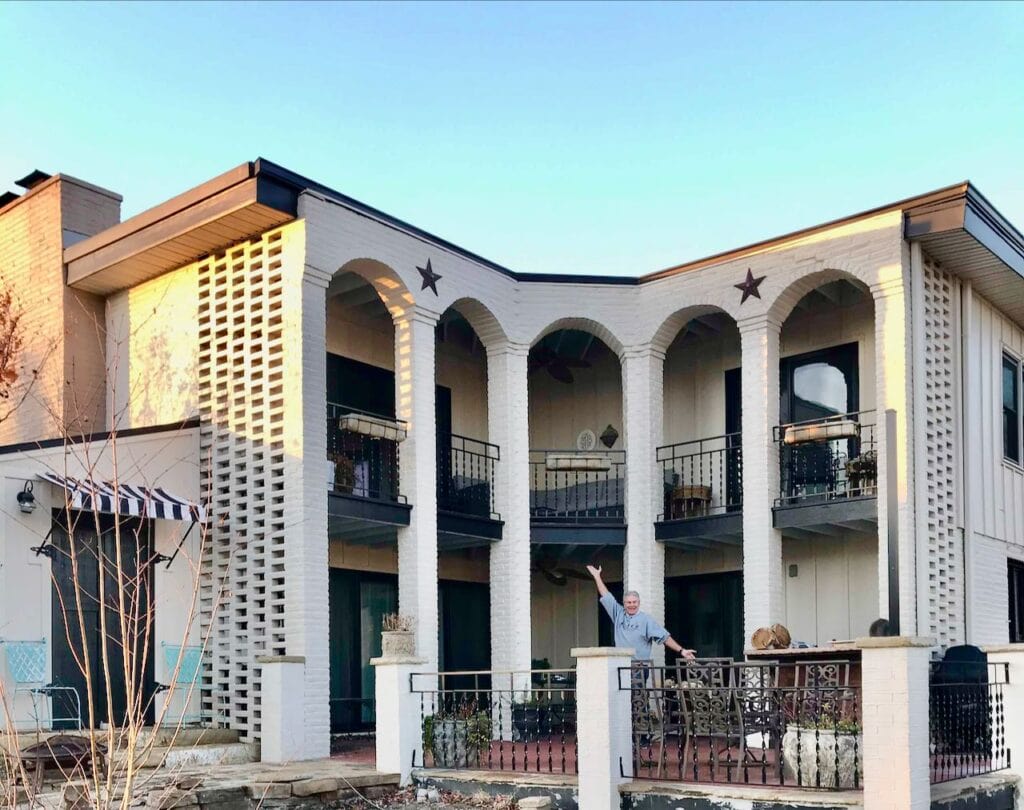
Those five two-story arches wrapping the brick patio make THE statement. They are what have us thinking Mediterranean villa.
The black iron railings tend to disappear. You can hardly see them from the lake. Compared to the strong, beefy columns, the railing surrounding the patio just felt wimpy. Note those scholarly design terms. Impressed?
They looked like an afterthought. I wanted them to look intentional to the design, to the architecture.
It was now or never, so we went big and added brick fence pillars to mimic the original columns.
The iron fencing would tie into these pillars, just as the balcony railings tie into the 2-story columns.
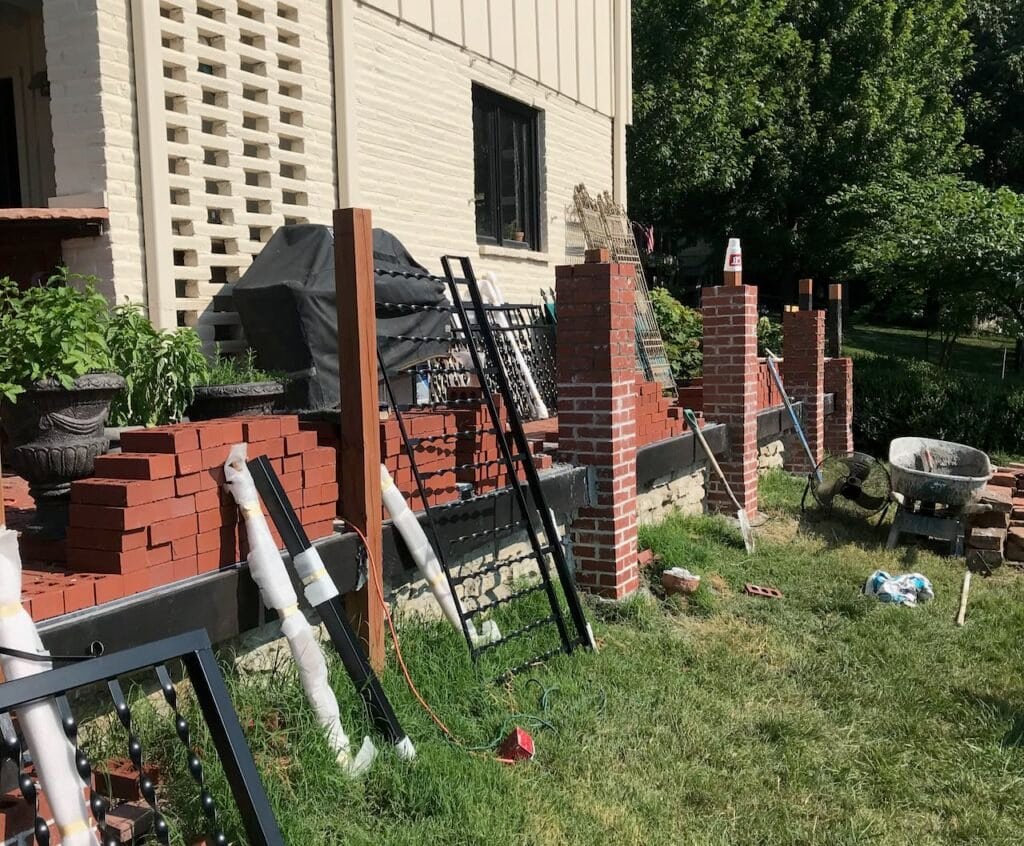
We recognized this was way beyond our skill set and that of our original contractor. We hired a new set of masonry pros and are soooo glad we did.
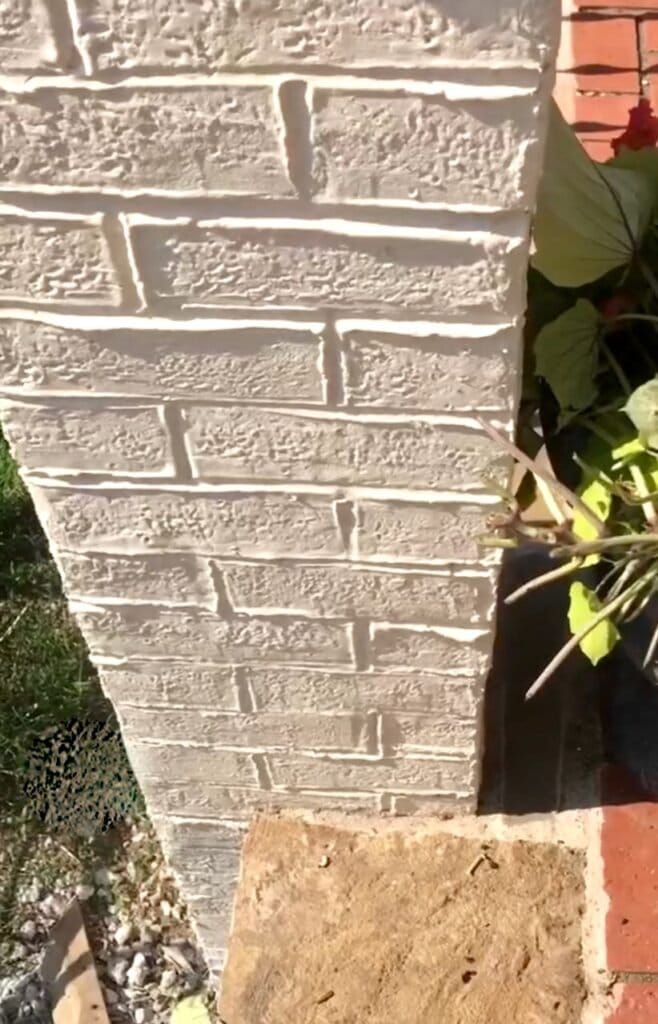
Why Doesn’t This Brick Fence Match Better?
Something felt wrong about the pillars as soon as they went in!!!
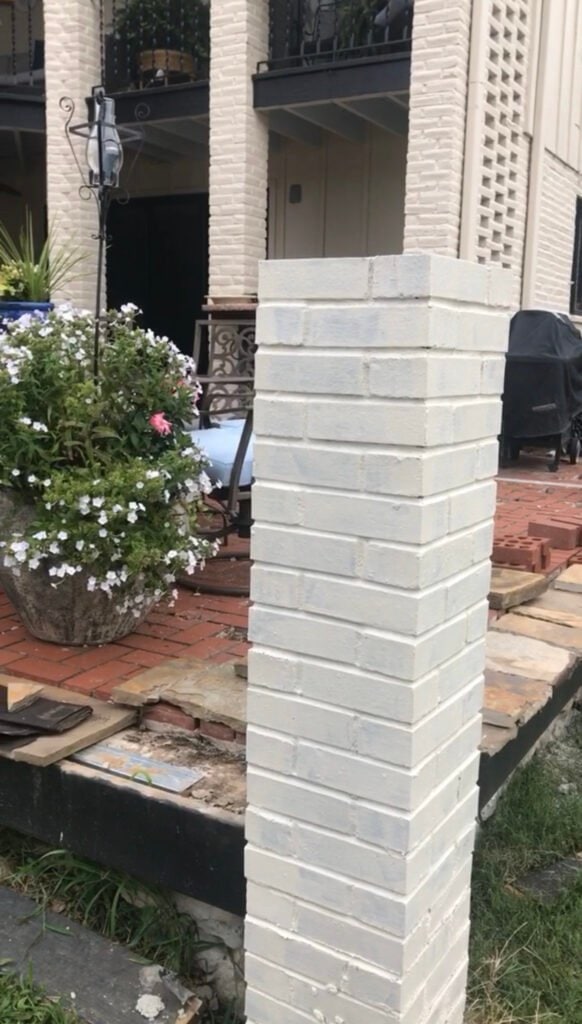
When I painted the first pillar, we realized what was wrong.
Yes, a second coat would help, but not enough! But it was much more than the color of the brick – it was the shape and texture of the brick that was all wrong.
Our first contractor had ordered these bricks because the were “a great match”. I didn’t get more details than that. By the time we had our new masonry crew on site and the bricks (we had paid for a long time ago) delivered, I had forgotten all about the “matching”.
He had matched the color to the floor. He should have matched the shape and texture, because they were going to be painted anyway.
The issue now is the shape and texture.
More creative problem-solving was needed.
Have no fear! We came up with a system to makeover the surface of the new brick to better mimic the original brick of the house.
This post is already so long! I will post the step by step tutorial separately — very soon.
Now to Tie it All Together-
We introduced a common color/material in all elements of this Lakeside makeover.
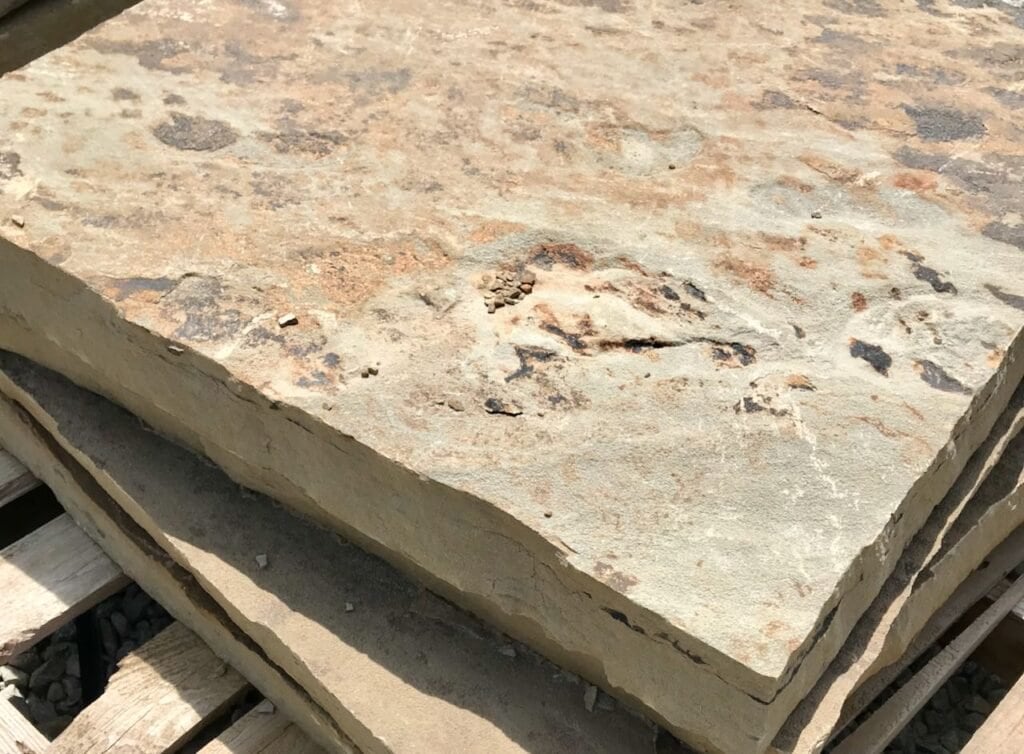
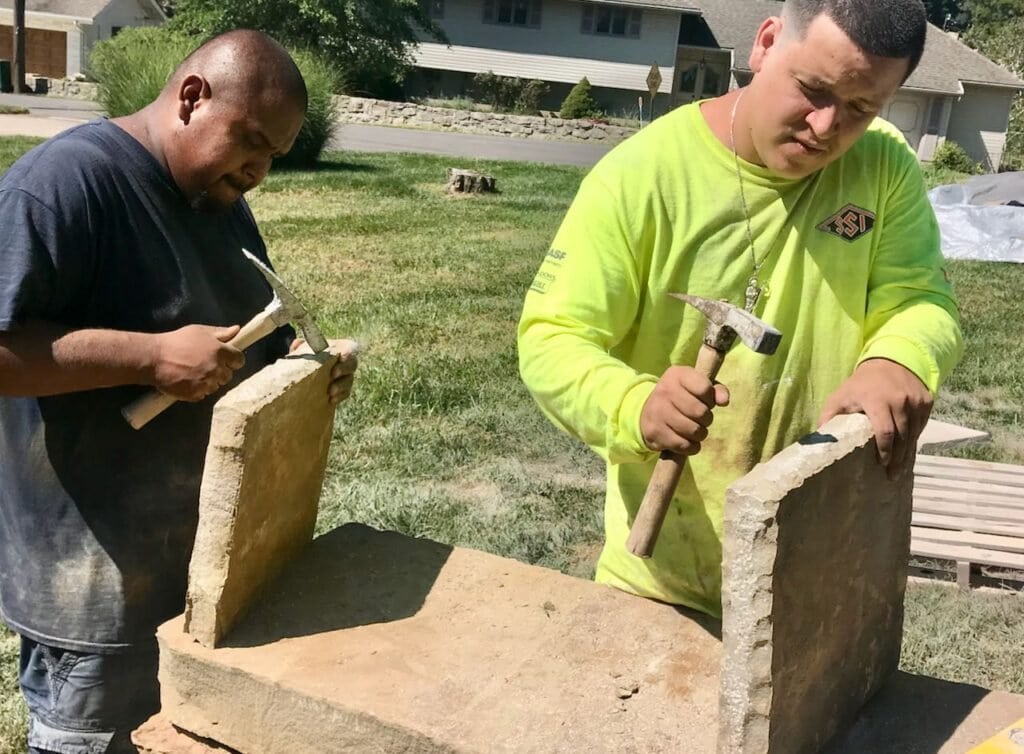
We went back to our favorite stoneyard — Semco Outdoor — and picked out four of these slabs of Black Hills fieldstone.
When they were delivered, our masonry team cut each slab into four capstones. Then they chiseled a bit along the cut edges too give it a more natural hand cut look.
These new caps of fieldstone on the brick fence posts tie into the fieldstone edging around the patio, which flows right into the walkway and steps that join the patio to the tool cabana.
I’m probably not giving anything away to say that the new (soon to be shared) patio extension also incorporates the same stone.
I know this is a LOT. And there are parts that I skimmed over pretty lightly. Don’t hesitate to reach out with any questions. I’m here for you!!!
Can’t resist sharing these Before and Afters together:
And didn’t that tool cabana turn out great? Don’t forget. those details are right here.
Thanks so much for being here and reading along! It bears repeating, do not hesitate with any questions or comments!!!
Our lives are certainly more joy-filled with this Outdoor Space nearly complete. Stay tuned for more reveals!

8 Comments