How to Make a Small Tool Shed Stylish
An outdoor small tool shed becomes a tool and toy cabana in this makeover
bringing fresh style and a much needed safe entry.
Let’s Start in the Most Logical Place: The Before
This pic was taken on the day we took possession.
Series Update: Here are all the posts (so far)
Feel free to jump around. and take in what you need to be inspired, to dream and to look for insights and answers. And always feel free to shoot me a question, or three!
The Prequel: Our Problem areas and three mood boards that helped to guide our decisions
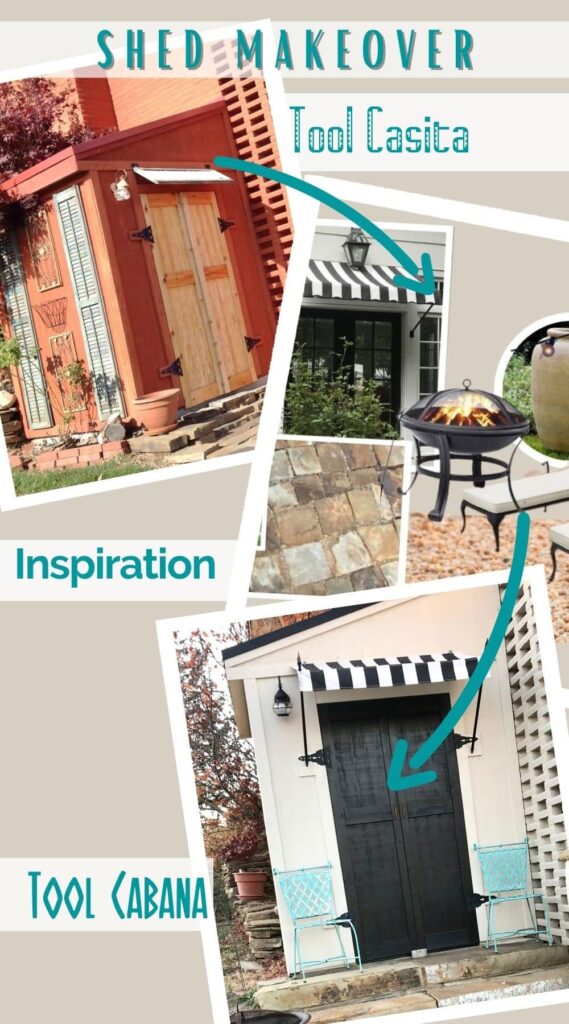
Eps. 1: The Santa Fe Tool Casita (you’re here right now) and treacherous entry became our Tool Cabana with its own front porch
Eps. 2: The Original Starting Point – (you’re here now) our vintage red brick courtyard with crumbling foundation and a dated and dangerous railing
Eps. 3: Planning & Plotting the new Gravel Patio and evaluating pea gravel vs. crushed granite
Eps. 4: How to Build a Retaining Wall and steps with natural stone
Eps. 5: Installing the Decomposed Granite Patio
Eps. 6: Installing a Stone Walkway and Steps from the driveway down to the patio
Eps. 7: How to Hang Outdoor Edison Style Cafe Lights for a warm, inviting glow
Today We’re All About that Small Tool Shed-
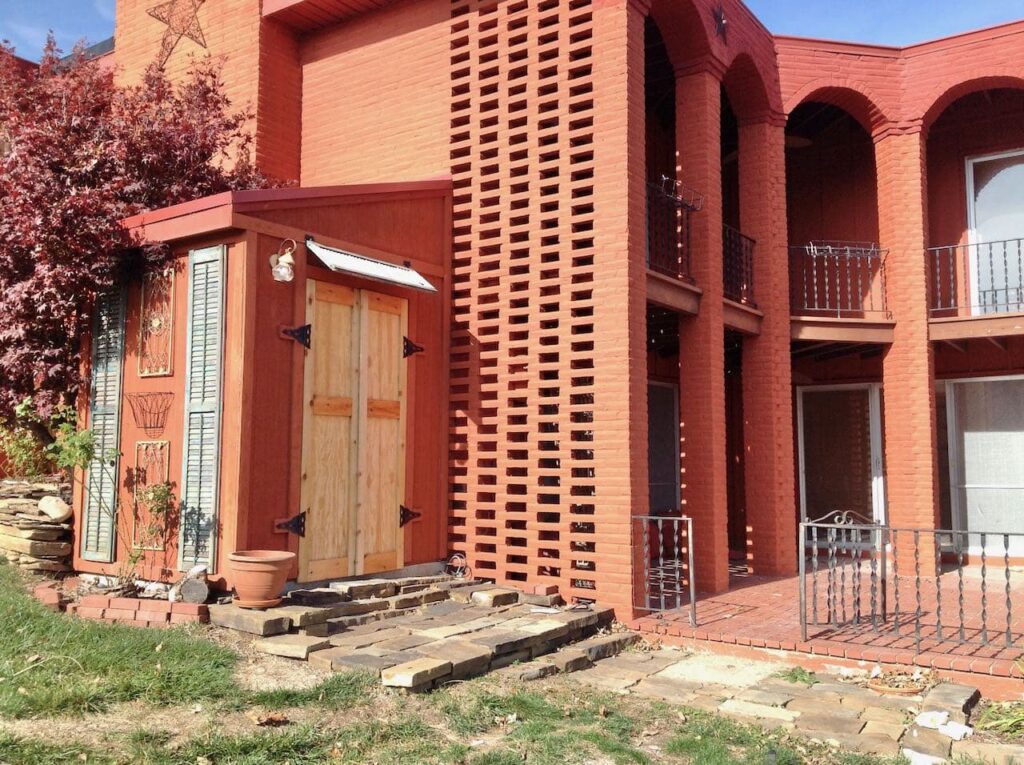
The previous owner added it on and called it her Tool Casita. And it was perfect for her vision for the house. When she bought it, it was its original grey. She envisioned it to be a Santa Fe house.
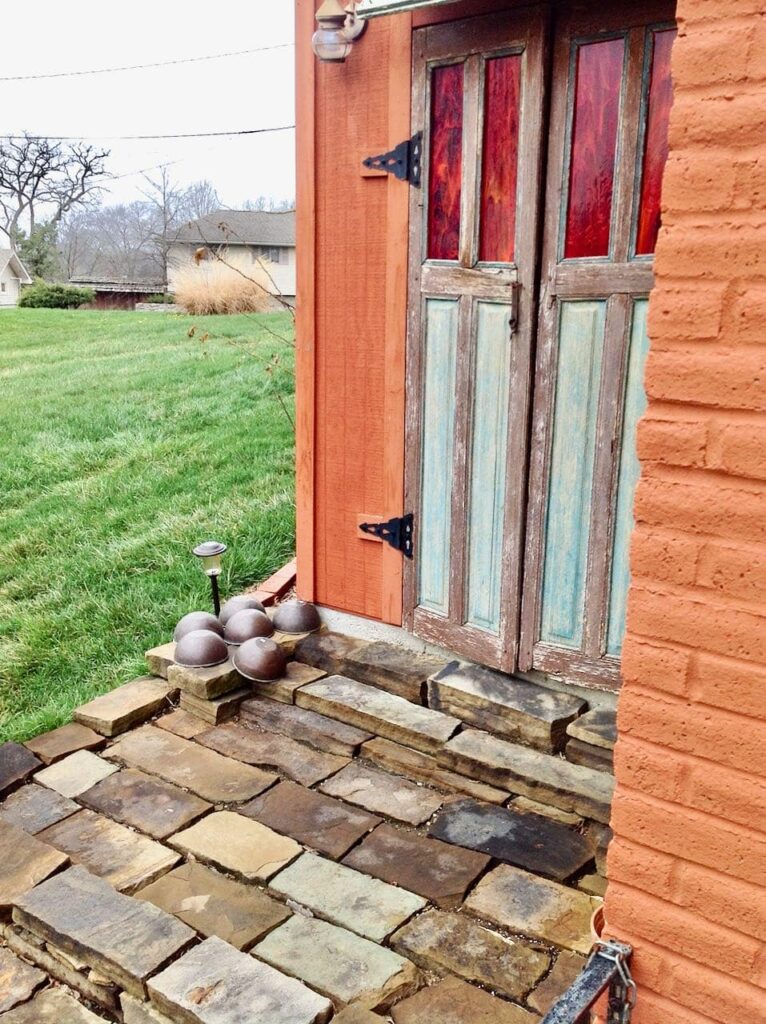
She made these extraordinary handpainted doors and requested to take them with her. She replaced them with these plain cedar doors which worked perfectly for us.
Since we are located on a lovely lake with lots of trees (except this one house), I interpreted these grand columns to be more Mediterranean and we have been transforming the house in this direction.
Our Small Outdoor Shed Has Two Problems:
Style And Safety!
Yes, the second is the most critical, however we were waiting on contractors to help with the patio foundation repairs that would determine the tie-in of the transition between the Cabana and the two patios.
So we worked on the style makeover first.
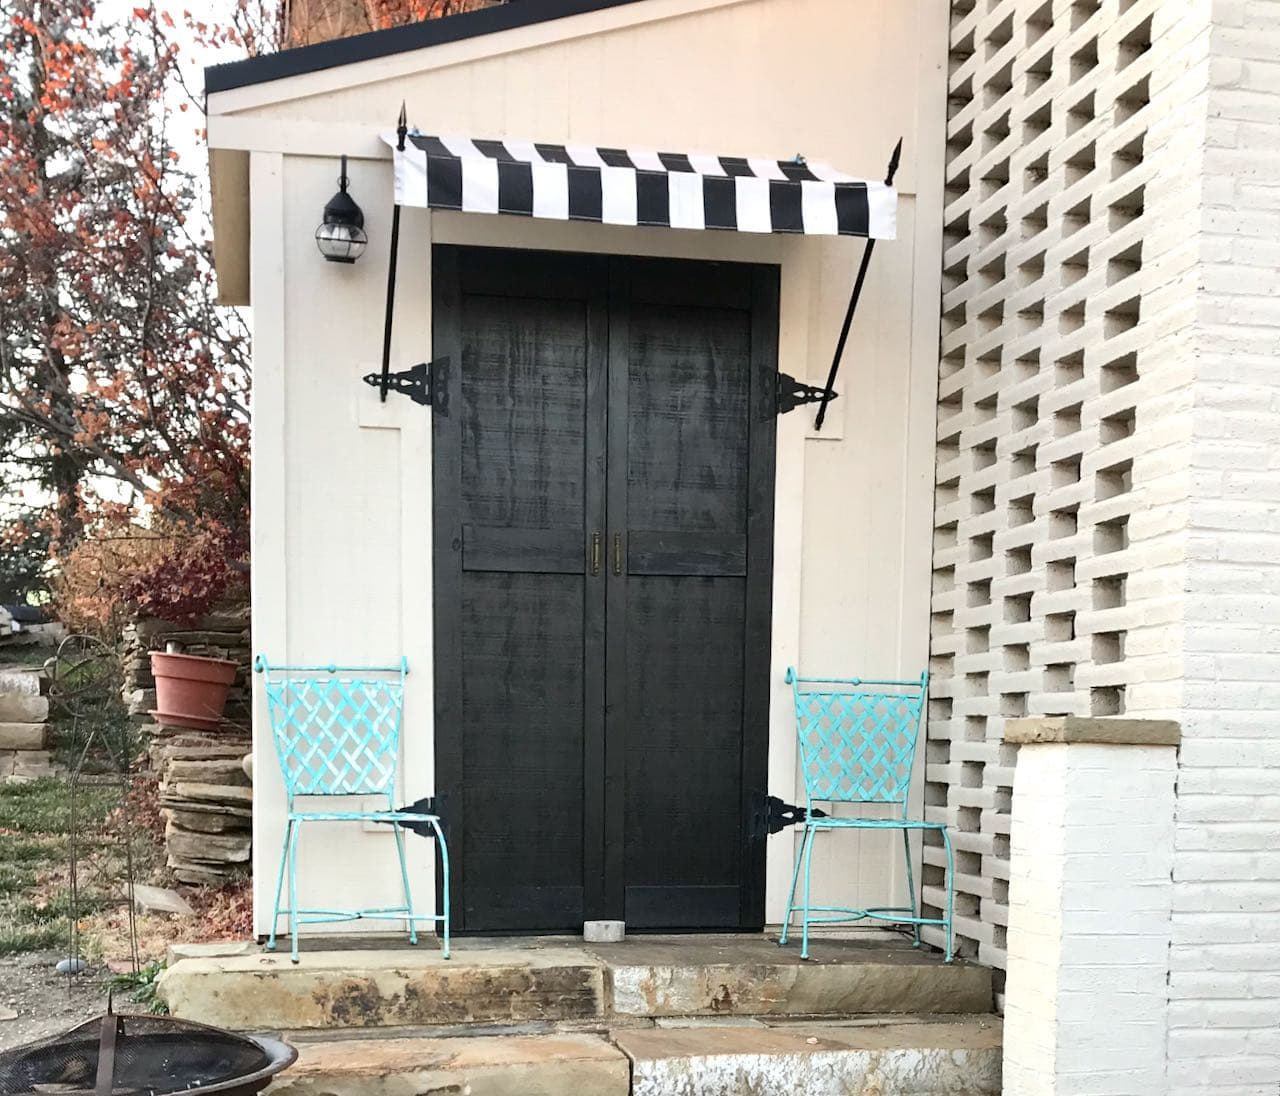
1) A Style Makeover: From Tool Casita to Tool Cabana–
This was an easy fix!
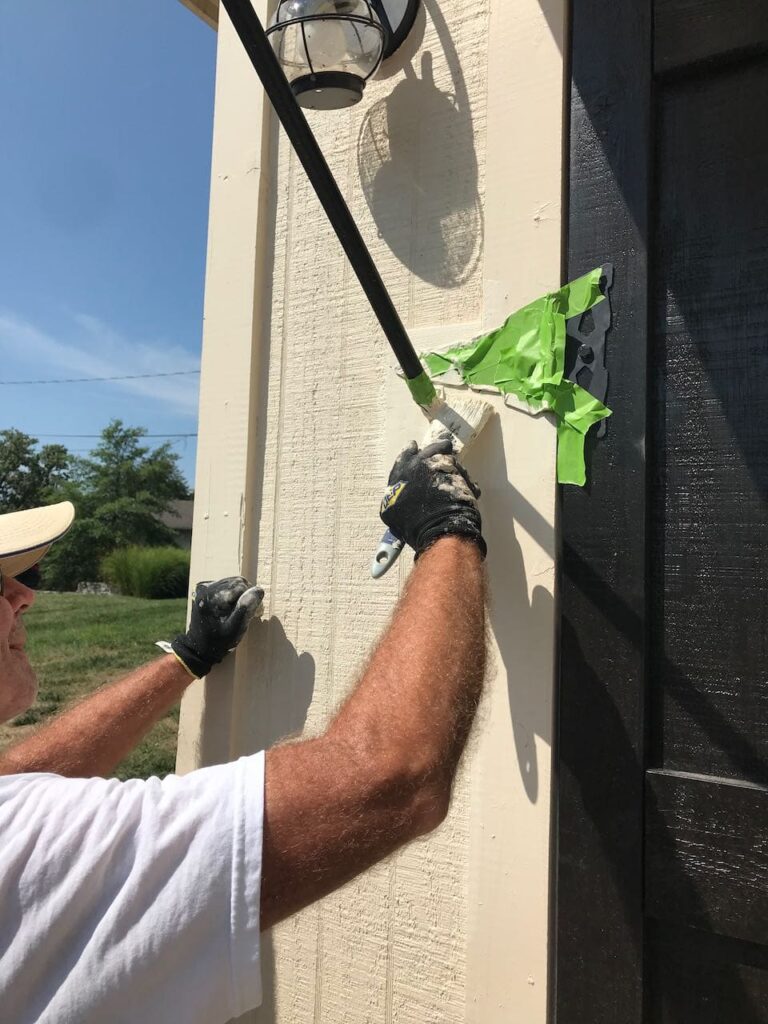
The body of the shed was painted with the rest of the house – a warm bright, not-quite-white called Patience, by SW
Throughout the exterior, we have a number of strong black accents. I knew I wanted a black and white cabana stripe awning, and the doors needed to be black.
Rather than use the SW Tricorn Black that we used on these other accents, I used a gel stain in Spanish Oak. I thought this would give it a bit more durability and avoid peeling paint this way. It. blends perfectly with the Tricorn Black trim.
The top of the awning is installed on a horizontal piece of the shed’s framework.
For the awning to install properly, we had to add on each side of the door, a piece of wood the same thickness as the framework piece.
A little paint magic and it practically disappears.
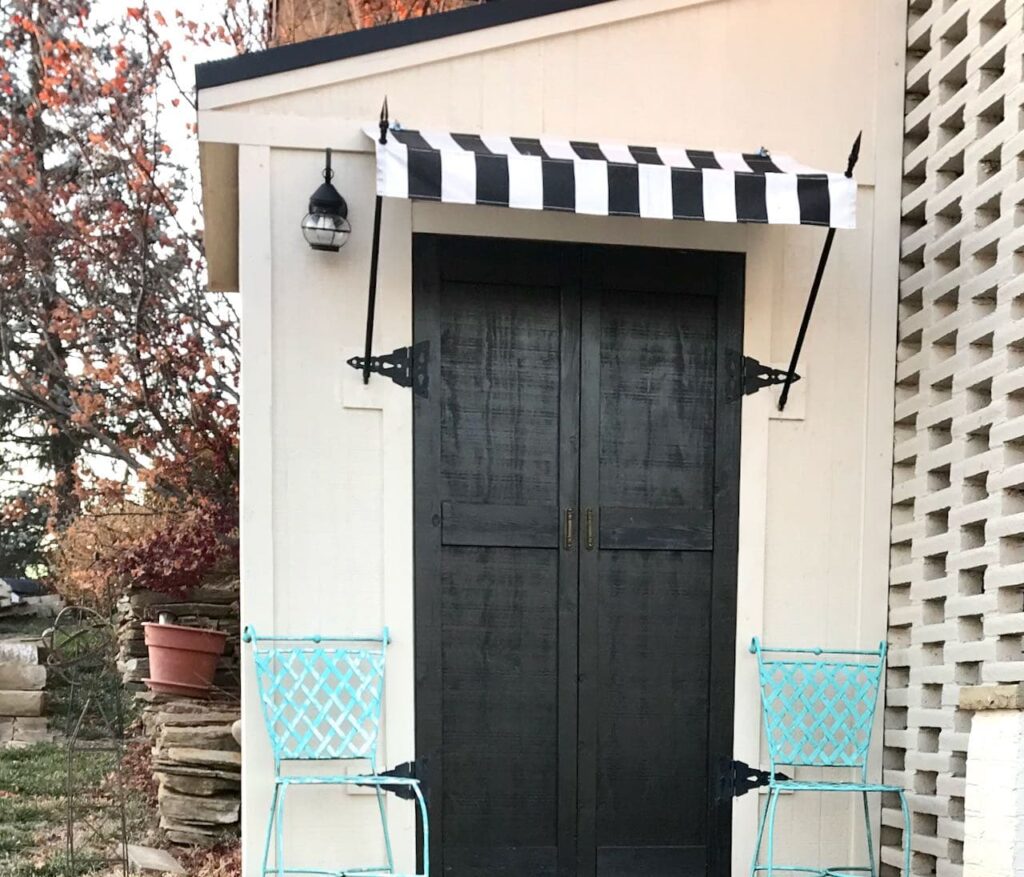
Style? Check!
Now on to the safety and function piece. And this one is a true puzzle.
2) A Dangerous Entry Between Patio and Storage Shed–

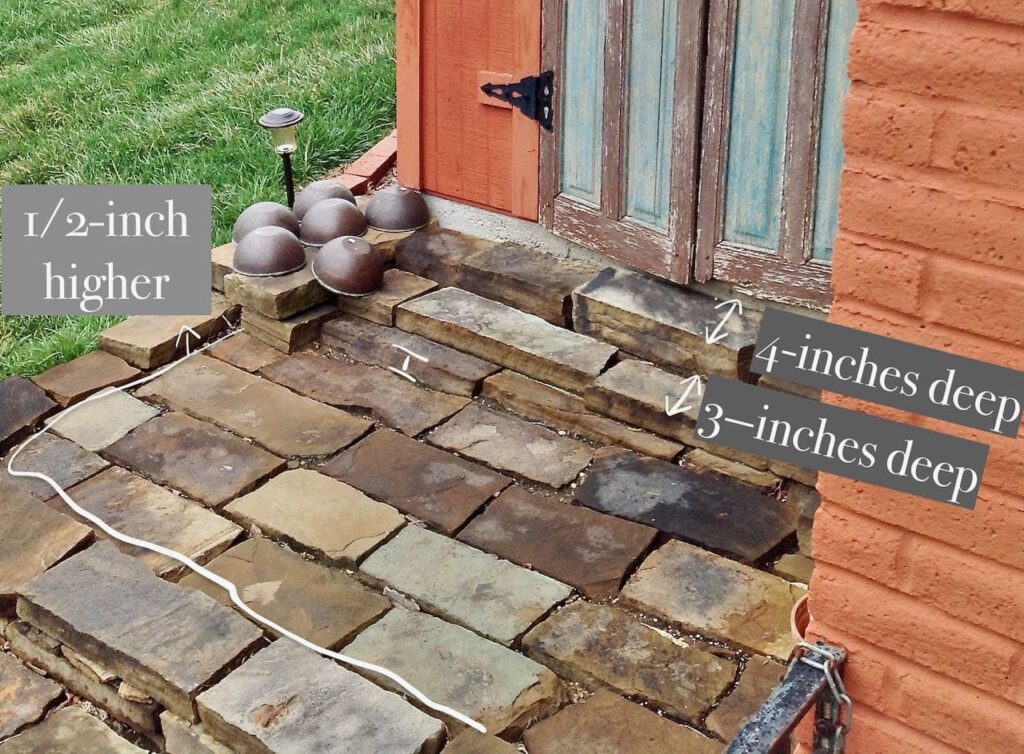
Look closely, you can easily see how the stones were at all different heights, especially right in front of the doors. You had to balance on two wobbly stones that were still lower than the shed floor.
The safest was to keep your feet back at least 10-inches from the door and once you have the doors open, avoid the steps all together. It was really hard when we were bringing our bikes in and out.
And the extension ladder was a real feat!
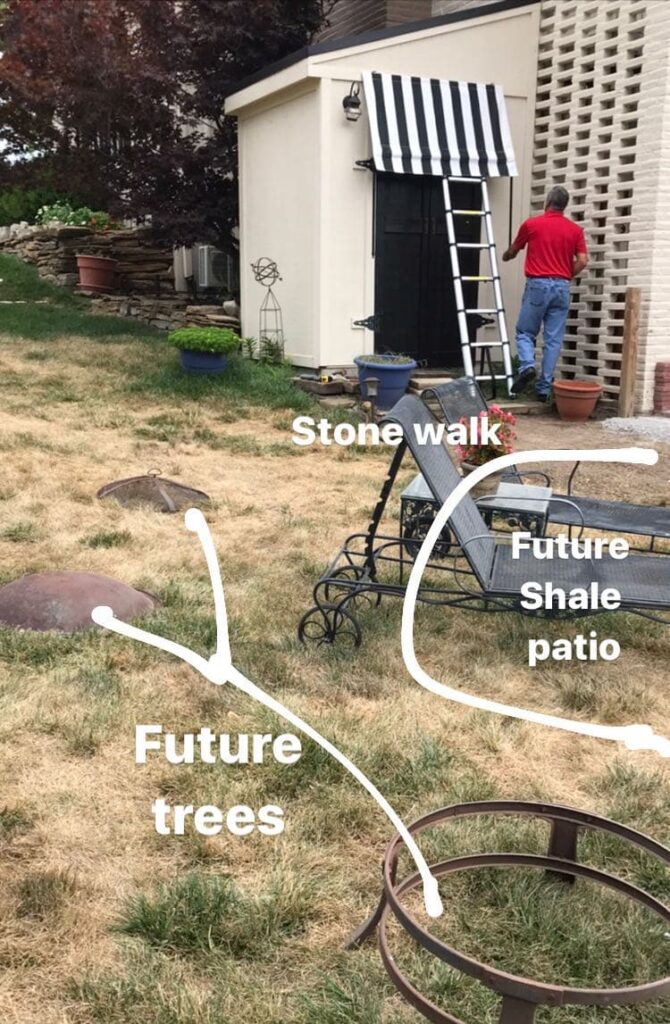
Here’s the general idea.
Where the chaise lounges sit is where the gravel patio extension will be, surrounded by a landscaped berm with three trees, shrubs, perenials, etc.
The new stone walk will bridge the original red brick courtyard patio with the new gravel patio with the Tool Cabana. All with minimal and safe transitions.
This will require significant digging and filling and leveling. It’s not highly technical, but it takes a lot of measuring and provides a lot of work for your backs.
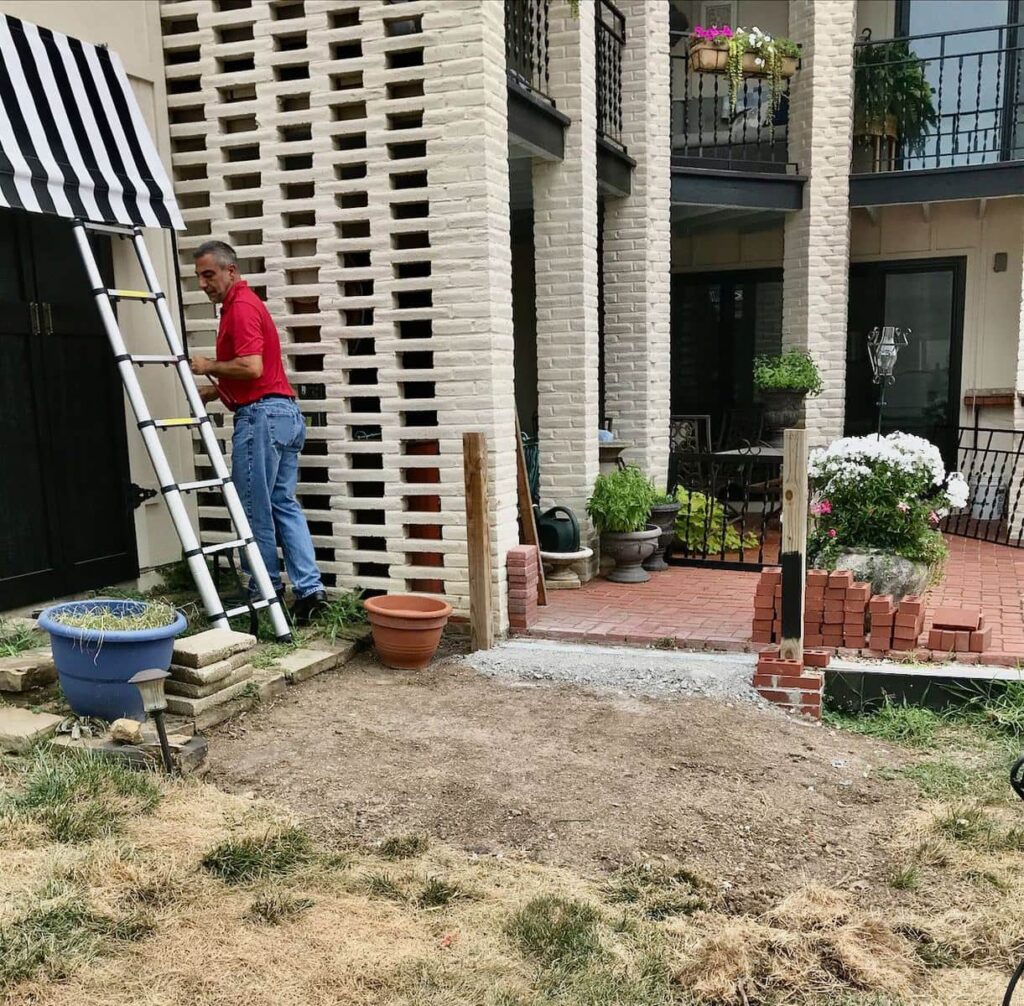
We have removed the natural stones between the patio and the tool shed. And the ground is leveled off.
The outer edge of brick has been removed all the way around the original brick patio. The foundation for the outer edge has been repaired and a black facing board added all the way around. This will support the new edge of natural stone.
Between the two wood posts, will be the entrance into the courtyard. The edging stones at this entrance will be of varied lengths to blend into the stones of the walkway. That area is ready with a gravel base waiting for the top layer of stone.
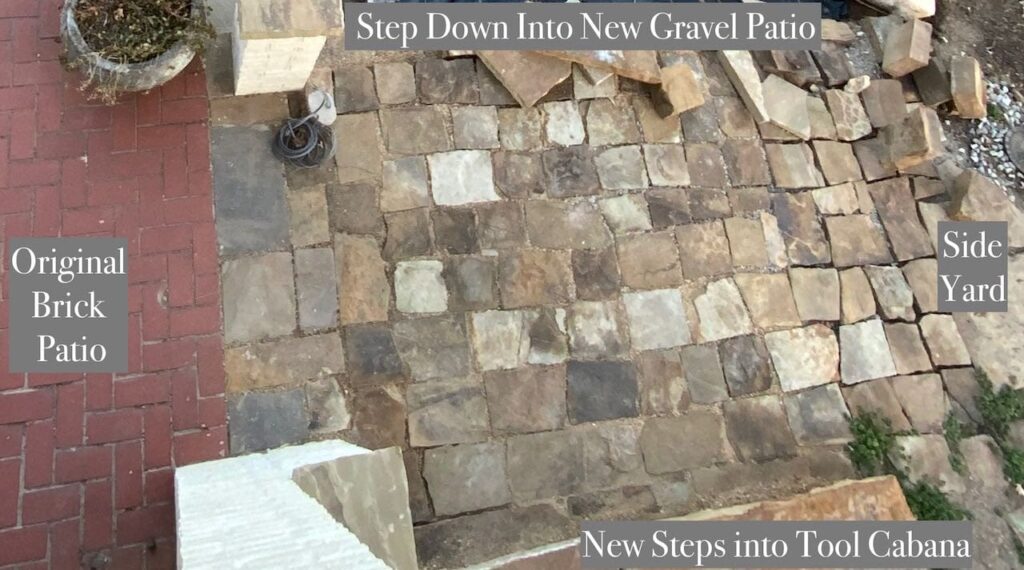
The stone walkway is about 2/3 complete here.
How to Set Patio or Walkway Stones-
It’s a pretty straight forward process:
- Dig down deep enough for the thickness of the stone, plus 2-inches of gravel and a bit more of sand.
- Add your 2-inches of base/gravel. We used AB3 or road fill as it has a stabilizer mixed it, compacts and becomes almost like concrete.
- Tamp it down with a dirt tamper.
- Add a slight layer of sand to fill in any gaps in the base.
- With a level and a plastic cup of sand within reach, one by one, lay each stone in place. Check the height next to adjacent stones and check that all are level. If you need to fill a bit, lift the corner that might be low and pour some sand under the stone. If one stone is thinner than others, just add more sand. Stand on the stone to settle it. Check again. If using natural stone like ours, there can be quite a bit of difference in thickness.
- Lather, Rinse, Repeat with each stone making necessary adjustments as you go.
- Fill the space between stones. Several things can be used. The same sand you used for leveling topped off with Decomposed Granite (DG), Crushed Granite (CG) or Pulverized Granite (PG). Generally speaking, DG, CG, and PG are all the same. You can also fill those spaces with a Polymer filling, that when it gets wet it turns solid and pretty permanent. In back, we used sand, topped off with the same DG we used for the patio.
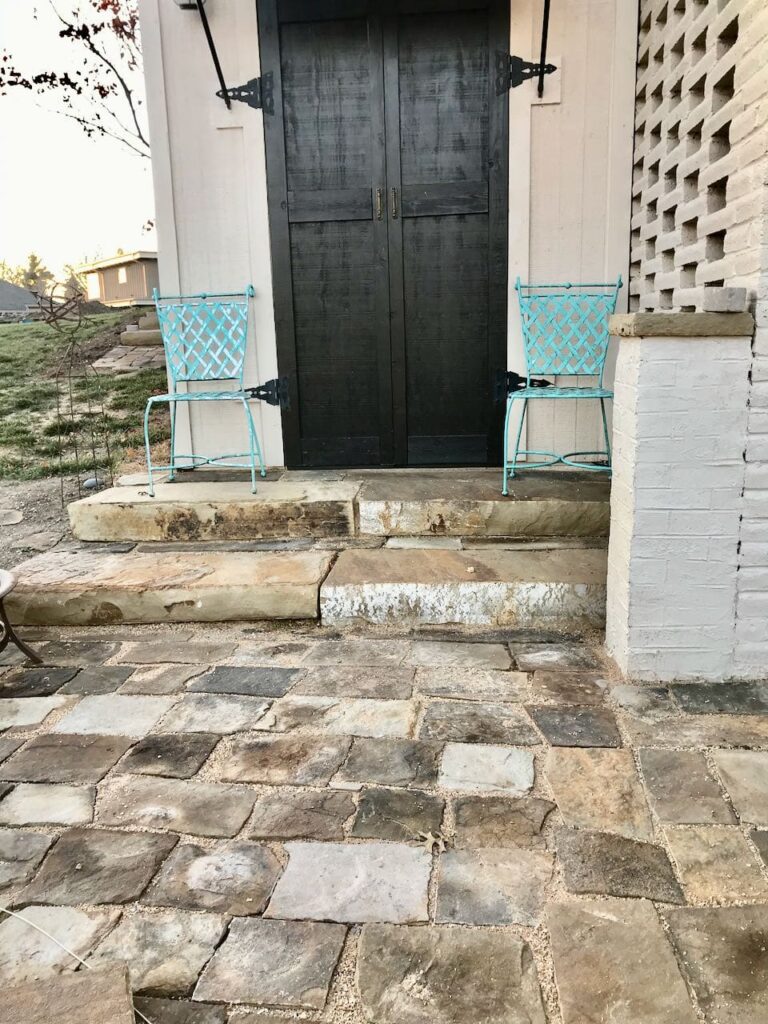
And Those Steps!
We hired two friends to help with setting the new incredibly heavy and huge steps into the tool cabana.
What a difference! Remember those 4-inch deep steps? Look at it now! a pair of vintage iron chairs can even sit on those steps!
It’s like the Tool Casita grew into her real self as a Tool Cabana complete with a front porch.
Those chairs are from a set of four. The other two are on the flagstone patio on the street side of the house.
You’ll see thoe same stone steps showing up again, and again as our Backyard Makeover Super Series continues!
On to the patio with many more reveals and tutorials and answers to all the questions you have.
UPDATE: This Backyard Makeover has grown into a Super Series-
- The Prequel: Our Problem areas and three mood boards that helped to guide our decisions
- Eps. 1: The Santa Fe Tool Casita (this post) and treacherous entry became our Tool Cabana with its own front porch
- Eps. 2: The Original Starting Point — our vintage red brick courtyard with crumbling foundation and a dated and dangerous railing
- Eps. 3: Gravel Patio — planning and plotting the installation, plus pea gravel vs. crushed granite
Send this to a friend who is wanting to update their outdoor spaces. (they’ll be sooo grateful)
Or save it to your “Backyard” Board
Or to your “Shed” Board
or to your “I Want Need This” Board
Or to your “Stylish Storage” Board
Save it wherever you know you’ll be able to find it again. Okay to ALL your boards ?.
Thanks bunches for joining me today. I hope you’re enjoying this Outdoor Spaces Makeover Series. There is sooo much more to come!
Hopefully these will inspire you to take on a project you weren’t quite sure about. We’ve learned a lot along the way and will be sharing the oops, the wins and the fails. So that hopefully you can sail right through to the wins on your first try.
You know what a “win” means? That’s right joy! And here at South House Designs, we are ALL about more joy!

We get tons of comments from neighbors and friends who really like how this project turned out!
Wow, Diane! This is such a huge improvement!! I’m sure you love it!
Thanks Cindy! We sure do. It gives it the coastal vacation feel that I was going for!
What a great transformation, Diane! I love the cabana stripes!
Thanks Kim! What says vacation more than cabana stripes, right? And that’s the attitude we want here at home.
Wow ;this turned out so dang cute. I love it! Cabana stripes are my favorite! Your patio walkway is just enchanting!
Thanks so much Karin! Hold on to your hat — this is just the beginning of a huge overhaul.
Gorgeous! Excellent Job!
Thanks bunches Rebecca! Hope you are having a great day!
This is so cute! The cabana is truly an inviting structure. Great makeover!
Carol
http://www.scribblingboomer.com
Thanks bunches Carol! it is really fun to have it like that, and so grateful for the safe and sturdy entry!
It turned out so nice. What a change!
Thanks Donna! I am loving it! I mean if you have to have a storage shed, no reason it can’t be fun, right?
Wow, what a change, it looks fantastic!
Thanks so much Jenna! Why not make function fun, right?