Crushed Granite vs. Pea Gravel Patio: Which to Love?
Crushed granite patios are THE thing! Yes, you can DIY one! With proper prep and planning, and understanding the pros & cons. All found here!
This is the fourth episode in our March Super Series –Our Backyard Makeover. If you need/want to catch up:
- The Prequel: Our Problem areas and three mood boards that helped to guide our decisions
- Eps. 1: The Santa Fe Tool Casita and treacherous entry became our Tool Cabana with its own front porch
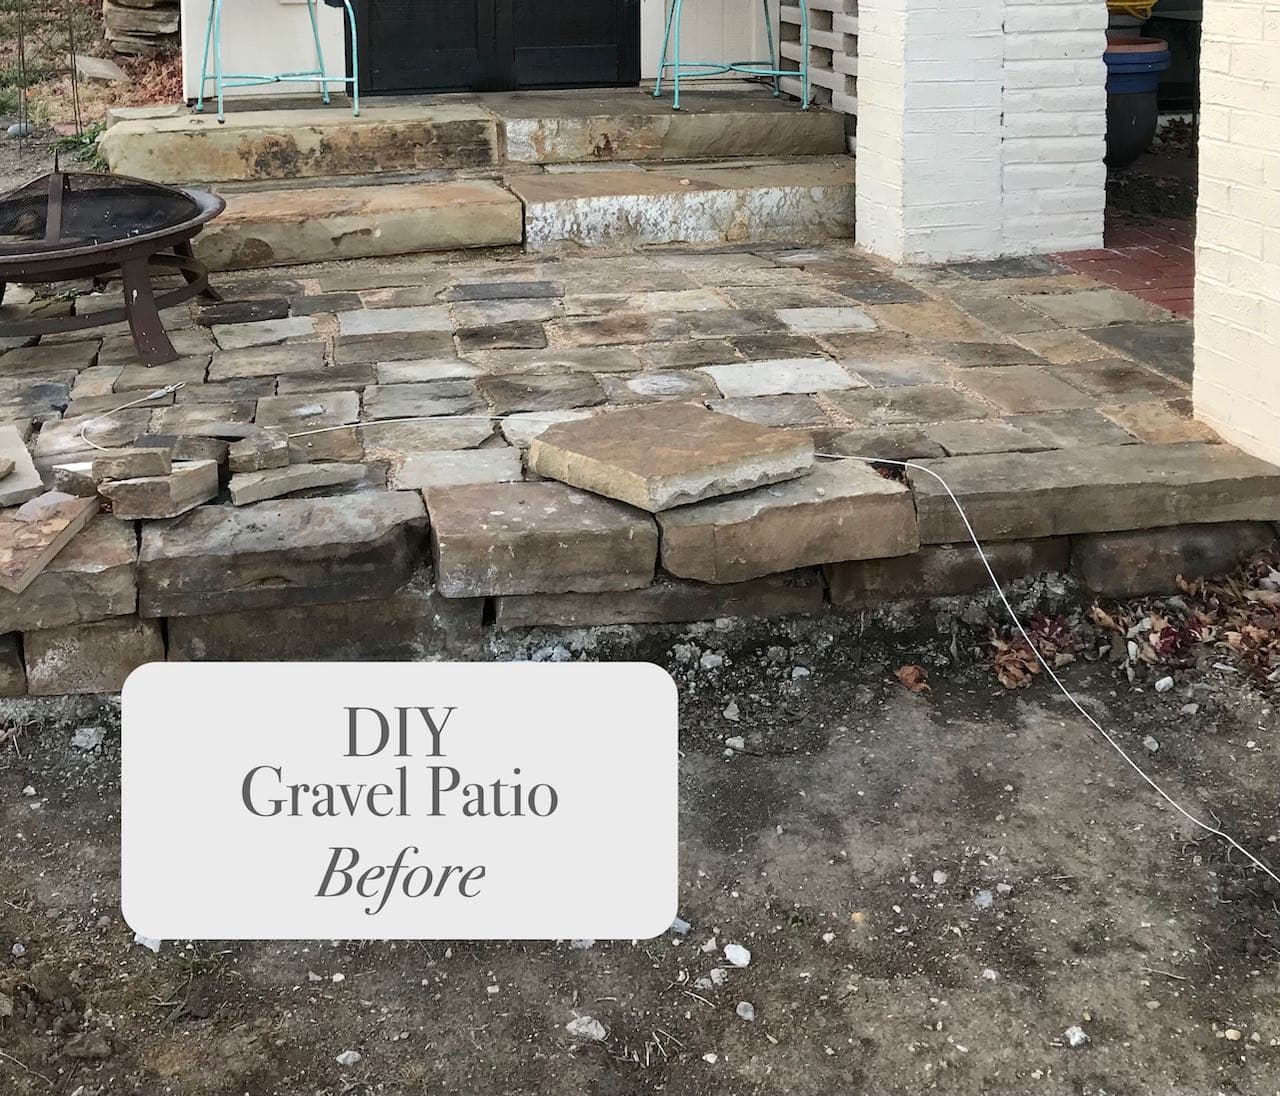
- Eps. 2: The Original Starting Point — our vintage red brick courtyard with crumbling foundation and a dated and dangerous railing
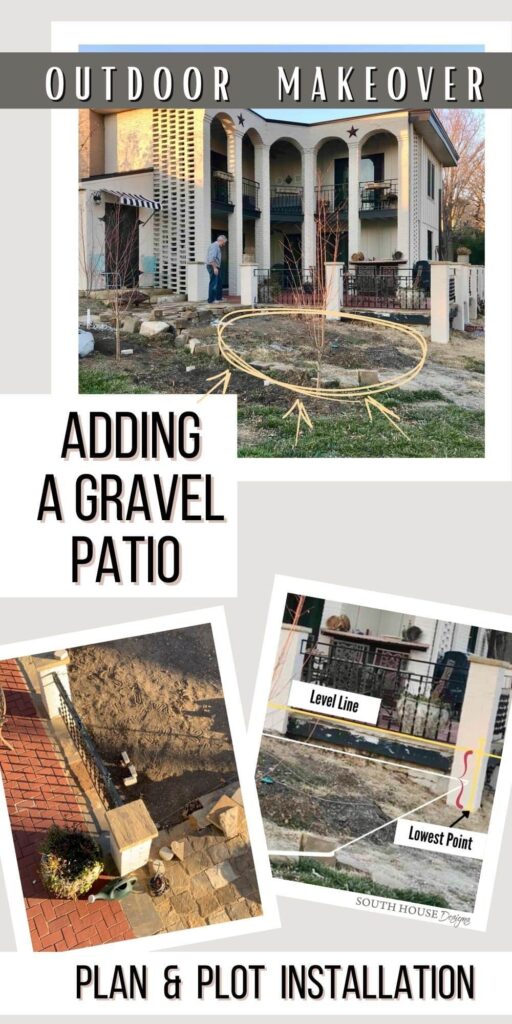
- Eps. 3: Planning & Plotting (you’re here now) the new Gravel Patio and evaluating pea gravel vs. crushed granite
- Eps. 4: Building a Retaining Wall with integrated stone steps
- Eps. 5: Installing the Decomposed Granite Patio
- Eps. 6: Installing a Stone Walkway and Steps from the driveway down to the patio
- Eps. 7: How to Hang Outdoor Edison Style Cafe Lights for a warm, inviting glow
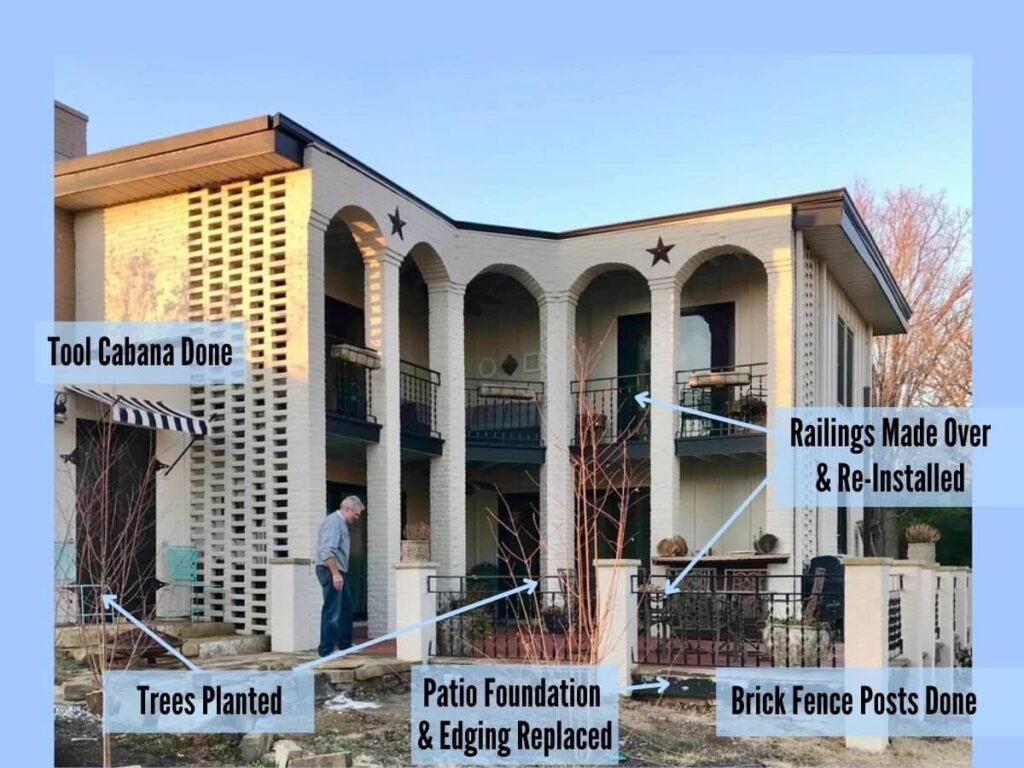
Yes, so much has been finished, but still so much more to come!
Feel free to jump back and forth to get the info you need for your project. There are no rules! They come in the order we constructed our massive project.
NOTE: There are many terms floating around: Crushed granite (CG) = decomposed granite (DG)= pulverized granite (PG). They are all one in the same.
Pea gravel is a whole different gravel!
TABLE OF CONTENTS:
The links in this post may include affiliate links, which means if you purchase anything using these links, you pay no extra, but I may receive a small commission that helps keep this blog running. I truly appreciate you using affiliate links whenever possible. Please know that I will never recommend a product I do not believe in!
Why Add a Gravel Patio-
- The Look – I first fell in love with them traveling around centuries-old parks and pathways throughout Europe. Particularly an old park in Paris where the paths have been there forever and made from crushed shale (I believe). To me they had an old world feel. Swoon!
- Shapeable – You control the shape of your pathway or patio, narrow edging or a wide expanse. And the shape greatly influences the style. Sleek modern applications are using crushed granite also, but usually with straight lines and sharp angles.
- DIY-able – Yes, its physically demanding! But it is not rocket science. We hired some younger backs to help place the large stone steps we incorporated.
- Less Expensive – than most alternatives. According to the Goeff Rodden, the branch manager of Kansas City Semco Outdoor, gravel patios to DIY can cost as little as $3 per sq foot where a professionally poured concrete patio will be around $9 per sq ft.
- “Temporary” – technically a gravel patio is considered not permanent. So for our small city we did not need a permit and all that it entails. And in our case, we own the lot next door. We have no intention of selling it any time soon, but it was smart for us not to put in a poured and stamped concrete patio, something more permanent.
- Green – the surface is water permeable, so the rainwater flows back into the water table where it should go. This is becoming even more important with the effects of global warming are becoming more evident.
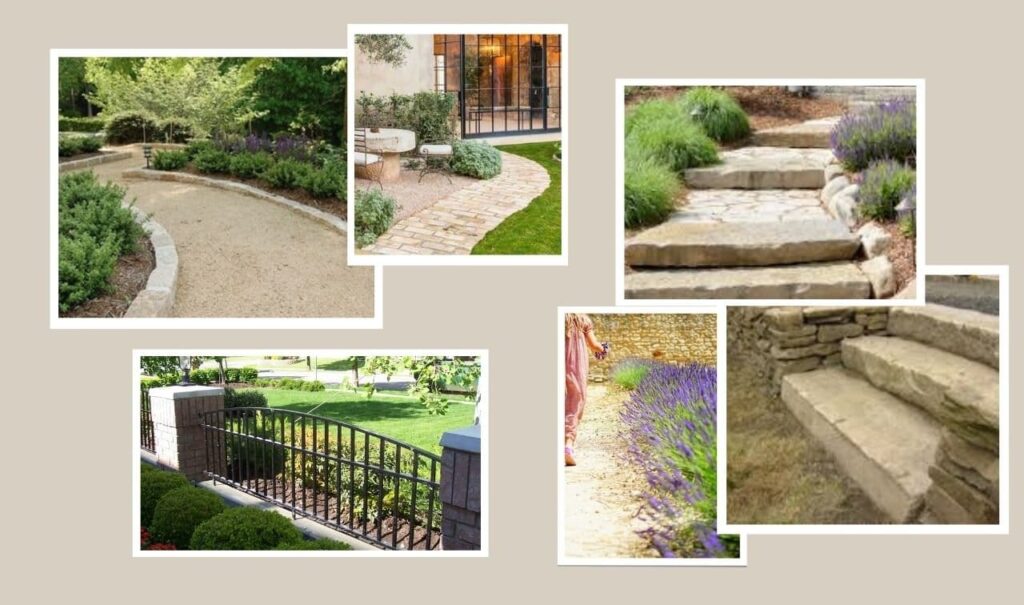
Looking back a one of our mood boards: chunky stones steps, lots of natural stone, and gravel patios were all over our mood boards.
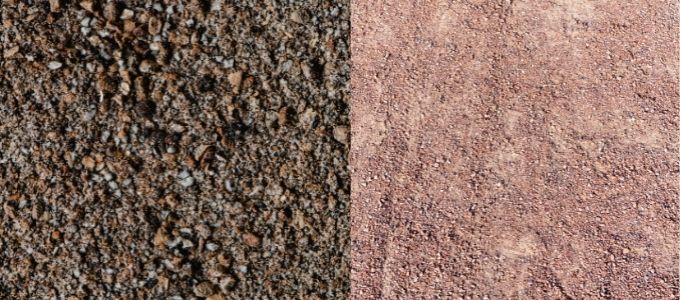
Now, it was just deciding between granite vs. pea gravel. Here are the material specific pros and problems of each.
Pea Gravel Pros and Cons-
Pea Gravel Pros:
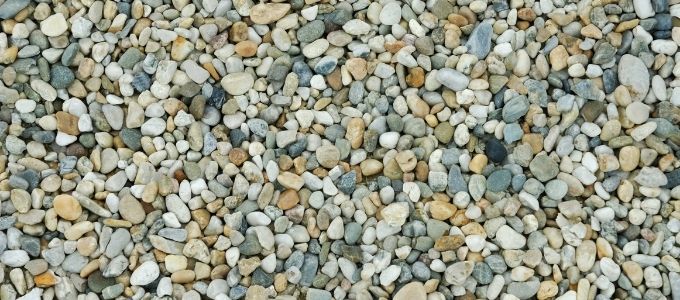
- Pea Gravel is shaped like, and about the size of peas, appropriately named, right? So it is easier on bare feet because there are not as many sharp edges and points
- Widely available
Pea Gravel Cons:
- Really tough to walk on in any heels or flip-flops
- Since the gravel is a gazillion tiny, tiny balls, It’s kind of like “Honey, I shrunk McDonald’s ball pit”, they don’t lock together and form a solid base. It’s fun until it isn’t. Twisted ankle anyone?
- Patio furniture on pea gravel is limited – the legs sink into the gravel. Not good for table and chairs. A stationary bench or sectional would work
- Pea gravel will be constantly shifting and will require racking back into place periodically
- Limited colors
- Can get stuck in shoe soles and do a number on hardwood floors inside
Granite Patio Pros and Cons-
Granite Pros:
- Color Options – There are many colors of decomposed granite. Think of all the slabs of granite, now you can picture the wide variety of crushed or decomposed granite. However, your options will be dictated by your locale and how much you need. Check with your local stoneyard.
- No problem with outdoor furniture – installed properly, with stabilizer, it hardens almost like concrete. Very solid
- Stable and comfortable to walk on – no twisting ankles here.
Granite Cons:
- Rough on bare feet. It’s crushed up granite, yes, it’s rough. But not enough to cut. I have been barefoot on it with no issue beyond temporary discomfort. (NOTE: We thought about embedding a path of paver stones across the patio, but in our situation, i’s not much further to run on the grass to the docks than to cross the DG.)
- Can track granite dust and pieces in the house, which you wouldn’t want on wood floors. (NOTE: This is not an issue for us. You have to cross our original red brick patio to get to the house from the granite patio. Plus the entire downstairs of the house is the same red brick as the original patio.)
We ordered our granite with stabilizer and that may have made a difference, but we have not even noticed any granite dust inside.
Four Years Later: Living With Our Granite Patio
Four years in, and I’m still head over heels for our decomposed granite patio!
If I could whisper one regret into your ear, it would be not making it a smidge wider—those extra 2-3 feet into the side yard would’ve been chef’s kiss.
Maintenance? As effortless as convincing yourself that one more cookie won’t hurt!
The occasional weed dares to sprout, but since they’re just surface crashers (not deep-rooted party animals), they pluck right out. My husband likes to let the get a bit of a start and then he sprays them. I think he gets some secret satisfaction watching them wither in place.
A quick blast with the leaf blower sends any fallen debris packing—just be sure to get one with adjustable power settings unless you enjoy watching your granite travel to the neighbor’s yard! My Ryobi has been our faithful sidekick in this adventure.
Best news? Zero granite hitchhikers making their way into the house. The color looks as fresh as day one, and our floors remain blissfully unaware.
Honestly, it’s been so drama-free that sometimes I forget it’s there—until another neighbor compliments it and I get to feel smug all over again!
Planning Our Decomposed Granite Patio-
After looking at that list of pros and cons, you aren’t surprised we opted for the granite are you?
Shall we begin?

Level, level, level!!!
This is true with ANY patio, but even more so with a gravel patio of any kind. You don’t want the loose material washing away.
Determine the Size and Shape of Your DG Patio-
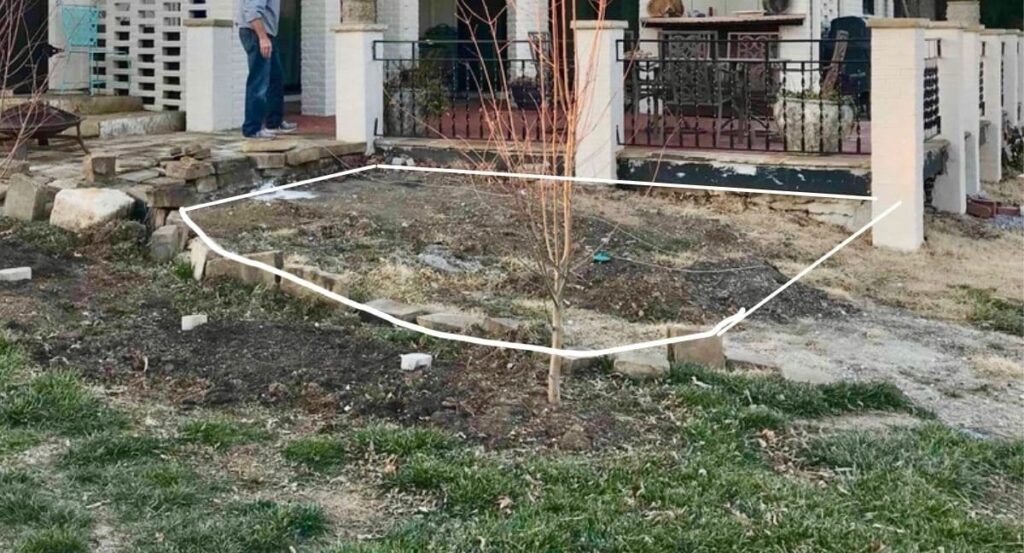
We’ll have three straight sides with one curved edge that will be edged with a landscaped berm.
Determine Your Elevation Change-

Now that we know where our patio will be, we need to determine the slope, or the change in elevation, so we can plan for our entry and exit points (our transitions).
If you are on a relatively flat yard, and your patio be very close to the same elevation as the yard, you don’t need to establish these points. except maybe for landscaping puposes.
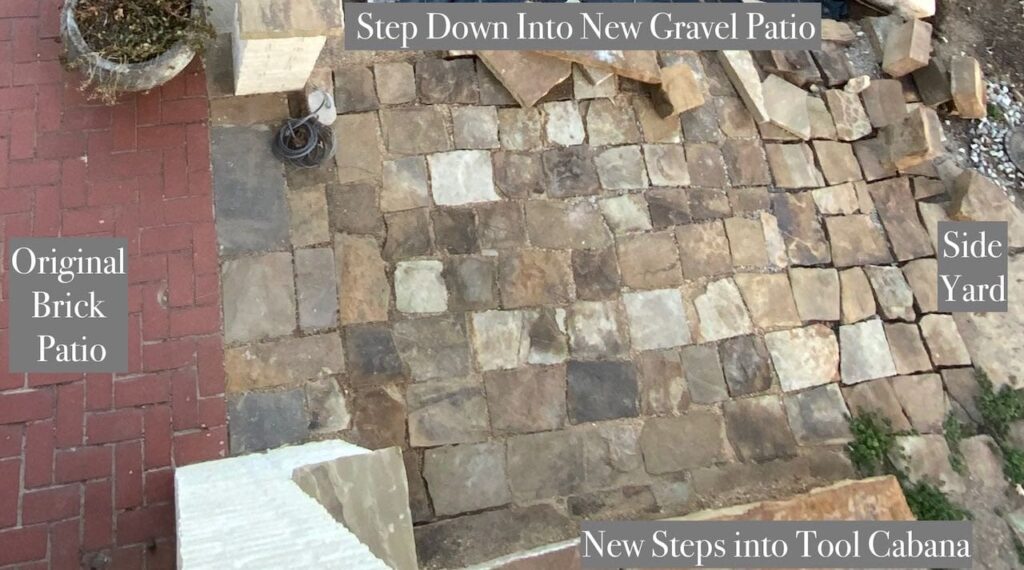
We installed a new stone walkway to transition from patio to Tool Shed to side yard to new gravel patio. Our highest elevation is the height of the original brick patio and the walkway. Our lowest point is where the yard meets the corner brick post we just added.
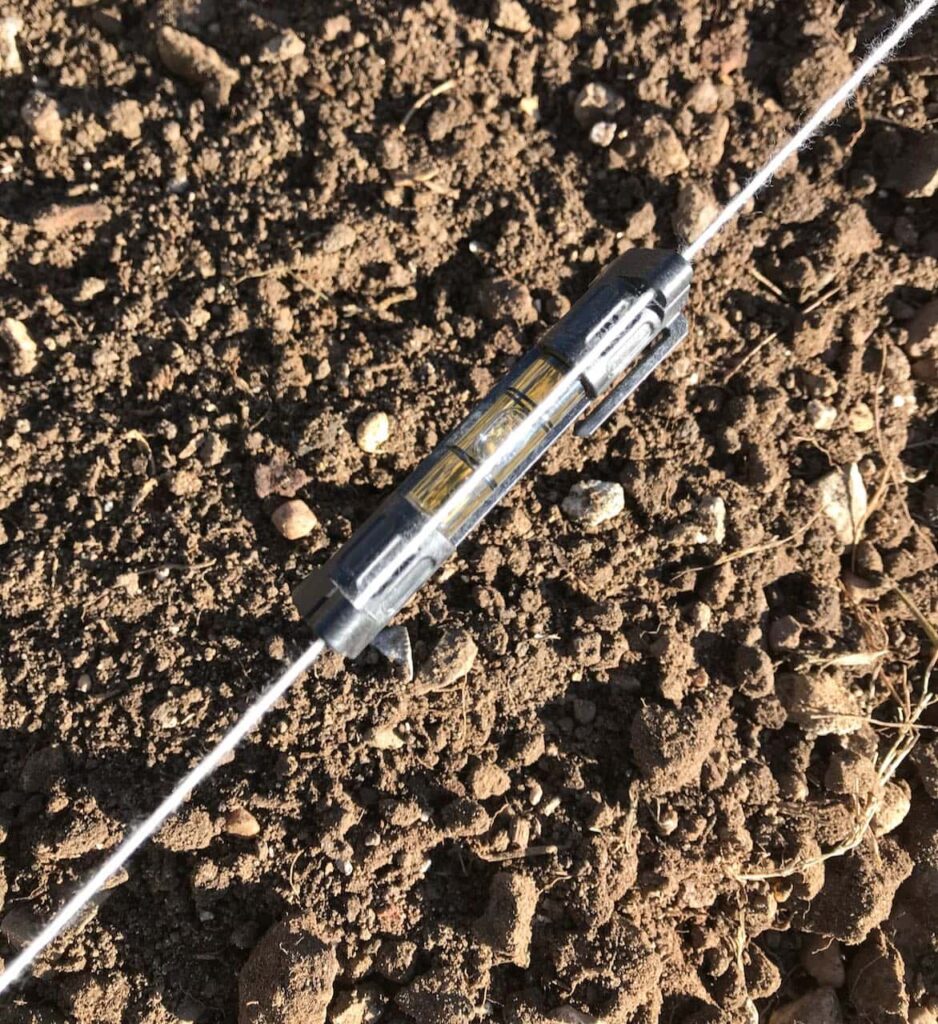
Now to Measure the Elevation Change:
- Mark these highest and lowest spots with stakes.
- Tie a string to the highest point stake at that highest point.
- Pull the string taut with a string level suspended and raise and lower the string on the lowest point stake until your line is level. Mark that level spot on the stake.
- Measure the distance from the lowest grade point to the marked level spot.
This is your change. The red marking in the pic is our elevation change.
Plan Retaining Walls, Edging or Steps For Your Gravel Patio-
To mark our edging, We used stones that were strewn about. A garden hose works well too.
I wanted a straight border bed between the brick patio and this new DG patio for lavender, baby’s breath and maybe herbs.
Along the outside curved edge will be a berm with some uplit shade trees, lilac bushes, Spring bulbs and such. We have quite an assortment of natural stone from other beds and locations. Perfect for edging between beds and the DG:
- Already on site
- Free
- They will tie together all the elements of this growing makeover
The east edge will require a short retaining wall.
If you have an elevation change, now is when you determine the transitions, the entry and exit points.
Ours was roughly an 18-inch drop from the patio to the yard in front of the new DG patio. So we needed three steps with 6-inch rise each.
There are several ways we could have done this. We decided to split the steps. One step down from the brick patio and stone walkway into the DG patio. And then two steps from the DG patio down to the yard.
This was the best from a design standpoint and how we use this area.
Fortunately it was also the option that required the least amount of materials and back-breaking labor. Win-win!
It means just over a 12-inch retaining wall on the east side of the future crushed granite patio and the wall will flank our two steps down into the yard.
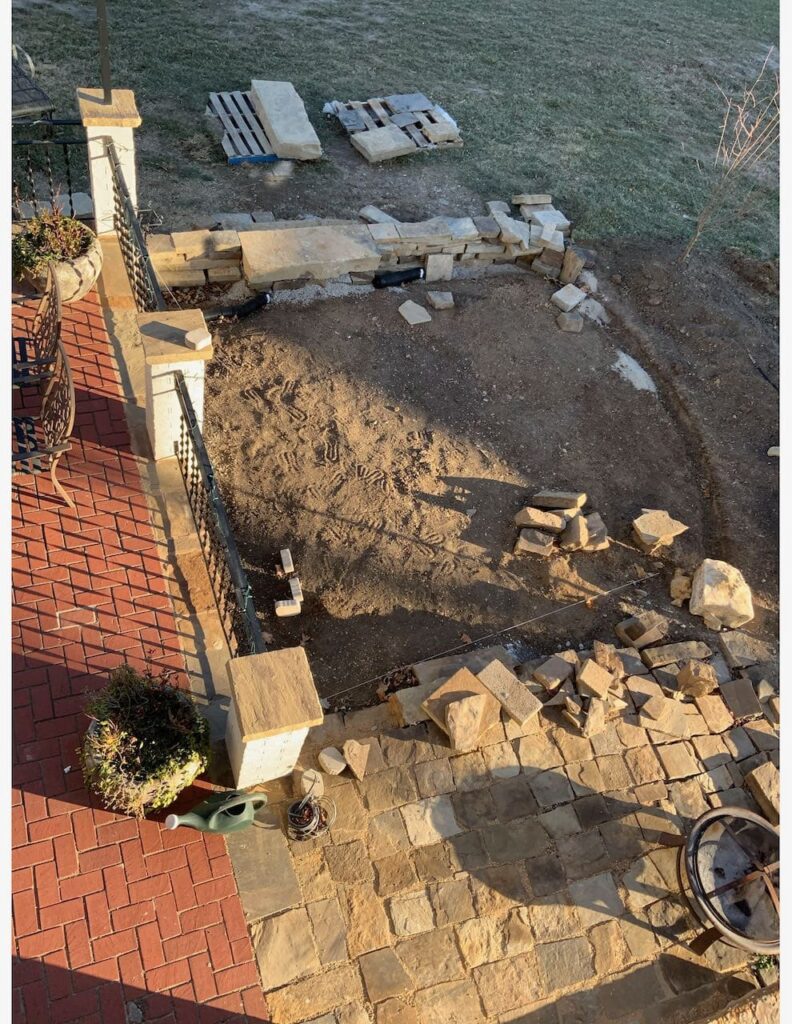
Here we are working on that short retaining wall that we built with stacked natural stone.
See that one lonely stone step on the pallet in the yard? We have to move that all the way around the patio to the stone walkway where we will place it in the DG.
We’re just waiting on all the strong backs on our block to help hoist it in place. Don’t worry. In anticipation, the beer is on ice!
Can you see it? We are getting so close!
Next up; I’ll share the process of building the stacked stone retaining wall, even an oops or two that hopefully you can then avoid.
Do you have plans for your outdoor spaces as the weather starts to warm up? And questions, just shoot them to me and if I don’t have the answer, I will certainly search it out for you.

What a great post! So much good information! thanks for sharing!
Thanks so much Kimberly. Don’t hesitate is you have any questions!
Dragging it in the house would be my issue.
So much helpful information
Definitely, a big factor to consider. I’m lucky that our patio set up and floors works well with this. But i wanted to point it out as it could be very problematic for some.
My daughter and son-in-law are planning to do this. Your blog post is EXCELLENT and I am forwarding it to them! Thank you!