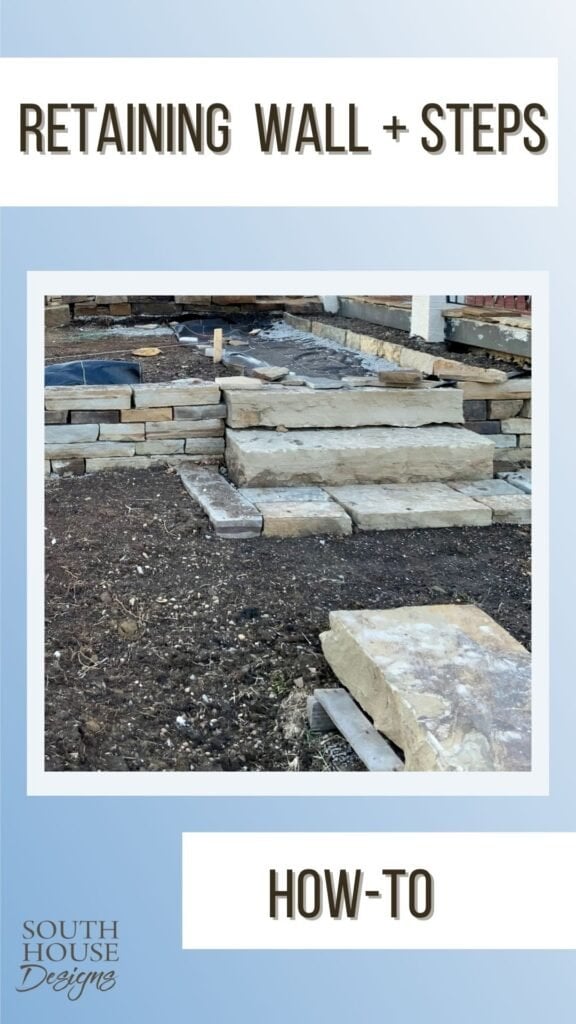
How To Build Natural Stone Retaining Wall And Steps
Here’s the best way to build a strong retaining wall with steps. All of natural stone
for timeless style and that won’t degrade!
This is the fifth episode in our March Super Series –Our Backyard Makeover. If you need/want to catch up:
- The Prequel: Our Problem areas and three mood boards that helped to guide our decisions
- Eps. 1: The Santa Fe Tool Casita and treacherous entry became our Tool Cabana with its own front porch
- Eps. 2: The Original Starting Point — our vintage red brick courtyard with crumbling foundation and a dated and dangerous railing
- Eps. 3: Planning & Plotting the new Gravel Patio and evaluating pea gravel vs. crushed granite
- Eps. 4: How to Build a Retaining Wall (you’re here now) with integrated stone steps
- Eps. 5: Installing the Decomposed Granite Patio
- Eps. 6: Installing a Stone Walkway and Steps from the driveway down to the patio
- Eps. 7: How to Hang Outdoor Edison Style Cafe Lights for a warm, inviting glow
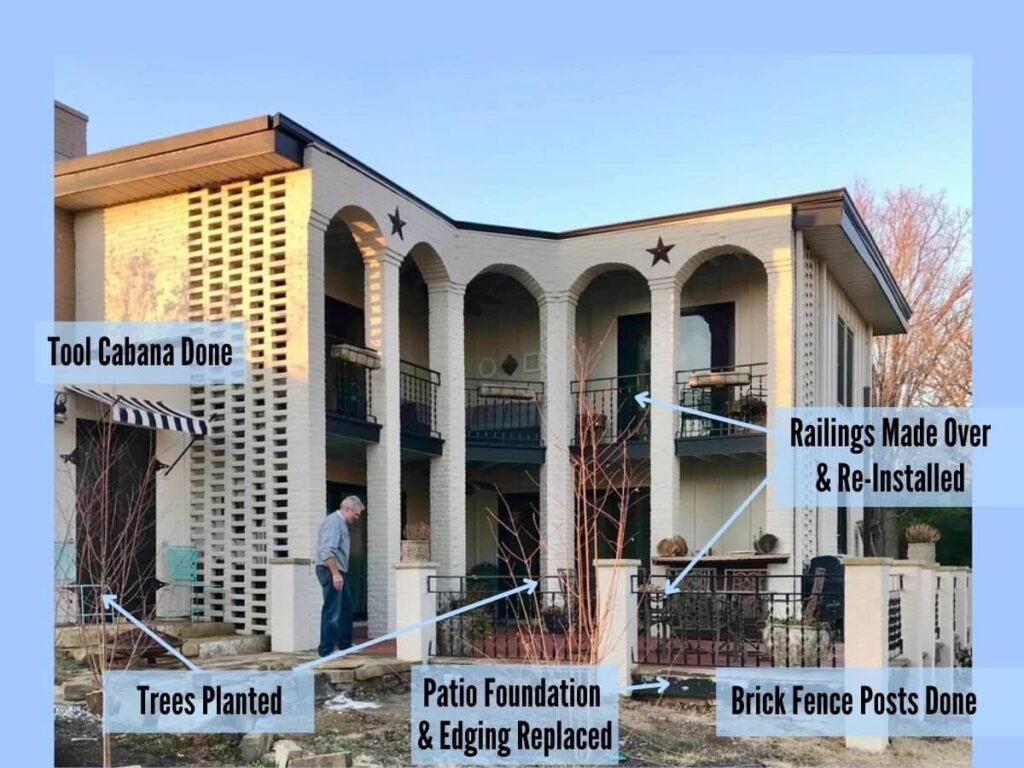
TABLE OF CONTENTS:
- So Far-
- How to Build a Dry Stack Stone Wall-
- Organize the Stones-
- Lay Out What Will Be the Top Layer-
- Select the Stones for the Base Layer-
- If Using Embedded Stone Steps in Your Retaining Wall, Plan Them Now-
- Dig and Set Base Layer-
- Set Bottom Step-
- Stack the Next Course of Stones-
- The Top Layer-
- Here, You Get to Learn From Our Mistake-
- So Thrilled With These Stack Stone Retaining Wall Steps!
So Far-
Just a reminder of what we’ve accomplished so far.
HINT: it’s a LOT, with more on the way!
The last episode, we determined:
- Crushed or Decomposed Granite is the material we wanted to use, rather than pea gravel
- The placement and shape of the patio
- We will use three steps to make the transition from highest to lowest elevation
- We’ll use the natural stone we salvaged for our edging between granite and berm and garden bed
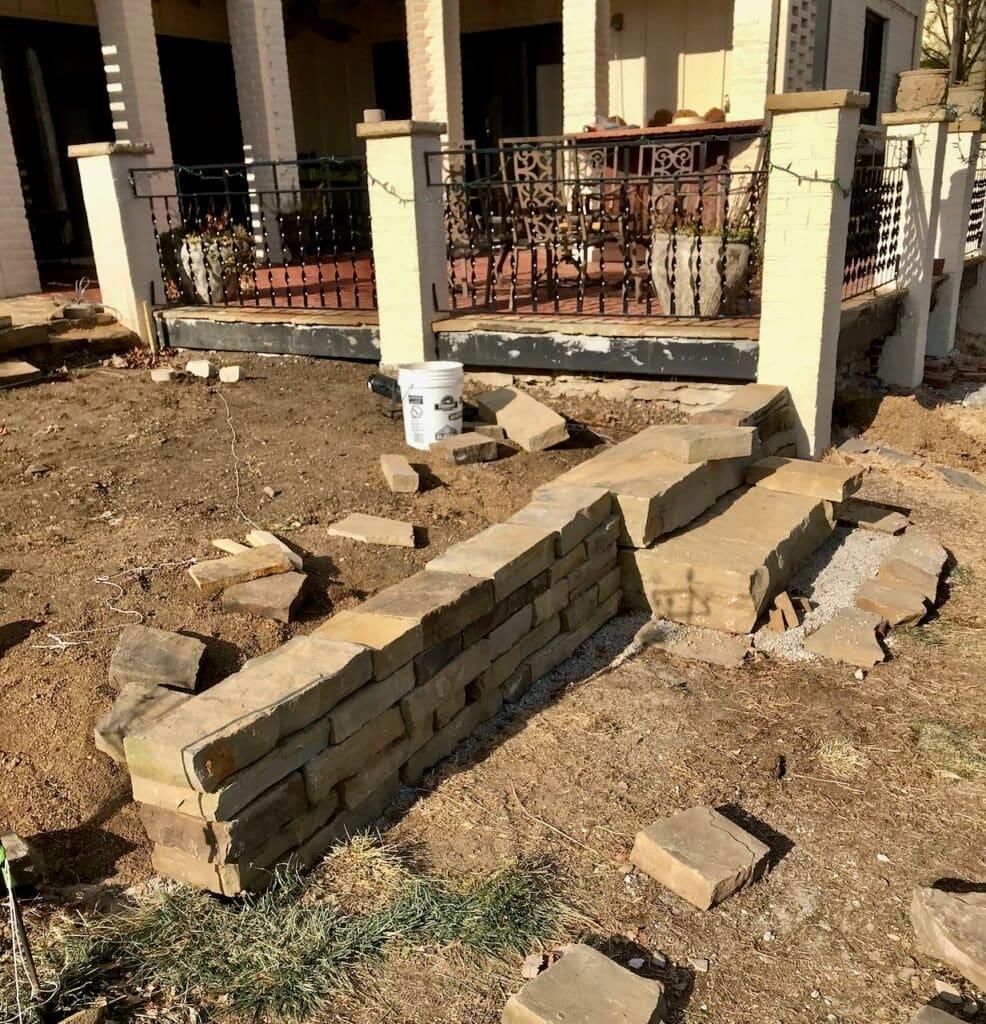
This takes us to the fourth side (the East side) of the patio that needed to be a retaining wall.
This is where I can’t thank Semco Outdoor enough for their guidance and help with this project!
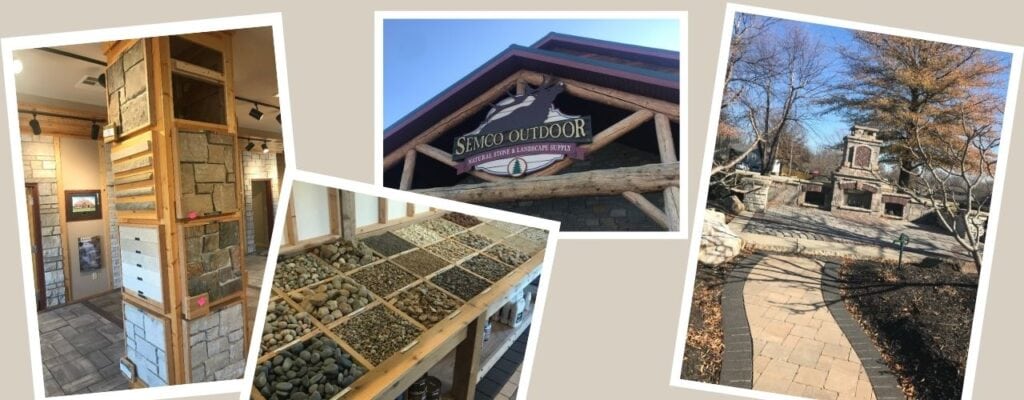
They have it all! Large beautiful showroom, gorgeous outdoor display “rooms”, a great assortment and a friendly knowledgeable staff.
They are happy to let you go into the stone yard and pick out the stones you want. If you have the right vehicle, you can even load up what you want and take it with you.
At their recommendation we chose a stacked natural stone for our retaining wall and more of the big, chunky stones that I love for our steps.
It was all delivered 2 days later and gently placed around in back, just where we requested.
How to Build a Dry Stack Stone Wall-
I have built retaining walls before!
Even terraced retaining walls.
But I had only used the pre-formed interlocking landscape blocks.
A stack stone wall is similar in concept, but requires more planning and is a slower build.
I knew this, but it was worth it to me for the natural stone look.
This wall will be prominently seen from the lake and the docks. It butts up to the original elevated brick patio that sits on a stone foundation. We had added a natural stone edging to the brick as part of the repair work (see episode 2). I felt it was important to continue the natural stone look.
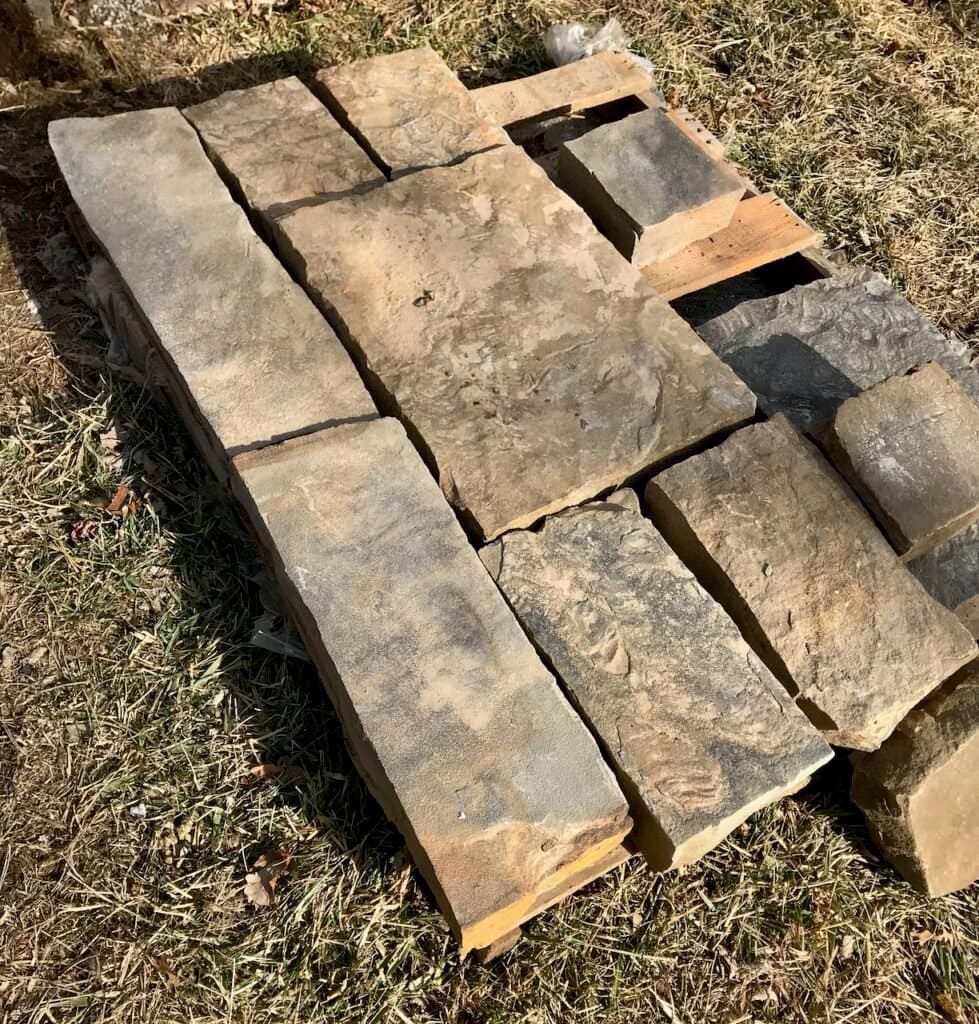
The stones we chose were fairly uniform in thickness and were relatively straight sided and flat, but the lengths varied significantly and even some of the widths.
Organize the Stones-
Since we were novices, we thought it best to lay the stones out to see the variations rather than working off the stack on the pallet.
Looking back, we do recommend this! It was a significant help when we were in the midst of trying find a stone to fit a particular spot.
Lay Out What Will Be the Top Layer-
Once they we were able to see them all, we started by laying out the preferred stones for our top course – our capstone if you will. These are the only ones where you will see more than one edge.
We wanted these to be relatively flat — as in comfortable to perch on — and close to the same width front to back.
These favored stones were noted and set aside for the end.
Select the Stones for the Base Layer-
Next we looked for the opposite — the “worst” stones. Not worst, really. Perhaps the most “rebellious” stones.
The base layer is the best place to use any stones that have a discrepancy in their thickness. Something like a bulge on the top or bottom. The base layer will sit on a base of gravel and sand so that can compensate for any pending “bulge” issues if you place the bulge down into the base.
If Using Embedded Stone Steps in Your Retaining Wall, Plan Them Now-
Determine Placement in the Wall-
I wanted a narrow planting bed between the original red brick patio and this DG patio. Outdoor furniture will be along the curved berm side. So it makes sense to have the steps just inside the narrow planting bed.
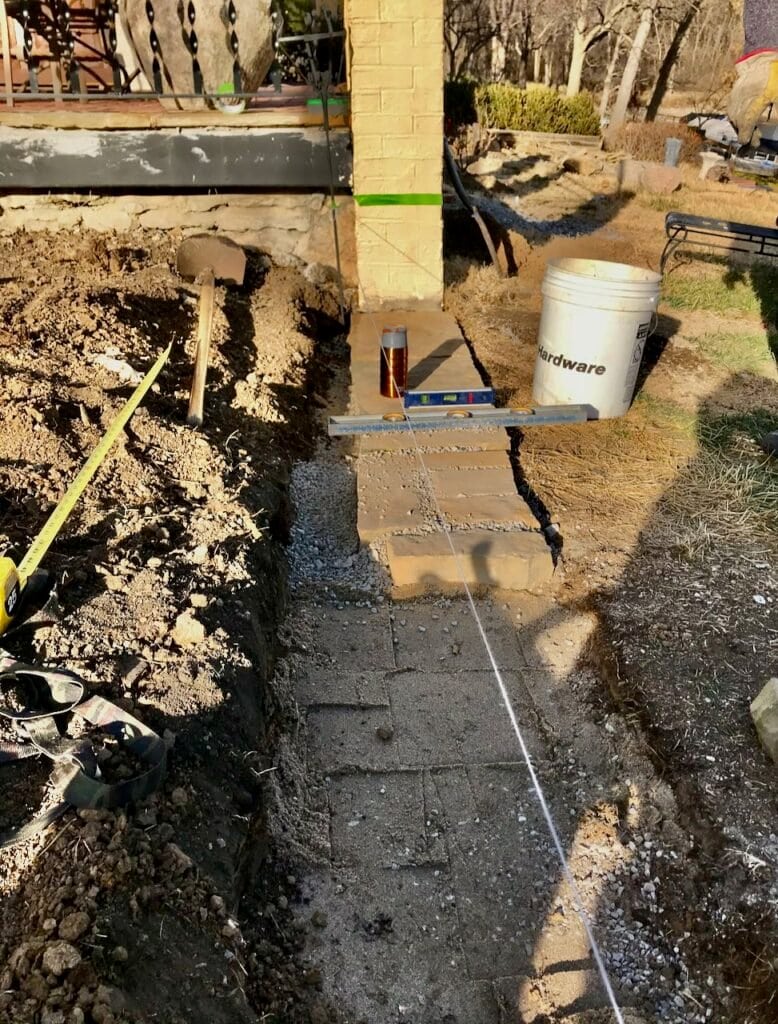
Dig and Set Base Layer-
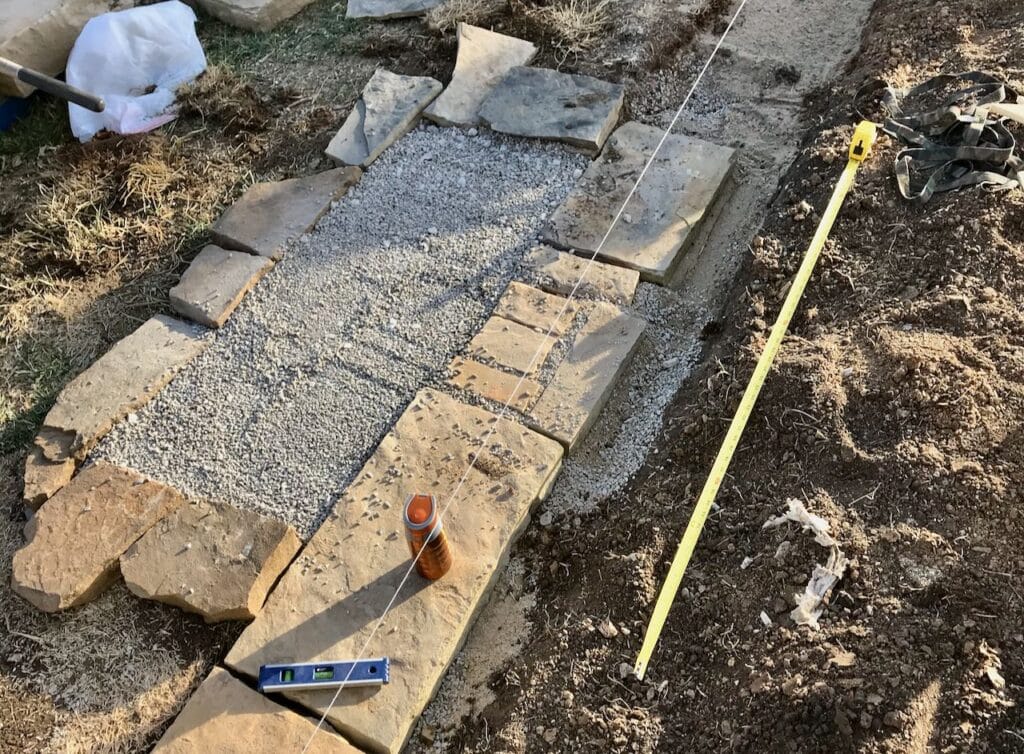
Place a string line where you want the front of your wall to be. This is especially important when you are doing a straight wall. And even more when it needs to run at a particular angle. For us, it needed to run the same line as the front of the original patio.
Using a string line and levels, dig a trench for the bottom layer of stone.
You need to dig deep enough for 3 inches of gravel, a bit of sand and 2-inches of stone. Roughly 5 – 6 inches below the front of your wall.
Lay Out All the Stones For Bottom Layer-
We found the most success when we laid out all the stones for one course first. once we found the right combination of stones that filled the wall length wise, we flipped them out of the trench onto the grass right in front of where they will go.
Base of Gravel and Sand-
Then we added the gravel and sand, tamping it in place.
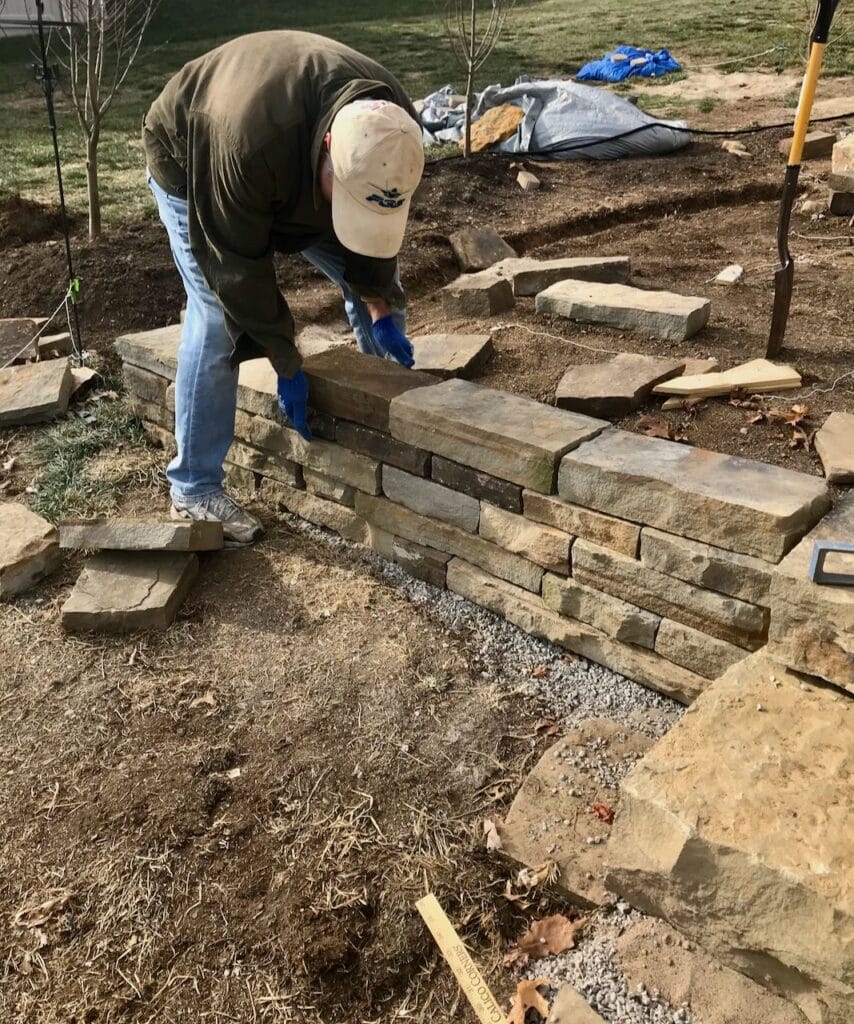
Place First Course of Stones-
We placed the stones one at a time, taking out or adding in gravel as needed for that particular stone. The object is to make sure each stone is level front to back and with the stones on each side.
This is why this bottom layer is the best place to use those non-conforming, rebellious stones.
The backs of the stones below the top tier do not matter. They won’t be seen because the back will be filled with drain tile, and gravel and then crushed granite. You want the fronts to line up, looking nice.
If you will have steps, This is a great place to use multiple stones (like the four narrow stones that are closest in the above pic) that otherwise might be problematic.
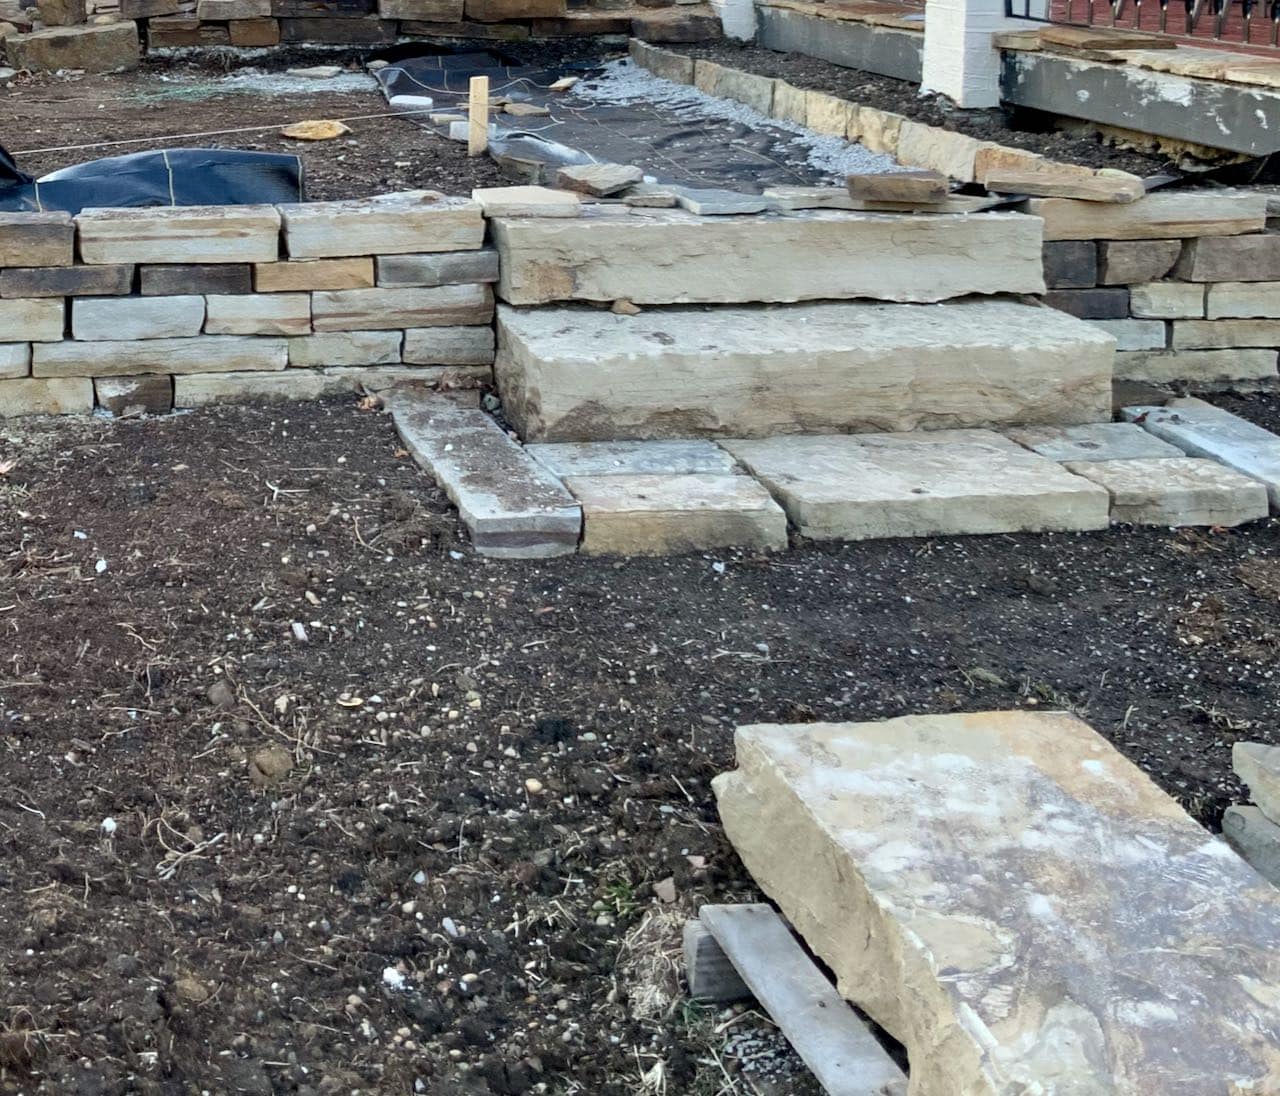
Set Bottom Step-
Build Out Base-
In preparation for the bottom step, we dug out in front and filled with gravel, tamped it in place. Look closely and you can see the impression in the gravel from the hand tamper we used.
Due to the slope of the yard, we used some random stones to hold the gravel in place for the time being. It will be addressed more permanently in a bit.
Place the Bottom Step-
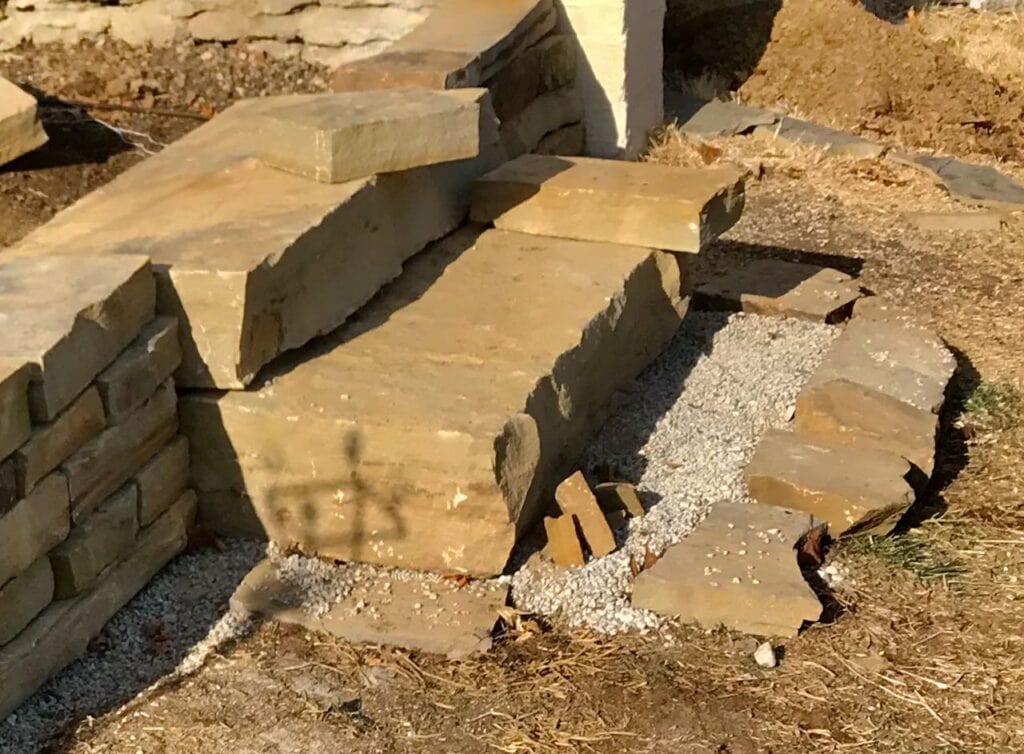
Since we installed just two steps on this side of the patio, the back of the bottom one overlaps the front of the walls stones on each side. (left pic above)
In the picture on the right you can just barely make out that the space behind that bottom step was filled in with stone to make a complete level surface for the top stone.
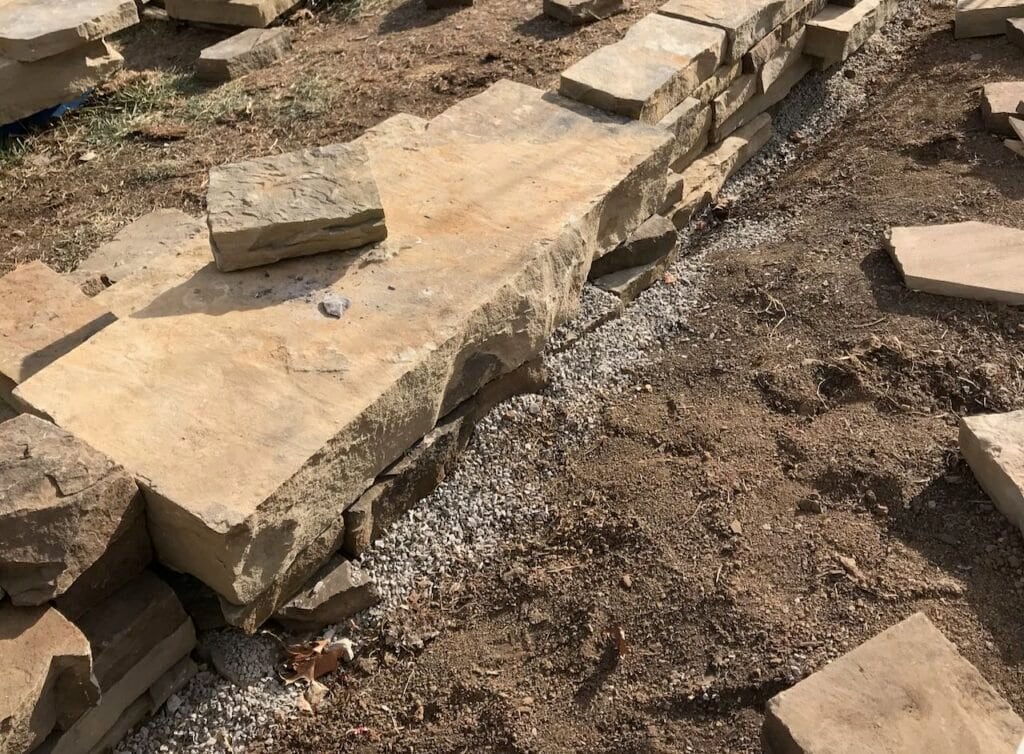
Stack the Next Course of Stones-
Each successive course of stone is set on top with no gravel or sand. If you have small pockets where the stones do not meet closely side by side, you want to wedge a small stone or shard of stone in there. Back filling any hollows makes the wall stronger.
The goal is to keep each layer about the same thickness so they remain level.
As you are building you courses of stacked stoned, you want to periodically use a stone running from front to back rather than side to side. Meaning the long side of the stone would stick out in back into the back-filled area behind the wall. This adds to the strength of the wall.
Stagger where the stones begin and end down the length of the wall. Avoid seams stacked on top of each other.
Each successive layer should set back from the front line just a bit (1/4 – 1/2-inches).
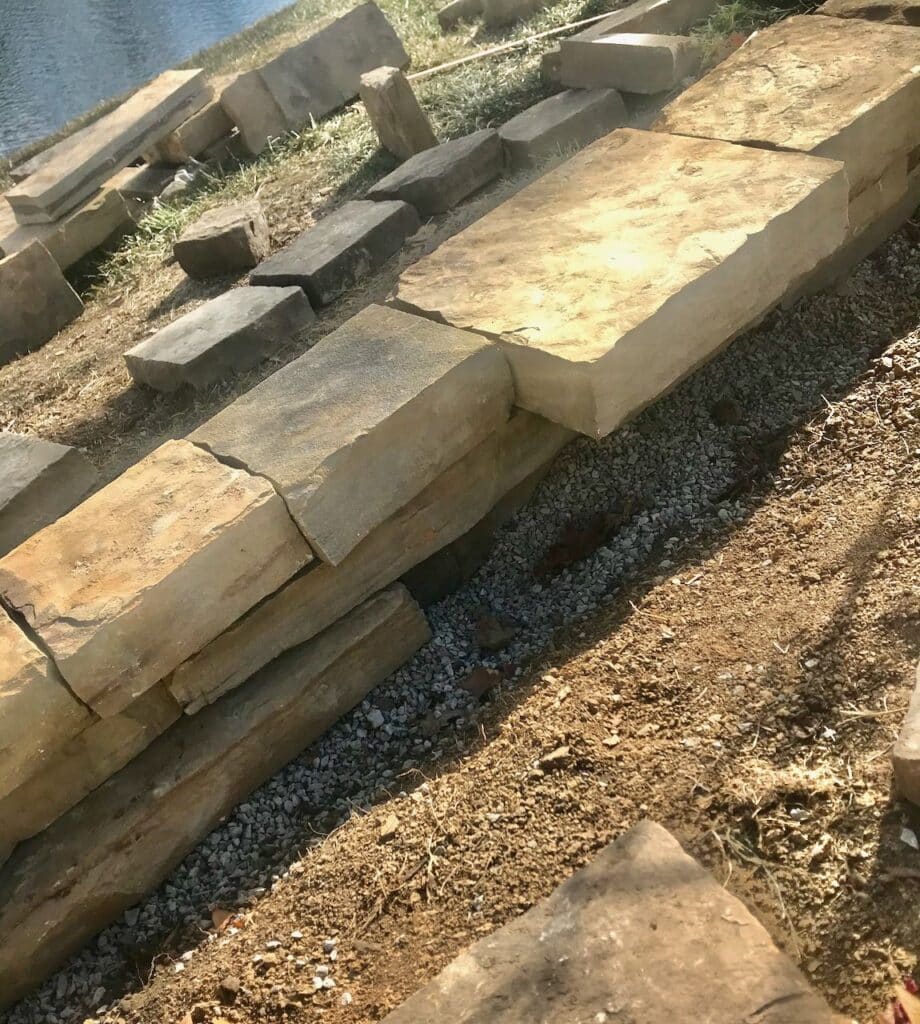
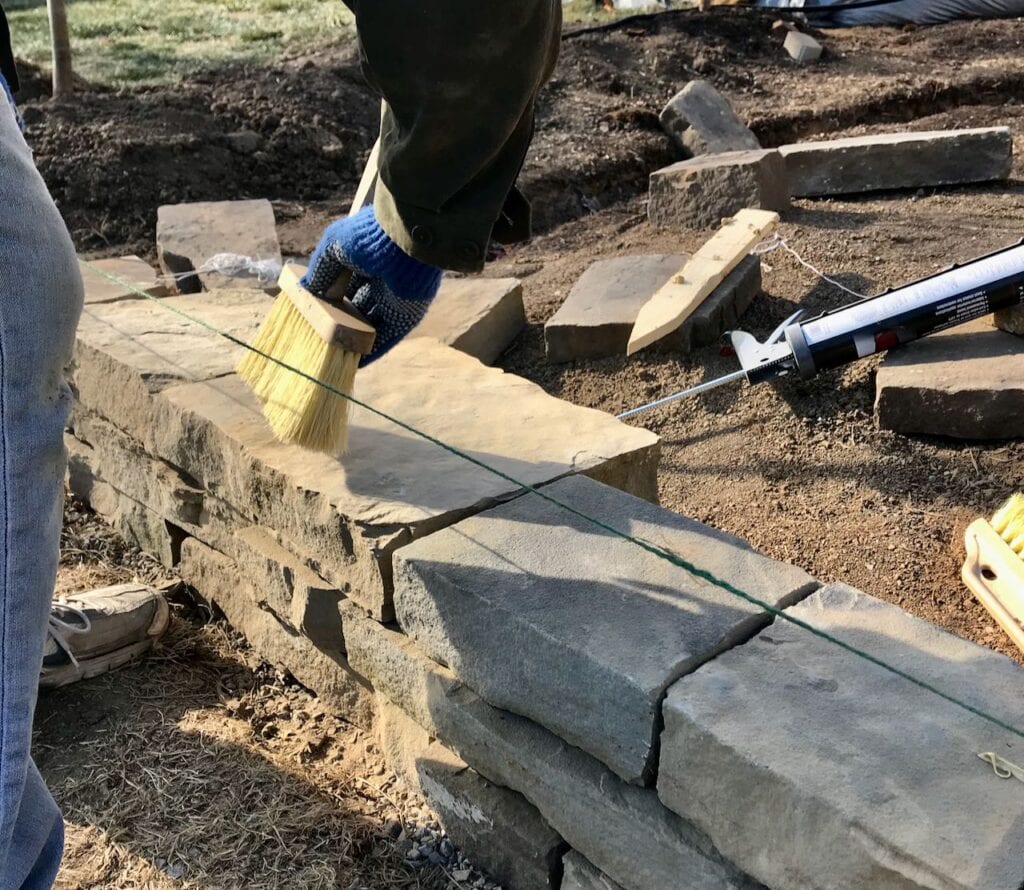
The Top Layer-
We set the top layer of stones to make sure it was all good to go.
Then we used a brush and cleaned the top and bottom of the stones that would be joining. We decided it would be prudent to add construction adhesive between the top too layers. There isn’t much holding the top layer in place and we have visions of kids (of all ages) jumping off that wall.
Here, You Get to Learn From Our Mistake-
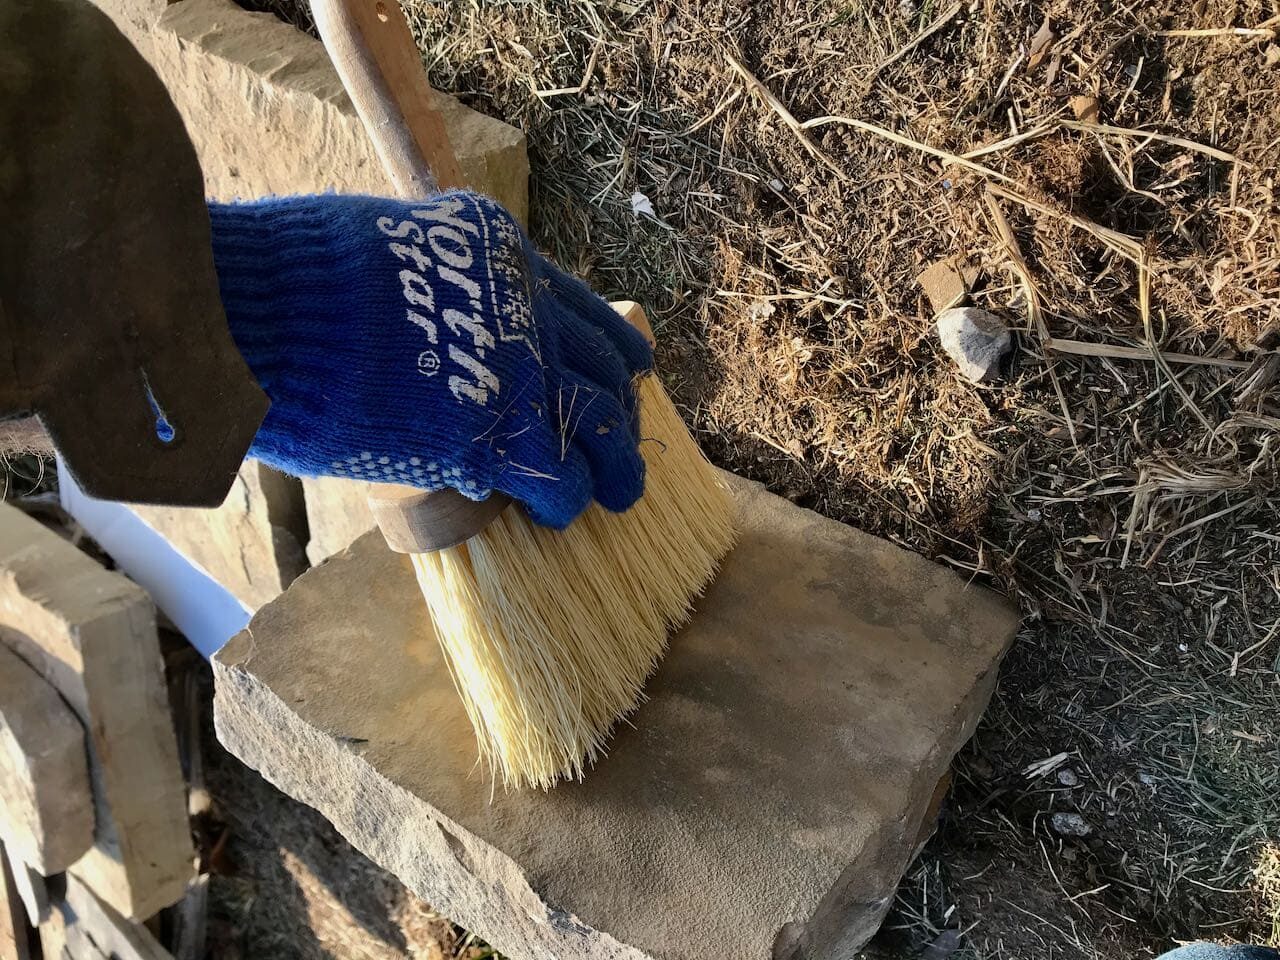
We brushed the stones good and clean, both surfaces.
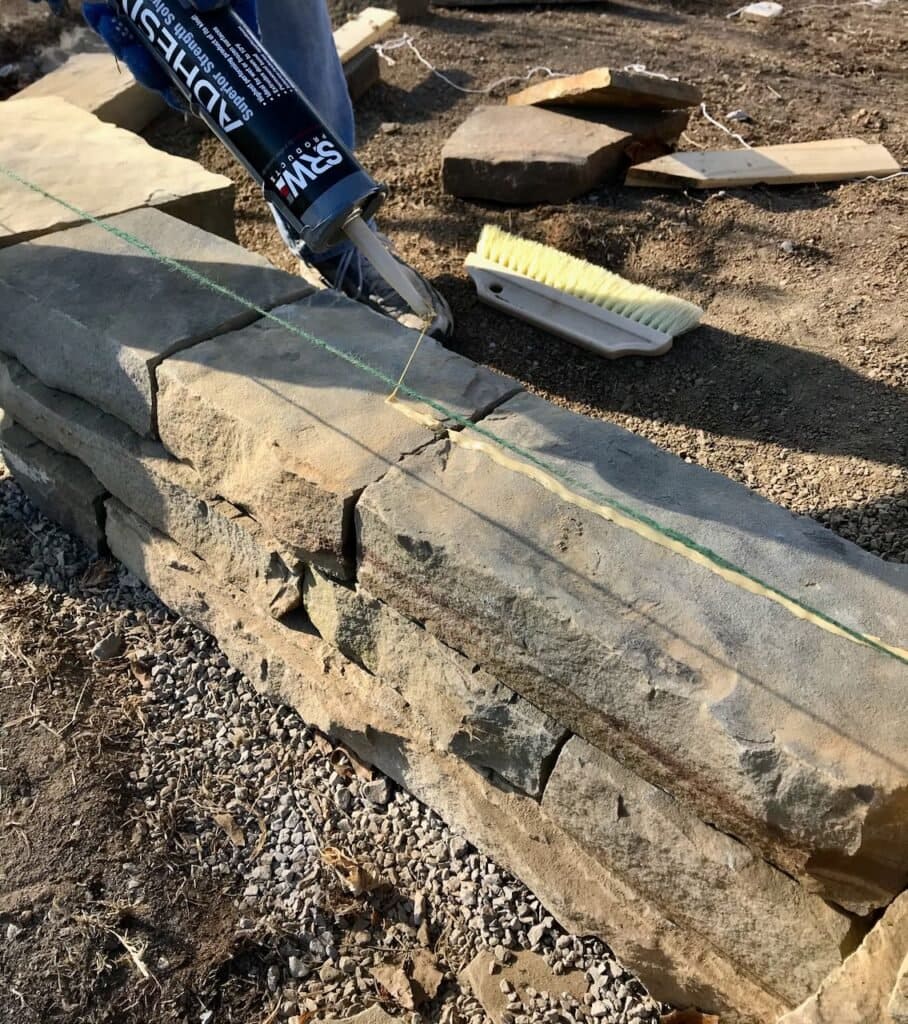
Applied construction adhesive all along the layer just below the capstone layer.
And then in the Spring when the rest of the work was done, and we were waiting on the granite delivery, we discovered the adhesive did not hold! It was one of two things;
- Brushing off the dirt and debris was not enough
- Or the weather was too cold for the adhesive and we should have waited
- Or both
So lesson to learn from us:
- Wash and dry both top and bottom stones
- Use adhesive in temperate weather only
So Thrilled With These Stack Stone Retaining Wall Steps!
This wall jutting out in the middle of the yard is not all that thrill-worthy. But it was one more huge hurdle to jump to complete this snowballing backyard makeover.
Yes, the very makeover that started as a patio repair! sigh!
With the few remaining stones, I was able to put together a landing pad at the base of the bottom step. It will be set in the gravel and back-filled with soil and grass as needed.
Next up: the DG patio will be going in! Send your questions. I’ll be doing a round-up once all the reveals and how-to’s are live.
NOTE: This is a sponsored post. That means I was compensated for featuring a product or service. Please note that all opinions and words are honest and mine! I will never recommend a product or service that I do not stand behind!

I hope you are enjoying our Backyard Makeover Super Series. Hope you are inspired to do some of these projects in your own Outdoor Space. Don’t hesitate to let me know if you have any questions and I’d love to hear how your projects go!
For us, more outdoor living and entertaining, absolutely means more joy in our lives!

I love the look of a stack stone wall! A house in our neighborhood just got one in front and I can’t help built stop and admire. Your yard will look amazing once complete.
Thanks Marie! It’s the look I have always loved, but the first home it’s worked with. Yippee!