
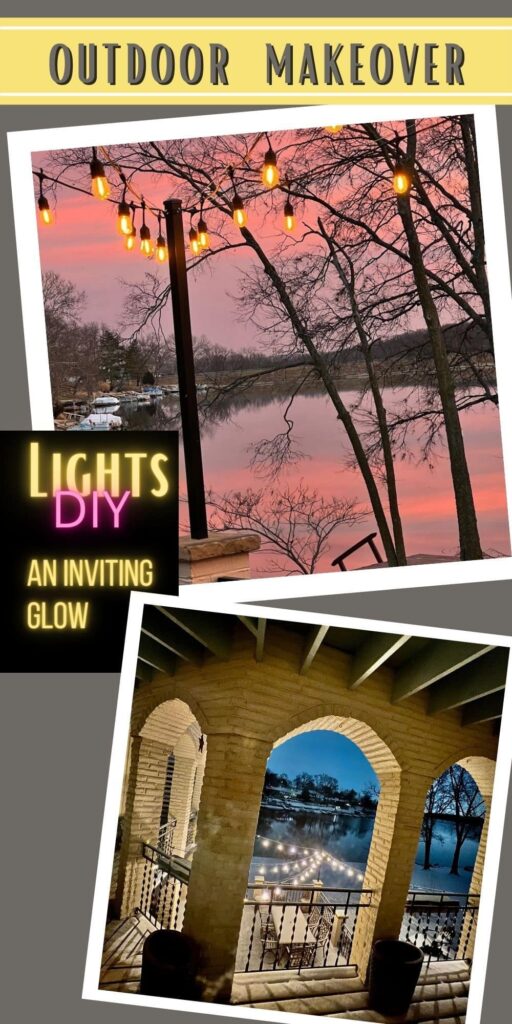
How to Hang Outdoor Edison Bulbs For an Inviting Glow
Outdoor Edison bulbs -cafe lights- are perfect for an inviting glow. But can be a challenge to hang. See how we hung them for year round use.
Lighting is a critical element of setting the mood for any room — including your outdoor rooms!
That’s why, when we started on this great backyard makeover, adding cafe lights was a tip top priority for me.
Have you been following our Blog Super Series — Our Backyard Makeover? Yes, this is technically the side yard. But it’s how we safely navigate our guests to the backyard. So I’m including it.
You can find all of them here if you want/need to catch up, jump around, refer back to something — you’re in charge:
- The Prequel: Our Problem areas and three mood boards that helped to guide our decisions
- Eps. 1: The Santa Fe Tool Casita and treacherous entry became our Tool Cabana with its own front porch
- Eps. 2: The Original Starting Point — our vintage red brick courtyard with crumbling foundation and a dated and dangerous railing
- Eps. 3: Planning & Plotting the new Gravel Patio and evaluating pea gravel vs. crushed granite
- Eps. 4: How to Build a Retaining Wall with integrated stone steps
- Eps. 5: Installing the Decomposed Granite Patio
- Eps. 6: Installing a Stone Walkway and Steps from the driveway down to the patio
- Eps. 7: Installing Cafe Lights over the brick patio (you’re here right now)
- Eps. 8: Modern Landscape Lighting beside the new DG patio and up the stone walkway
I’m so glad we planned for them from the beginning! When the mason built our brick fence pillars on the patio they knew to include the pole we bought to suspend the strings of lights.
Since it was integrated at that time, it is very stable, secure and a real design element vs. an improvised after thought.
Plan For Your Installation-
Power Source & Attachment Locations-
Start with the basic questions – where is the power coming from? And then where/how will we attach the light strands?
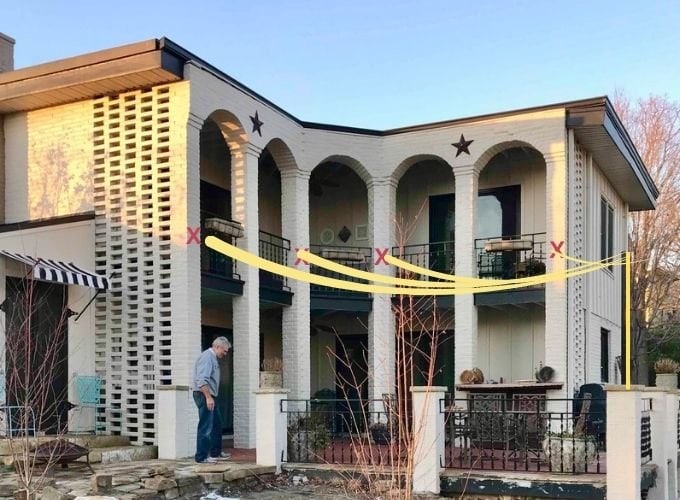
Fortunately we have an outlet on the balcony at each outside edge (just inside the brick screens).
Unfortunately, they are both faulty. There is another outlet in the center corner that we can use in the meantime.
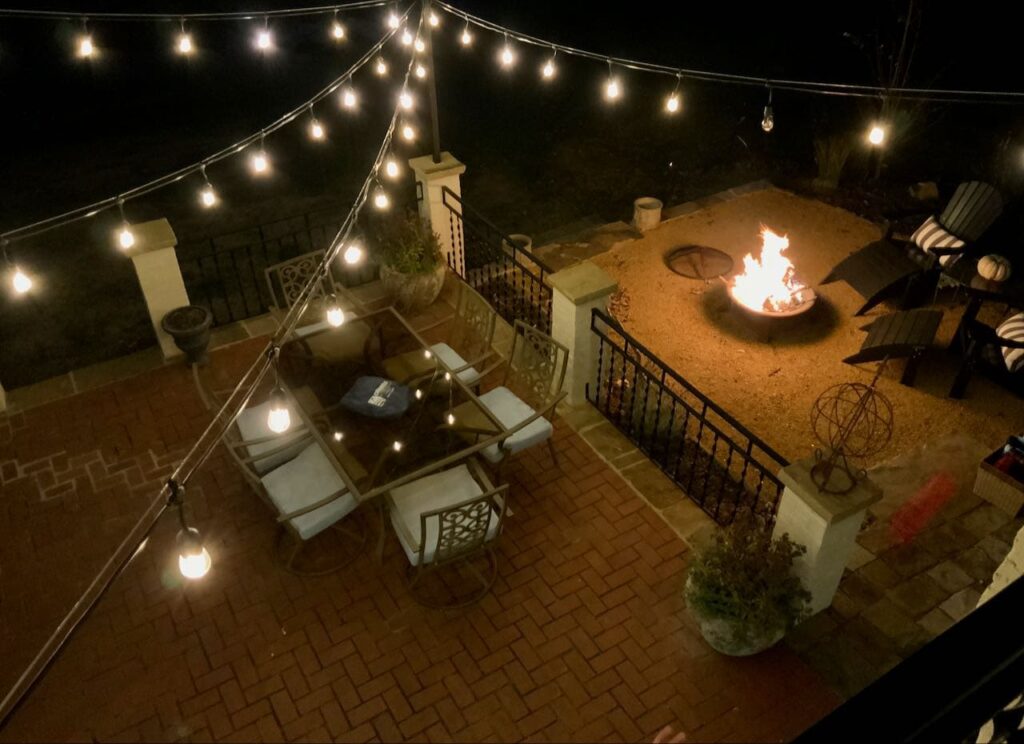
The black pole coming up from the corner brick pillar on the patio is hard to pick out in the picture, so I highlighted with yellow. We knew we wanted four rows of lights all meeting at the corner post.
An easy way to really plan out your lights is to drape a rope or string in the pattern you are envisioning. Mark where it will attach to supports/structures.
This helped us determine the height for attaching to the columns. We liked having a bit of an incline down to the corner. This made us think of a gazebo and felt very inviting. We also like for the lights to have a bit of slack for a more casual feel.
HINT: Keep in mind, depending on your bulbs, they may hang as much as 6 inches below the steel guy wire.
Figure Your Length-
Once you have the placement laid out, measure the rope to determine the length of light sets you need. Two 50-ft sets worked great for us.
Each female end will start on either side of the center arch coming to the black pole, and turning back, each to an outside column edge. Here they will tie off at the column, with the last 6 ft on one side and 9 ft on the other, minus the last bulbs connecting to the power outlets.
Purchase Your Lights and Supplies-
Now that you know the lengths, find the bulbs that are right for you.
Keep your ideal lengths in mind.
Make sure you only purchase lights that are classified exterior and commercial grade.
LED has come a long way from the early cool lights. But still be sure to check the Kelvin rating to get the level of warmth that is right for you.
After a lot of research we finally went with Hampton Bay lights at Home Depot. So far we LOVE them! We have had them installed four months now and yes, we used them throughout the winter.
UPDATE: We’ve had them up for 3 years with not a single issue. And we are talking harsh Midwest weather!!!
TIP: purchase a few extra bulbs at the same time to insure you have ones that match your originals. Our sets came with two extra bulbs, plus we have the ones we took out of our “excess sockets”.
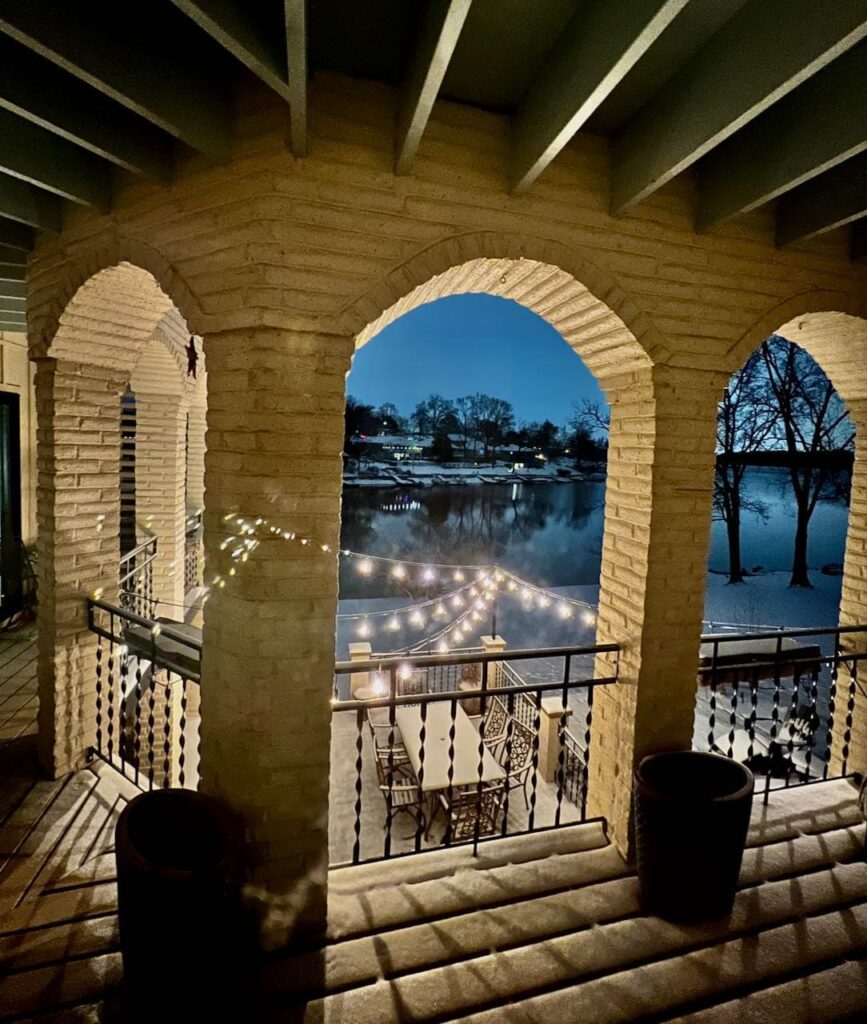
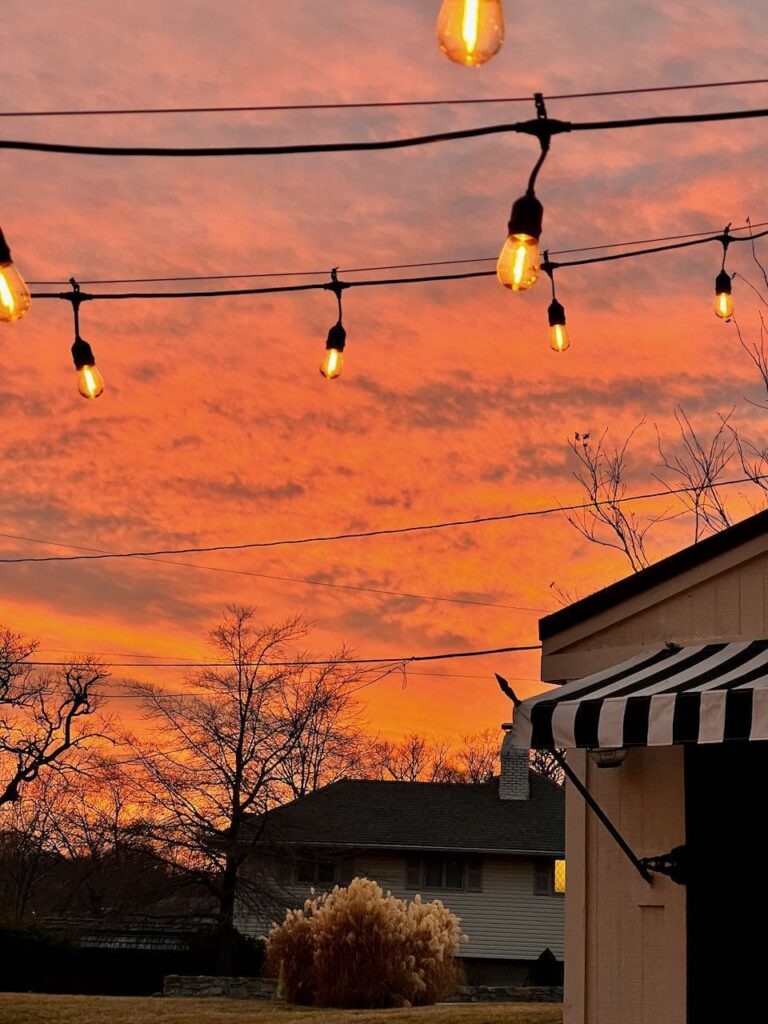
They were particularly beautiful in the snow!
And if we have friends over, even though we are playing games or having dinner inside, the lights on the patio shining through the glass doors make it warmer and more inviting.
SIDENOTE: I didn’t want to open the door for the picture so we have extra reflection of the bulbs on the glass doors.
Guy Wire Support-
If you are planning on a “permanent” installation, meaning hanging year round, you need to suspend the lights from a galvanized steel cable. Even if you plan to take them down after “the season”, if the distance is long, it’s still best to hang them from a guy wire. This takes the pressure off the lights’ wiring, extending their life.
SIDENOTE: Literally one week after we installed our lights in mid November, we had an epic storm — sustained winds of 80+ mph. It was like a tornado without a funnel cloud. And our lights on the guy wires handled it beautifully.
Cafe Light Installation
Supplies Needed-
- Stainless steel wire or vinyl coated wire of your choice
- Appropriately sized crimps and crimping tool
- Fasteners such as eyebolts, with anchors if needed
- Appropriate drill and drill bit based on your structure and selected eyebolts
- Bit of painters or masking tape
- Canned air if drilling into masonry
- Wire cutters
- Ladder
- Zip ties, preferred black
- Scissors
- Safety goggles and ear protection since using a hammer drill
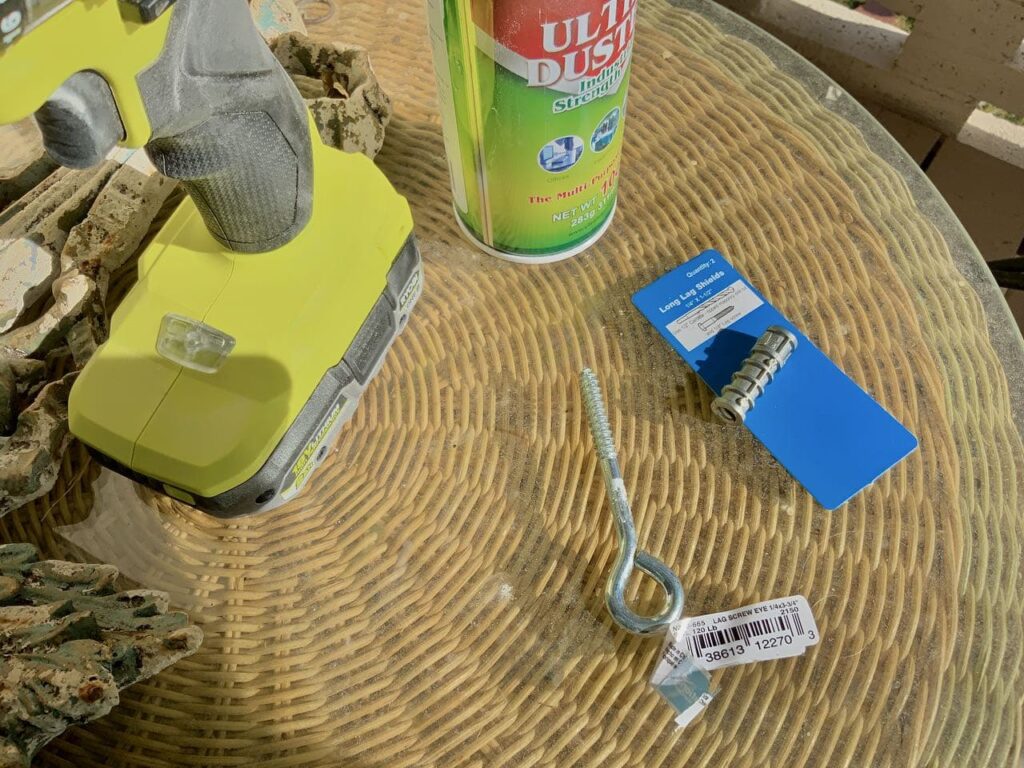
NOTE: Since drilling into brick, we used our Ryobi Hammer Drill (LOVE that thing!) On the brick columns, we found the right combination to be 1/4 x 3- 3/4 eyebolts with 1/4 x 1 -1/2 long lag shields. These required a 1/2″ carbide-tipped masonry drill bit.
The links in this post may include affiliate links, which means if you purchase anything using these links, you pay no extra, but I may receive a small commission that helps keep this blog running. I truly appreciate you using affiliate links whenever possible. Please know that I will never recommend a product I do not believe in!
Click on a picture for more details and to order. Hover and favorite an item to be notified if and when there is ever a future sale price.
There are many different combinations for purchasing the Ryobi Hammer Drill. At the time of writing, Ryobi is having an amazing sale, so I included several of the best pricing options. One great combo that includes a drill and battery for an amazing price. If you have or are building your Ryobi tool cache, the one with all the battery options is a phenomenal price.
Install Guy Wire-
Start by installing all your eye bolts.
For us, we started at the black pole on the brick post on the corner. Our mason drilled a hole near the top on each of the two sides that faced in to the lights. Removing the black cap, we inserted two short, but stocky eyebolts from the outside, reaching in and adding washers and a nut on the inside. Easy peasy.
The brick columns took a bit more. Specifically two orders from Amazon that were a bust, before we finally landed on this combination that worked like a charm.
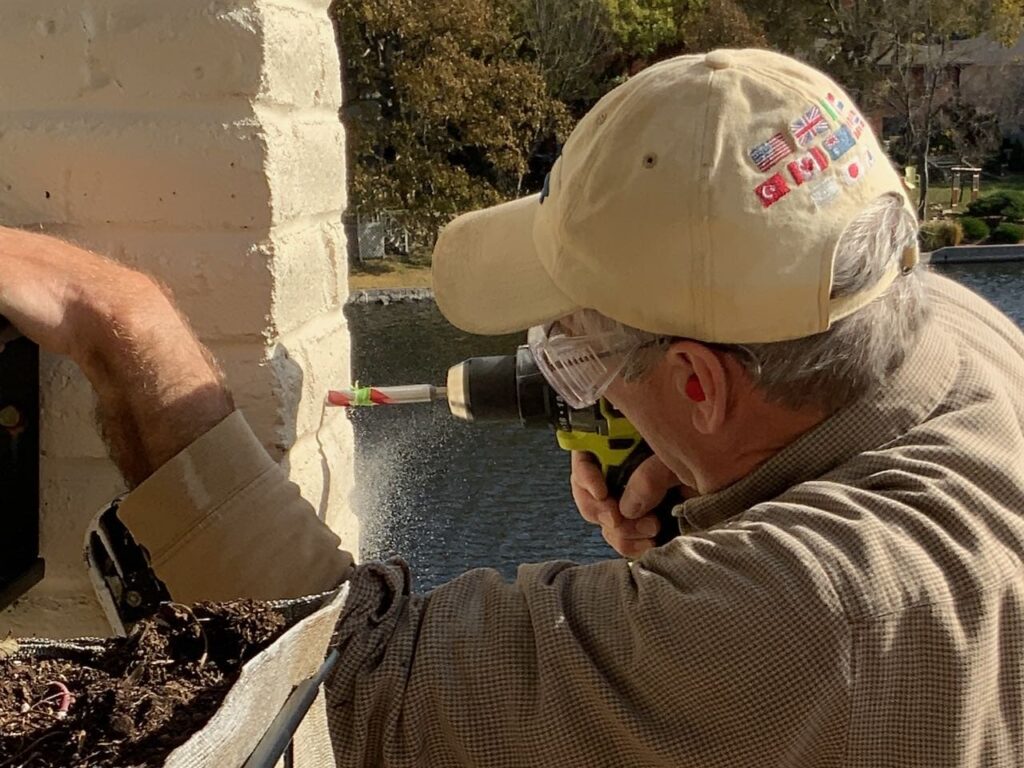
Drill your holes.
TIP: See the green painters tape on the drill bit? We measured the length of the lag shields against the drill bit and marked it with the painters tape. Then drill just to the that length. Worked perfectly.
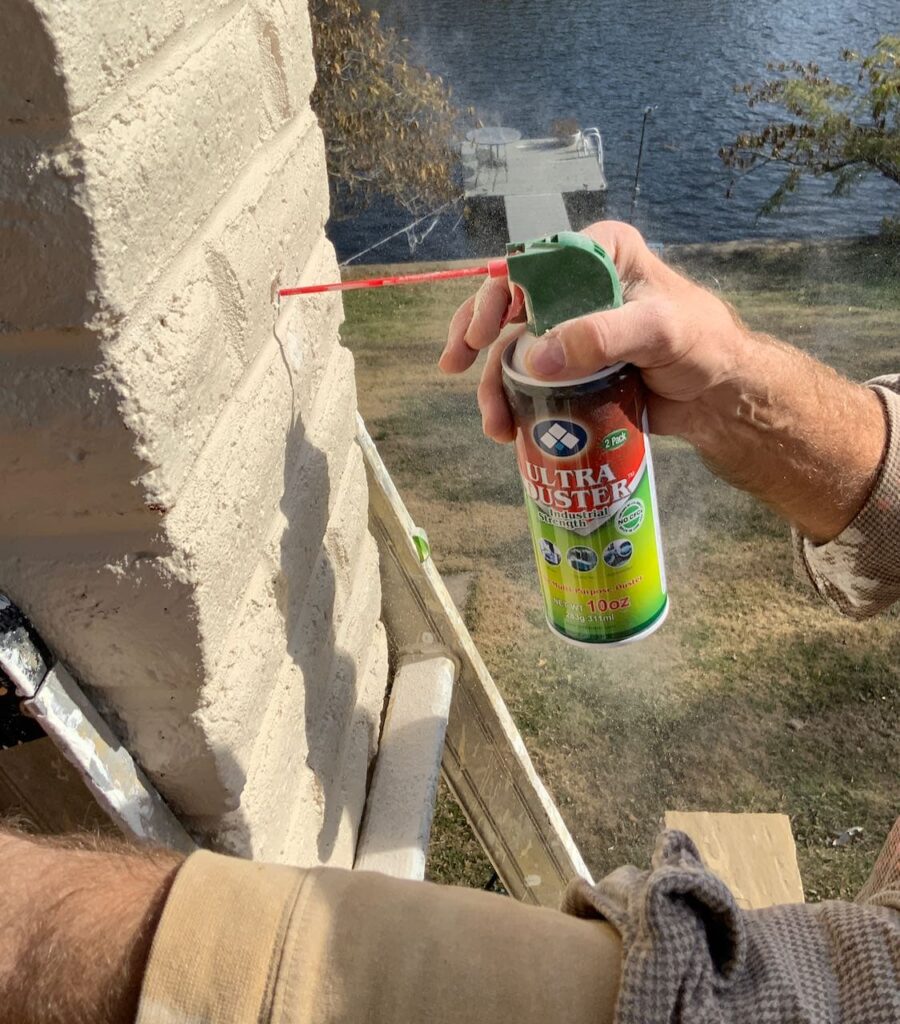
Use canned air to clean out the hole before proceeding.
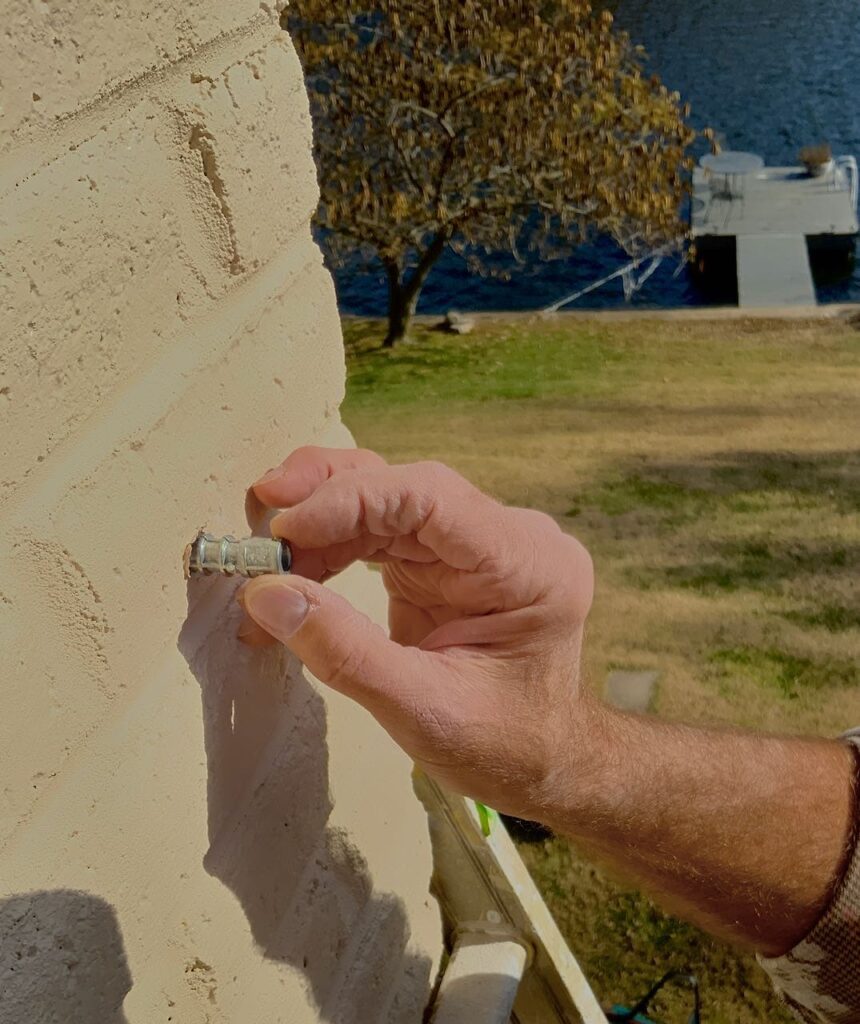
Insert the lag shield.
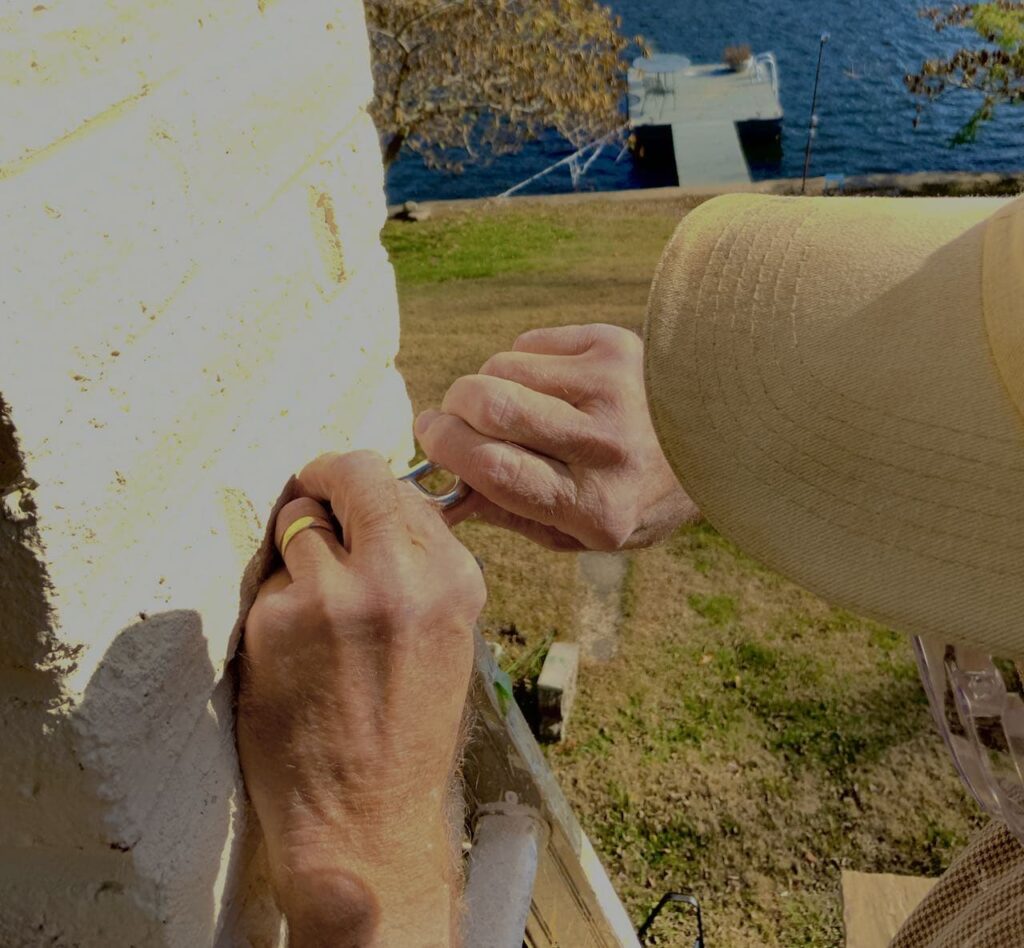
Screw in the eyebolt.
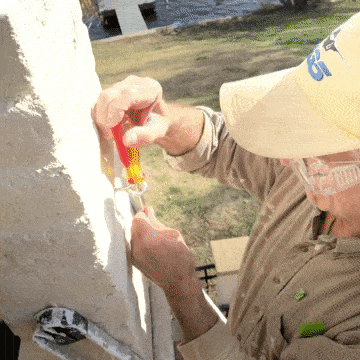
TIP: To tighten an eyebolt, stick a screwdriver through the eye to act as a handle for you to turn it and it adds quite a bit of torque, too!
Now install the wire.
Sorry I don’t have pictures at this point. It’s really straight forward. We rolled off two lengths of wire and threaded one through each of the eyebolts on the black pole.
Then we brought one end up to each of the column eyebolts. We crimped off the outside edges first. And then strung the ends through the center column eyebolts working to get them hanging to the same level., and crimped them off.
These are the same lights we have and are thrilled with. We use similar remote control plugs for our lights. It’s amazing. We can turn them off an on from almost any location inside the house. The other items are equivalent to what we used.
Click on a picture for more details and to order. Hover and favorite an item to be notified if and when there is ever a future sale price.
Install Light Cord-
The easiest way to hang Edison or outdoor cafe bulbs is with zip ties attached to guy wires.
Before you begin, decide which end of the light string will have any excess length. Start installing at the opposite end.
We started at the center column eyebolts because that’s where the female ends of our light strings will connect.
We zip tied those ends to the eyebolts, which helps keep the first bulbs far enough from the house to prevent breakage against the brick and stops the bulbs from sliding downhill along the wire.
TIP: Do not install the light cords with the bulbs already in them! If your string set arrives with bulbs pre-installed in the sockets, remove them first to avoid breakage.
Each empty socket should have a small eyelet at the top. Run a black zip tie through that eyelet and around the guy wire, then trim off the excess tails of the zip ties.
SHORTCUT FOR EFFICIENT INSTALLATION:
Instead of moving your ladder constantly, position it at your starting point and attach the first 3-4 sockets you can comfortably reach. Then, move the ladder several feet down the line. From this new position, continue zip-tying sockets to the wire, pulling the light cord taut between attachment points as you go.
This method allows you to install multiple lights while keeping the ladder in one spot before moving again. Continue this pattern along the entire run, stretching the light string the full length of the guy wire. This approach significantly reduces the number of times you need to reposition your ladder.
Adding the Edison Bulbs-
Once your entire light string is properly secured to the guy wires, go back and install all the bulbs into the sockets. (This is the “proper” method, but see our time-saving tip below)
BULB INSTALLATION SHORTCUT:
We discovered a more efficient method: have one person screw in each bulb just before the other person attaches that socket to the wire. By working just ahead of the installer, the bulbs never hit the ground or crash into each other.
This eliminates the need for a separate bulb installation pass and saves countless trips up and down the ladder! (You’re welcome! 😊)
Fire Up the Festivities and the Lights-
Our oldest son brought eight buddies with him from Dallas for the Cowboys vs. Chiefs game here in KC.
They were the first to enjoy the finished patio with lighting!!!
Yes, it was cold here, but that did not deter them. A roaring fire and cornhole on the patio made for a very fun evening for all!
I hope this has inspired you to consider outdoor cafe lights if you don’t have them yet.
As always, I truly appreciate you and please don’t hesitate with any feedback or questions you have.

Your lights look gorgeous!
Beautiful Diane! You will have many celebrations in that back (side) yard under the lights!
I love this, Diane. We’ve been wanting to add some lights like this to our back patio. Thanks for sharing such a detailed how-to. I’d love to share a link to your post in my weekly round-up tomorrow.
Thanks Jen! I’m honored to have you share far and wide! Please let me know how yours turn out. The biggest struggle for us was getting to a power source. if you run into any issues along the way, just shoot me a question and I’ll see if I can help out. BTW, I still mean too send you a list for KC eats and such. Although, if you are coming Easter weekend, which I thought I understood, our forecast is not looking the best — bummer!