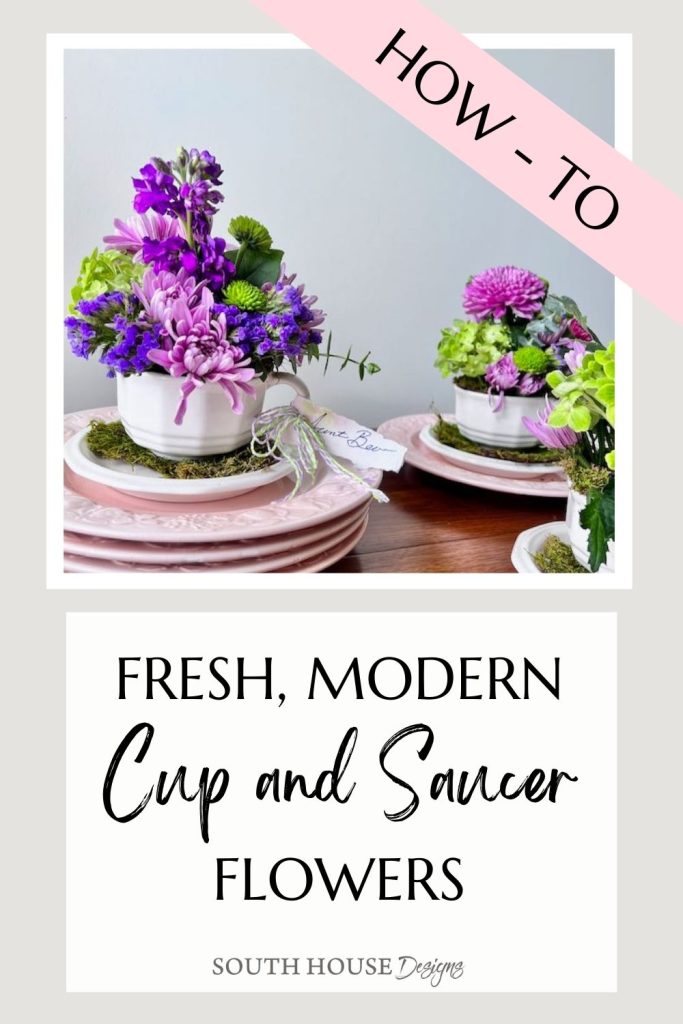
Make Easy Cup & Saucer Flower Arrangements for Your Guests
Individual centerpieces will delight your guests , create a gorgeous table and optionally become a party favor for each guest.
I love flowers, particularly fresh flowers! Duh . . . I mean, who doesn’t?
You’re with me, right?
So if I love fresh flowers so much, why don’t I use them in my table scapes more often? Big beautiful fresh flower centerpieces can be:
- intimidating to arrange
- expensive
- interfere with table conversation
Today I’m sharing a way to set a table with fresh flowers with a touch of whimsy. This special design is:
- Easy
- inexpensive
- and will delight your guests
A number of years ago, tea cup arrangements were quite popular. A lovely gift bouquet was arranged in a ceramic teacup, usually vintage teacups with a victorian flower pattern.
Modern Interpretation
As much as I loved the idea of a beautiful arrangement at each place setting, a variety of different floral cups holding flowers was just a bit chaotic for me. Don’t get me wrong, I truly appreciate the Victorian style, It’s just not me..
While recently cruising through my favorite thrift store, I came across a set of Pfaltzgraff cups and saucers. I loved that they were all white, generous sized, an interesting shape — and $1.50 each! I knew just what I wanted to do with them.
My reinterpretation would be a bit heftier than the dainty teacups, more clean-lined and not nearly as frilly, That’s much more me.
How To Make Cup & Saucer Floral Arrangements
Materials & Supplies-
- cups and saucers
- fresh flowers, I used one $16.99 bundle from Costco for my four cups
- wet oasis or florist chicken wire
- snips
- preserved moss
- lazy susan, not required, but very helpful
Step 1) Prepare the Cups-
If using wet oasis, soak it in water first, then cut to fit the cup
If using wire, wearing gloves, cut off a chunk of wire and roll into a ball to fill the cup
Step 2) Prep Your Flowers-
This should be done as soon as you bring your flowers home. Strip off all the lower leaves that would be within reach of the water. Angle cut the ends of the stems and place in water. Store in a cool place, preferably the refrigerator.
Step 3) Prepare the Saucers, optional–
Hand tear a piece of moss for each saucer.
TIP: Test a cup to see that it sits fairly flat. You can pull off some extra thickness from the back of the moss if necessary.
Step 4) Make Optional Place Cards-
Now that you have your flowers, you can make your place cards to coordinate.
Water Color Place Cards
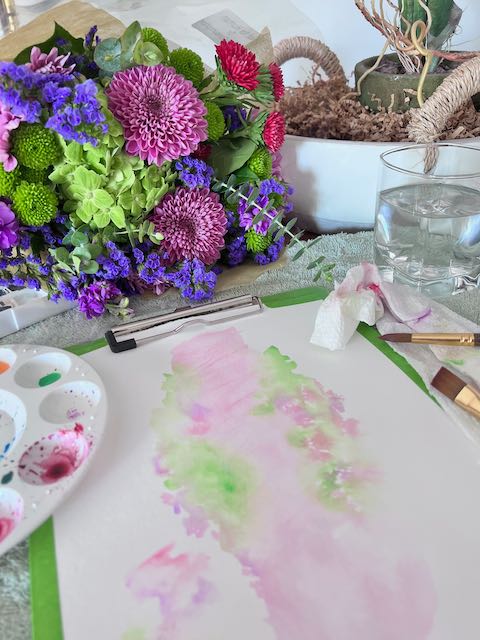
Materials and Supplies-
- watercolors
- watercolor paper
- paint brush
- hole punch
- bakers twine or ribbon of your choice
There’s no single “right” way to do this. For me, I painted clouds of my colors down the length of the center of the paper.
When the watercolor was dry, with a fine marker, I wrote the names so that they started in the painted section and ended on white.
Then I tore the edges creating a rough rectangle around the name.
I punched a hole and cut an 8-inch length of both lime green and lavender bakers twine and another pair about 12-inches long.
TIP: Simplify threading twine or ribbon through the hole with my popular post “How to Thread A Big, Fat Ribbon Through a Small Round Hole”.
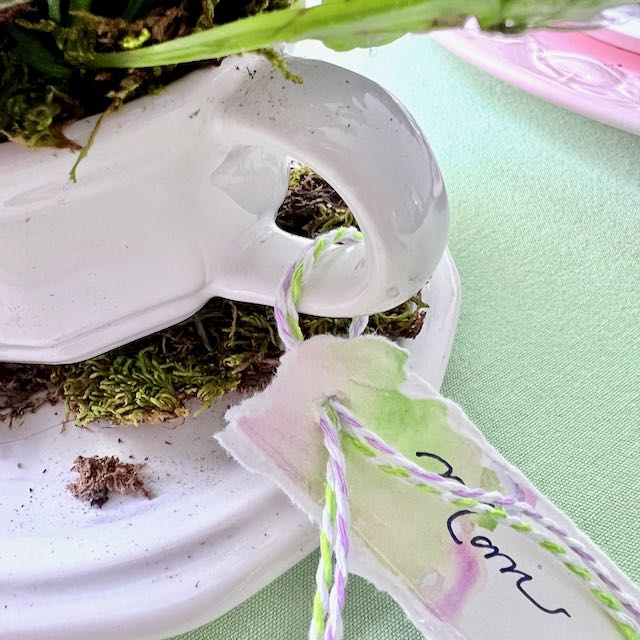
LEFT: Thread the shorter pieces through the cup handle and then through the name tag hole from the back.
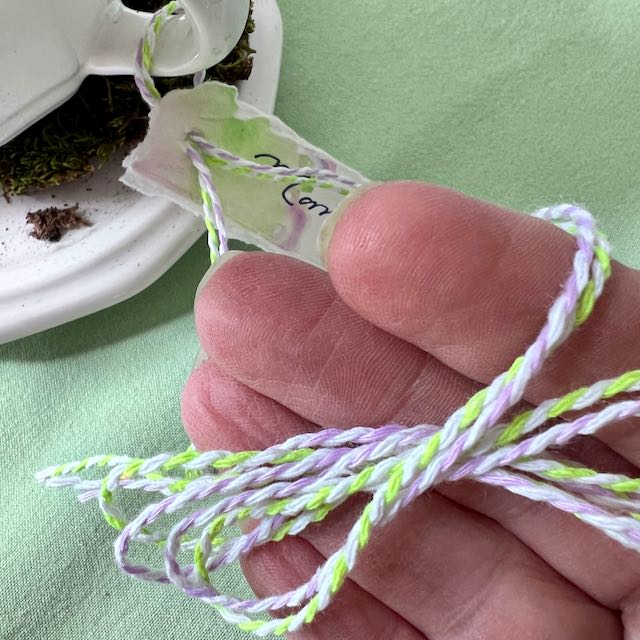
RIGHT: Lay the two longer pieces in two pairs of loops in your hand
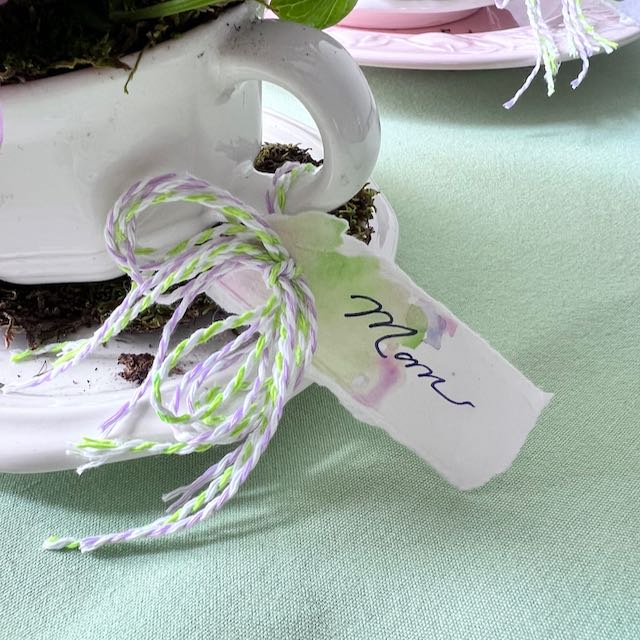
LEFT: Lay the loops across the punched hole.
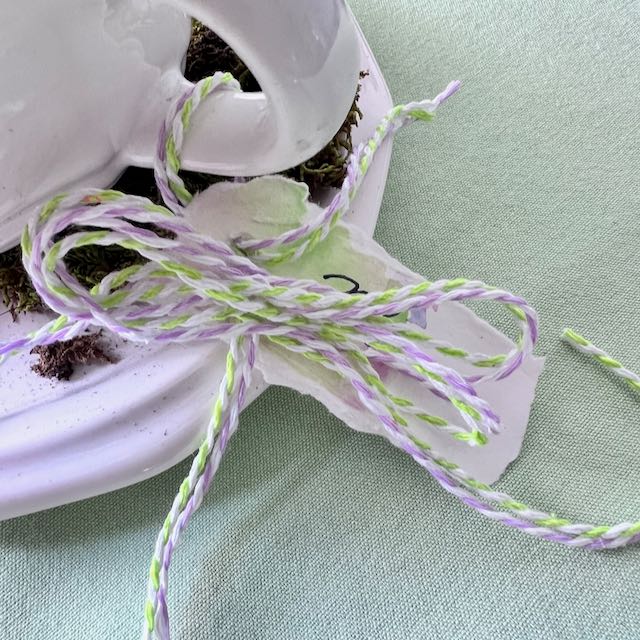
RIGHT: Use the tails coming through the hole to tie the loops in place like a bow. Trim off any excess.
Step 5) Arrange the Flowers, Preferably the Morning of Your Party-
I always like to start by organizing my flowers by type. And because I was making four similar arrangements, I wanted to make sure I had a similar number of each flower per cup.
This bundle of flowers included two hydrangeas. Not a problem. Examining them in Costco, I saw that the individual petals were on stems that were actually quite long. I just split each Hydrangea head in half.
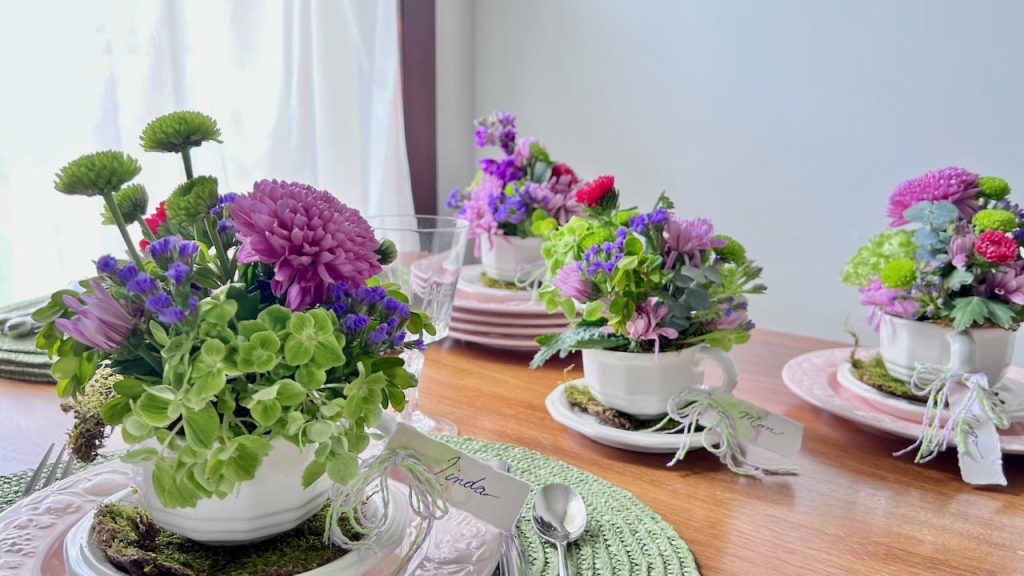
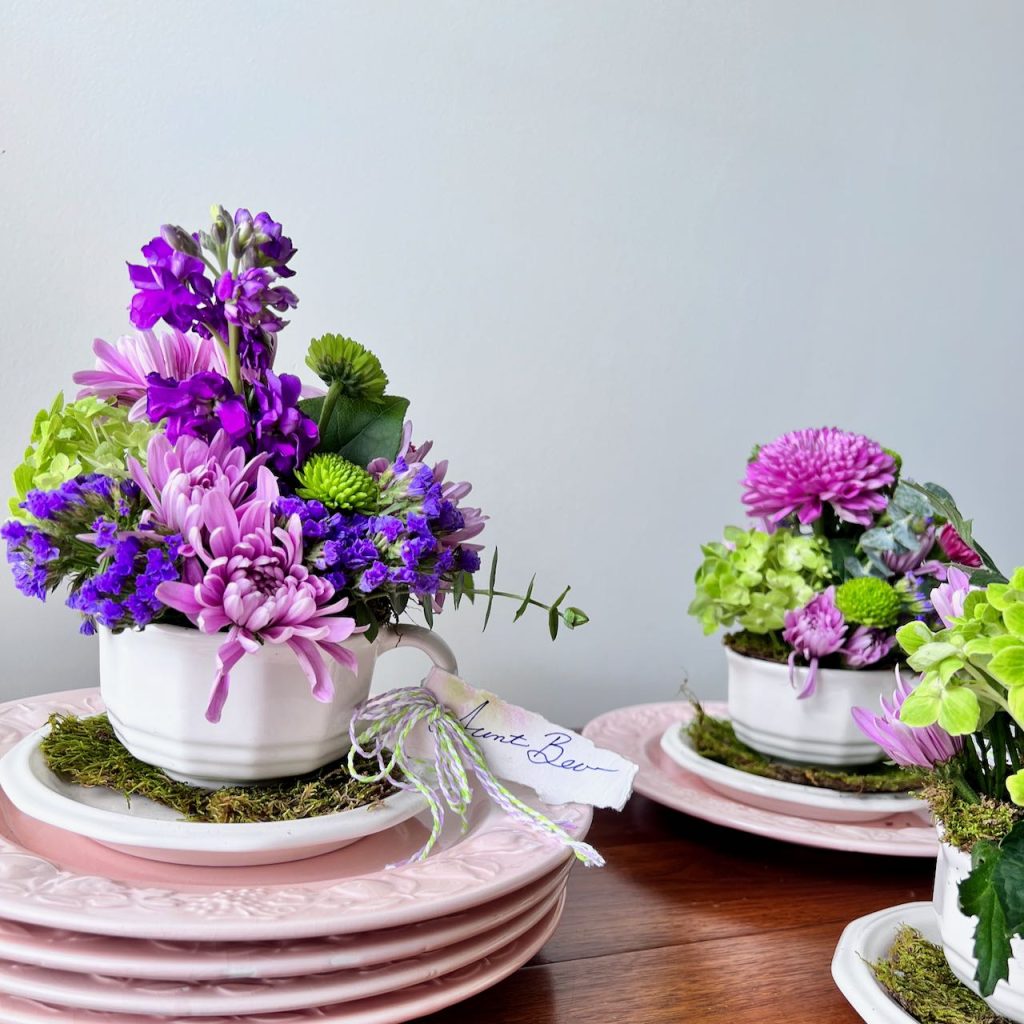
I wanted my cup and saucer arrangements to all coordinate, but not be exact duplicates. So rather than assembly line style, I made them one at a time.
TIP: set a cup on a lazy Susan while arranging its flowers. This makes it sos easy to spin and check it from all sides.
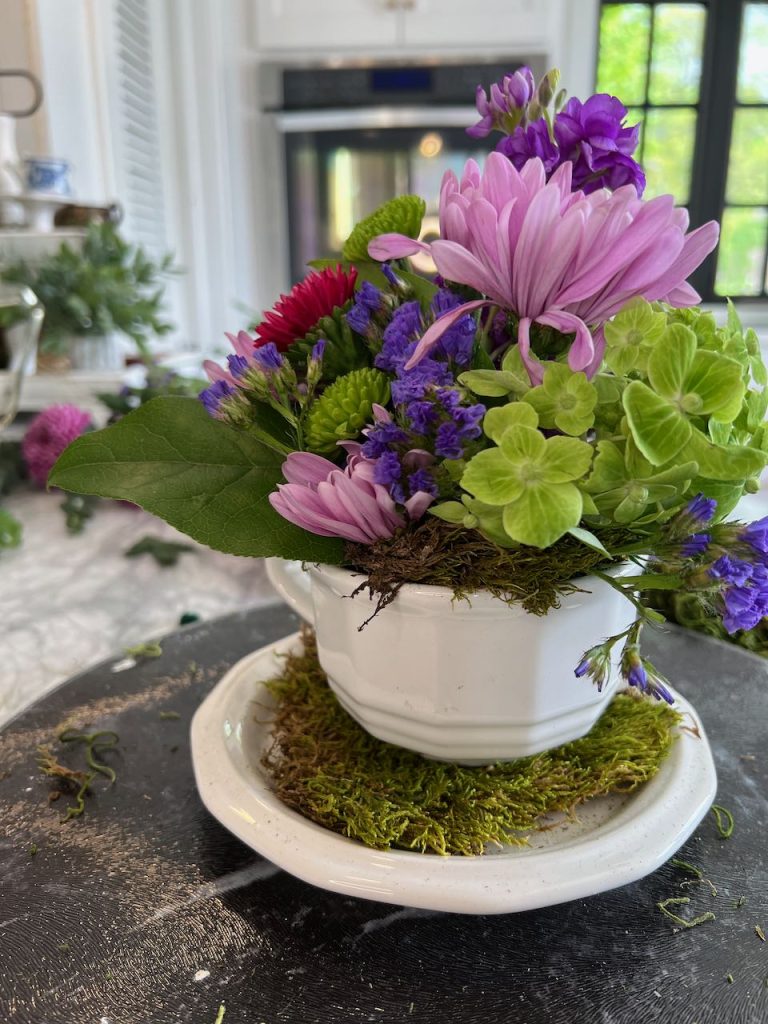
I like to start my arrangements with the largest, showiest bloom and then work around it.
Clip each stem to the length you need and insert it. Keep in mind, this process is very fluid, you can move them around until they feel right.
Don’t forget the final step whenever arranging flowers, make sure all your “structure” is covered. I tucked in little snippets of moss wherever the oasis was showing around the lip of the cups.
Styling Suggestions For Your Cup and Saucer Flowers
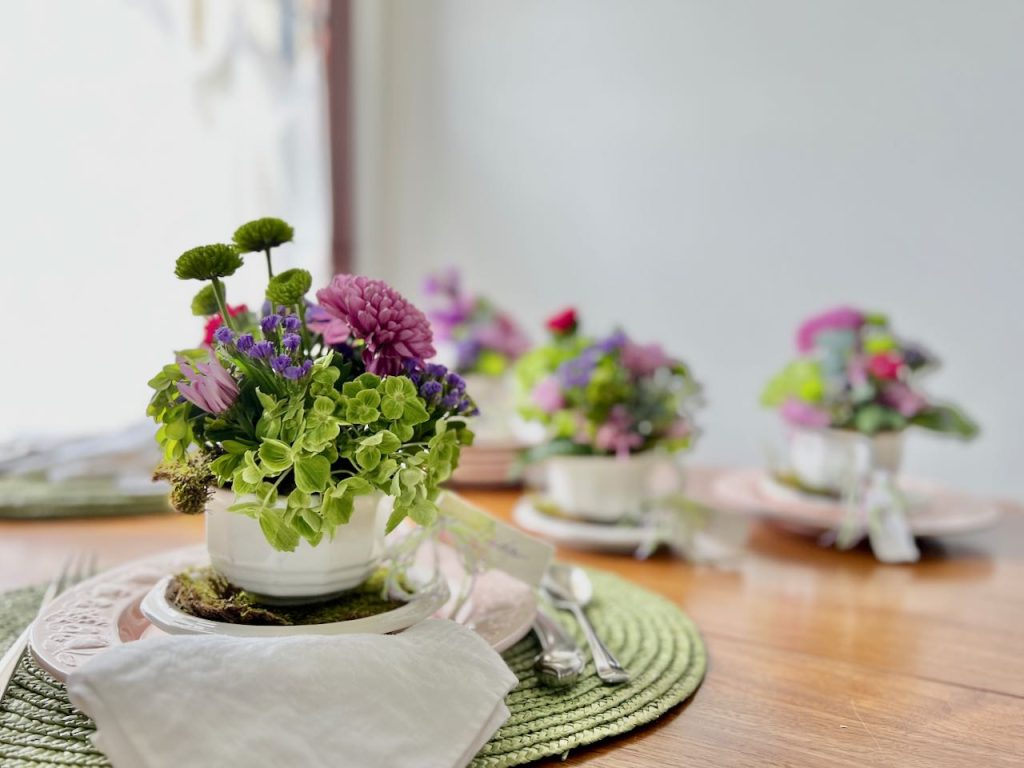
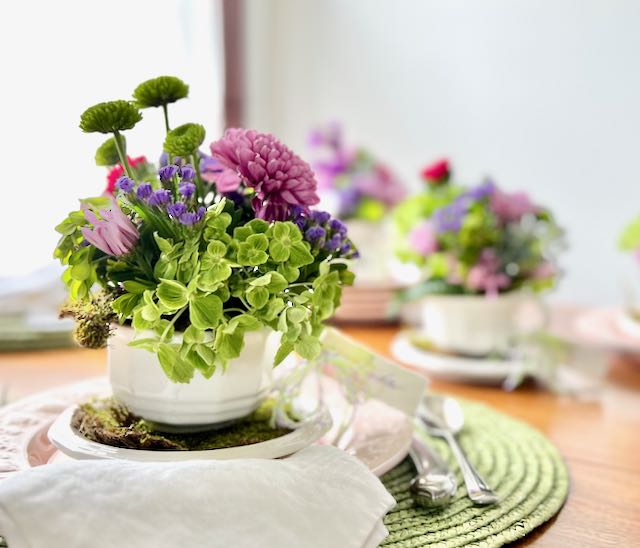
Set a cup on each placesetting. It makes for such a pretty table. Then when your guests are seated, move them to in front of their dinner plate.
Or stagger the individual cups, without place cards, down the length of the table with some candles. This makes a lovely centerpiece and you can optionally send a cup home with each of your guests.
Bring the beauty of fresh flowers to a buffet table with a series of these sweet small arrangements. Place them among tthe. dishes on various small risers.
Do you have open shelves in your kitchen? A small arrangement clipped from your garden would be darling there — and out of the way!
Occasions for Flower Cups & Saucers
May Day Brunch — have the flowers and cups all prepped, but each of the guests gets to make her own arrangement.
Mother’s Day of course. I created this table with four of the mother-figures in my life in mind.
Galentine’s Day — for that special girl squad that always has your back
Bridesmaid Luncheon — this is a great chance for the bride to spoil her ladies.
Send off to College Brunch for a daughter and her best buds — maybe even do the flowers in each of their collegiate colors.
I hope this post has inspired you to use fresh flowers. I spent $6 on the cups and $17 on the flowers. That’s less than $6 per arrangement. Which is probably less than what Mother’s Day cards would have cost me.
Have you enjoyed this post? Would you like more? Please subscribe for all the inbox joy:
Oodles of thanks!
I so appreciate you spending time with me today!

Diane these came out beautifully. I’m loving the crisp white cups and pretty little tags to boot! Great post!
Thanks so much Susan! I can only imagine the fun you’d have with your extensive teacup collection!
I love this idea. Thank you for sharing.
So glad you enjoyed it Rebecca! Please send pics if you give it a try!
How do you press flowers flat I was told to use Fire Bricks and napkins, and microwave them for 30 seconds is that true
Beautiful Diane. I love the pure white cups along with the gorgeous tags you created. You are one talented gal.
Super cute idea! I love it. I will definitely do this. Thanks for the inspiration, my friend. Hugs to you.
Diane,
I love this idea. I need to use all those cups and saucers that I never pull out. Thanks for the inspiration and thanks for having me along this month.
This is such a sweet idea! Great flower project.
Your mini flower arrangements are so pretty Diane, and the lovely tags are such a sweet idea! I can’t wait to host a luncheon and make these!
So precious Diane!
First of all, great thrift find! Whoo hoo! Second, these teacup flower arrangements are so beautiful! They make me think of Eliza Doolittle in the musical “My Fair Lady”. If only she had the teacups to go with her flowers! You arranged them perfectly and the place cards are the perfect addition! Beautiful, my friend!
Diane – I love these. The flowers you chose are so vibrant, I’m with you on the less frilly look 🙂
I’m taken with the watercolor name tags, they are the cutest. Thanks so much for sharing.
These are so beautiful, Diane. They would make such a special and unique gift for Mother’s Day! I have some teacups that are just collecting dust, so I may have to try this. I can’t wait to share a link to your flower arrangements in my weekly recap post tomorrow.
Thanks bunches Jen. I can’t wait to see your floral teacups. I’m sure they’ll be wonderful as all your great creations!