
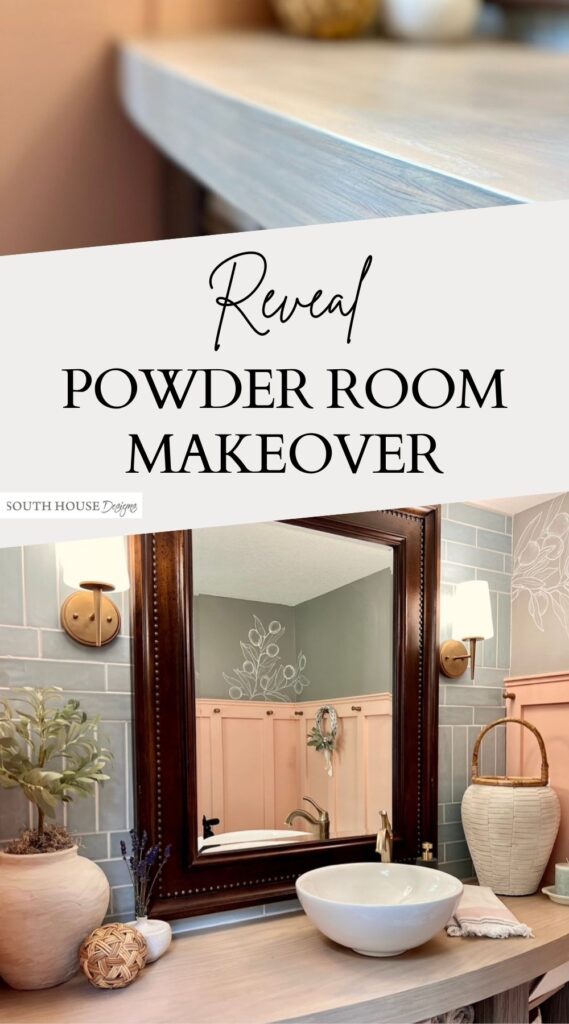
Powder Room Remodel — Amazing DIY Before & After
Our Powder Room Remodel reveal is here!!! You won’t believe the changes and ALL the extras touches you can add to your powder room, half bath, or full bath. It’s a great post even if you just enjoy a great Before & After, and who doesn’t?
As a reminder, we started this powder room remodel as a guest in the One Room Challenge.
You can read all about our starting point, and our inspiration board right here.
Just a bit of a flashback:
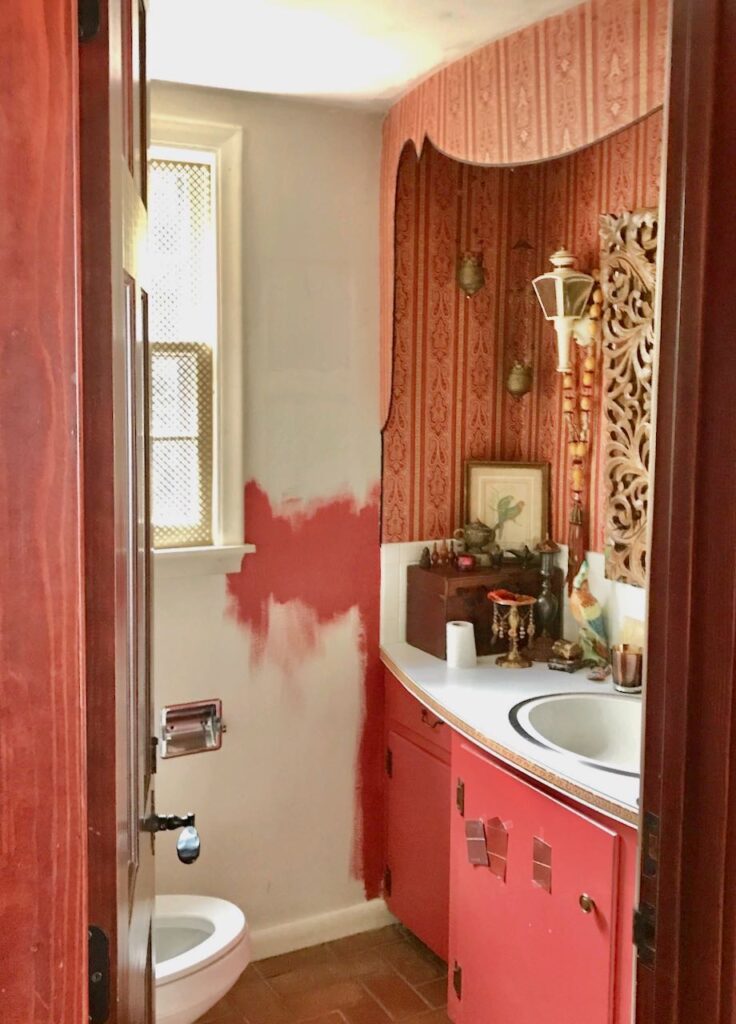
This is the Powder Room on the day we bought the house. YIKES!
(By the way, that lambrequin (or cornice board) lasted about 6 hours.)
This doorway was right next to the dinner table and looked straight into the family room. And to make matters worse, the toilet was all you saw of the bathroom when the door was open — not even a pretty vanity.
Prior to moving in, we had a contractor do the jobs meant for the pros — gutting the kitchen and two full baths, moving walls and converting a carport into my studio . While he was here, we stole a few feet from the utility/laundry/hobby room, creating a hallway to an existing glass panel exterior door bringing much needed light into the family room.
This also gave us the opportunity to swap the original powder room door and the toilet.
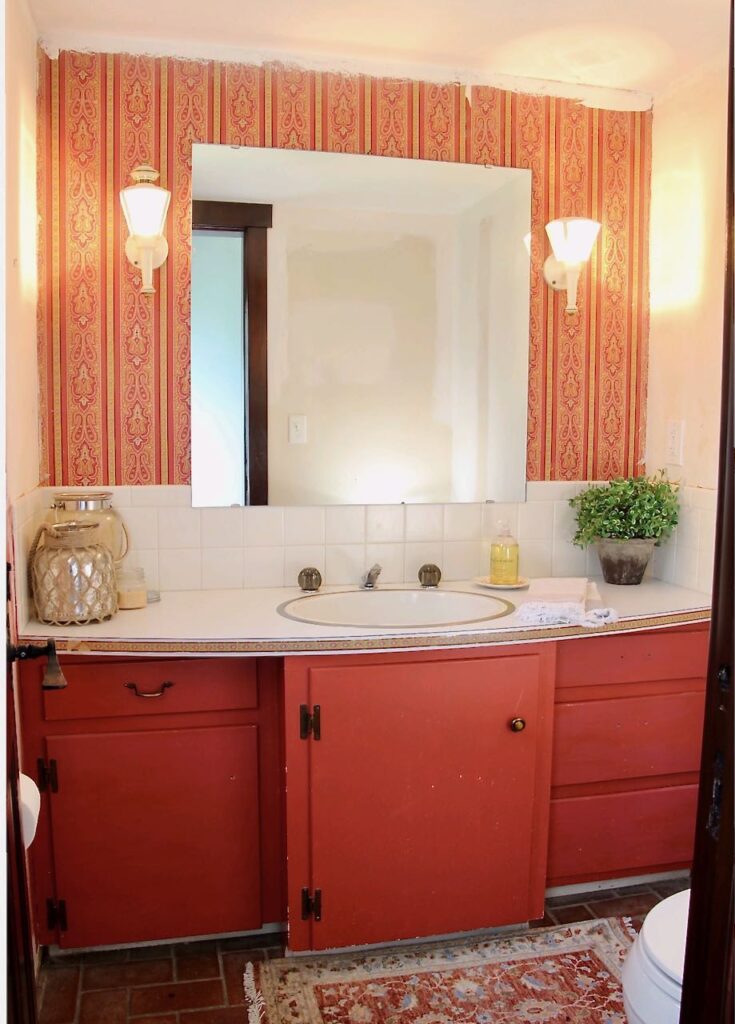
So this is was our starting point 8 weeks ago.
Now you’ll be able to appreciate how far we’ve come!
First Things First — A Vision For Our powder Room Remodel
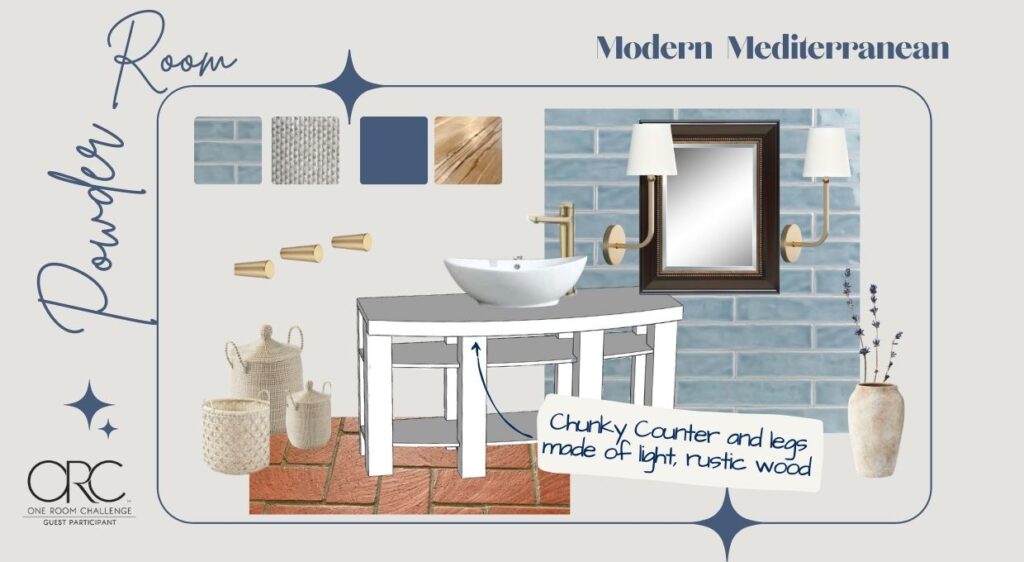
Why Mediterranean? Because the house told us so!
Don’t believe me? Check out our patio and the lake side exterior right here.
Yep, she wannabe Mediterranean Villa.
I’m all about empowering dreams, not busting them. So we had her vision to work with.
Tile Wall
We started with the gorgeous blue tile wall. This was my first time tiling, but once I cut my first piece, I was hooked. It’s oddly satisfying! Kind of like wallpapering.
There will be a blog post out soon with all the how-to’s I learned along the way. particularly a trick we came up with for drilling holes in the tile to hang the mirror.
Powder Room Vanity

The one thing we salvaged from the original bathroom, was the shape of the countertop. I loved the gentle curving front a basically square room filled with lots of linear aspects.
I wanted to bring in the warmth of wood.
I liked the open shelving concept for the curved countertop. Since this is a half bath (and changing room for our lake guests) we didn’t need drawers and drawers to hide all the toiletries and cosmetics of a full bath.
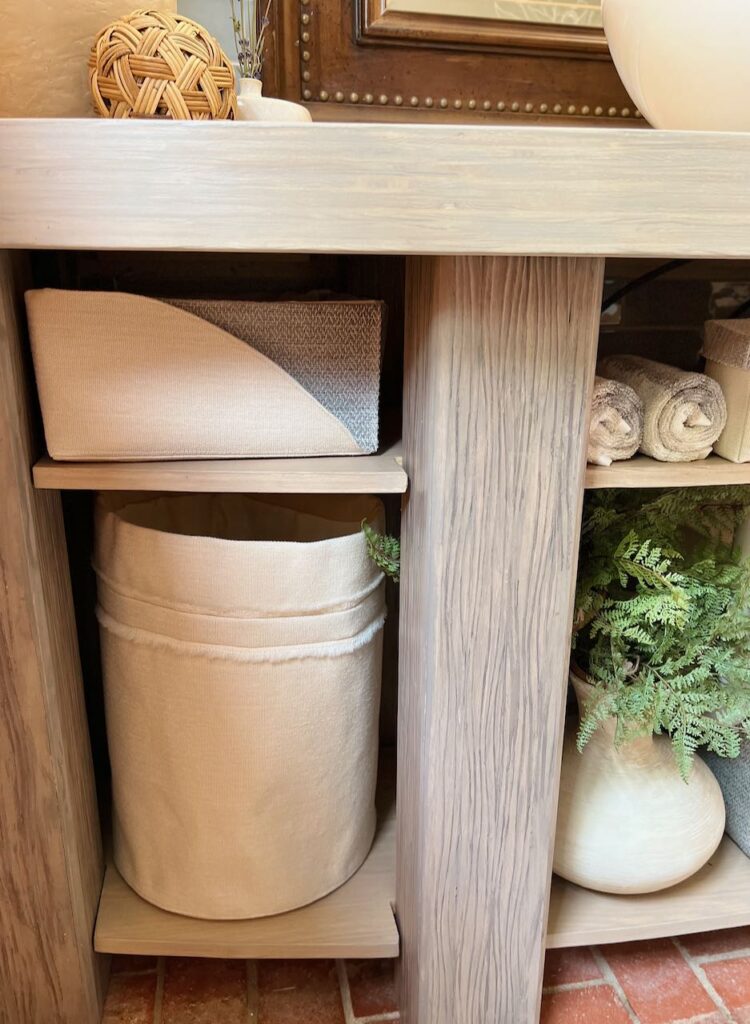
I knew I could make baskets and bins that would be coordinated and sized perfectly to hold the extra rolls of TP, cleaning supplies and rolls of paper towels (our overflow from the kitchen pantry).
You won’t believe how we came up with this. We are both novice DIY-ers. And we built this ourselves. AND we designed it and came up with the plans ourselves.
Full disclosure: I took our plans to our architect son who converted it to the files I needed to send to a local fabricator who used a CNC router to cut the two shelves and the four pieces of the countertop. We knew those tricky cuts were beyond us.
But we built it from there.
And you won’t believe what we used and how we did it. Fortunately we took lots of notes and pics. There will be a full how-to post on this coming soon.
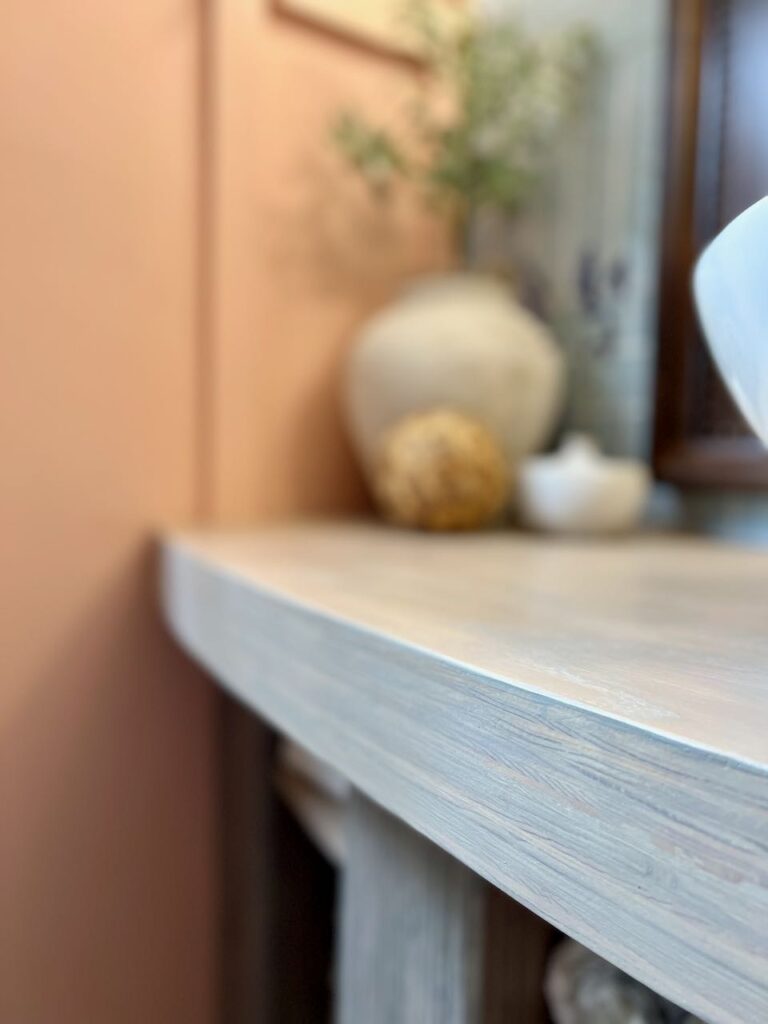
Look at the finish on the countertop!!! You won’t. believe the wood we used and how i finished it.
Yes, you guessed it. Another how-to post on how I finished the legs, shelves and top will be coming along also.
Dominating Mirror
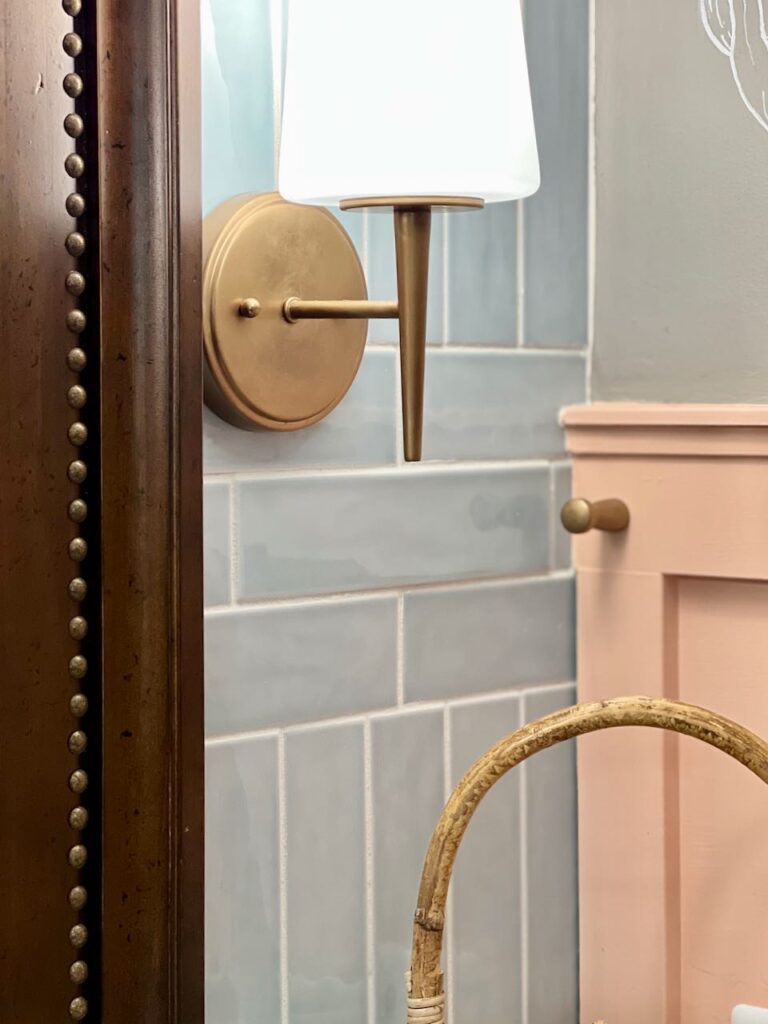
If you have not read the before post, you may not know that this mirror was the inspiration for the whole room.
Yes, I bought the shoes first and then needed the outfit.
I couldn’t help myself. I fell in love with it and it was a steal of a deal. I actually bought it before we even closed on the house. It’s been patiently waiting in the storage room for . . . well, for embarrassingly too long!
The nailheads inspired all the old gold trimmings: the faucet, the pegs the light fixtures . . .
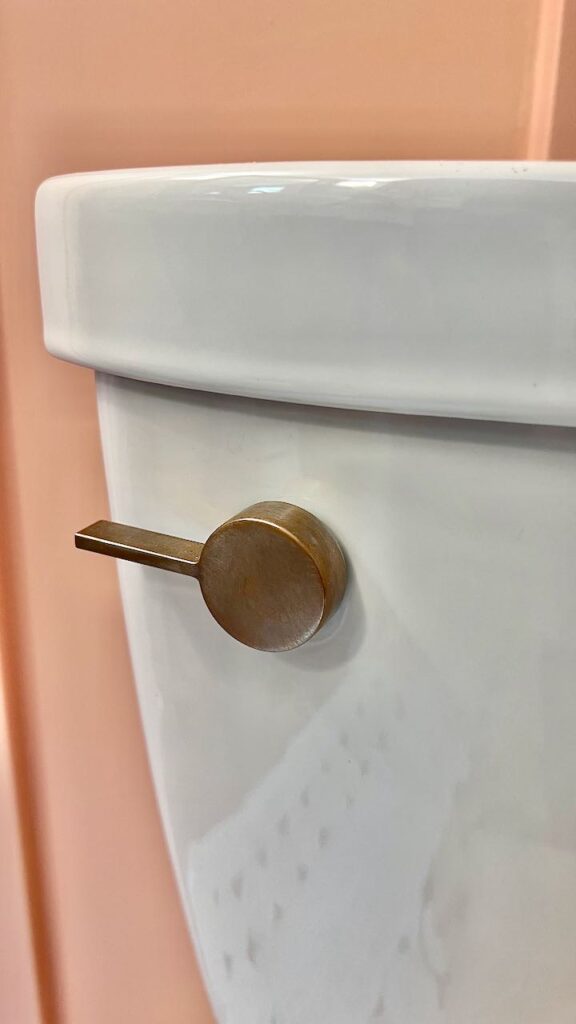
. . . yes, even the flusher handle.
Of those, only the faucet started life that way, but I used the same product on all of them.
You guessed it, another how-to post coming your way.
Board & Batten Wall With Wall Pegs
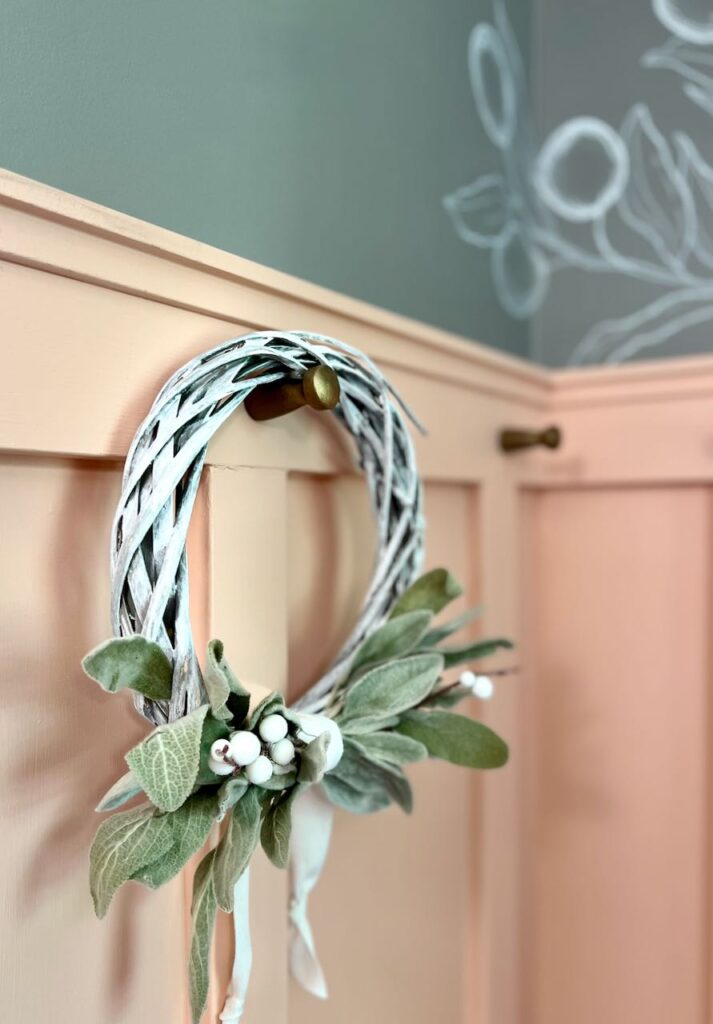
We added a board and batten accent on three walls.
This references the board and batten exterior of our house, but it also is more functional for our powder room to be used as a changing room for all our guests who come spend the day at the lake with us.
Change of clothes, beach towels, swim suits. The pegs work great for all of those.
Or for a sweet wreath.
In planning the board and batten, I was astounded by the number of questions I needed to answer to effectively plan the treatment. If you might be considering a wood accent wall, I created this checklist to help you out.
That color! That coral color! It’s was the biggest frustration of the entire remodel. So frustrating it almost became white. And I still think white would have been lovely, but we set out to add some. excitement, some unexpectedness to this room.
That’s the fun of powder rooms. You can do adventurous design in them. They are standalone rooms, and the decor can be also.
But if you need help picking colors for a small, single window room (this is the hardest kind of room as the light is radically different throughout the small room and throughout thee day. I made this blog post to help you discover your perfect shade of whatever color you are wanting.
Mural
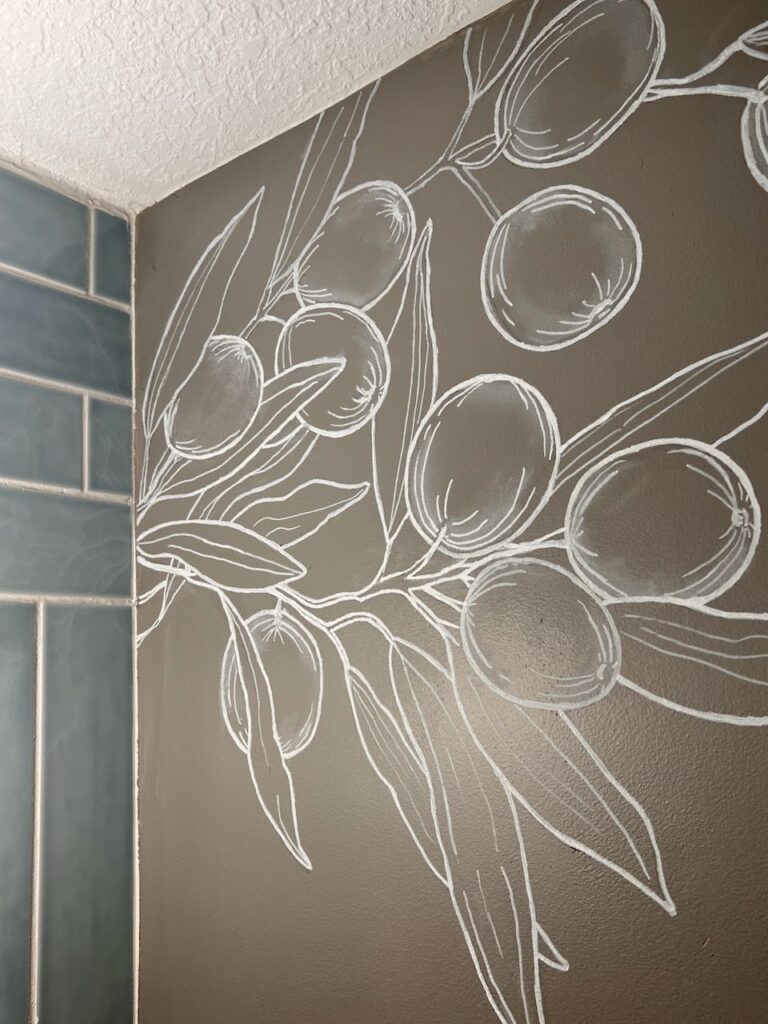
I wanted to add some unexpected softening, something with curves to break up all those straight lines.
I was going to try my hand at a giant, oversized flower or two, but then somewhere along the way, I settled on olive branches — the quintessential flora of the Mediterranean.
I’ve never tried this before. “It’s only paint! It’s only paint!” became my refrain. I could always paint over it.
I’ll be posting a how-to for this one also!
Decor Styling
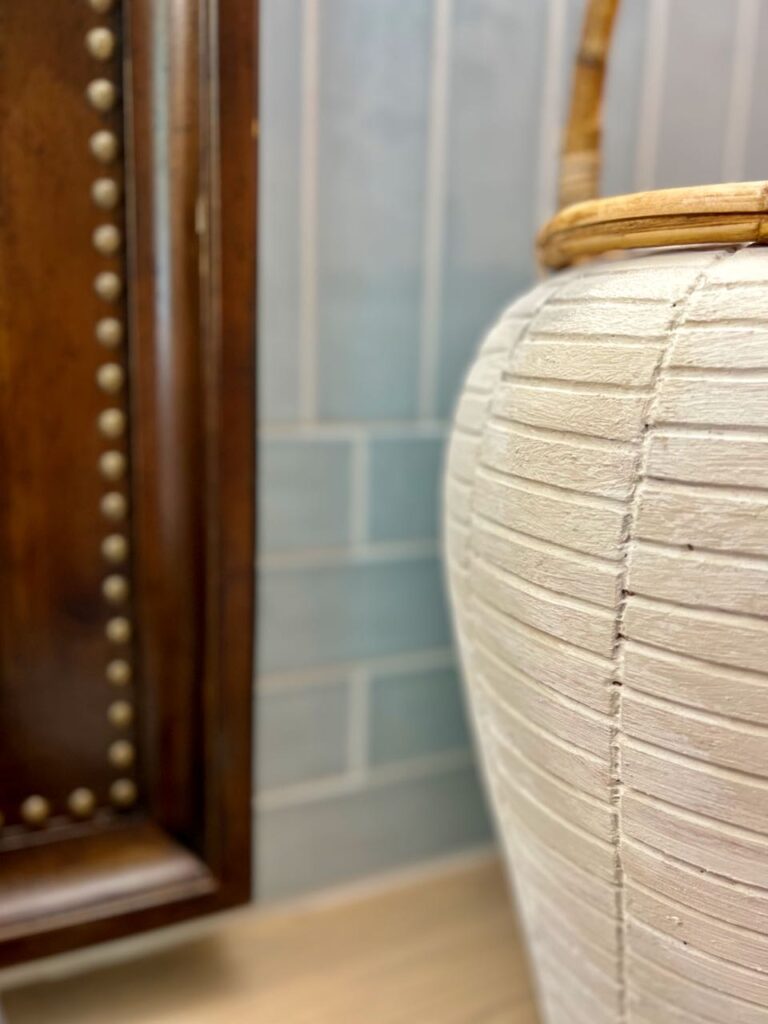
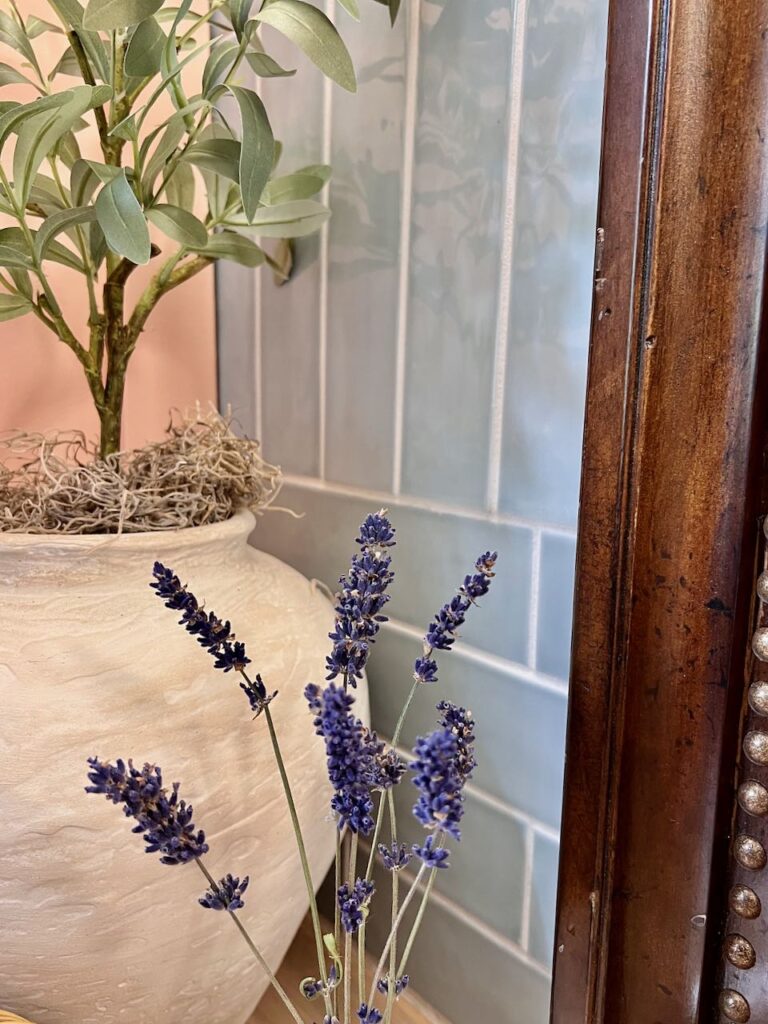
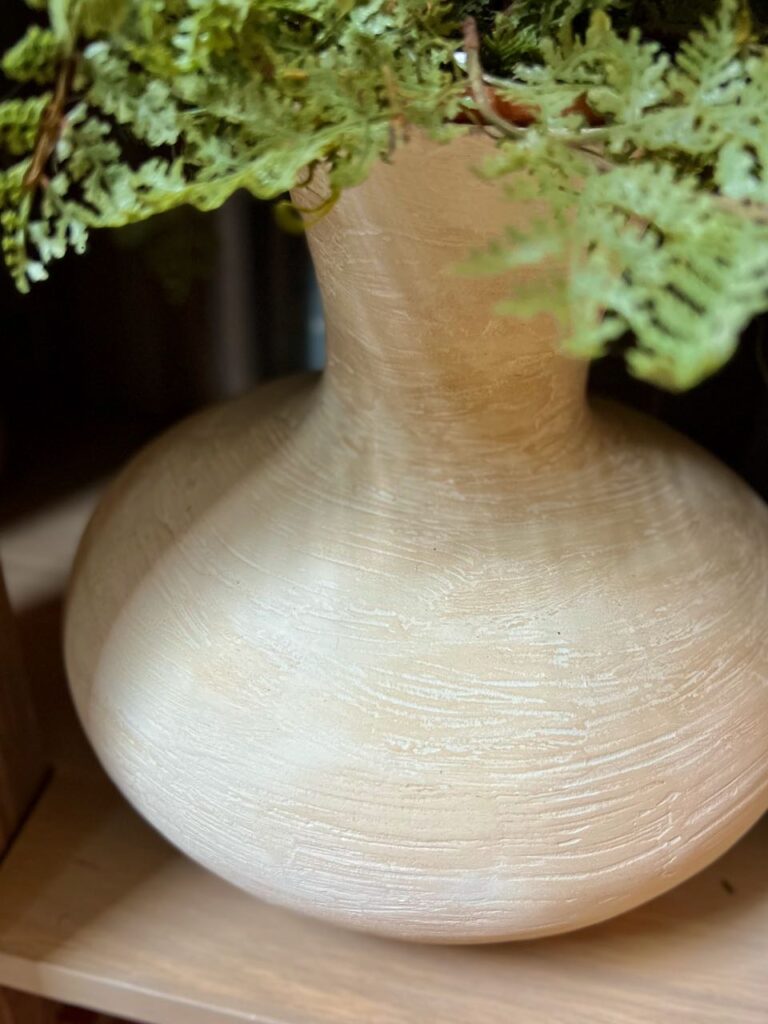
I love these pottery pieces! Aren’t they fabulous!!!
All three of them received a facelift bringing them to this new life — look just like the high end inspiration pieces that start at $79 and top out well over $300 each.
I’ll be sharing how I did each of these very soon!!!
Did You Catch the Recurring Theme?
YES! All DIY’S With How-To’s Coming Soon!
I hope you enjoyed this powder room reveal. We are thrilled with it. There were a LOT of projects going on in one little space.
Are you interested in any of the how-tos? Interested in more projects like these?
Then think about signing up for some inbox fun so you don’t miss out on any.
Of course, your email will never be shared or sold and you have complete control over your subscription at all times!
There’s a lot here! I get it.
So pin this to your
Before & After Board, or to your
Bathroom Board, or to your
Dream House Board, or to your
Vanity Board, or to your
Wall Treatment Board.
Pin it to whatever board makes sense for you.
(this helps me too, so, many thanks)
I also encourage you to jump over to the One Room Challenge and check out the other participants. So much incredible inspiration waiting there. They have all worked hard. If you see something that intriguing, interesting or inspiring, please take a moment to spread some love and leave them a comment.
As always, I appreciate you joining me here. Thanks from the bottom of my heart.

It turned out beautifully Diane! So many fun DIY projects and I can’t wait to see them all.
Thanks Lynn! That means a lot coming from you!!!
YEAH! So glad you approve. YES, those how-to’s will be coming along soon.
I can’t wait to see all your how to’s, especially on that vanity! It looks beautiful! 😍😍
Thanks Traci! We are thrilled with how it turned out. And you won’t believe what it’s made from.
Thanks Traci. You can bet the how-to’s will be coming along soon.
Wow! You have worked so hard! I love the tiles. They are gorgeous. I’m looking forward to seeing the DIY projects.
Thanks Renae! They will be along soon.
I love the watery feel of those tiles. I had to search high and low for that blue — my happy blue. There were lots of aqua and teal, but not as many options in more of a soft blue.
Diane, what an amazing job you did on this bathroom! That vanity is just stunning!
Thanks Cindy! We are thrilled and I am particularly thrilled to have YOU admire the vanity. Thanks for steering me to General Finishes!
Diane,
This gorgeous and love the tile. I’m with you, I often buy the shoes first too. When you see a piece, you love to grab it, or it could be gone.
Love the touch of lavender and the small addition to the wall.
You’re so kind!!!
I’m glad I have a kindred spirit!
What says Mediterranean more than lavender and olive branches?
Wow! This is an amazing makeover! I love everything about it, from the tile to the cabinet, and your mural! Great job! Enjoy your beautiful space! Blessings, Donna
Thanks so much Donna! We are very excited with how it all came together!
Diane, it is pure perfection! Every little detail is just gorgeous. You did an amazing job, well done!
Oh my goodness! That’s so sweet of you.
Wow! Diane, this is such an amazing transformation! I love the tile and all of the gorgeous details!
Gorgeous! And I love the Before pix – it’s so fun to see the transformation, and you did a fabulous job! Thanks for sharing it! 💛
Your bathroom turned out beautifully! I think my favorite parts are the vanity and tile!
This looks amazing! What a transformation!
Thanks so much Elizabeth. I’m so grateful that I signed onto One Room Challenge to hold my feet to the fire to take this on and get it done!
Absolutely love this design, please come and do my bathroom!
OH wow; what a beautiful remodel!
Thanks bunches Joanne! We are so pleased with how it turned out!
Have a wonderful weekend!
This update came out fabulous! Great job
Oodles of thanks Meagan! I appreciate you taking the time to comment!
Wow! Great make over full of inspiration too.
Thanks Linda! I sure appreciate hearing that. Hope you’re. having a great weekend.
Holy Crow! I am so impressed! It is a complete transformation. Fabulous job. Thank you for taking the time to share and photograph the changes.
Thanks so much Anna! You just made my day! Hope you have a day to match.
Hello,
I happened to find your site while searching for murals for my half bath. Do you still have the “how-to” olive branch mural posted? It’s very elegant and I’d love to give it a try.
Thank you!
Thanks Allison. I sure do and hope you give it a go.
https://southhousedesigns.com/line-art-wall-decor/
Don’t hesitate to reach out with any questions as you go along. I hope you’ll share pics with me that I might share to encourage others.
Thank you so much, Diane.