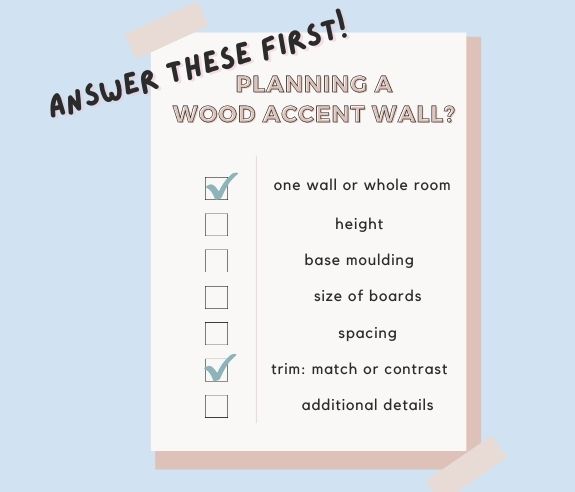
Design Decisions To Make For A Great Wood Accent Wall
The complete list of all the critical decisions to make when planning and installing a wood accent wall – help to make your wall a success!
It’s Week 3 of the One Room Challenge, ORC! I’m busy working on a wood accent wall treatment beyond the tile wall behind the sink
A wood accent wall seems pretty straight forward, right? I mean they are all over Pinterest, and certainly all over the home blogging world.
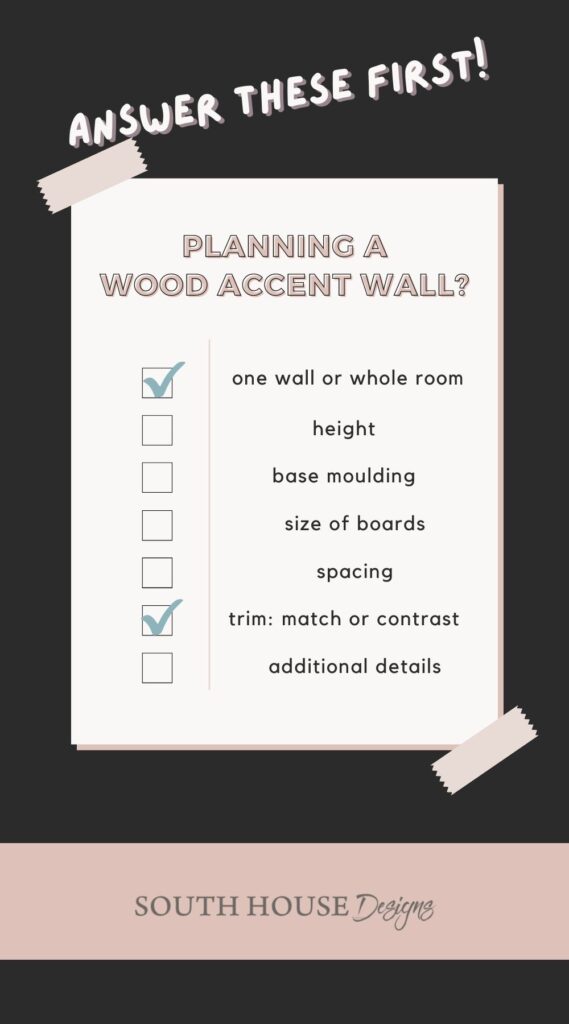
But look closely, and you’ll find a myriad of design questions you need to resolve before you begin installing.
And to make it even more confounding, there are truly no completely right or wrong answers. Just perhaps better answers for your situation and your style.
Let’s Take a Dive Into Wood Accent Walls-

There are so many styles of accent or feature walls, like this dining room wall we did in our daughter and “new” son’s home. Or this very functional book wall they also requested.
But for today’s exercise to help you assure a very successful accent wall, let’s keep it simple and focus on a board and batten wall. Actually a faux board and batten wall, because we are really just adding the battens to our sheetrock walls rather than true board walls.
But of course, these questions can also guide you through many versions of accent walls.
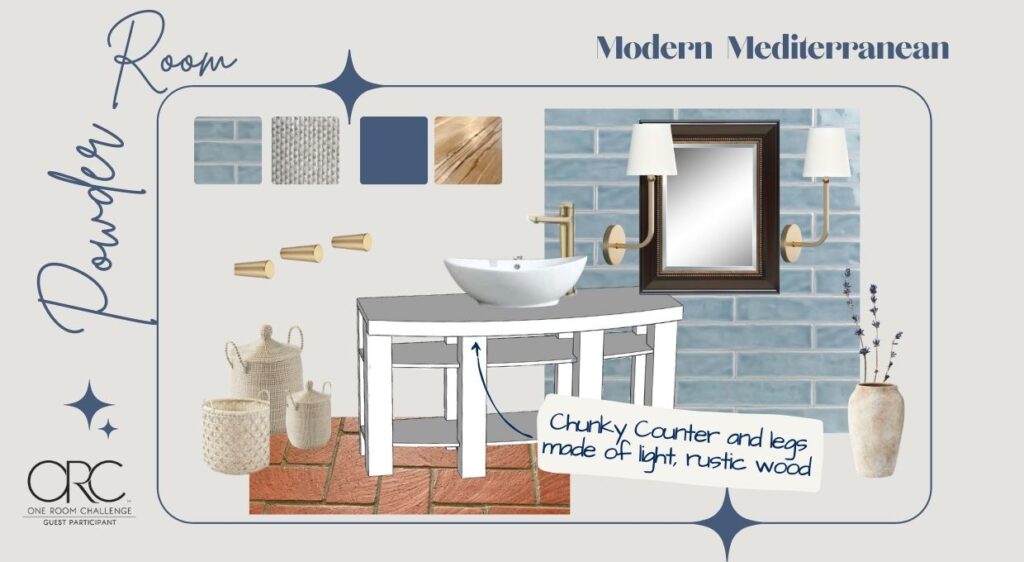
I’ll be answering each question along side you with our Modern Mediterranean Powder Room renovation as our goal. Here’s the original mood board (and the rather crazy starting point) for this reno.
1) Accent Wall or Walls?
First and foremost, is it one accent wall or are you wanting to wrap a room — or hallway or stairwell? A single wall is obviously smaller in scale and easier, particularly if said wall does not include doors or windows to plan around.
Our wood treatment will wrap three walls with the fourth wall, the sink wall, being floor to ceiling tile.
2) Height of Wood Accent Wall(s) – Floor to Ceiling, or Partial?
Decide your height. There are no real hard and fast rules. A single wall is often floor to ceiling. If more than one wall, then the accent is often treated as a wainscoting. Wainscoting used to be traditionally chair rail height, but lately wainscoting has grown taller and taller, just like drapes. It seems to add a sense of height to a room.
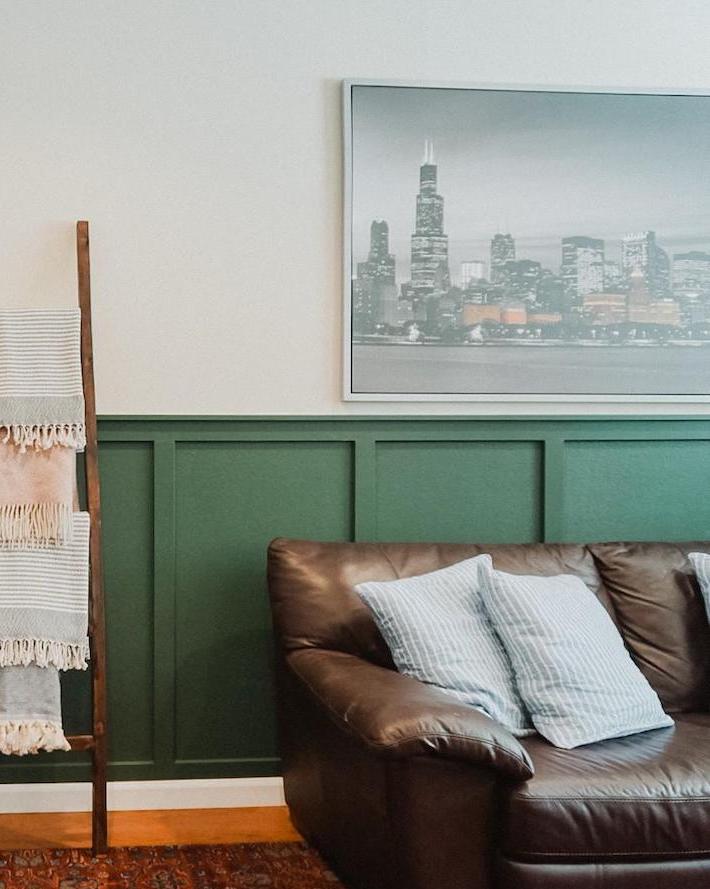
From Lynn at Living Large in a Small House, shared her niece’s home and the board and batten accent wall. Here the accent wall height complimented the couch and was low enough to accommodate the large artwork above.
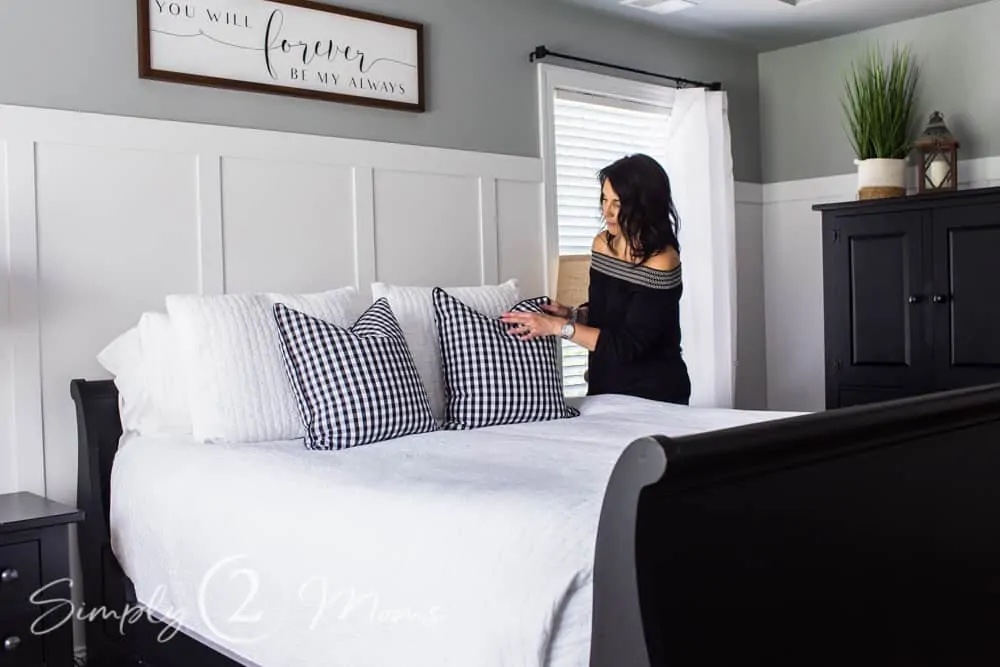
And here, AnnMarie’s bedroom, shows a taller version that compliments her tall windows and wardrobe, but still allows for a short, wide piece of artwok.
Look around and see if there is a natural break for the height. If you have sconces, you would not want them to break that line, but rather be mounted above the break or below the break so the fixture base is on the horizontal batten.
We want the Powder Room to go from floor to 62″ height. That is the midpoint height of the window. And the sconces will be installed above the height of the board and batten (although they will be on the tile wall)
This powder room is also our guests changing room when they come spend the day at the lake with us, We need to offer them any easy way to hang their towels and bathing suits as they change. This is a good height for that.
3) Trim – Replace or In Addition to Existing Base and/or Crown?
This could be determined by if your room is closed off or open to say a stairwell or part of an open floorplan, Is there a logical stopping and starting point for a new style of trim? If there isn’t, you may want to work with the trim you currently have and try to blend with it.
Our powder room is obviously a standalone room, separate from the remainder of that floor, so we are using the same MDF boards as our trim. This way our transition is seamless, our wall treatment is fully integrated and doesn’t look like an afterthought.

Here, AnnMarie of Simply 2 Moms, removed the base in her laundry room because she wanted her shiplap wall treatment to go all the way to the floor.
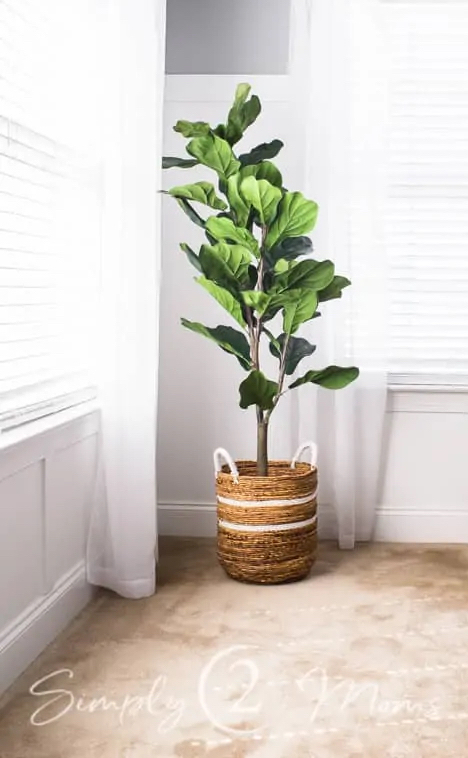
And then in her bedroom, AnnMarie chose to keep her existing base moulding. Her battens were thin enough that they didn’t protrude beyond the face of the moulding, so she chose this transition between the two.
And back to Lynn’s niece, she opted to retain her original base moulding and added a board and batten horizontal piece to it. Note how she also built this up around the steps.
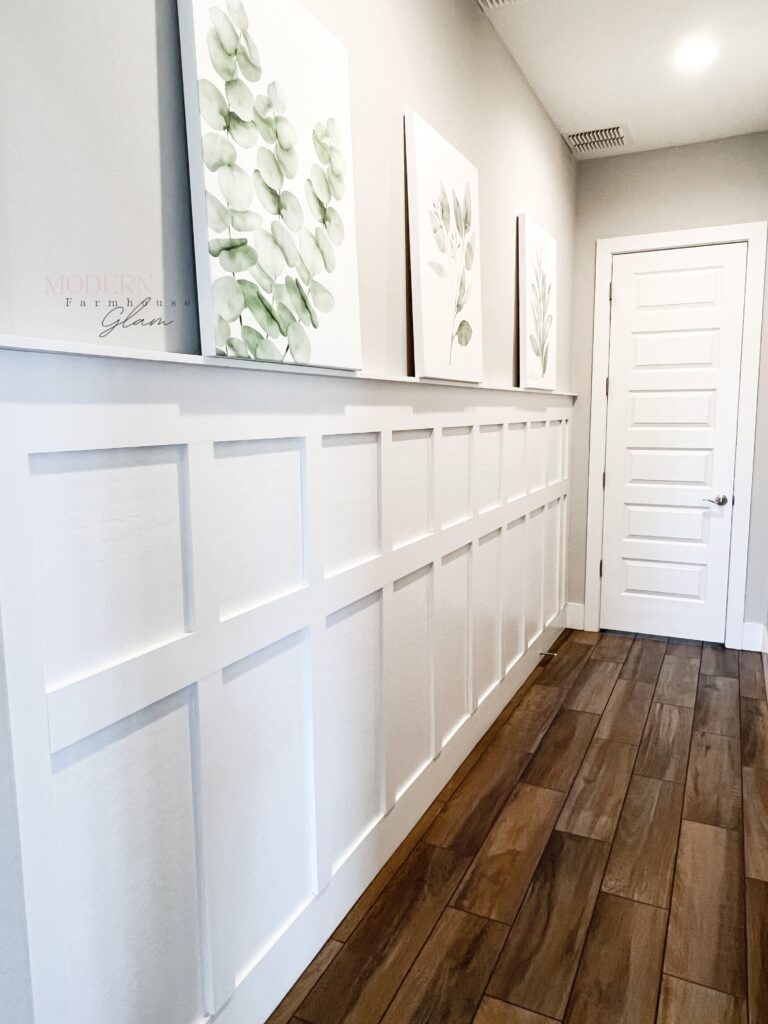
Here is another example of retaining the original baseboards. Here Amy from Modern Farmhouse Glam treated the original base moulding as the bottom horizontal piece of her board and batten rather than adding a board above the trim,
Look closely, she noted in her blog post that on this wall they used 5/8-inch battens so it extends over the original base a bit. In other rooms, she went with 1/2-inch battens so the vertical battens would match up with the original baseboards. You can see this in the next picture, question no. 5.
4) Size of Accent Boards?
This is where you have a lot of play to really impact your style and the final look of your room.
How busy, how much texture do you want it to be? What’s your style? Traditional? Playful? Bold?
Keep in mind the size of the room.
For us, our powder room is actually quite large for a powder room. But it’s still a rather small room. The tiles are slightly oversized and the vanity is open-shelving style with big chunky legs and an oversized vessel sink.
So it’s important that we use properly scaled wood accents.For the vertical battens, 1/2 x4-inch would be too wide for the size of the room. Conversely, 1/2 x 2-inch would be way too skimpy for the weight of the other components. So for we are going Goldilocks with 1/2 x 3-inch vertical battens. And our horizontals will be the 1/2 x 4-inch.
5) Spacing?
The spacing of your boards also determines the style or feel of the room. Large and oversized for a modern, bold aesthetic? Thinner and more closely placed can read more delicate or feminine.
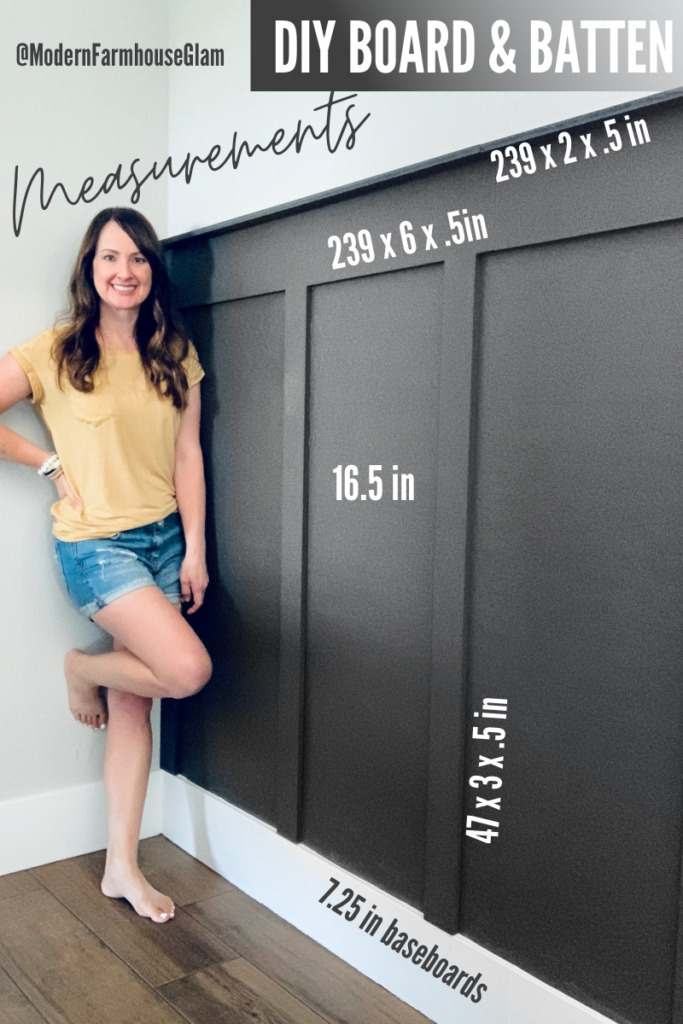
Above, Amy of Modern Farmhouse Glam, shares her choices in scale of trim pieces and spacing for her “Moody Board and Batten Accent Wall”. This is also a great example of the original baseboards being used and matching the other baseboards in the room and contrasting the accent wall. Keep this in mind with the Q no. 6, below.
Also, look at the placement of objects, such has windows, plumbing lines, wall lights, and the corners. Once again, there are no true and fast rules. In general, plan the layout to be most pleasing for the first wall you see as you enter the room, or the most prominent wall. Determine how many vertical pieces or repeats of an element you want across the length of that wall. Now factor an even spacing.
Take a similar size repeat onto the next wall. This wall, you do not necessarily have to have the same exact spacing, but something similar. If you have a window you are planning around, it is best if you have a full repeat centered on the window.
So in our example of a board and batten, we will have two vertical battens with our set spacing of approximately 9 inches between centered under the window.
Also. in our example, our vanity runs across the full width of the room. At the side walls the vanity sticks out 17.5 inches. So I do NOT want a batten falling along that same vertical line of 17.5 inches. We will have one in the corner. then the second batten will be about 11.5 to 13-inches with the next batten 21 to 23.5 inches. This means the edge of the counter will hit almost squarely between two battens.
How to plan the corners? Some like too have each adjoining wall in the corner have a batten butting up next to each other. This gives the corner more weight. I don’t think it’s a must. I may wait and see how straight the walls are as we start installing. If it squares up well, great. But if our old walls are a bit wonky, I’ll place thee first batten on the second wall about 9-inches over and that will be effective too.
6) Trim to Match Wood Accent Wall or Adjoining Trim?
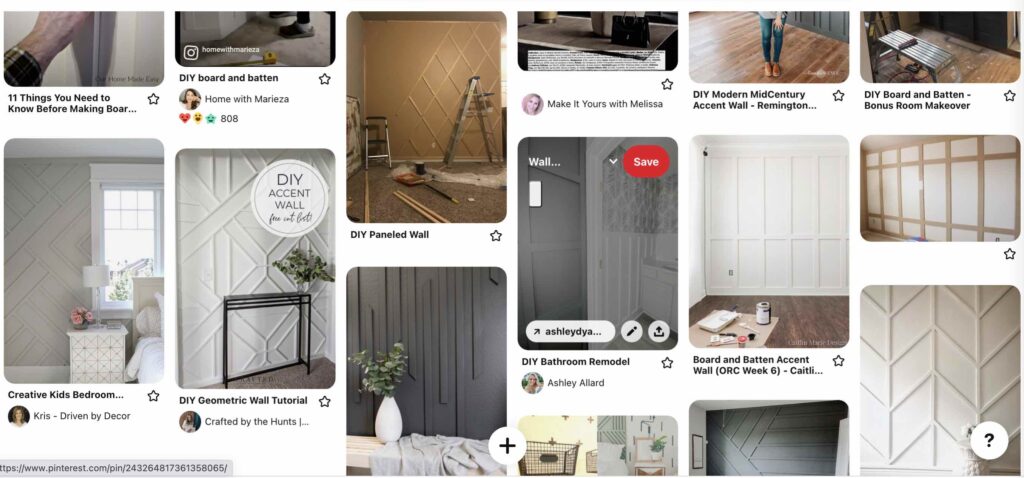
Repeating once again: There are so many options, and no specific rules! Just take a look at one of my Pinterest boards.
To blend or to contrast? There are so many fun options here! Typically with feature walls are created with wood trim, the accent boards are painted the same color as the background wall. But they don’t always have to be, do them? Ombre shading? Color blocking? Stained wood on a painted wall?
I am very partial to the tailored look of the top horizontal rail with a narrow ledge and a bit of cove moulding all in stained wood over the painted wall and base.
However, in our small powder room, the door and casing are a deep mahogany, like the rest of the house. The open shelving vanity and counter top will be getting a rustic, weathered treatment. so we felt a third stained wood treatment would just be too much!
Because our powder room will have a tile wall and three walls of wood board and batten accents with a dramatic wall treatment above the board and batten, we wanted to minimize the busy-ness. So all the board and batten, including the base will be painted one color and we will also be painting the window trim and the window mullions the same color — integrating the window into the wall treatment.
7) Additional Accent Wall Details?
Will you be adding any hardware to your accent walls? Any contour to your accent wood pieces?
We are adding modern pegs all around our board and batten for the needed functionality. We are also planning to have a thin ledge on top with a bit of cove detailing, but will paint them to match the board and batten to emphasize texture, but not pattern and contrast.
A Basic Accent Wall. Simple, Right?
Actually, the installation is quite simple and the impact can be enormous. It’s really just a matter of answering the above questions.
And these questions are exactly why wood accent walls, or feature walls are so popular. Without a lot of expense or fancy tools, you can create the perfect custom look for your home and your style!
How to Install Your Wood Accent Wall?
In a nutshell, a level, a miter saw, a nail gun (or brad nailer) a spacing jig, and caulk are your best friends!
If you have horizontal wood pieces, start with those, making sure they are absolutely level.
Then pick your starting point and cut each vertical board individually measuring and marking carefully. Install that piece with a level to make sure it is absolutely plumb.
If you have a long wall(s), a spacing jig will save tons of time. See how we used one in multiple ways on this dining room feature wall.
Once all your trim pieces are installed, don’t skip the caulking. It’s time consuming, but particularly critical if you are painting a light color. You want to run a bead of caulk everywhere that a trim board meets the wall. This makes for a polished, professional-looking project.
Frequently Asked Questions:
Do The Boards Have To Be On Studs?
In a perfect world, yes. But there would be very few designs where the boards would line up with the wall studs. It is smart practice for the horizontal boards that might be passing over studs, to use those studs for nail placement.
Do I Need To Use Adhesive Also?
Some advise adhesive, particularly if you have kiddos who might be inclined to see this as their personal climbing wall. The downside to adhesive, is that when you are ready to change this wall treatment, you will probably need extensive sheetrock repair.
We did not use adhesive on the dining room feature wall. I do not anticipate using it on this powder room wall. This is the functional reason for placing our pegs in the horizontal boards that will be nailed to studs. Fortunately, I also like that style best, too.
I would NOT advise adding hooks or pegs to a wood accent piece that is not nailed into a stud or wood glued with brad nails.
How Should I Design Around a Corner?
Do what looks good to your eye.
I’ve seen some that in my example of board and batten two vertical pieces meet at the corner. I’ve also seen some where only one meets at the corner and the next batten has the typical spacing out from the corner. And even several examples where part of their typical spacing laid on each side of the corner.
All are acceptable as long as you make it look intentional to your design and not oddly random.
I can’t think of an example where a horizontal element does not continue around the corner at the same height. Doesn’t mean it is totally wrong, just that it wouldn’t happen in my design eye.
I hope this list of design questions helps you feel encouraged and trusting of your own style. I hope you are empowered to go forth and accent away. Life is too short for boring walls!

Be sure to hop over to the One Room Challenge — Week Three Blog Post for all the fun of so many transformations taking shape. Be sure to take a moment to send words of encouragement to some of your favorites.
As always, please do not hesitate to shoot me a question or let me know if I missed a question that should be added to this list.
Our powder room wall will be appearing soon in the One Room Challenge, so be sure to check back with me. And follow along on IG and FB to see how this room is progressing.

This reminds me to search for stained trim pictures to see what will look right in my bathroom! 🙂
It’s always fun to dive in and see what others have done to see what might work best for you.
This was very helpful! Thank you!
I wished I’d had this list when I started working out the plan for my walls. Hope it helps!!!
I love board and batten walls but I don’t have continuous wall anywhere in my house where it might make sense. Maybe Emma’s room when she moves out this summer 🙂
Thanks for showing off my nieces handiwork.
such an amazing, informative post, Diane! Thanks for sharing all the tips! Who knew there was so much to consider!
I didn’t know there were so many details to consider until I got into the weeds with my ORC wall. Wished I had a list to start with, so hoping it might help others out.
Diane, thanks so much for sharing so much helpful information! I can’t wait to see how your wood accent wall turns out!!
Hi Diane! I am very interested in doing a wood accent wall in my home but didn’t know where to begin! Thanks for all the great info and checklist! I’m pinning this now to use in the future! Donna
So many designs have the single horizontal rail at the top, which looks great, but I already have crown moulding trim at the top all the way around the room. Is there a way to incorporate the existing crown at the top that makes sense?
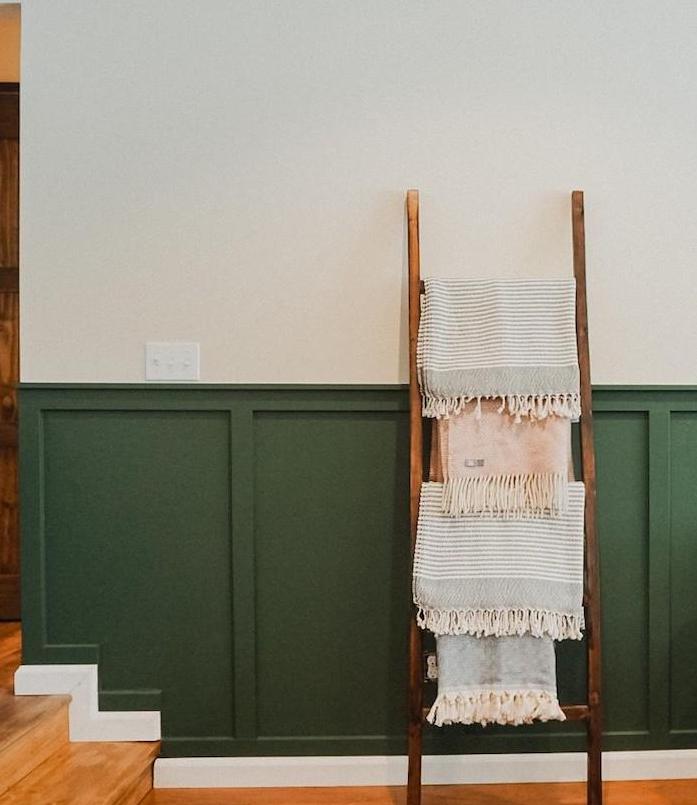
Hi Tracy, I think it sounds like you are wanting something other than the partial height traditional board and batten look. You can certainly take the vertical board and batten all the way up to your crown. Just be careful and determine how the two will meet. If the crown has a flat, vs, rounded, base, then just make sure your vertical pieces are the same depth. If you are looking for something different, like the green dining room wall we did, we determined the base and the crown would not meet up with our vertical trim boards gracefully due to their rounded profiles. So we chose vertical boards that had softer, slightly rounded edges and installed so they did not meet either the base or the crown.
I hope this helps.
This is a great guide. I am happy to learn more from you!
I absolutely love the tips you shared for designing a wood accent wall! The suggestions on choosing the right wood type and finish were particularly helpful. I never thought about how different textures could impact the overall feel of the room. Can’t wait to try some of these ideas in my own home! Thanks for the inspiration!
Glad to inspire and hopefully simplify the process a bit. Learn from my trial and error.