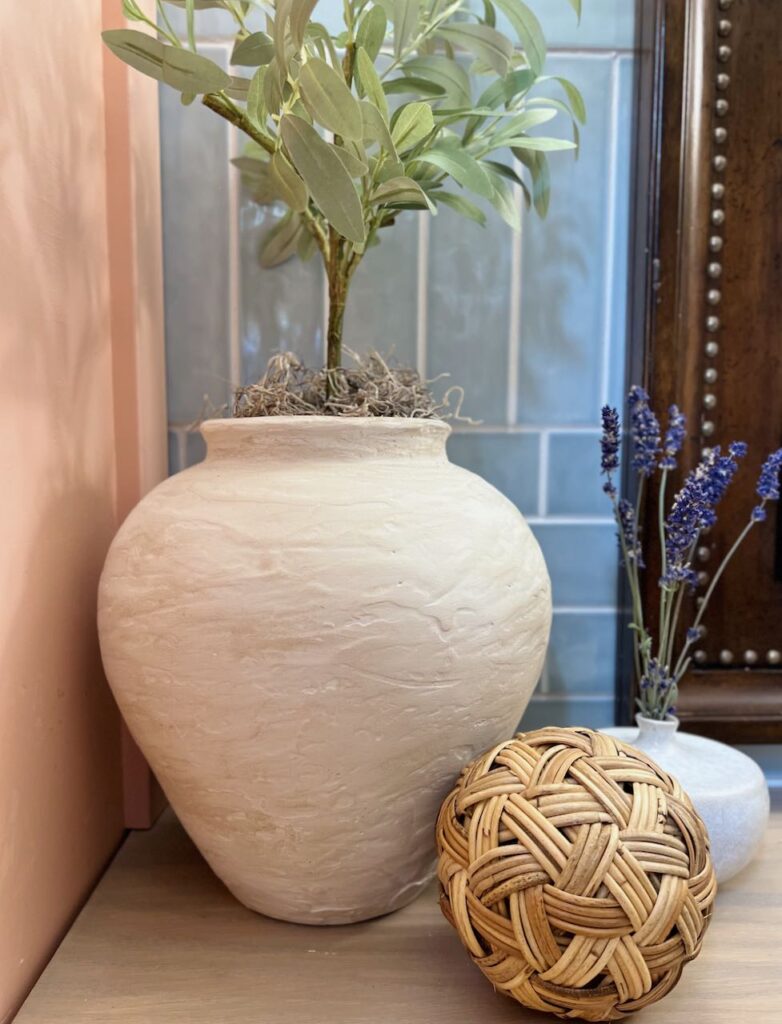
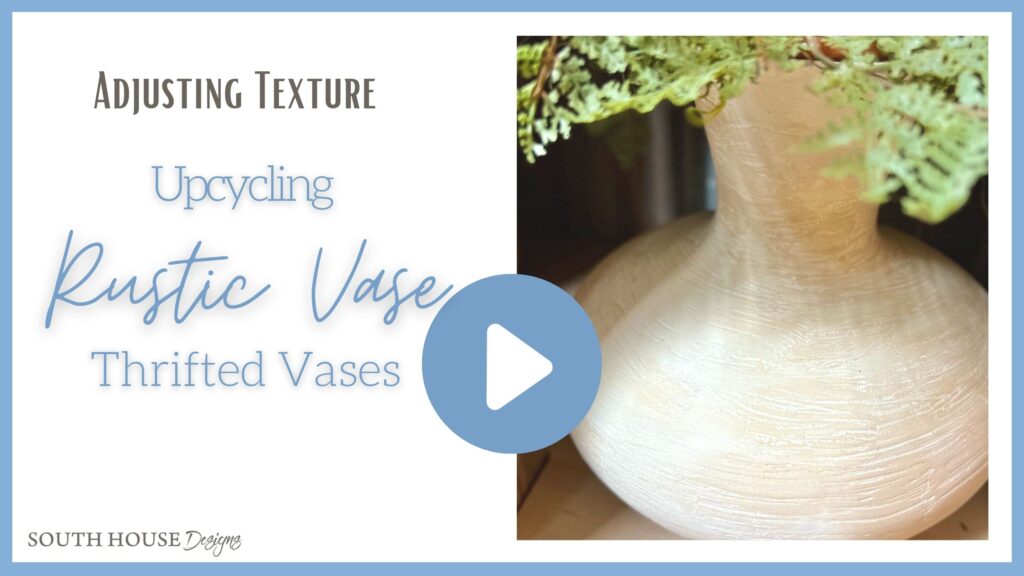
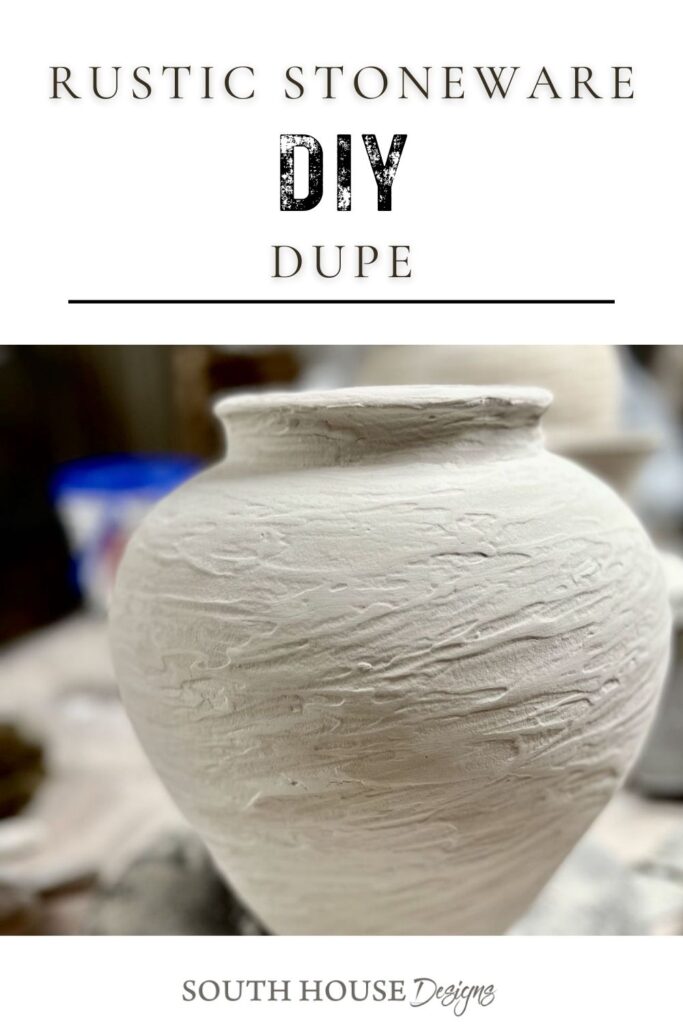
Yes! It’s Easy to Dupe an Artisan Rustic Vase
Turn thrifted vases into rustic vase pottery Restoration Hardware and Pottery Barn dupes. Great look! Great value! And such fun to do.
Artisan pottery with a rustic look, specifically a rustic vase, is everywhere! But with a price!
So let’s see what we can do about that! We want the look, but without foregoing food this week, right?
You have come to the right place. Before long, we’ll have our pottery and still be eating, too!
But First, a Bit of Background-
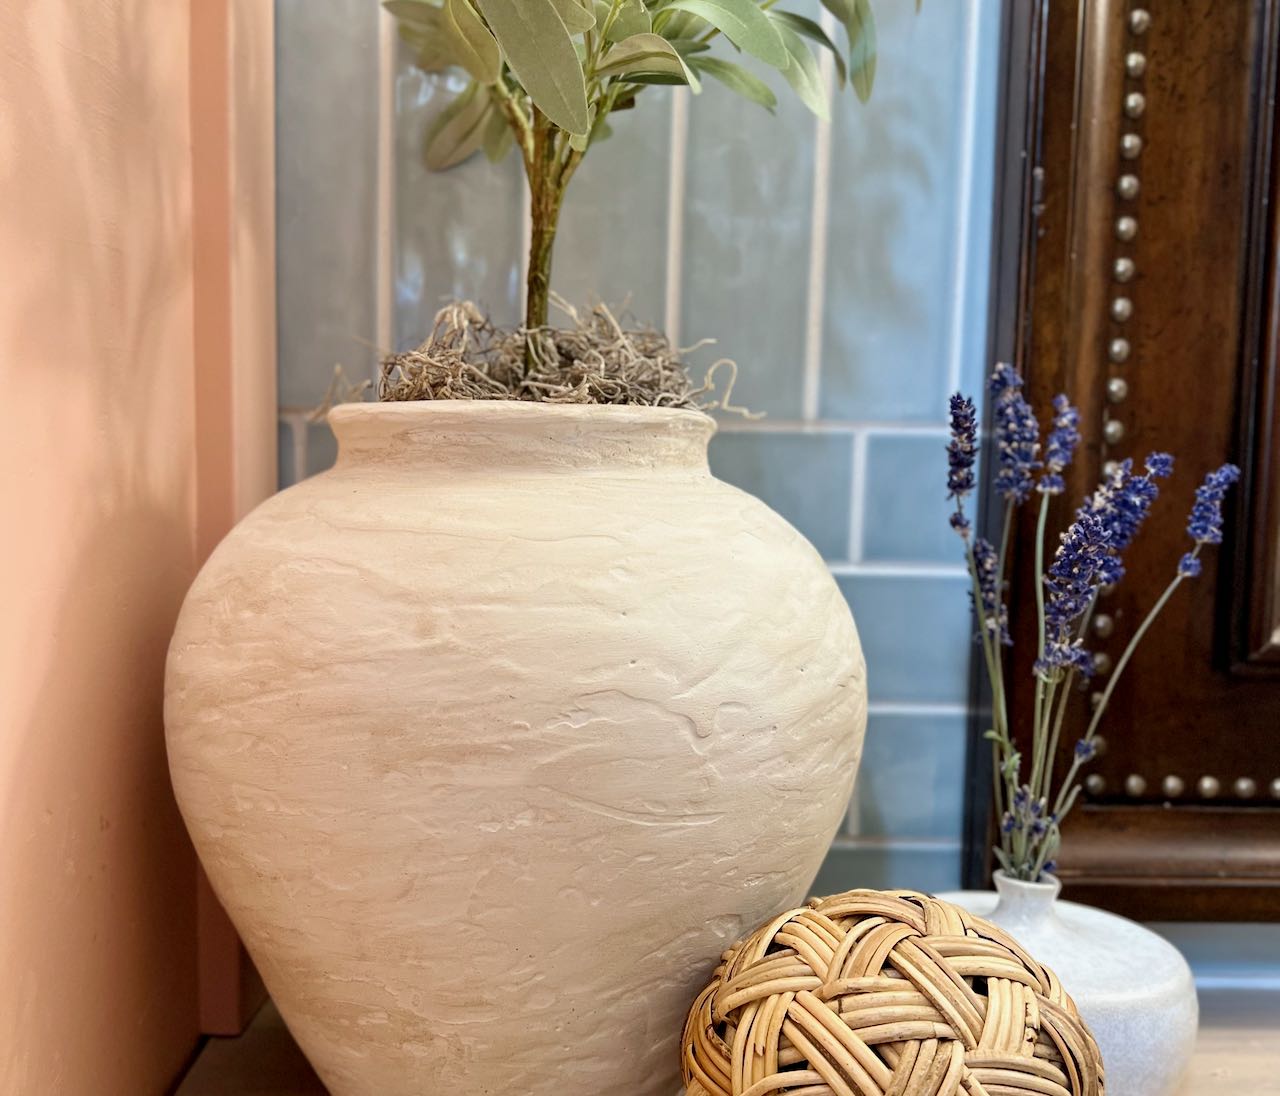
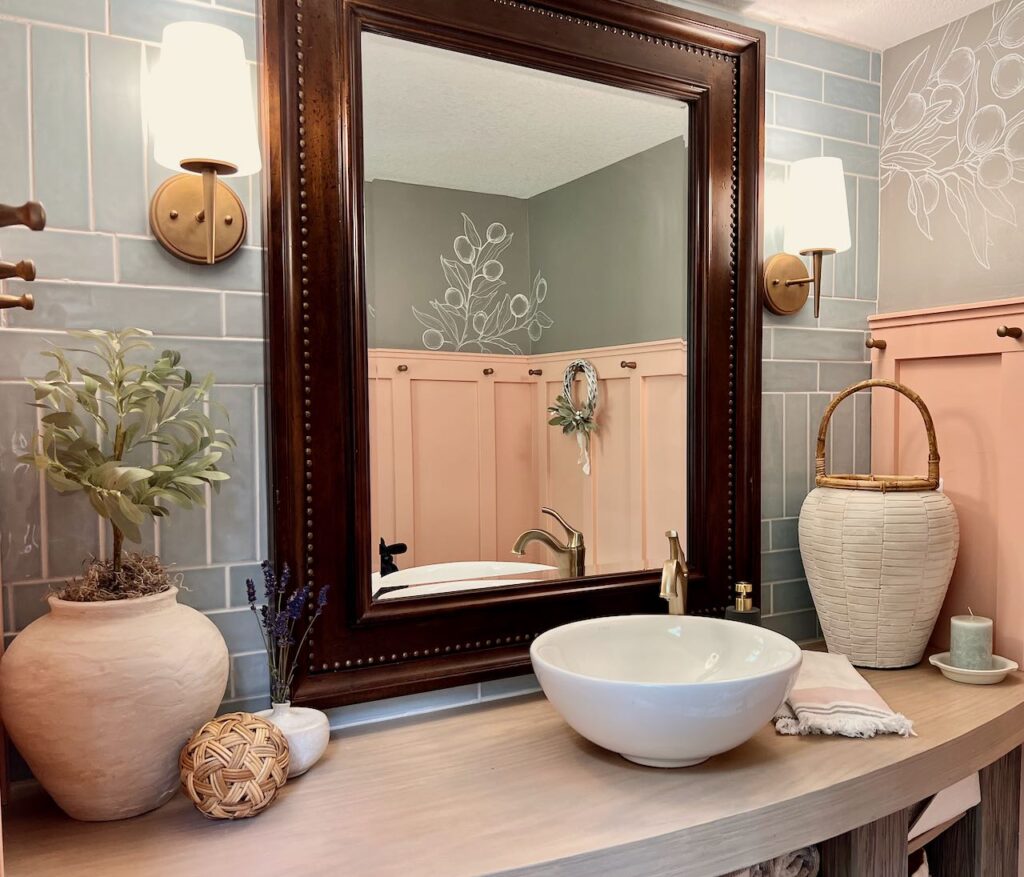
We remodeled our Powder Room for our first One room Challenge.
- Here is the before and the our inspiration board.
- Here is a post about all the decisions that need to be made before starting a wood accent wall.
- Here are tips to help when choosing the “right” paint color.
- The reveal is here.
- How we built the open shelf vanity and countertop is here.
- Then how I finished and sealed the vanity is here.
- Here are all the tricks I learned tiling for the first time.
- Here is the line art wall mural I added for a modern take on an old Mediterranean fresco.
Now you’re all caught up!
Before we get into the details, here’s a pin that you might want to save before you get too excited and you forget.
Save it to your Stoneware board, or
your Decorative Accessories Board, or
your Best Dupes Board, or
your Upcycling Board.
Just save it where you know you’ll be able to find it and share it.

Let’s Get Started Making Your Own Rustic Vase and Rustic Urn-
Gather Your Supplies-
You’ll need:
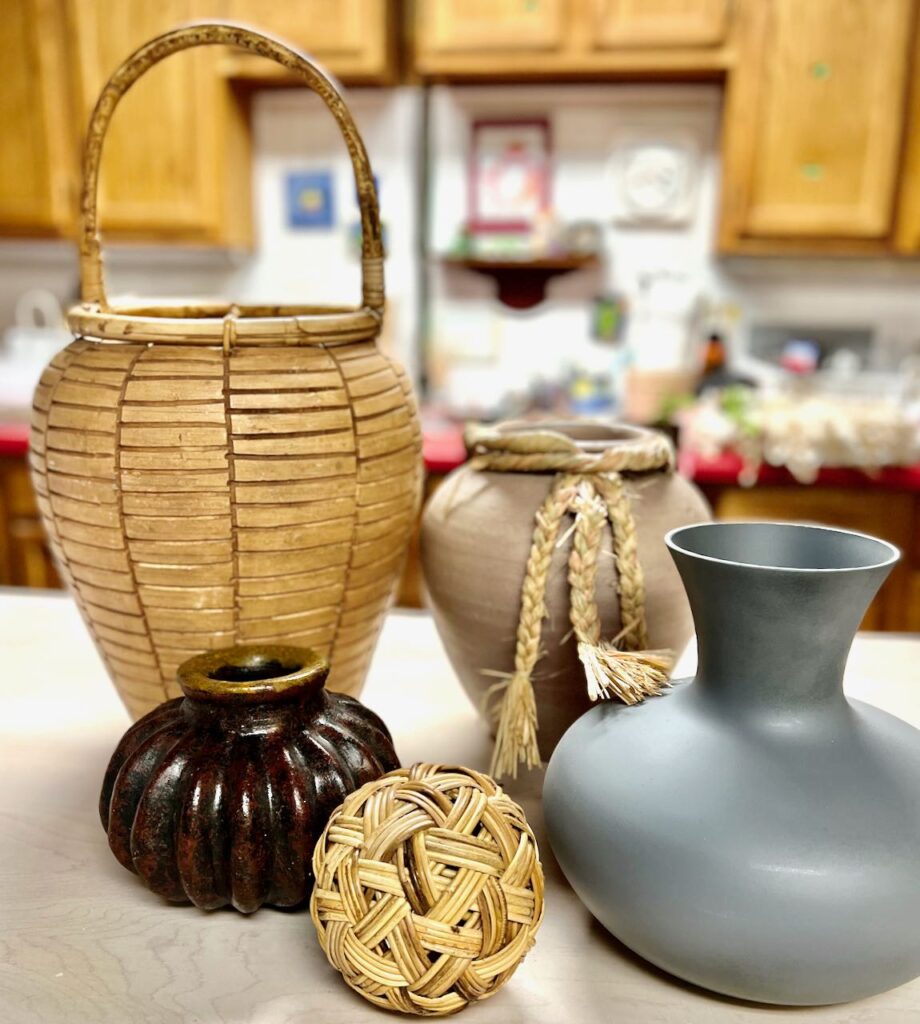
- Forlorn vases, urns or planters that have great shape and size
- Chalk paint or acrylic paints
- A texture additive (Joint Compound, thinset, sand, baking soda, calcium carbonate, or plaster of paris) I have used all of these at one time or another. I keep coming back to Joint Compound, Read below for my reasons.
- Primer spray paint, optional
- Paste Wax or matte sealer, optional
- Disposable bowls or tubs for mixing
- Wood stir sticks for mixing
- Gloves, optional
- Foam brushes and rags
- lazy susan, optional
- Protective covering for your work surface
Preparing a Base For the Rustic Texture-
Every good transformation requires a good base, right?
If your vase or urn is slick, shiny, glass or plastic, you’ll be happier with the end result if you add a primer. This helps your heavy texture coats cling onto the otherwise slick surface.
The grey vase on the right is glass and it was green. Here I had sprayed it with a grey primer. (I needed something to demonstrate my homemade spray tent, so I grabbed this vase that was waiting at hand)
Spray or brush? It doesn’t really matter. Use whatever you have on hand.
This is one of the rare times, you don’t need to worry about brushstrokes. So if you have always pined for the opportunity to brush with abandon. This is it! Seize this day and toss caution to the wind.
If your destined-for-new-life vessel has a detail that you need to protect from paint and goo, now is the time to cover it. For me, I needed to wrap the bamboo trim on the tall urn with painter’s tape.
I was so excited to get started on this motley assortment, I didn’t even give it a thought and then had to stop halfway through and regroup. ugh!
Texture Talk-
(Not Quite as Deep and Intellectual as a TED Talk)
In the supply list, I included:
A texture additive (Joint Compound, thinset, sand, baking soda, calcium carbonate, or plaster of paris)
If you’re a crafting nerd, you may recognize that three of those — baking soda, calcium carbonate and plaster of paris — are often suggested as the secret to making your own chalk paint.
This was before the day that paint companies realized that chalk paint was not going away quickly and we wanted it in every color imaginable. So we figured out how to make our own.
The reason they work for making chalk paint is exactly the reason I tend not to use them for building up texture. They are meant to dissolve in the paint giving it strength, but achieving a smooth surface.
Joint compound (JC) and thinset are intended to fill holes, cracks, divets and be sticky. Sounds perfect for a rustic vase or stoneware vessels in general! This is the specific JC I like to use.
If you plan on using your vessel outside, unprotected, I suggest a thin set mortar mix that you would find in the tiling section. Just make sure that you include the additive if you need it for exterior use.
For interior and protected porches, I’ve been using joint compound for years. This fireplace surround was my first, then these birdbaths, even this “slipcover” for a fireplace surround.
Joint Compound is one of my secret weapons that just keeps popping up in my crafting.
JC Pros:
- readily available
- inexpensive
- versatile
- easily thins with water
- easily mixes with chalk paint and all latex paints
- easy to add texture
- easy to reduce texture by sanding
JC Con:
- it may crack as it dries if you put it on too thick
The Prevention: thin layers.
The Remedy: If it does crack and you don’t like it, just sand it down a bit and add a fresh thin coat if needed.
This concludes our Texture Talk.
How to Make a Vase Look Rustic-
Better Stated: How to Paint a Vase to Look Rustic
Notice with the steps below, the last three are optional.
Yes! This is an extremely flexible process. Relax and have fun with it.
No two vessels will turn out the same. That’s as it should be! You are not mass-producing. You are now an artist creating one-of-a-kind artisan crafted vessels.
Don’t let that title, “Artist” intimidate you. Wear it proudly. It just means you are creating something that is pleasing to you! Don’t worry about anyone else. This is for you!
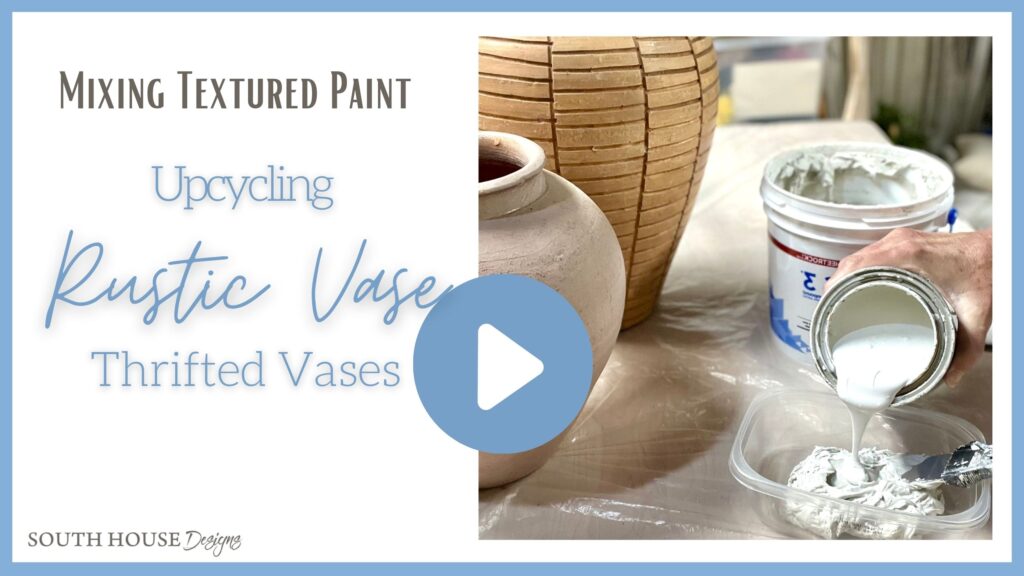
1) Mix Your Stoneware Dupe’s Base Textured Paint Layer-
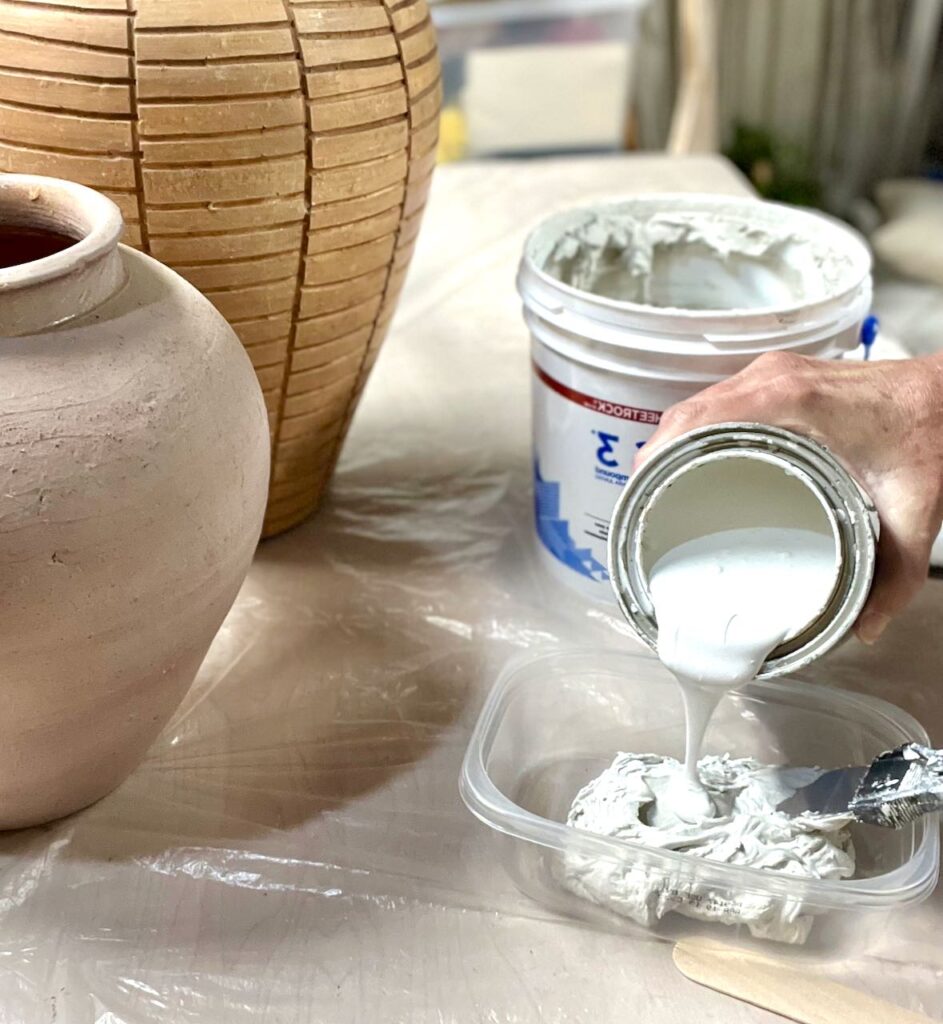
Scoop a generous mound of JC into a disposable tub.
Pour in enough paint for the color you want as your base and to achieve a consistency of frosting. Peanut butter is too thick.
TIP: use enough paint to achieve the color you want, and if you need to thin your JC more use a tiny bit of water (so much less expensive than good paint).
Mix thoroughly!
2) Apply Your Textured Paint to Your Thrifted Vase-
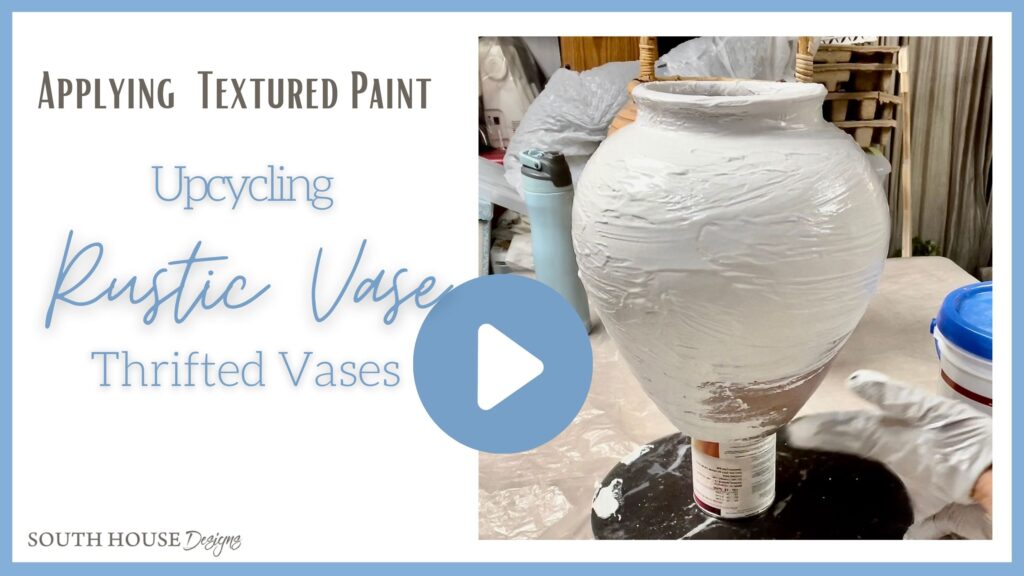
Use your hands, with gloves or just wet fingers. Or use a foam brush.
Elevate your vessel to get your textured paint under the lip of the base.
Apply a coat of your base color
If you have one, try a lazy susan to easily see all sides.
3) Apply a Second Color, Optional
If you want to add another shade or color for a bit of extra richness, you do not necessarily have to wait for the first coat to be completely dry.
For a touch of warmth, I mixed a bit of cocoa Jolie chalk paint into the original tub and applied that haphazardly over the original cream. Then I let them dry completely.
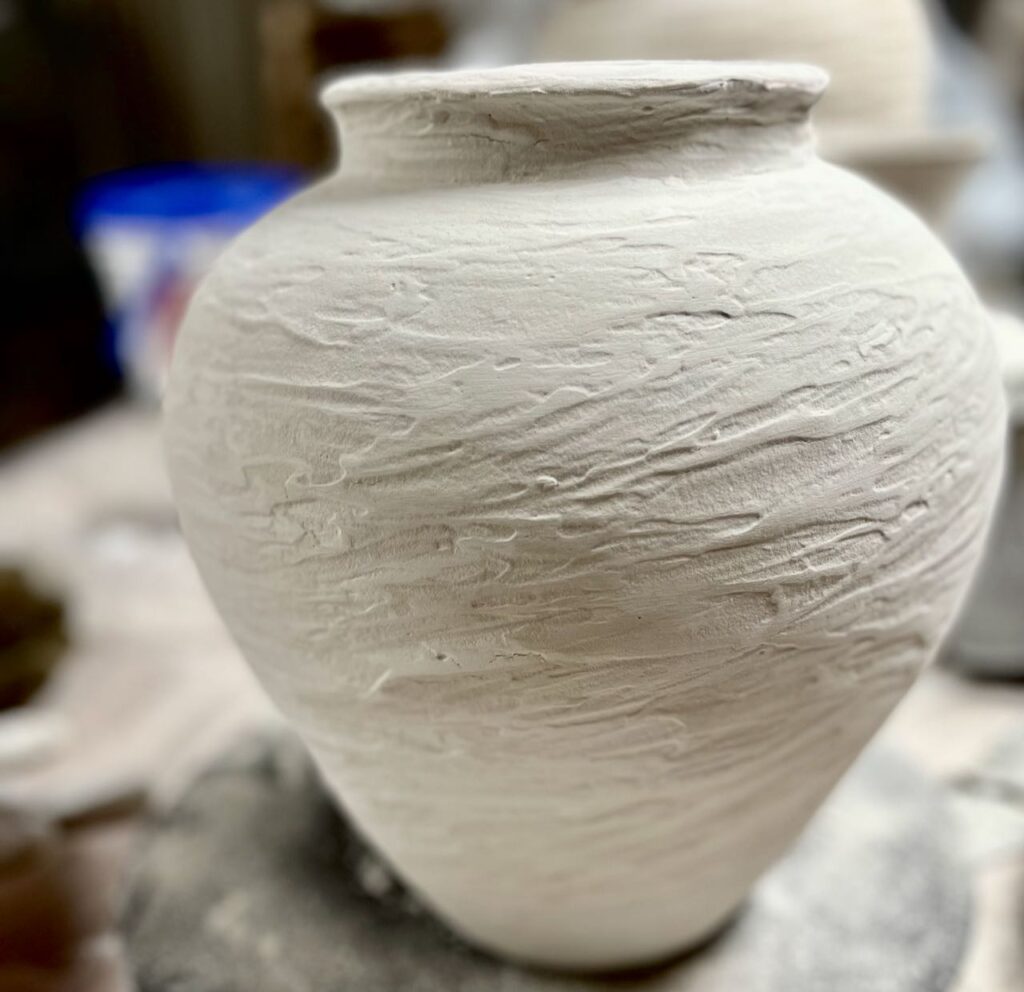
4) Adjust Your Rustic Urns’ Texture, Optional
If you want to add a bit of texture do this before your “paint” is fully dry. Alternatively, you can always add another thin layer that you texturize as you go.
For instance, I wanted this fireplace surround to have the look of cast concrete. I discovered if i applied a tile sponge to the semi-wet JC, the dipples left behind were a great match.
Is you want to reduce the amount of texture, when the JC is partially dry, you can smooth it down running wet fingers over it.
Or here I used a sanding block with 60 grit sandpaper to smooth the dry JC:
5) Let Your Rustic Vase Dry-
6) Wax or Seal, Optional
You’ll probably want to finish your faux pottery treatment with some kind of sealant. The fireplace I sealed with Dead Flat Varnish from Modern Masters. They offer interior and exterior versions.
This rustic vase received an aged wax treatment.
SUPER TIP: Did you know you can color your own wax? Yes! Truly you can. I use old school Johnson Paste Wax and add a small squirt of latex craft paint from my stash. Mix it well and apply like you normally would. Let it dry and then buff.
Here’s a short 40-second clip showing mixing and applying the wax:

That’s it!
It’s a super forgiving craft with great results.
Here is another urn that has a great bamboo handle, terrific shape and texture. It just needed a fresh color that worked for us.
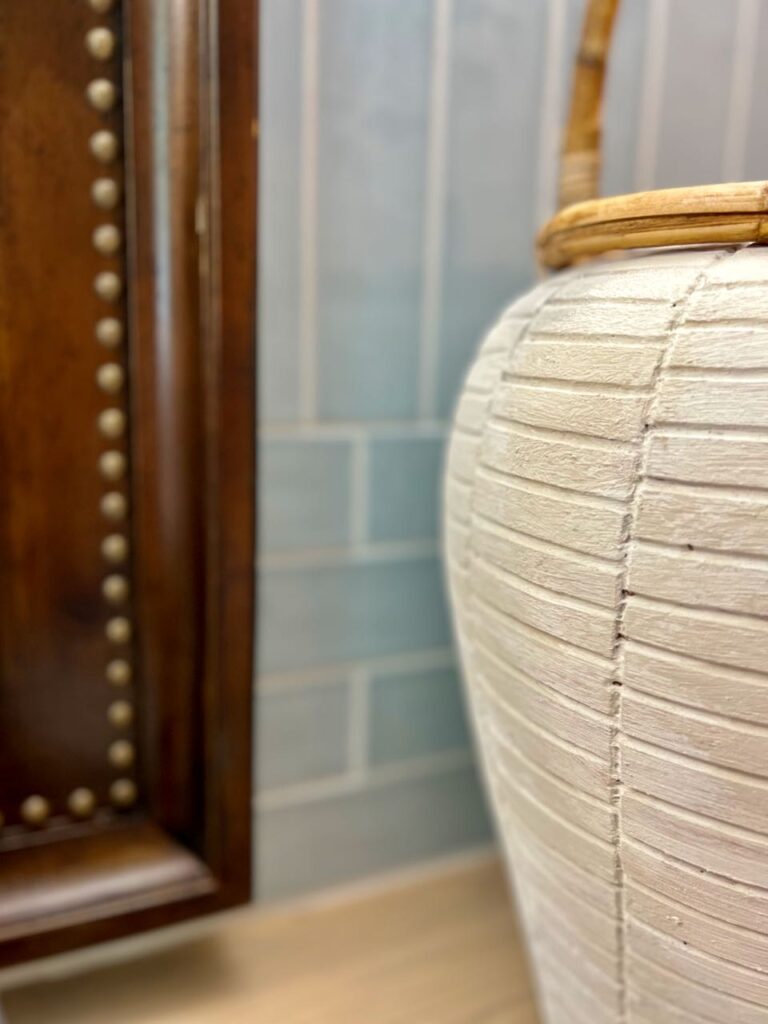
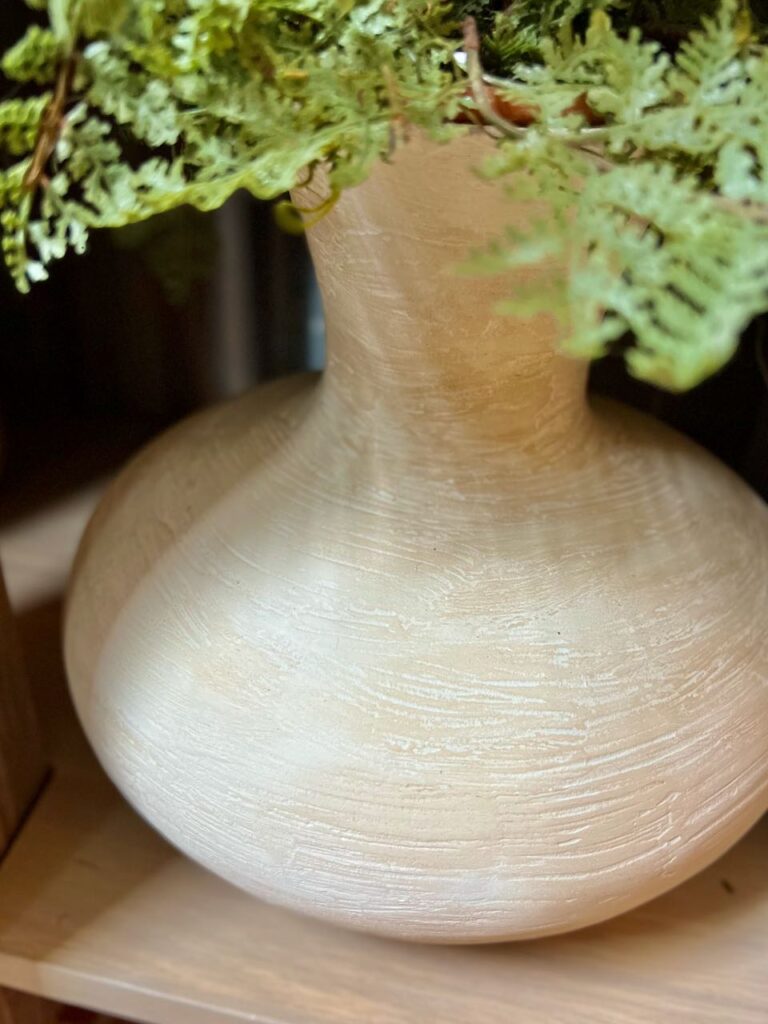
I used the same technique, but made the “paint” a tiny bit thinner to easier fill between the grooves and show the original texture. And since I wanted even more texture, I used a cheap chip brush for more variation.
I also applied several shades, one right after the other.
I am absolutely crazy about how they turned out. All three cost me a total $9.75.
That’s my kind of savings when you consider a big name rustic vase or urn runs from $79 to $289 each!!!

Here’s another pin to save to be sure to find this info again.
I hope this little project has inspired you. If you need some examples to dupe, check these out, and these, these, and these.
All wonderfully rustic, all unique. And every one of them can be duped by altering the colors and the textures, but using these same basic steps.
As always, don’t hesitate to reach out with any questions. PLEASE share with your friends and send me pics of what you do!

These are all gorgeous Diane! I agree with you about using chalk or baking soda for the texture. The joint compound definitely works better!
Thanks Cindy! So glad to be reinforced by a real pro!
These are fantastic, Diane!! I just love this idea, and think I just might try it myself! Happy Weekend!!
I hope you do Kim! Send pics my way when you do. I’d love to share them.
These look so good. Since the wax or seal is optional, would I get chalky fingers when I touch the base after is dry? Thank you
Hi There! No, the paint leaves a chalky look, but it does not come off. However, without anything to seal the paint, it can be easily stained due to its porous nature. It can be a matte finish. But if the pot will sit away from possible splatters, curious fingers, etc. you can certainly go without a sealer.