
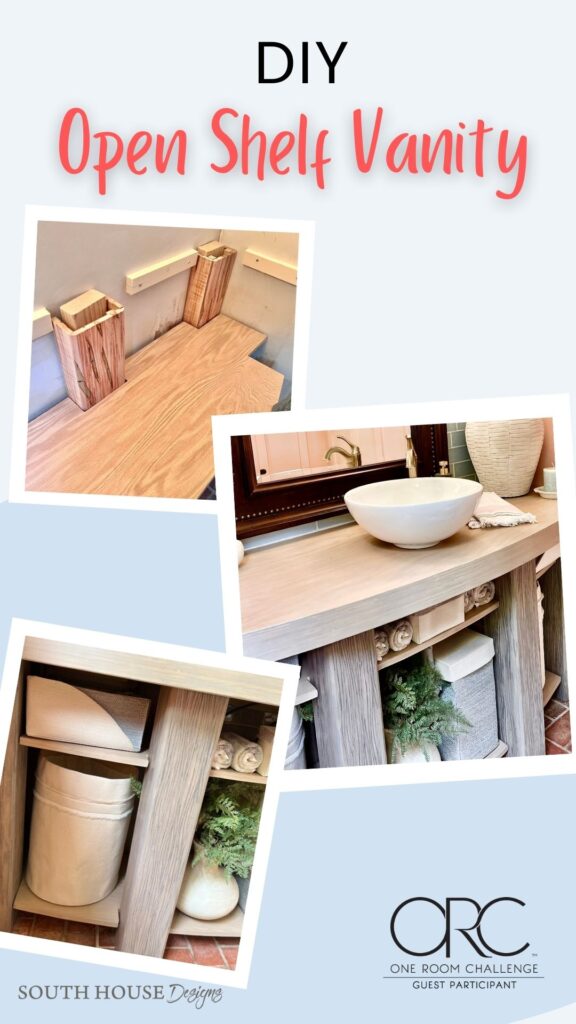
How To Build an Open Shelf Bathroom Vanity
It can be easy to DIY a custom open shelf bathroom vanity. Get the look you want – size, height, material, wood grain, color, etc. Have it all!
Bathroom Vanities come in a multitude of stripes. And there are four basic sources;
- stock vanities you can order in standard sizes and finishes
- custom ordered from a cabinetmaker to meet all your specs, except perhaps the budget
- Made from another piece of furniture
- a DIY Built Vanity
Today we’re talking about the later. Why and how we built our open shelf bathroom vanity with NO previous experience and a tight budget.
But First, a Bit of Background:
We remodeled our Powder Room for our first One room Challenge.
- Here is the before and the our inspiration board.
- Here is a post about all the decisions that need to be made before starting a wood accent wall.
- Here are tips to help when choosing the “right” paint color.
- The reveal is here. Now you’re all caught up!
- Jumping ahead, how I finished and sealed the vanity is here.
Why Build a Vanity?
When making over our powder room, we wanted our vanity to go wall to wall. This meant a custom size. Plus we wanted custom finishes. Plus we had a limited budget.
Is it Cheaper to Build or Buy a Bathroom Vanity?
It’s probably cheaper to buy:
- IF you can use a standard size
- IF you can find a style you like
- IF you can find a finish you like
Since we needed a custom size and had some distinct style ideas, PLUS a tight budget, building was our answer!
I don’t say this lightly, as we have NEVER, Ever built furniture before!!!
Why Open Shelving in a Bathroom?
We are not the tidiest household. So one might think open shelving is not a smart idea for us.
However, this is our powder room, a half bath.
There’s no need for bath towels, toiletries, cosmetics, and all the paraphernalia
Not much is required for storage in here.
The only real requirement in a half bath are extra rolls of TP and maybe a couple of fresh hand towels. That’s all we had in the powder room of our last house. That was a tiny half bath and we used a vessel sink on a small rustic table with one shelf below. Extra TP was stored in a great black iron basket with a small stack of hand towels beside. Easy!
That was a new build house with loads of storage. This current house, our quirky vintage bungilla (thinks it’s a bungalow on the street side and goes all Mediterranean villa on the lake side) is storage challenged. The old vanity we demo’d had become our overflow storage for paper towels and cleaning supplies.
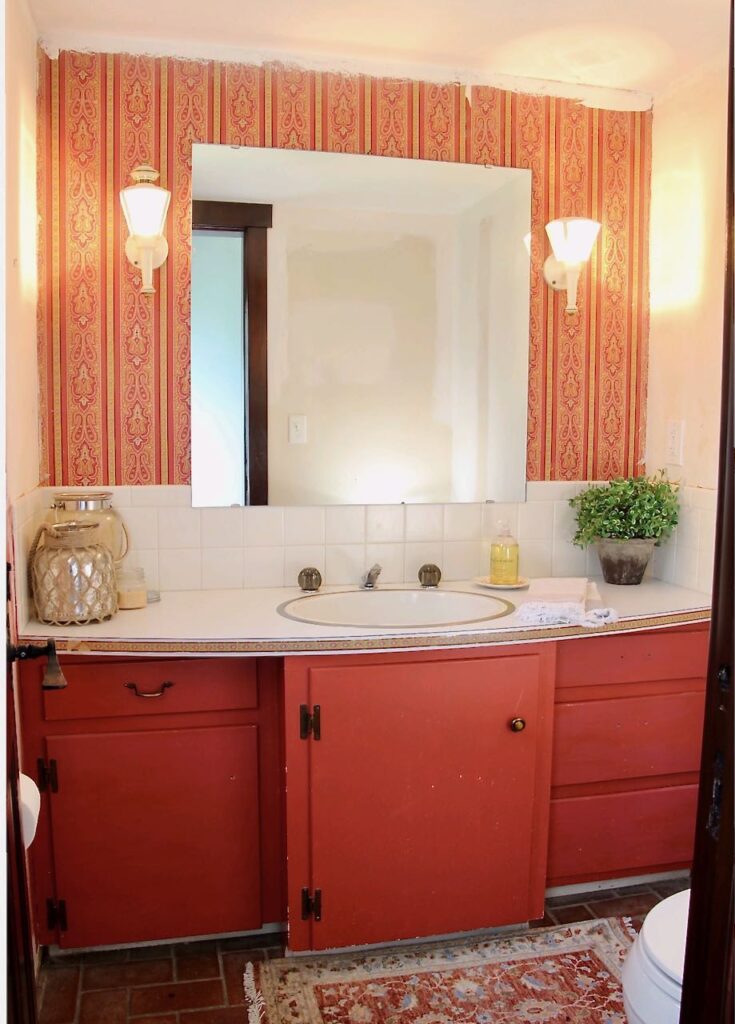
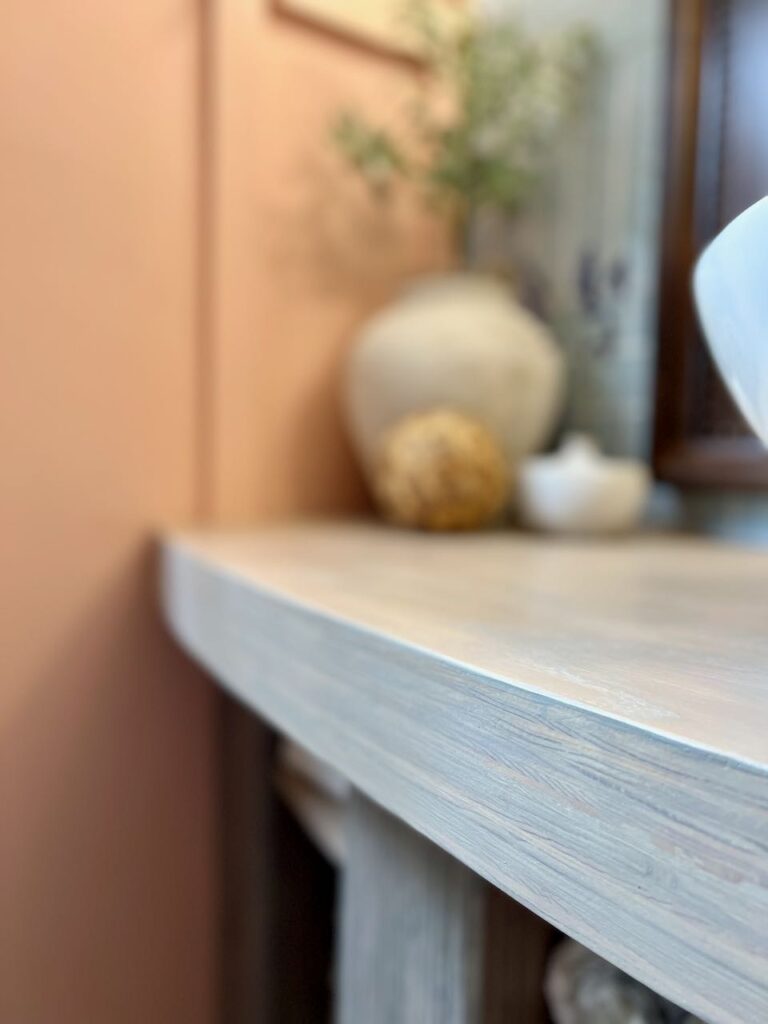
I loved the shape of the original countertop with the curved front. But I did not care for it sitting on the original squared off bases.
I knew curved cabinet fronts would be beyond our novice skills, but curved shelves, seemed very doable.
An Open Shelving Bathroom Vanity Because:
- It could be customized for our storage needs
- It could have a curved front to match the countertop
- It was buildable for us — novice builders
Can You Make a Bathroom Vanity Out of Plywood?
I researched and spoke with many experts!
YES, plywood was the choice of most, definitely over particle board and MDF.
Being a half bath vs. a bath with shower and tub and tons of humidity, solid wood would have been another option. Albeit, a more expensive option. I’m told solid wood can be problematic in the high humidity environments of full baths. But that’s a topic for another day.
How Thick Should Vanity Plywood Be?
It’s a more expensive option, but it’s best to go with a cabinet grade 3/4-inch plywood.
We chose a cherry laminated 3/4-inch plywood. And are thrilled with that choice.
We were advised to make the countertop two layers, so it is 1-1/2 inches thick — no. sagging or bowing there!
Open Shelf Bathroom Vanity Designs Decisions-
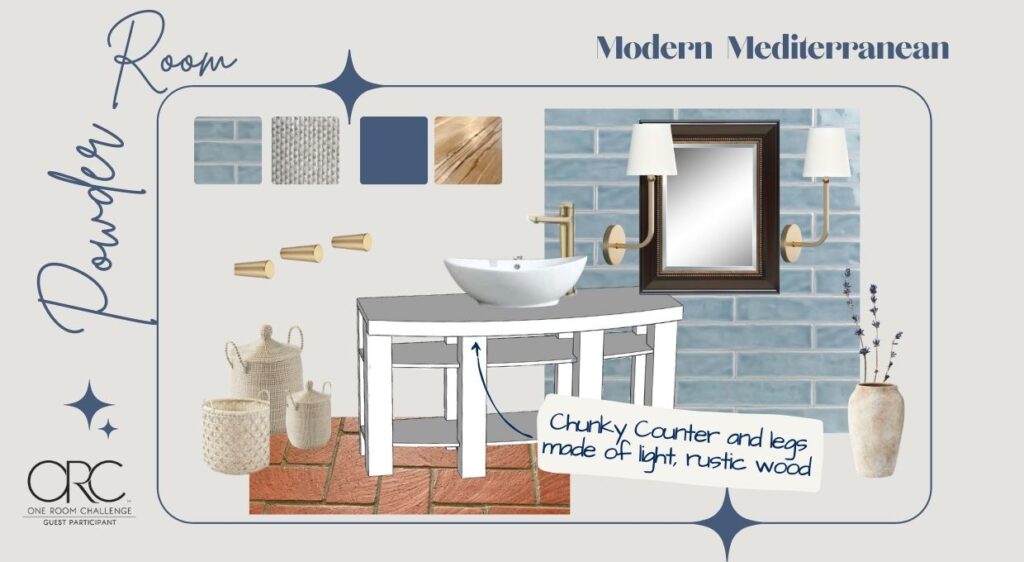
We were going for a modern spin on Old Mediterranean style.
When I think of Mediterranean style I think of the old villas and cliff side homes of Italy and Greece filled with natural materials and stocky, solid, yet practical design.
This led me to thick, stocky wood legs that had some aging, in either very dark wood tones or lighter weathered wood. To keep with the rest of the house and keep the room fresh, I went with the light weathered look for the finished wood.
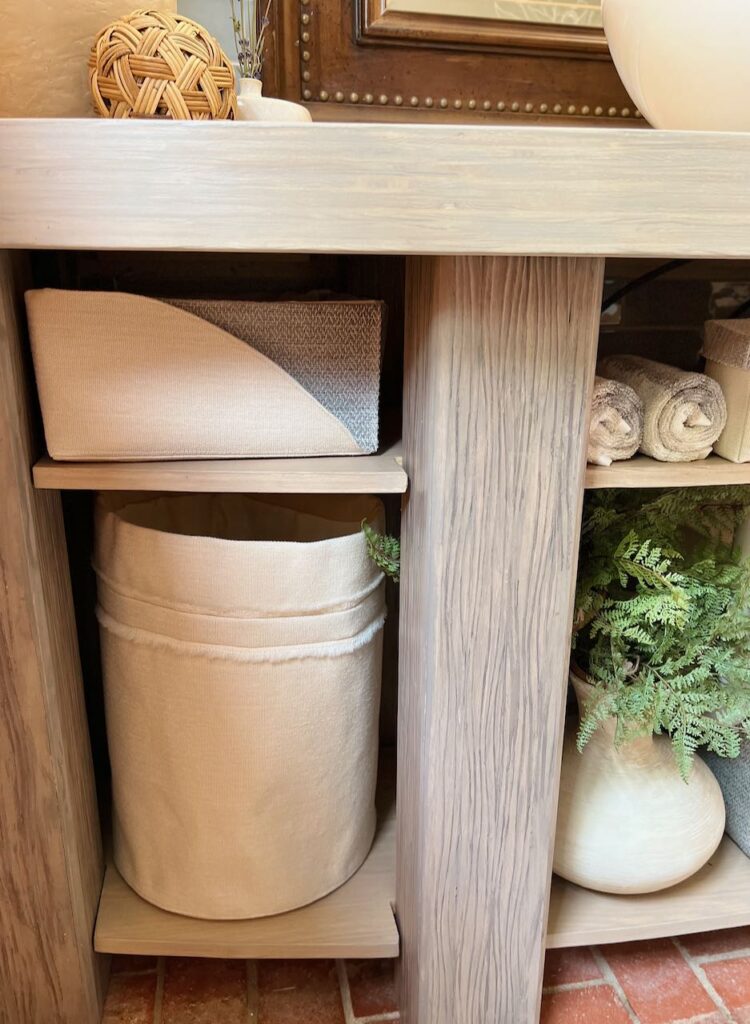
I wanted to keep the curved front. Plus two curved shelves spaced to hold the extra TP rolls, extra hand towels, overflow of paper towels, tissues and cleaning supplies.
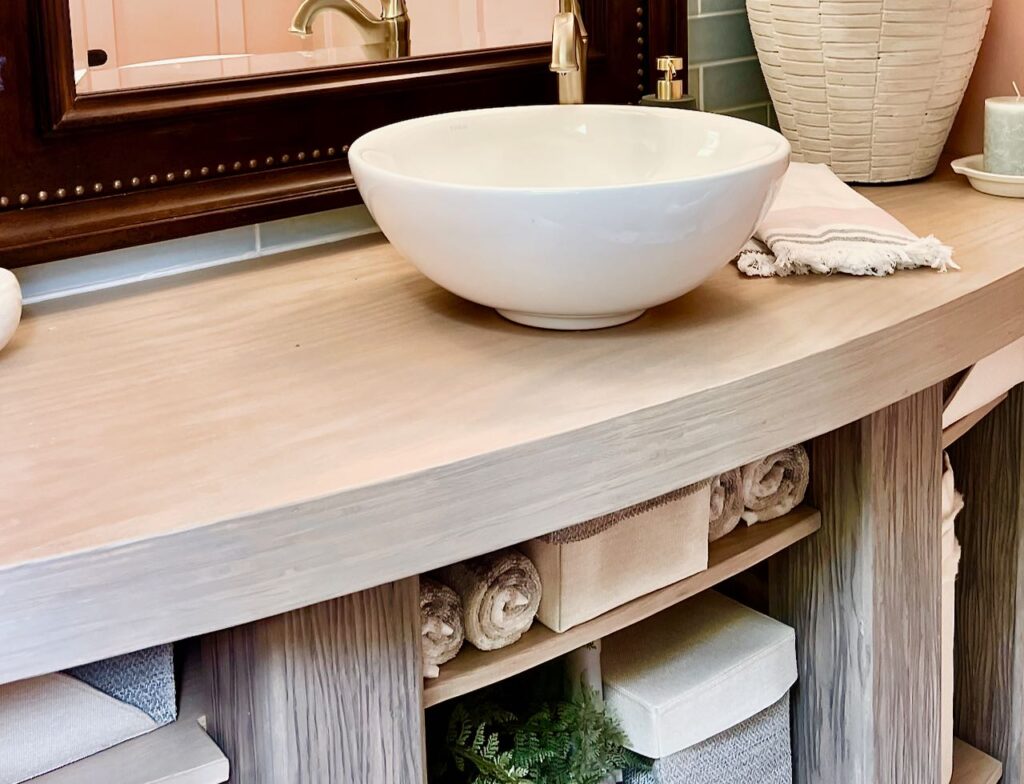
A classic round vessel sink would be perfect.
AIso, we wanted the countertop to have an apron front that matched the weight of the stocky legs.
For height, I wanted taller than the original vanity, but it needed to stop short of the large, dramatic mirror I had for the space.
Before we get too far into this,

Hopefully you will feel so inspired, you might try something similar.
This same concept can be used for other wall mounted open shelving:
in a game room
in a home office
built-in book shelves
in the playroom

Secret Ingredient for the Vanity–
It all came down to the chunky legs. Can you guess what we used?
Beams! Yes, the faux ceiling beams from Home Depot. They are 5 x 5-inches.
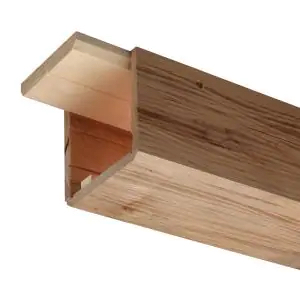
This is NOT what they are designed for. But they work perfectly IF you have some other structure for support.
These beams are not designed or able to support anything. They are meant to be the sprinkled parsley of your room, not the powerful entree carrying the weight of your nutrition — or your countertop.
So we used structural 2 x 4’s for the six legs mounted to the walls and 4 x 4 posts for the two legs front and center. Then the beams wrapped these.
Countertop and Shelf Design-
Once we knew what we specifically wanted, it became clear that there were going to be some tricky cuts involved with the way I wanted the shelf to wrap the legs. These cuts would be beyond our skill set.

So I drew out our design idea with all our measurements. Then took it to our architect son. He made a CAD drawing that I sent to a community workshop we joined, Hammerspace in Kansas City. They have a fabrication department with plasma cutters, a CNC Router and such.
Hammerspace cut our shelves and counter pieces out of two 4 x 8 pieces of 3/4-inch cherry plywood. Two shelves, two full countertops and two apron pieces.
Then we went to work.
Let’s Build an Open Shelf Bathroom Vanity-
The Shelves and Countertop-
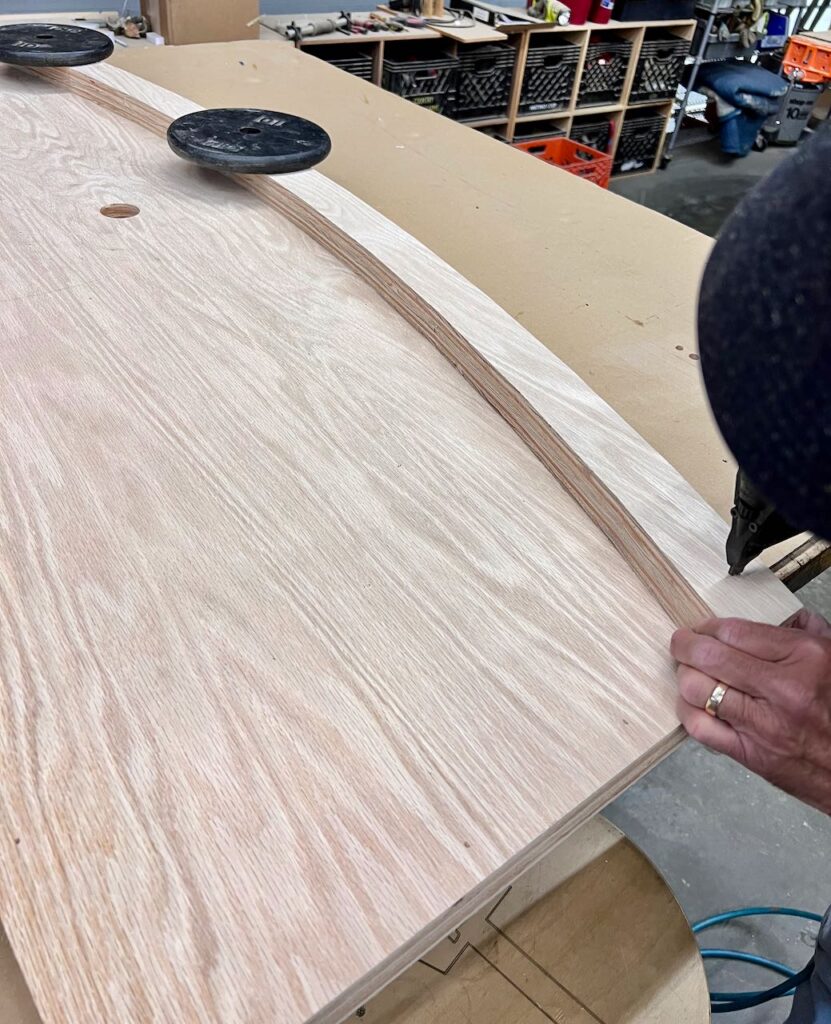
We started by gluing the countertop pieces together and the two apron pieces together.
Then we glued the doubled apron to the bottom, front edge of the doubled countertop and added some brads to hold it tight.
The Legs-
Since we started with 8-ft faux beams, we needed to cut the length. But these are 5 x 5, so we took them to Hammerspace to use their larger equipment.
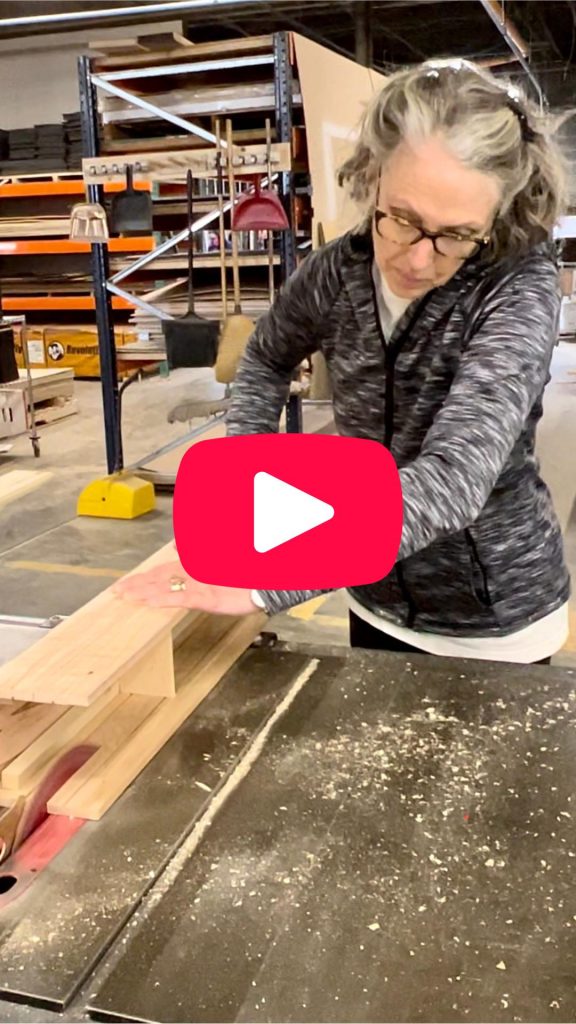
Click to see how easy this was!
Step 1) Cut the length.. To save money, we cut them to 32-inches to get three out of one beam. It’s a bit short of the actual leg height, but this will be hidden behind the thick countertop apron.
Step 2) The four back legs I wanted to be 3-inches deep to the wall, not the full 5-inch depth. So we used the large table saw to cut 2-inches off each side of four of the beams.
Assembly-
It was truly a simple build, but since we had no set of directions to follow and we had never done anything like this before, we took our time, measured, leveled, measured and leveled several more times.
If you start the slightest bit off level, it magnifies with each following step.

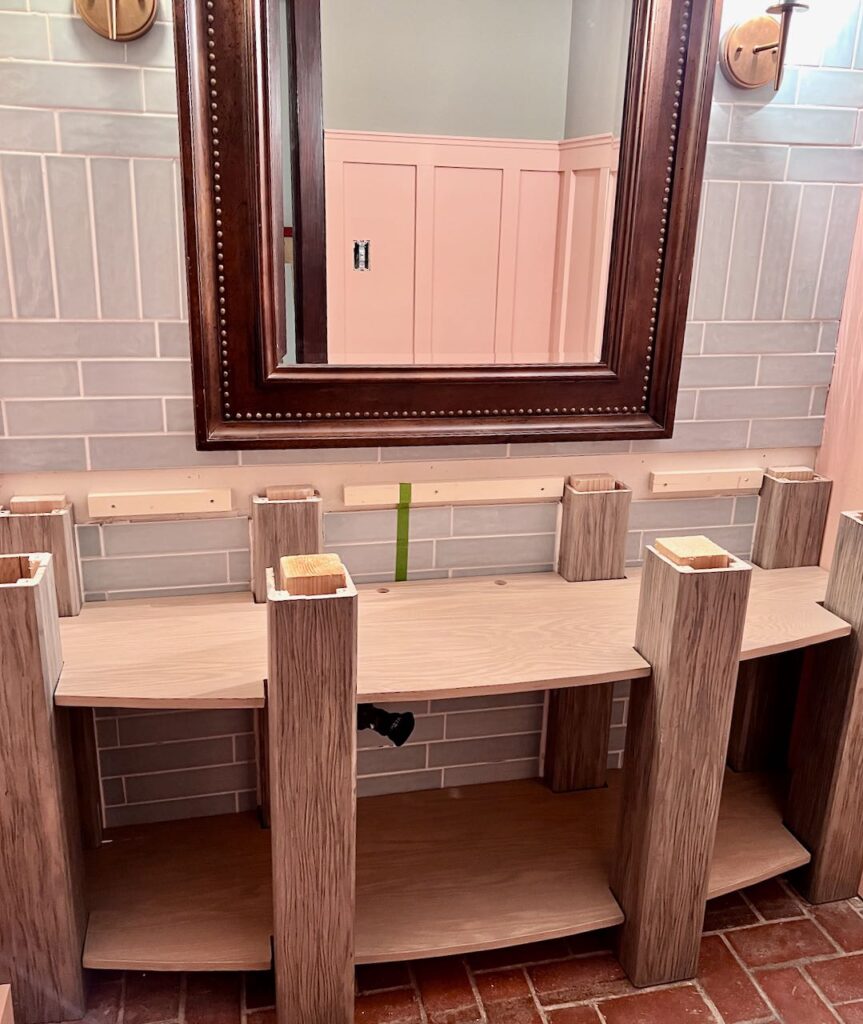
Start by marking the height for the top of the supporting legs. We attached scrap pieces of 1 x 2 at the height the countertop will sit on. This allowed us to rest a level between them and verify the height of the individual legs were all level.
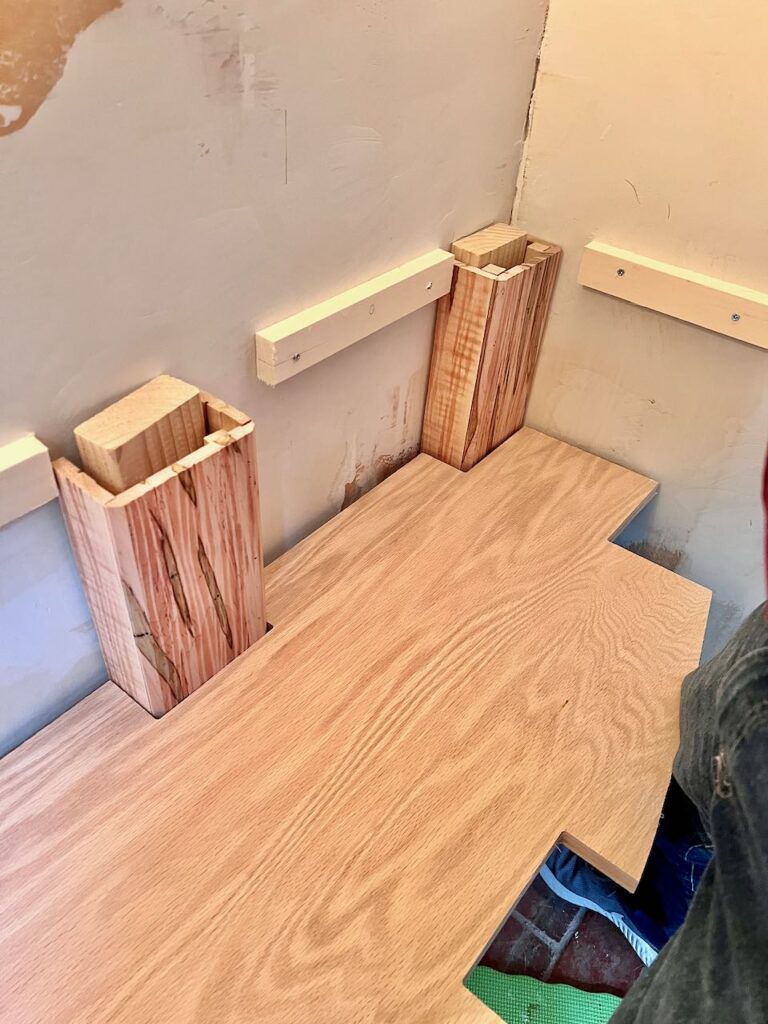
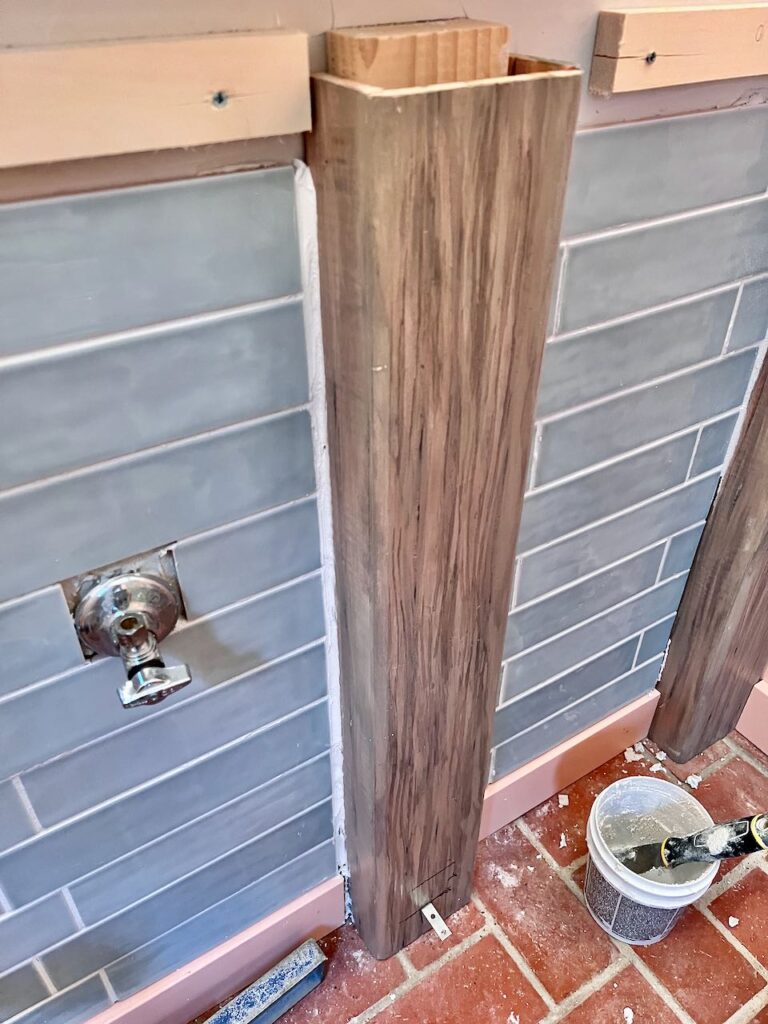
We started by placing the bottom shelf in the place, temporarily suspended on some sample size paint cans. Then we stood each of the wall beams in place, leveled vertically and marked the wall to give me guidelines for tiling and base board between the vanity legs.
With the beams still in place, we slid a 2 x 4 in place moving it to one side of the beam, and marked the wall for this placement.
Took out the beams and screwed the 2 x 4’s in place. Then we added the beams back in place with the shelf and the 2 x 4’s to make sure these pieces fit together well. We could have screwed them to the 2 x 4’s now, except I had not yet finished the legs with their colorants and topcoats.
Plus, since I had never tiled before, I felt most comfortable tiling first without the beams in my way.
Now the tiling is done and and the side walls are painted. We are back to our final assembly.
So excited for this stage!
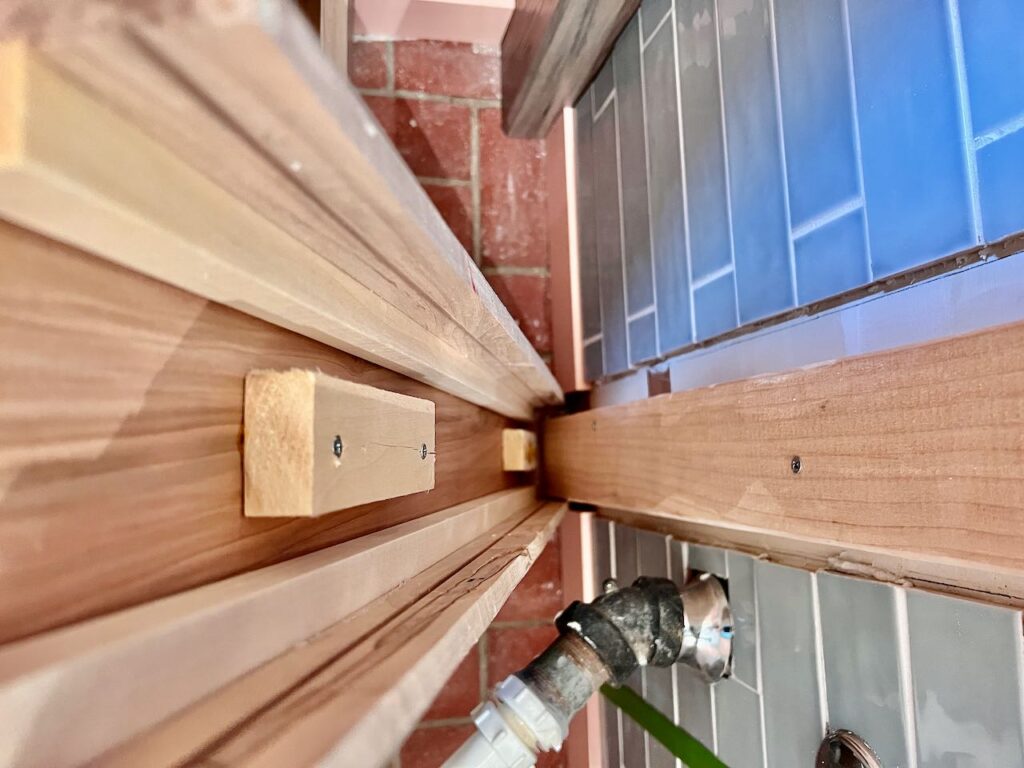
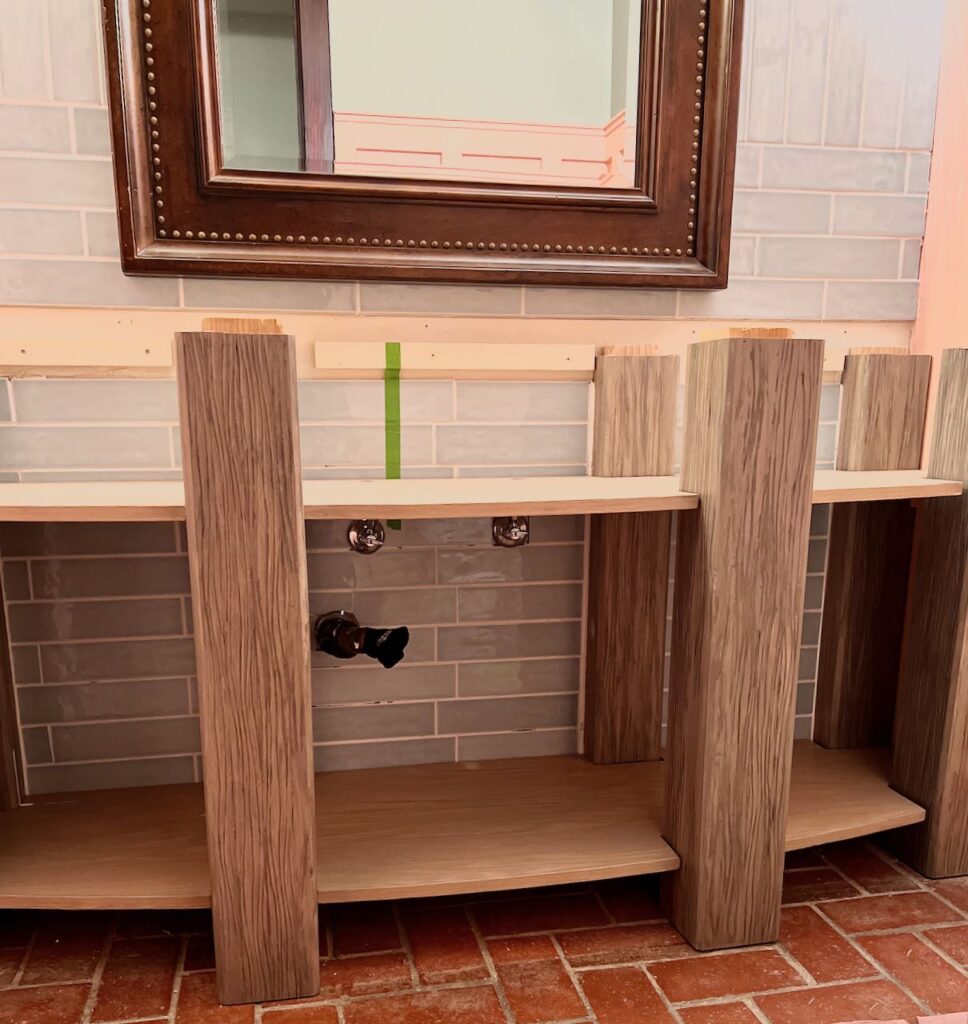
It’s probably overkill, but we wanted to add a support between the two back center legs and the two front center legs to keep those front legs stationary. They can’t move left to right or to the back because of the shelves wrapping around them. Our only concern was if they could slip forward at the floor. We hid a support beam under the bottom shelf.
There is a void between the structural 2 x 4 and the face of the beam. We added a strip of 1 x 2 to fill this void that a angle racket could attach to to hold the support beam to the back of the 4 x 4.

The beam then wrapped the 2 x 4, offset to one side. This one screwed into the 2 x 4 on the right side.
Notice we also marked each of the beams’ locations. Any slight differences were adjusted for once and no need to play the matching game over and over.
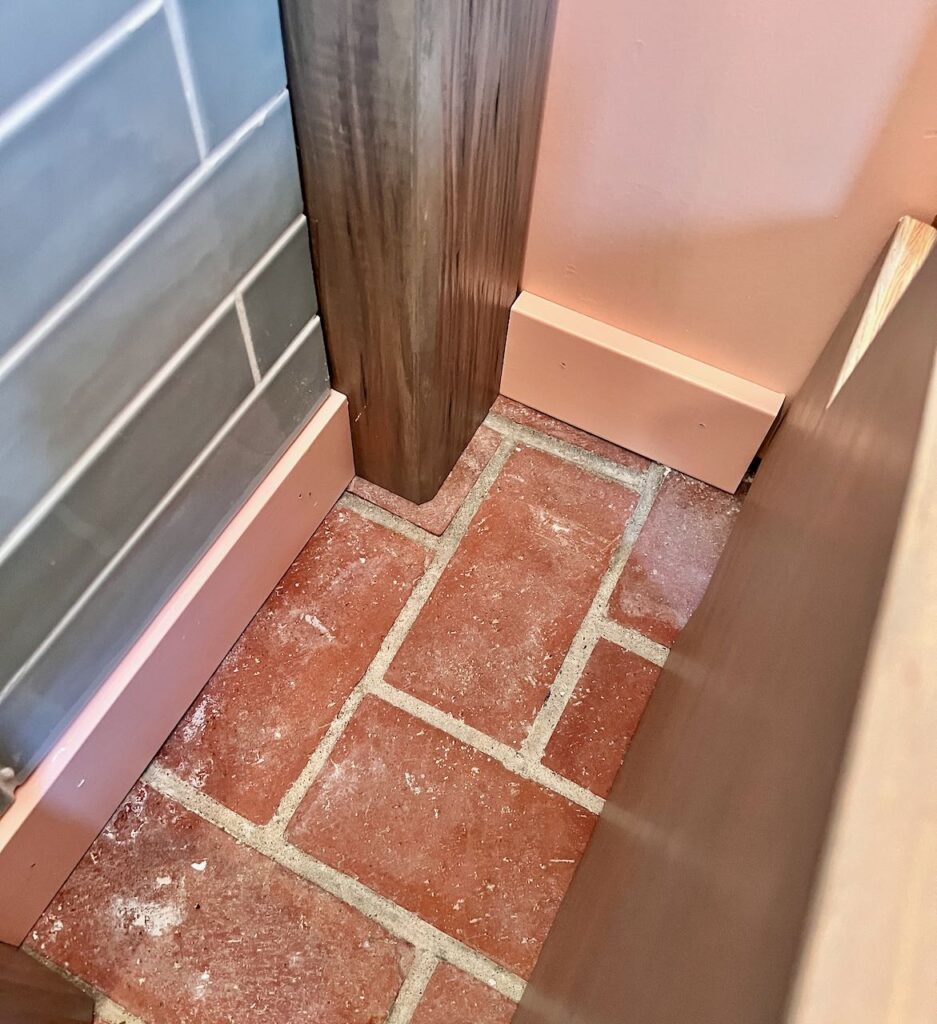
The side wall base moulding was attached.
Once the beams were in place, I grouted between the tile and beams and the tile and base.
NOTE: I used this back of the vanity as my trial ground for tiling. Yes, I chickened out and decided that I didn’t need to cut tile around the water lines and drain. I did learn to cut curves in tile when I got to the light fixtures. So no judgement please.
We added two ledger boards on the side walls between the front and back legs and brackets attached to the center back and front posts to support the top shelf. Now it’s just a matter of dropping the top shelf in place.
Sadly, we were stuck at this point for several days. I want to save you the trouble!!!
I decided that while the CNC Router was cutting the countertop layers, it might as well cut the drain hole for the sink. According to the sink literature, it just needed a 1 3/4-inch drain hole.
When our plumber showed up to hook up the faucet and sink, he explained that it’s not the drain hole but the drain stopper which comes with the faucet that needs to be accommodated. Plus he prefers to have the rubber gasket sit inside the drain hole in the countertop rather than between the countertop and sink which can make it a bit wobbly.
Since we already had the hole drilled at 1 3/4, it was a pain to drill it new at 3-inches. There is nothing to support the drill since the center is missing. We ended up with Hammerspace laser cutting a plug to fit the original hole, gluing it in place and then drilling a new hole.
SUPER HINT:
You can skip all that if you check in with your plumber first.
The Countertop–

No fancy construction here. That beautiful countertop just sits right on top of the 2 x 4’s, the 4 x 4’s and the wall ledger boards. The front legs sit right inside the apron lip.
And we are so proud to reports she sits level every which way and is incredibly sturdy!
Isn’t she gorgeous!!!!
We are smitten!
EXTRA TIP:
With exposed pipes, paint them and they practically disappear! Just be sure to scratch sand the surface first and use a good primer.
Please pin this to your
Bathroom Board
Half Bath Board
Powder Room Board
Furniture Build Board
or wherever it makes sense to you.
There’s a LOT here! I get that. So please don’t hesitate to reach out if something is not clear or you feel Iike I skipped over something.
This is the first of what I expect to be six tutorials on different aspects of the Powder Room Remodel. So be sure you are subscribed so that you will be notified each time I publish one.
I hope this inspires you to try something you never thought you were up to. It’s amazing what we can do when we try!!!

This is a great design! Both simple and elegant at the same time. The bathroom in our rental house has a floor vent underneath the sink which has prevented us from installing a much needed vanity. This is a good option for a solution to build once our current renters move out. Thanks for sharing your project and the inspiration. Pinned and this project will be a feature this week. #HomeMattersParty
Oh Donna, thanks so much for the pin and feature!
I’m so glad you are inspired and that it might solve a dilemma for you. Isn’t that what this community is all about?
Your step-by-step guide on building an open shelf bathroom vanity is detailed and informative, making it a valuable resource for readers interested in a DIY project.