
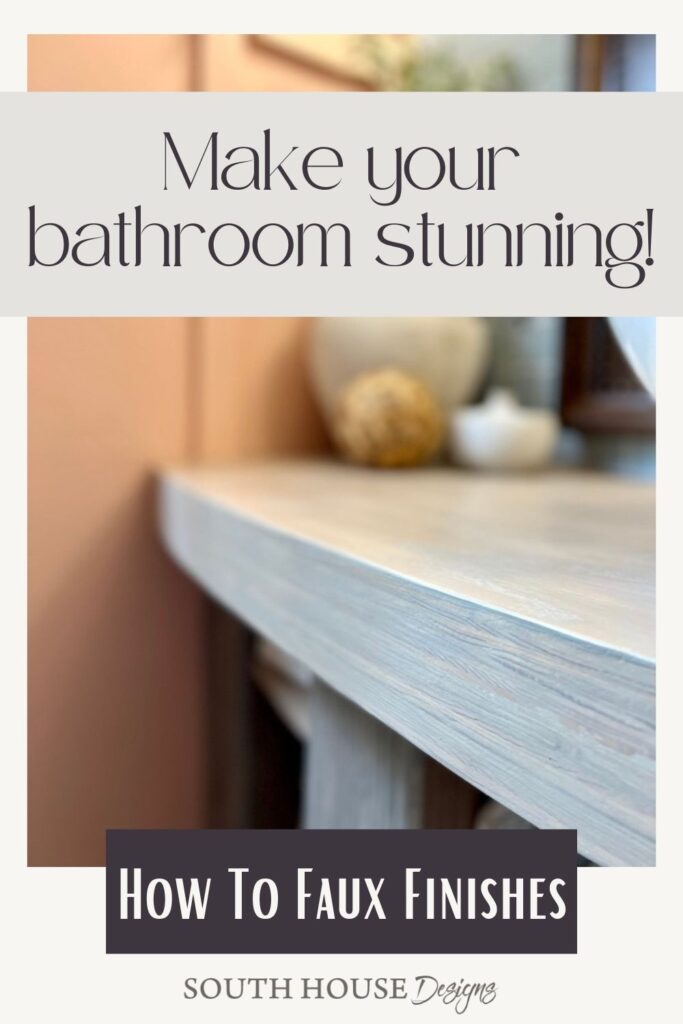
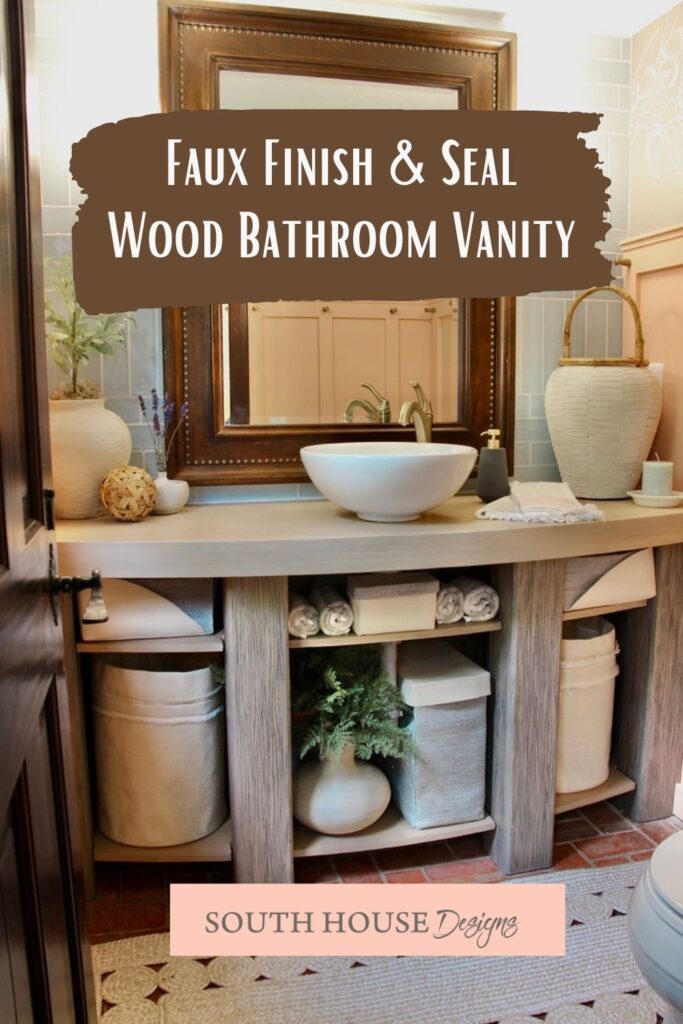
How To Finish A Wood Bathroom Countertop and Vanity
So you don’t think wood bathroom countertop is practical? Surprise! Wood can make beautiful hard-working countertops in a bathroom! The secret is in the finishing and sealing.
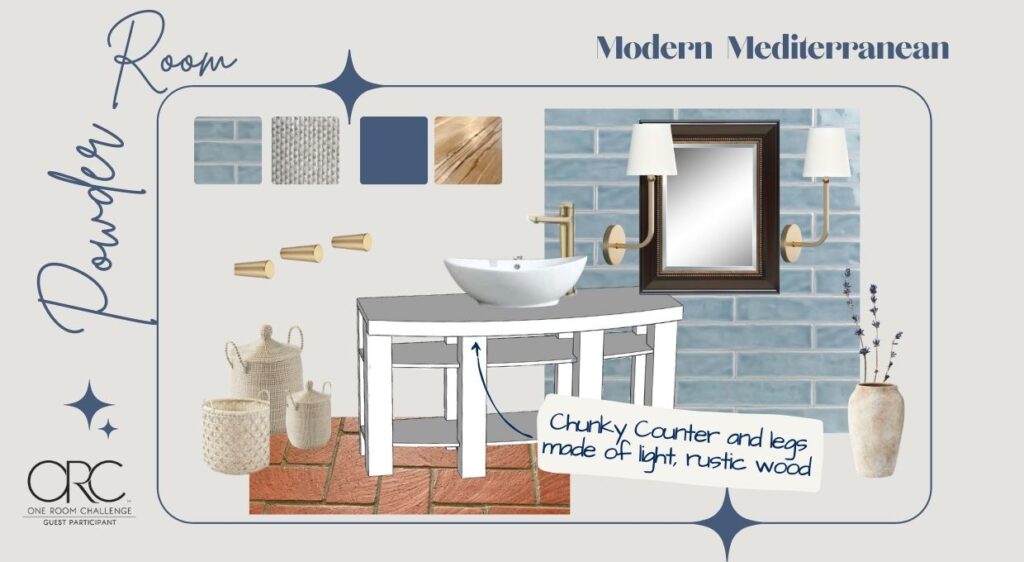
If you’re just dropping in here, it may be helpful to know that we remodeled our Powder Room for the One Room Challenge. Before you read all about how to finish and seal a wood bathroom countertop, you can catch up with the before, the changes we wanted (hint: everything), and our inspiration board right here. plus the reveal here. And here’s a post of all the considerations when planning a wood accent wall. And another post full of tips for finding the “right” color paint for a small single window room (the hardest room for paint colors).
Now I’m working on tutorials that have been requested. The biggest request is for the vanity!
Here is the post on how to build the vanity. Don’t need a vanity? Perhaps you need a a cool built-in shelving for a playroom, game room, home office or anywhere. This could be easily modified for any of those.
So now you are all caught up.
Today, We’re All About Finishing the Wood-
Starting With the Wood Bathroom Countertop-
Don’t have time right now? I get that!
So instead:

Are you thinking: Can You Do a Wood Countertop the the Bathroom?
Why yes, YES you can!.
We had one in the powder room of our last house for 17 years as the kids were growing and a parade of their friends hung out there. No Issues!
We added a wood countertop in the guest bath of our current house four years ago. It’s a small bath with a shower and lots of steam.
Now we are adding one to our powder room and couldn’t be more pleased with it.
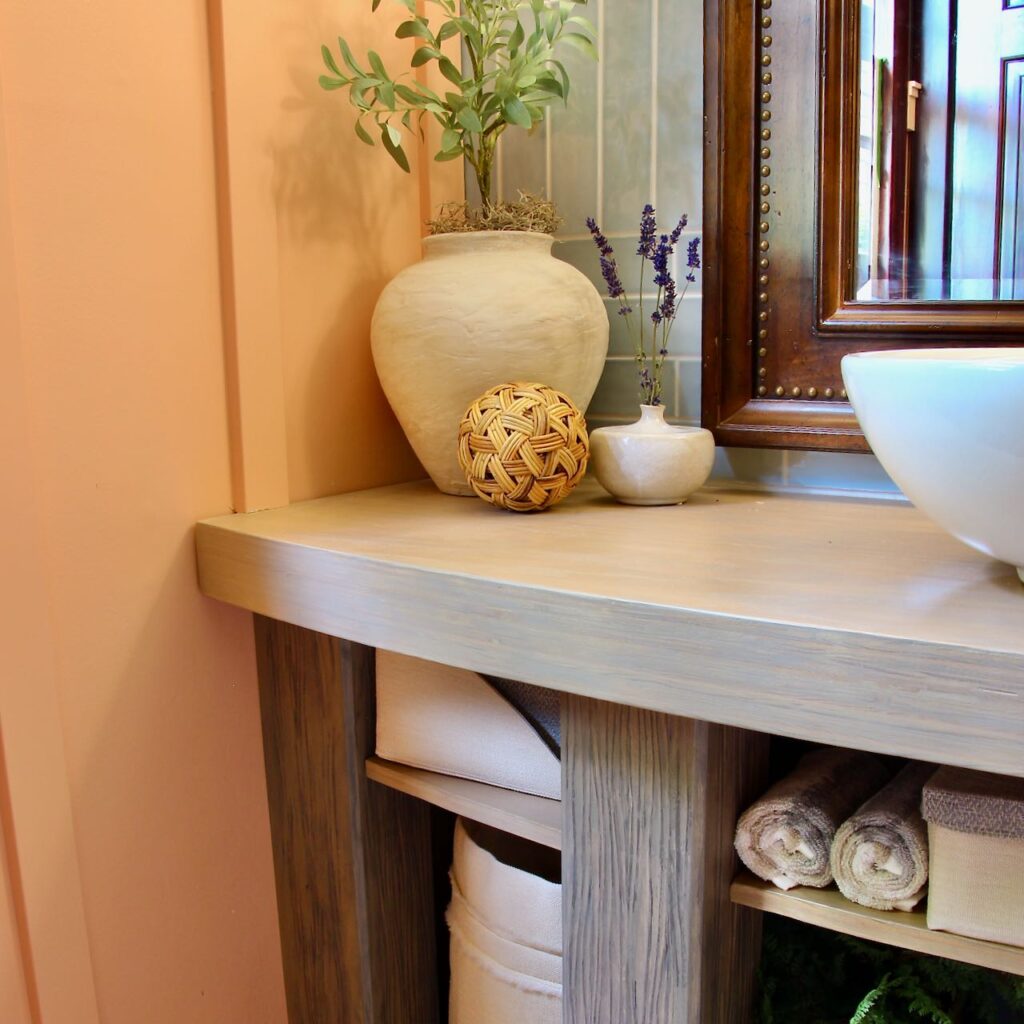
The wood adds a rich warmth that can go missing with lots of tile (and in this case a brick floor).
The key is how well you seal it and topcoat it.
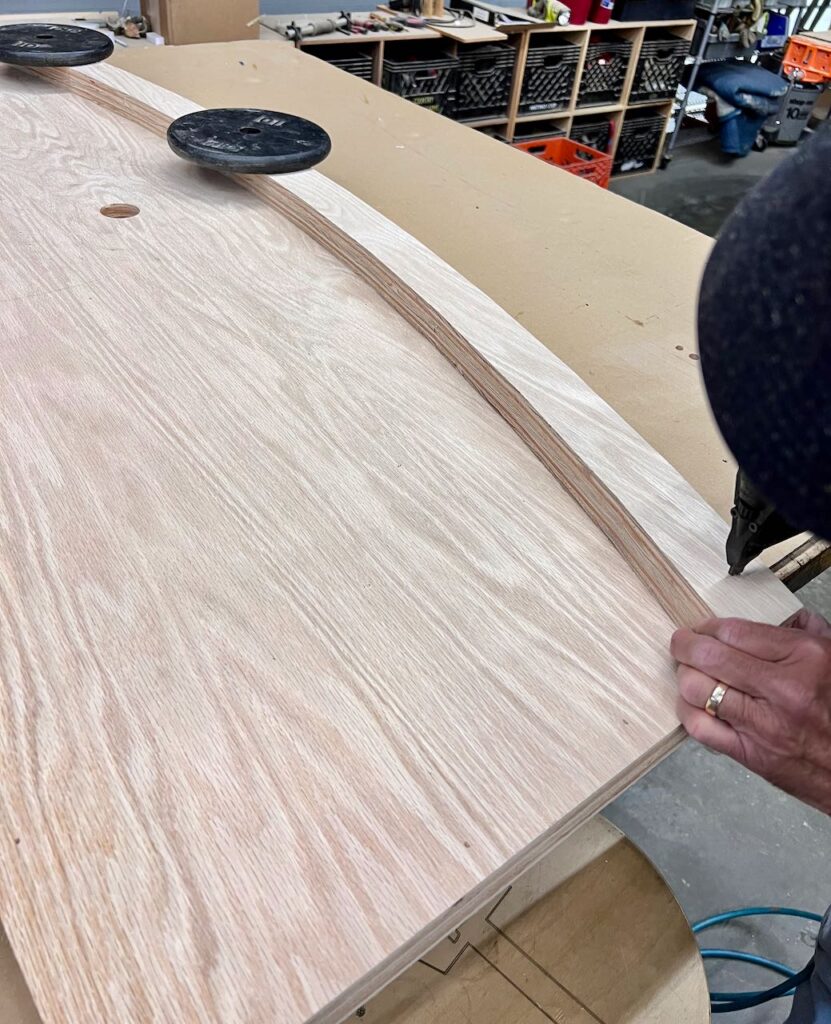
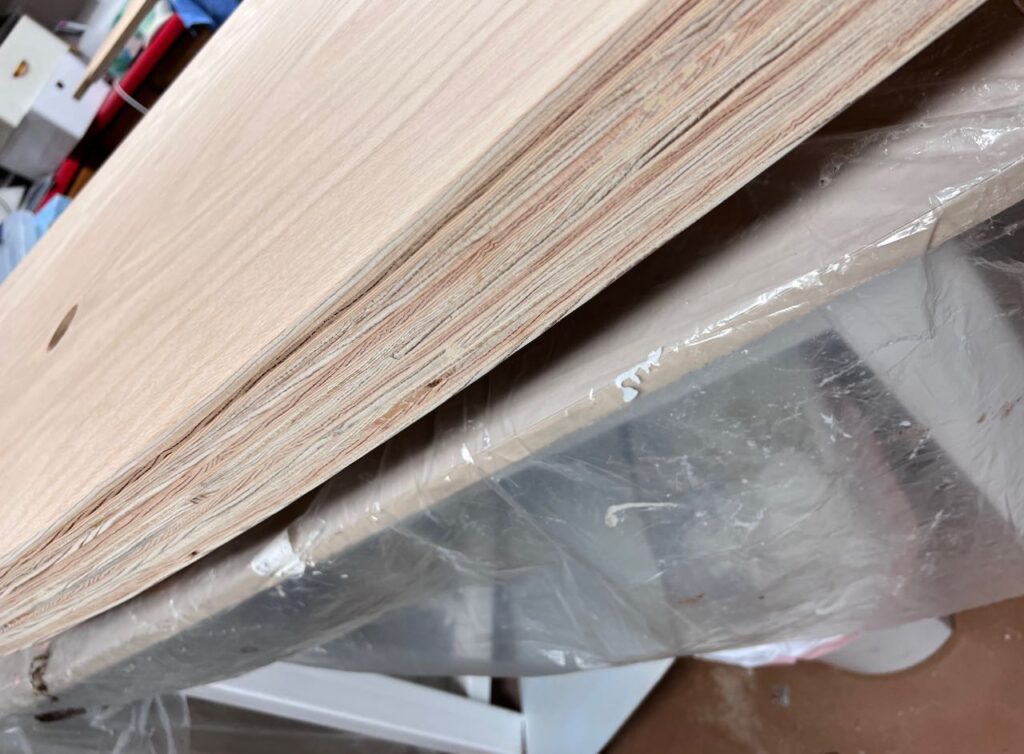
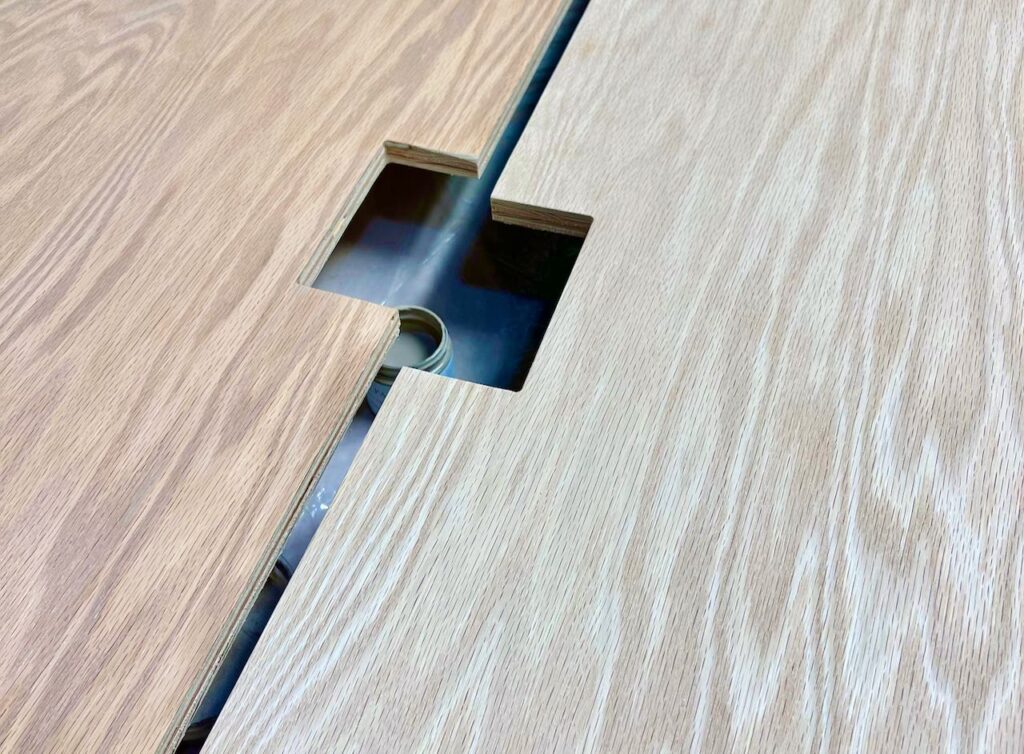
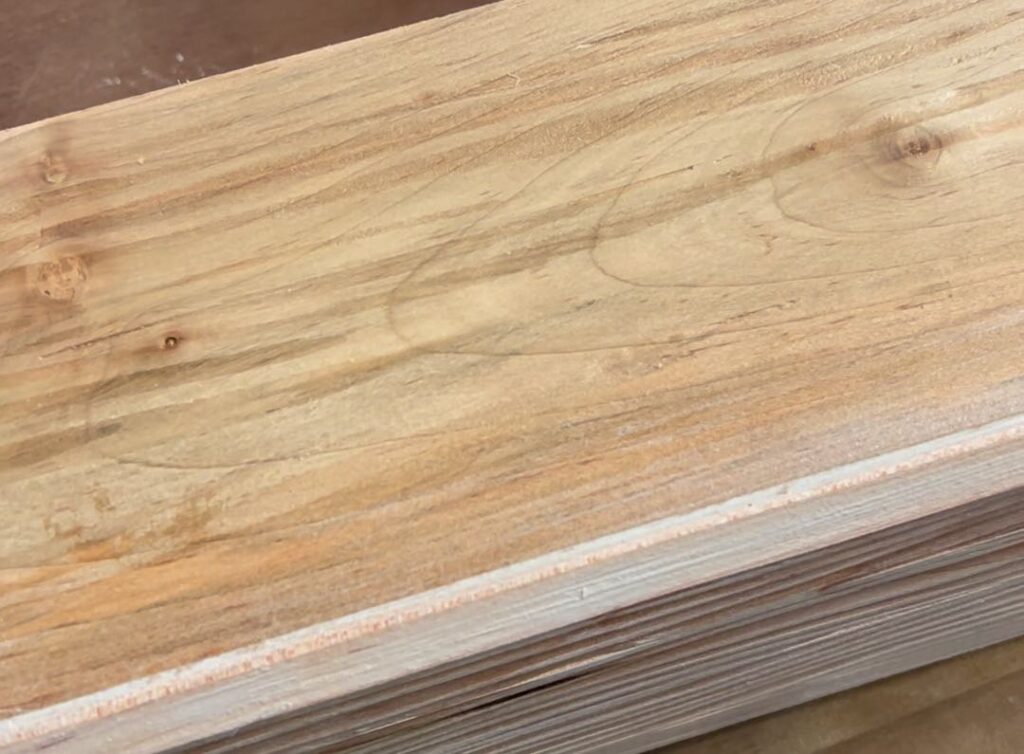
The countertop is made of two layers of 3/4-inch cherry cabinet grade plywood. They were cut by a CNC router at a fabrication shop in Kansas City, Hammerspace, and then we glued them together.
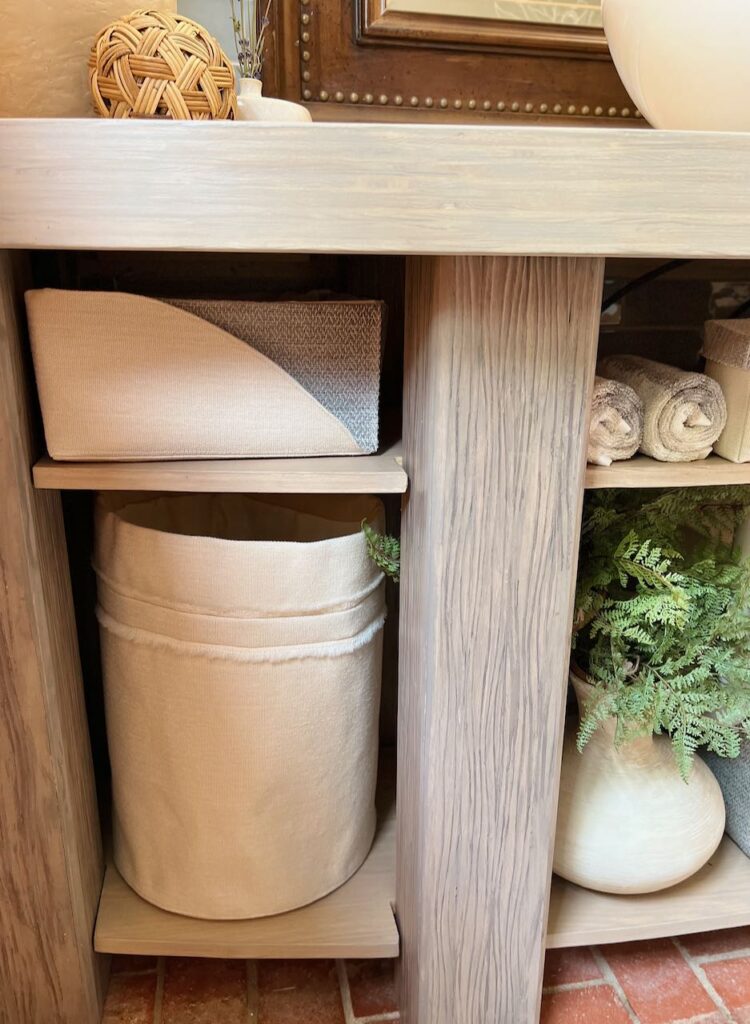
There are two more layers approximately 3-inches wide glued to the underside of the countertop along the front curved edge creating a deep apron to balance the thick, chunky legs.
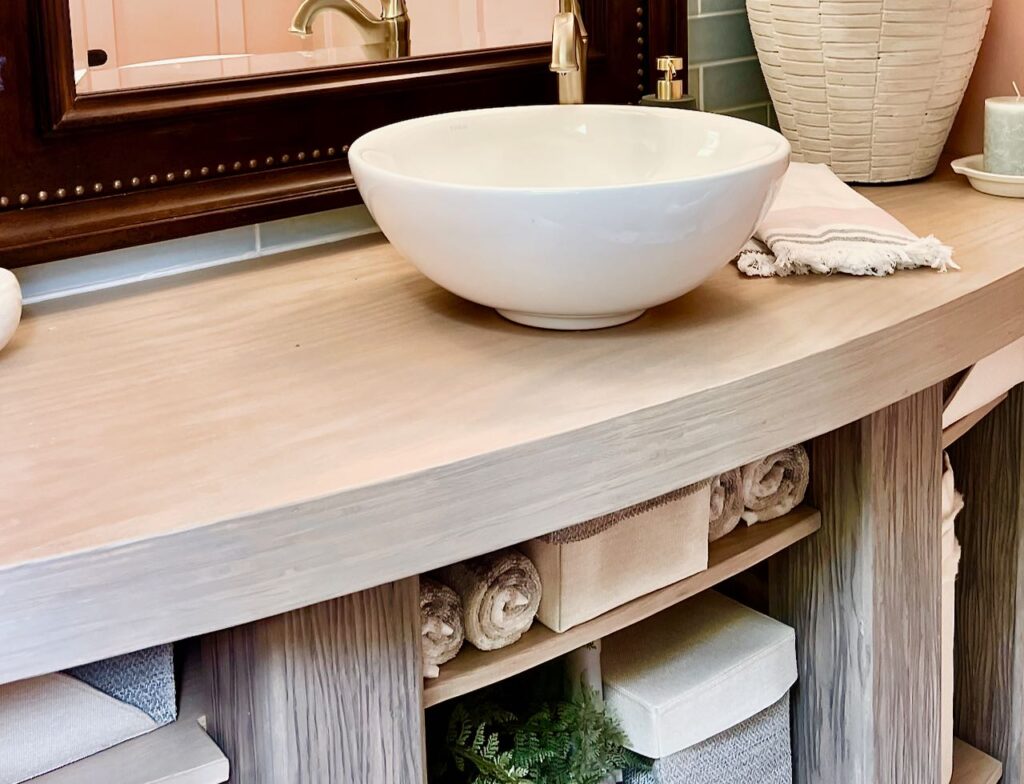
The countertop and two shelves were finished the same way.
I love the different ways the cut edge of plywood can be treated to make it look more like an exotic wood. Or of course it can always be covered with a veneer banding. But why when it can look so great?!?!
Step 1) Joint Compound the Cut Edge-
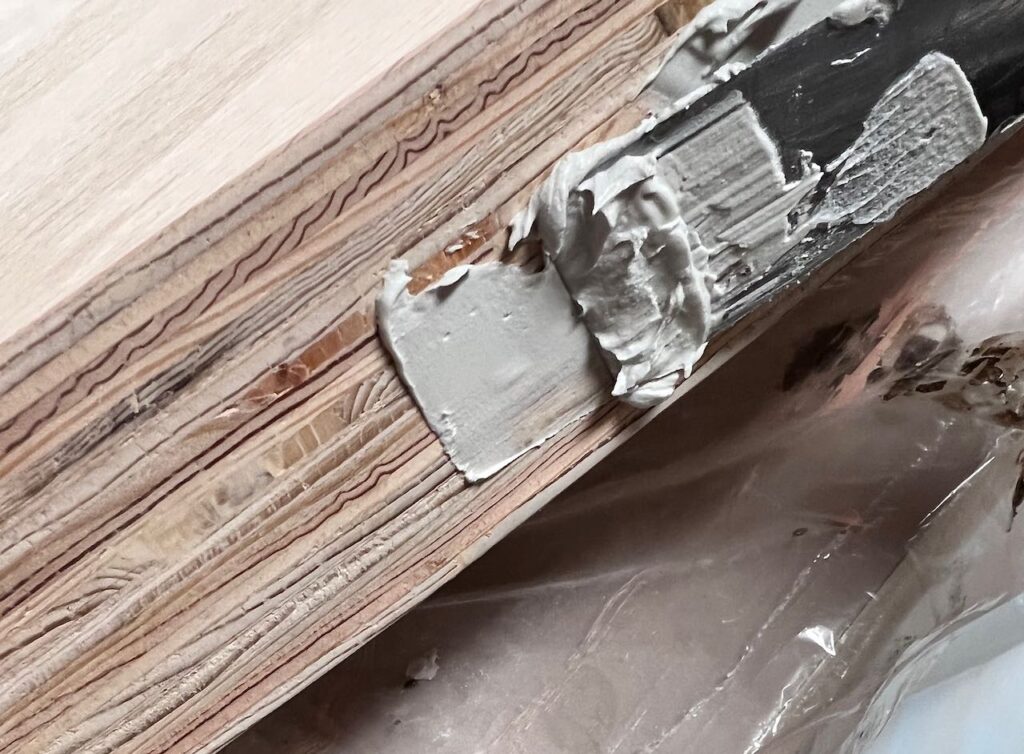

I used joint compound. But you can use spackling. I felt JC would be stronger and more durable.
Smear thin layer over the cut plywood edges. Be sure to work it down between all the layers and fibers. While still wet, scrap off any extra.
Let it dry.
Step 2) Sanding-
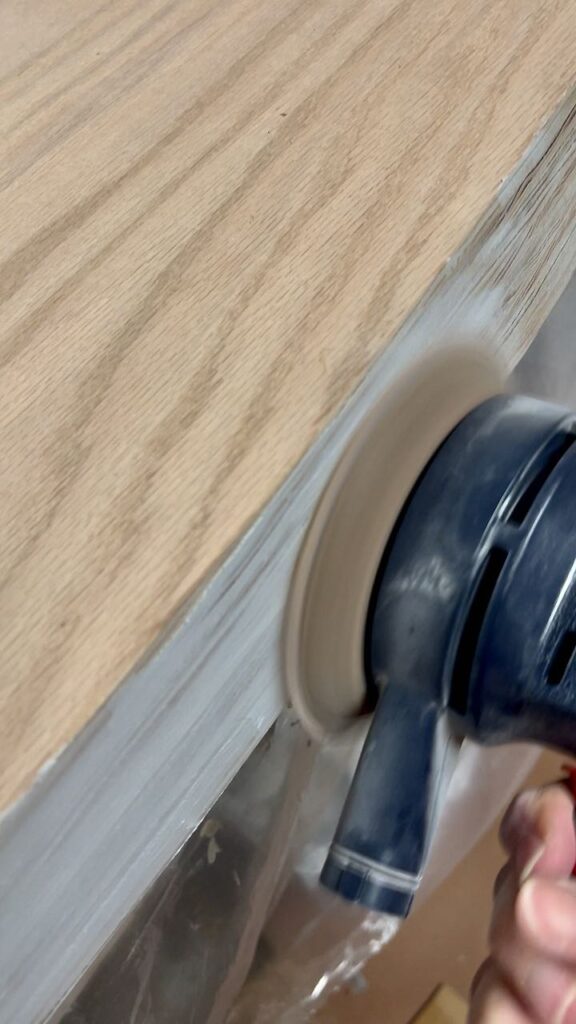
Then sand to a smooth finish. I used 220 grit here.
Also, before applying your preferred finish to shelves and countertop, Give a light sanding to smooth out all sides of the plywood countertop and shelves. Here, I used 120 grit at this point with very little pressure.
Wrapping plywood around a dowel, I also knocked down most of the roughness inside the holes that had been cut for the drain and water lines.
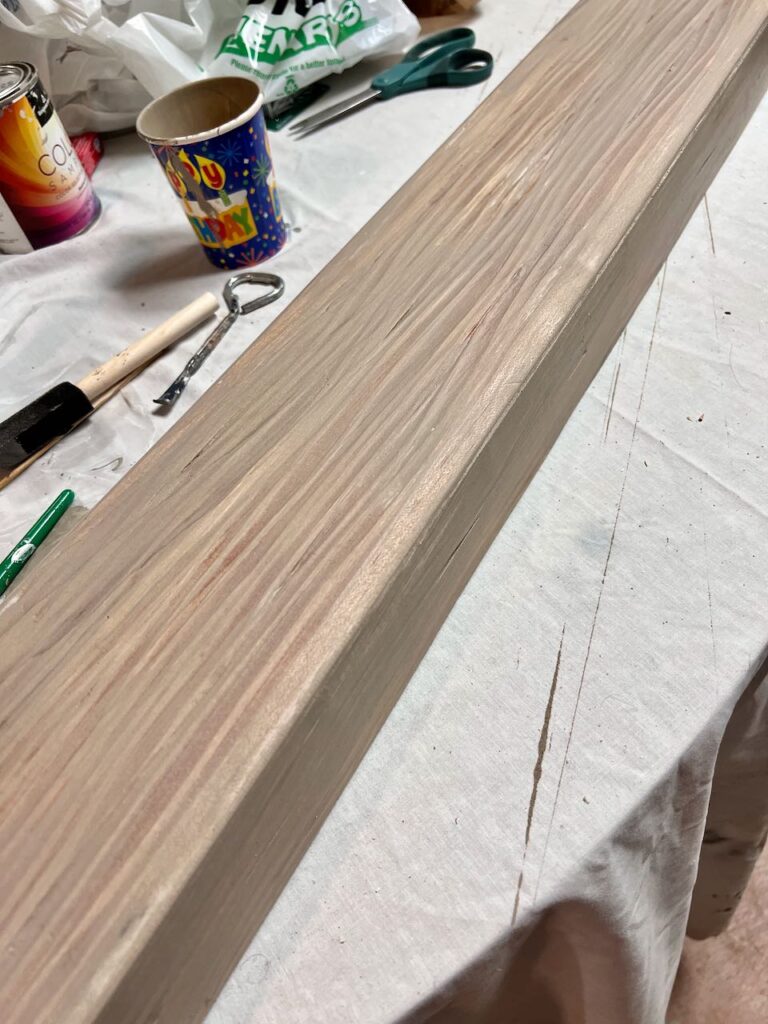
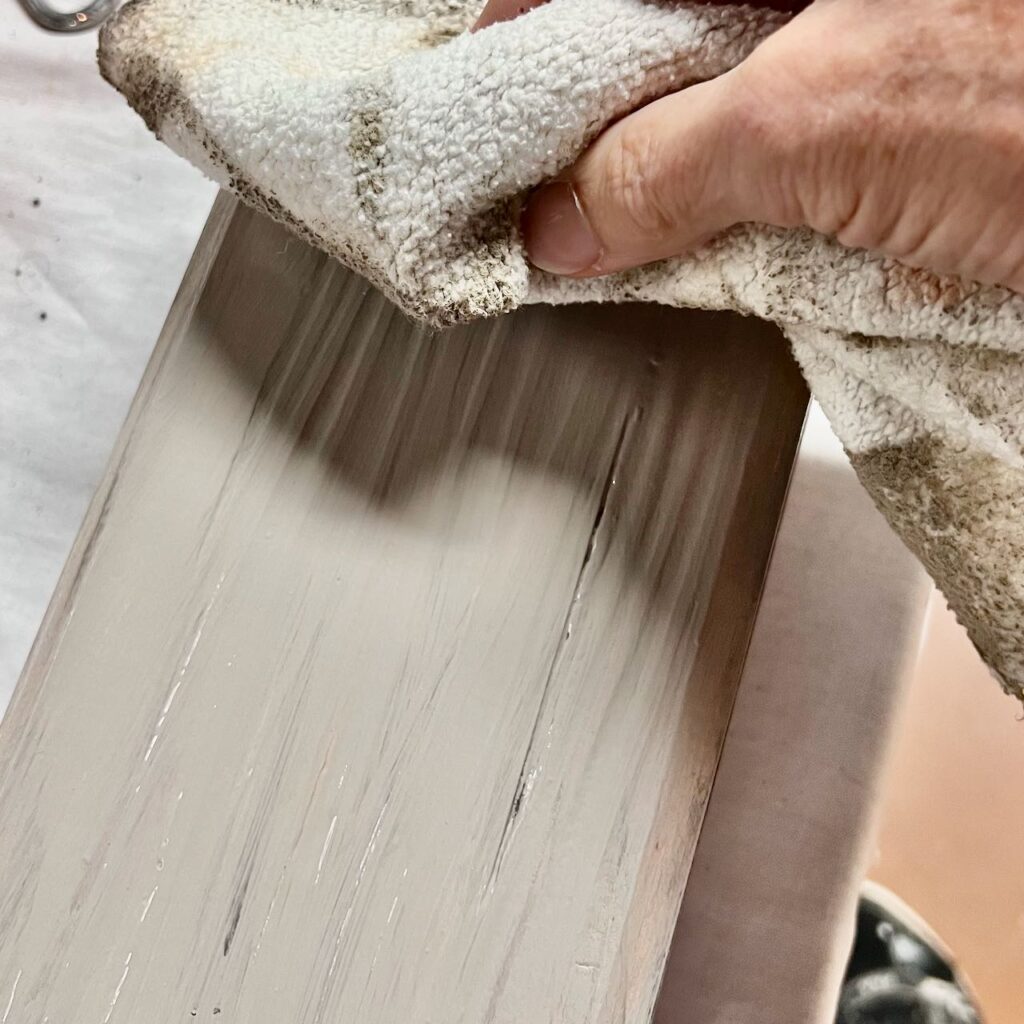
Step 3) Faux Finish-
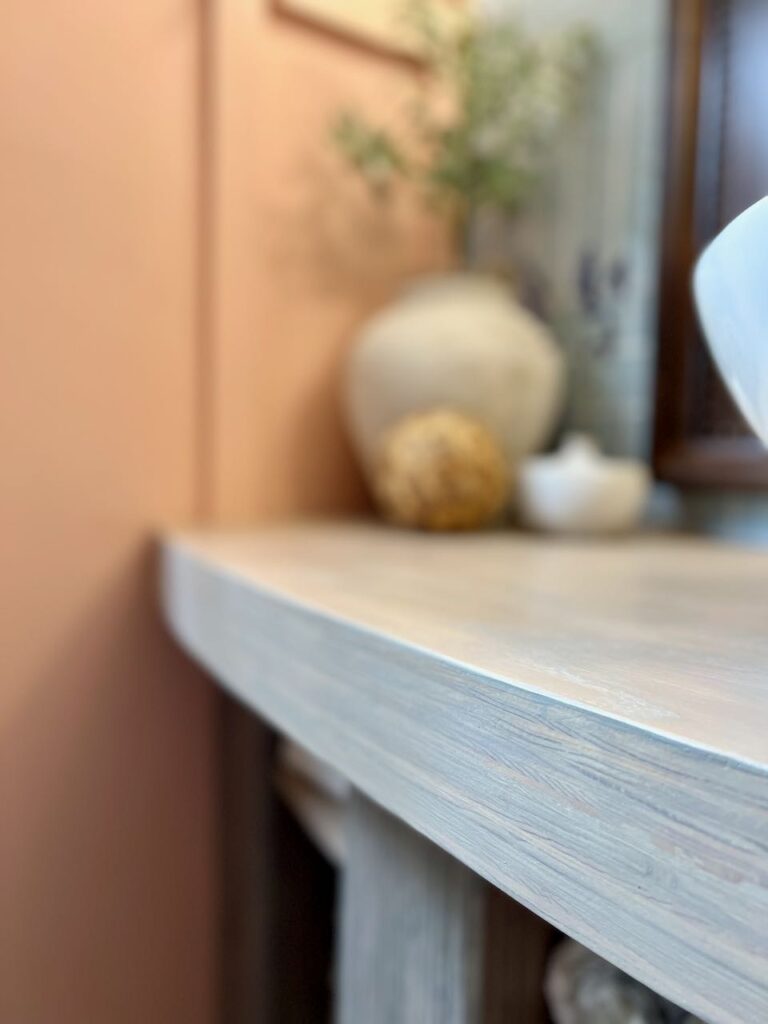
I wanted a light wood grain finish that leaned towards the weathered grey wood or olive wood.
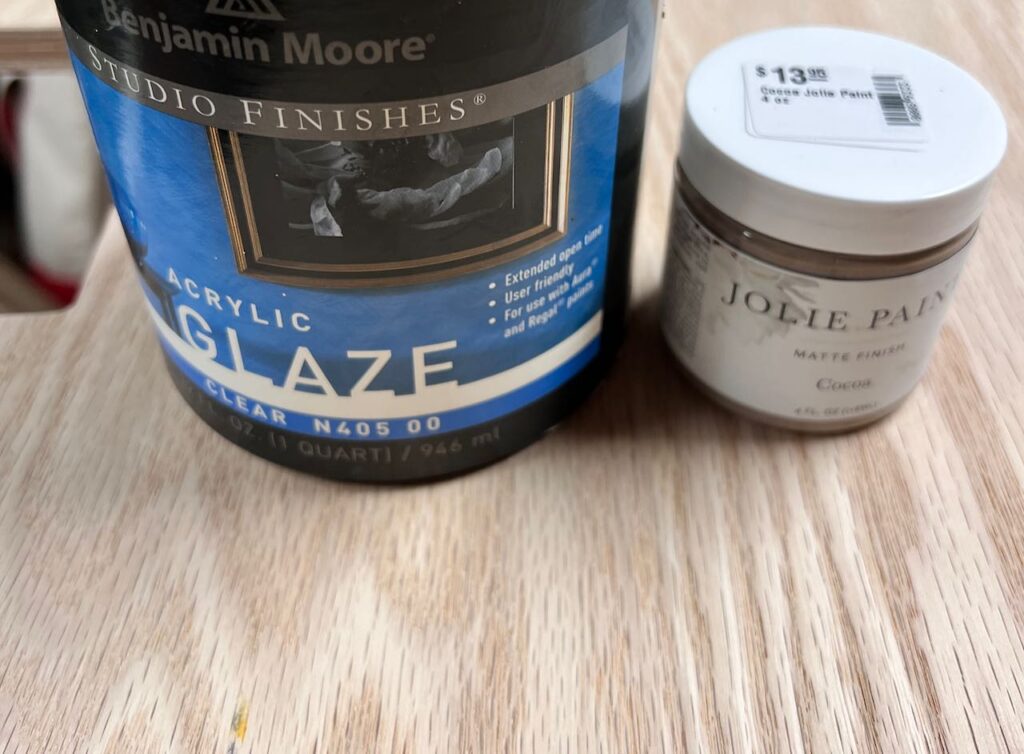

After sampling a bit, I found I had the best results making a glaze. I seem to have more control over this than stain.
I used Benjamin Moore Acrylic Glaze mix that I had on hand. Mixed about 5 parts glaze to one part Jolie Paint Chalk Paint in the color Cocoa. Gave it a good mixing. Then applied it by brush and just using a cheap chip brush, because I didn’t necessarily want the application to be perfectly even.
Looks like stain right? But I have more control. And I’ve never had a glaze peal!
But you will want to add several coats of sealant or a good topcoat. We’ll get to that right after the legs.
That Great Wood Bathroom Vanity Needs Legs!
The Legs-
My vision was to have thick, chunky legs of old, weathered wood. I could have gone hunting for reclaimed wood beams like that, but we didn’t have the budget for that, or the tools they may have required.
So I came up with a much more economical and workable way to achieve that look!
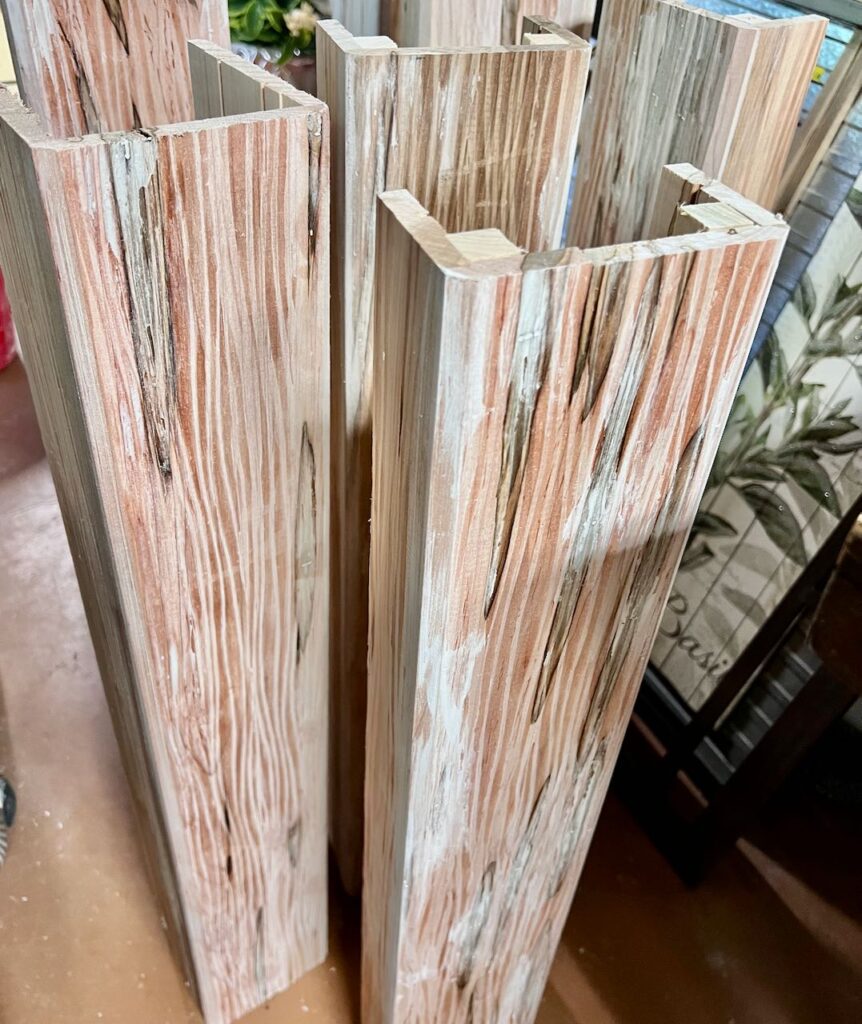
We used these faux ceiling beams from The Home Depot as the legs for our vanity.
CRITICAL NOTE: These faux beams do NOT have the structural strength to support the vanity. So really the beams wrap 2×4’s and 4×4’s that give the vanity it structure and strength. The beams give it the style. Read this post for all the construction details.
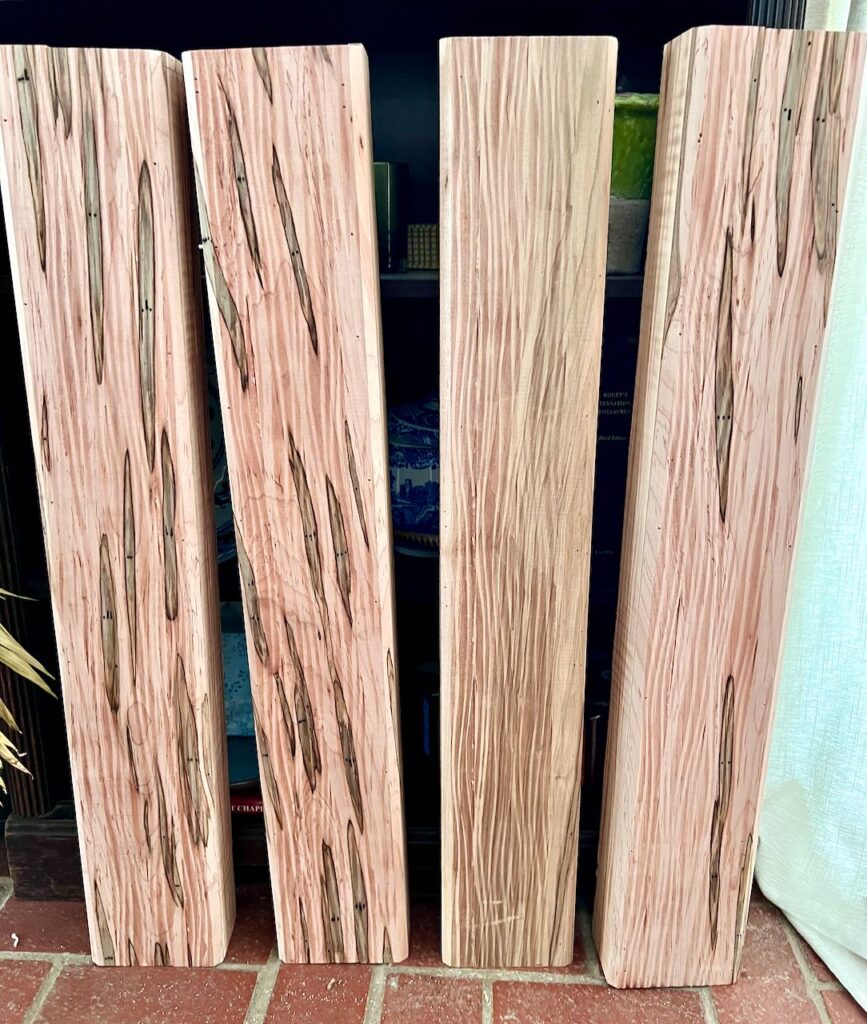
Here are the four beams for the back of the vanity cut to length. But, yikes!!!! Look at the finish.
The beams are also available with a grey finish, but I thought this “ambrosia” finish would give me more flexibility in determining the final finish. I knew I wanted some grey, but also wanted a touch of light brown. I may not have been able to do that if the grey arrived darker than I wanted.
It’s always easier to go from light to dark.
Step 1) Fill Holes and Gaps-
Use spackling or Joint Compound as I did, to fill all the seams along the corner edges and all the holes you’ll find.

I quickly learned that with the deep texture of these beams, the putty knife did not work here. I resorted to spreading the JC with my finger. Very easy — and cost effective!
I lightly sanded the corner edges, and used a damp rag pulled over my fingertip to take down any excess JC.
Step 2) Neutralizing the Eyes-
You may be thinking I’m crazy with those “eyes”.
They can be challenging, but really the first step is to assess whether they will bleed through your preferred base coat. I have a plan. I’ll start by neutralizing them.
I tested and there is no sign of bleed through. But as anyone who has done much furniture refinishing or faux finishing knows, bleed through stains can show up down the road. But these are not like knots in wood that contain tannins, the cause of bleed through, so I’m feeling confident.
With a kids craft paint brush, I dabbed a base of primer on each of the eyes.
Step 3) Adding the Base Color-
Next, add a glaze like the countertops to be the base.
I added a bit more paint to my glaze to make it a bit more opaque.
This is one of the reasons I love making my own glazes. You have control over the color and the opaqueness vs. transparency.
I tend to err on the side of light and transparent as it is easy to add another layer. Not so easy to take some away.
Because the beam had so much color variation, and I used a glaze rather than a base coat of straight paint, there is still quite a bit of color variation.
Step 4) Adding Color Depth-
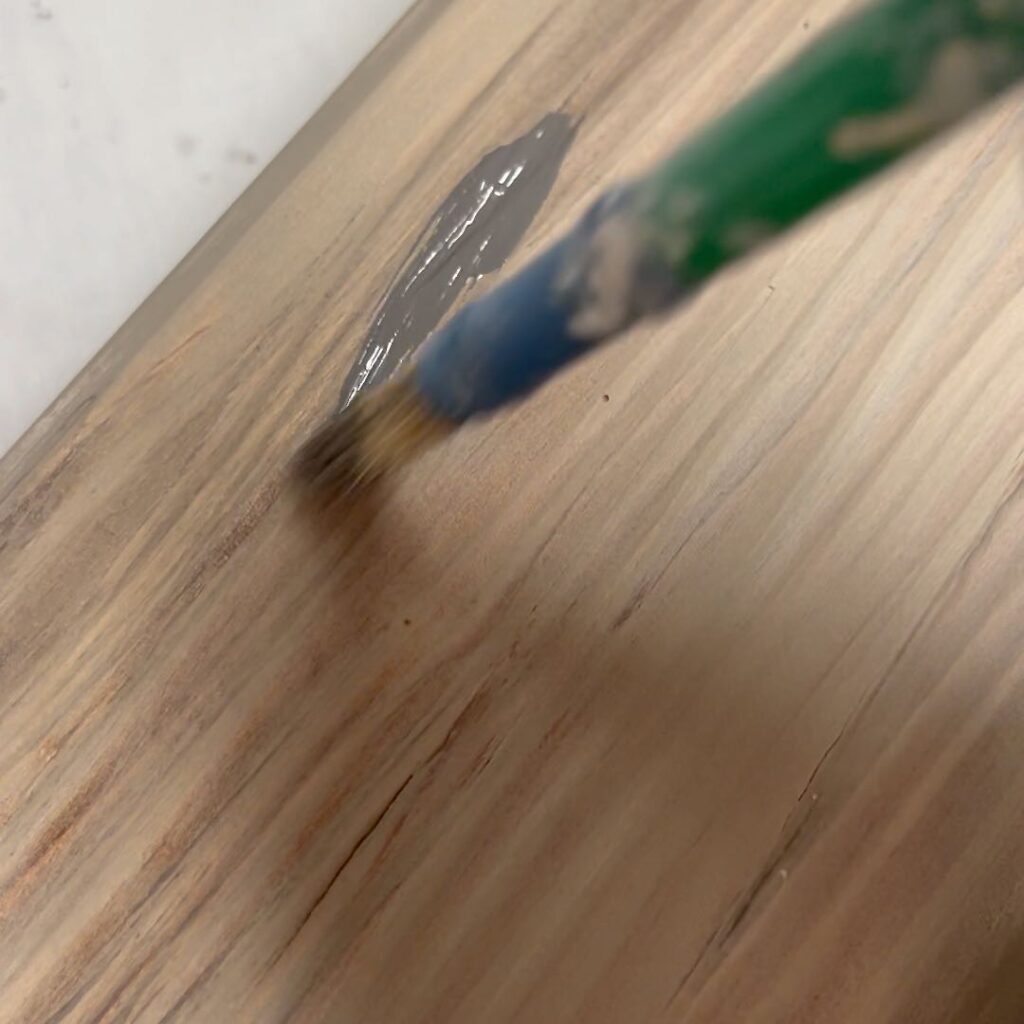
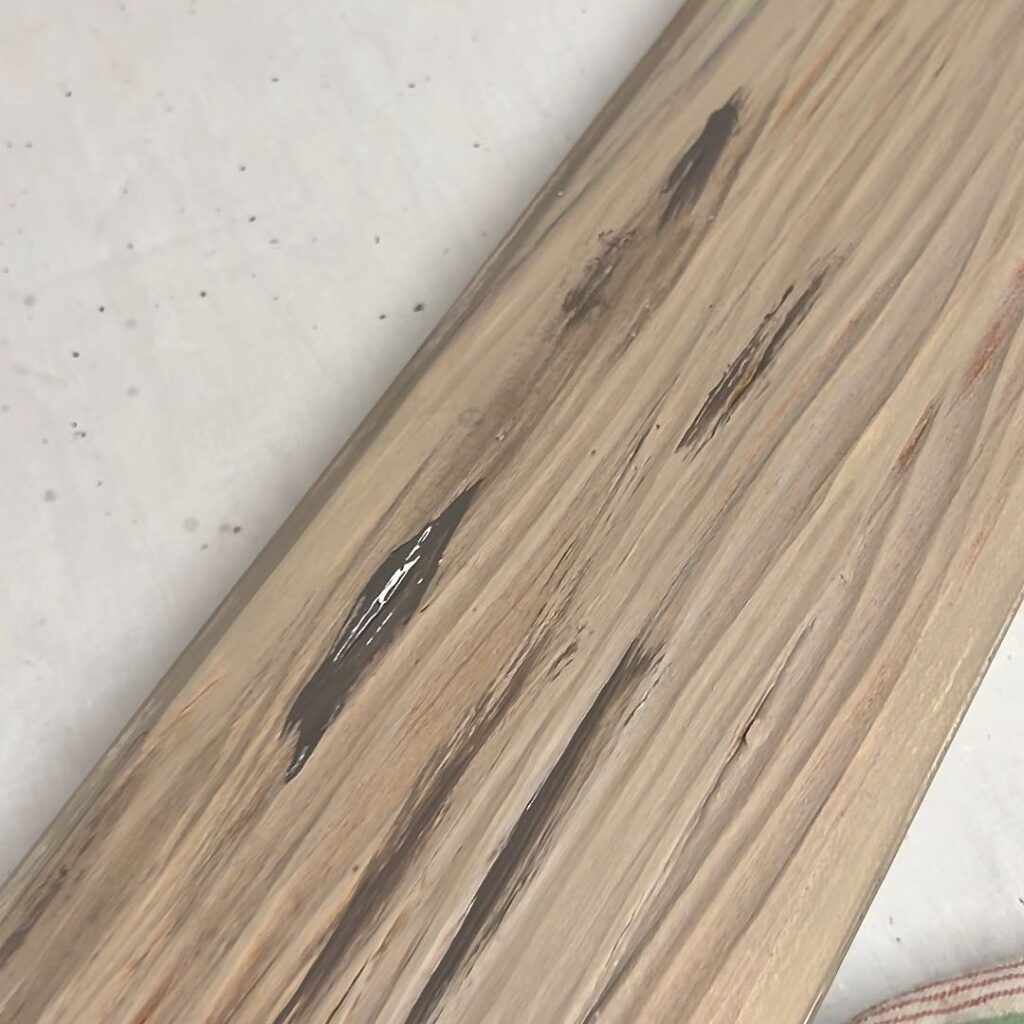
Now I went back in to add some highlights and depth. Wood that’s been outside weathering has a multitude of colors. And that’s what I was going for.
I also wanted to darken it quite a bit because the wood bathroom countertop and legs are obviously made from different woods and I wanted to play that up even more. I didn’t want them too close together where some might interpret it as I tried to make them match and missed.
No, I’m intentionally going for different woods coming together to make the vanity. And if the legs look like reclaimed beams, all the better!
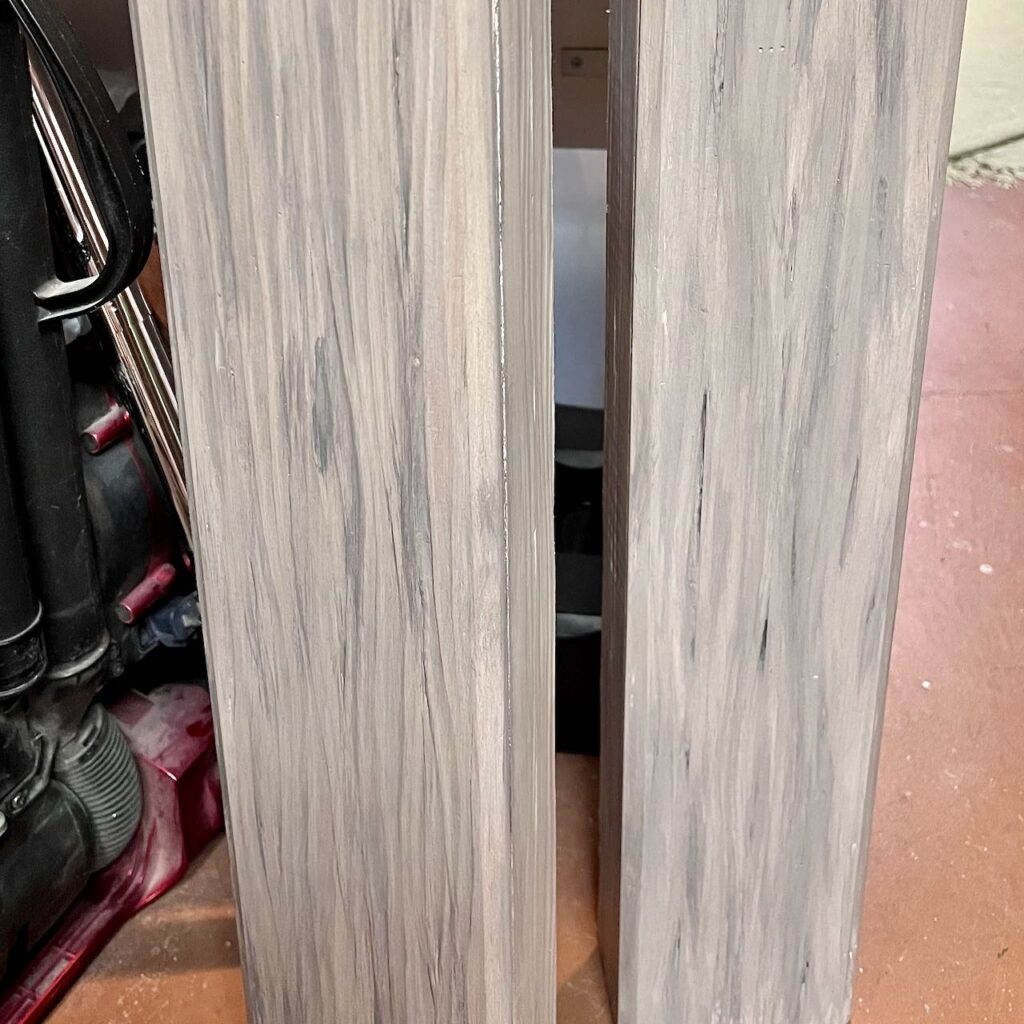
This is how the legs looked after the final round of highlighting. On its own, I really liked it.
But next to the countertop and shelves, I wanted a more significant difference. Sooooo . . . .
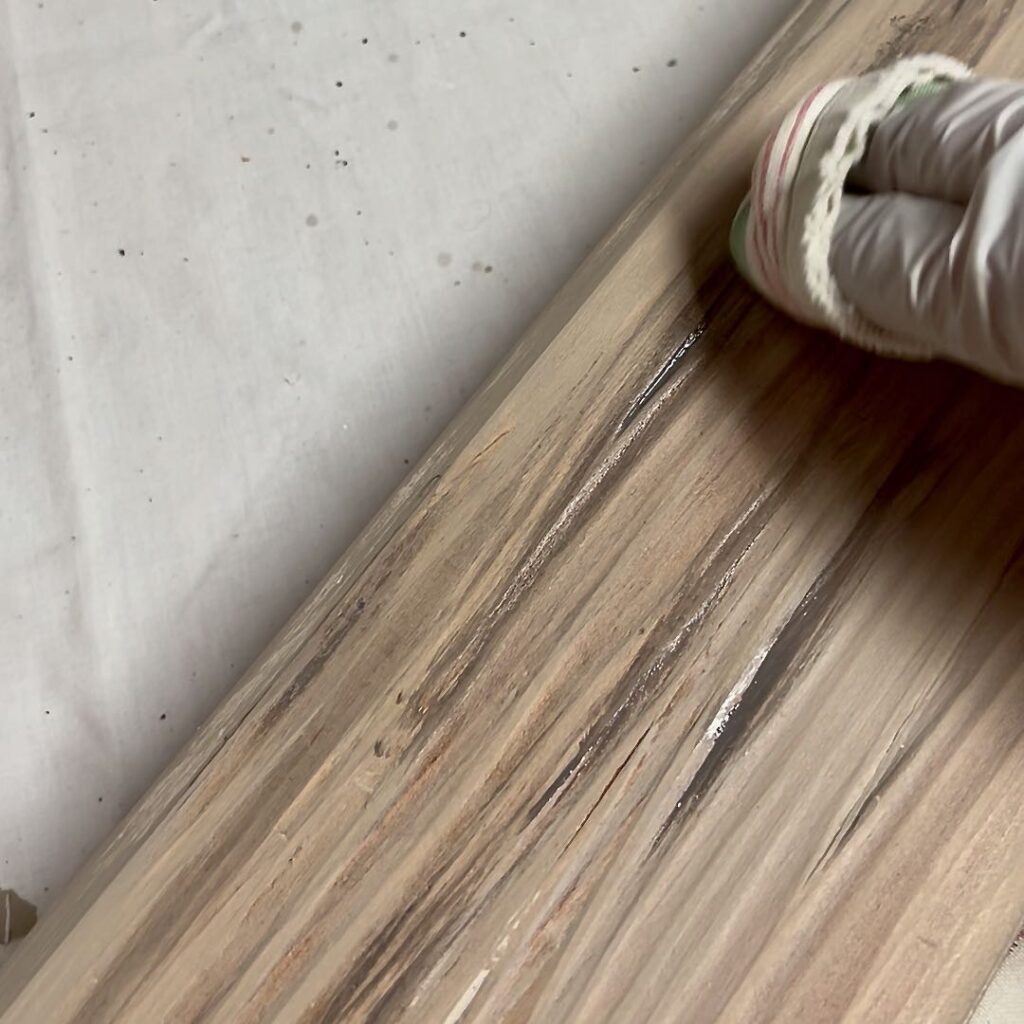
Step 5) Adding More Color-
Yep, I went back for one more layer of glaze.
Bears repeating, this is why I love glazing. You can keep adding and working it until you get just the look you were going after,

The glazing medium also extends the length of time you have before the paint dries. this is particularly helpful when working a faux finish.
The pic on the right is the finished look, but. glossy because the. final glaze is still wet.
I used what remained of an old can of acrylic glaze. I’m not seeing it anymore. But General Finishes makes one that is every bit as good.
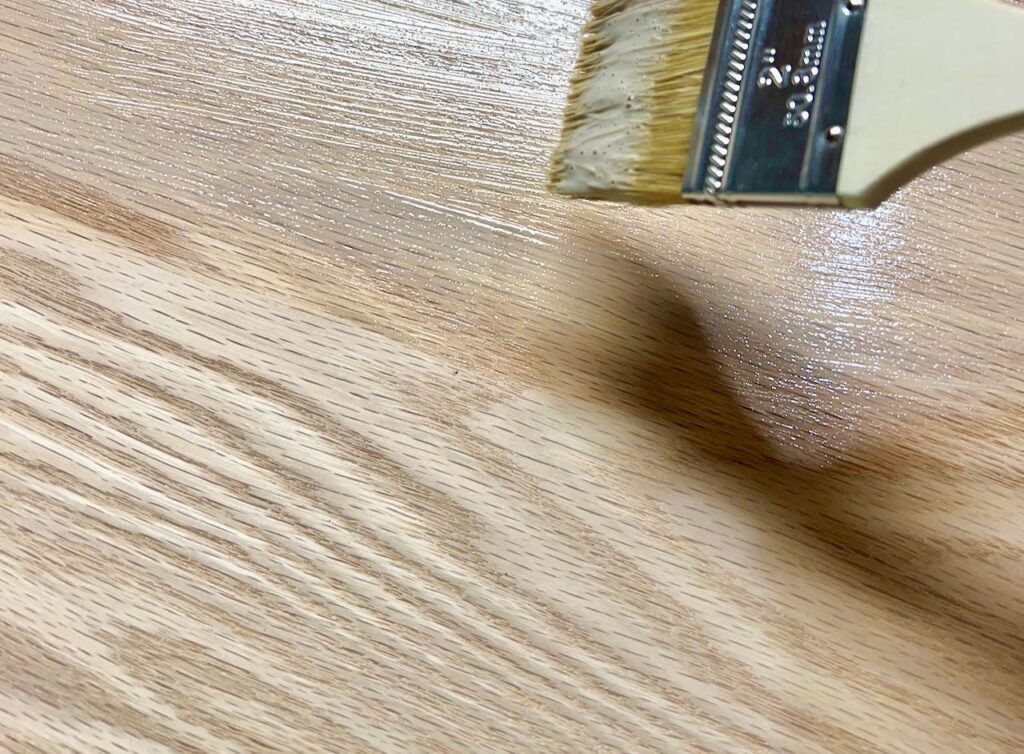
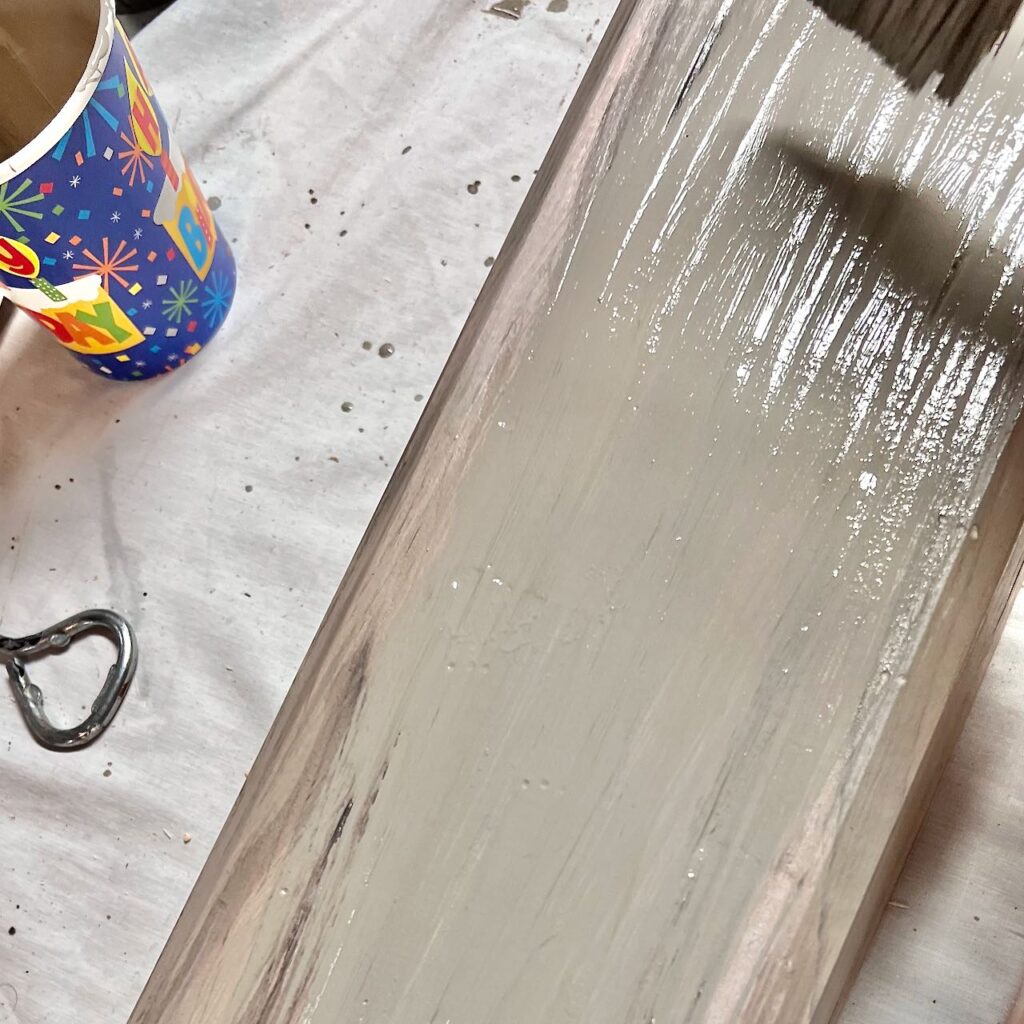
Sealing the Wood Bathroom Countertop, Shelves and Legs-
YES, they all need to be sealed, and sealed on every side, every surface.
Not all that long ago, I would have used an oil-based topcoat. But topcoats have come a long way.
The deciding factor for me this time is the toxicity of oil-based products, the longer drying times between coats, and that they still typically amber over time. I really did not want any ambering or yellowing with the lighter countertop or the grey of the legs.
After a lot of research and talking with several experts I trust, I went with General Finishes High Performance Topcoat. Yes, it’s water-based and I am soooo pleased with how the finishes turned out! This is Not a sponsored post. i’m just sharing what I have used and now love.
The links in this post may include affiliate links, which means if you purchase anything using these links, you pay no extra, but I may receive a small commission that helps keep this blog running. I truly appreciate you using affiliate links whenever possible. Please know that I will never recommend a product I do not believe in!


NOTE: Remember how I sanded inside the holes cut for the plumbing? This is important! You want to seal all that rough wood several times. Any stray water will find its way to the easiest access point. The same is true for all the side cuts of the plywood. Even though those cuts don’t show, it is critical to keep them dry so the plywood does not swell from water making its way between the. layers.
Please consider pinning this to your:
Bathroom Board
Faux Finish Board
DIY Board
Dream House Board
Before & After Board
Wherever it makes sense for you to find it again.
And here’s a highlight video if you prefer:
I hope this inspires you to think of wood in the bathroom with a different mindset.
And to try glaze medium for your next, or maybe your first, faux finishing project.
As always, I so appreciate you being here. Don’t hesitate to reach out with any feedback and/or questions.

Good info! A great look. How many coats of sealer did you use? Did you sand between? How much dry time between sealer coats?
Hi Elle,
Thanks bunches. The legs just got two coats of topcoat and I did not sand between them. They have a very textured surface and the intent was for rustic. I was pleased that the General Finishes High Performance Topcoat did not produce any little air bubbles. It laid very flat and smooth on all that texture.
For the countertop and shelves, I sanded lightly before the first coat and planned on sanding between each, but I was surprised by the quality of the topcoat as each layer dried. I think I did a cursory swipe with sandpaper after the first layer, more out of a sense of obligation than a real need. The next layers, I didn’t.
The directions suggests a dry time of 2 hours between coats. I probably gave it three hours between coats and I did two coats on the bottoms of the shelves, three coats on the top of the shelves and all the cut edges and the bottom of the countertop and inside the cut circles in the countertop. Four coats on the top of the countertop and I will probably add another one before I silicone around the sink base.
Don’t hesitate with any additional questions; I am here to help!
I love this look for your bathroom so much Diane! Using the edge on the plywood was brilliant – I would have never thought to treat it the way you did. General Finishes High Performance top coats are among my faves! Pinned 😊