You Need to Make This Easy & Cheap Spray Paint Tent
This spray paint tent is so easy and cheap to make. Perfect for small projects or large pieces of furniture. Use again, again and again!
This is an easy solution when you have a small craft that needs some spray paint, or a large piece of furniture that will require days of spraying finishes. Just remember to plan your paint tent around good light and good ventilation.
First, you build the framework. This framework can remain in place as long as you like. Mine’s been up for years and years.
The framework just hangs out, waiting for your next project. When it is project time, it’s a simple process to clip plastic drop cloths to the frame.
“Drywall Corner Bead” strips are the keys to the framework you’ll build. You should be able to find them in the sheetrock area of your home improvement store.
NOTE: My first paint tent in our garage, last house, I made with lightweight metal strips. The new paint tent in our storage/hobby room is made with the white plastic version. Your choice. Either one works great!
Sounds like a great idea? But you’re busy right now.
Don’t lose track of it. Pin it to your:
Brilliant Ideas board, or your
Life Hacks board, or your
DIY Tips board, or your
Things I Need to Know board.
How to Build Your Spray Paint Tent Framework-
Materials & Supplies-
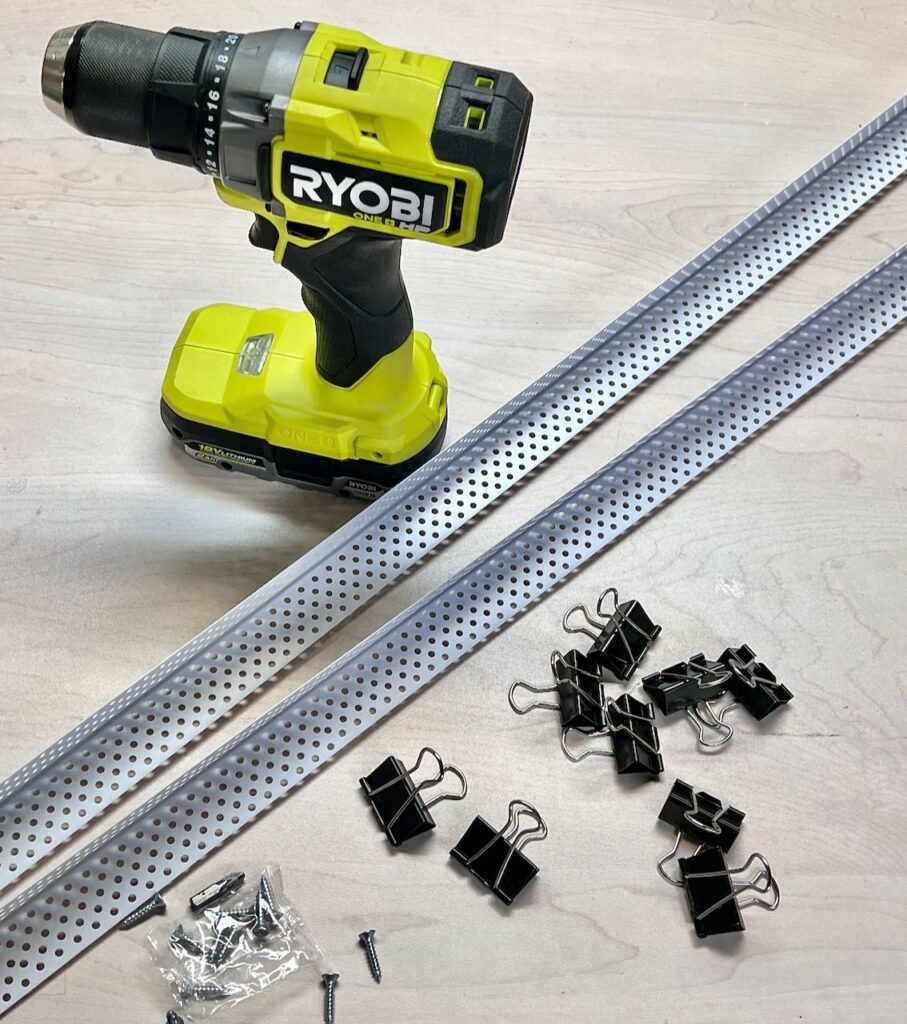
- Drywall Corner Bead Strips, metal or plastic
- Small wood screws
- small screws and nuts, needed for tall ceilings
- Drill with appropriate bits
- Step stool or ladder
Your Spray Paint Tent framework should be where you will have good light and good. ventilation. In our garage (in our previous house) I had to add a clip on light. Combined with the natural light and the overhead light, it worked great.
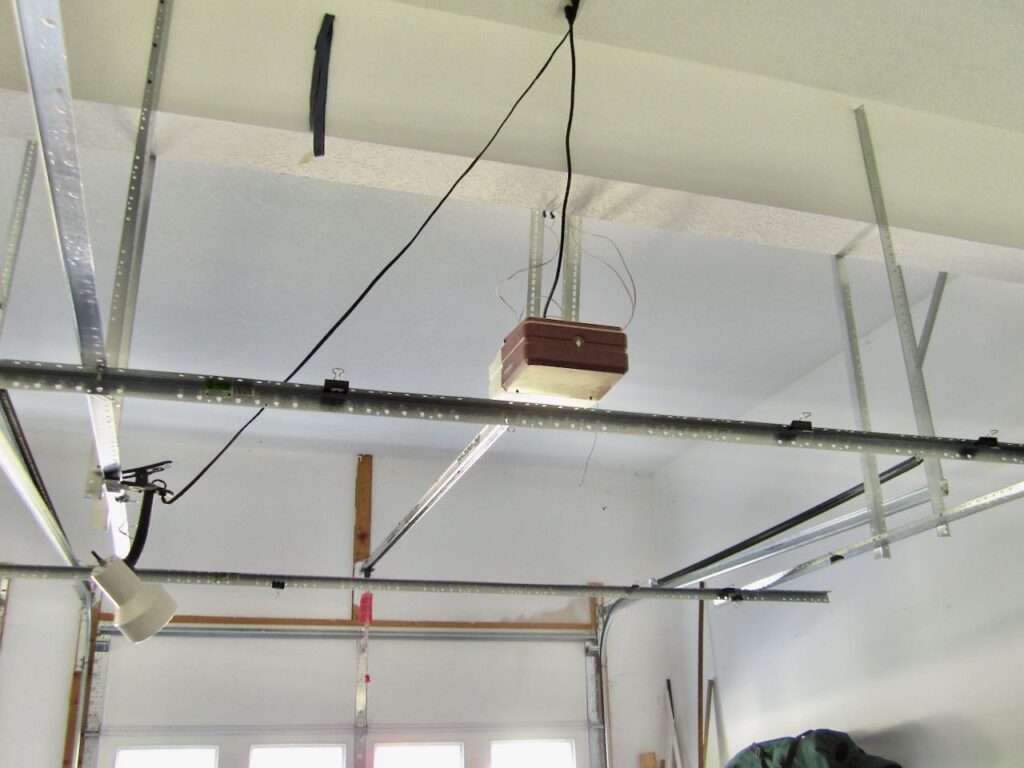
If you’re setting up for painting in your garage, be sure to plan the tent frame around the garage door opener and tracks. Not difficult, just be sure to keep that in mind.
Attach the Framework-
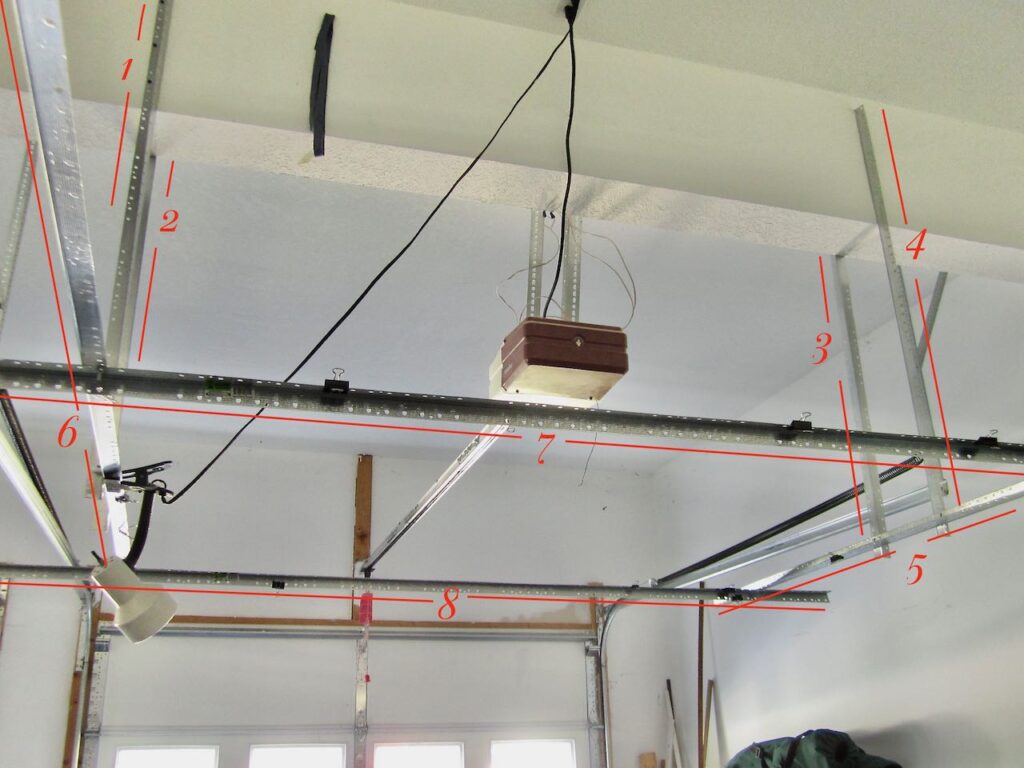
If your ceiling is quite high, start by applying vertical strips to lower the horizontal strips that will be the frame for your plastic drop cloths. This is how our garage frame worked in our last house.
I cut two 8-foot strips in half. Then each of these halves were attached with wood screws to the side of the beam that ran across our garage, 1 – 4 above.
Next, using small machine screws and nuts, I attached a horizontal strip, 5 & 6 above, along the end of each pair of the vertical “halves”.
And lastly, I added two more strips horizontally, 7 & 8 above, These crossed and attached to 5 and 6 with more machine screws and nuts.
SIDENOTE: Dating myself here, but does this take you back to your old Erector Set days? My older brother had the Erector set. Yea, gender roles of old! I used to sneak in and play with it. I then acquired it when we closed out our parent’s house and I have since gifted it to our architect son.
Our current house is a quirky, lake house built in the 60’s. Our garage is currently my studio, filled with hundreds of rolls of fabric — NO paint allowed in there!
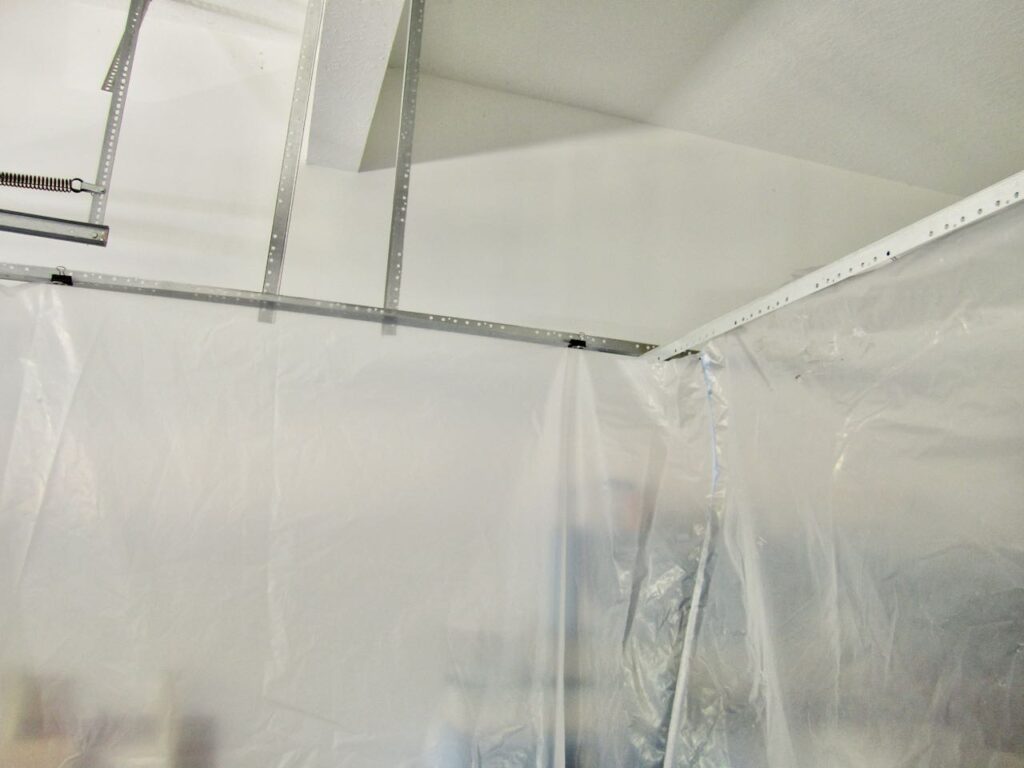
We use our hobby/storage room for spray paint projects. It’s a low ceiling with exposed rafters, so in this case the white plastic drywall strips are screwed directly into the rafters. And I placed several rows so I can easily adjust the size of the paint tent to the size of the project.
Now For the Spray Paint Tent, Itself-
It’s as simple as binder clips and plastic drop cloths!
HINT: I use and reuse my plastic drop cloths.
SAFETY TIP: When spraying a larger project on the floor, use a canvas drop cloth on the floor. The plastic can get slick and if you are using a platform or a stool with casters, the plastic tends to get sucked up in the casters.
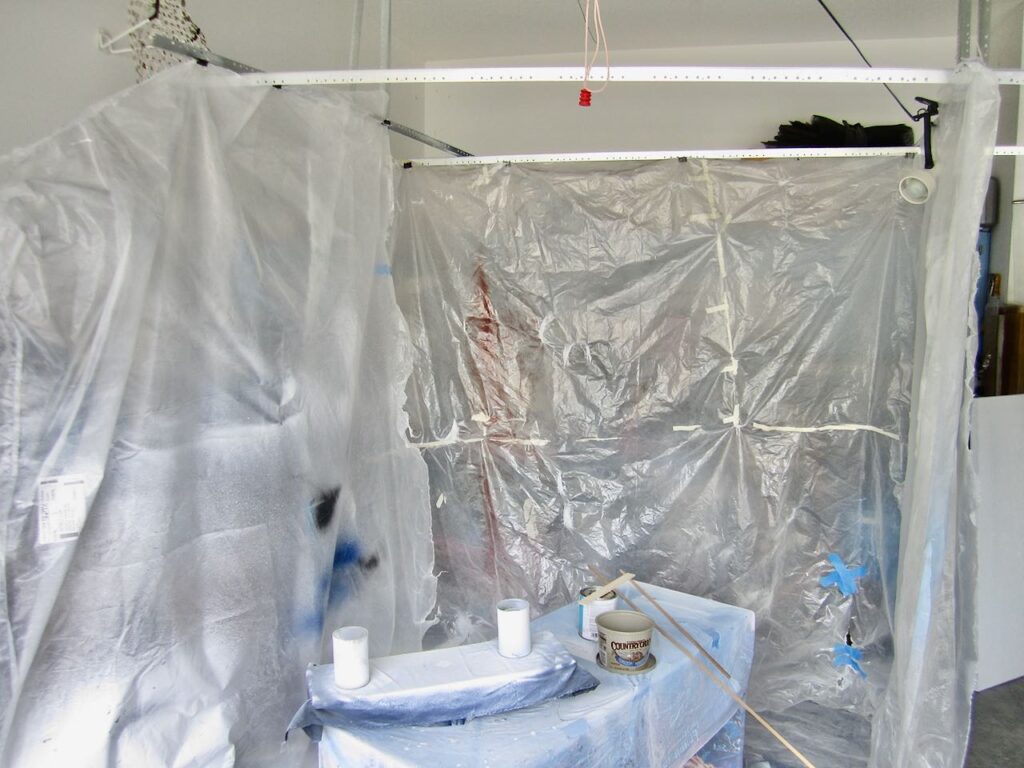
Here, I have a table on casters covered with plastic as my work surface. I was spraying a small project, so it was elevated on the cans and I rotated the table to spray all sides. To really contain the overspray, the plastic on the left was clipped along the opening. I just opened it for the picture.

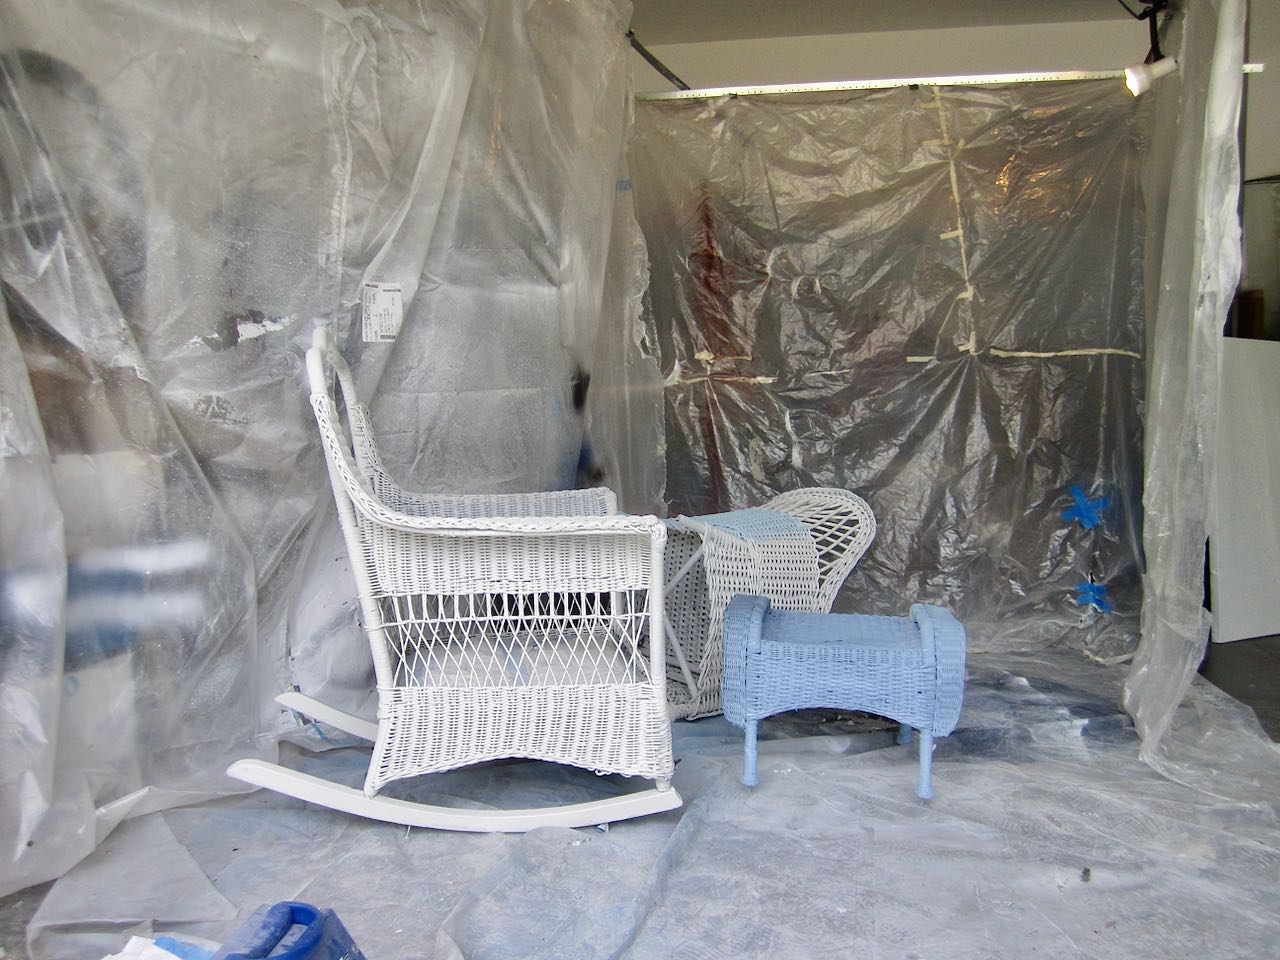
When a project requires more space, like this set of whicker furniture, I could also temporarily clip an extension of the plastic to the overhead door tracks.

For smaller projects, a table inside the tent area with the drop cloth wall also covering the table works great. Here I’ve also added binder clips on the corners and front to create a tighter tent area to confine the overspray even more.
CAUTION: I can’t stress this enough! In a spray paint tent, you want to always use a ventilator! Our hobby room has an extra exhaust fan installed, but it is still not enough. We always use a ventilator.
Don’t forget to pin this!
It’ll help you, AND it helps me . . .
. . . a lot!
(Thanks bunches!)
I hope you’ll make your own spray tent frame, so you can easily take on any spray project you dream up! Afterall, the easier the set up and clean up, the more likely we will create!
Plus easier set up and clean up leaves more time for joy, right?

What a great idea!! Thanks so much for sharing! I’ve pinned this for future reference!!
I hope it makes future projects easier, which means more joy-filled!
A great idea. Thanks for sharing!