
How to Makeover a Tacky Thrift Store Nativity Set
Here’s a gorgeous neutral, modern nativity set without the trendy price tag. It easy, budget-friendly and a favorite Christmas DIY.
Our family heirloom nativity set that I grew up with is one of my favorite treasures of the Christmas season.
I’m so glad I didn’t have to wrestle my sister or brothers for it. I was prepared to, but glad it didn’t come to that!
As much as I love that set, it’s really all about the nostalgia, not necessarily its great style.
Although it is lovely, I have been longing for a really pretty set. The Hubs even bought me a set for Christmas one year, but it was too large for where I wanted to place it.
I’ve seen a few lovely sets over the years. But the ones I love are always way beyond a reasonable price range for us. So I’ve been on the lookout for a thrift store or garage sale set.
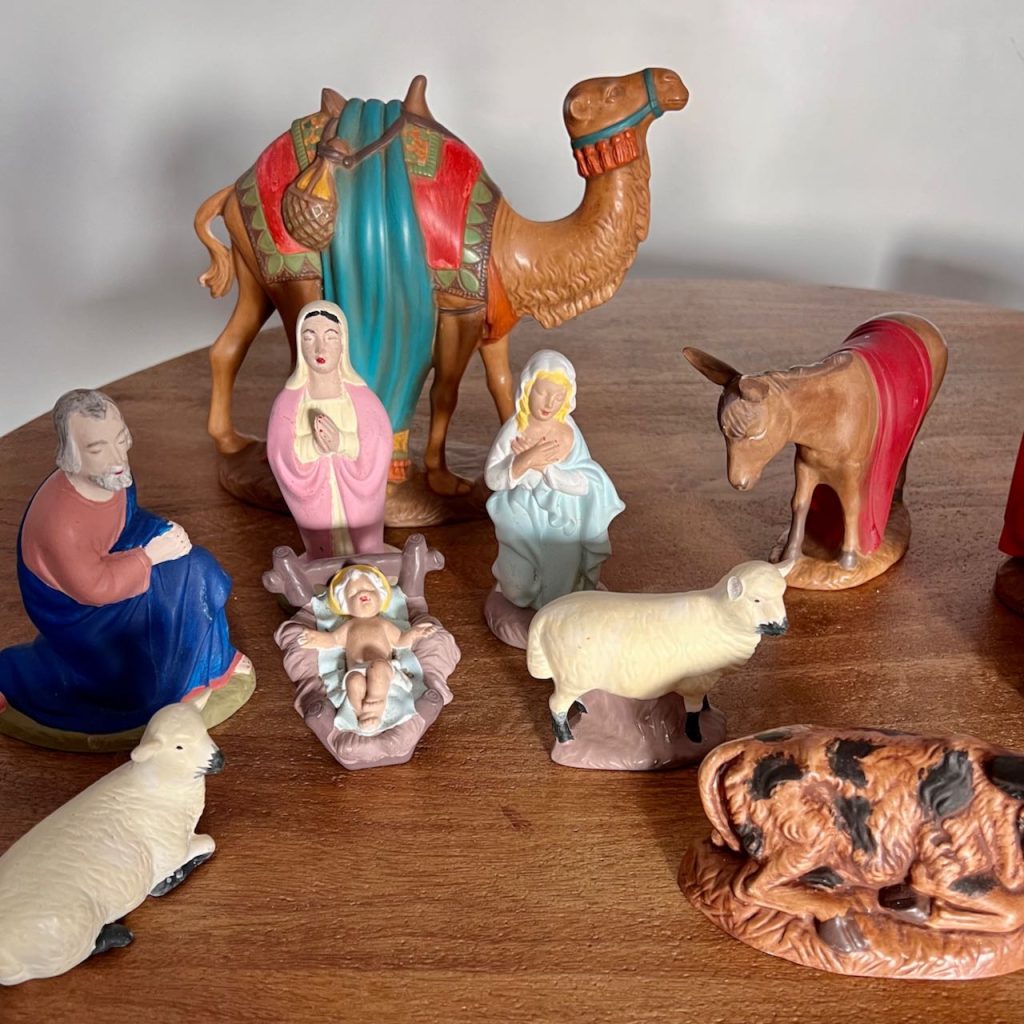
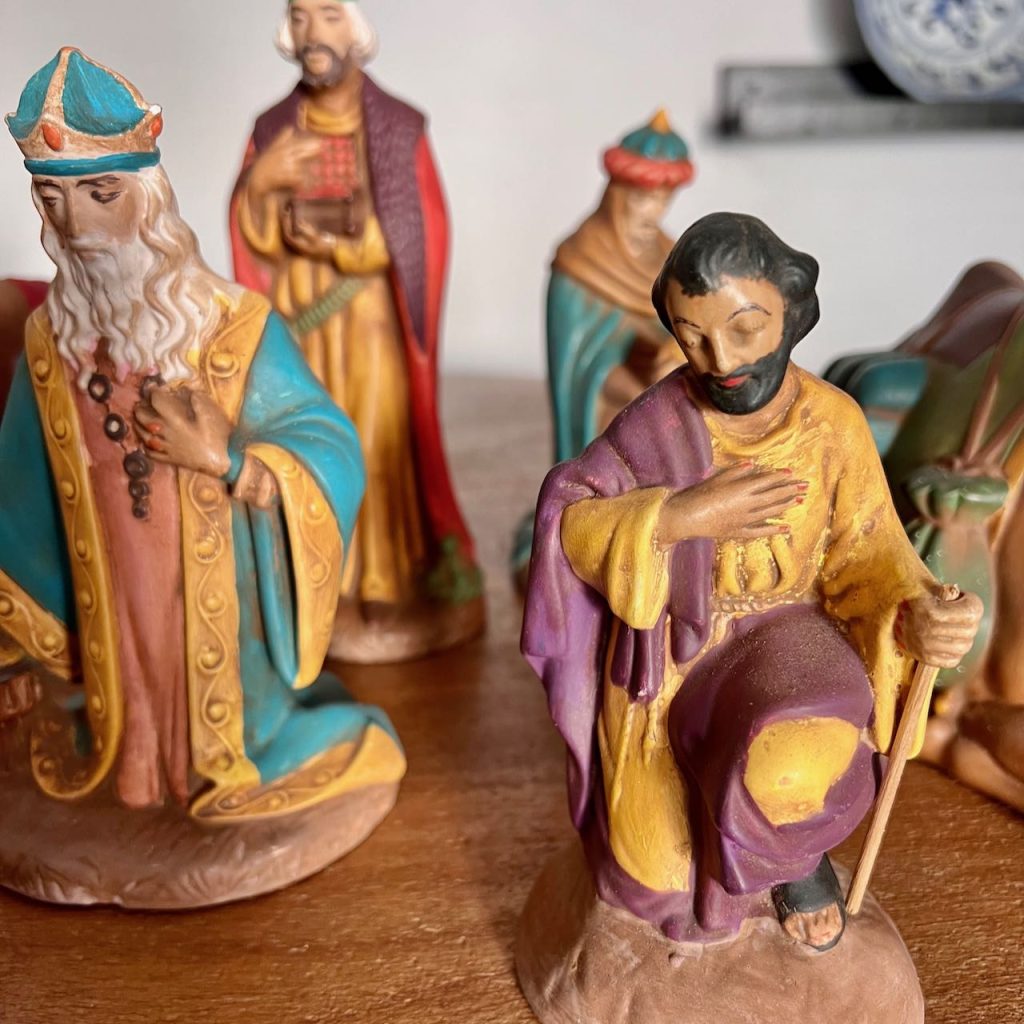
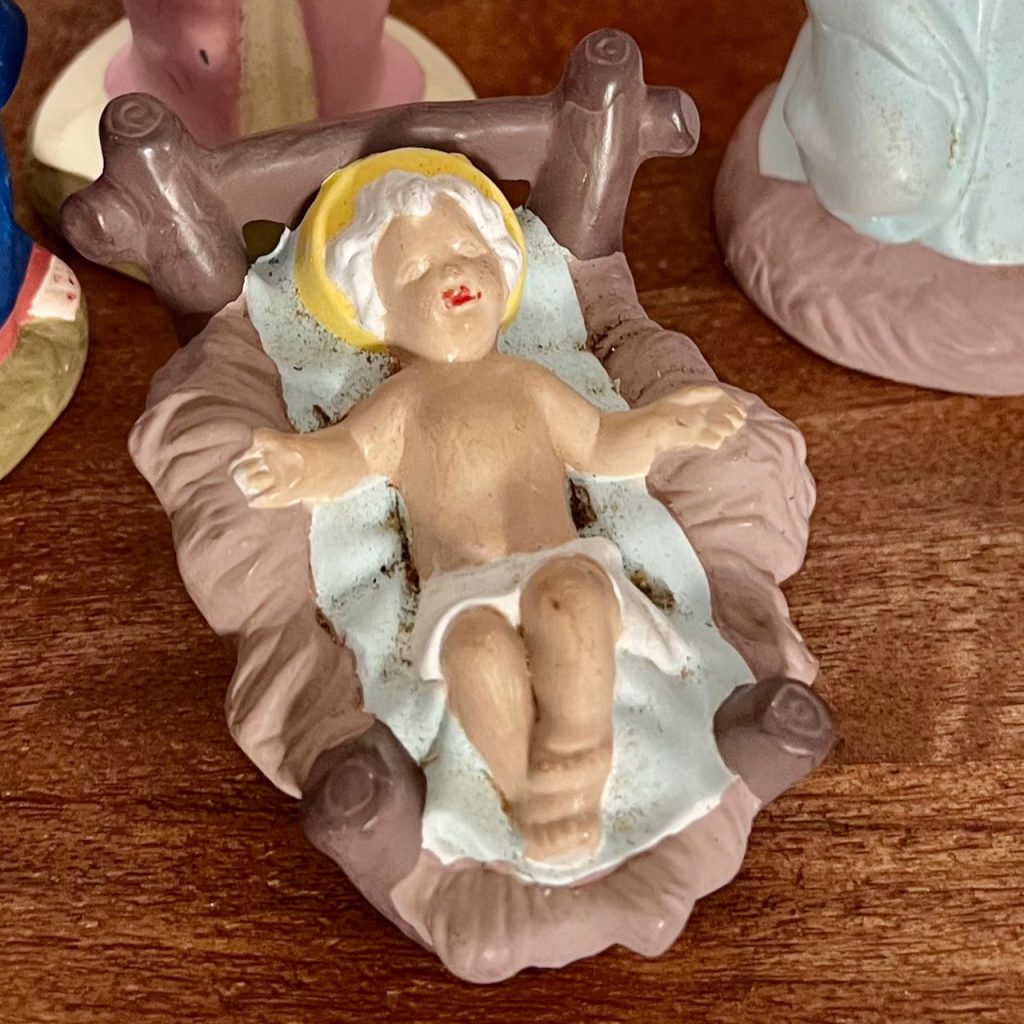
Last July, I scored a great set at my favorite local thrift store. Well, actually it was two mismatched sets that I could make work together. All together, 14 nativity pieces, plus a stable, for $12.
I knew I could give this combined vintage nativity set a whole new look with just a little paint — specifically white spray paint. And then some accents.
Let’s Start With Some Inspiration
Always a good place to start, right?

In my head, for a couple of years now, I was seeing glossy white, but new I wanted some accent? That lead me down the path of a Lladro-inspired creche.
But I didn’t want a spot on Lladro dupe, so then I veered towards metallic gold accents. Felt right for the wise men, but not for the baby Jesus and other important cast members. So both of these must not have been right since I’ve been dragging my feet for several years on this.
Then in October, on a visit to my favorite store in probably the whole Midwest — Nell Hill’s — I spied this set:
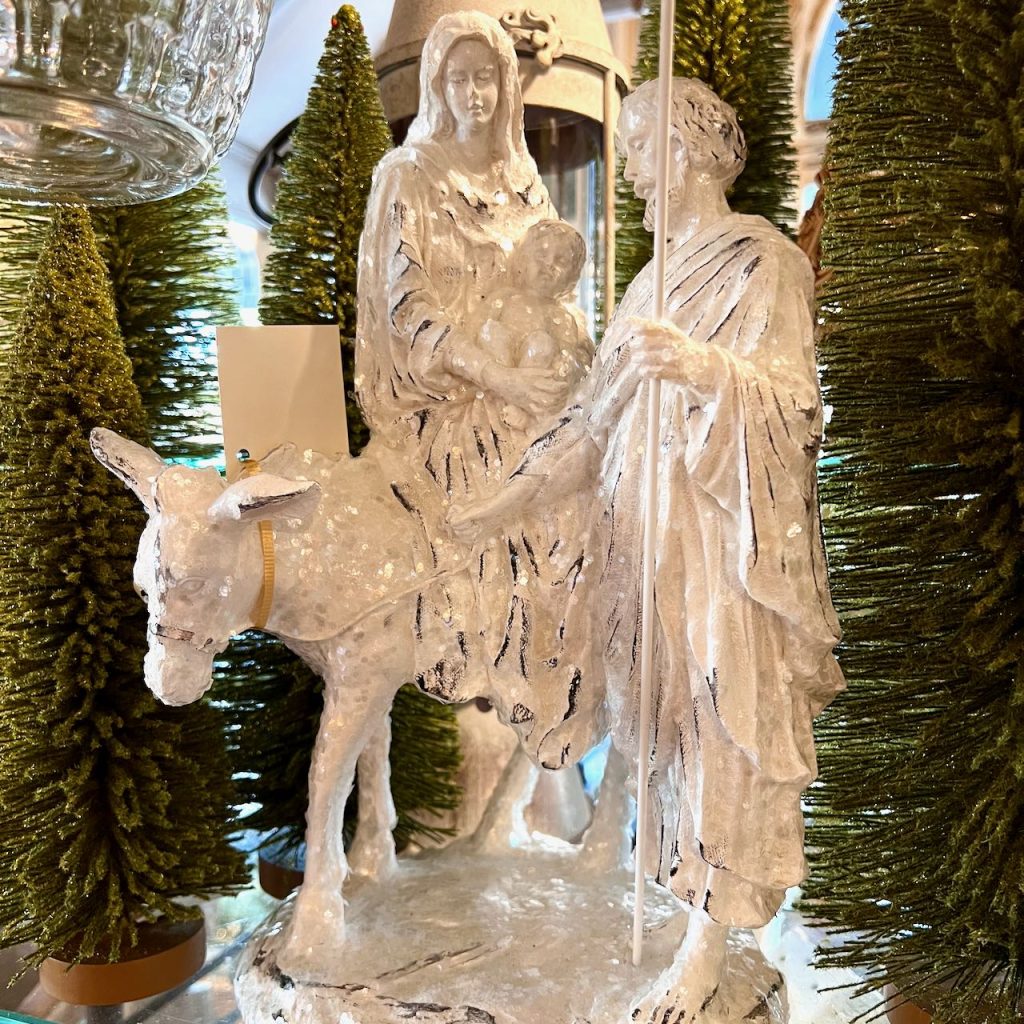
I could hear bells ringing and the Hallelujah chorus!
I finally had my inspiration and could clearly envision what my tacky, mismatched, forlorn nativity scene could become, minus the glittery snow!
TABLE OF CONTENTS
Let’s Transform a Tacky, Mis-matched Nativity Set
Making Mis-matched Work —
Yes, mis-matched pieces can become a cohesive group if:
- You completely cover the original colors
- They are of the same scale
- The general style is similar, whether realist, simplistic and flowing, modern blockish, etc.
- The amount of detailing is somewhat similar,
Paint Time —
Just like any painting project, start with a good cleaning.
Use a brush to get any dust or grime out of the cracks and crevices. An old tooth brush works great.
Next, we hung a plastic drop cloth on the installed paint tent framework and were ready to go,
We have a heavy duty vented exhaust fan in our hobby room and wear a respirator mask.
REMINDER: Please take precautions if you are spraying indoors. We only have one set of lungs, protect them!!!
By this time it was early November, so The Hubs did the spray painting as I was confined to my sewing studio with Christmas stocking orders.
We learned the hard way.
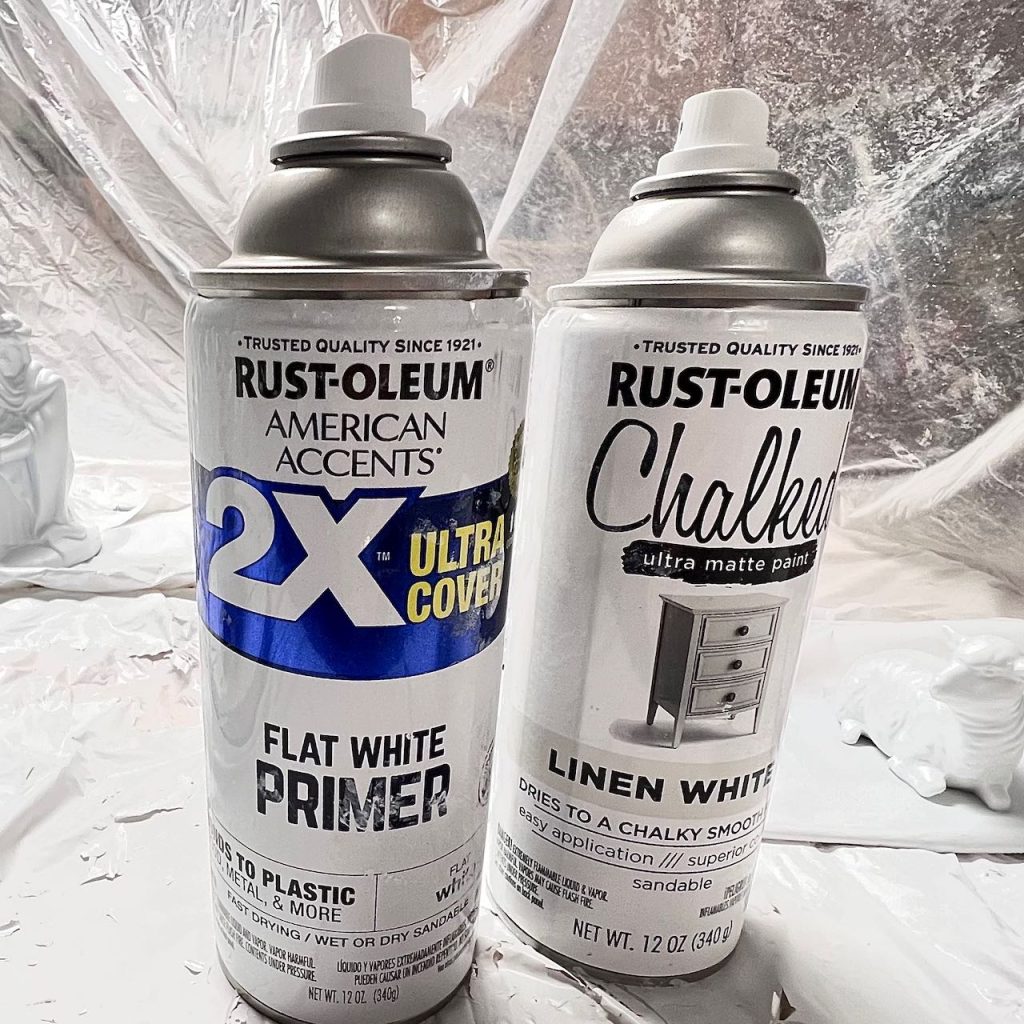
LESSON LEARNED: Take it from us, the best spray paint to cover all those bright colors is a definitely a primer in grey. Then the white will cover much easier.
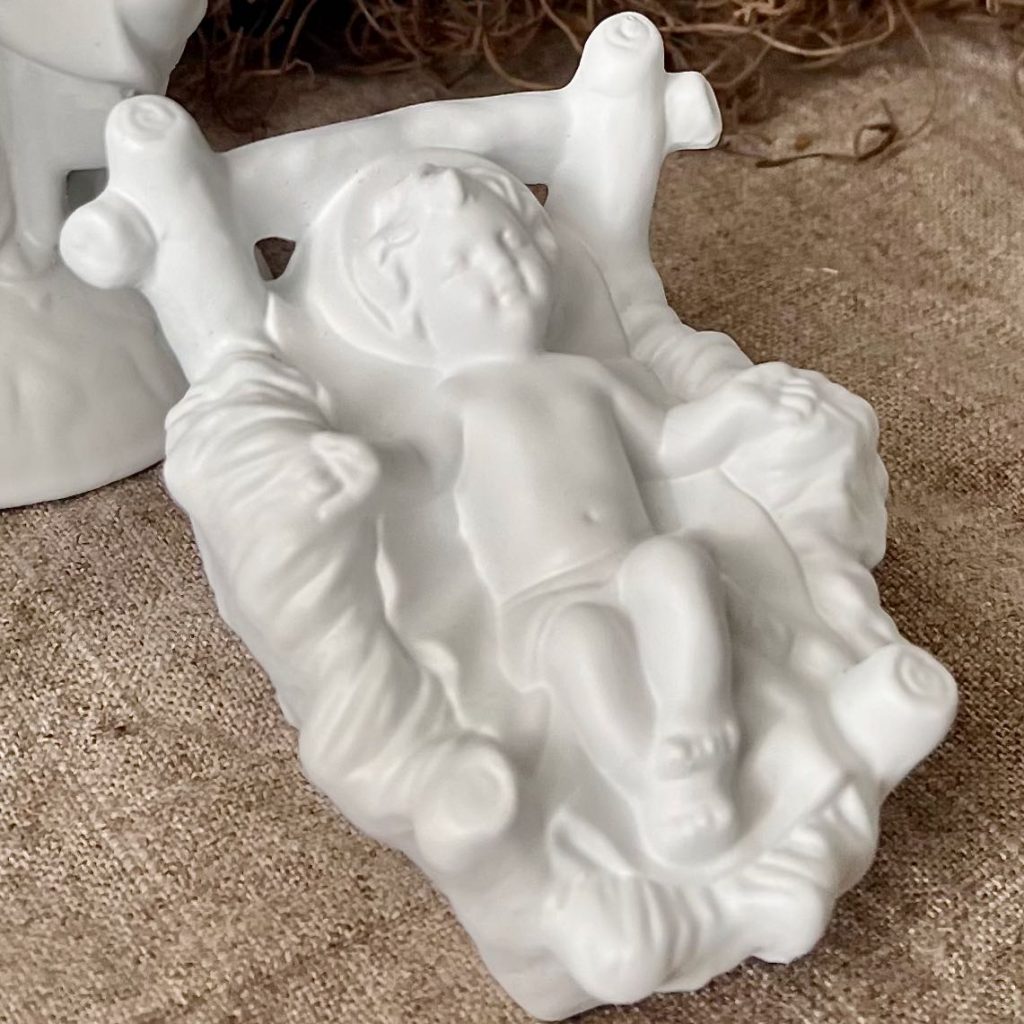
We used a combination of Flat White Primer and then White Linen Chalk Paint over that. We still ended up with 7 thin coats!!!
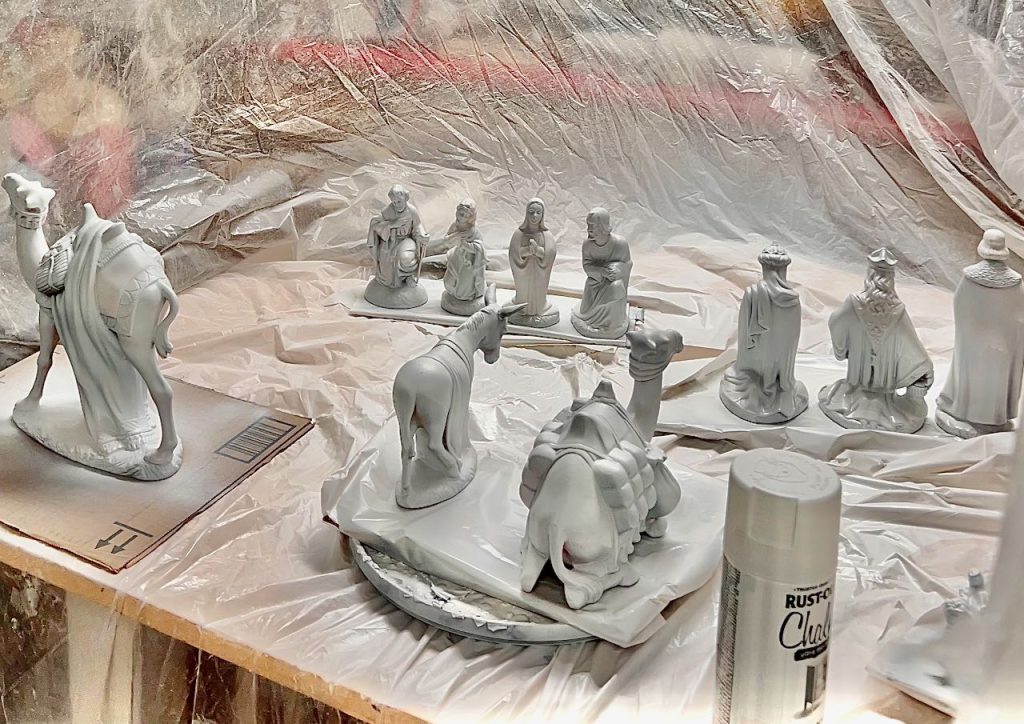
PRO TIP: Use a lazy susan for the easiest way to spray all sides of detailed items.
PRO TIP #2: For multiple small items place 2 or 3 on a piece of cardboard on top of the lazy susan. Lift the cardboard to move them aside to dry while you spray the next set on another piece of cardboard. Repeat, and repeat and repeat again as needed.

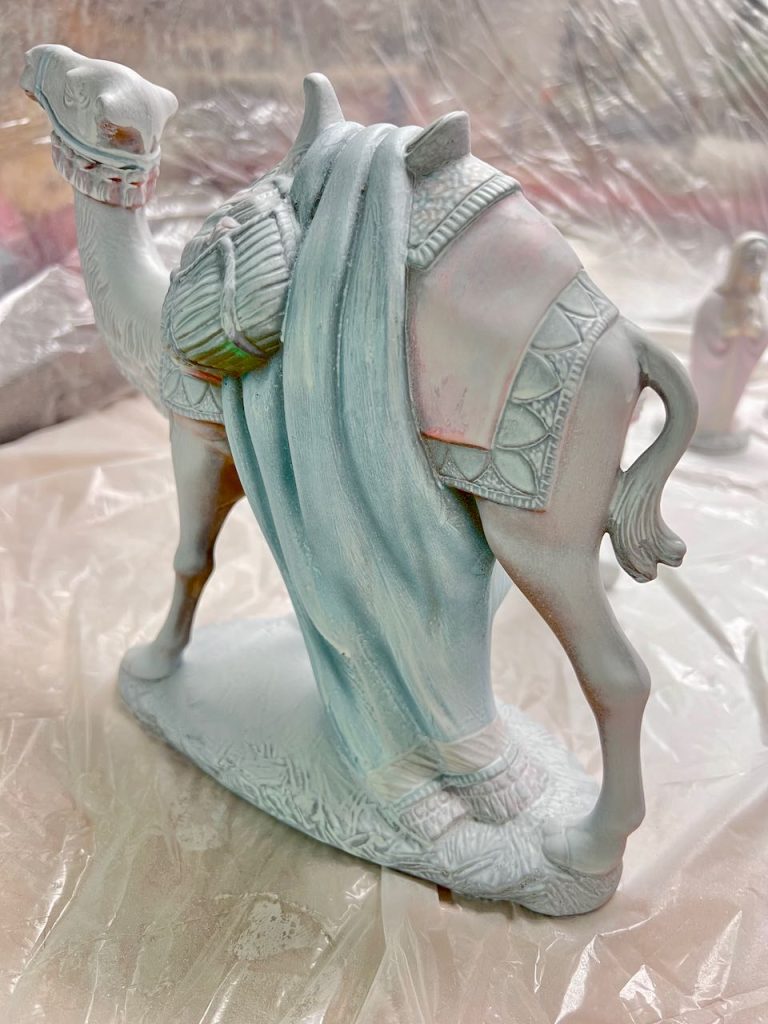
For Christmas, I put the Nativity scene out like this. And it was lovely. It felt fresh and new, yet timeless and traditional.

I wasn’t thrilled. It wasn’t quite what I wanted.
I knew this would be my first project after Christmas as soon as the kids all returned to their homes. I would get to work with the accent painting to bring it closer to the inspiration — in time for the Epiphany.
Now For the Accent Paint —
I remembered the fine brushstrokes of dark charcoal on the inspiration set.
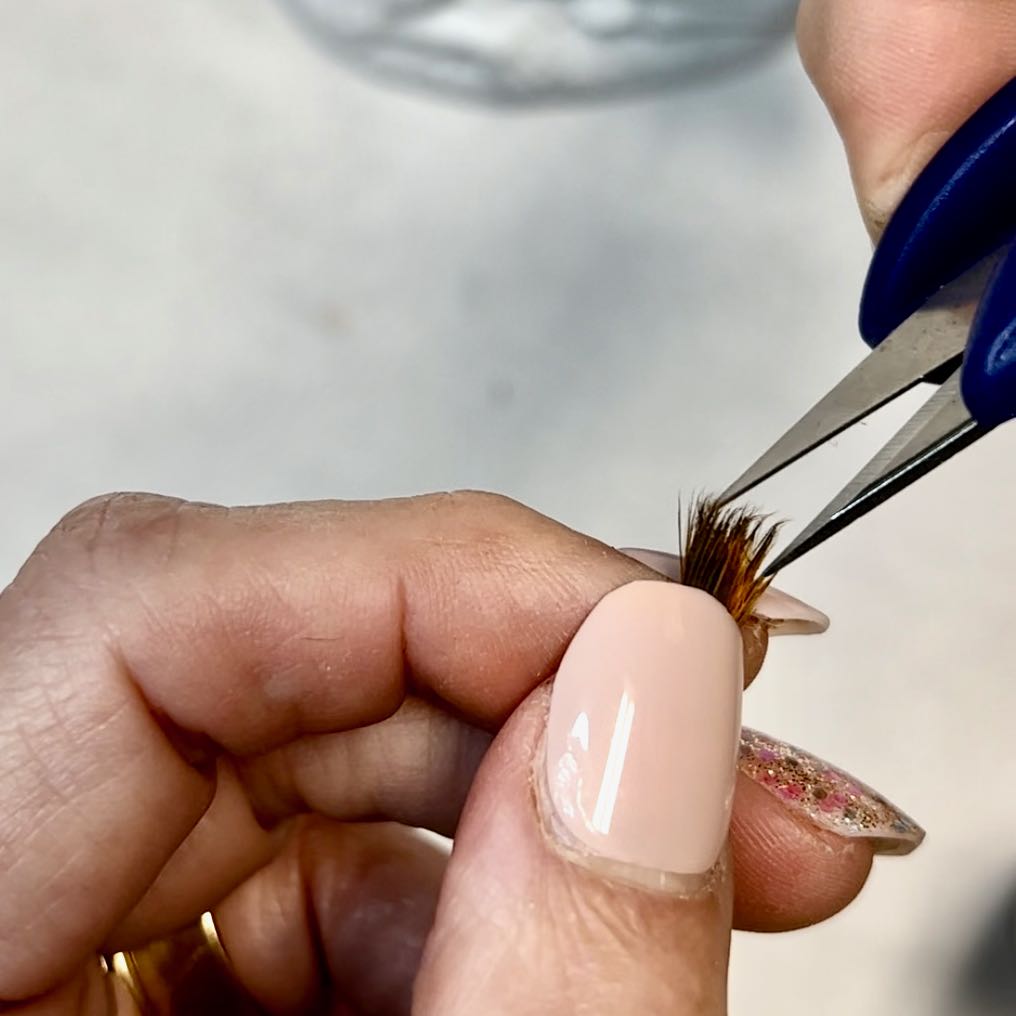
I started by modifying/trimming a cheap paint brush so only a few bristles are full length. This way I can dip just those couple of bristles in the paint and be able to keep the painted accents very thin and light.
Next I mixed some craft paint in a lidded condiment cup. I wanted a warmer grey — more of a warm taupe color. So I added several generous squirts of burnt umber and topped that with two squirts of steel grey. Mixed and thinned with a touch of water.

I added some thin accents of this warm taupe color along fold lines and edges.
It made a nice difference, but honestly, I wasn’t thrilled. So I dug back through my phone and saw the pictures I’d taken of the inspiration set.
It was then obvious, I needed to do a wash of this taupe on the whole statue.
Paint Wash —
I started with an inconsequential lamb with a broken ear. Talk about sacrificial lamb.
I misted part of the statue with water and then quickly slopped the paint on, making sure to get it in all the nooks and crannies. Then I patted it back off with a cotton rag.
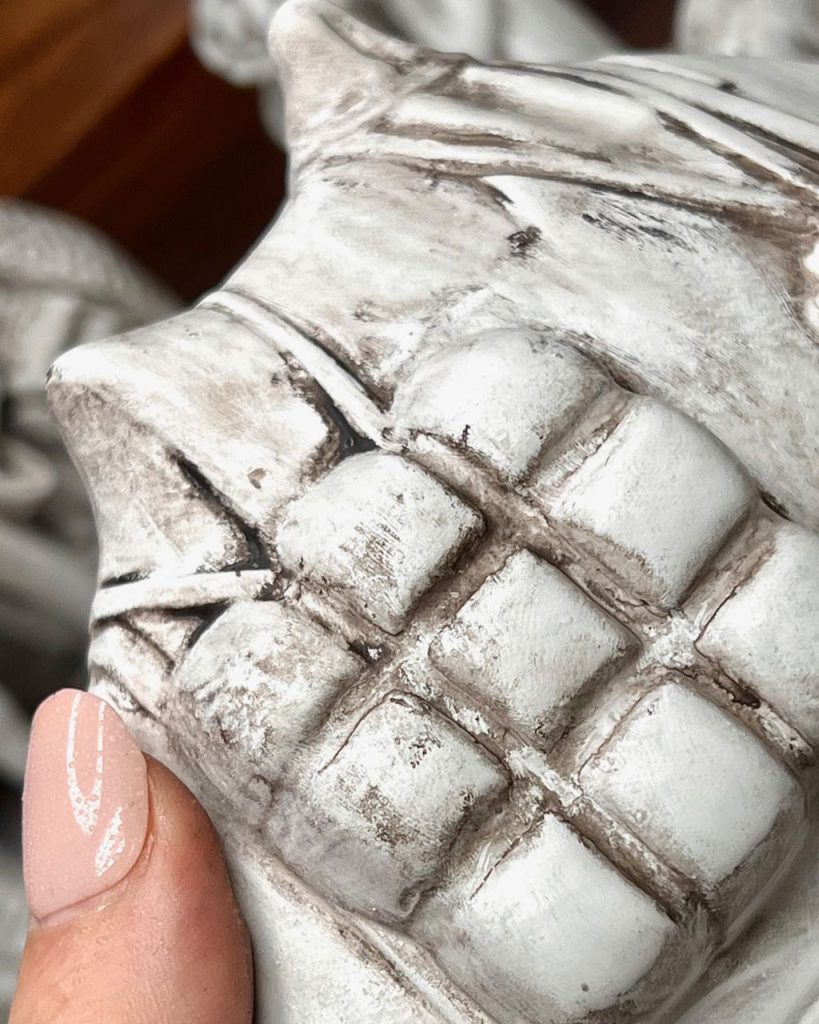
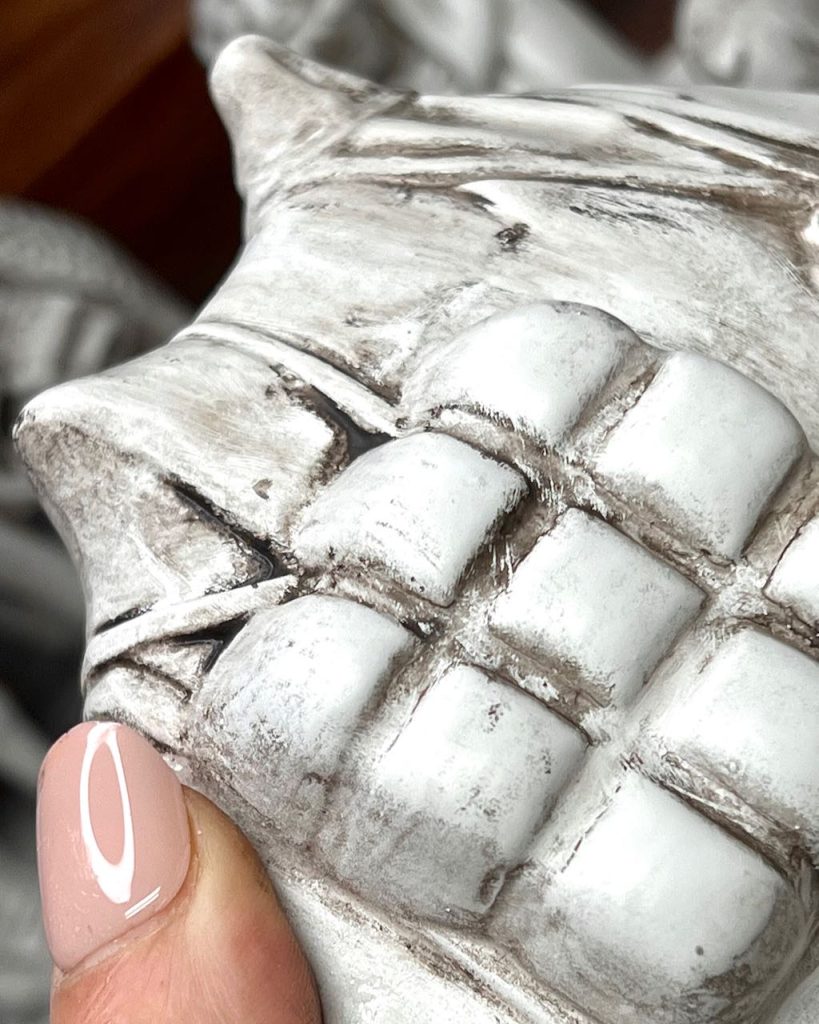
In some areas where the taupe was heavier than what I wanted, I misted and then wiped a bit harder to achieve the look I was going for. I wanted mostly white with a bit of accent.
This is a paint technique I have used time and time again. It is so easy to adjust for the look you are after. I used it to turn a scary rabbit statue into a charming garden bunny, and I used it when I made these tabletop birdbaths, and even on furniture like this bench, and this blue and brass beauty.
A quick pause: Have you found this post inspiring? Would you like more? Please subscribe and join this creative, joy-filled community:
Thanks bunches! Now back to the statues . . .
I suggest, starting with a small statue, like the lambs, then I moved to the cow, then I moved to a kneeling shepherd, progressing to the largest. This way I built my confidence and shortened my time as I went.
However, even though they aren’ the largest, I did save the holy family to last. It just felt right.
I also learned that it seemed to work best for me when I started at the bottom and worked my way up.
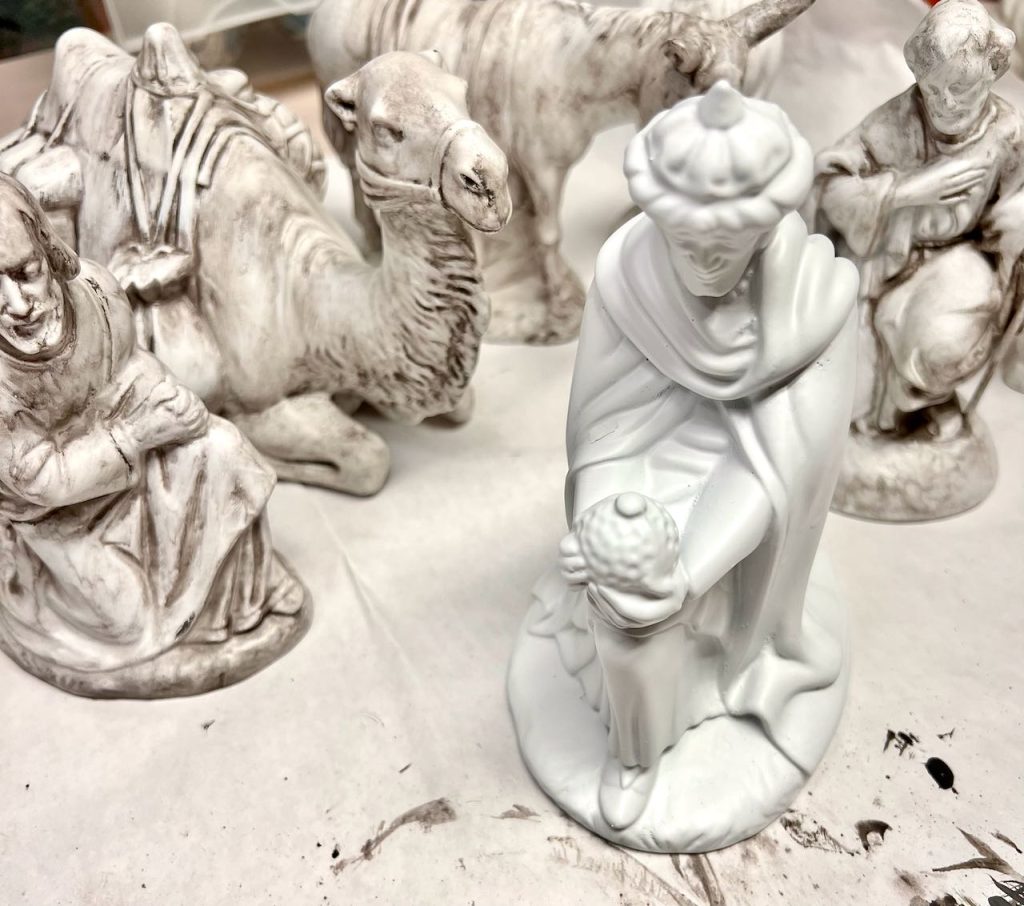
Look at the difference between with and without the taupe wash. Above, they look quite dark. The shepherd on the far right is what I was going for. But no worries.
When the wash was done on all the statues, I realized that several of the early ones were darker than others. I could either add more wash to the lighter ones or I could adjust the darker ones, I decided I liked the lighter version best, so I misted the darker ones and rubbed with my cotton rag until it was the level I wanted. Wow! That was easy.
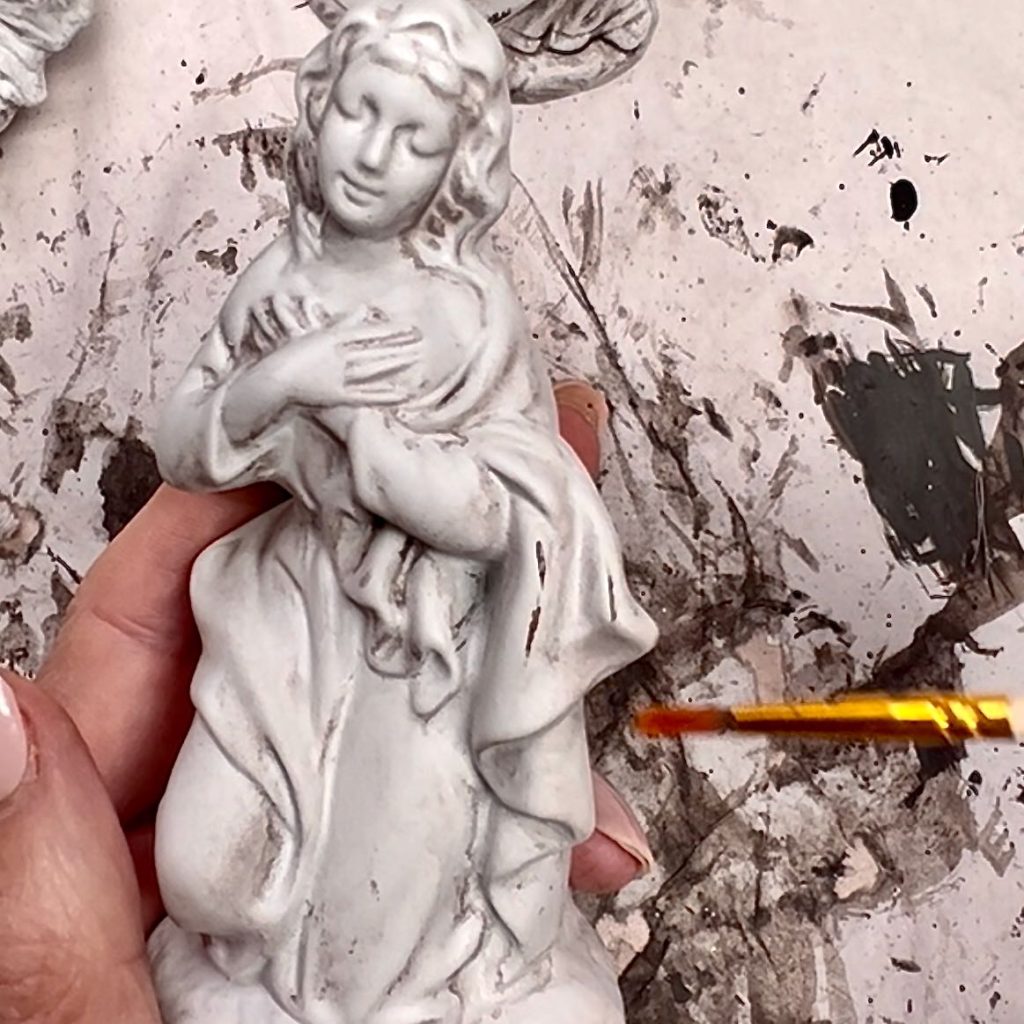
Looking back as my inspiration image, I added more accent streaks to the statues I had not done that to before the wash. It doesn’t seem to matter which goes first. Using my trimmed brush dipped just barely in thee paint, I very lightly dragged it where I wanted a worn spot.
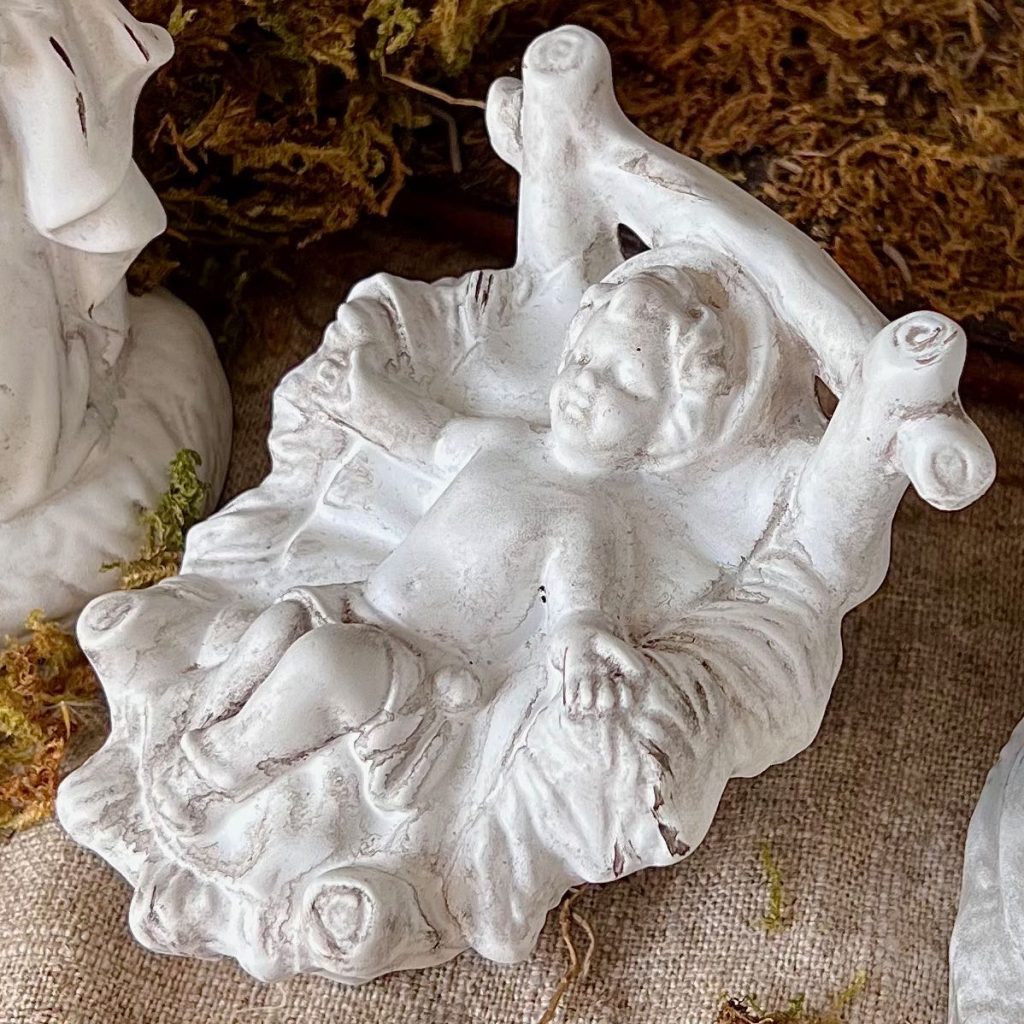
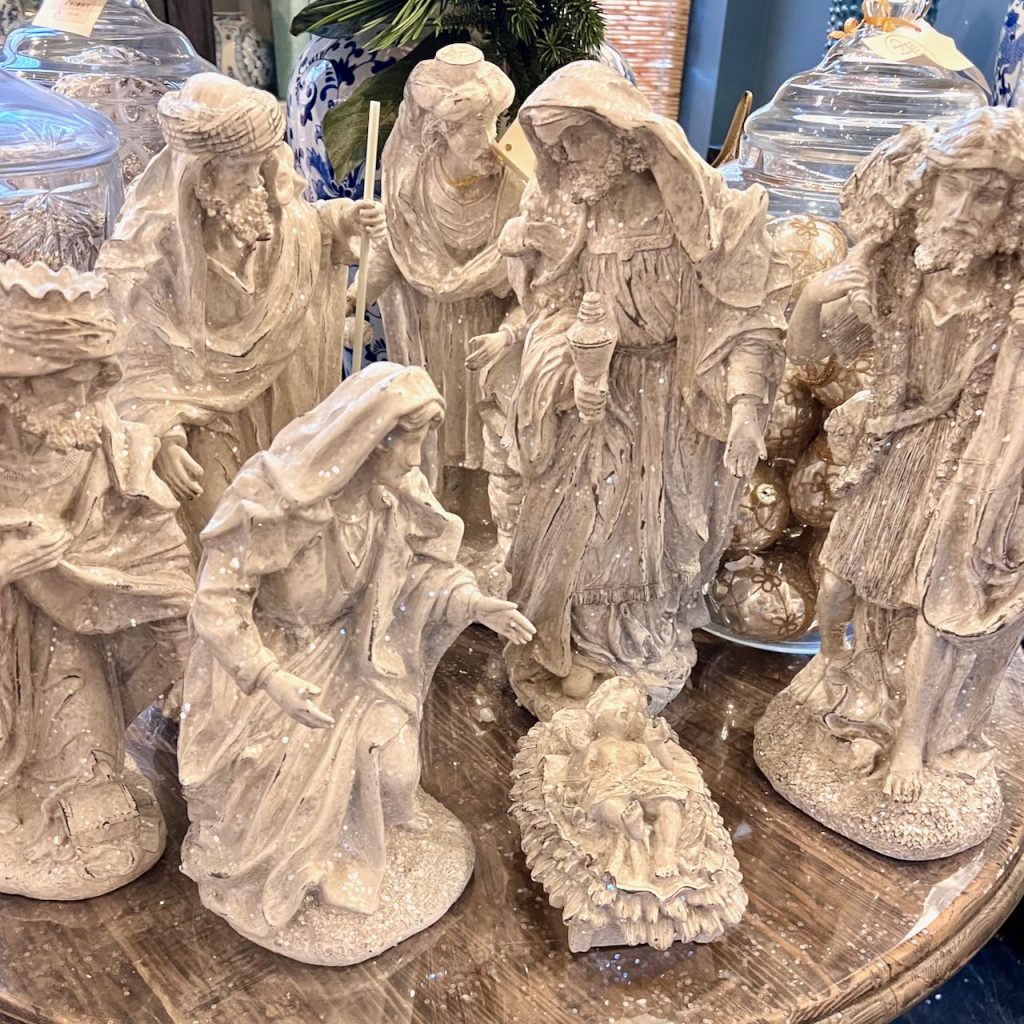
Isn’t the progression these statues took amazing? The plain white is lovely. But then I added a light taupe wash and a bit of accenting, and it became exactly what I wanted. Perfect for my style and our home!
I’m thrilled with how it turned out!
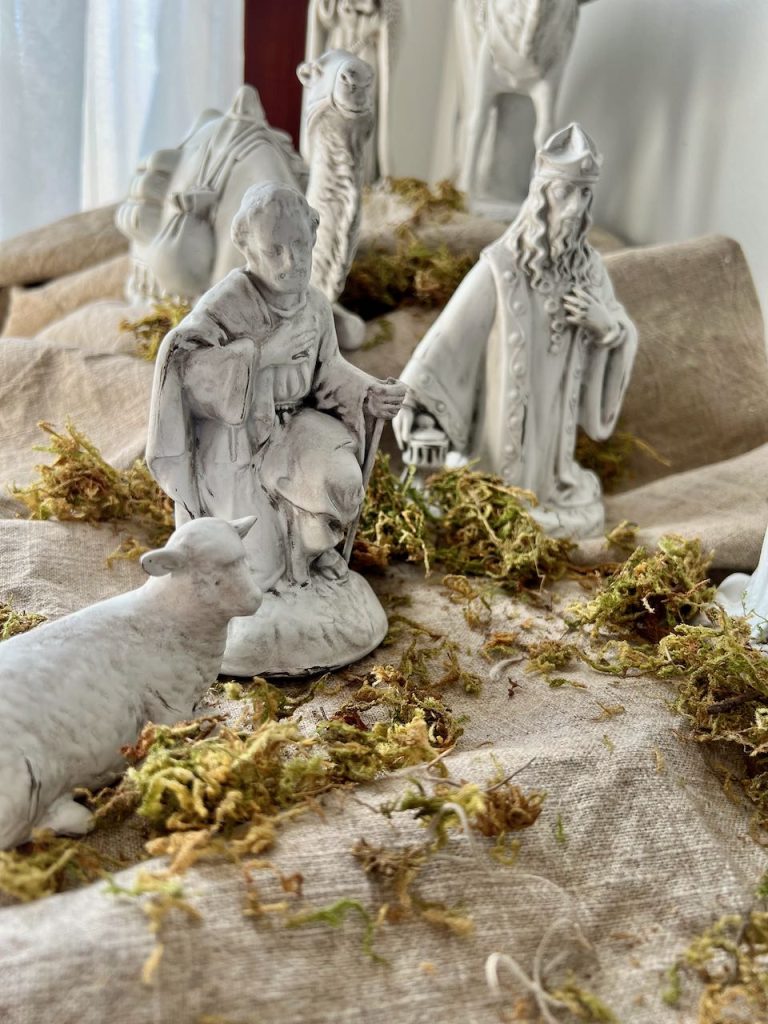
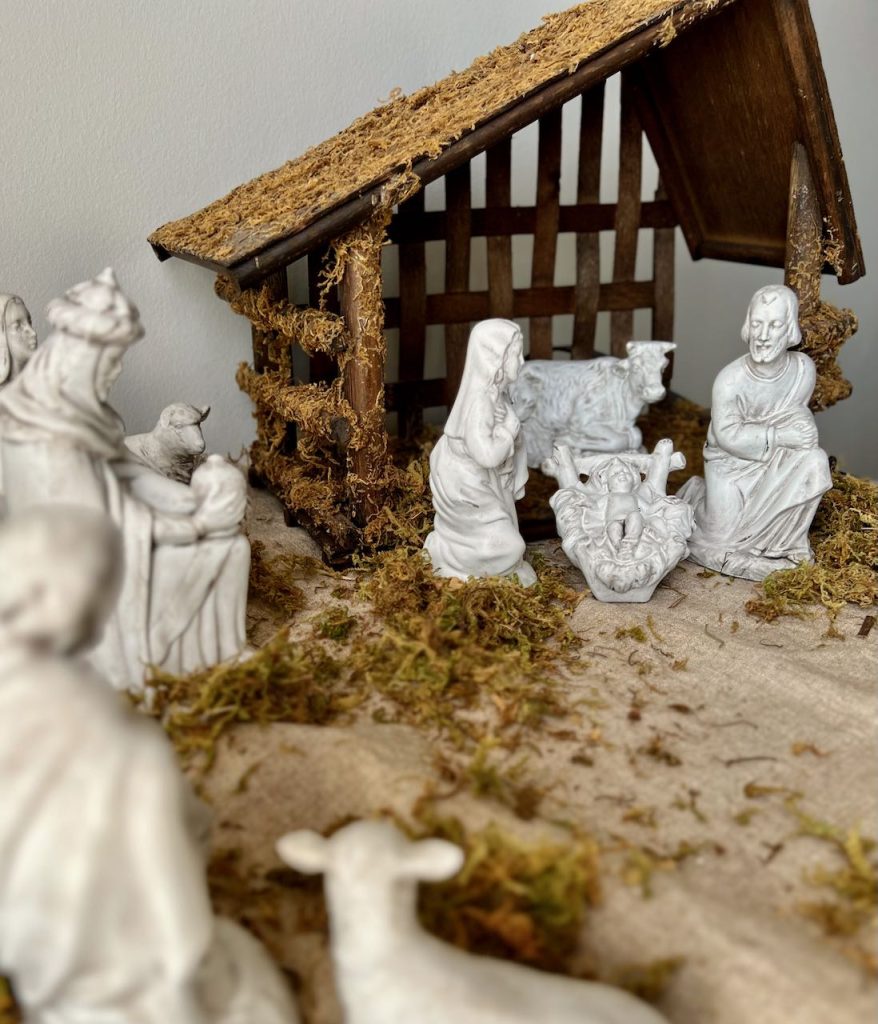
It’s neutral, but so much more than just white.
I use washed linen under the stable and to make hills over a base of books. I like to scatter some Spanish moss to soften the edge of the stable floor and tie everything together.
This has to be one of my favorite diy Christmas projects to date. And that’s saying a lot! I have done SO MANY diy Christmas projects!
This is a very easy diy project, it just takes a bit of time to get the wash applied and wiped off with some consistency. But, oh so forgiving in the process.
Be sure to pin this so you can find it when you score a sad, tacky nativity set of your own.

Now my mismatched, tired thrifted nativity set is ready for the Epiphany and to take its rightful starring role next year.
Be sure to keep your eyes out for a tired, forlorn nativity set that you can transform for your family and home! They are often seen at thrift stores and estate sales and such.
As always, don’t hesitate with questions or comments!

You are truly a genius! This is such an amazing transformation! WOW! Can you hear me clapping and whooping in Nebraska? Fantastic!
(And Nell Hills is my favorite store on the planet!) Well done, Diane!
Thanks bunches Missy!!!
Do you come down here often? We need to get together! I live 15 minutes from Nell Hill’s. (can be dangerous ????)
Your Nativity turned out beautifully.
Thanks so much Debbie! I’m glad to hear it[s not just me. I’m so smitten with it.
Wow – that’s fabulous Diane! You are such an inspiration!! It’s beautiful!
I’m so glad you shared this! I’ve been looking for a set to paint, but I love the finishing touches you added!
This is such a great, clever idea! You’ve got my mind spinning with ideas! I look forward to your weekly newsletters and seeing what fun things you’re working on!
Holy Moly what a great idea! I’ve been down sizing my mother’s substantial Christmas collection and really didn’t want to donate what the grand daughters felt was too dated – this just might cause them to change their minds 😎
Thanks ol’friend!
YEAH! So hoping it helps you. Surely those girls will see the light!
Diane,
This Nativity is just beautiful! I have a 52 year old Nativity set that I bought when I was 10 years old. It has been very well-loved but needs some freshening up. I think I’ll try this idea because I really do love it and remember how I hard I worked as a kid to earn the money for it. Hugs and blessings to you and yours! ~Lynne~
I love this Lynne!!! Purchasing your own nativity set when you were 10 — that alone is inspirational. Please send me before and after photos.