
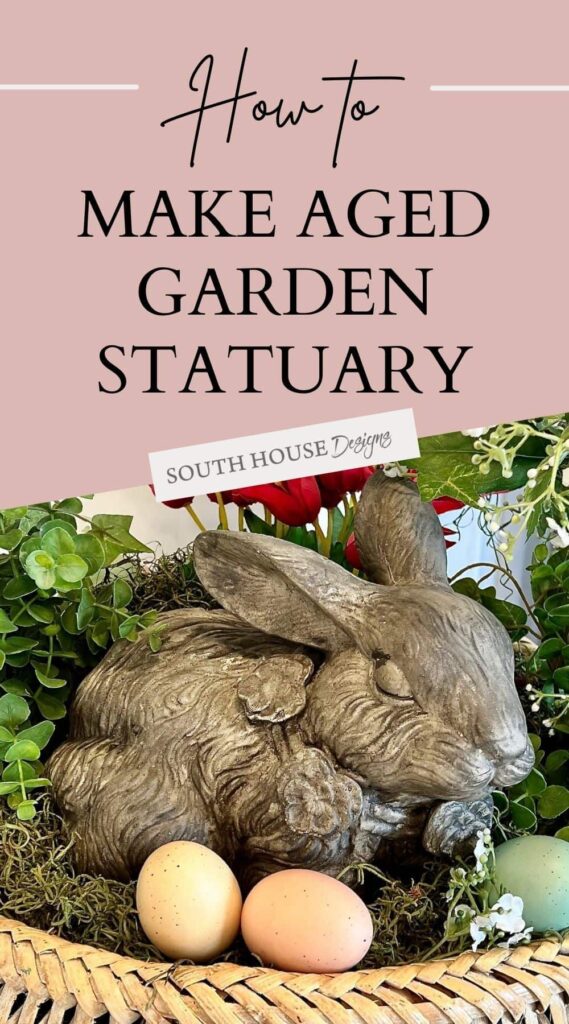
Quick & Easy Way To Make a Concrete Rabbit Statue From a Thrifted “Treasure”
Love the charm of vintage concrete garden statues? Make a concrete rabbit statue -or any other statue- with this quick & easy paint treatment.
Vintage concrete garden goodies have always tugged at my heartstrings! They just make me smile!!! And give a home that curated over time look.
It doesn’t take much! Just a piece or two.
I’ve always decorated my outdoor spaces with the lights, rugs, artwork just like our indoor rooms. And because I’m an equal opportunity decorator, I love to bring outdoor elements in, blurring the definition on interior and exterior.
True vintage garden statuary is hard to find and expensive when you do! Plus, I’m rather fickle!
So it’s wiser for me to dupe the expensive hard to find pieces with a thrift store find.
Don’t you think your Spring Decor Board needs this?
Or maybe your Easter Decorating Board.
Yes, maybe to your Paint Treatments Board,
or to Thrifted Makeovers.
Just be sure to save it a place or two, so you can definitely find it again.
Make a Concrete Rabbit Statue — Or Any Vintage Garden Statuary
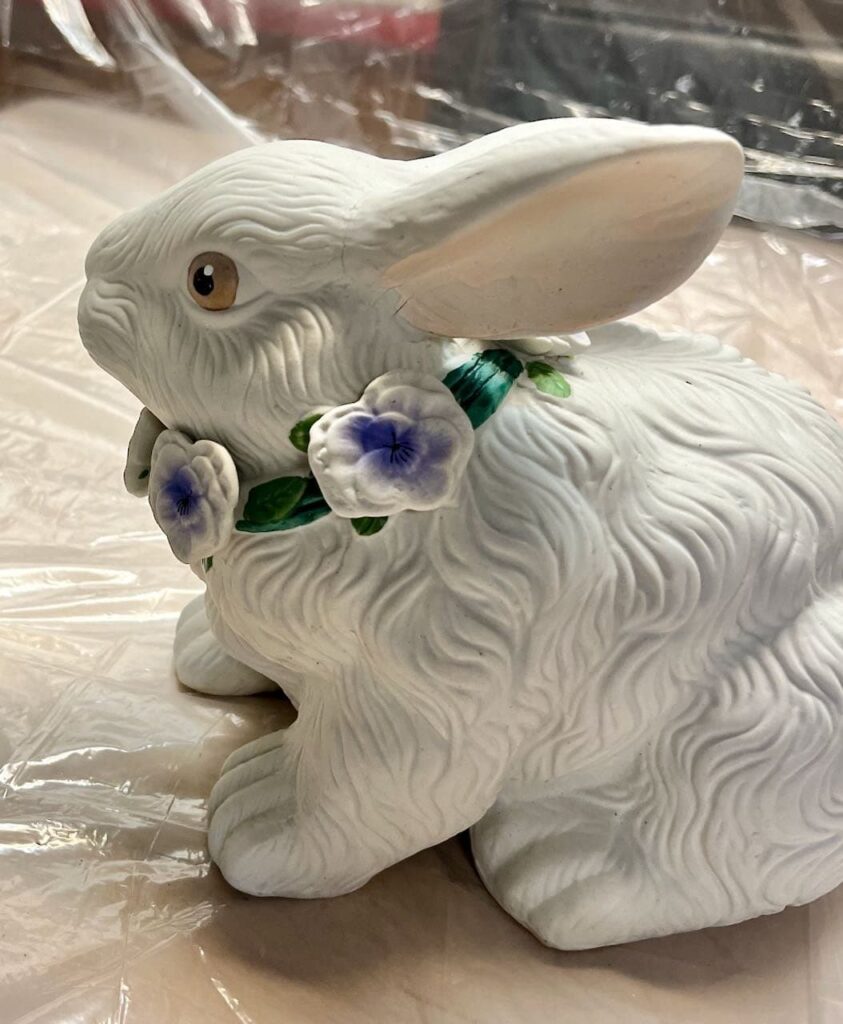
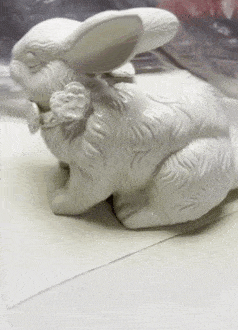
Look for a shape and size you like! That’s it. No need to worry about colors or a bunny’s “scary eyes”.
My Easy Concrete Effect Paint Method-
Step 1) Base Paint Coat-
This is the easiest! Don’t overthink it!!!
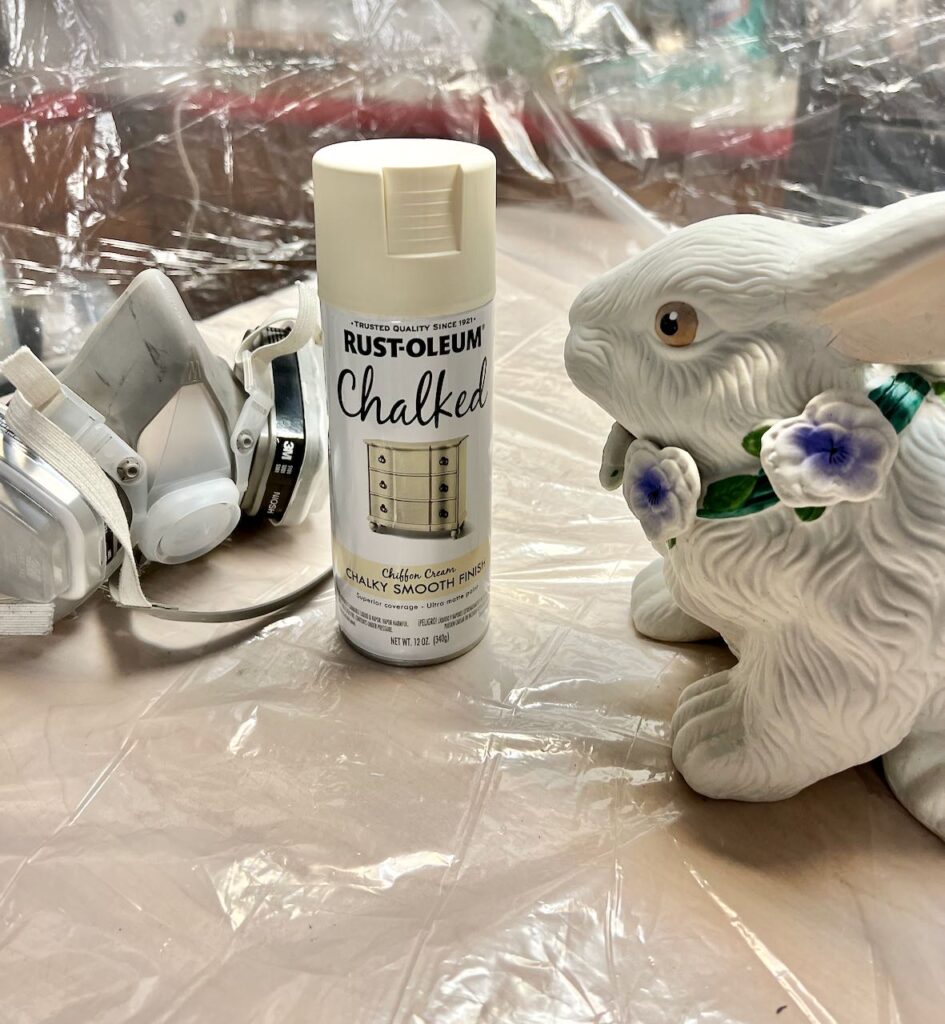
I used chalk paint, because Rust-oleum recently released a spray version and I wanted to give it a try before I use it on a large, elaborate bird cage that I’ll be sharing later this week.
PSA: If you are spraying, be sure to wear a respirator — lung health is so important!!!
I usually use a brush-on chalk paint, mineral paint, or even craft paint that I have left over from any other project.
You can use just about any color. I prefer my “concrete” to be of a warmer tone, so I typically use a cream or beige color for my base vs. white or soft grey.
BIG TIP:
For spray paint, my secret weapon is using a lazy susan.
Be sure to cover your lazy susan to protect the ball bearings in the spinning mechanism! I just used two paper towels here. It’s what I had handy!
Step 2) Antique it-
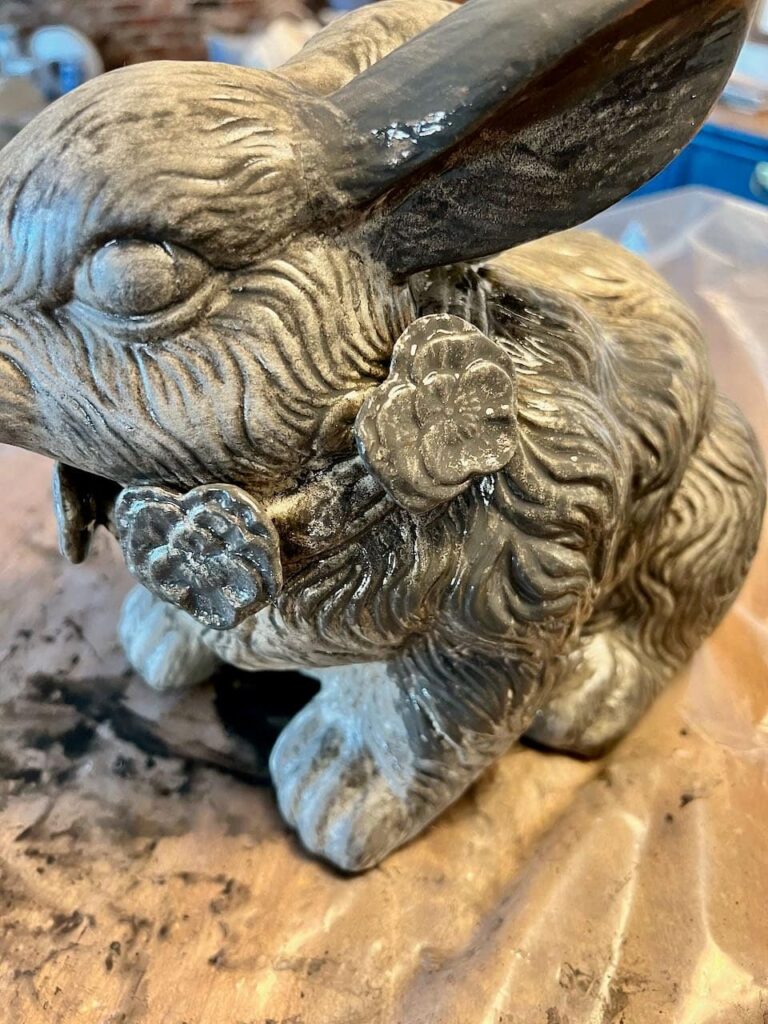
This is such a fun and forgiving process! Watch the short 3-minute video and you’ll believe!
Any black or grey craft paint, thinned with water is a great antiquing glaze for this project.
Use a craft paint brush, not a nice artist’s brush! And be sure to wear gloves!
You’ll also need some soft, dust-free rags.
Honestly, this requires minimal supplies and even less artistic talent!
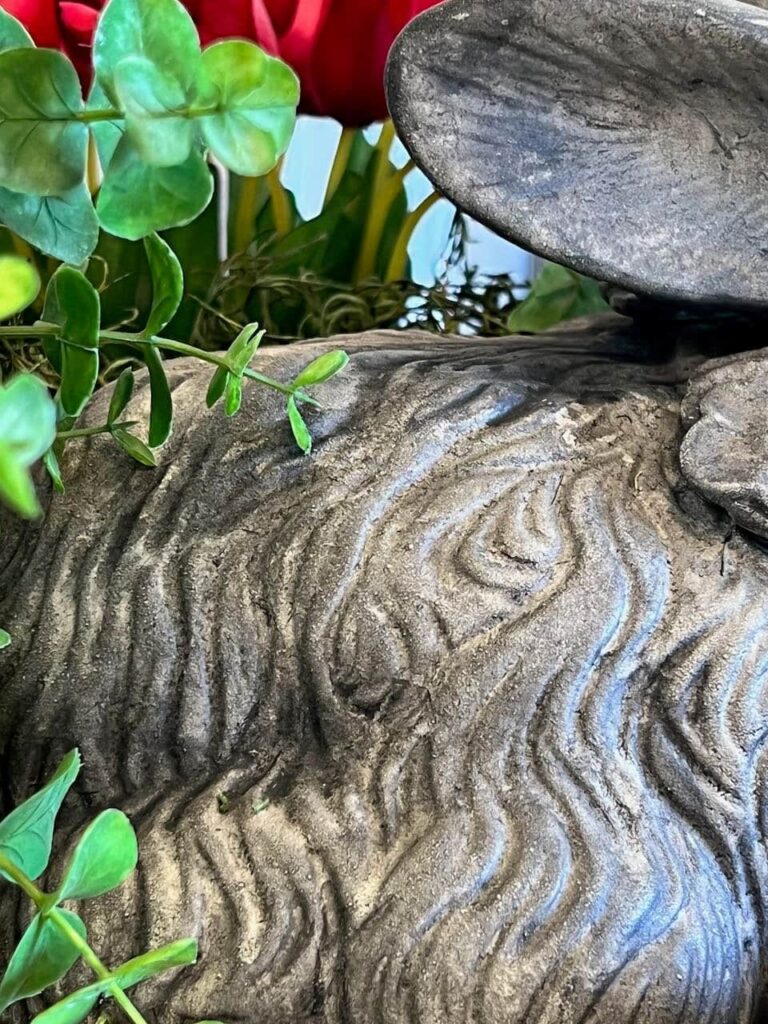
Again, don’t overthink it! Don’t try to make every groove the same. Concrete statuary does not age evenly in nature. So yours shouldn’t either.
Work in small-ish sections and start light until you get the hang of it. You can keep adding and adding to get a deeper color if you wish.
This fella took me just under 20 minutes for this step.
I used this same water down black craft paint glazing technique, with a lighter touch, on these adorable tabletop birdbaths. Jump over here to see them. You don’t want to miss these!
Step 3) There Isn’t One! That’s How Easy This “Concrete” Method Is
If you’re using this indoors, you don’t even need any sealer!
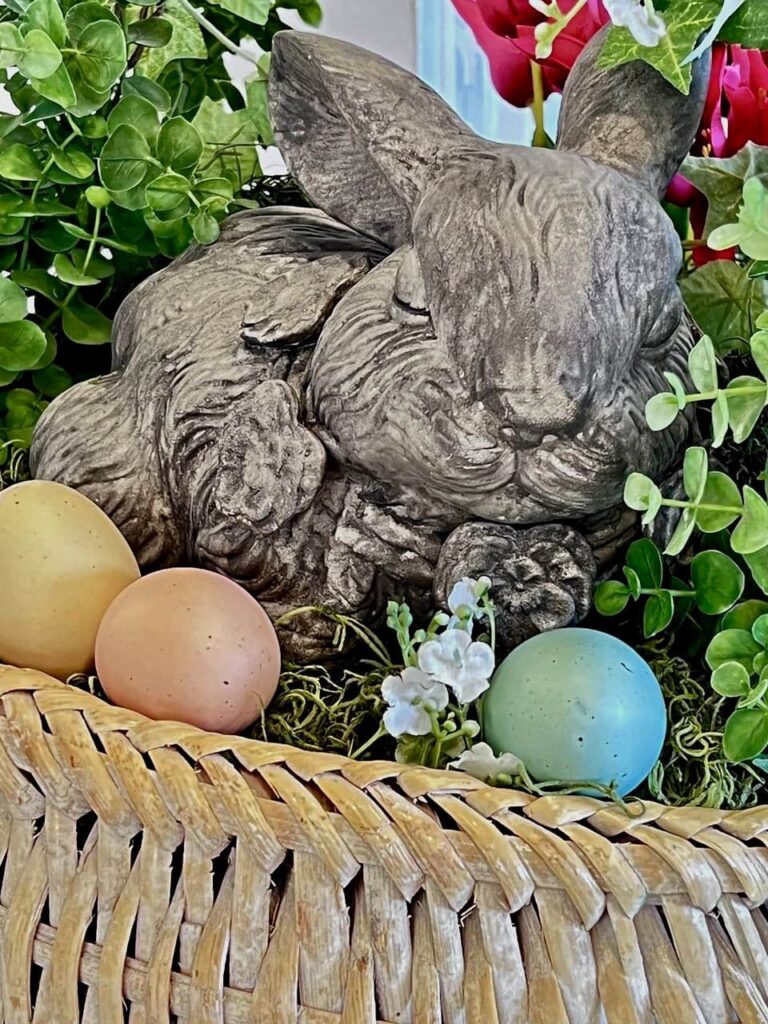
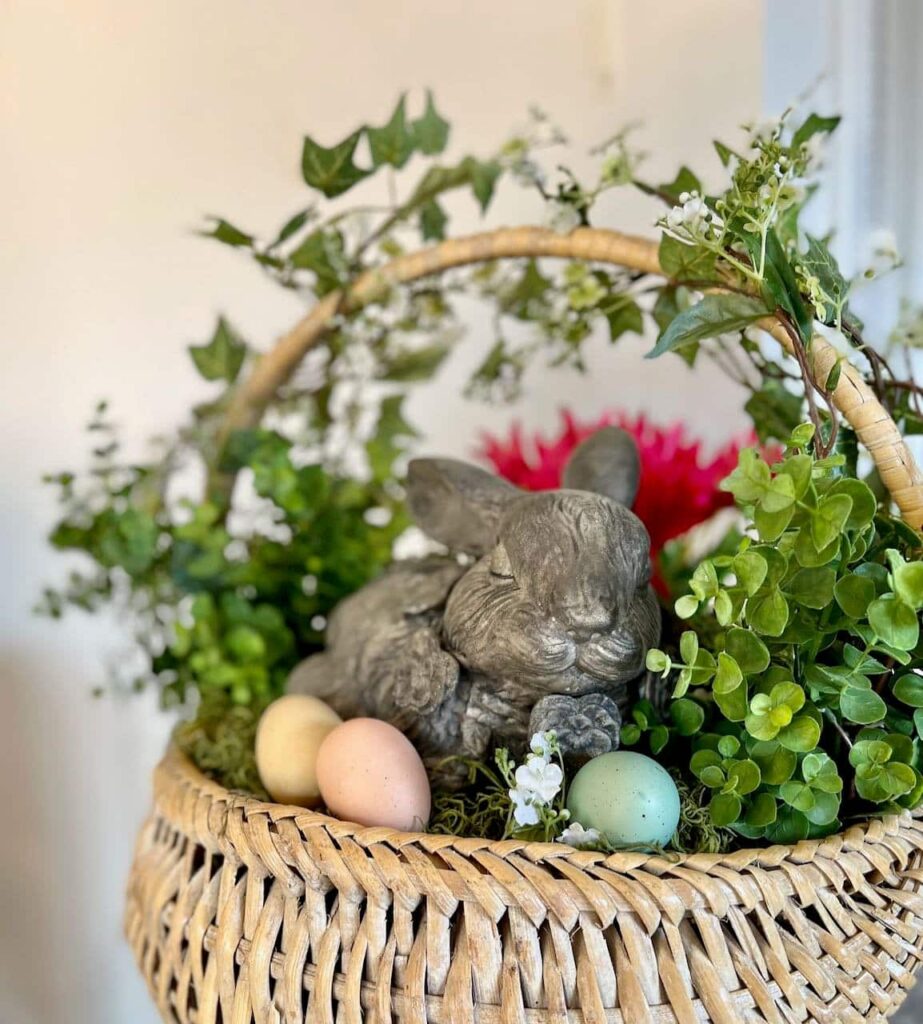
Isn’t she just the sweetest! Remember those scary eyes? Not anymore! Now my concrete rabbit statue is a sweet slumbering bunny.
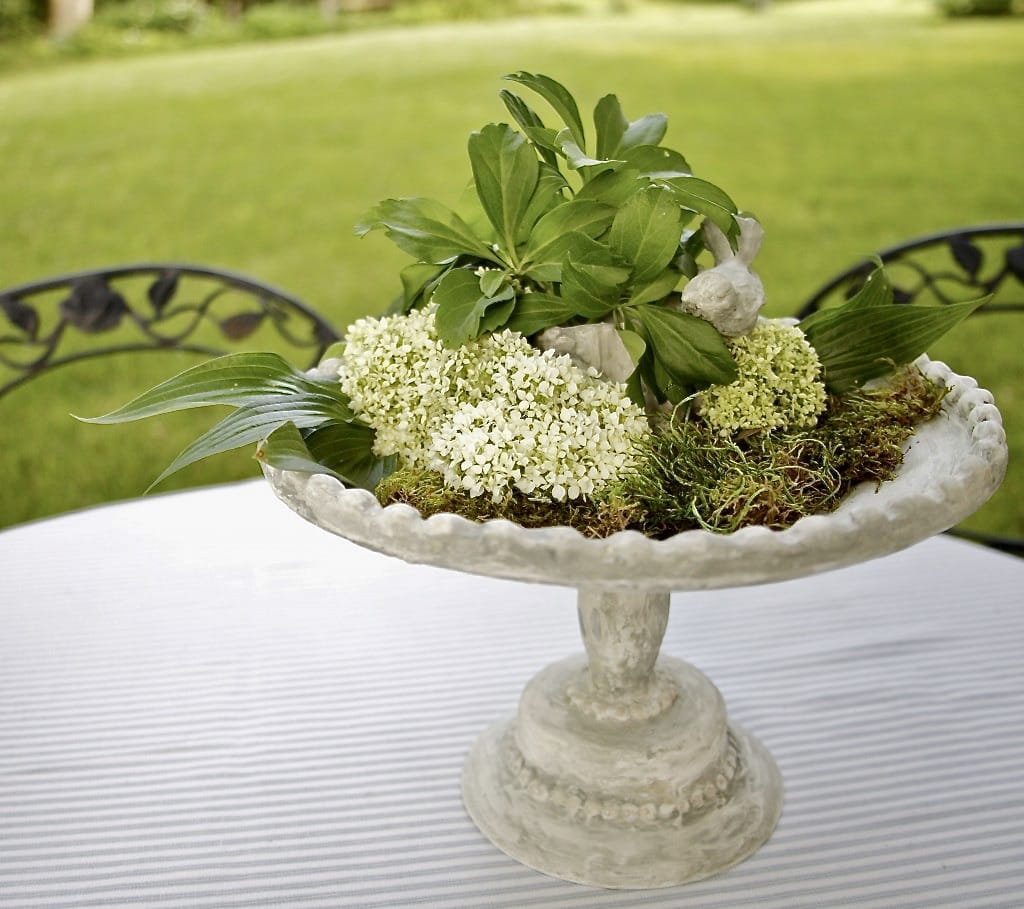
How Do I Use My Faux Garden Statuary Inside?
My favorite way is as part of a seasonal display or vignette?
This bunny is now the star of this large Easter basket on our stair landing. I’m working on a video of putting the whole look together.
Watch for it on IG or FB, whichever you prefer. Be sure you’re following along on FB and/or following along on IG.
Do you have a garden event coming up?
Save these to your centerpiece board
Or to your decor board
Are you addicted to thrifting?
Save this to your Thrifted Makeovers Board
Or how about your Spring Decor board?
Your Easter Board?
How about a Vignette Board?
Shoot, save it to 2 or 3 Boards!
I hope you are enjoying a lovely change in weather and all the promise it holds for the new seasons ahead.
As always, don’t hesitate with questions, feedback and certainly pics to share.

This looks fantastic. I walk by these kinds of ceramics all the time while thrifting. Using your technique would improve anything!
I would love it if you would share this at my Friday With Friends Link Party:
https://myhubbardhome.com/friday-with-friends-april-crafts-a-la-mode-link-party/
Have a great weekend,
Rachelle
Oh my goodness, Diane, that bunny is so precious! I can’t believe the thought never crossed my mind to use a lazy Susan to spray paint! I will definitely try that tip! Happy day, Donna
What a fabulous makeover and your bunny is just adorable.
Thanks Joanne! He did turn out rather snuggly, didn’t he? Honestly, I wasn’t sure how the eyes would be, but they just look like he’s sleeping — win!
This turned out great. I use a lazy susan when painting flower pots.
Pinned
Beautiful transformation! I love the new rustic look. Thanks for sharing it! #HomeMattersParty
Mel
Home matters Party
Happiness Is Homemade
You’re The Star Blog Hop
Wow, that turned out great! I’ll be a lot more open minded when thrifting, now! Thanks for sharing it with us at Thursday Favorite Things.
P.S. I’ve featured it today at the Thursday Favorite Things link party. 🙂
Oh, thanks so very much Pam!!! I’m thrilled.
Thank you so much for sharing this on Farmhouse Friday LP. It’s adorable and you make it looks so easy. Featuring it tomorrow and I hope you link up again soon. Pinned
This is the sweetest little bunny, Diane! I enjoyed this post so much and I wanted you to know that this post will be featured on Tuesday Turn About Link Party this week! Pinned to our Tuesday Turn About Pinterest board.😊 Thanks for sharing your makeover and I hope to see you at the party this week! 😊
This project is a perfect weekend task for anyone who loves the look of expensive “antiqued” garden decor but wants to achieve it on a thrift-store budget. It’s a great way to give a second life to a forgotten yard ornament.