
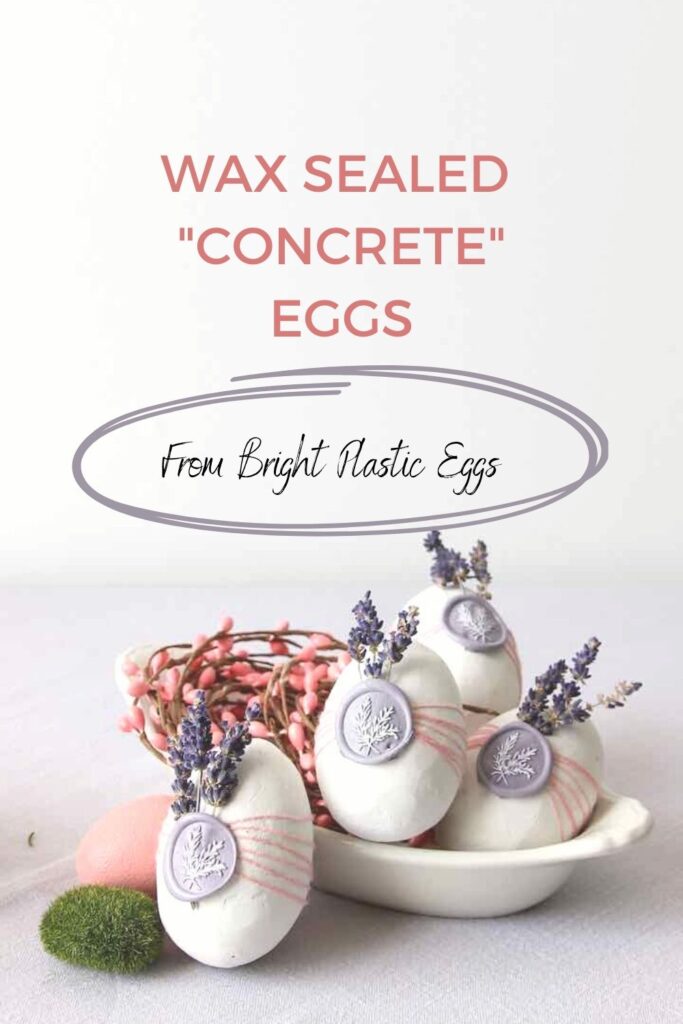
Fresh New Way To Update Plastic Eggs: Wax & Lavender
Do You like fresh takes on old decor favorites? This wax seal craft with dried florals turns a plastic Easter Egg into a modern and unique Faux concrete egg.
Oh how I love Spring!!!
Longer days, more outdoor time, the stunning green of all the new life sprouting
Shedding our parkas and snow boots.
Even the smell of fresh Spring rains washing away all the Winter dredge.
And how about those bumper crops of asparagus and strawberries displayed next to tulips in every bright beautiful color of the rainbow?

Every year I am compelled to come up with a fresh new take on Spring decorating featuring eggs — and usually a few bunnies and carrots too.
Here at South House Designs, I’m all in on creative doings and creative problem solving to make our lives more joyful.
Today’s creative doing is transforming large bright plastic Easter eggs into more upscale and unique decor accessories.
Let’s Get to Transforming Our Bright Plastic Easter Eggs
There are three basic steps:
- Turning the plastic to “Concrete”
- Adding the twine and flowers
- Finishing with the wax seals
Step 1) Changing Plastic to Concrete-
No hocus pocus required. But the results are pretty magical in my book.
Minimal supplies and minimal skill are needed.
The biggest component is time, but fortunately most of that time is drying time.
Supplies-
- Thin masking tape
- Joint compound, this is the one I typically use
- Disposable cup with a lid
- Disposable stir stick
- Dixie cups or similar
- Sandpaper – Micro sander highly recommended. This is the one I couldn’t work without!
Note: these may include affiliate links, which means I may receive a small compensation if you use one of these links, but you don’t pay a penny extra.

1) Apply thin tape over the seam-
First seal the two ends of the egg together.
NOTE: If your egg has a plastic hinge that sticks out a bit, sand it off first.
I used a thin craft tape, but you can cut masking tape to make a thin strip.
Burnish the edges with you fingernail to minimize the edge of the tape.
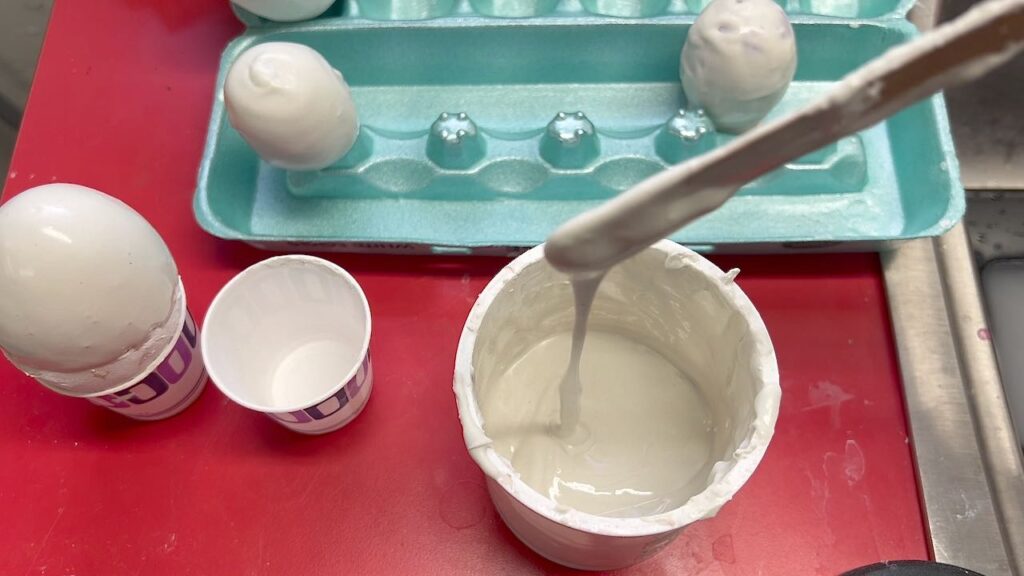
2) Make Joint Compound Slurry-
It simple. Just mix water into joint compound to make a “slurry”.
Slurry is a thinned clay that is usually used to bind two pieces of clay together. So I’m borrowing that term loosely here.
After a lot of experimenting, I found that having the slurry the consistency of glaze and dipping the eggs, rather than the consistency of frosting and spreading it on worked best for me!
NOTE: toward the bottom of this post is a video with a closeup of the two methods and the consistency of the slurry
TIP: If you want your eggs to be a color, such as pastel green or blue, you can add acrylic paint to the slurry to help thin it and add color at the same time.
You can see how I did that when I made these charming tabletop birdbaths, and when I built our “cast concrete” fireplace surround.
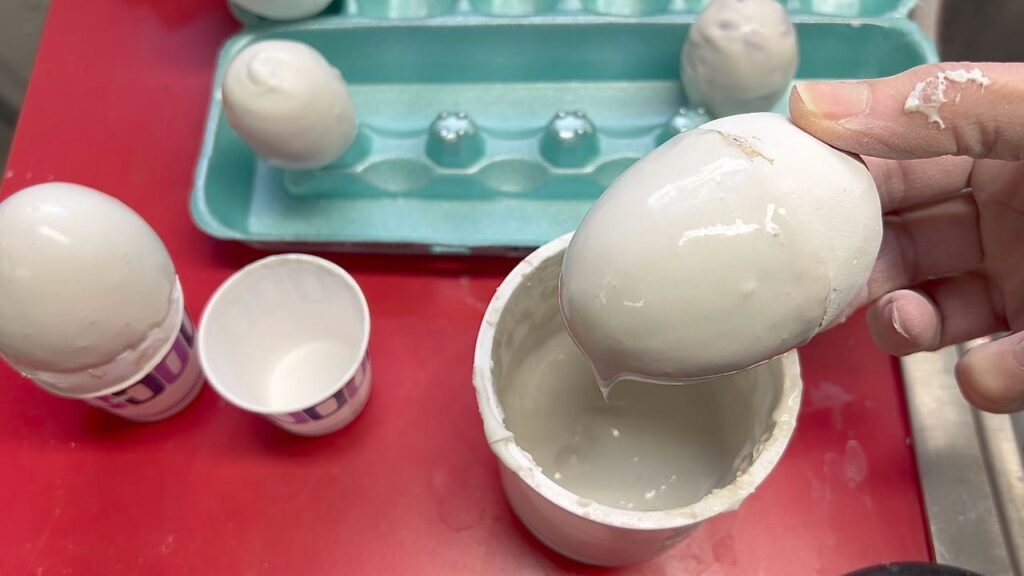
3) Coat the eggs with the JC Slurry-
Again, I prefer dipping the eggs.
Half one day.
Let it dry overnight.
Then sand the edge of the first dipping so you don’t get too much build up around the middle where the two dippings will overlap.
Think about it, nobody wants a thick belly band, do we?
Now dip the other end and let it dry overnight again.
HINT: If you have foam eggs, with a skewer, you can do the whole egg in one coating!
4) Sand your eggs-
Use a micro sander block with 120 grit paper. Use small circular motion all over your egg to smooth out any lumps or ridges or rough spots in your “concrete”.
Step 2) Add Dried Flowers and Twine-
Supplies-
- Dried flowers
- Twine (or yarn, string, raffia, etc.)
- Glue
I used dried lavender, but also consider baby’s breath or even some sweet little leaves.
Keep in mind the scale to your egg and you want the thinnest stems possible.
And twine can mean thin ribbon, jute, yarn, raffia, bakers twine, string, etc. etc.
I used some wool crewel yarn that I had in my stash.
Image: Wrapping Egg

Hold your egg. in one hand. Determine where you will want your wax seal.
With the thumb or index finger of that hand, hold the end of your “twine” along the stems at the “seal spot”.
With your other, wrap the egg criss crossing at that “seal spot” several times.
When you are pleased with the arrangement of your stems and twine, hold them in place with a dollop of glue. I used Gorilla Brand super glue, because it was handy. Even a spot of good old Elmer’s would do.
A quick pause in the action to ask if you are enjoying this post, please consider subscribing.
YOU say how much is right for YOU!
THANKS! Now back to the eggs:
Step 3) Add Wax Seal-
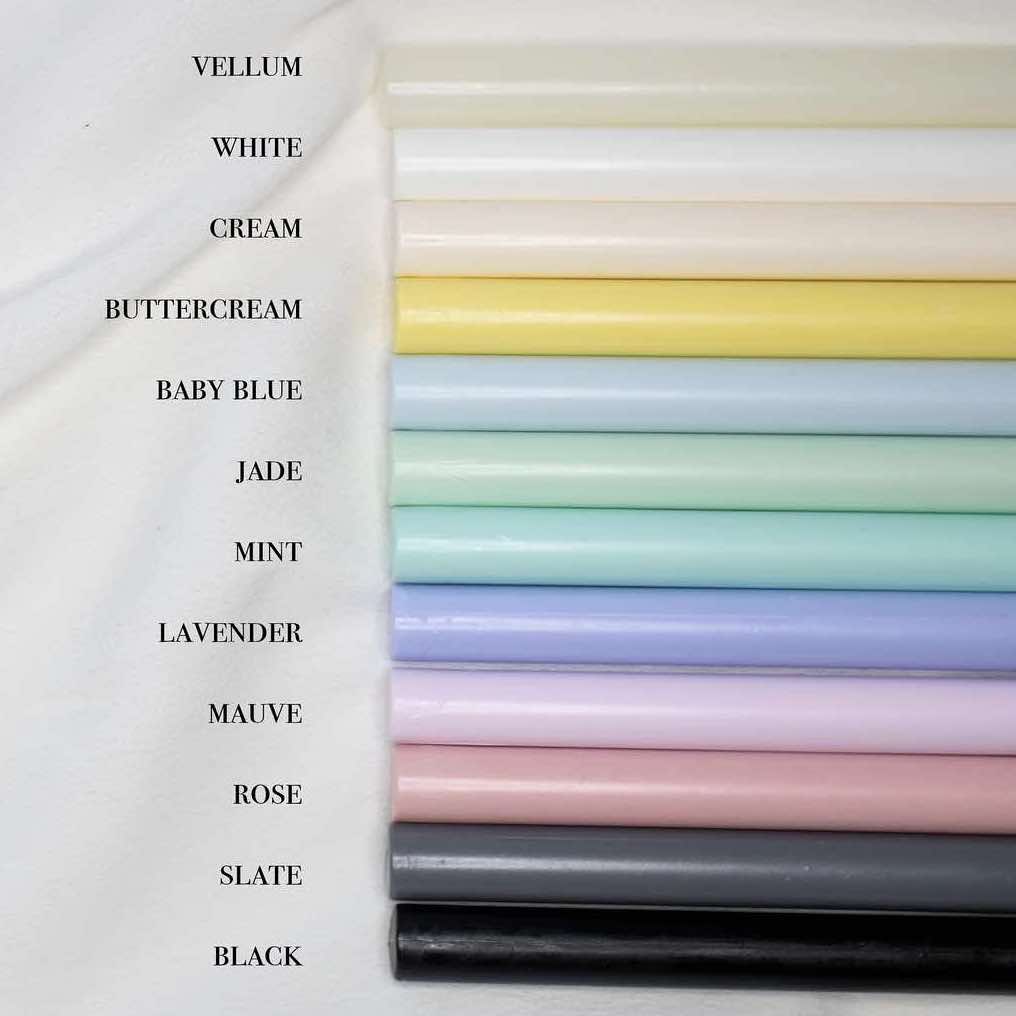
Supplies-
- Sealing wax sticks
- Hot glue gun
- Wax stamp
- Damp sponge
- Small smooth tile or glass
- Scraper
- Marker of your choice
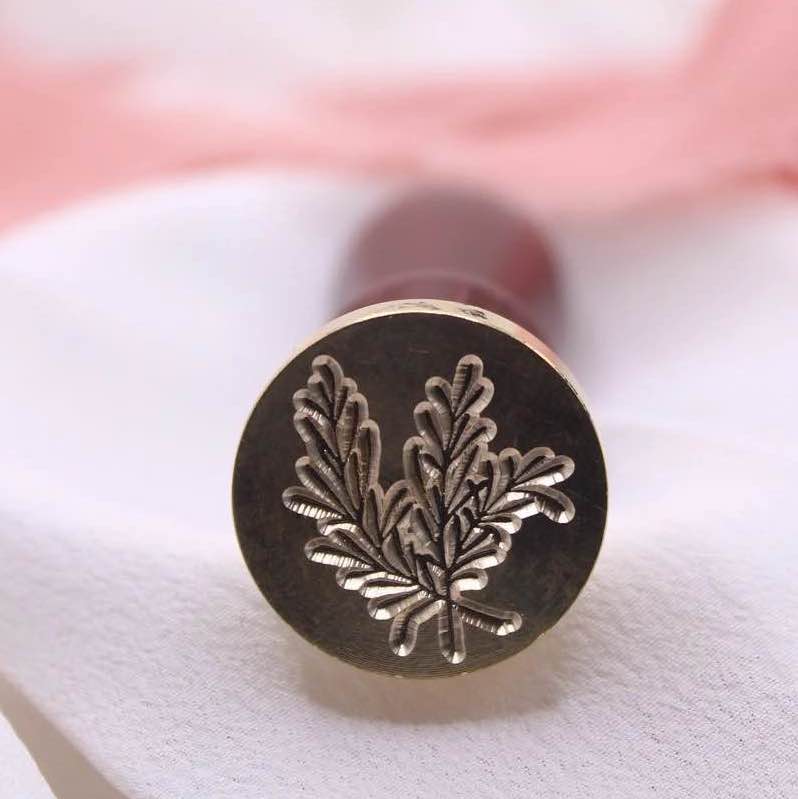

I received that amazing rosemary stamp with it’s wood handle and a sampling of wax sticks from the Etsy shop Adin Paperie out of New York. Shop owner Doriel took great care of me and the package of goodies. I highly recommend this shop. Stop by and tell her I said “Hi “!
Because of the curves of the egg, I was not able to add the wax seal directly to the egg.
I persevered with my vision and after a lot of trial and error, I have what works.
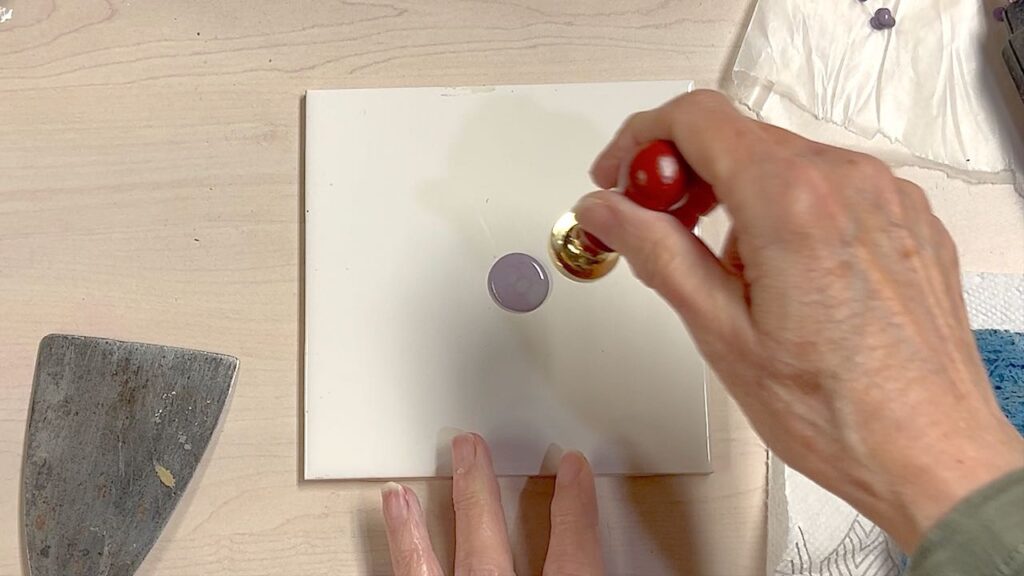
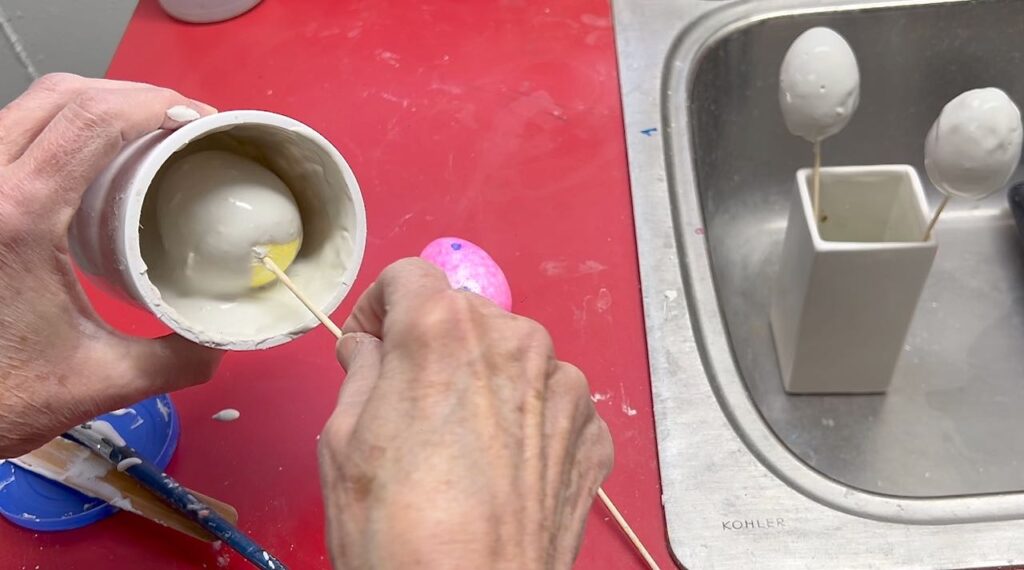
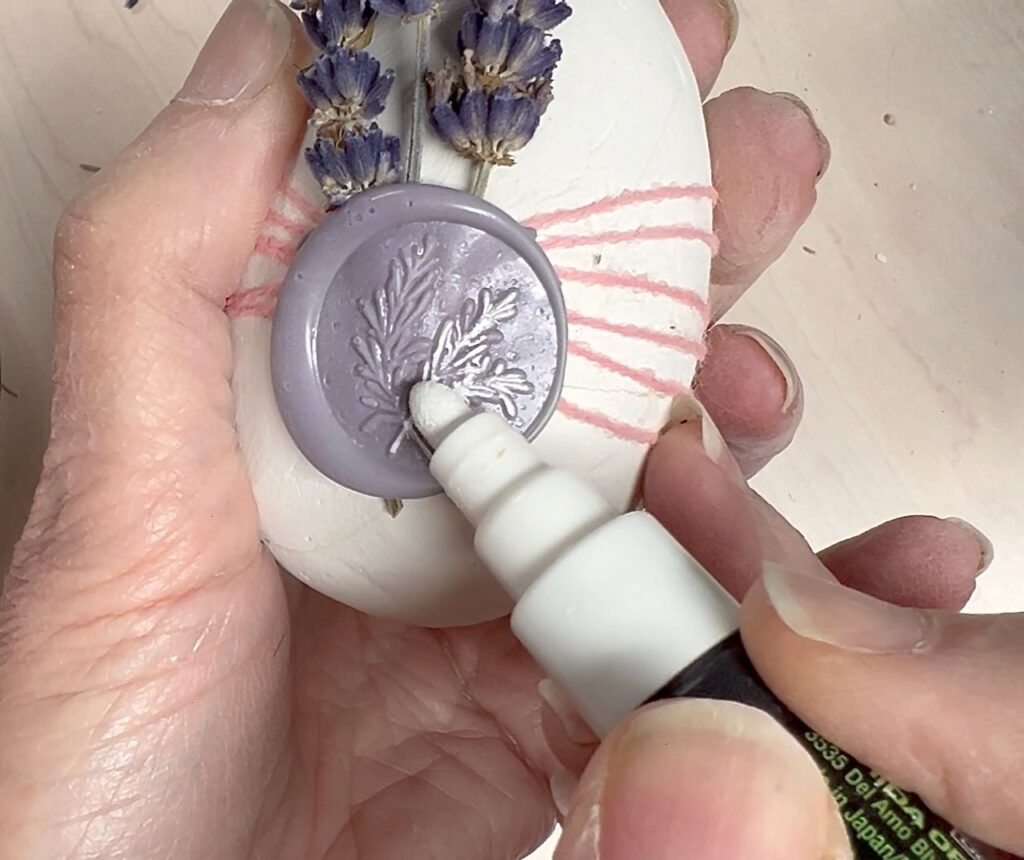
On a smooth tile or piece of glass, puddle enough melted wax to cover the diameter of your stamp.
Dampen the stamp on the sponge and gently press it into the hot wax puddle. My seal is heavy enough that I didn’t really push it down, just steadied it so It wouldn’t slide.
After a few seconds, gently pull straight up, releasing the stamp from the wax.
While the wax is still a bit warm, using a thin scraper, carefully pry the wax seal up off the tile surface. Be careful not to do this too soon or the edges may not be set yet. Once you do one or two, you’ll get the hang of the timing.
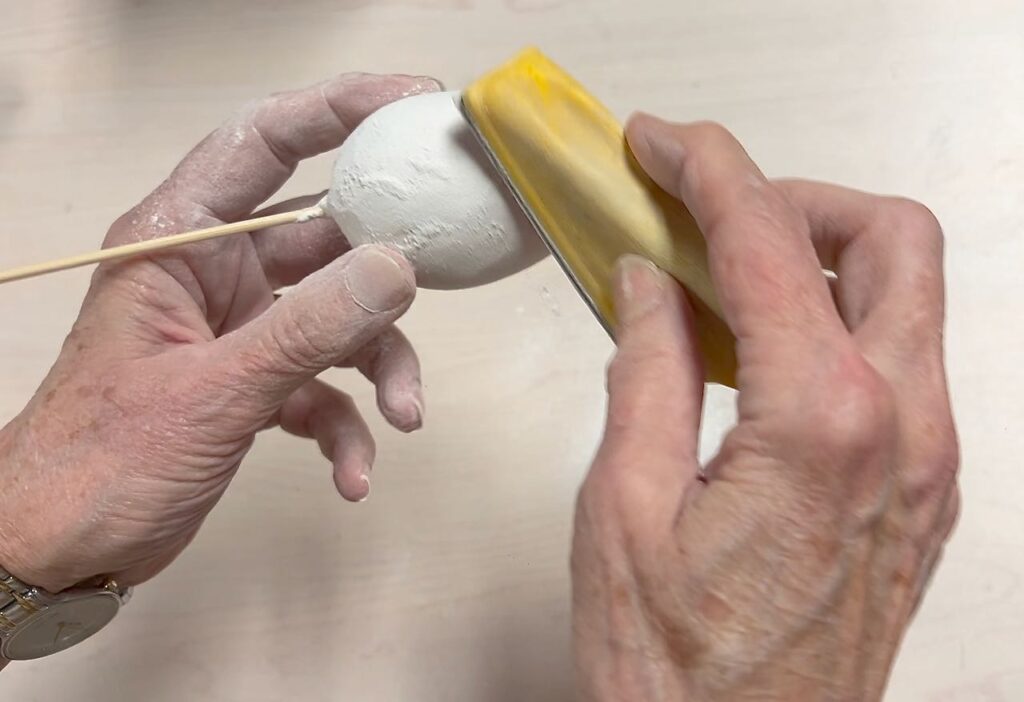
Immediately hold it with your thumb and index finger on the left and right side of the seal. Press in just enough for the seal to bow a bit matching the curvature of the egg. Hold for a few seconds for it to cool like that.
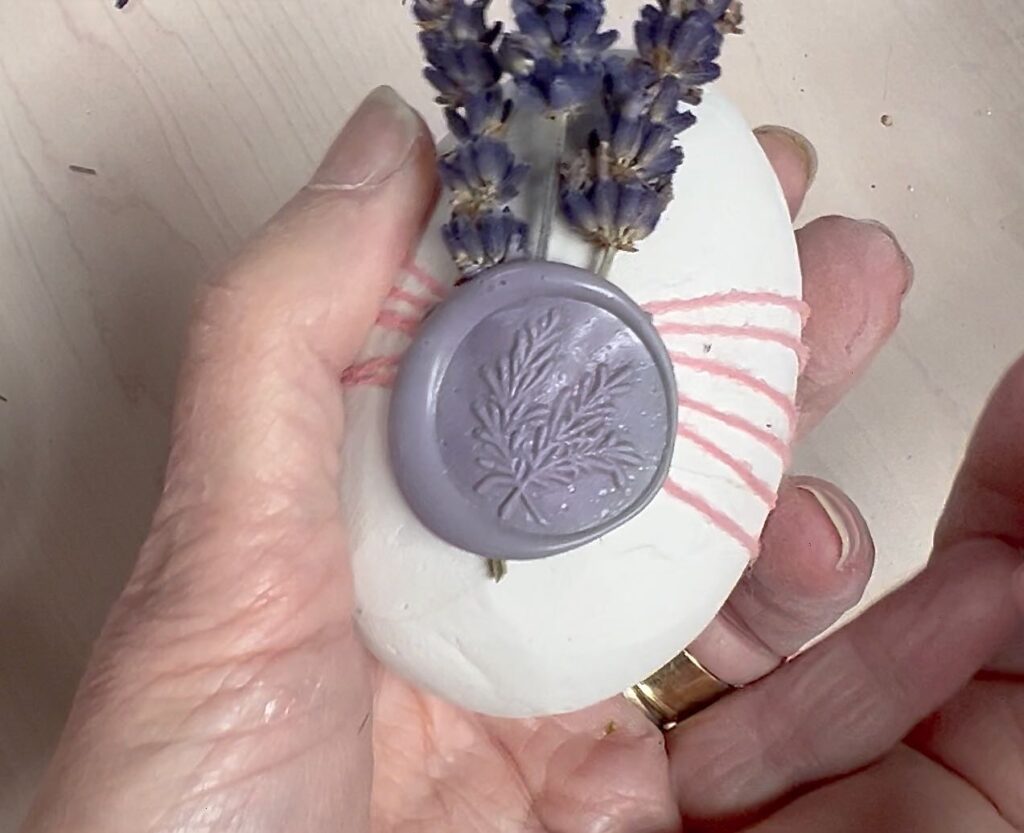
Now drop a small bit of hot wax on the glued spot of the twine and flowers. Immediately press the seal into place and hold it there to cool.
This is optional, but I think it made such an impact I can’t imagine not doing it. Besides, it’s easy and very quick making the payoff well worth the small amount of time and effort.
Use the side of the marker tip and just brush it very lightly across the top of your impression. You can always go over it again and again to get your desired amount of highlighting.
Do You Prefer Video?
I’ve got ya covered!
Just click this image for about a 5-minute How-To video:

Aren’t these the sweetest? Use them:
- mixed in with some solid eggs in a bowl
- as the star of individual displays at each tablesetting
- In a Spring vignette
- As part of an Easter tray display
- and so many more ideas

Thanks bunches! I truly appreciate it.
And a Couple More Projects You Might Enjoy

I love this idea Diane, I would have never thought to use wax in eggs. You are brilliant. I’m so glad you joined us this month.
Thanks bunches! You’re making me blush! I thoroughly enjoyed hopping with all you ladies.
You never cease to amaze me with your creativity, Diane! I LOVE this project and your spring eggs are absolutely beautiful! (I adore the wax seals!) Thank you so much for joining us this month. You are a delight to work with!
Diane I’m intrigued with how well the joint compound worked on your eggs, and then the crowning touch of the wax seal. So beautiful with the dried lavender too. Wonderful project!
Misssy, you’re the best! Thanks bunches for inviting me. I loved hopping with you talented ladies!
Thanks so much Amy! It was really fun hopping with you!
Thanks bunches Michelle! The joint compound holds up surprisingly well. I have used it for many projects. The first wass also the largest where I used this method to make a faux “cast concrete” fireplace surround.
It was fun hopping withh al of you amazing ladies.
Diane, these are amazing! I love all the elements from the concrete to the lavender and wax seals! So precious!
Diane – I love this project. I’ve never used that medium and I love the “slurry”, I can’t wait to try. All of the details make this so special, the twine, stamp….beautiful and so creative. So glad you joined us this month.
Oh that’s so sweet of you to say Regina. It’s funny to think of Joint Compound as an art medium, but I use it all the time!
These eggs are so adorable! I would have never thought to cover them in concrete and put a wax seal on them! Thanks for sharing your amazing creativity!! Pinning now!
Diane, these are quite possibly the cutest eggs I have seen. Wax seals are a thing of the past, but I get goose bumps when I see them. Love this idea! Thank you for sharing with Whimsy Home Wednesday!
Diane – Your eggs are just beautiful! I’ve never seen anything like them! Pinned 🙂
xoxo
You’re so sweet Cara! I truly appreciate the share!!! AND you hosting your fun link party!
LOVE how you turned plastic eggs into concrete, Diane! We will be featuring you starting Wednesday at the Creative Crafts Linky Party! Pinned and shared
Creatively, Beth
Wow! These are fantastic! So magical and whimsical!
Thanks Mandy! Quite a difference from the bright plastic eggs, right?
Hi Diane- I love this idea! I had never thought of creating a slurry with joint compound. Thank you for the tutorial, which included some great tips.
Diane, I absolutely love how these eggs came out. What a great idea to make concrete style eggs and the wax seal is so precious! The eggs pair so nicely with the lavender. beautiful job! -Meagan
Featuring this tomorrow on Farmhouse Friday. Thank you for sharing it with us and always linking up. I appreciate the support. pinned!
Diane, I can not stop thinking about these eggs you made. To cute. I am excited to be featuring you tomorrow at the Home Imagined Link party. Congrats my friend.-Meagan
OK, this is the second project I’ve seen with watering down joint compound…I’ve used it so many times in DIYs and have never thought of that!! I love how your eggs came out!!