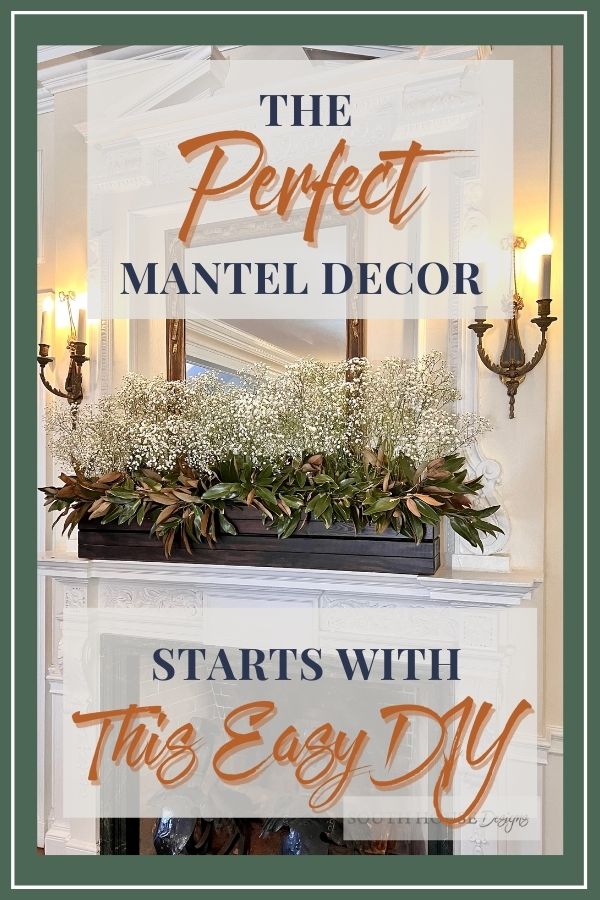
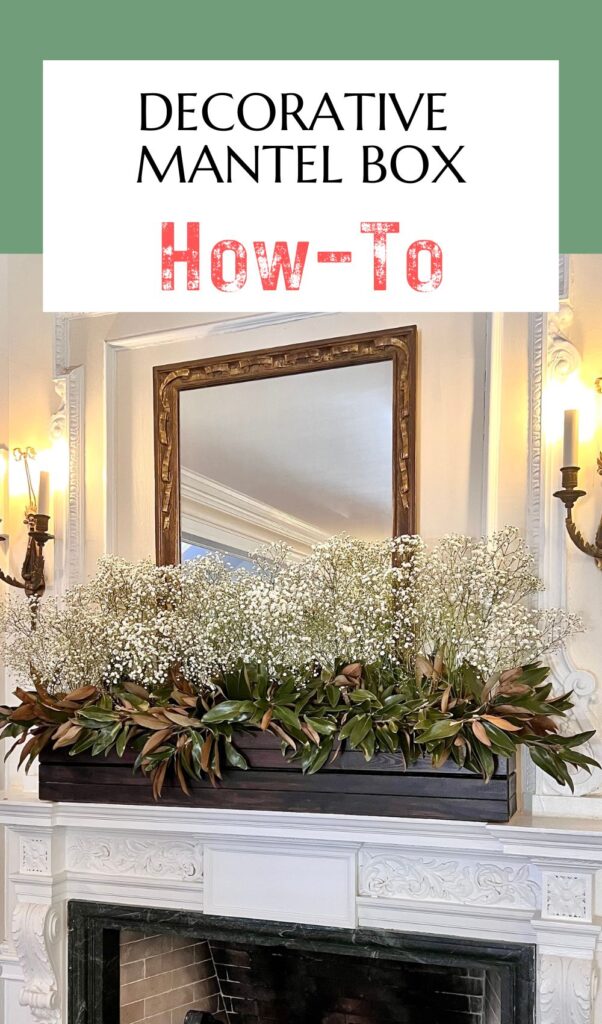
How To DIY An Awesome, Decorative Long Wooden Box
This simple to build, dramatic long wooden box is also easy to style again and again. Use it on a mantel, as a centerpiece, atop a hutch or bookshelf, on a console table behind a couch, etc.
I made this for our daughter’s best friend, Libby’s wedding! But I’ll be using it again and again for our mantel. Be sure to keep an eye out for it at Christmas this year! I have sooo many ideas for it already! And can’t you also see it overflowing with all the Fall goodies?
Christie, the MOB, called to ask for help. Libby wanted individual stems in about fifteen little mis-matched vases per round table mixed with 8 mis-matched candlesticks. You really must check out how Libby’s family with a little assistance from our family made this happen and how lovely they turned out.
If you’re planning a similar cluster arrangement, I’ve chronicled all the steps and details for you — thanks to super organized Christie. Just follow her lead.
All good there, but a prominent mantel at the venue was throwing them.
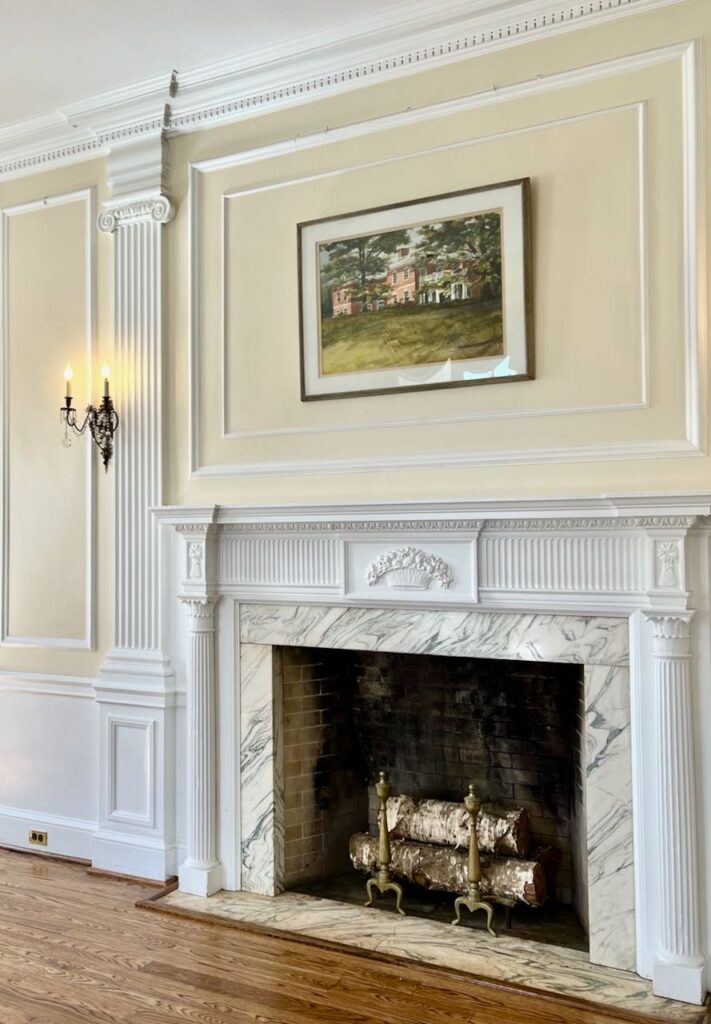
Help with a mantel display? They came to the right person. I’ve certainly decorated my fair share of mantels. Just last Christmas alone, this one and this one and this one and even here, just to share a few.
Above is the picture I had to work from. We ended up decorating a different, but very similar fireplace that was the first thing you saw as you entered this beautiful venue, the Woodend Sanctuary in Chevy Chase Maryland. It was also right in front of the dance floor — a very happening place for our box to hang out.

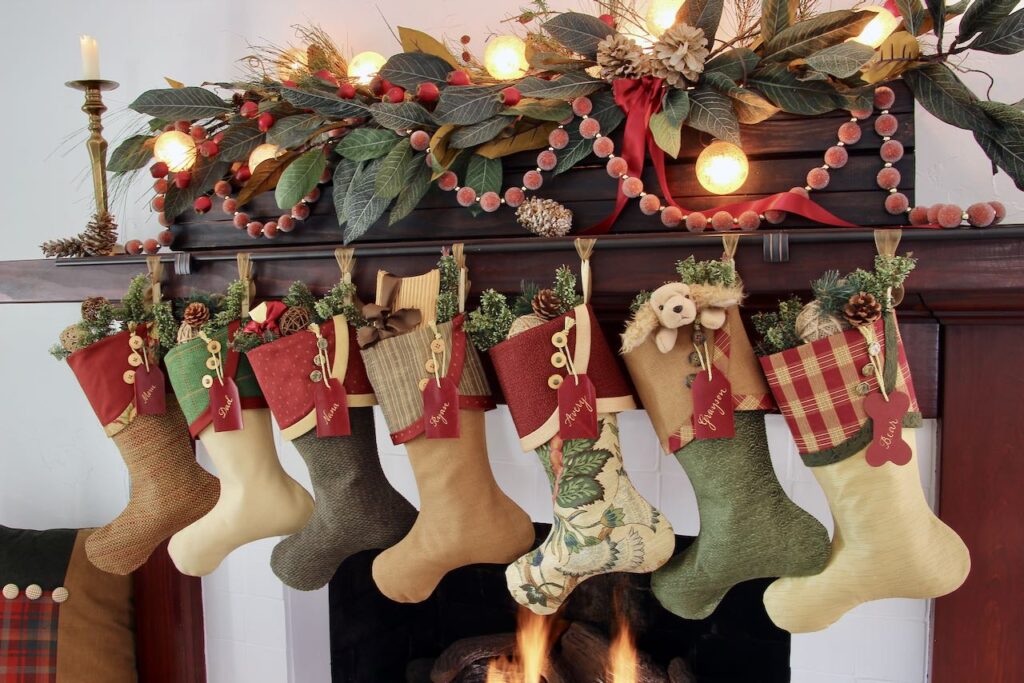
And here is the same mantel box, seven month later, all decked out for the holidays.
And here is a shorter white version I made to use in mantel displays but also for a tabletop display, here for a buffet table, and here for a Spring or Easter centerpiece.
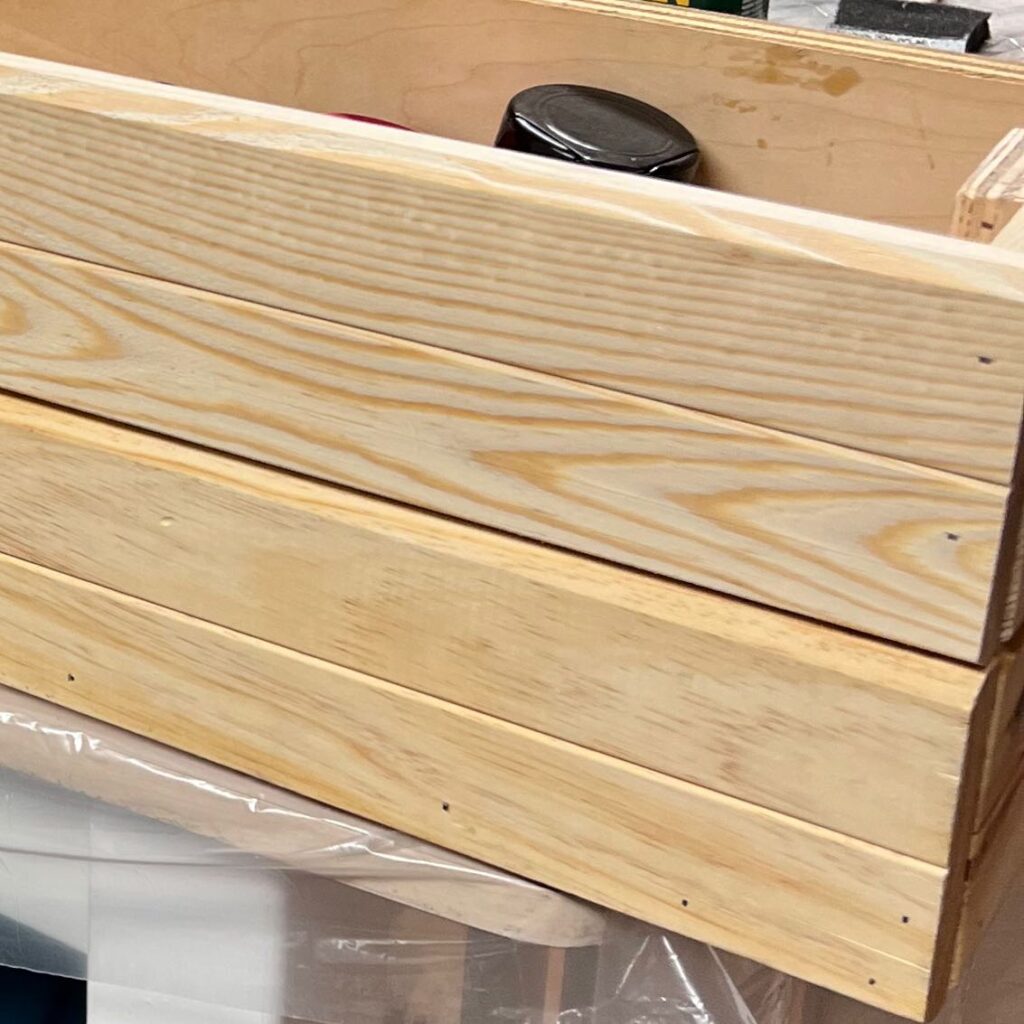
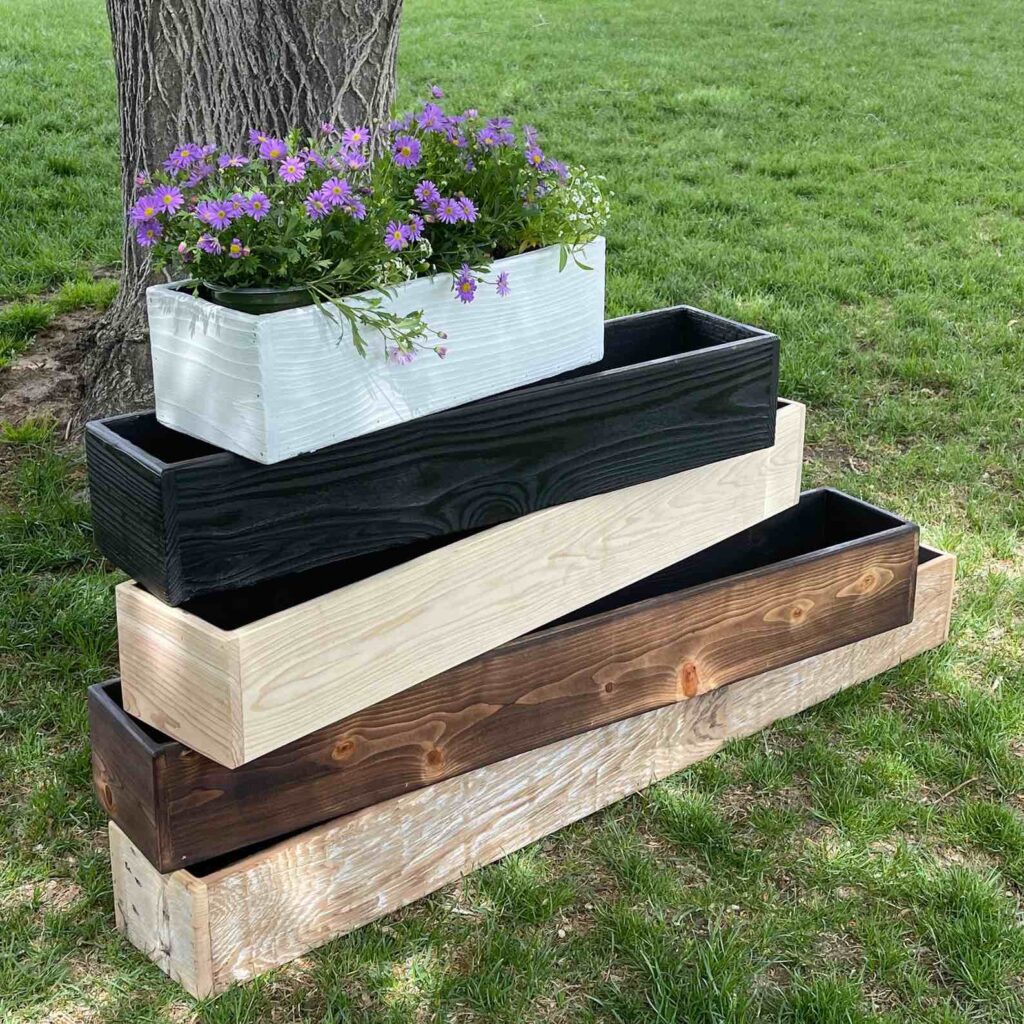
I’m in the middle of the One Room Challenge, ORC, so I had a surplus of scrap lumber on hand. One long side and the two short sides are all made of two lengths of grooved wood stacked for height. The other long side and the base are made of some other random scrap lumber.
The only time all four sides will be seen is if I use it as a centerpiece. Due to the scale of the fireplace wall, I knew the same box would probably not work for my dinner table. I’ll make a smaller version for the dinner table. So I was happy with three sides of the same wood.

Busy Right Now?
I get it! But be sure to Pin this so you’ll be able to find it when your next mantel decor is needed. Save it to:
Your Mantel Decorating Board, or to your
Flower Arranging Board, or to your
Wedding Decor Board, or to your
Mantel Styling Board
Or wherever it makes sense for you!
How to Build Long Wooden Box-
Materials & Supplies-
- Scrap Lumber for your box size
- Stain or paint as desired, I used gel stain
- Miter Saw
- Brad Nailer
- Sand paper
- Paint brush or stain rags
- Tape measure
- Pencil
Measure & Cut Wood-
- For the front
- For the back (front length minus the thickness of the two short ends)
- For the base (same length as the back)
- For the two short ends (same as the width of the base plus the thickness of the back)
- Scrap pieces (height of the box less the base thickness x 2), needed if using more than one board per side.
These lengths hide the joints from the front and show only one joint on each side. The base does not show at all.
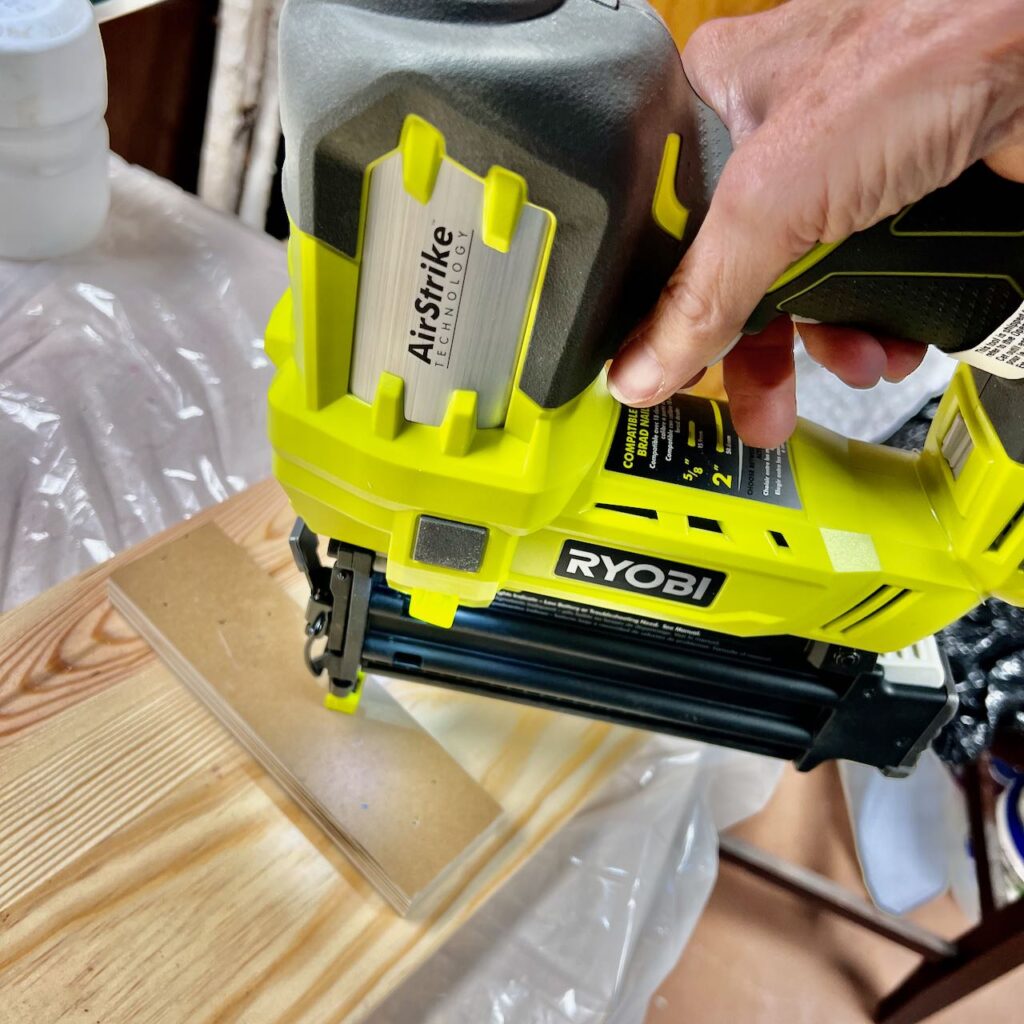
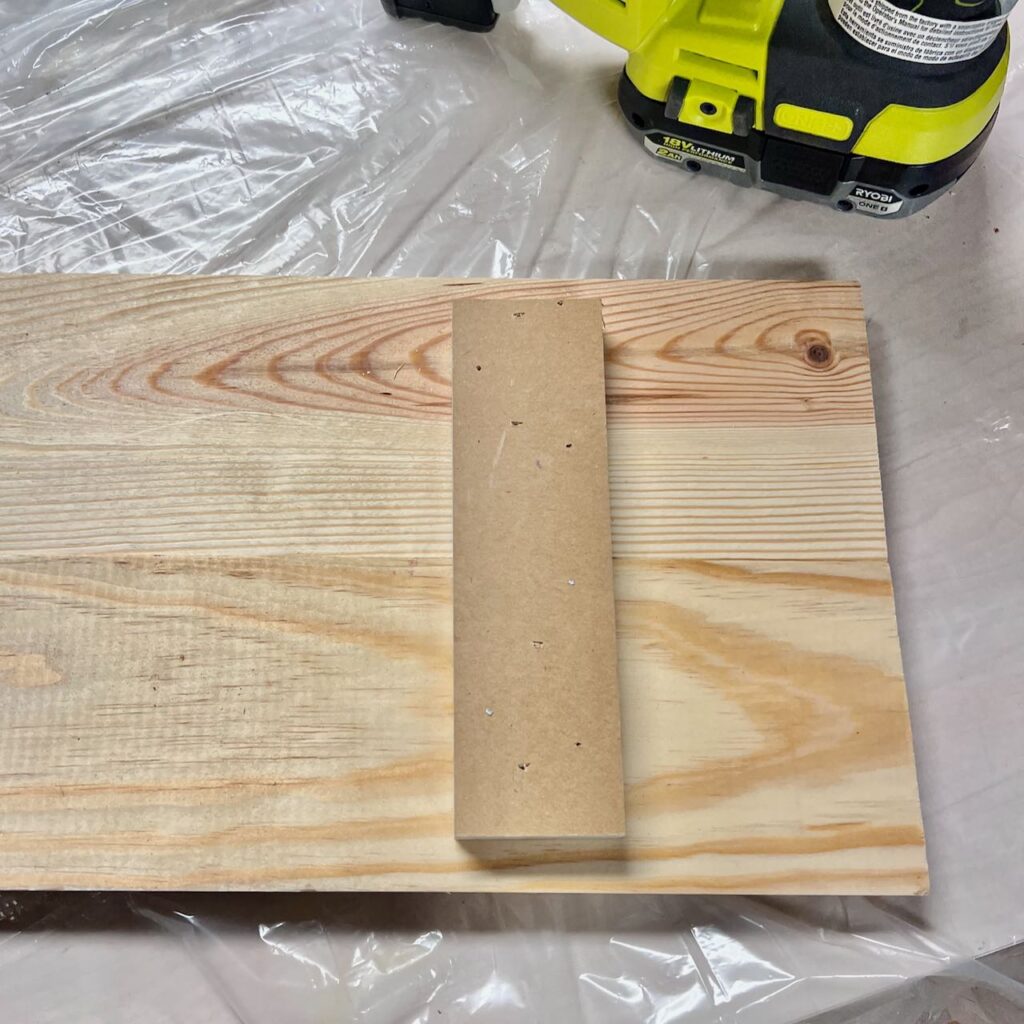
The scrap pieces are used to stack two boards vertically. Lay your side boards with long edges meeting, Lay a scrap piece over these two and attach with at least two brads on each horizontal board. I used two scrap pieces for the front and one on each of the short ends.
Attach one short end behind the end of the front of the box using a brad nailer.
Slip the base in place and nail across the front lower edge and the side lower edge.
Add second short end and the back to your box.
Finish Your Long Decorative Wooden Box-
Fill your nail holes and sand smooth. Sand the box, paying particular attention to cut ends and edges.
Now finish with your choice of stain or paint or just a sealer.
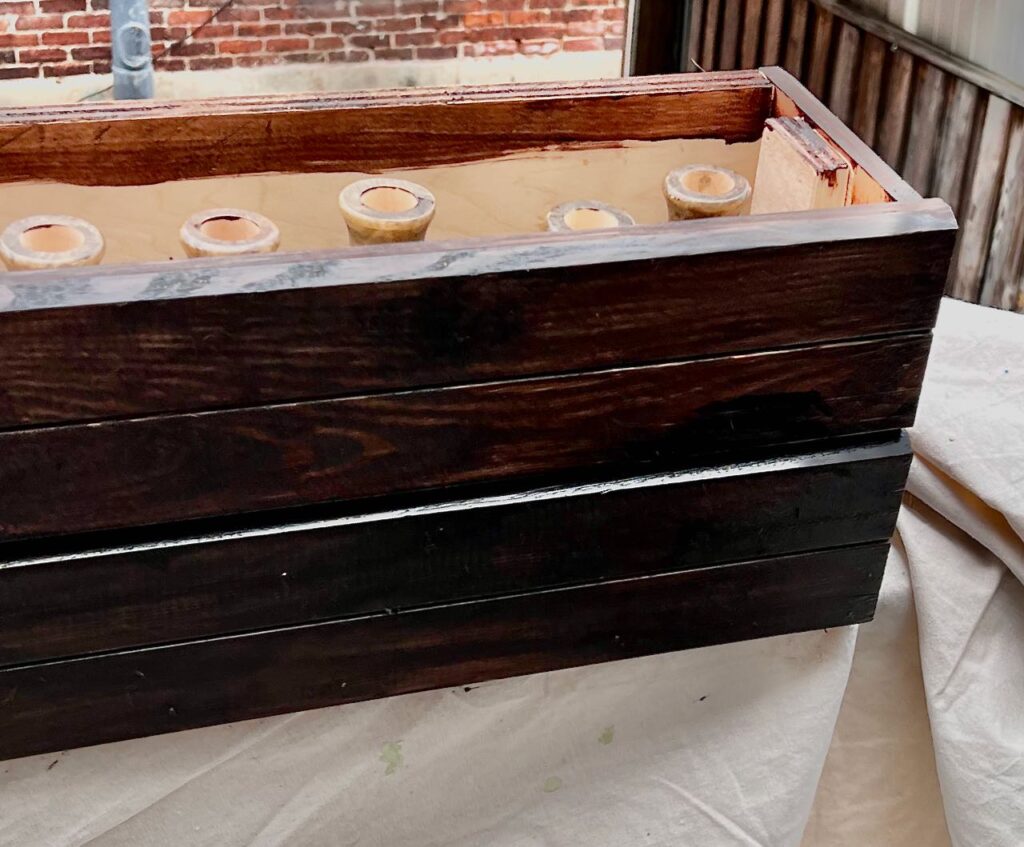
Libby, our bride, requested a dark stain. I started with an Aged Oak gel stain. This seemed to bring out the pink and yellow hues of the wood — in not a particularly good way.
So I packed a can of Spanish Oak gel stain that I always have on hand. Once we arrived in DC, I added a light coat and it had several days to cure before the wedding.
HINT: If you are staining or painting dark, you do not need to caulk your seams. I did not even caulk the groove between the two boards as it just looks like shadow.
If I had painted this white or any light color, I definitely would have caulked all seams and filled all holes and even the cut edges for a more polished look. (Thanks Libby, for going dark)
SIDENOTE: Those are the tops of some wooden candlesticks we had ordered from Amazon that we had also stained. They were in the box drying so the wind would blow them around.
How to Style a Long Wooden Planter Box For a Mantel–
Materials & Supplies-
- Chickenwire
- Florist Foam
- Jars of water
- Wire Cutters
- Gloves
Structure-
What you fill your long wooden with, will determine the structure you need.
Keep in mind, the box is not waterproof, so for fresh florals, you’ll need jars of water lined up inside. And the jars can have tape acrooss the openings in a crisscross pattern to help hold the stems upright. For sturdier branches, consider chicken wire.
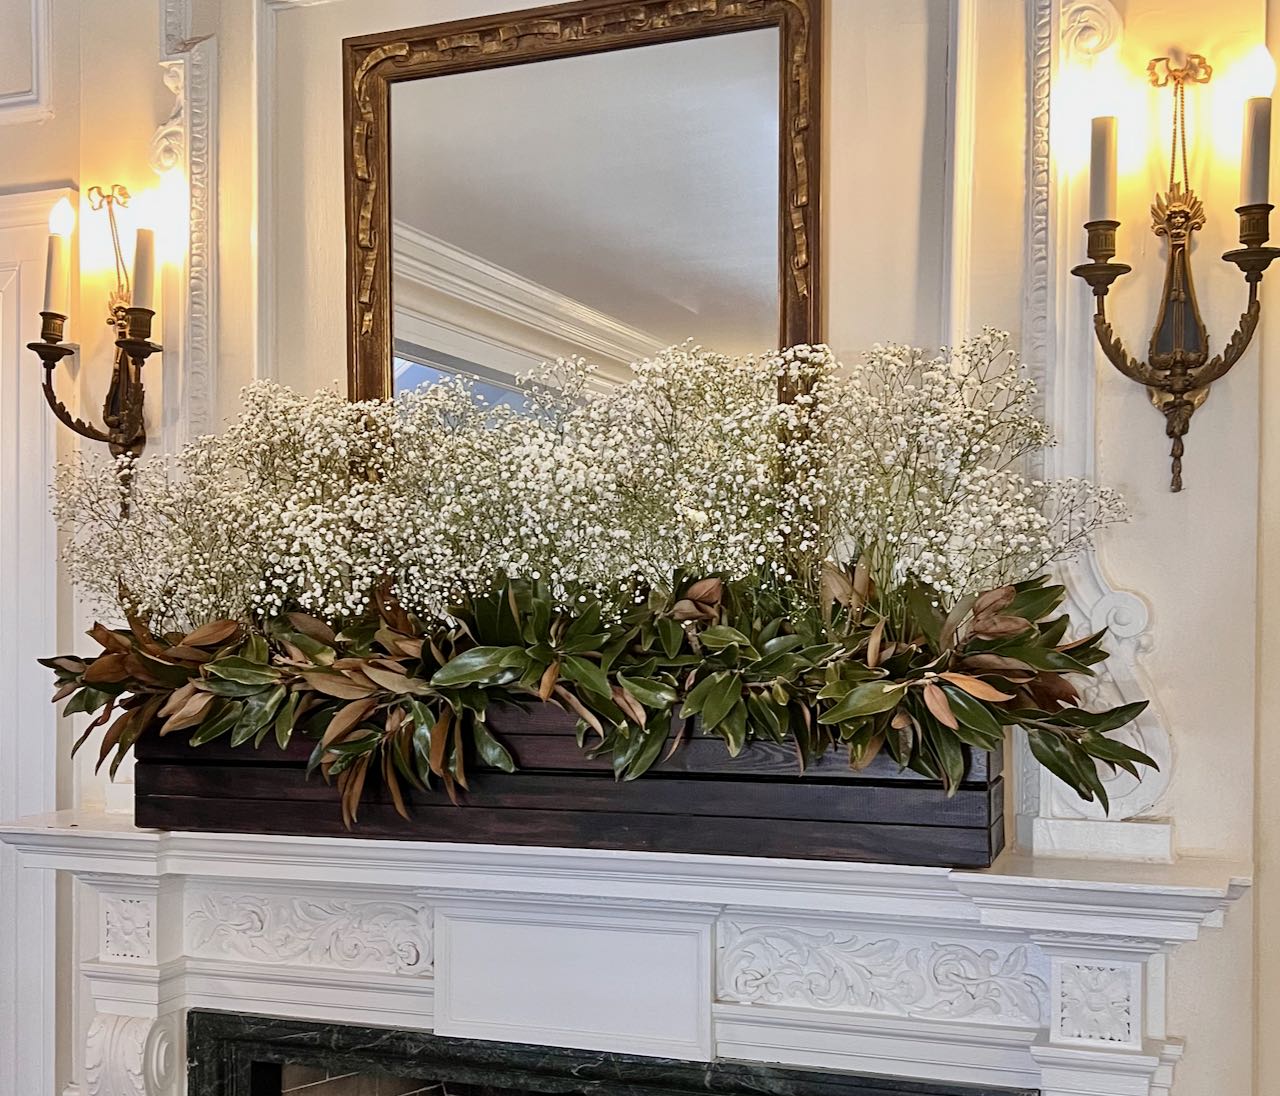
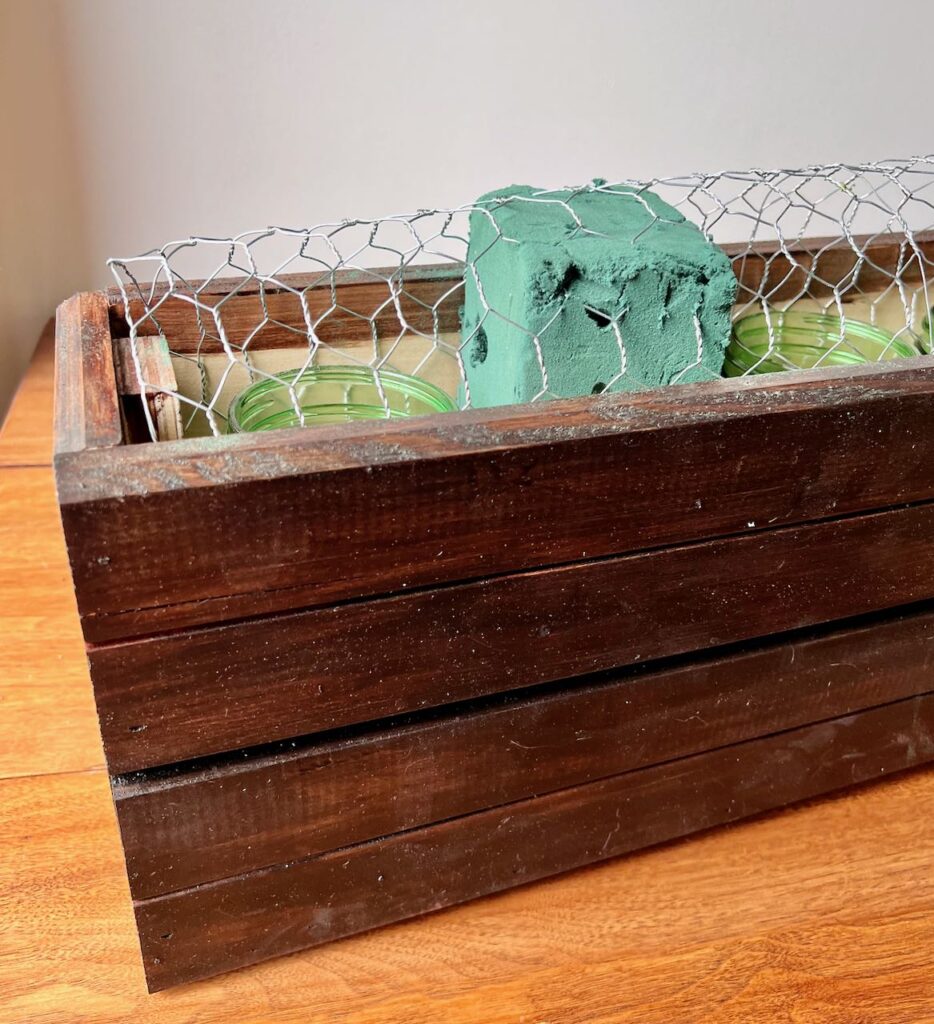
In this case, I used a combination of all three. I spaced out four blocks of florist foam standing a bit beyond the full height of the box. Between these blocks I inserted quart-size Bell jars. Then I added a domed “roof” of chicken wire.
The box is 4.75-inches inside front to back. Our chickenwire was cut to about 10 – 12 inches wide. the long sides were mushed down inside along the front and back.
TIP: Now is the time to add water to any jars if you are using them. I waited and that was a mistake!
Now for Styling the Wooden Planter Box Fillers-
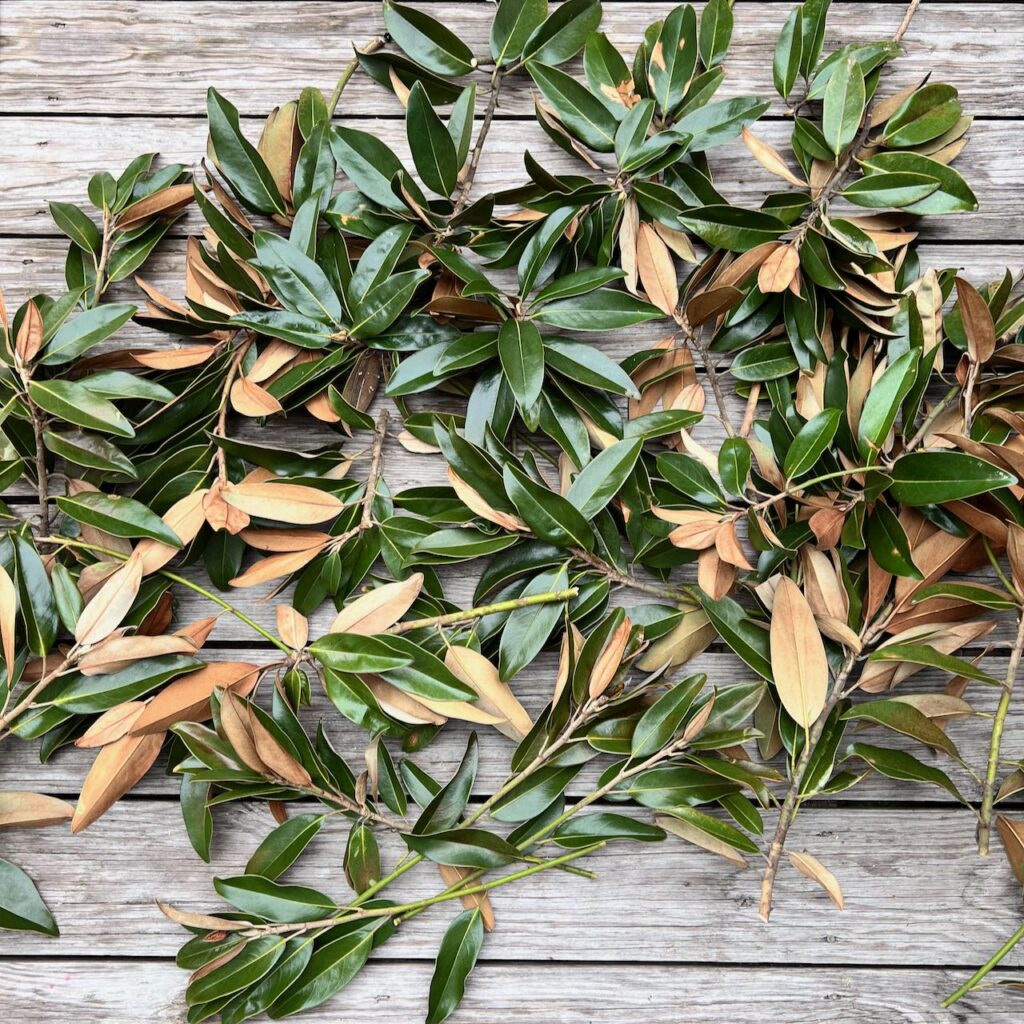
We had planned on eucalyptus and flowering Spring branches. But sometimes, what you plan turns out way better when “gifts” present themselves and you follow the new lead.
On the street corner by our daughter’s house in DC, someone had trimmed a large magnolia tree. The hubs and I brought many large branches back to Katie’s deck. I love foraging when I am away from home. But urban street corners are not my typical foraging locale!
If Libby wanted to stick with eucalyptus, I’d make a wreath. But when she saw the magnolia, she was thrilled.
The girls used to play under an enormous magnolia tree they had in their backyard. Sentimentality won out!
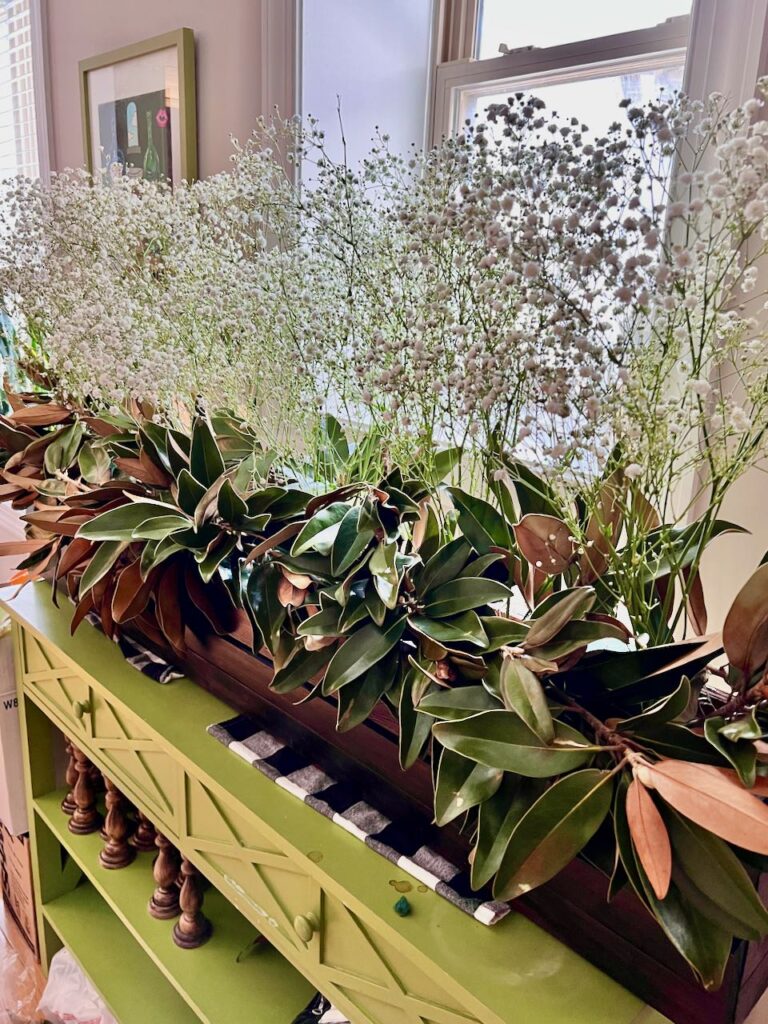
When planning a simple arrangement with basically two tiers, I start with the lowest tier. These are typically the heaviest materials also.
Weave the long branches of magnolia leaves through the chickenwire, working them outward from the middle. Loose leaves can be stuck into the florist foam to fill any low spots or gaps.
Libby had ordered ten or twelve different flowers (variety of colors, shapes and sizes) plus baby’s breath for the vast array of little clear glass vases. There was quite a lot of baby’s breath. So that became our tall filler. The perfect tall wispy complimentary companion to the large shiny magnolia leaves.
Once the base layer was done, it was time for the height. Time for the light airiness that referenced the array of single stems of the dinner table arrangements. A mass of baby’s breath was perfect!
LESSON: I didn’t really think Baby’s Breath needed water. But just to be safe, I added water to the jars because these were arranged on Wednesday and the wedding was on Friday. YES, baby’s breath needs water. Apparently, I missed one jar! A true blind science experiment. All the blooms on the baby’s breath in that one jar were shriveled up and looking sad compared with the others.
Fortunately, we had another bundle of Baby’s Breath in our “excess” bucket that we used to replace any flowers that did not tolerate the two day wait.
TIPS FOR MANTEL STYLING-
When Your Mantel Decor is Part of a Larger Event Decor-
It’s nice to have them relate to each other. But sometimes, that relate is just in terms of a mood or a common material.
Libby’s reception centerpieces were light and wispy single stems in a delightfully mismatched diversity of glass bud vases and vessels. With candlesticks of brass and stained wood.
Lining up a bunch of similar vases and candlesticks would be totally out of proportion with the scale of the fireplace and mantel.
So we needed a complimentary arrangement, not a similar arrangement. Originally, we planned on widespread, but airy flowering Spring branches. We ran into an issue with timing. In KC where we live, the branches were not in full bloom yet when we left. By the time we hit Maryland and Virginia, the views were filled with blooming redbuds. But in DC, the redbuds were past prime and more green. But the wispy Baby’s Breath, repeated one of the flowers from the centerpieces, and more importantly, the feeling of the centerpieces — airy, charming, and simplicity.

By adding a level of thick magnolia leaves as our bottom tier, we again repeated the attitude of the centerpieces by introducing a complete contrast to the Baby’s Breath. Had we replicated all 12 of the flowers used, it would have been a chaotic jumble. By using just two high contrast elements, we still referenced the original theme.
We decided on a wooden box stained dark. This repeated the material of the wooden candlesticks on the tables, and the simple, charming somewhat non-fussy attitude.
The materials are all understated, but the mass in which we used them gives them the impact needed for the large and prominent mantel space.

Here are a few resources to replicate the look:
The links in this post may include affiliate links, which means if you purchase anything using these links, you pay no extra, but I may receive a small commission that helps keep this blog running. I truly appreciate you using affiliate links whenever possible. Please know that I will never recommend a product I do not believe in!
Customize!!!!

Last forever! No foraging necessary.

No water required.
I hope this gives you an idea for your own decor styling! This long wooden planter box would also look great on a buffet table, a console table behind a couch, topping off a bookshelf or hutch, on a covered porch, etc.
Thanks so much following along! I appreciate every read, every comment, every share!

SO beautiful Diane! No wonder the bride and her mother were thrilled. Lovely job and thanks for the tutorial! Happy Mother’s Day weekend!
Oh thanks Barbara! That means so much coming from you!!! It was such a fun and easy “throw together”.
Beautiful! Just a note that if you use REAL Baby’s Breath, spray it with hair spray to keep it from shedding if bumped. It looks like styrofoam particles on the floor ….but the hairspray sure helps!
Oh thanks Alda! That’s a great tip!!!
Absolutely stunning! Takes the mantle to a whole new level!
Thanks Jan! Don’t you love it when things just fall into place!
Thank you for sharing this Diane – I have a long wooden box and I didn’t have a clue how to utilize it & now I do! Can’t wait to get started.
I’m so glad you are inspired! That’s what this community is all about, right? Pleas send pics when you have it set up. I have a smaller galvanized steel mantel box that I use a. LOT. Here is how I use it for a patriot theme. And sometimes it ends up down the center of the table — so easy! (It’s actually longer than it appears in the pictures, that’s just a super wide old fireplace)
Thanks for sharing your wooden box DIY! I have a long mantel so a box like yours could easily work.
Oh, I’m so glad to here this! Please send pics!