Best Grass to Grow For Easy, Spring Centerpieces and Decor
Grow your own Easter centerpiece! This guide offers easy steps for creating a beautiful, eco-friendly grass centerpiece for your table.
Spring has sprung and with it comes the urge to hatch some creative ideas for Easter!
Forget the usual store-bought centerpieces – this year, why not try something a little more personal and eco-friendly?
Growing your own grass centerpiece is surprisingly easy and adds a touch of nature’s charm to your table.
Imagine the delight of your guests as they admire your vibrant green creation – and the best part? You can do it yourself with just a few simple steps. Let’s get growing!

TABLE OF CONTENTS:
Why Grow Your Own Grass Indoors
I love growing my own grass indoors because it:
- Is quick and easy
- Makes stylish, fresh decor
- Saves money growing it myself
- Is eco-friendly
- Is perfect backdrop for many seasonal decor ideas
- Is plain and simple, real grass is much more beautiful than plastic
It’s hard to resist running your fingers through the thick tufts of grass. How can something so simple feel so luxurious?
And the color of new grass — no words!!!!

What You’ll Need:
Materials and Supplies-
- Grass Seed, of course
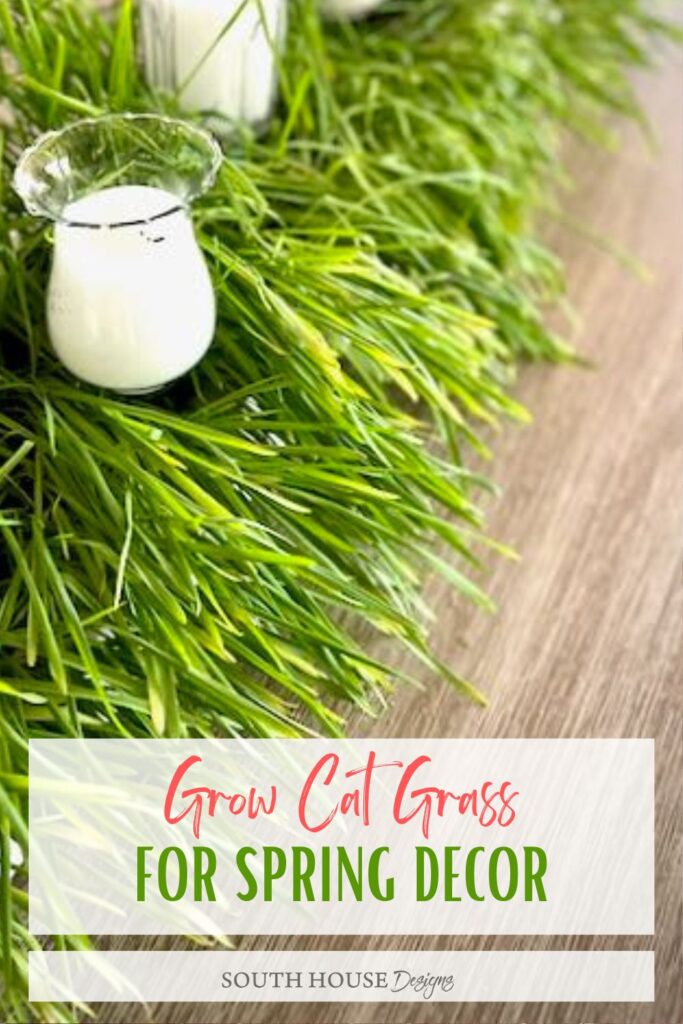
- Cat Grass, may new found favorite of the grass options — more on cat grass below
- Many other popular options include;
- Wheat berries
- Wheat grass seeds
- Rye grass
- Potting soil
- Gravel or small rocks for drainage
- Plastic to line your container, optional
- Container(s) — anything from a flower pot to unexpected containers like:
- Lined Easter basket
- Galvanized trough
- Thrift store finds
- Glass bowls
- Egg cartons
- Vintage tea cups
- Dough bowl
- Sprinkler bottle for watering, see diy below
What is Cat Grass?
I had never heard of it either!

The manager of my favorite nursery put me on to it, advising me that it is the best option for growing grass indoors. It sure worked for me!
- Cat grass is a mixture of grass seeds like wheat, oat, rye, or barley.
- Cat grass is specifically marketed and grown for cats to nibble on indoors.
- It’s not the same type of grass found in lawns, which may contain harmful chemicals.
- While the exact reason cats eat grass isn’t fully understood, it’s believed to help with digestion, eliminate hairballs, or simply provide a source of fiber and nutrients.
And honestly, I don’t think I’ll ever go back to a single grass variety again! I had better luck with this Cat Grass than I ever had with any single grass seed.
One of the large packets is supposed to be enough seeds for a 6-inch flower pot. I used two of these large packets for my 4 x 50-inch planter box.
And beside, when I’m done with my centerpiece, I’m planning to separate it into a number of smaller clumps for some of my cat loving friends.
How-To Grow Grass Centerpieces Indoors
Location-
Your container(s) will need to be in a bright sunny window. I used our only west facing window. The afternoon direct sunlight was not too much probably because I planted my seeds in late Winter, February 18th to be exact.
Make a Water Bottle Sprinkler-
The manager of the nursery who turned me on to Cat Grass, advised against misting. He said with grass, it’s the seeds that need the water not the stalks. And as the grass grows thick, the usual problem is getting water down to the roots.
My issue with misting, is not being able to control where the water goes. To get and keep the seeds along the edges of my planter box, misting would require a lot of water ending up outside the box. My planter box was to sit on a sweet antique cabinet and I didn’t want to damage the finish of it or the window sill of our only west-facing.
Inspired by my Grandmother’s ironing bottle — an old green glass bottle with a perforated silver metal screw top — I used a cleaned Diet Coke plastic bottle. I used a thin nail to punch 6 even-ish spaced holes in the screw top. Works like a dream.

Keeping the holes as small as possible, the water trickles out very gently. Squeezing the bottle also affects the flow.
Now I have great control over where the water goes and the seeds and light soil are not disturbed.
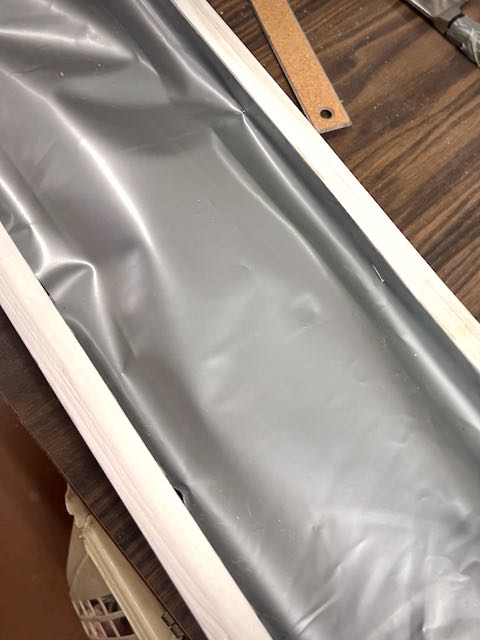
Prepare the container-
Wondering about my planter box? It’s the shorter brother of a mantel box I made for a friend’s wedding. Check out how easy it was to make, right here. It’s a great novice wood working project.
In today’s post I’m using it for a Spring or Easter centerpiece, But I’ve also used it on a mantel for the holidays, and to elevate a buffet table.
If you are using an unconventional container, first, I applaud you!
Secondly, it may need lining. Like my wooden box which is not water tight. I lined it with plastic to protect my table. Anything wood you probably want to line with plastic to prevent damaging the wood. Baskets and such may also need to be lined.
TIP: to conserve on the amount of potting soil I would need, I filled the bottom of my box with old florist foam and just lined the top 3-inches of my box.
If you are using clear glass containers or loosely woven metal baskets, a layer of moss to show through is a great idea and then line with plastic.
As with all houseplants, you need to plan for drainage so the roots do not get soggy and rot.
I have to say, I don’t obsess over this as I have never kept my live grass for more than a six weeks or so indoors. Once my dinner or event is through, I tend to move the centerpiece some place else and modify it for another week or two and then I might add it to our window boxes.
If drainage holes are not practical — hello, Grandma’s cut crystal serving bowl — then be sure to add a good layer of rock in the bottom of the pot, the bowl, the basket, etc.
If you do have drainage holes, don’t forget about a saucer or the like to collect the water and not ruin your table or surface under your planter.
QUICK INTERRUPTION: Are you enjoying this post? Would you like more? Subscribe to have them delivered straight to you and access exclusive material:
Many thanks! Now back to planting our grass
Fill with soil and moisten-
Add your potting soil and moisten it. A basic, generic brand potting soil will work for your decor grass. But if you are planning to use Cat Grass and offer it up to your furry friends after your through, I’d be sure to go with an organic blend.
I prefer to fill my containers so that the soil level, or top of the soil, leaves an inch of space at the top. The bottom 1/2 – 1-inch of the blades of grass are sometimes not the prettiest.
Moisten the soil to prepare it for the seeds. Isn’t your new little bottle sprinkler the best?
Planting the seeds-
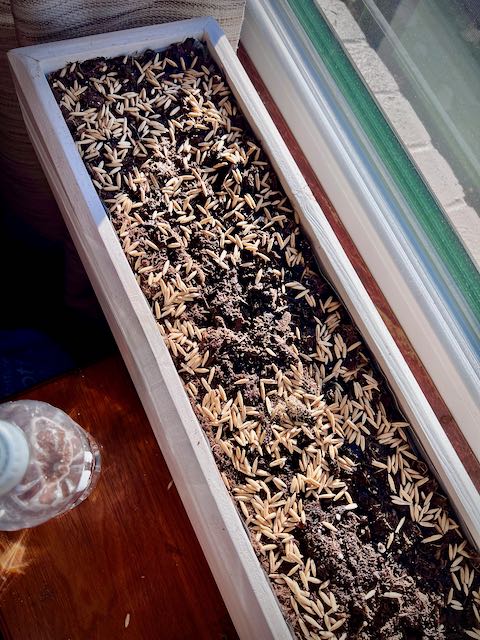
Read the package label — some seeds like wheat berries will need to be soaked for 12-24 hours. My Cat Grass seeds did not require pre-soaking.
Typically, you’ll scatter the seeds across the container. Filling it rather thickly.
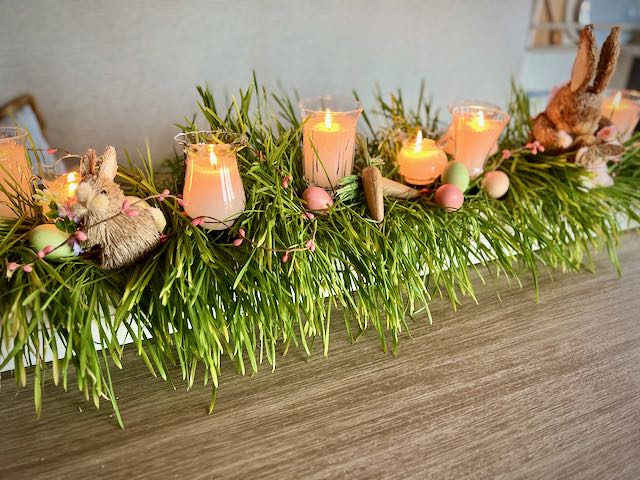
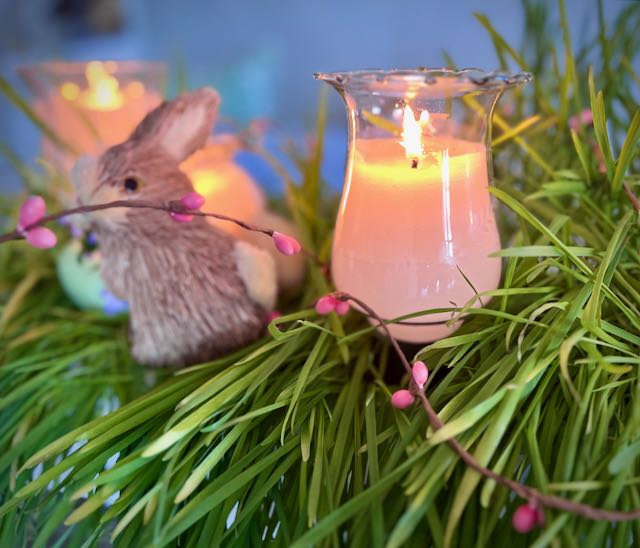
However, for this arrangement, I knew I wanted to nestle the hurricane candles I made recently the the grass and I didn’t want there to be too much grass where I wanted a cluster of candles, so I rationed my seeds to be thicker in some spots and thin to none in others.
Say you want a semi-circle of thick grass with a patch for maybe some decorative rocks and moss, arrange your seeds accordingly.
You want a thick stand of grass, so use a pretty dense layer of seeds.
Watering-
I know a lot of people will say to use a spray bottle or misting bottle to water your seed, but I’ve already professed the wonders of a diy-ed bottle sprinkler.

You’ve used it once to moisten the soil, now you want to water the seeds without disturbing them.
Cover the Seeds-
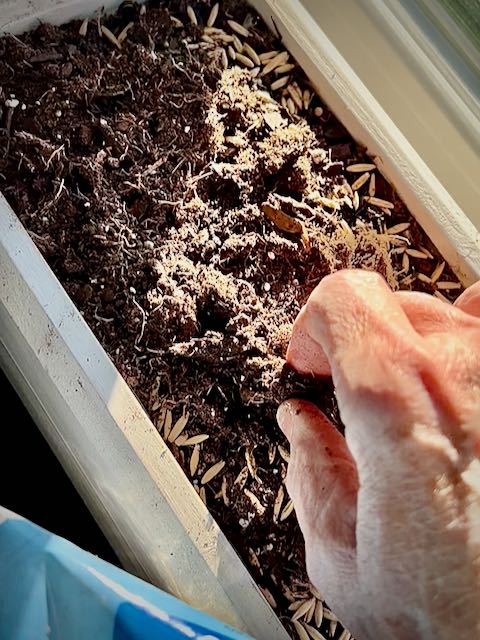
Now cover your moist seeds with a thin layer of soil and water it again just to get this layer moist too.
My soil was rather clumpy, so I took a few moments and broke up the clumps between my fingers.
Maintaining Moisture-
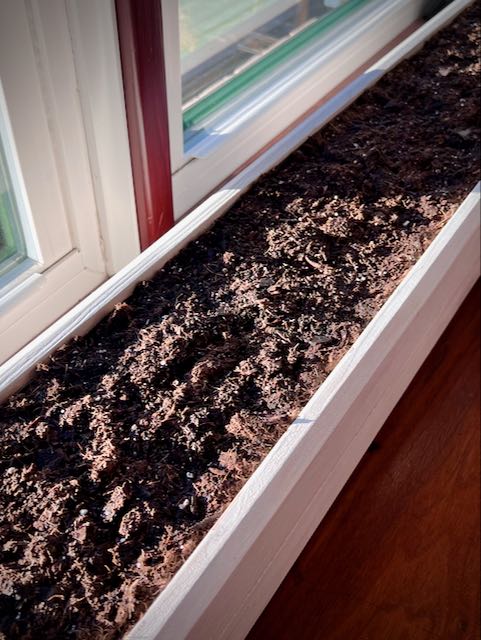
Just like outdoor grass seeds, once the seeds are planted and moist, they need to remain moist until sprouted and growing well. Then you can back off and water only when the soil feel dry.
Depending on your seeds and your temperature and level of sun, you may find that you want to help their sprouting along a bit. You can do this by creating a miniature greenhouse by loosely draping your moistened seeds and soil with plastic wrap, like saran wrap. This will keep the moisture in and magnify the light that does reach it.
So if you plant your seeds during a string of grey cloudy days, try this.
Sprouting and growth-
Again there are many variables, the type of seeds, the amount of sunshine, the ambient temperature, etc, that all impact how quickly your seeds germinate, sprout and start shooting up.

It may appear very slow at first, above was after 5 days.
I probably could have forced them earlier if I used some plastic wrap to create a greenhouse effect.
But once they get started, watch out!


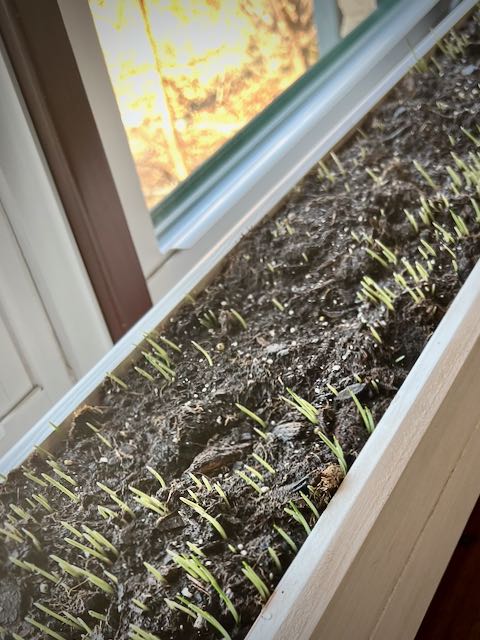
You should see little baby green sprouts in a 2 – 3 days, growing blades of grass in 4 – 6 days.
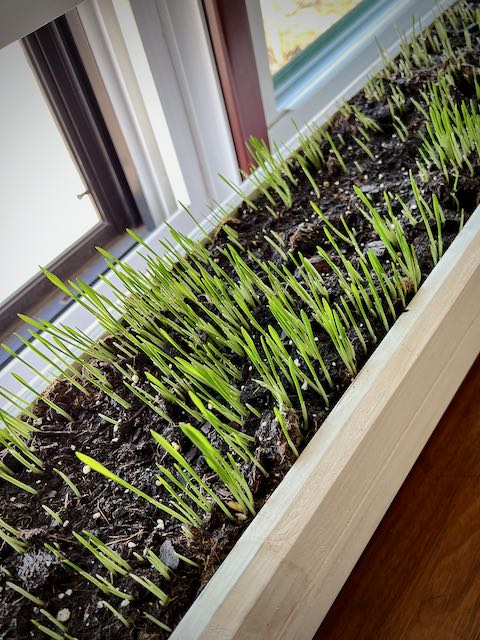

And then watch out! It really starts taking off and you’ll have a thick stand of grass in 9 – 14 days.
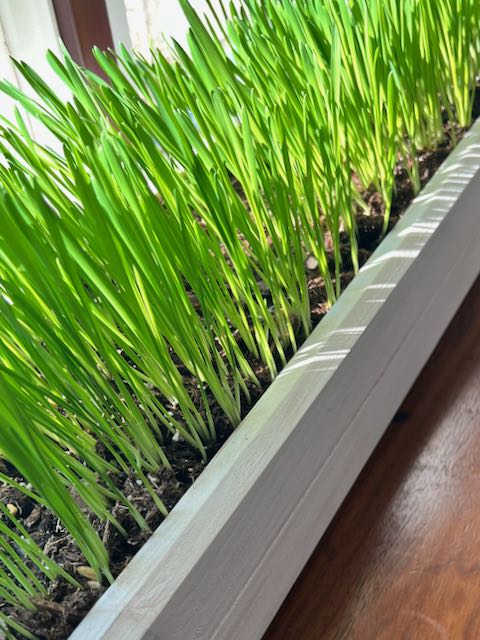
I turn them every day to encourage even growth. And I left mine in the window until the 29th day because I just didn’t have time to get my centerpiece ready and photograph, etc. So my grass was a bit longer and more unruly than I usually let it get.
You can choose to let your grass grow long and sweeping, like a wild field like I did. Or you can choose to trim every few days to keep it tailored and manicured, more turf-like.
Trim it with some sharp scissors.
PRO TIP: For an even trim, cut cardboard to the height you want the grass above the top of your planter. Stand it across the planter to guide your cuts.
Grass Centerpiece Styling Suggestions
First off, don’t think of it for centerpieces exclusively. A bowl, pot or tureen of bright green grass can be a decor piece for the coffee table, a mantel, to brighten an open shelf, to tuck in a hutch display of white dishes or transfer ware.
Year round, you can design a very sleek and contemporary decor piece with just the grass growing thick out of a sleek container – like a low, matte black bowl.
For Parties–
How about a slice of turf centerpiece to celebrate the opening game of MLB (or soccer, or football). Add some thrifted baseballs, a few pennants and all the appropriate foods and beverages.

Of course, live grass in your tablescape and in the actual egg-hunting baskets would certainly make for elevated Easter decor.
How about a tuft of grass growing in a vintage teacup at each place setting for a Spring brunch. Add a pretty rock and maybe a crocus bloom or two from a watering pick buried ini the grass.
After the Party?
Unlike plastic grass that you either need to store, throw in a landfill or send to the thrift shop; with live cat grass, you can replant it outdoors, gift it to a friend’s cat, or compost it. Those are al more desirable options for me!!!
All in all, I loved the process of growing my own real grass indoors. I found it so satisfying to see how much it grew each morning.
I love how my Easter centerpiece turned out!
I will do this again and again — of course tweaking the design each time for something new and different
Please pin these to remember them (sometimes, that’s just how our brains work — do you have days like that too?):

I hope you’re feeling inspired
If you act quickly you can have a grass centerpiece for Easter. Or maybe you’d like to save it for a Mother’s Day brunch. Or maybe you’re hosting a bridal shower or baby shower — oh, the possibilities!

How deep is the cat grass box?
Hi Deb, the box itself is 4-inches deep, but I stapled the heavy lining plastic so that the soil would just be 3-inches deep. (I was afraid I wouldn’t have enough soil for all 4-inches and just didn’t want to go out to the store again. Lazy, I know🤭)