
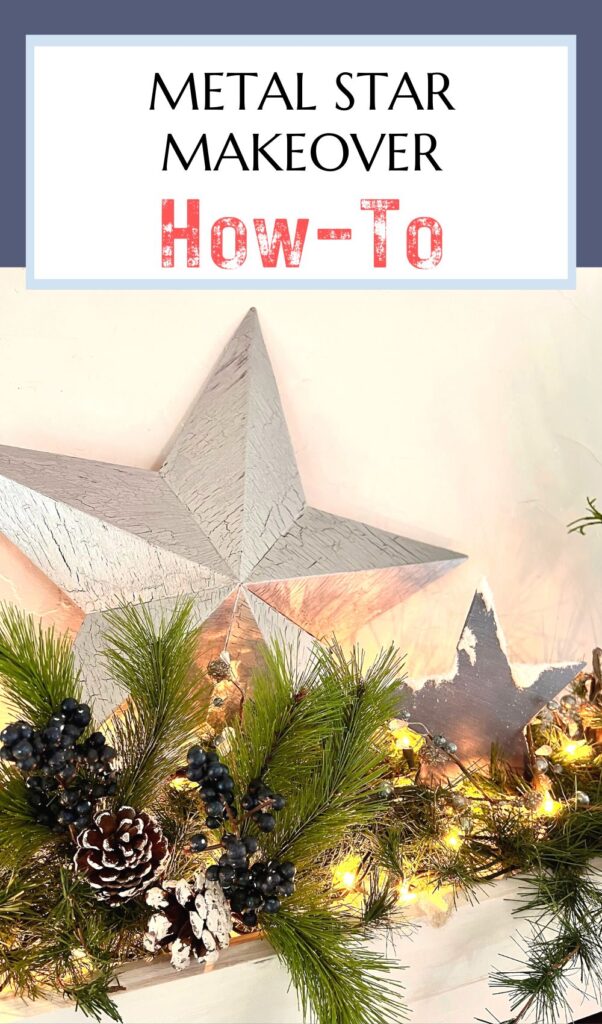
Quick & Easy Makeover of Old Patriotic Metal Stars for Christmas
Shop your old, or thrift store, Patriotic decor for tired, faded 3D metal stars to makeover for holiday decor. Easy and Cheap, but WOW!
Sometimes the solution to a decorating dilemma is in our own storage tubs.
It’s always the best when you can shop your stash and come up with something wonderful! And in my case, I even had all the makeover supplies on hand.
Follow along to see one of my crafting favorite paint go-to’s that let me add a bit of metallic shine, no matter. the color!
Let’s Get Started:
SCREECH!
When an idea hits and you get so excited, and have everything you need. Do you just jump right in?
Even when you’re a blogger? And you know better? And you still forget to take before pictures?
Yep, rookie mistake, from a veteran blogger! Sometimes it happens.

So that’s why I’m using this as my “Before”. You can bet mine was not nearly so pristine as this.
My two large metal stars came from dear friends who moved from our little piece of paradise to Florida — more water, more sunshine, more warmth. But they weren’t taking the stars with them.
Can you paint over metal that is already painted?
Absolutely! With just a bit of prep;
- First, you need to clean is real well. I use TSP mixed in water as a great cleaner and degreaser.
- Scuff sand with 60 grit, You are not trying to remove the finish, just roughing it up a bit so that your paint has something to grab onto. This is particularly important with a previous shiny finish.
- Wash and dry to remove all sanding dust
- Then be sure to use a primer that is designed for metal finishes.
Do I need to use primer on already painted metal?
Yes! Not all paints can act as primers. Be sure to read the label.
Plus, be sure to rough it up as detailed above. Then use a primer and then your “pretty paint”.
Table of Contents:
Let’s Makeover Our Old Metal Barn Stars
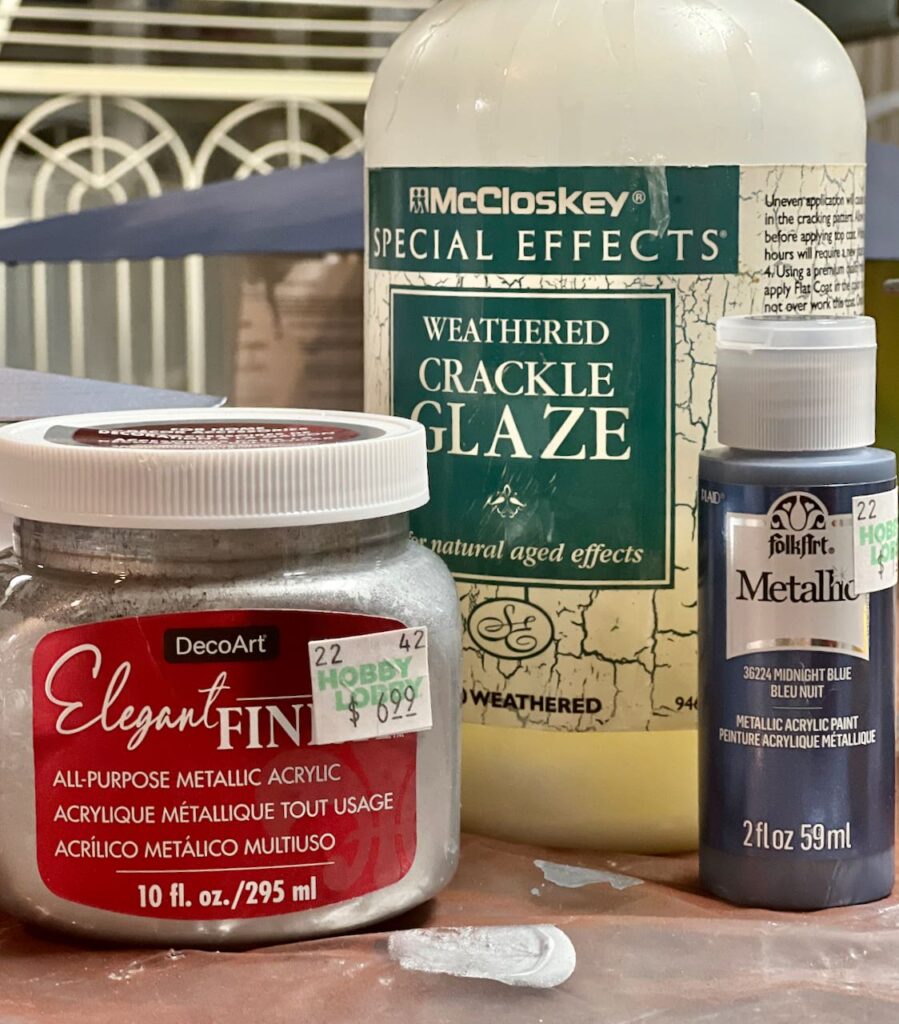
Materials:
- Old stars
- Primer spray paint, my usual choice!
- Choice of top paint, mixed with this metallic — gorgeous! (note, thee picture looks green but it’s really Shimmering Silver)
- Crackle Paint Medium, optional
- Sealer, optional
Supplies:
- TSP or cleaner of choice
- drop cloth or protective covering
- disposable cup and spoon or stick for mixing paint
- Paint brushes
- Sand paper and sanding gator, Every crafter NEEDS this!
The links in this post may include affiliate links, which means if you purchase anything using these links, you pay no extra, but I may receive a small commission that helps keep this blog running. I truly appreciate you using affiliate links whenever possible. Please know that I will never recommend a product I do not believe in!
Step 1) Clean and Sand Your Stars-
I used a mix of TSP in water to clean my stars well. Then I scratch sanded with my trusty gator sanding block and 60 grit paper.
CRAFTING MUST: this sanding block needs to be in every crafters tool box!!! There is hardly a project mine doesn’t touch.
TIP: To save money, you can cut larger sheets of velcro style sandpaper into strips to fit.
TIP: To get into tight corners and crevices, cut a piece of sandpaper wider than needed. Attach to the block with the excess hanging over one side and wrap it up the side of the block.
Wash and thoroughly dry to remove sanding dust.
Step 2) Spray Primer-
Use a good metal primer. For priming, I prefer a spray.
Because I was covering bolder colors, red in particular. I did two light coats. This doesn’t really take much time with the newer spray paints available these days – 20 or 30 minutes between is all you need.
Step 3) Paint Your Stars-
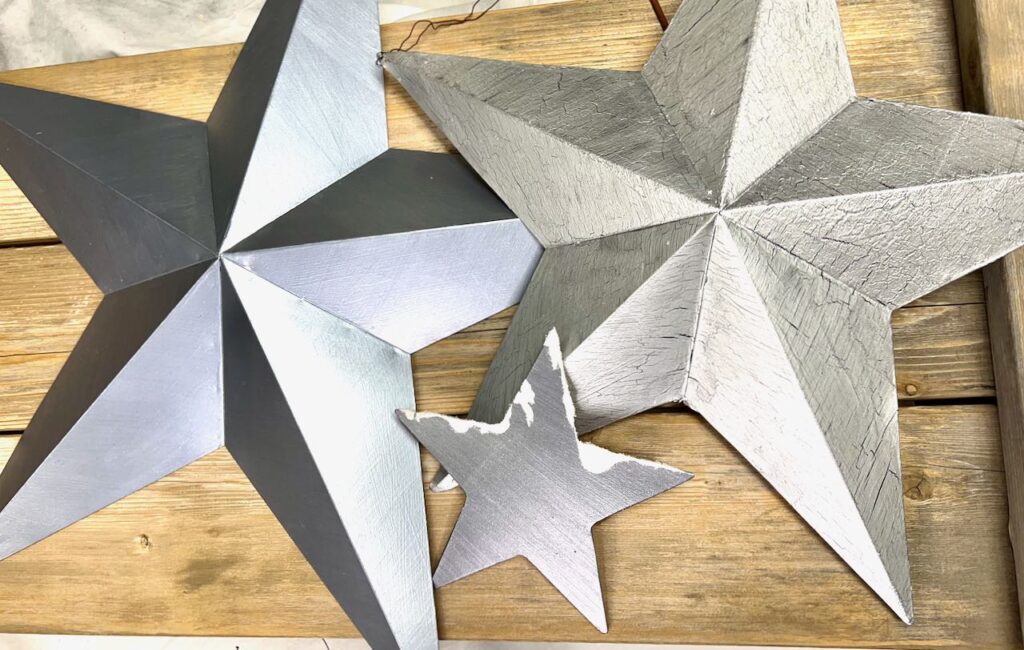
I had three stars to paint and I knew I wanted them all different shades of metallic silver blue.
I have an amazing product for anytime I want to add a metallic sheen to ANY color of paint. It’s Decoart Elegant Finishes.

I keep a jar or silver and a jar of gold on hand at all times. They both mix beautifully with all the craft paints I’ve tried.
Here are some notecards from a project I was working on in 2015. See, ANY acrylic craft paint can go glitzy with a jar of my secret spice on hand.
The blue craft paint had a metallic finish straight out of the bottle, but when I added some of the Decoart Elegant Finishes in silver they really glistened!
No magic formulas, I just varied the ratio of silver to blue for each star until it looked good to me.
HINT: With metallic paints in particular watch the direction of your brushstrokes!
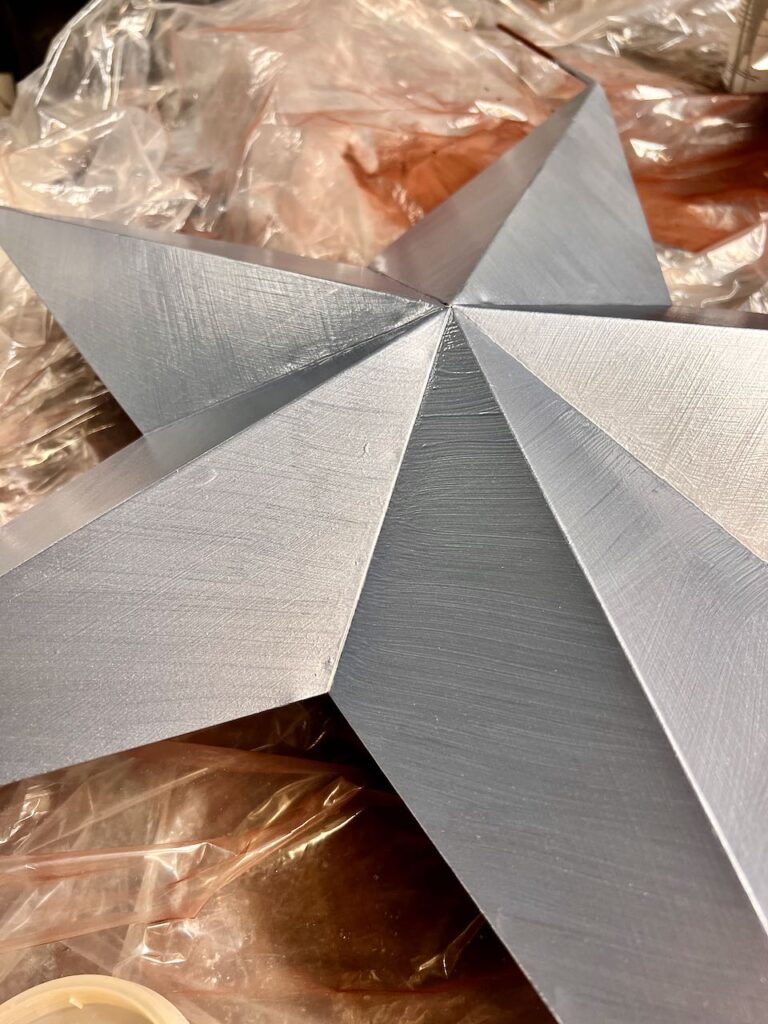
After a bit of experimenting. I like the widthwise brushstrokes. Once you determine a direction, try to maintain the same line throughout, keeping your strokes parallel on each plane.
This way the strokes match up in the valleys and along the peaks.
Below is the first coat, so it’s never going to look the best.
I could tell at this point that I did not care for the lengthwise brushstrokes.
Step 4) Add Crackle Medium, optional-
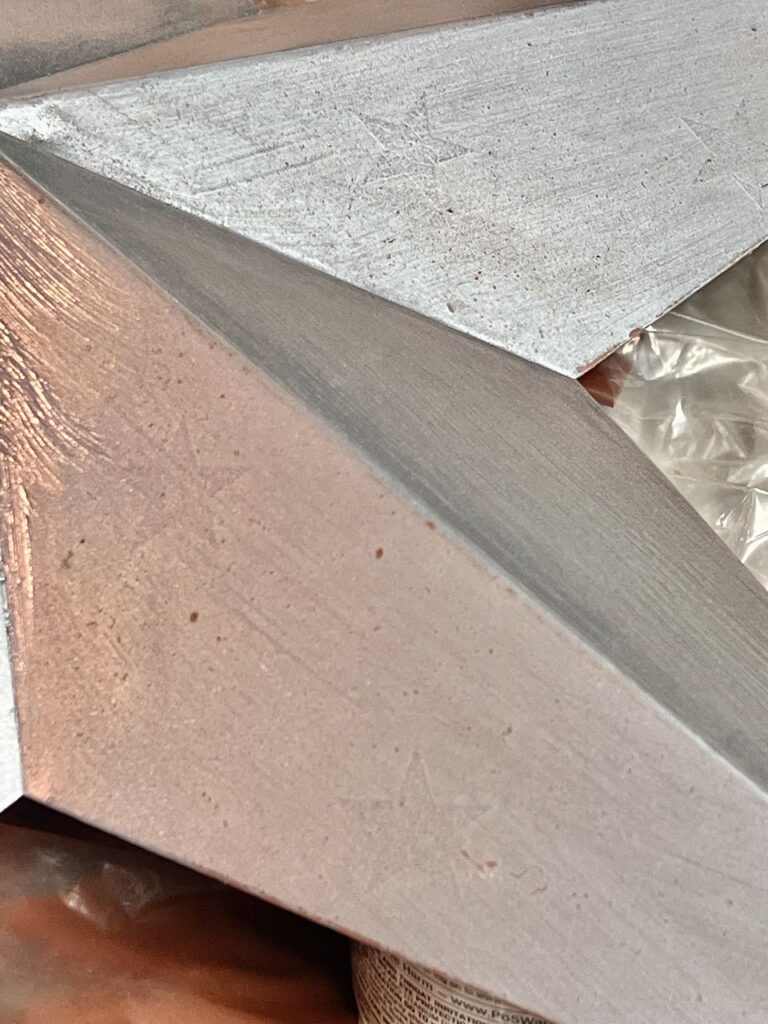
Look closely and you’ll see that one of the ,metal stars had embossed mini stars in the metal finish. The solid metallic paint seemed to make these all the more. apparent
No worries! You can add texture of your own to camouflage them. I chose to use a crackle glaze. I haven’t done this in years, but still enjoyed this fun and surprising process!
With a crackle finish, the greater the difference in base color and top color, the more the crackling will appear
I gave this star a darker blue base coat (over the original primer).
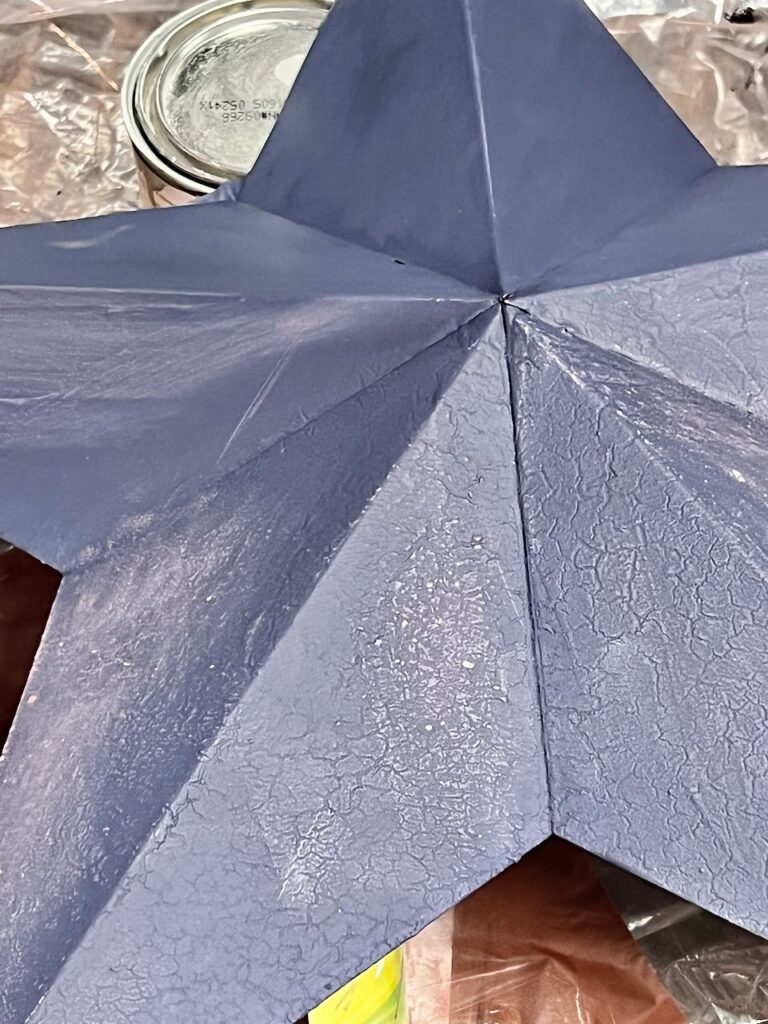
Once your base is dry. You brush on a layer of crackle medium.
Follow the instructions with the brand you have. Mine said for the crackle medium to dry one to four hours and then brush on your top color. As that color dries, the cracks will appear like magic!
The glaze I used does not seem to be available anymore. I bought it at a local hardware store probably more than twenty year ago. Shocked it still worked!
HINT: A thin layer produces fine, thin cracks. A thicker layer produces thicker cracks. By strategically adding crackle glaze, you can force crackling in chosen spots, not all over if you want.
Step 5) Final Paint Coat-
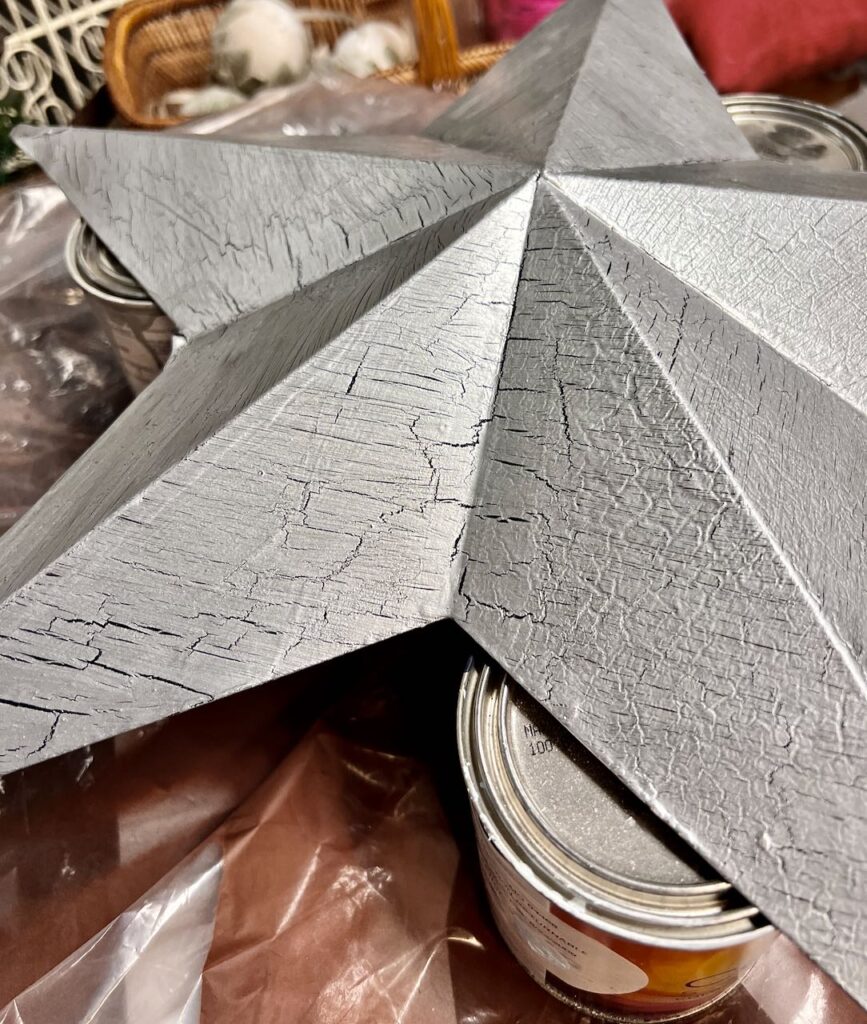
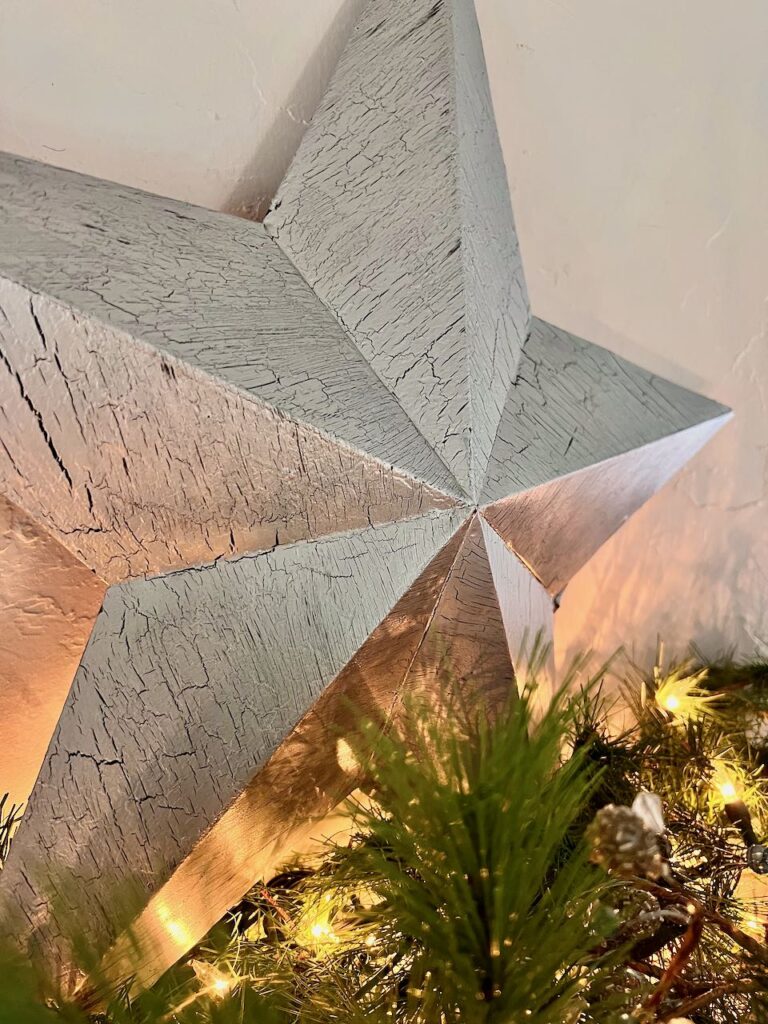
Isn’t that the coolest! It always amazes me.
Think crackling is just for farmhouse or rustic decor? Think again!
By using metallic paint, my stars have a modern edge and the way I use them in my display also has a bit more of a transitional feel. These stars will shine in just about any holiday decor style.
In particular the are perfect for a Chrismukkah celebration!
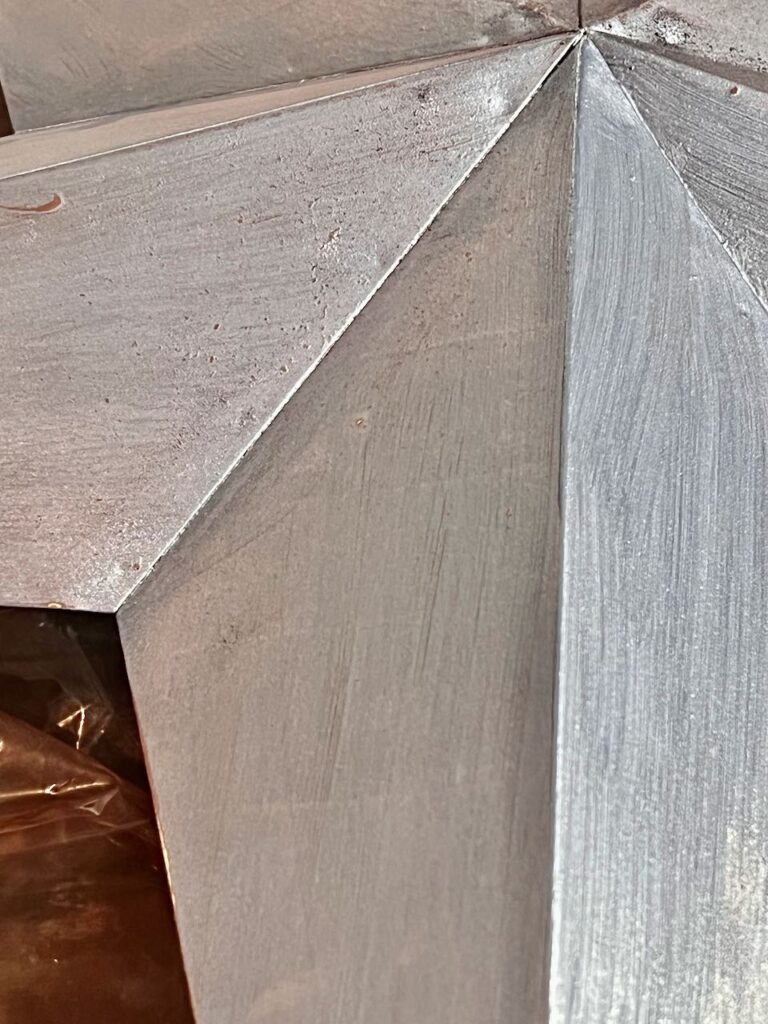
To some degree, you can control the crackling with a thinner or thicker layer of crackle glaze or how you apply it.
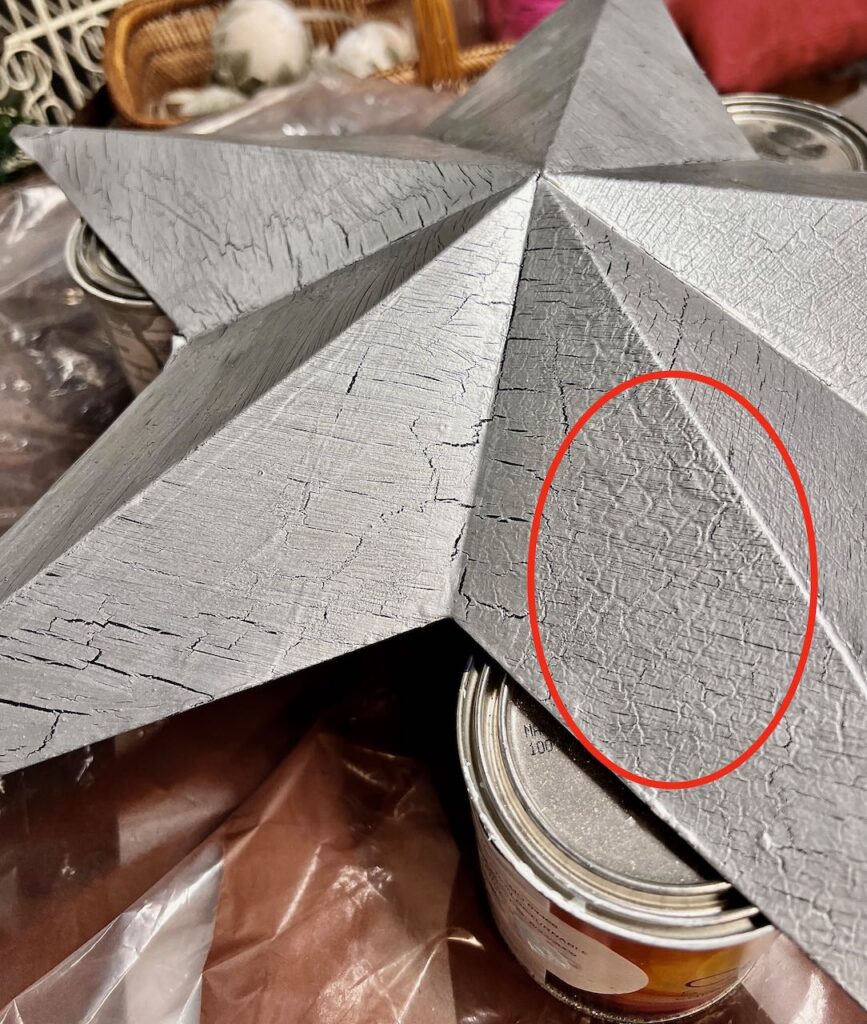
Look at the difference here. The circled area, I applied in a helter skelter manor. on the other side of that valley, I applied it carefully following the same brushstroke pattern that I will use with the top color.
There’s no right or wrong, just the look you prefer for each project. And whether you are camouflaging something. The helter skelter method covered the embossed stars better.
Almost there! But first, are you enjoying this post? We are in “my” season. So hang on, there’s so much more coming! Don’t want to miss a thing? May I suggest subscribing? You pick how much!
Step 6) Sealer-
Full transparency: Since this is just for my holiday display, I did not bother with a sealer. You choose if you need one or not.
Final Notes-
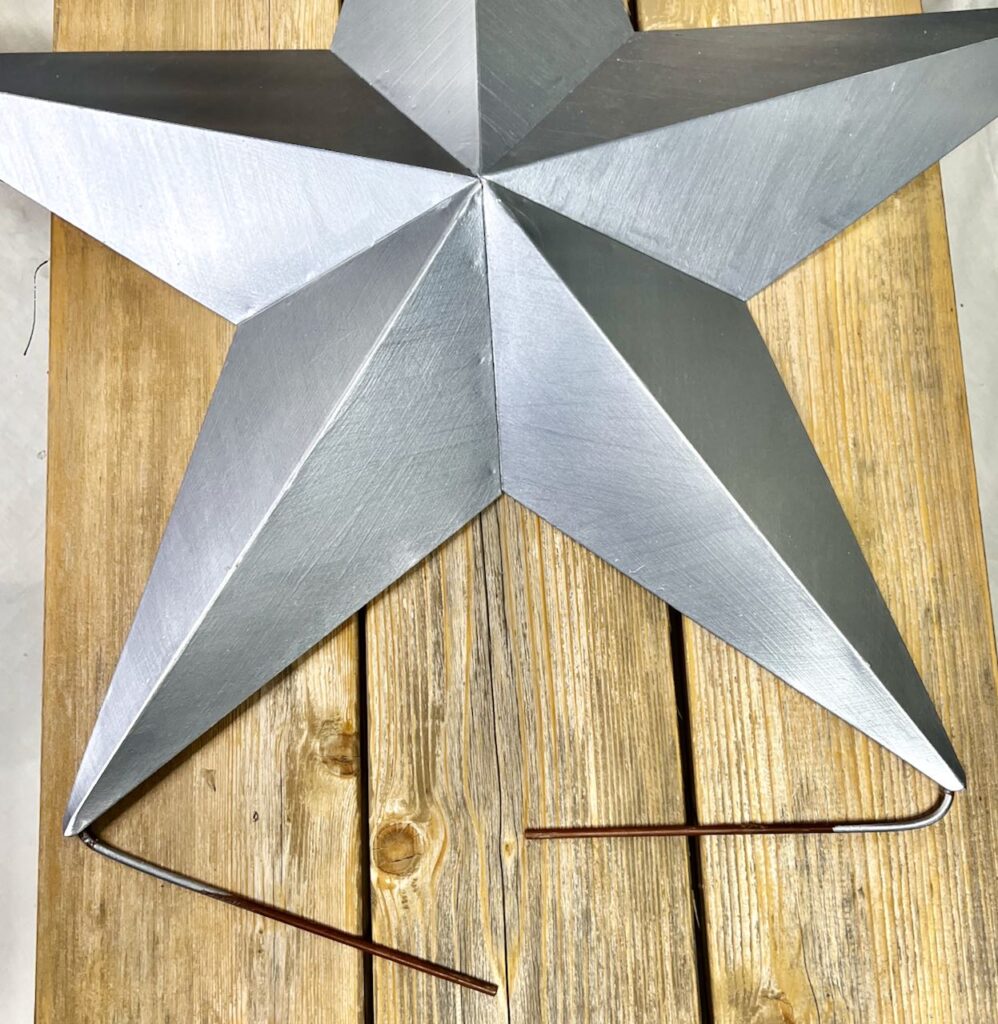
The legs on the largest star were too thick for my tin snips. So I folded them up out of the way.
They’ll be hidden in my mantel box.Folding them at odd angles makes the star sit off kilter which I prefer.
Plus I can straighten them back out and use them in the yard or a planter next 4th of July if I go with a metallic theme.
Or maybe as part of an Oscars watch party. Or a star gazing birthday party. Lots of opportunities ahead.
The Final Results!
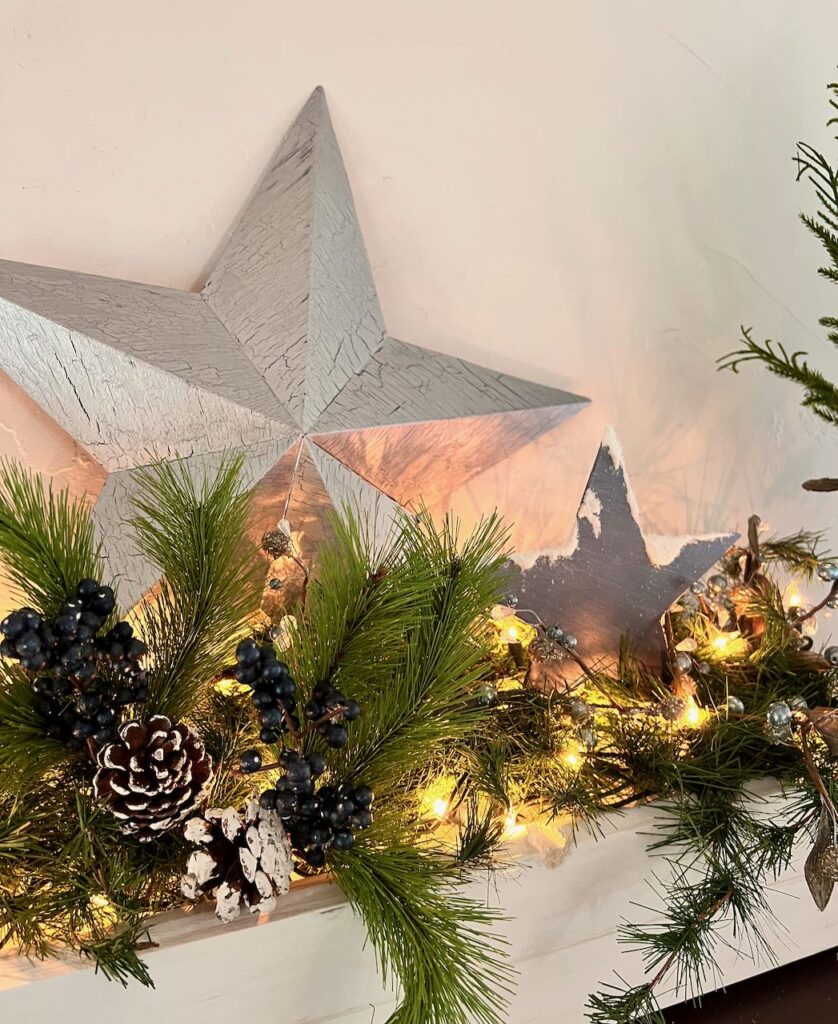
And the little blue star — isn’t she sweet, I decided she needed a bit of something extra since she is flat and small.
Snow it is! I used my favorite method I covered here.
That cute mantel box? It makes arranging the easiest thing ever — ad it’s great for a long thin centerpiece too. You can make one too! Read all about it here.

I hope this inspires you to look at what you already have or can thrift for some fresh decor for all your seasonal decorating.

Diane, this is a fantastic transformation! Your instructions are so clear and the end result is amazing! I love it!
This is awesome. Happy holidays, my friend.
This is a great idea, Diane! I have one of these stars and I am thinking it needs a makeover! Thanks for the inspiration!
This is great!
These came out great Diane. Love the crackle finish.
Great update to the stars! Your mantel looks wonderful! I still have a cabinet with a crackle finish, and I love it!
Thanks Donna! I’m so glad you approve of the crackle finish.