
How To Revive Old Christmas Village Houses For Your Tree and More
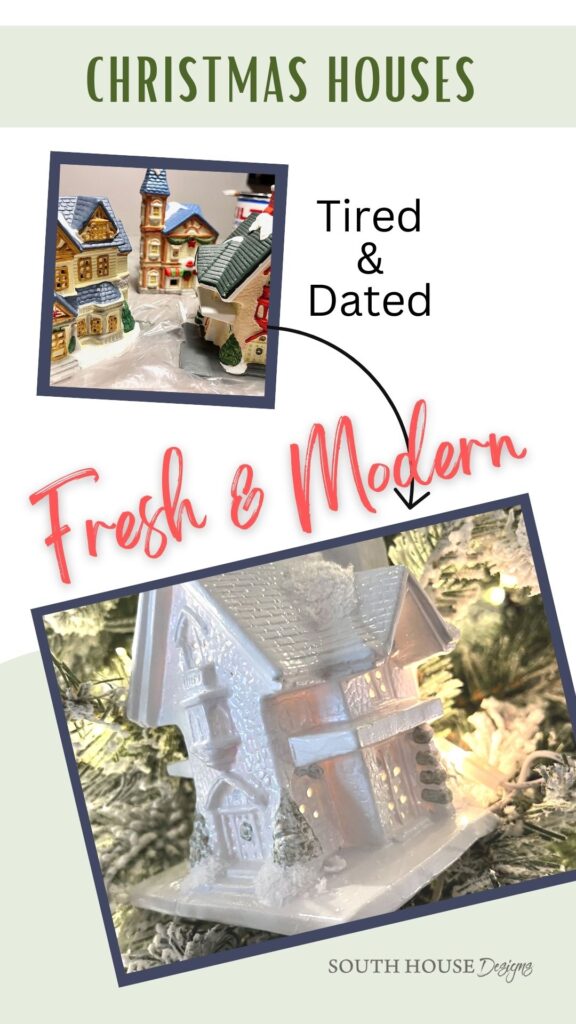
Revive your old or thrifted ceramic Christmas village houses with this easy refresh. Quick, simple and so gratifying!
What is it about those charming little houses, churches, gazebos and more? It’s like Stars Hollow live on our console table. What’s that Lorelei I can’t hear you?
Sometimes they’re exquisitely detailed Victorian painted ladies, and sometimes, they are humble thatched roof structures and sometimes very minimal simple houses. It doesn’t seem to matter. They still capture our hearts.
Maybe you’ve collected your own miniature houses over the years and have grown tired of the bright colors. Or you no longer have a large media center to hold your Christmas village display.
Or maybe you’re like me and you picked up several houses last Summer at the local thrift store or garage sale because they were only 50-cents each. (I mean who can pass that up, right?) Again, like me, you had no idea what you were going to do with them — until now! With this easy tutorial.
No worries, friend, I’ve got ya! I’m sharing with you how to revive your tired Christmas village houses so they can be used in a fresh new way. on your tree or another part of your holiday decor.
Table of Contents
- Let’s Get Started Reviving and Restyling Your Miniature Christmas Village for the Holiday Season
- Simple DIY Tutorial-
- What Can You Do with Your Own Christmas Village?
- My DIY Christmas Village Houses Are Now Ornaments on My Dads’ Christmas Tree-
- How to Attach Christmas Houses to a Tree-
- Looking For Another Way to Use Thrifted Christmas Houses?
Let’s Get Started Reviving and Restyling Your Miniature Christmas Village for the Holiday Season
Materials and Supplies:
- Little Christmas village houses
- Primer
- Spray paint
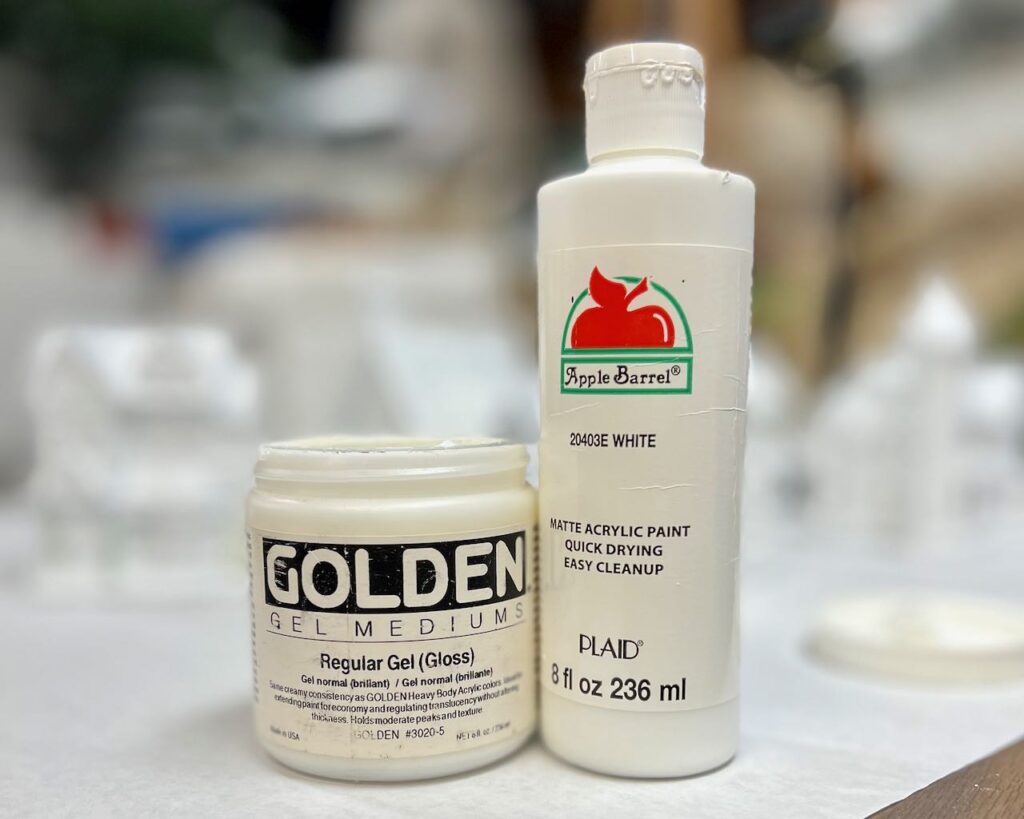
- Gel medium
- White acrylic paint
- Fake snow
- Accent color or two, optional
- Sealer, optional
- White zip ties, optional
- White wire, optional
- Fairy lights or string lights
Simple DIY Tutorial-
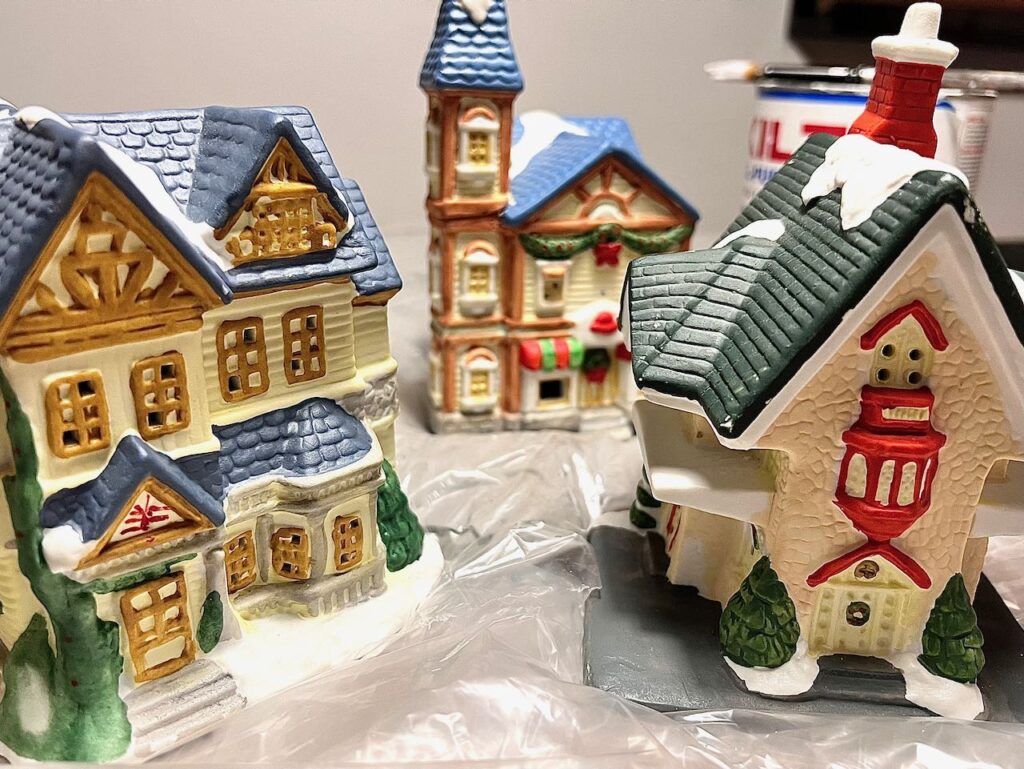
Step 1) Primer-
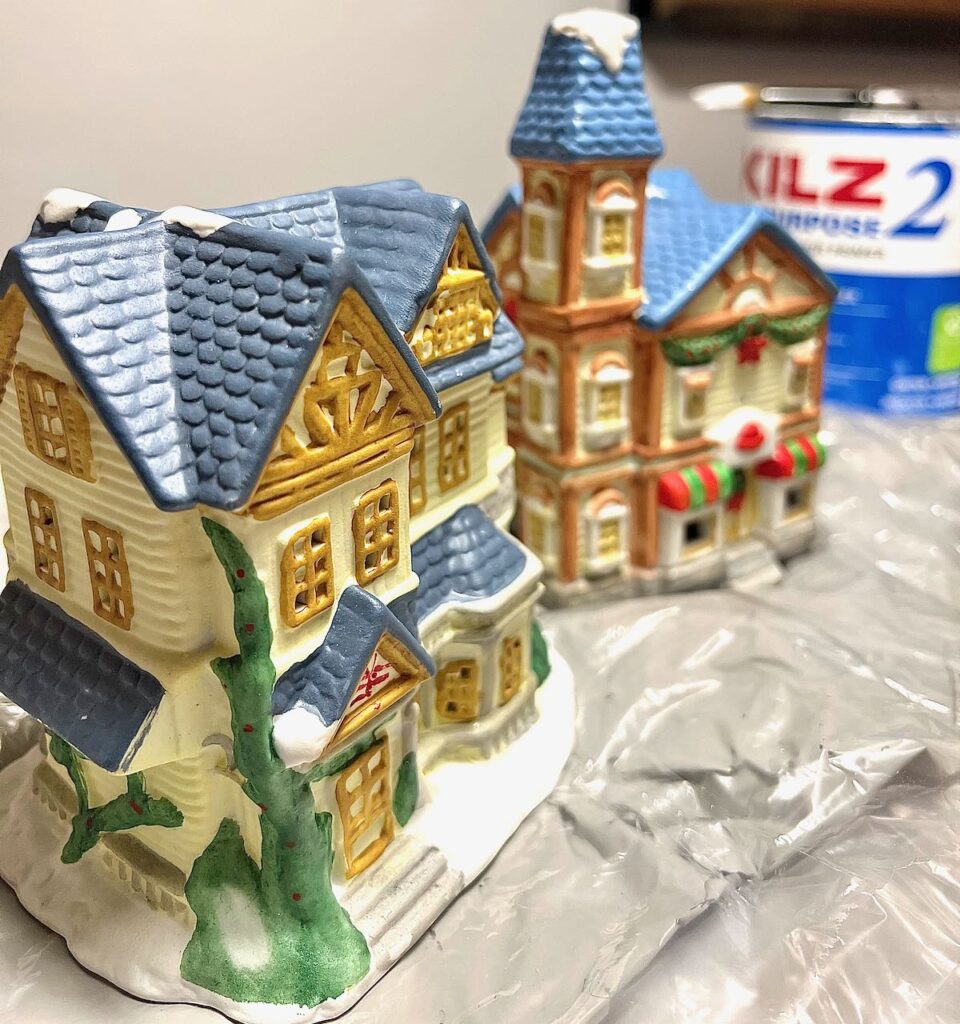
Yes primer is essential if you’re covering bright colors with white or if your surface is glossy!
I used two light coats of Kilz brushed on with an artist paint brushes. I felt I could get into all the cracks and crevices easier this way (plus I could do this in the evening while watching White Christmas, for the 84th time — it’s a family tradition).
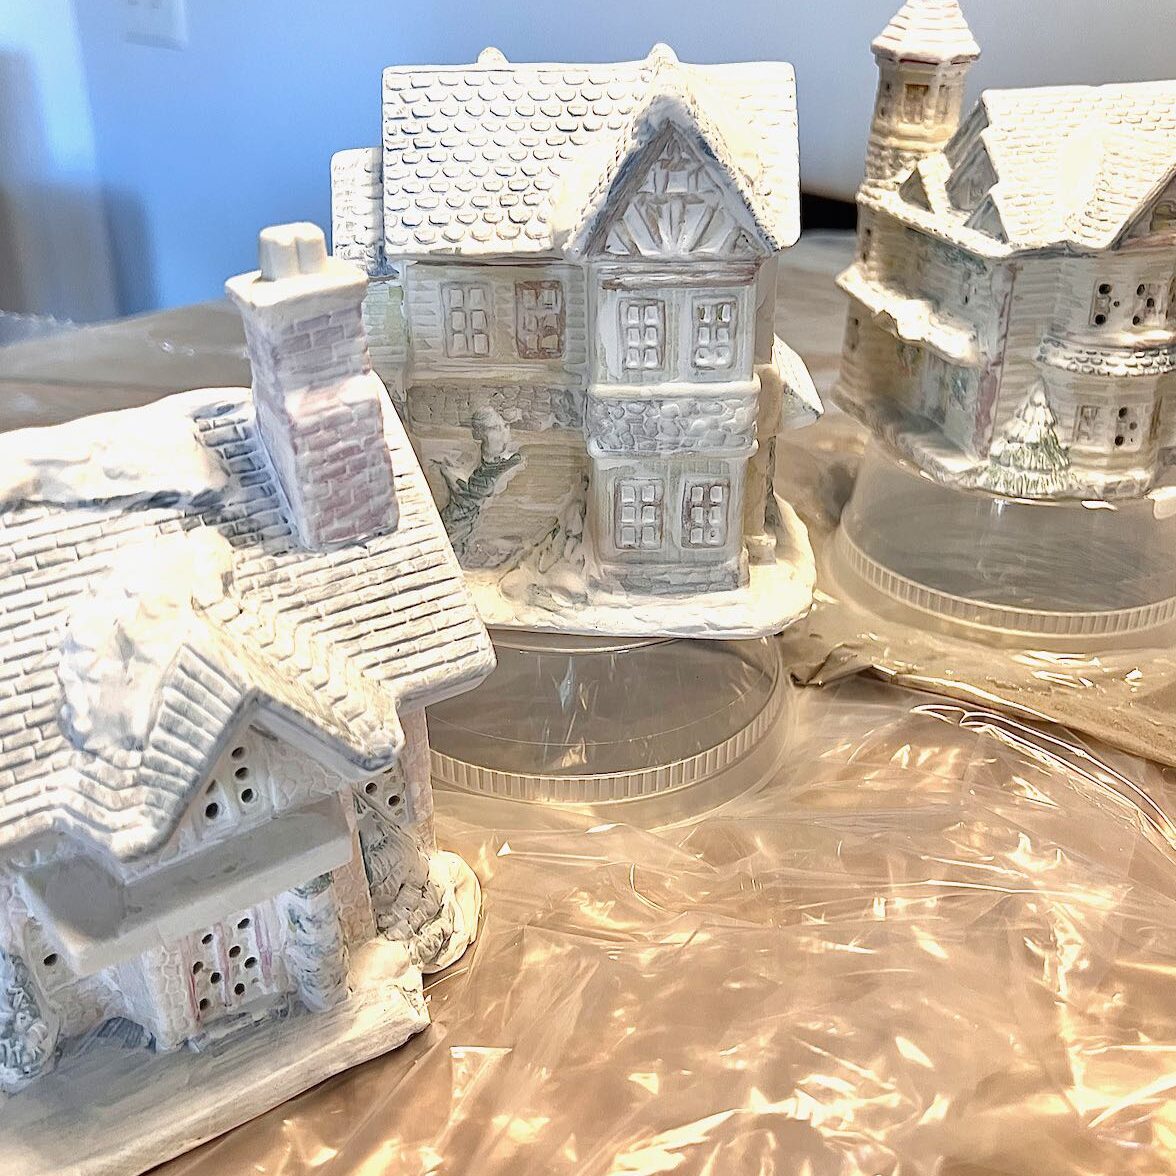
Step 2) Glossy White Finish-
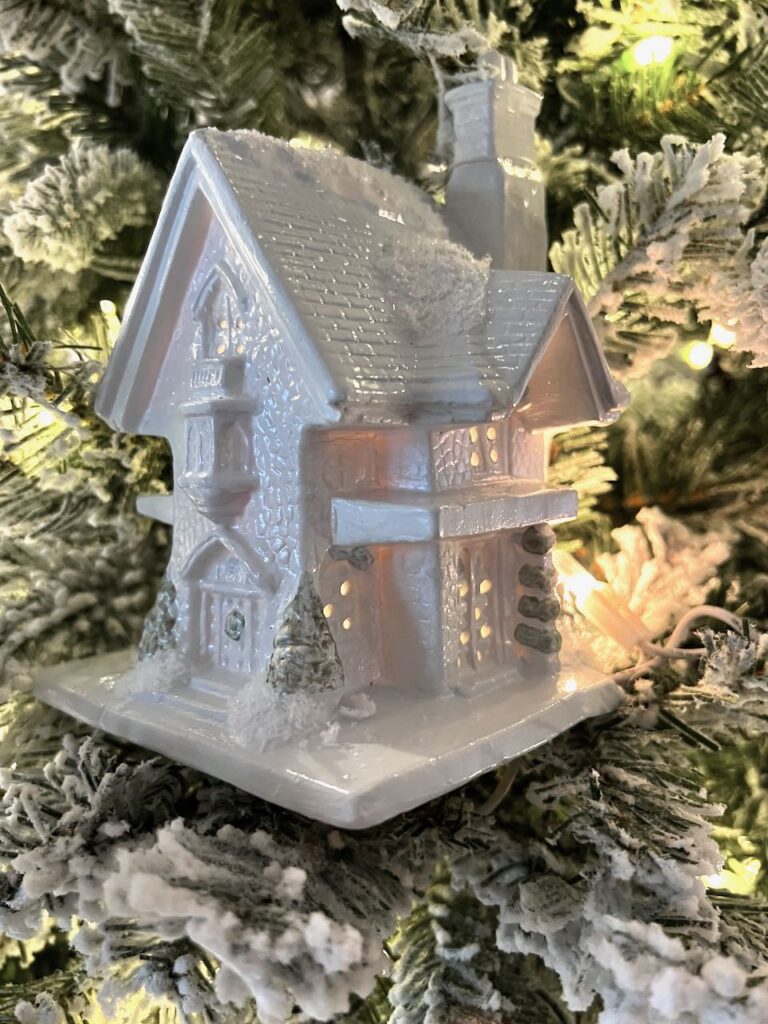
I wanted a glossy white finish on my little ceramic houses — minimalistic and modern!
RustOleum’s glossy white is my go to! It took two light coats.
TIP: Use long pin or thin nail to “open” the windows, if the paint fills the openings.
Of course, glossy white isn’t the only option. I toyed with a matte bone china color. Sparkling snow would really pop off of that.
The gloss won out mainly because I knew I wanted to use these on my tree with wood nutcrackers, poinsettias and some matte ornaments. My tree display was missing a shiny component.
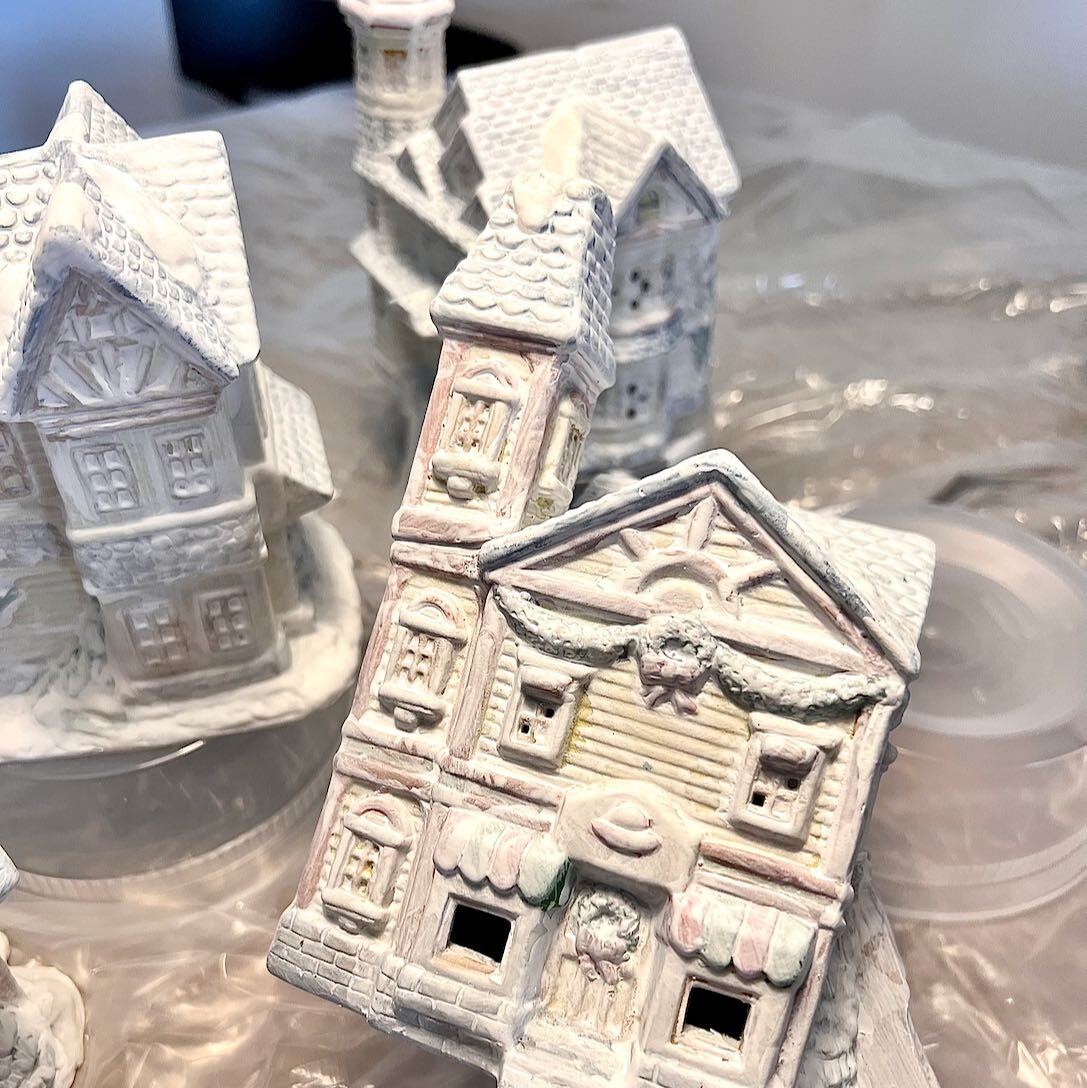
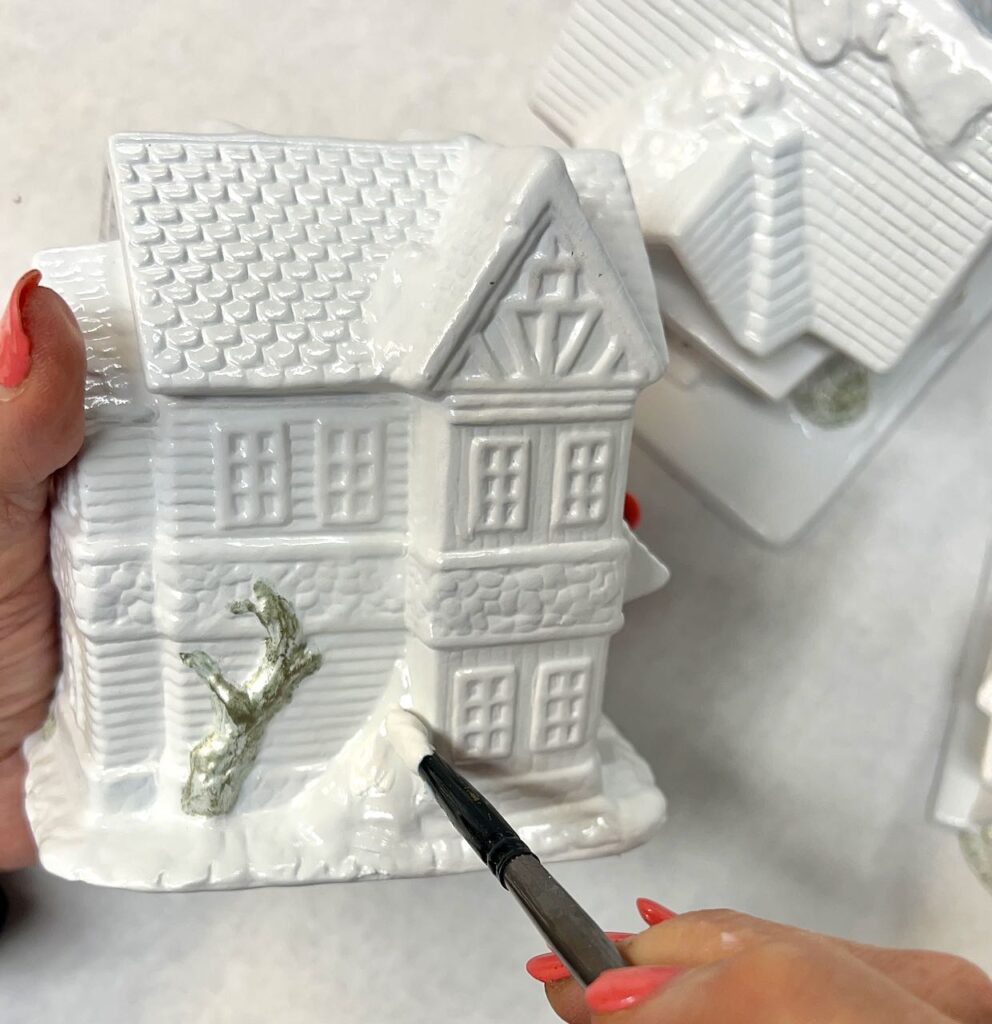
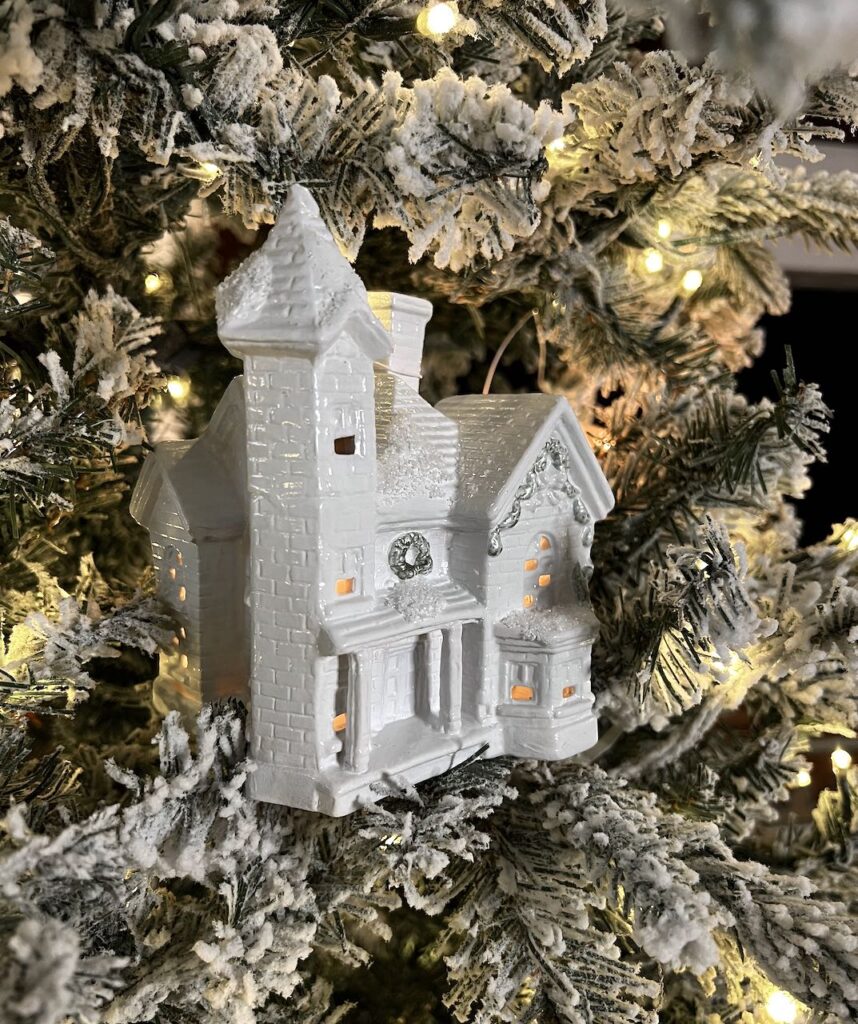
Step 3) Add a Detail Accent Color, Optional-
My Christmas houses have a lot of detail!!! So mine was basically, paint-by-number, With only one number!
I wanted to accent the detail without adding a lot of color. Accenting the green wreaths, garlands and landscaping is a great way to do this. It’s a common theme with all the houses. and it works perfectly with the subtle color scheme of my tree.
I used some green metallic paint from Behr that I’ve used for many projects over many years. If I hadn’t already had this in my stash, I would have whipped up my own with my “secret sauce”.
Secret sauce? Yes, It’s magical! Read about it here with my star makeover project.
If you are adding an accent color, be sure to do this before the next step!
Taking a quick pause to ask if you’re enjoying this post? That’s my goal! If so, please consider subscribing to follow along with all the projects [‘m working on. You control how much you receive!
Thanks bunches!
Now back to our project . . .
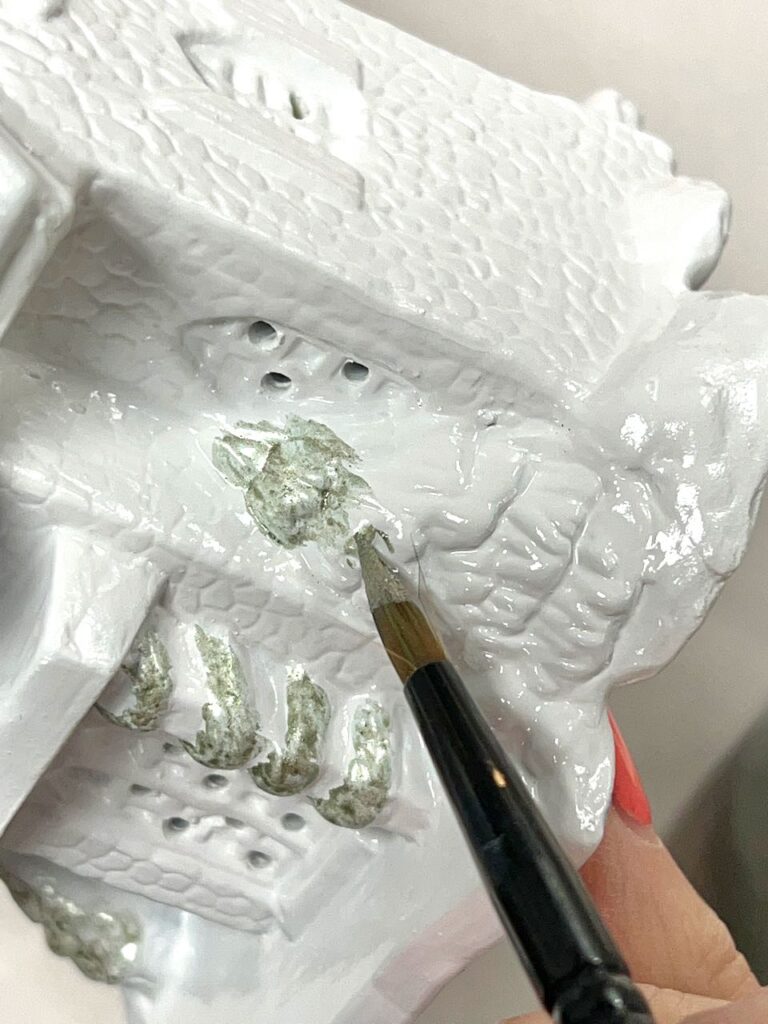
Step 4) Add Faux Snow Accents, Optional-
The houses in my mini Christmas village all had drifts of snow on them. So this was really easy!
I have my very favorite way of adding snow to my holiday decor pieces. A full tutorial is here. And I used it here and here and here!
This is what the gel medium and white paint is for. One is for building depth the other is for the color. I just applied my mix wherever there were already little drifts of snow on the rooftops, steps, bushes and such.
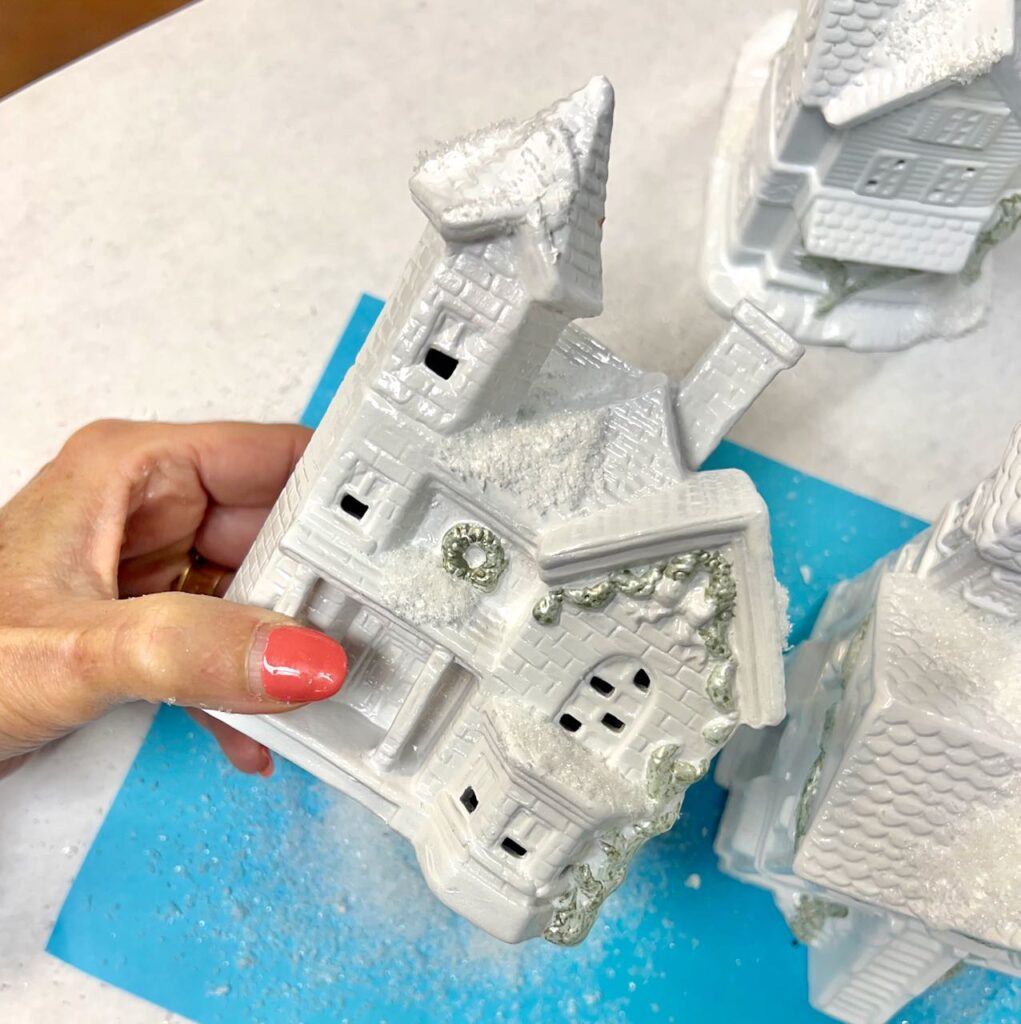
Then I generously sprinkle the snow over it.
TIP: Be sure to sprinkle your snow over a bright colored clean piece of paper and shake the excess off over this paper. When you’re, use the paper to save the excess snow back into the original container for the next project.
You can spray a sealer over the accent paint and the snow if you feel the need to protect them a bit.
What Can You Do with Your Own Christmas Village?
Your little village with its new look can make a beautiful display on virtually any horizontal surface from the coffee table to open shelving, from the family room to the living room to the dining room.
Your tabletop version might include bottle brush trees and other village accessories.
For help designing a great display, be sure to check out this post where I put together a display using my 8 Design Principles that work for every vignette or display.
My DIY Christmas Village Houses Are Now Ornaments on My Dads’ Christmas Tree-
I love a themed tree — whether that theme is a color scheme or even something family oriented and “non-themey” as “Handmade Childhood Ornaments”.
I mean those macaroni wreaths have to live somewhere, right?
I have a gorgeous new tree this year, thanks to King of Christmas! And I wanted this tree to pay homage to two kings in my life that I miss immensely — my Dad and my Dad-in-Law.
My father was one of the star realtors in his day! Using my revamped houses as tree ornaments is a wonderful way to honor him this Christmas season.
You can read about the other elements to my “Kings” tree and their meaning here.
How to Attach Christmas Houses to a Tree-
IMPORTANT: If you are lighting your little houses, these should be the first decor items added to your tree.
Attaching them is rather simple using white zip ties or wire.
NOTE: But BEFORE you attach them, you want to light them.
Since my tree is pre-lit, Each house sitting on a single bulb from an additional strand of string lights worked best for me.
Once your tree is assembled and fluffed, locate the best spots for each of your little houses or buildings. You’re looking for spots that are randomly spaced, have plenty of room for your house and has a base where several branches diverge. You do not want it to sit on the end of a single branch, but rather back a bit where a thicker branch splits into several branches.

Now that I knew where I wanted my houses to sit, I ran two additional short lengths of lights deep inside the tree. I started with the end light where the two highest houses sit, one on each side of the tree. I lit the first house and wired it securely in place,
Then I threaded the plug end of light strands down between the branches stopping to light the next house and wire it securely. Then to the next. Rinse and repeat as needed.
Secure each house with small white zip ties or white wire through windows and/or around chimneys, turrets, porch posts or the like. Attach securely to at least two different strong interior branches.
Look closely and you can see a white wire around the chimney. There is also one the threads in one window and out another on the back side of the house. And in the shop building, can you make out the wire just below the top window in the turret?
NOTE: Safety First! If you are hanging quite a few heavy houses on just one side of the tree, because your tree nestles in a corner, make sure to wire something heavy to the other side to keep a good weight distribution.
Once your houses are all in place and lit, finish your decorating and spend the entire season enjoying your amazing Christmas project!
HINT: Same idea can be done with smaller houses in a wreath. So charming!!!
Please Pin It, Don’t Forget It!
Looking For Another Way to Use Thrifted Christmas Houses?
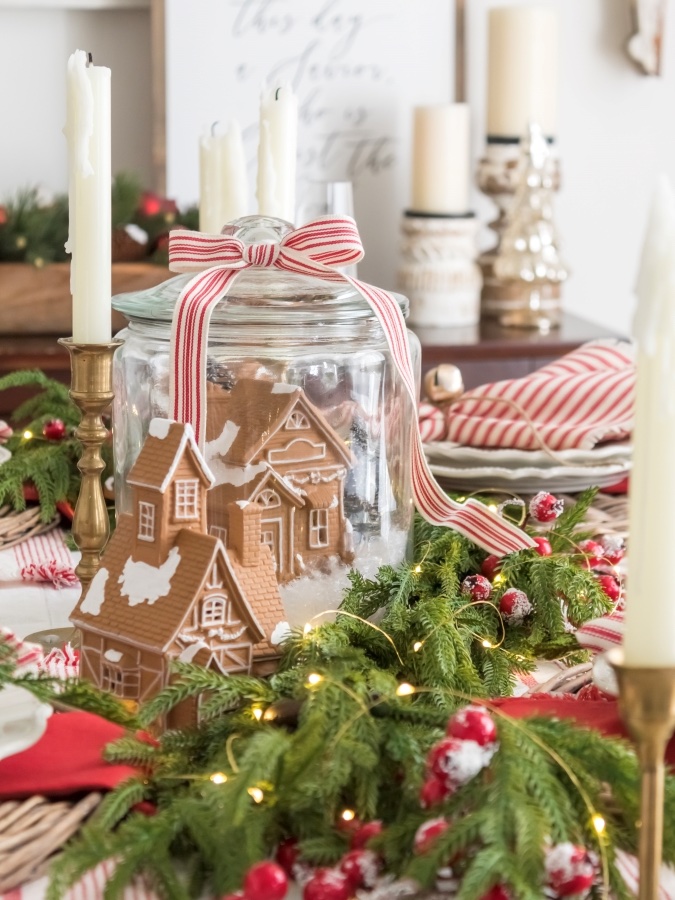
A blogging friend, Jen of Midwest Life and Style, created this adorable snow globe inspired table setting. Don’t you just love it??? Check out all the details here. And I highly recommend subscribing to or following Jen — she is just amazing!
Now I’m off on a quest for more houses. You, too?
I hope you enjoy a holiday season overflowing with friends and family, blessings and bliss,

Fabulous job. They are gorgeous. Thank you for sharing.
Diane, your little houses look so darn cute. And you found all of those for $.50? What a steal! Such a great way to give some old holiday decor new life. Now I want some small houses to add to my tree next year. I pinned your post so I can remember this when I’m out thrifting.
And thank you so much for sharing my DIY gingerbread house makeover. It’s so fun to see how people put their own spin on projects, isn’t it? I hope your holiday season is off to a wonderful start.
Hugs!
I love how we look at the same objects and somehow see potential in completely different ways. How boring it would be otherwise.
Happy Holidays from one midwest gal to another!
Oh my gosh, I love this………….it turned out beautifully, and is perfect for those who are using neutrals these days.
You have so many great ideas……..love it.
and
Merry Christmas early in case, I don’t get to come by again.
blessings,
nellie
Thanks bunches Nellie! So sweet of you. I hope you enjoyed a bounty of blessings and bliss this season!
Fabulous Diane!! What a great idea, and your tutorial is wonderful. Thanks!
These are adorable! I have had this idea in mind for a while now – I just couldn’t find a set of houses while out thrifting! Your’s look amazing in the high gloss Diane 🥰
Thanks Cindy! These were att my favorite thrift store for.50 each! Can you believe it!!!
Beautiful Diane. I love the glossy gel topcoat!!
Thanks Deb! It certainly gives them a fresh style.
Those little houses were such a great find! Terrific transformation! I love the subtle green you added to them! They look amazing on your beautiful tree!!
Thanks so much Donna! I really appreciate having you drop in and your sweet comments!
I love this idea so much. I will be keeping my eyes open when vintage Shopping . I would love a set. Happy holidays.
Thanks bunches Renae!!! Hope you’re having a wonderful holiday season!
OK! now I am sick that I got rid of the 500 of these I had in the attic. You did a marvelous job giving your houses new life.
Oh, I’m so sorry you don’t have them any longer!!! Wait a minute — You have a crate full of old bedsprings and another full of pumpkin stems, but no houses?🤪
Oh my! My sister has many of these village homes, I cannot wait to share it with her so she can make over hers. She was going to donate them, not now!
How cleaver! I just tossed out a bunch of these old ceramic houses when we cleaned out my mom’s storage – Darn It!!!!