How to Create the Perfect Display for Your Christmas Cookie Party
Delight your guests with the sweetest Christmas cookie party. Set a stage for the stars of the party — the cookies of course!
Entertaining during the holidays is the best way to get into the holiday spirit!
Intimidated by entertaining? Or do you love it, but want some fresh inspiration? I’ve got you either way.
Stumped for a party idea?
A holiday party centered around Christmas cookies can take many forms, depending on your guest list:
- the neighborhood friends — a fun way is to mix and bake cookies together
- your best gal pals — a great way is to decorate pre-baked sugar cookies, gingerbread cookies and more
- a wider group of friends — an easy way is to hold a Christmas cookie exchange party
- Mothers-Children — easiest of all, cookies and tea after a group outing to the Nutcracker or other holiday performance
- group of young professional — our daughter and friends throw a Cookies & Wine holiday party that the fellas are equally into
There are so many options. And this was just a few to get your wheels turning.
But in every case, the cookies are the main event. So don’t they need a worthy cookie display or stage, rather than just a “cookie table”?
Today, we’re talking this display!
A display that your party guests will oooo and ahhhhh over — and adds tons of visual appeal and holiday cheer.
Think of the Cookie Display as a Vignette-
You may recognize this list if you have been around here long. It’s my list of design principles for displays and vignettes that I used here for Halloween, and here for Spring. And now for the Christmas season
SIDENOTE: a dear friend, who decorates the bulletin boards at her church, told me recently that she had seen my Halloween post with these rules and how I used them and wondered if she should, or even could, apply them to her bulletin boards. She did and received immediate responses that she had not had before. People started noticing her boards rather than just walking right past them.
The Composition Design Principles — that work just about anywhere!
Creating a vignette is easy with a few design tips:
- Vary your textures
- Vary finishes including matte and glossy
- Mix linear and curved
- Use common color theme
- Add textile
- Incorporate negative space
- Layers- Build up AND build out
- A triangular shape is particularly effective
The first thing I like to do is to come up with a holiday theme. Having a theme, even if it’s just a color scheme, reins in the possibilities and helps me edit down to a cohesive look.
Table of Contents
Creating a Fabulous Cookie Display
Step-By-Step Guide
This little bit of planning is so worth the outcome!
HINT: This post and these same steps and design tips are not just for Christmas cookies! Showers, wedding receptions, graduation parties are all great opportunities for a display vignette.
Step 1) Choose Your Location
Plan a focal point where you and your guests will be spending most of your time, whether in your great room, dining room or living room.
If you’re planning a hands-on baking or decorating party, plan your display in an adjacent room. As each batch of cookies is completed, they can be added to the display. You’ll finish your gathering with a lovely display away from the large table where messy decorating chaos took place.
Step 2) Determine a Display Table
There are many options depending on the size of the display you’ll need. From a dining room table to a console table to a large kitchen island can all work.
Even folding tables can work if covered with festive tablecloths.
Step 3) The Structure of Your Display
This is where you want to focus on layers, building up and out. Especially if you are hosting a cookie exchange, a display of varying heights lets you condense a bit. For example, a large tray of sugar cookies decorated with royal icing can partially slide under a shelf holding a smaller dough bowl of rum balls or Russian tea cakes.
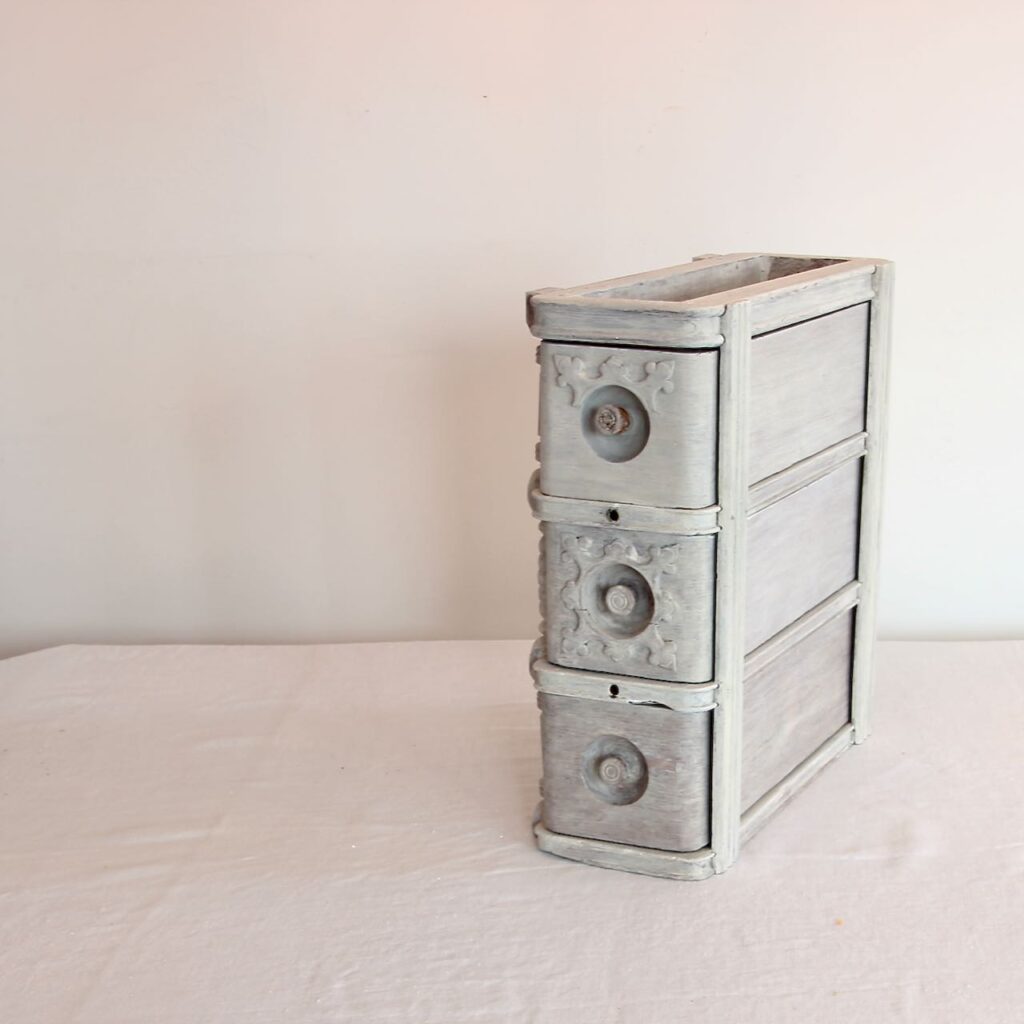
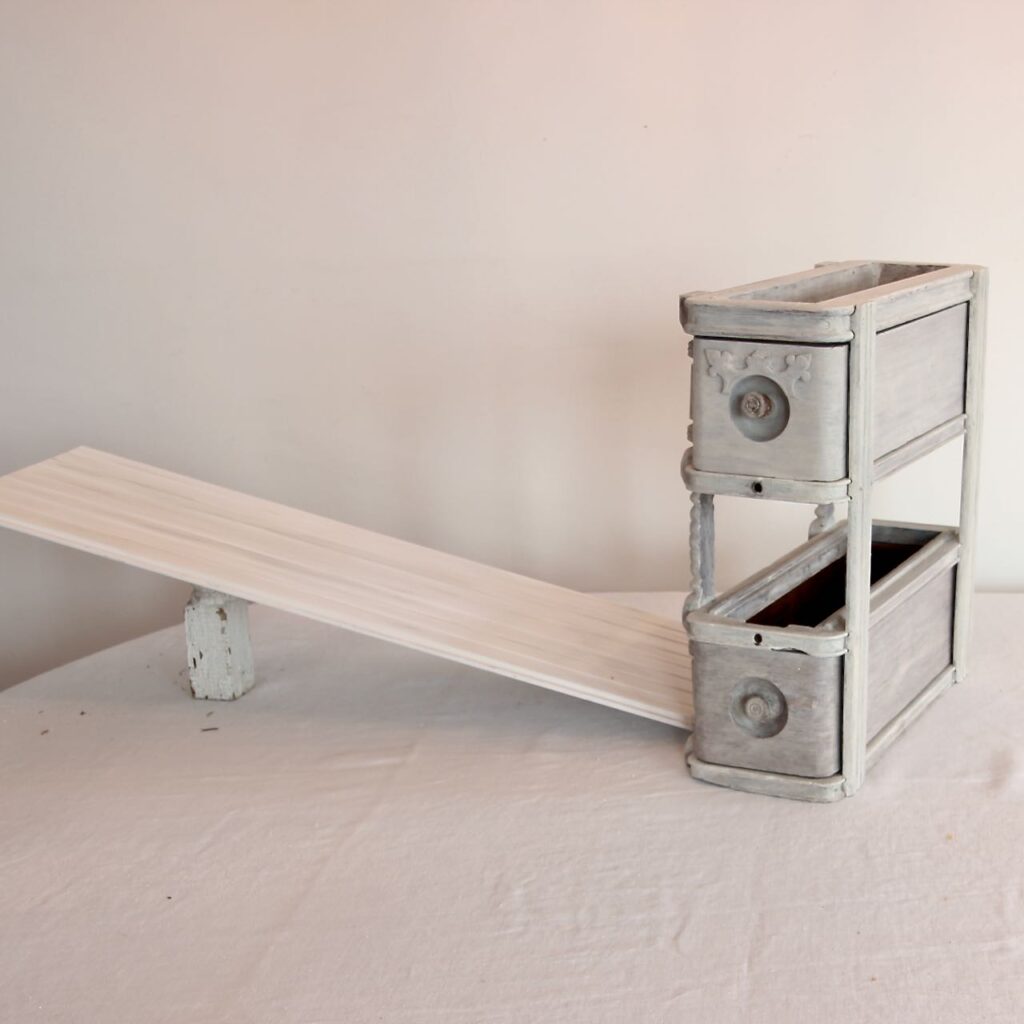
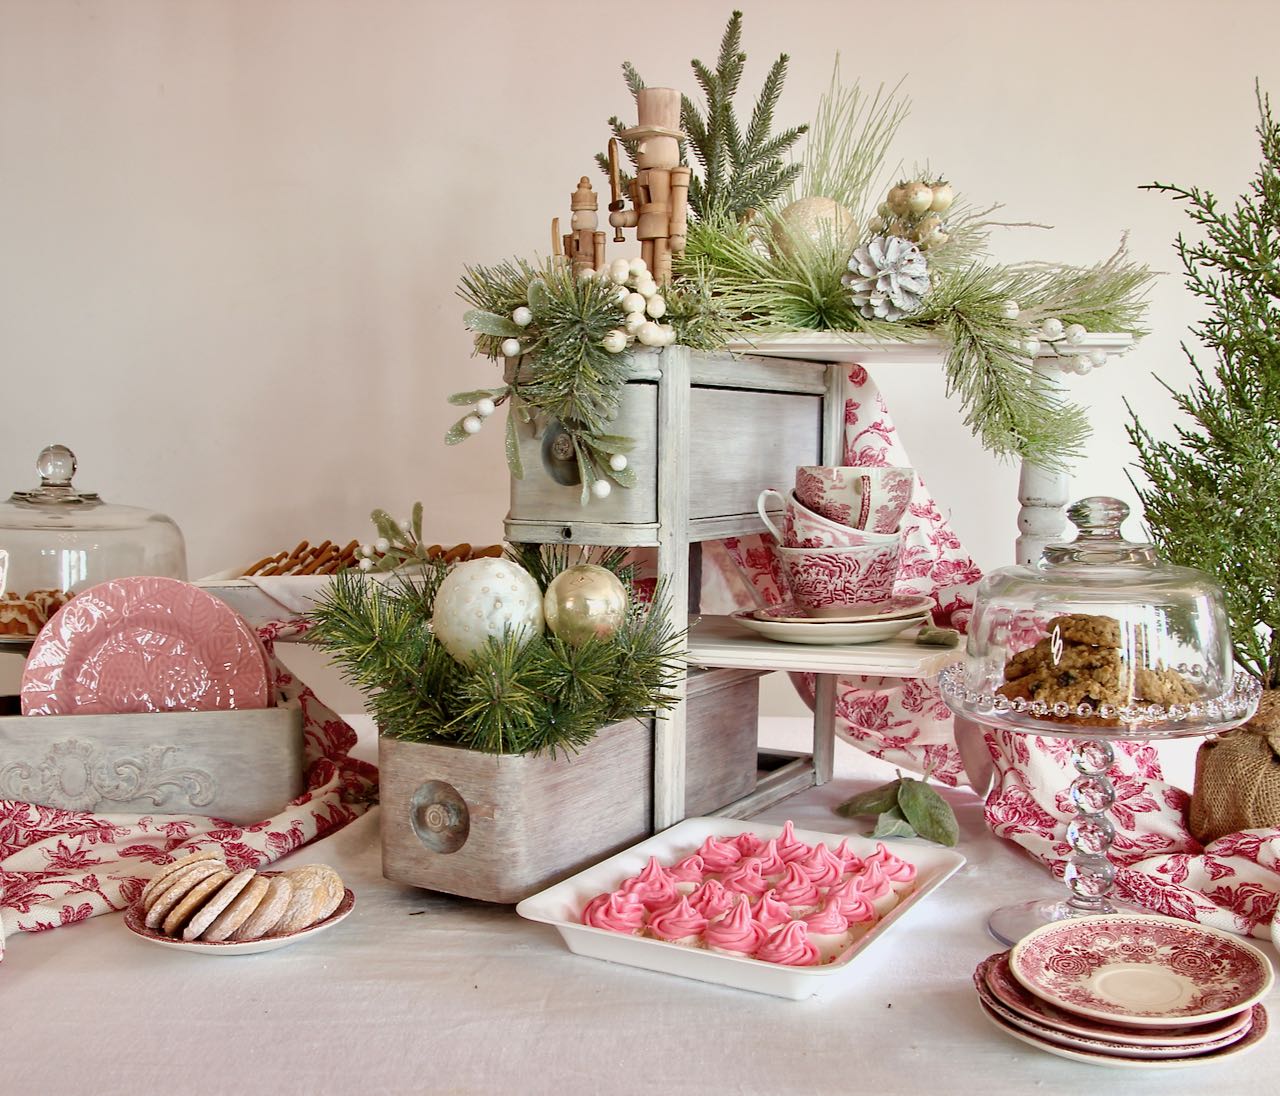
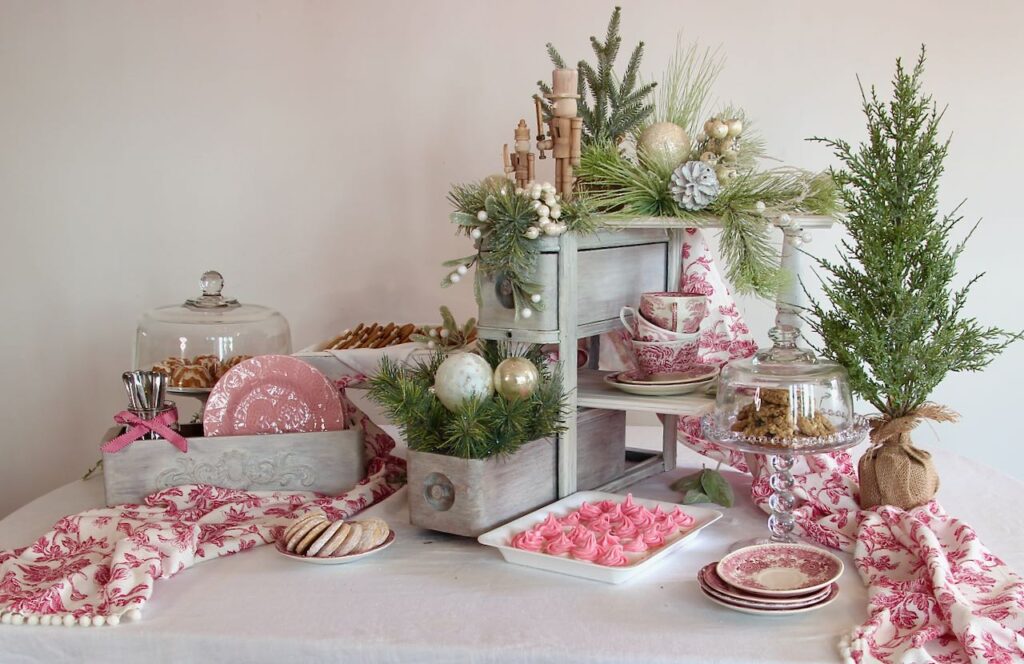
I used this charming vintage sewing machine drawer set as my structure. I added an 8-ft piece of shiplap from my local ReStore cut and glued to make the two shelves, plus a vintage spindle cut to length to support the shelves.
You could create a similar shape with reclaimed wood boards stacked at different heights. Or maybe wood crates, Do you have a collection of cutting boards? Use them as cookie boards set on inverted bowls or squatty candlesticks. Look around at how you can repurpose something you already have.
Step 4) Add Some Fabric
Beyond a tablecloth to laying flat on the table (which is optional), a touch of fabric is always a great addition lending softness and flow to your display.
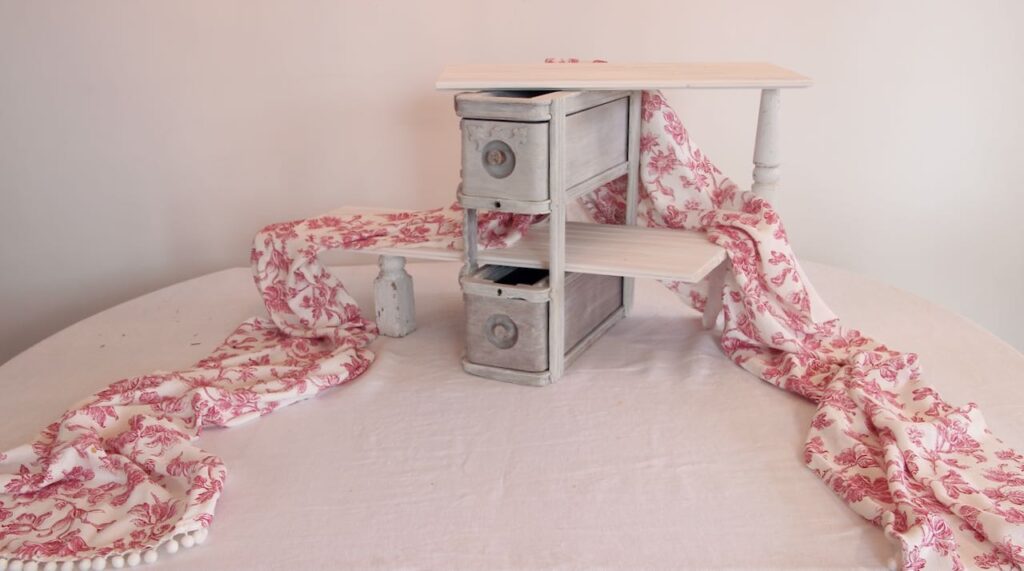
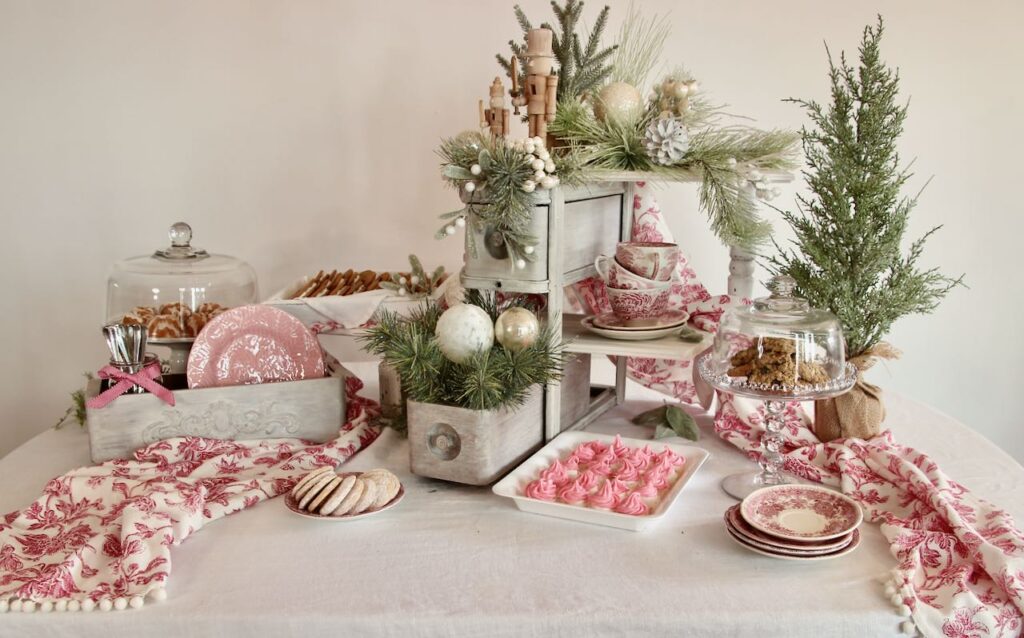
By using a soft, fluid runner of a charming floral toile woven throughout the display, I established my color theme of red, white and pink, softened the hard edges of the shelves, and laid a trail to keep the eye moving.
A slight pause in the action: are you enjoying this post? We are just heading into “my” season. So hang on, there’s so much more coming! Don’t want to miss a thing? May I suggest subscribing? You pick how much!
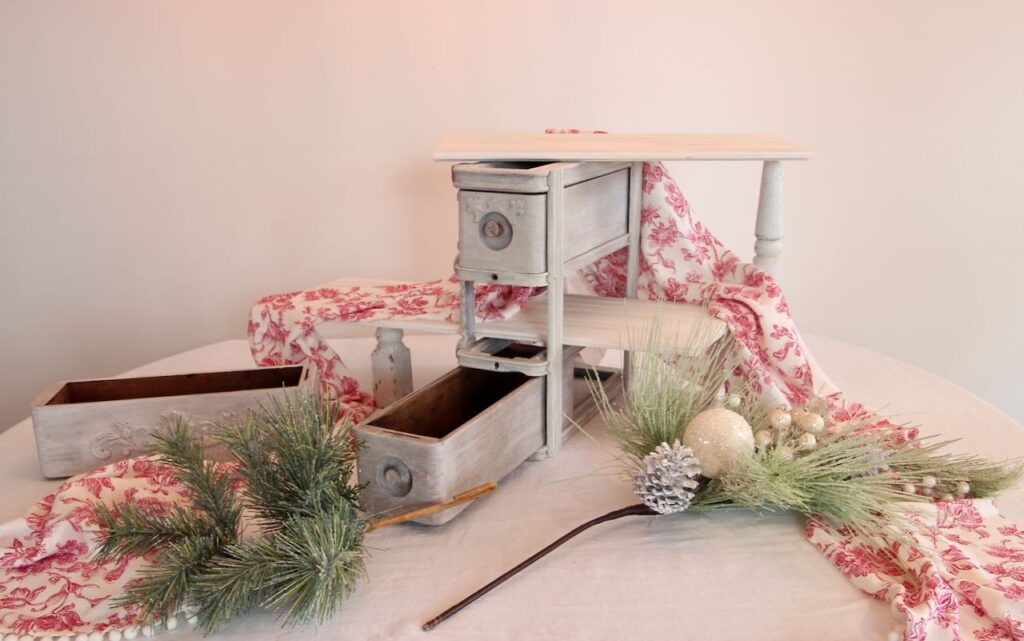
Step 5) Plan Your Serving Pieces
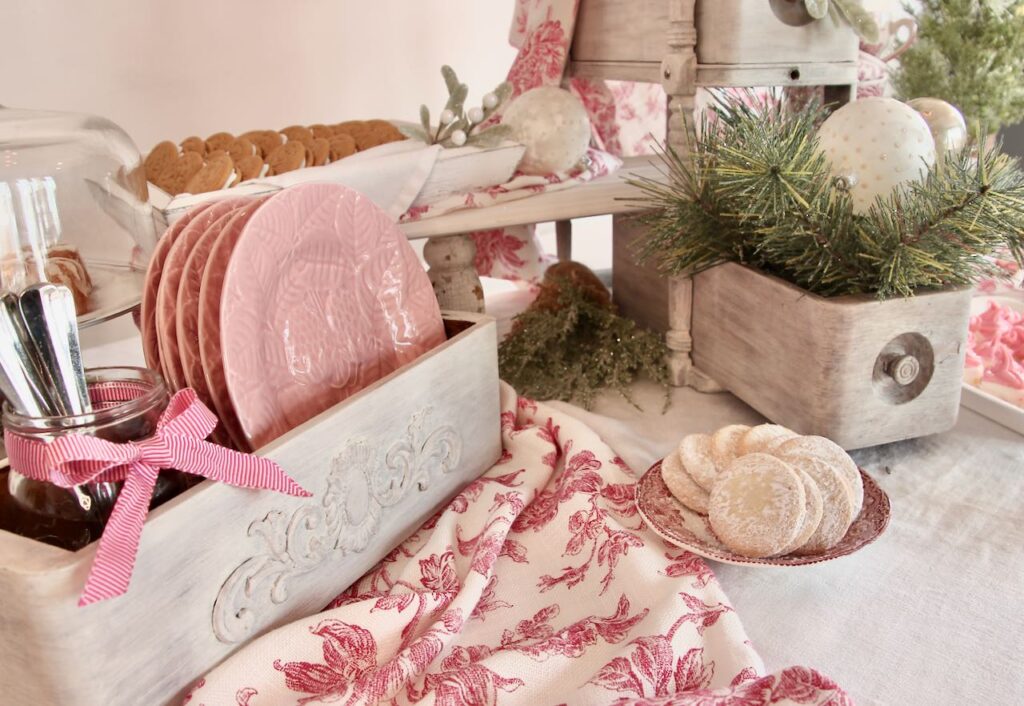
Since the stars of the party are the cookies, start with planning the placement of the platters, cake stands, trays, cutting boards, dough bowls, and such. Think beyond your typical cookie plate.
Try for a mix of shapes. A few rectangles, round and maybe a free form cutting board or two. Don’t forget the tree shaped dish you get to use this time of year.
If yours is going to be a cookie swap party, you may need to plan extra room depending on how many guests and how many dozen cookies they are each bringing.
In this case, have your empty serving pieces in place when your guests arrive. You can swap out their platter for one of yours. And for cookies that can be stacked, you can transfer them from their tray into one of your smaller serving pieces as needed.
With some, swap platters and some transfer. You decide based on the guest and their cookies. You’ll probably find some guests would be delighted to swap into your serving pieces, others would maybe take offense.
It’s a nice touch to add place cards pre-printed with your guest’s name and a space for them to write in the name of their holiday cookies. Set these next to each serving dish as part of your display.
Don’t forget to set out your plates and napkins, with forks or spoons if you think they might be needed.
Here I used one of the sewing drawers to hold my plates and forks (for the mini bundt cakes). Alternatively, I could have lined it with a cloth napkin and served a mix like puppy chow or stacked ball cookies in it.
Step 6) Now For the Fluffing
Now this is where you bring in extra style to really make your display truly festive. I started with a a spray I had purchased from JoAnn’s last year. I bent the long stem and tucked it into the top drawer with the angled shelf over the stem. And a second smaller spray is spilling out of the open bottom drawer.
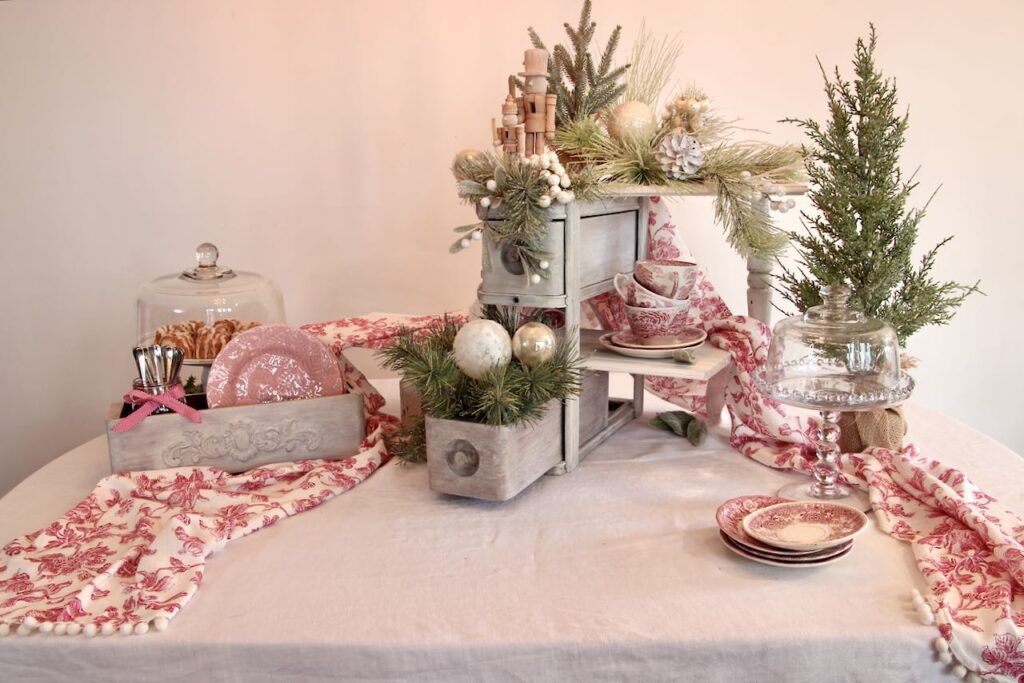
Next I added a total of four small artificial Christmas trees throughout the display. One is even laying down under the lower shelf to fill a void there. The tallest one is off to the right where I wanted to emphasize the vintage spindle supporting the top shelf, but also soften the edge there.
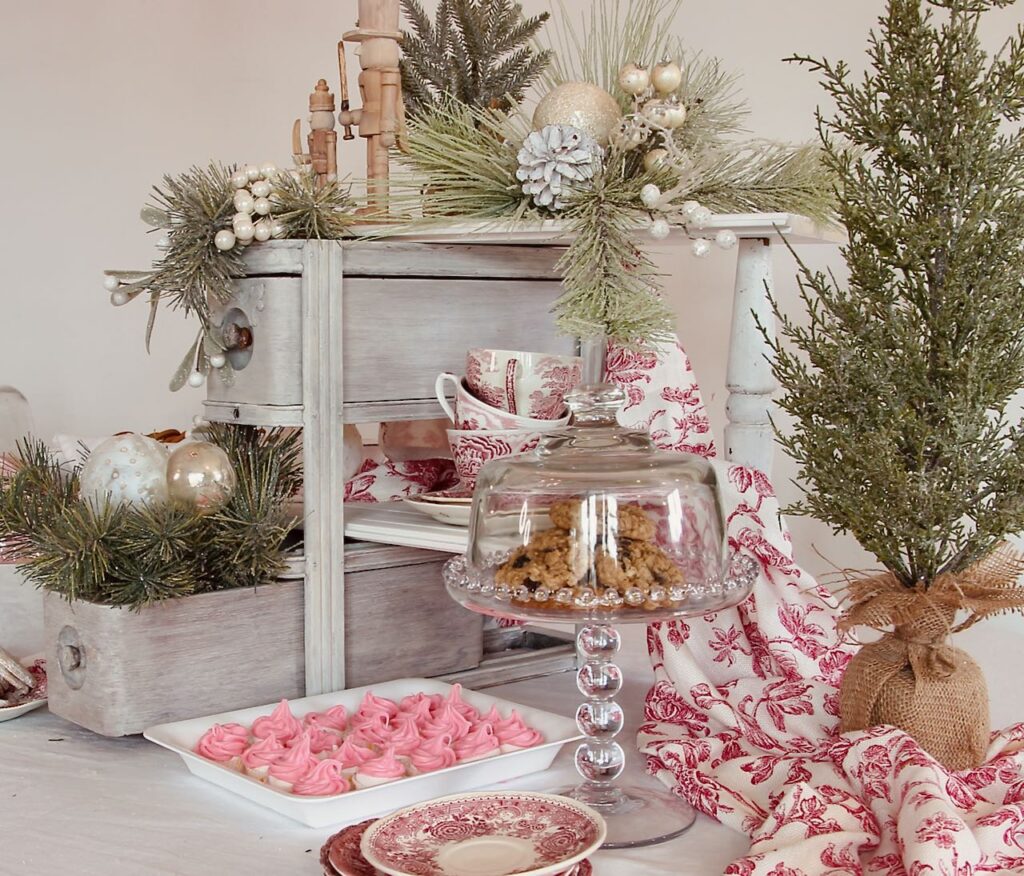
To carry the greenery throughout more of the display, I added a wreath around the base of the white cake plate on the left, behind the plate drawer, and tucked some mistletoe onto one of the cookie trays and spilling out of the top drawer.
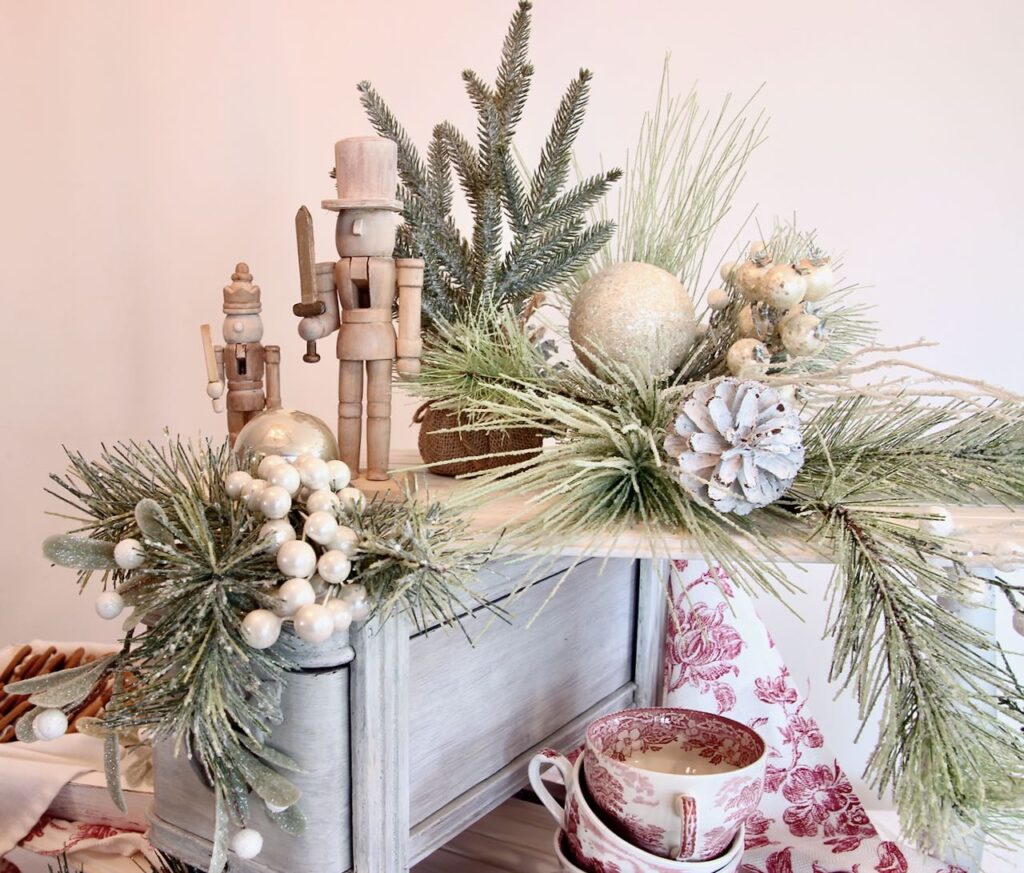
My greenery is glittered sage and soft green, which compliments the pinks and vintage-y feel of my theme. They also added some needed sparkle. Everything else in the display is matte except the dishes themselves, so I brought in touches of shine with some white berries and a couple of ornaments.
The final touch is two nutcrackers that I stained and white-washed perched on top protecting the best part of this display, the sugary cookies of course.
Now Let’s Grade My Cookie Display-
- Vary your textures CHECK – smooth surfaces of the dishes, wood texture from the drawers and shelves, needle like and scaly and rough texture of the greenery
- Vary finishes including matte and glossy CHECK – added in the berries and bulbs specifically for their glossy finish
- Mix linear and curved CHECK – round plates and cake domes with linear edges of shelves, rectangular trays and drawers
- Use common color theme CHECK – established by the red & white table runner, the pink plates and all the soft greens. Notice how your eye naturally follows the repeat of the brownish color of the burlap on the base of the trees, the nutcrackers and several of the cookies. The same think with the pink/red elements
- Add textile CHECK – table runner. Softens and adds movement to the display.
- Incorporate negative space – CHECK – I was tempted to hang a wreath over the left side of the display, but with that negative space it leaves breathing room and accentuates the triangular, asymmetrical shape
- Layers- Build up AND build out – CHECK – two shelves extending the display to the right and left as well as up
- A triangular shape is particularly effective – CHECK – plus I added diagonal lines which draws you in rather than creating a barrier. Think triangular horizontally as well as vertically. The drawer unit is set at an angle and the plate drawer sits a a complimentary angle. The long low shelf is perpendicular to the cabinet and the top, shorter shelf is intentionally askew to both of those. The two ends of the table runner pull you into the deepest point of the display.
I hope this gives you the confidence to try a fun holiday vignette. And holiday parties are the perfect excuse — plus you can satisfy your sweet tooth and are a great time.

From the right
And from the left.
I am so tickled with how this turned out.
My inspiration were the nutcrackers I put on this year’s new Christmas tree. Decorating that tree had me thinking about taking the kids all dressed up to the Nutcracker ballet downtown, when they were little. Our kids are now grown, sigh!
But maybe. Hhmmm maybe, I just stumbled onto this year’s gift. Have you heard how we exchange gifts in our family? It is the most wonderful part of the holidays!!!!
And I feel no guilt about saying our gifts are the best part if Christmas. You need to read about why right here and see if this might work for your family, It has quite literally changed how we all think about and look forward to the holidays.

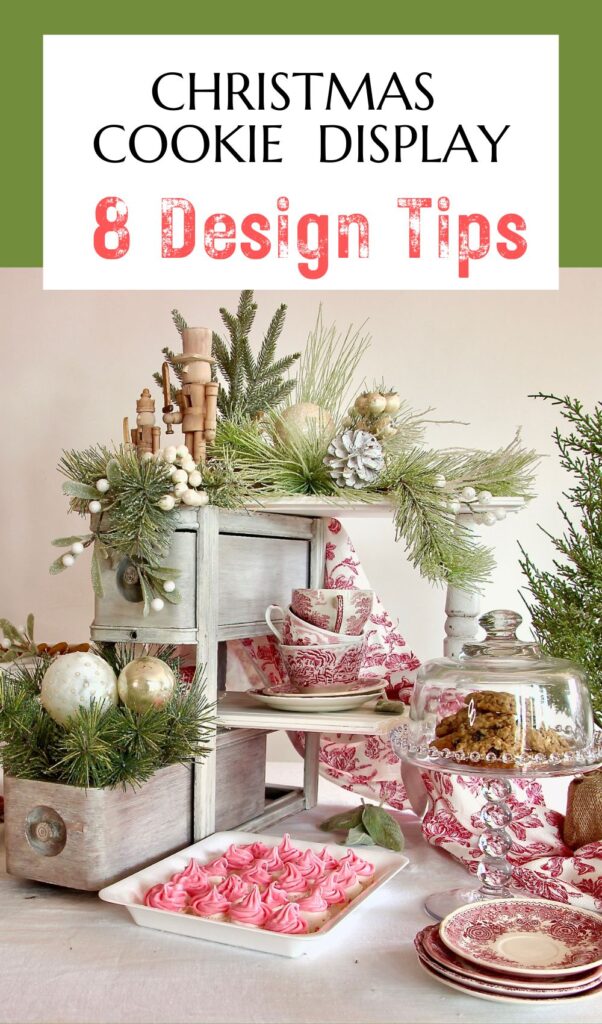
Don’t forget it, Pin it!
To your Christmas board
Or your Tabletop board
Or your Cookie Party board
or your Decor Styling board
or your Party board
and it not just for Christmas, so how about:
your Shower board
your Wedding Reception board
Anywhere & everywhere so you can find it again!
I hope this gives you a jumping off point, inspiration for moving on from a big blank table/slate.

Diane, this is such a creative display! The floral toile is gorgeous. It’s all so lovely!
Diane, your cookie display is so beautiful! You are so creative and I appreciate your step-by-step design tips! I learned several new things! I love the idea of using a triangle both vertically and horizontally! Thanks for sharing!
Thanks so much Donna! Really appreciate it.
The horizontal triangle is really just my way of applying a design principle in photography. Diagonal lines in a photo tend to draw you into the photo. I discovered the smae works for a 3-d display or vignette.
This is so beautiful! I can see so many ways to use these ideas! Thank you so much for sharing this with us! It was so much fun hopping with you !
I wasn’t able to comment during the hop so I wanted to circle back and tell you how much I loved this post! Everything you put together was positively magical and made me want to invite my friends and family over for a proper Christmas tea. Hope your holiday season is off to a great start, CoCo
Diane this is such a sweet idea! It makes me want to have a holiday cookie party! Thank you for sharing at my weekly Wednesday link party. I am happy to be featuring you this week! Have a great Hump Day!
Thanks so very much Nicolle! I so appreciate you and the feature! Love your link party — you’re rocking it!!!
I just love this display. You were so creative to add these darling sewing drawers.
Thanks Wendy! I have a feeling, I’ll be using them a lot for many fun displays.