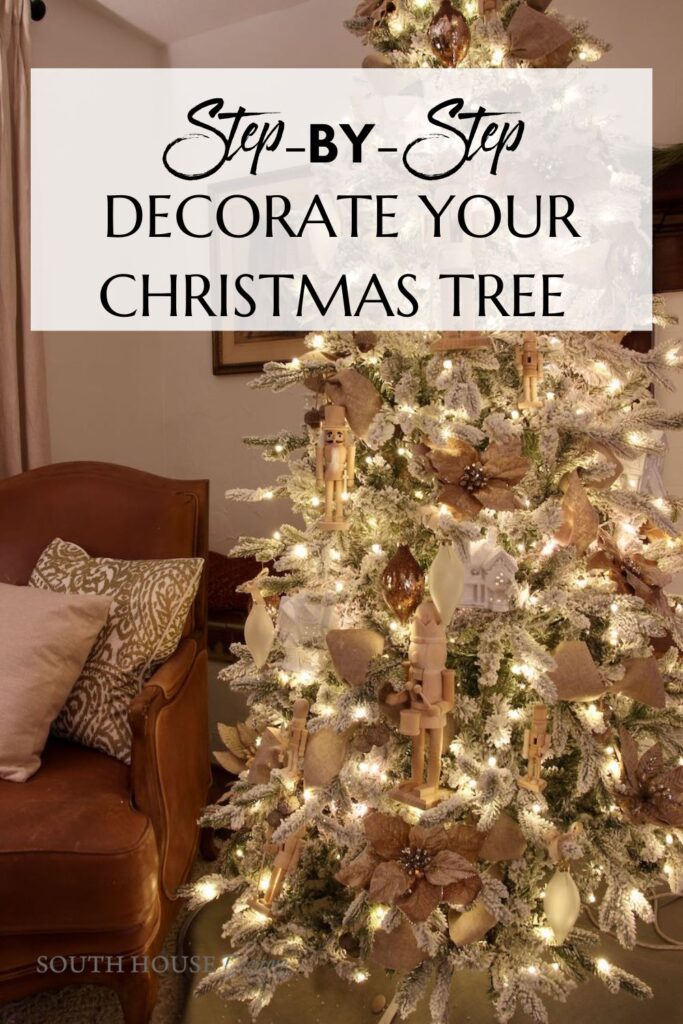
Decorate a Christmas Tree: Step-by-Step With ALL the Best Tips
Christmas tree decorating made easy with step by step guide full of all the BEST tips and hints. But loads of room to add your personal style.
There seem to be two camps.
Do you stall putting up your Christmas tree as long as possible, secretly dreading the process? Or do you eagerly start counting the days . . . on Halloween?
Either way, our Christmas trees are one of the focal points, the star of the holiday season. Whether in small spaces or a grand living room loving your tree is the important thing.
Creating a tree that makes your heart happy is the main objective!
I started to say that creating a tree that’s beautiful . . ., but “beautiful” is very subjective and not what everyone wants. Maybe you want a charming vintage look, or a whimsical playful look, or a clean, modern, chic look.
Isn’t it wonderful that we all have a different idea of the perfect Christmas tree?
I encourage you to keep your idea front and center. This is about the process and not the color palette or the shape of the ornaments, or the pattern of the ribbons.
However, there are many tips and tricks to make this process easier. And there is a specific order that is helpful to follow. This step-by-step guide will lay it all out for you.
Follow along! We’re happy to make room for you in the “Countdown Camp”.
And this is your lucky day!
Because today I am partnering with 4 amazing bloggers (all with very different styles)
who are also sharing blog posts filled with their Christmas tree ideas.
A peek at each of their posts and the links are right after this Step-by-Step Guide for Decorating a Christmas Tree
Let’s Get Started Creating the Perfect Christmas Tree Look For You
These easy steps remain pretty much the same whether you have a fresh tree or an artificial tree.
I have a new faux tree from King of Christmas that I am thrilled about.
I knew their reputation, but I didn’t really KNOW until I opened the box. Wow!
Want to know my favorite things about this tree?
- it is so heavy and sturdy
- the tree stand is sturdy and appears to be topple-proof
- it’s a pre-lit tree
- the lights are LED but have the perfect warmth to them
- come with multiple settings on the switch for the lights, from blinking, to pulsing, steady and several in between
- even my slim tree is incredibly full
- the tree branches are beautifully formed
- variety of branch lengths looks very natural (not all clipped to a perfect cone)
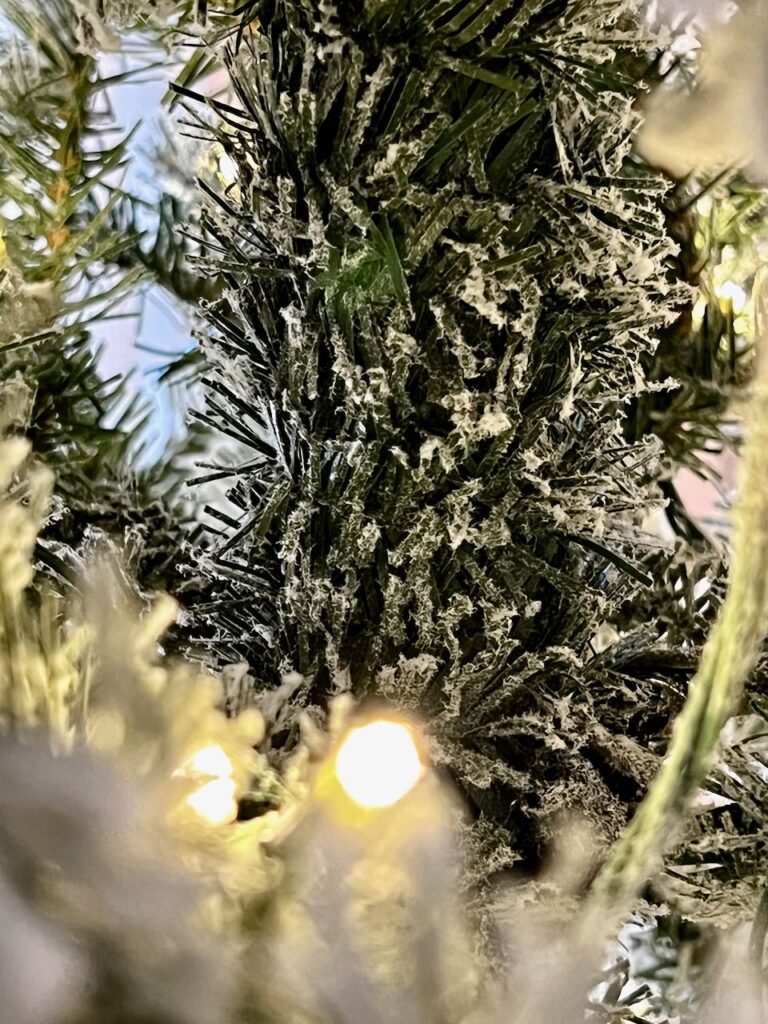
- my tree has the most gorgeous flocking (faux snow covering) on it
- It is well thought out, the trunk of the tree is covered in faux greenery, and even that has a dusting of the snow. (check out the picture below)
- and the light bulbs are flocked too which results beautifully diffused glow.
- very easy to assemble
- comes with a fabulous storage bag that dust, water and bug repellent
- even comes with gloves to my elbows for setting up your tree so your arms aren’t covered in flocking (now that tells me King of Christmas is thoughtful and detail oriented. I like that!)
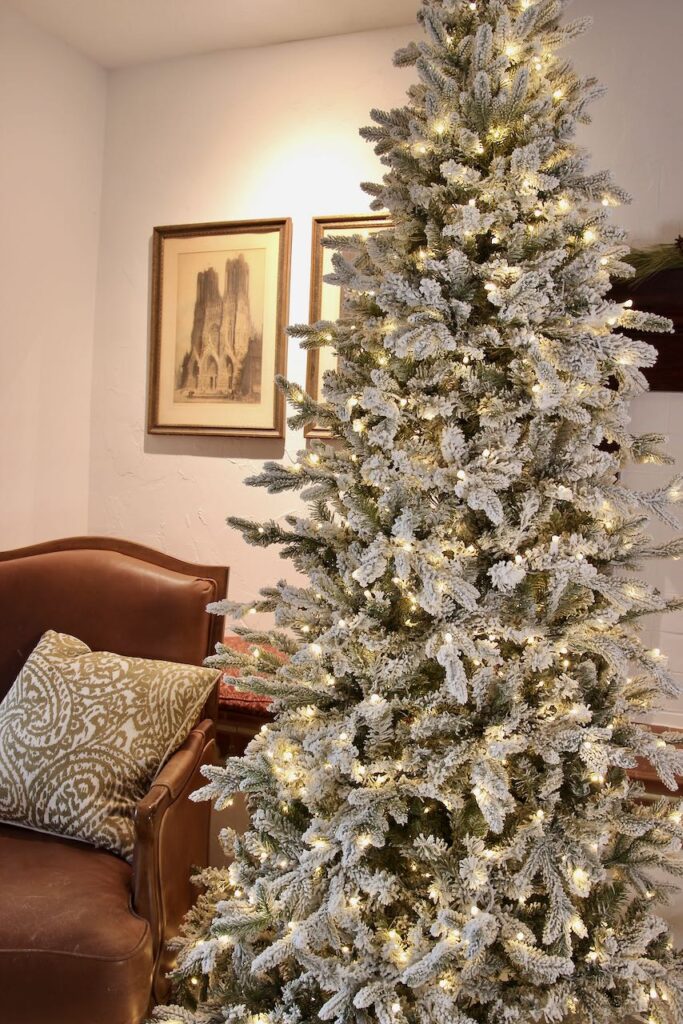
I have the 7.5′ Slim Queen Flocked Tree from King of Christmas
You can check out all their Christmas trees right here. And here is my exact tree.
Table of Contents:
- Let’s Get Started Creating the Perfect Christmas Tree Look For You
- Step 1- Tree Stand
- Step 2- Assemble Your Tree in Your Tree Stand
- Step 3- Fluff Your Tree
- Step 4- Christmas Tree Lights
- Step 5- Start With Anything That Needs Power
- Step 6- Then Any Statement Pieces or Larger Decorations
- Step 7- Add Ribbon or Garland
- Now It’s Time For the Whole Family To Jump In
- Step 8- Add the Christmas Ornaments
- Step 9- Add Any Bulbs
- Step 10- Add Floral Picks, Berry Picks, Pine Cones and Such for Texture and a Touch of Nature
- Step 11- The Topper
- The Final Results!
- There’s a Story Behind This Tree
- It’s my Grandpa & Paco Tree
- And Now Savor These Beauties
The links in this post may include affiliate links, which means if you purchase anything using these links, you pay no extra, but I may receive a small commission that helps keep this blog running. I truly appreciate you using affiliate links whenever possible. Please know that I will never recommend a product I do not believe in!
Step 1- Tree Stand
I’m assuming you have already chosen your tree whether a real tree or a faux tree.
If you have a real Christmas tree, then you probably want to stick with a Christmas tree skirt vs. a tree collar, as it can be kind of difficult to fill the water reservoir with a tree collar.
But if you have an artificial Christmas tree, then you can choose either one. If your have a collar, be sure to set the stand inside the collar before assembling your tree!
If you are using a tree skirt, here is Top Tip no. 1:
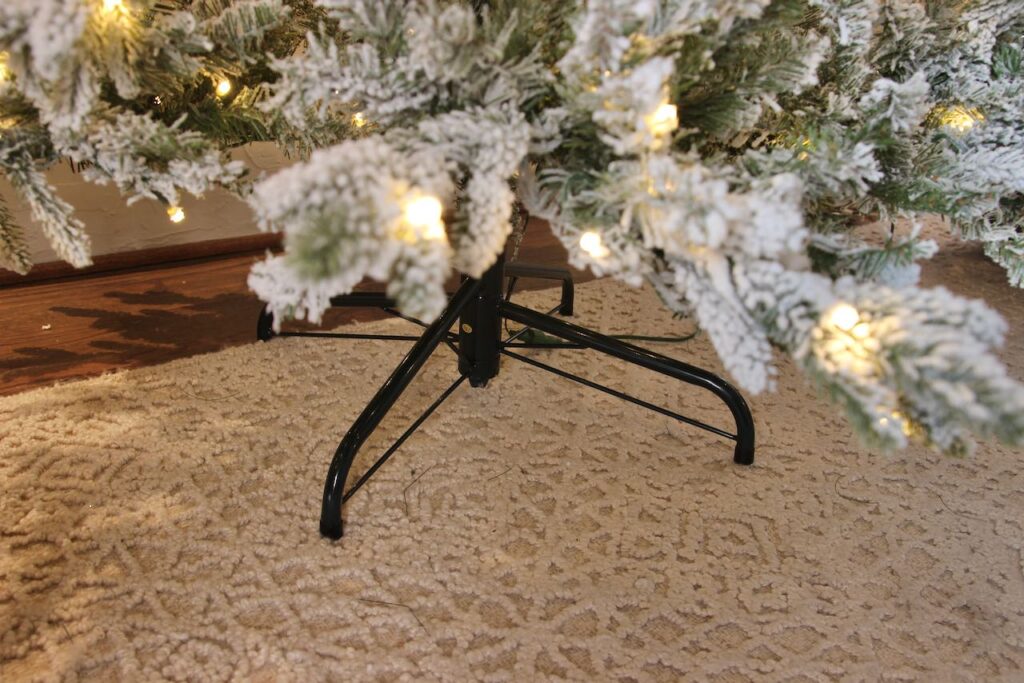

TIP: If your stand has legs that are rather protruding, typically the newer stands, the legs can cause awkward bumps under your tree skirt. Add batting or wadded up plastic bags between the legs to soften the fall of the tree skirt. Isn’t that an amazing difference?
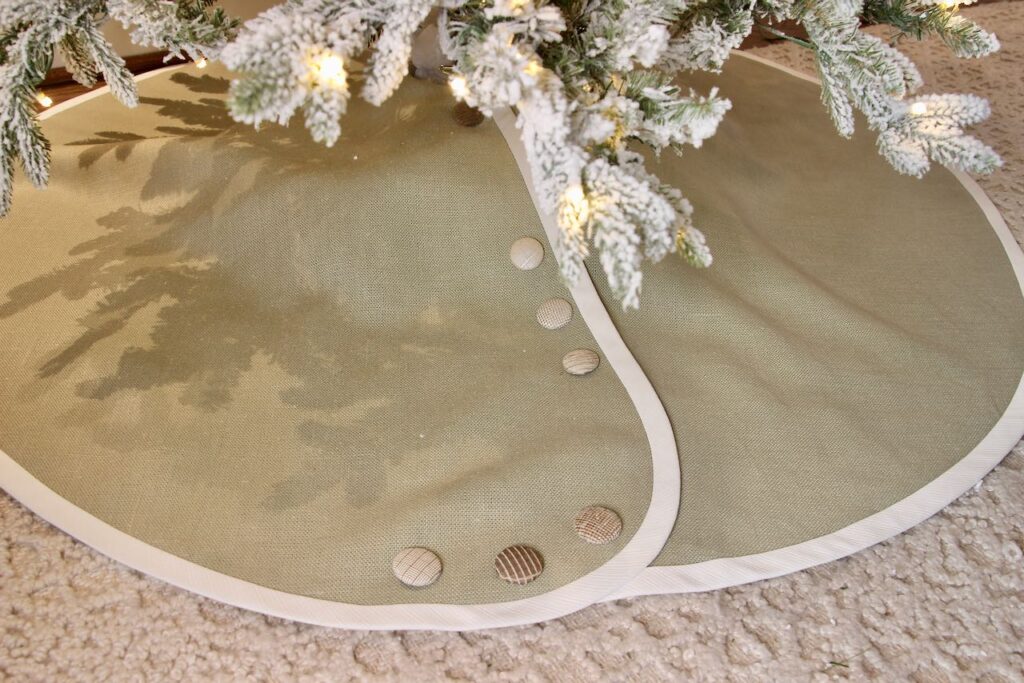
This Christmas tree skirt is available here.
Step 2- Assemble Your Tree in Your Tree Stand
With artificial tree, it’s usually one chunk of trunk into the one below.
With a real tree, it’s a bit more involved because you have to adjust your stand for the trunk and then adjust more to get the trunk as straight vertically as you can.
Step 3- Fluff Your Tree
If you have a live tree, there is not much to do unless there are a few errant branches that need to be trimmed up.
But if you have an artificial Christmas tree, it is probably pretty compressed from shipping or from your storage from last year. After assembling, your tree probably looks okay! But is okay good enough for your holiday focal point, where memories are made and your pictures will be taken?
I didn’t think so either.
The time spent is well worth it!!! I actually do most of the fluffing while I’m assembling the tree. I pull and shape each branch a section at a time. Work your way all around the tree and spread those branches so they fill in any vacant spots.
Of course not all branches should be sticking straight out. Some should have some natural bend and curve like they would in nature,
Step 4- Christmas Tree Lights
In my opinion, lights are the most critical piece to get right, and the most challenging.
Fortunately for me, my new King of Christmas tree came pre-lit!
Whether artificial or real, the lights on your Christmas tree should NOT just rest on the tips of the branches. The strings of mini lights should wind around the branches towards the trunk and back out. The lights should be evenly distributed and tucked inside so that you don’t see distinct horizontal or vertical lines of string lights.
This gives the tree lots of depth and richness.
TIP: Most pre-lit trees come with white lights. Although there are different whites. Originally LED lights put off a cold, blueish white. But that has been corrected fairly recently, but if you are buying a tree or new lights, I suggest double-checking that you are getting warm white lights.
Should You Decorate With The Christmas Lights On or Off?
Always on! The lights change the whole look of the tree. Plus, it’s important to make sure that when you are add more and more to your tree one of the connections doesn’t fail. If the lights go off mid-decorating, chances are you will know what triggered it and be able to fix it rather easily. That’s not true if you go for the big reveal and flip the switch when you are all done and the lights don’t work. Where would you start looking to fix it?
TIP: Think about using a smart plug or other remote control timer for your power cord. No need to squirm twist around to take care of the tree lights. Now you can use a simple remote, or even set a timer for both on and off, or control them from your phonNe.
These smart plugs are great for controlling your lights from an app on your phone or using with Alexa or Google Home.
Step 5- Start With Anything That Needs Power
Do you have any ornaments that need power? Or how about some novelty lights you want to add to the little white lights?
If it has a power cord, it goes on first. You’ll want to feed the power cord down the length of the trunk to reach an extension cord. Best to do that before you attach anything else to the tree.
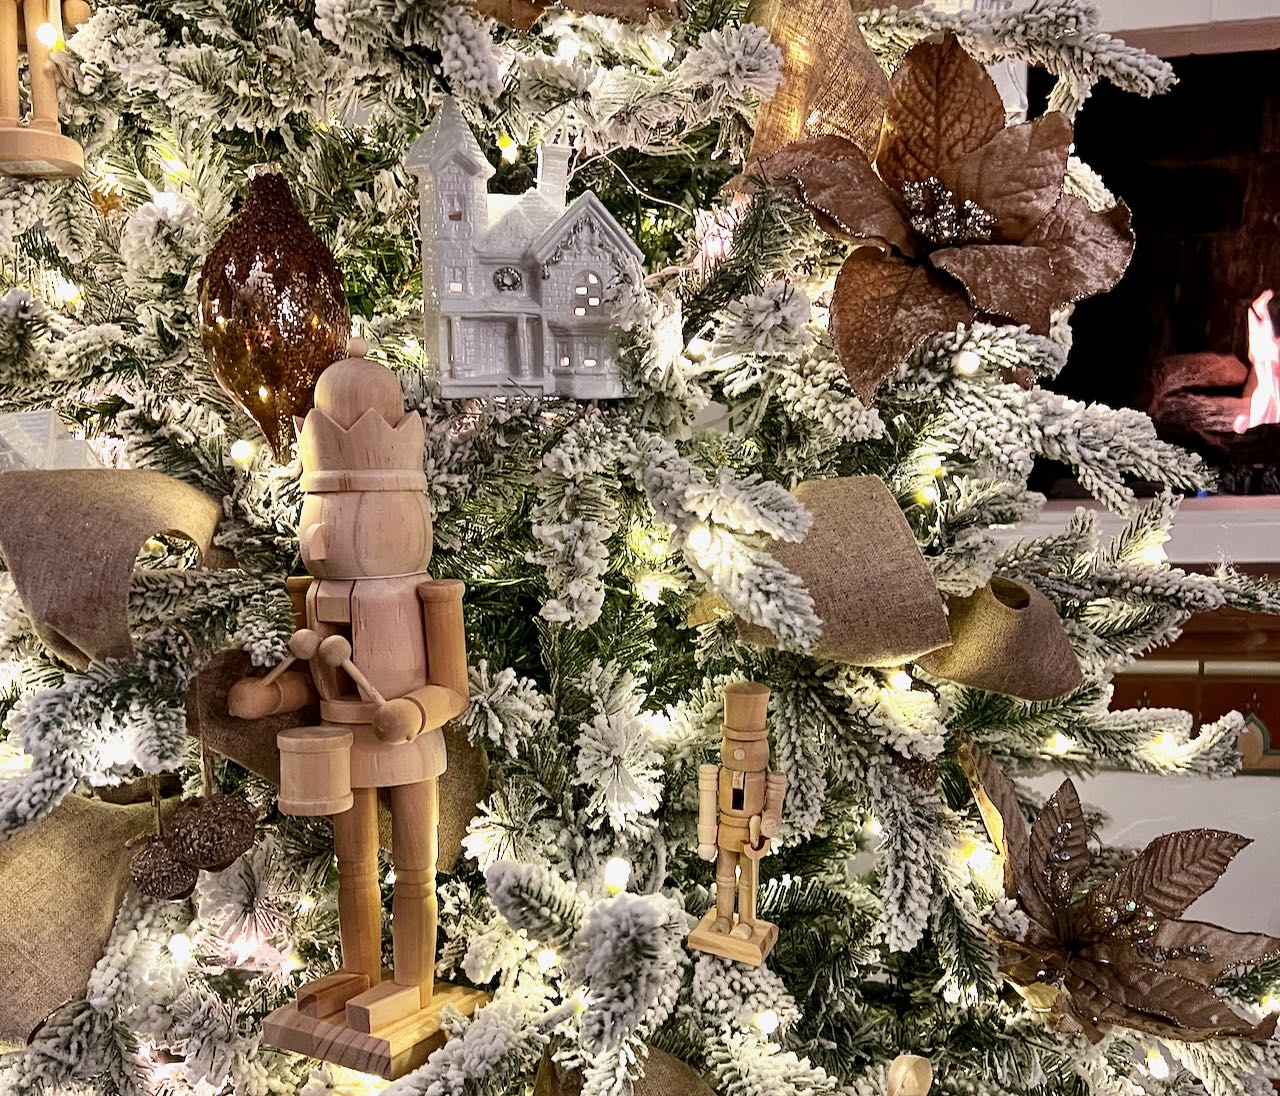
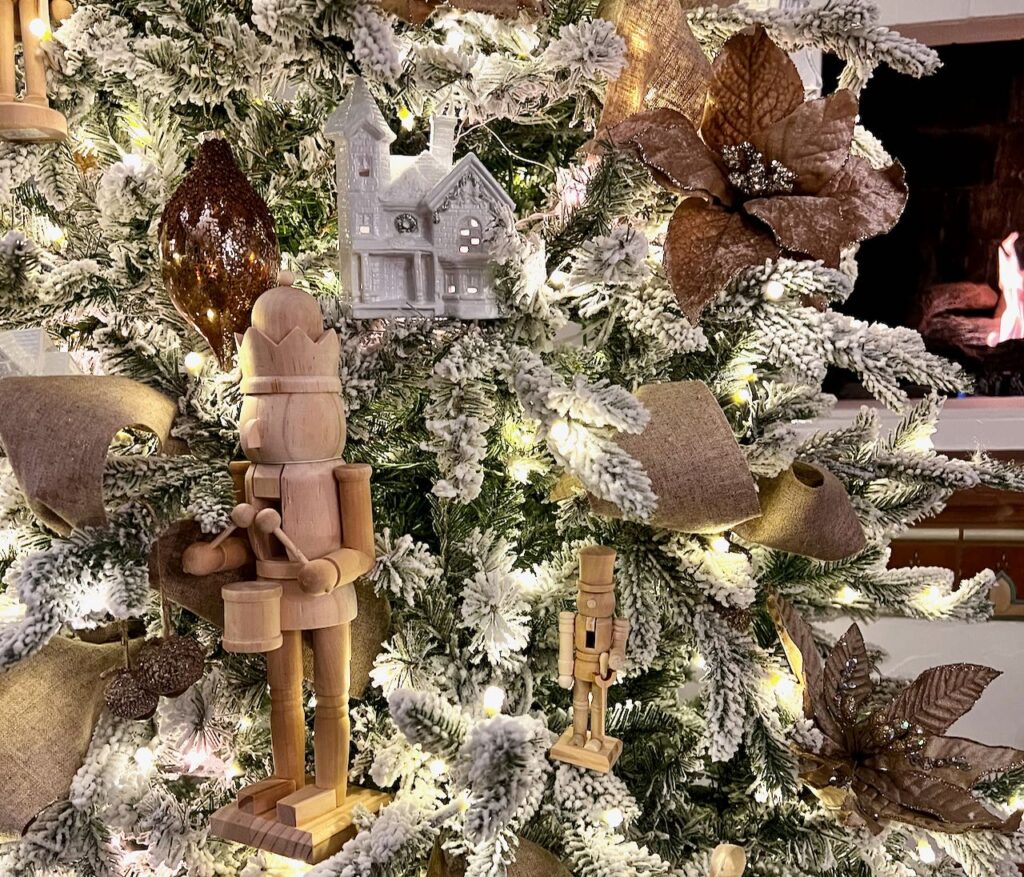
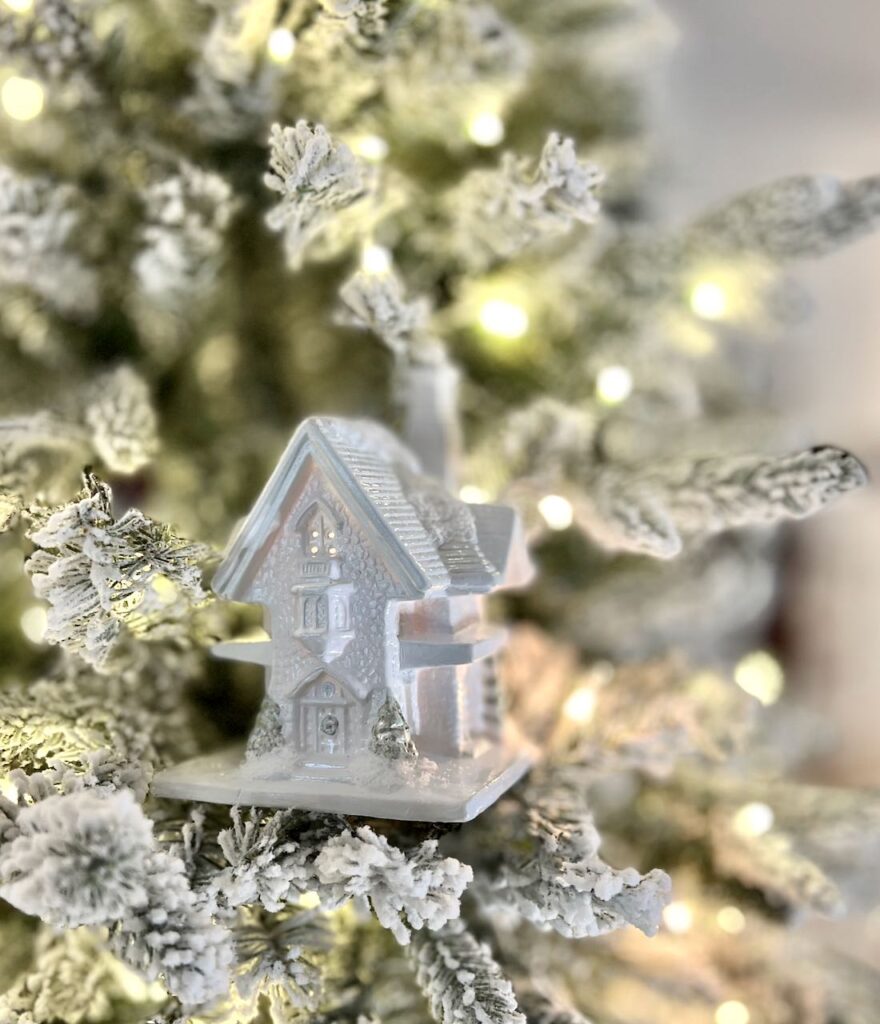
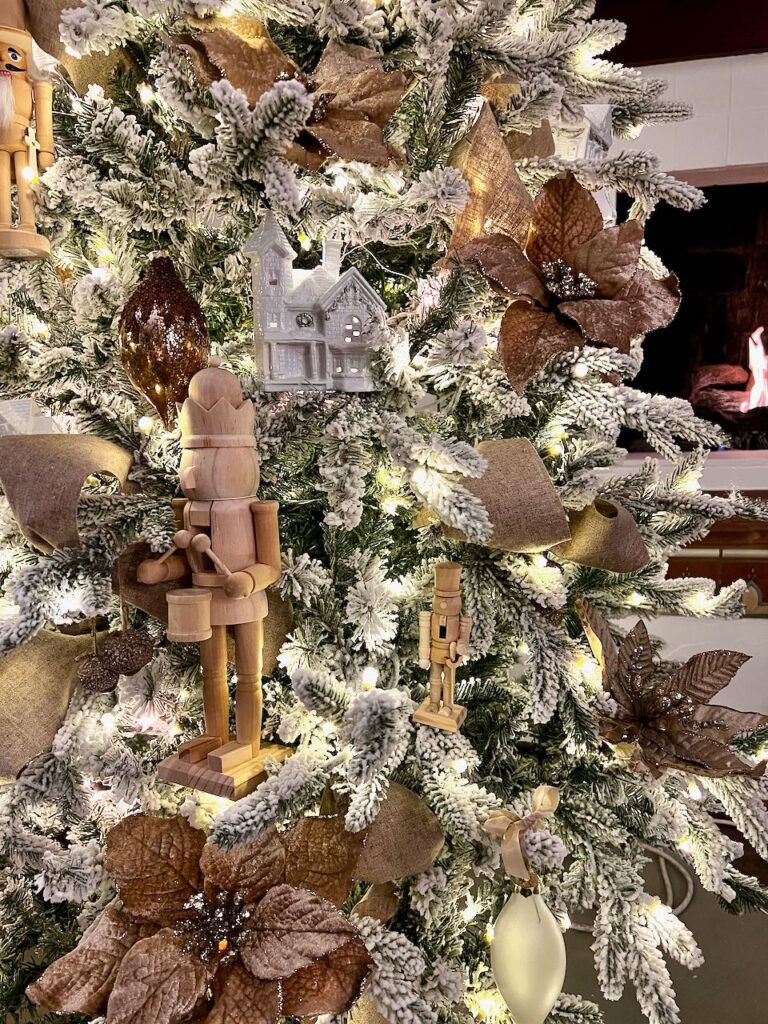
My little ceramic houses are lit by two additional strands of white lights. So they are the first things I added to this new tree.
Step 6- Then Any Statement Pieces or Larger Decorations
Do you embellish your tree with things beyond Christmas ornaments? Basically, turn other decor items into ornaments fro your tree?
If not, you should give it a try!
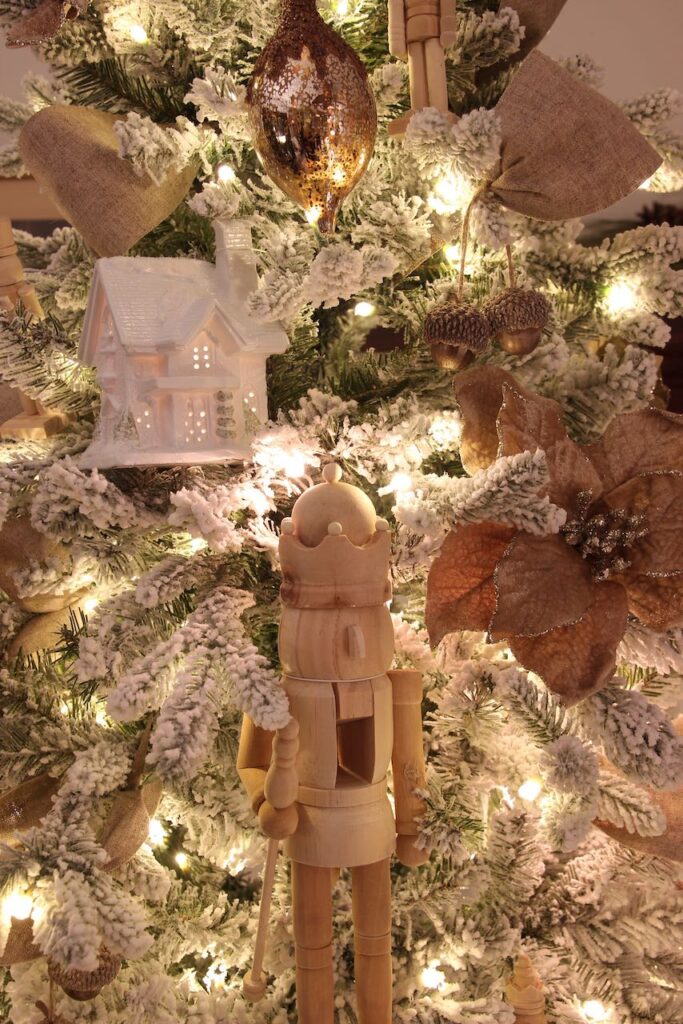
HINT: And they don’t need to hang. My houses and my nutcrackers are wired into place. Do you have a collection of creamers and little pitchers? How about vintage trophies? Vintage garden tools? These would all make unique and stunning trees.
Zip ties and pliable wire are your best friends when you want to decorate with items that do not have a hanger built in. Look closely and you can make out a thin white wire around the nutcracker’s neck that hold him upright. and the is the same wire around the chimney of that house.
Step 7- Add Ribbon or Garland
Ribbon is not required, unless you’re in my house. But I’m a textile geek. I will reach for a scarf over a necklace every time. Weeelll, unless we’re talking pearls and that’s a whole ‘nother story!
Like nature elements, I think fabric or ribbon adds a softness and polish.
There are many ways to add ribbon to your tree
- bows
- garland around the tree
- vertical lengths from the top down all the way down
- and my personal favorite; loops winding in and out sporadically
Any of these work. If you are using ribbon as your garland around the tree, sporadically bury the ribbon into the branches a bit and let it drape a bit. The same is true for a more traditional garland whether wood beads or hand strung popcorn.
HINT: Just like how the lights sitting on the edge of the branches is very flat and one note, but with ribbon it might be worse. if the ribbon is pulled somewhat tight with no draping and is just on the outside of the branches, the tree end up looking like a mummy. And that ship sailed in October.
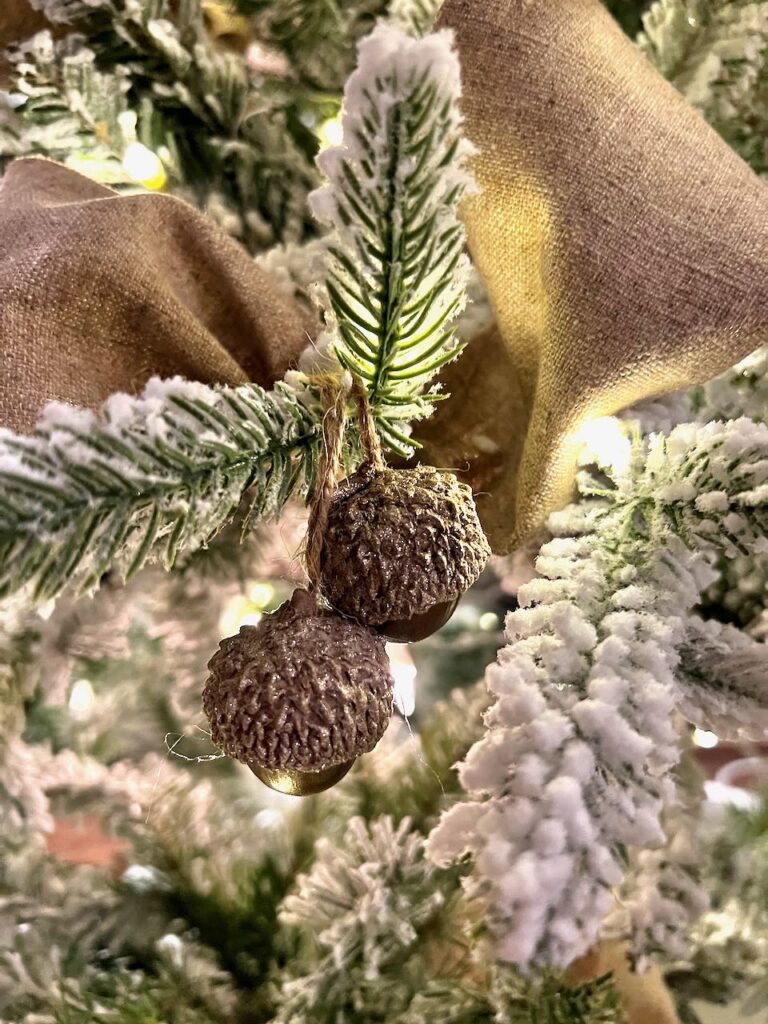
On this tree, I bunched my wide linen ribbon wherever I wanted to tuck it into the tree. Each of these spots is gathered and held in place with thin wire, or one of my handmade acorn tassels if at an outside branch tip.
I’ll have post on those soon!
Now It’s Time For the Whole Family To Jump In
But first, are you enjoying this post? We are just heading into “my” season. So hang on, there’s so much more coming! Don’t want to miss a thing? May I suggest subscribing? You pick how much!
Back to the Whole Family Bit:
I really miss those days! So much that the last couple of years, I had the main tree to this point, Step 8. I even had the tub of all the “family ornaments” sitting by the tree ready for the first night the kids were all back in town and sleeping under our roof again.
My Currier & Ives vision had us all decorating the tree with the fire going and the carols playing just like we used to every single year.
Reality: We gathered around the tree, lit the fire, cranked up the carols, had our beverages and a snack board. Everyone got cozy (and a bit lazy) and decided the tree looked great just as it was..
Catching up, laughing, and playing games trumped tree decorating. And you know what? I’m super okay with that.
Now I know. And I will finish the tree myself!
TIP: For family decorating when the kids were younger, it was always best if all the ornaments were unwrapped and on a table waiting. If there are some delicate, special ornaments, set those towards the back away from the little hands. Those are the ones you hang and up high towards the top of the tree.
Step 8- Add the Christmas Ornaments

With the ornaments, start with the larger ornaments first. There are fewer good places to hang or set them. The smaller ornaments can fill in anywhere so they go on last.
TIP: I’m so glad I started this on our first married Christmas! As I wrapped up each ornament, I wrote on the tissue paper the year, who it was gifted from or some significance. As the kids came along and they began receiving ornaments as gifts, that was also noted.
Because I’m the one who unwraps all the ornaments, I get a refresher. Then when it’s time to pack them away a month later, I am able to easily match each ornament to their wrapping. It’s quite a delightful, sentimental journey.
And then when the kids and hubs see all the treasures, the stories just flow.
Step 9- Add Any Bulbs
The bulbs are generally your color scheme. And like the ornaments, the larger ones go first, then the smaller ones. Take the time to spread the colors evenly throughout the tree — avoid any straight line of a common color, either horizontally or vertically. Unless of course that IS your theme. Then embrace those stripes, an ombre effect or even a rainbow.
And when the kids were little and anything that was yellow or pink ended up in one spot on the tree (Katie’s decorating corner) and anything that remotely resembled a dinosaur ended up in another spot (Ryan’s). And the lowest branch in the middle had at least 8 ornaments hanging on it (Robert’s), I embraced it as our Perfect Tree . . . for that year, that time in our lives.
Step 10- Add Floral Picks, Berry Picks, Pine Cones and Such for Texture and a Touch of Nature
This is so easy to do. Try to name me one thing that doesn’t benefit from another gorgeous texture and a touch of nature. Impossible! Everything is better with a bit of nature.
I save this for last because it truly is so easy. There are always spots in the tree where ornaments and bulbs do not hang well because the branches might be shorter than the ones below so there isn’t enough hanging space. But it is still an empty spot.
So this is where you plunge a pick of berries, florals, greenery or branches into that blank spot. It’s the perfect filler.
The florals and berries generally come on a pick or a longer stem, and you just poke that between Christmas tree branches wherever you find a void. Fill your tree as much as you like, or be as sparse as you like.
TIP: You can typically save money on floral and berry picks and stems if you buy a bush or bundle and then pull it apart.
Remember, there is no right or wrong. There is just a best order to follow.
Step 11- The Topper
I’m a traditionalist and still typically use a star on top of the tree. But there are so many great options. Do a PInterest search and you’ll see.
Literally anything you can sit on. the top or wire onto the top is an option for Christmas tree toppers.
For the best results, stay with something that compliments your Christmas tree theme or style.
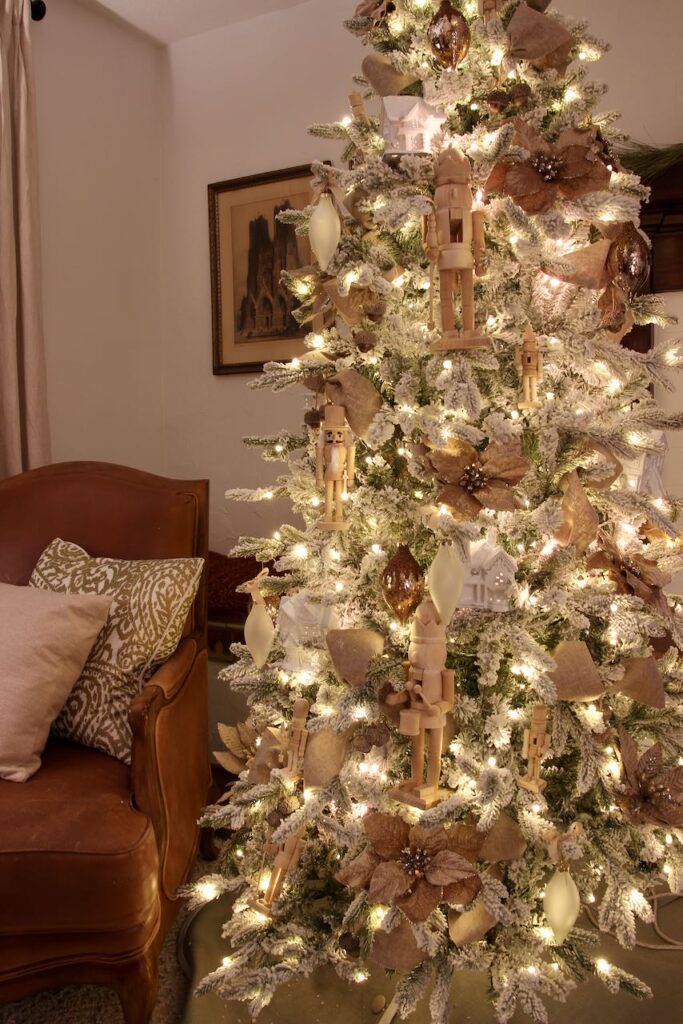
The Final Results!
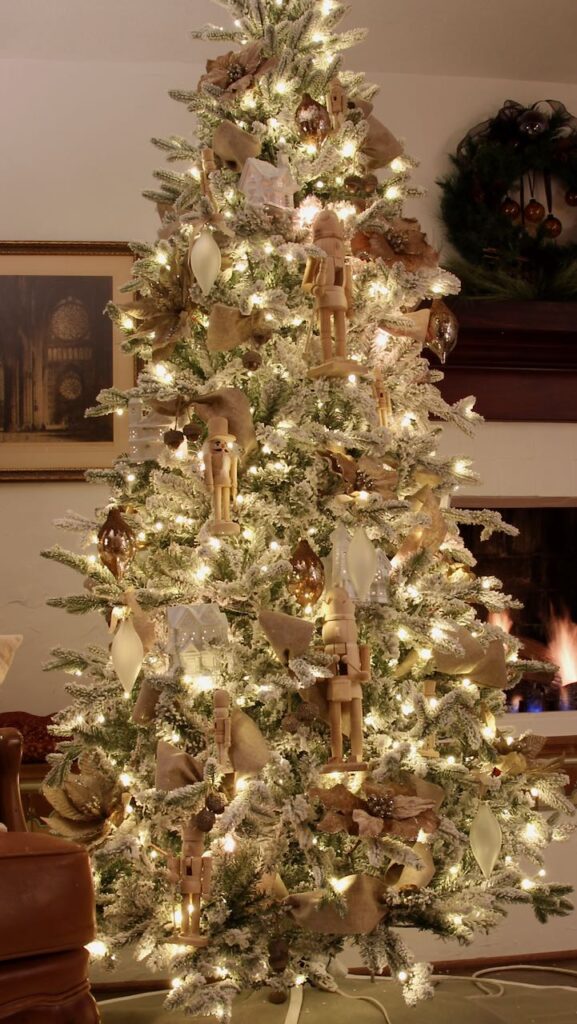
There’s a Story Behind This Tree
It’s my Grandpa & Paco Tree
My Dad (Grandpa) was a well-known realtor. He and I shared a passion for houses. Hence my white houses. They were quite . . . umm, . . colorful when I found them at my favorite thrift store. Jump over to check out the revival of the Christmas Village.
And my Dad-In-Law (Paco to the grandkids, and then everyone else) grew poinsettias. I mean a LOT of poinsettias. He ran the largest (at one time) greenhouse west of the Mississippi River and it was pretty common for him to produce 300K in a season. And in the most unusual and breathtaking color combinations. Hence the poinsettias.
And these men were both amazing guardians and protectors — and funny. So the nutcracker soldiers just seemed so right for both of them.
I planned to stain the nutcrackers and fancy them up a bit. But I kind of like them like this. We’ll see if they stay in their “raw” form.

Pin it where you will find it:
To your Christmas board
Your Christmas Tree board
Your “I Want It” board
Your Nutcracker board
And Now Savor These Beauties
From My Christmas Cheer Blogging Buddies

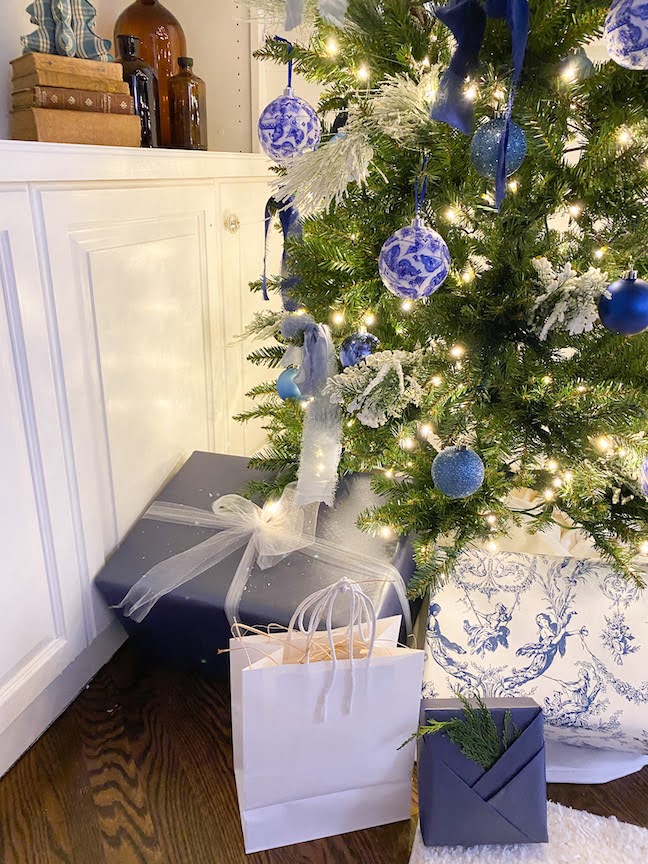
Lynn – Living Large in a Small House
Creating a French Country Christmas Tree for my One Room Challenge space has been so much fun. The blue and white theme of the room set the tone for the tree and the gift wrapping.
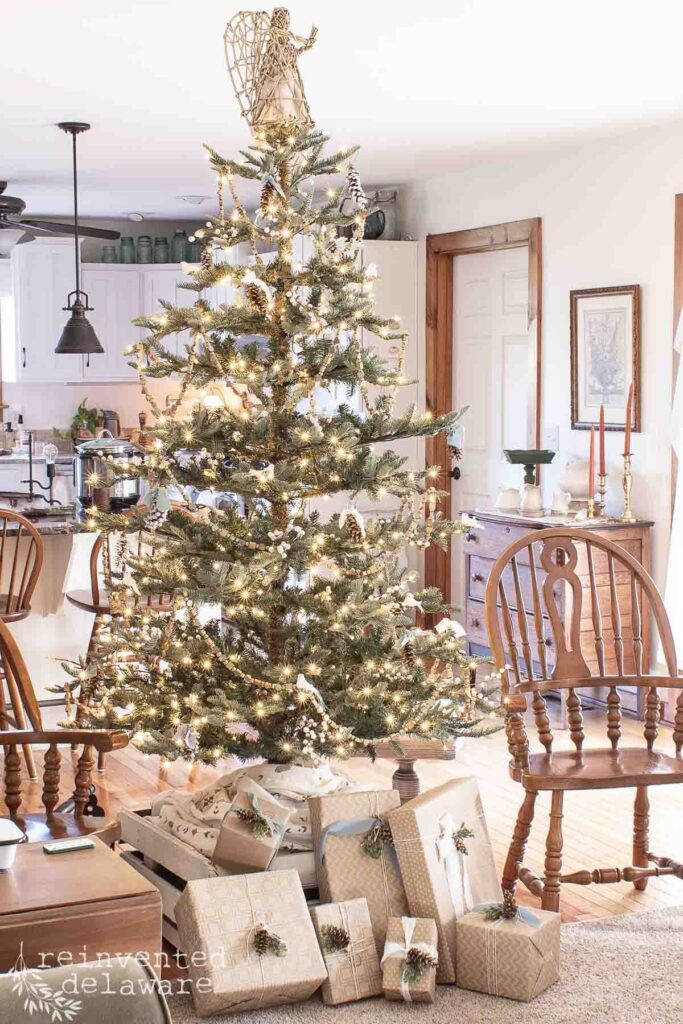
Rustic Christmas trees don’t have to be difficult to create. This holiday season, we’ve decided to create a rustic look using pine cones for ornaments, upcycled wooden bead garland, and a pallet wood crate to hold the tree. Let’s take a look at these simple rustic Christmas decorations on our tree!
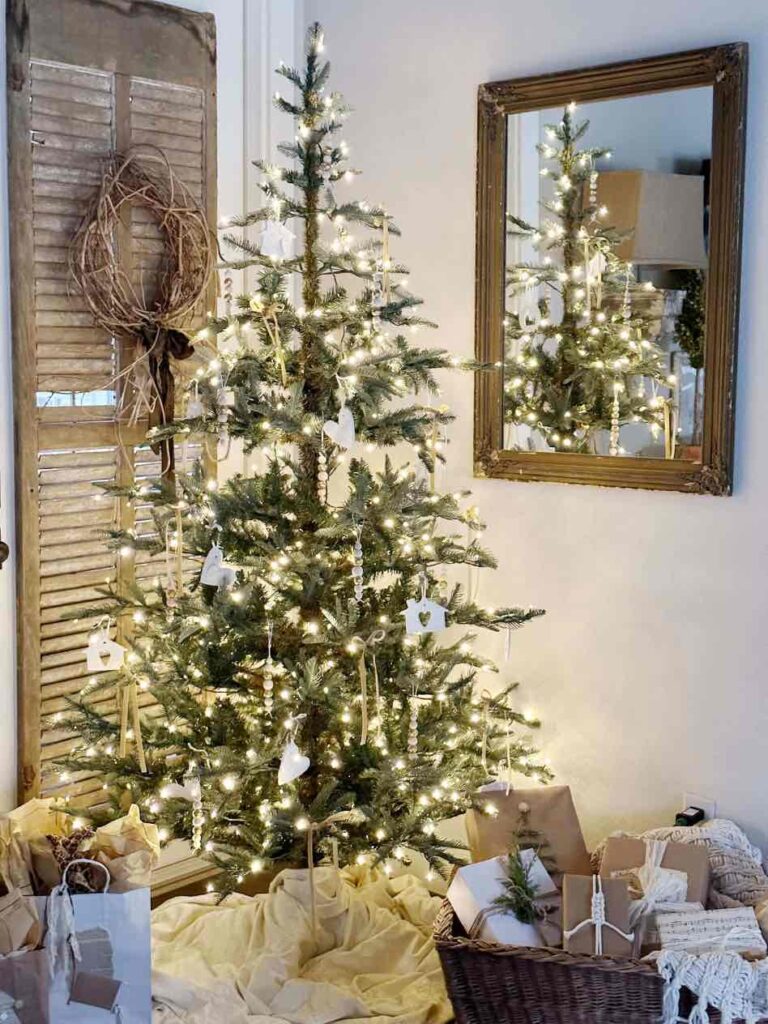
Michele – Vintage Home Designs
It’s time to start decking the halls! Michele is sharing lots of ideas for decorating your tree with simple, neutral and vintage style ornaments along with creative tree skirt ideas, tree toppers and more!
Stay close. I have blog posts on several elements I used in my tree coming out soon.
Don’t ever hesitate with questions and feedback!

Wow! So much great information. Your tree is beautiful!
Your new tree is so beautiful, I know you must be excited about it!! I love how you used nutcrackers on the tree! Everything looks wonderful and I enjoyed all your fabulous tips!
Oh Donna!!! That is so sweet of you. You just made my day.
Diane – Your 5 days of Christmas Cheer were amazing! I loved every bit of it. You truly are our Christmas Super Star!
What a lovely tree you decorated, Diane. I love the neutral tones and the sweet nutcrackers. And of course, you have the most beautiful tree skirt.
Diane,
Such great tips. Thanks for sharing.
Diane your tree is beautiful! These are great tips! Using floral picks makes it look so much fuller. And I love your nutcracker ornaments! I hope you will come link up over at my weekly link party that goes every Wednesday-Sunday for a chance to be featured! https://www.ourtinynest.com/2022/11/30/weekly-wednesday-link-party-324/
All of the trees in this post are beautiful. And thanks for sharing the tips. Even those of us who have been decorating trees for years forget some of these steps. This post will be a feature this week just to share the inspiration from your trees. #HomeMattersParty
Diane, your tree is so beautiful. I saw these adorable nutcrackers and just love them.
I’m all about the nutcrackers this year! Thanks Wendy!