Looking for a fun, easy and inexpensive way to bring a touch of Boho charm to your decor? Here is a simple craft that is easy to customize!
Want to add a pop of color and texture to your home? And make it easy? And inexpensively?
Then this DIY project is for you!
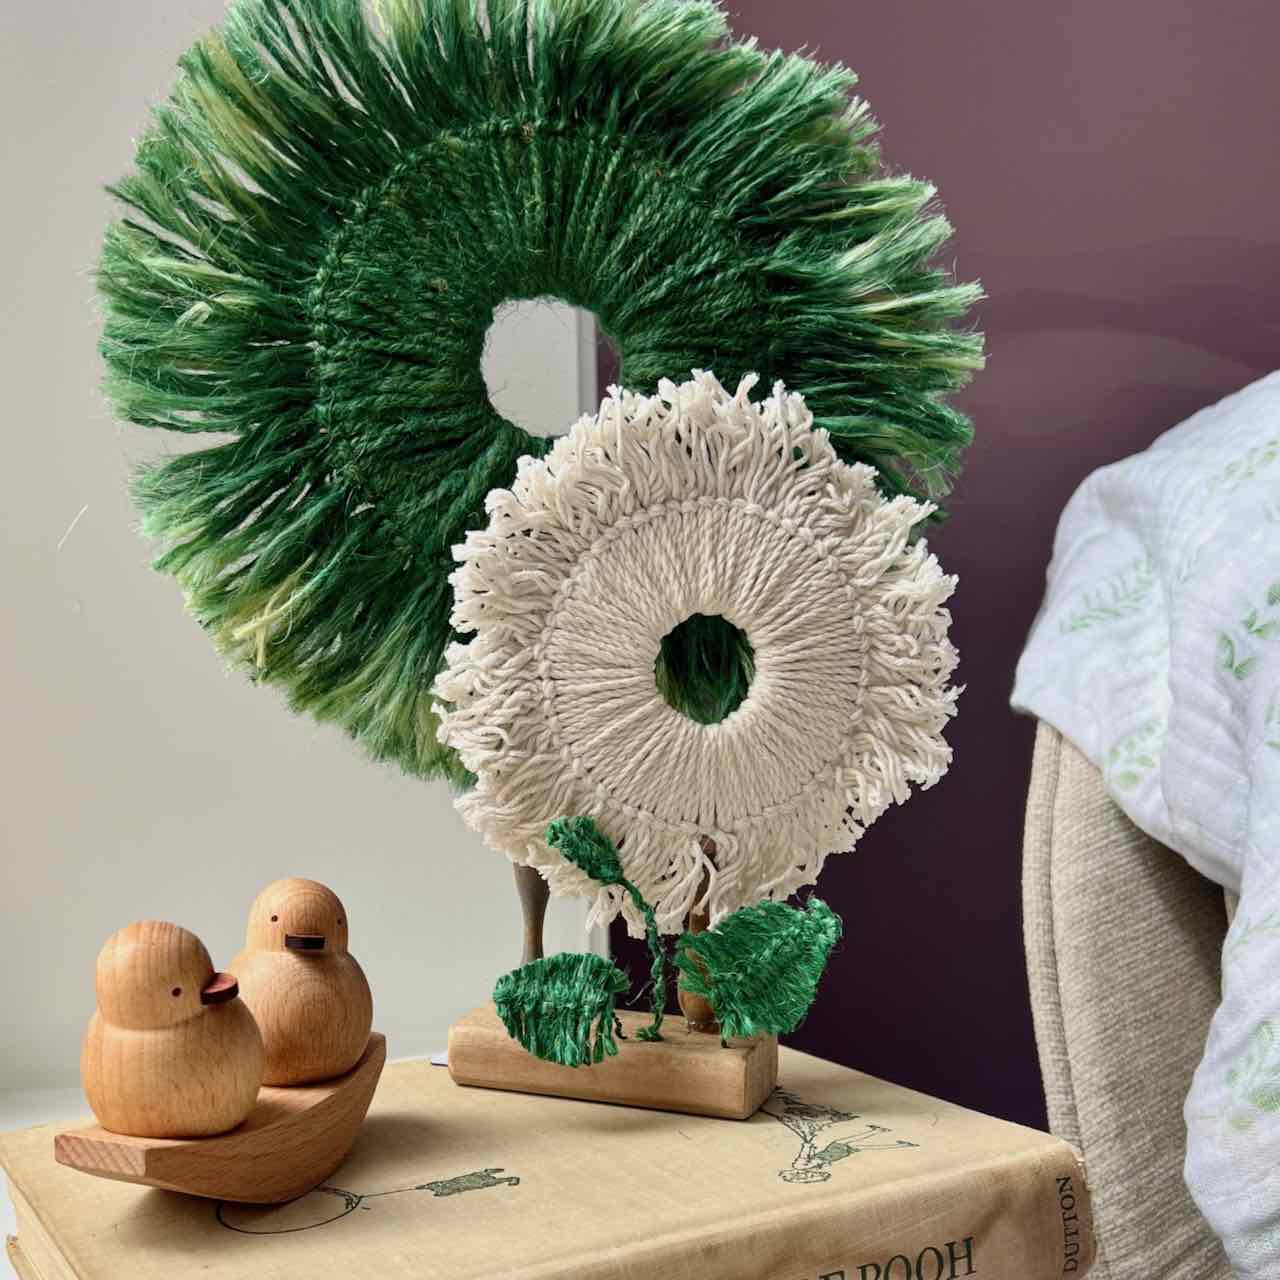
We’re making boho-inspired sunbursts and twine leaves that are as fun to make as they are to look at.
Let’s get started!
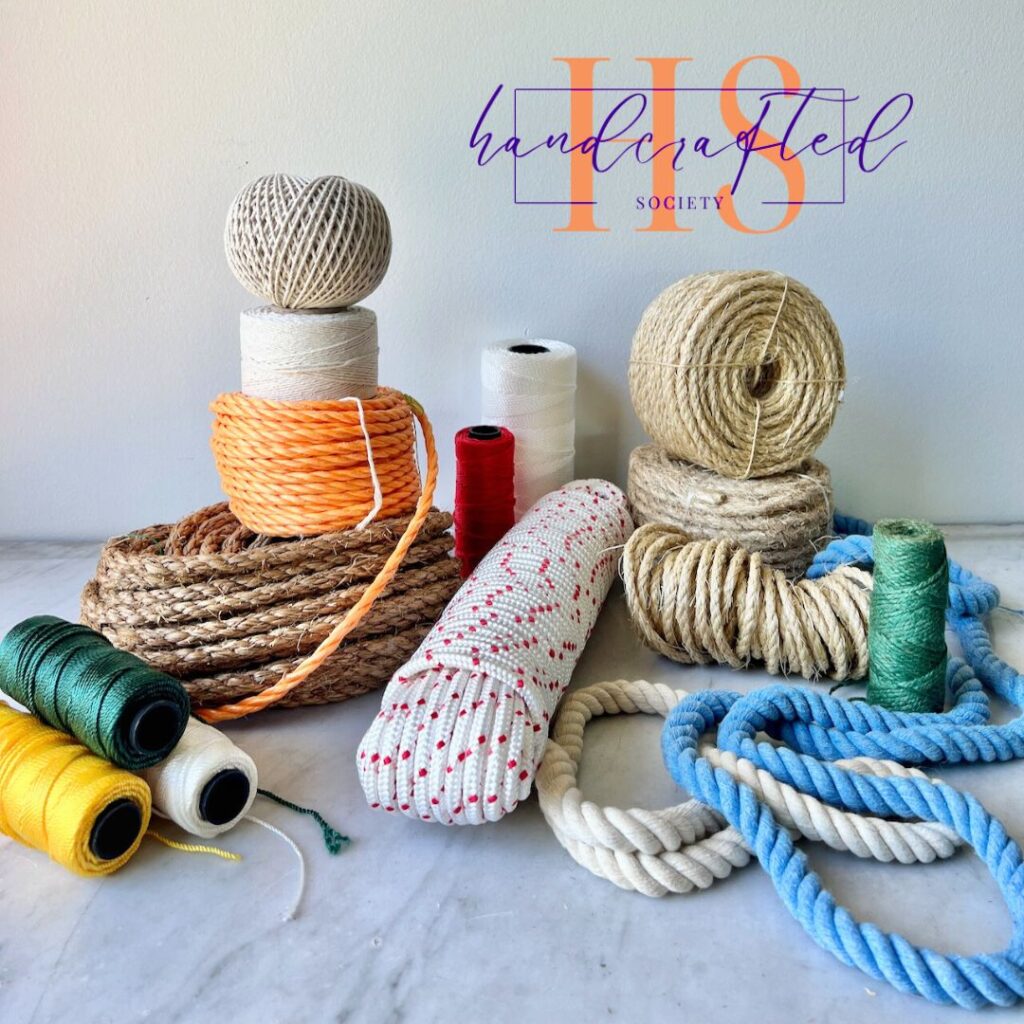
But first, I want to welcome everyone who might have found their way here via The Handcrafted Society’s August Challenge of using rope or twine in an elevated craft project.
And if you’ve been here a hundred times and you’re starting here today, I’m shouting out an especially hearty “Hello” and a million thanks for being part of my creative thinking and doing community.
Links to NINE more rope and twine projects are at the end of the post. Do’t miss them!!
When I was preparing for this project, our daughter was preparing to deliver our first grandchild — a little girl.
I had been out to DC where they live (we live in KC) for a baby shower and to begin the nursery preparations. So this sweet nursery and pending arrival of our granddaughter was at the forefront of my every thought and every ounce of my creativity.
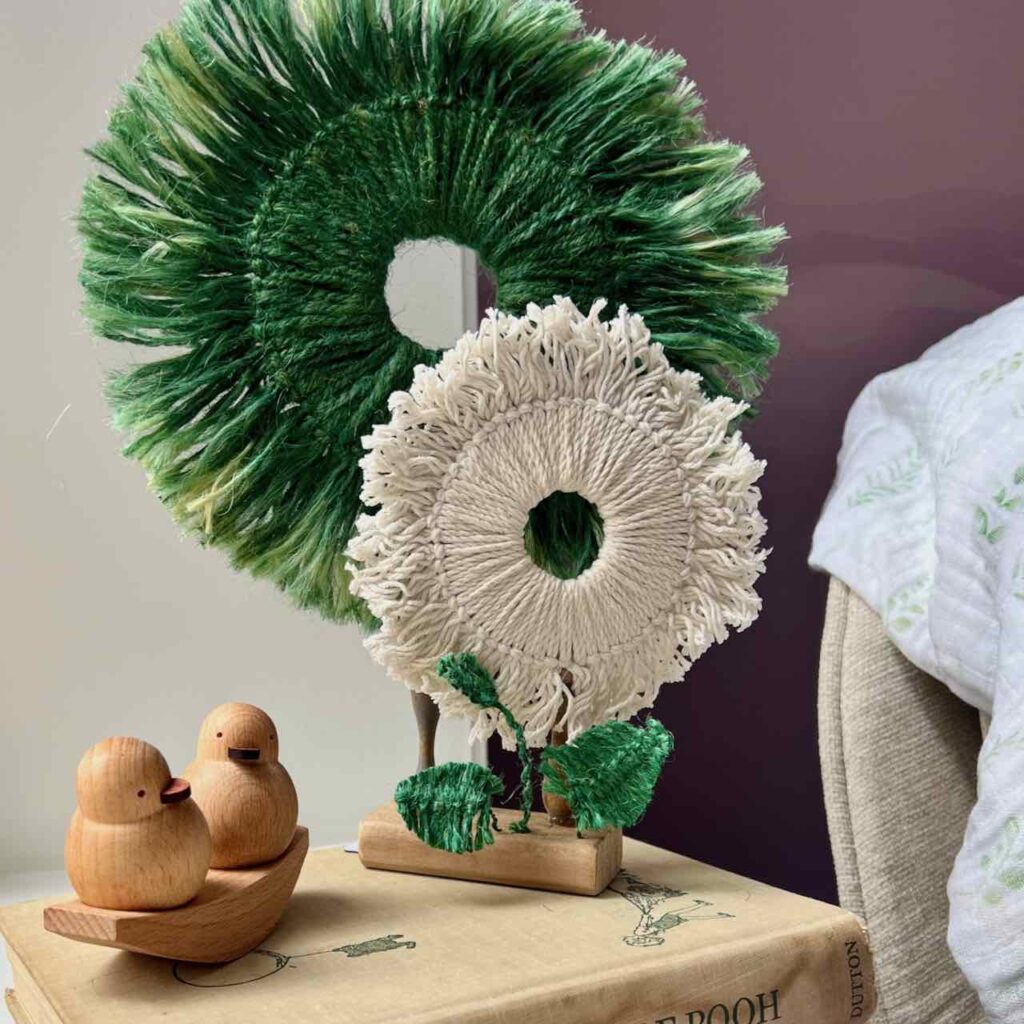
SIDENOTE: Yes blog posts on how I painted those fabulous walls and her baby shower as well as the rest of the nursery decor are all soon to be published.
Want to make sure you don’t miss any? Subscribe to get it all, including exclusive content and my printables delivered to your inbox:
Thanks bunches! Now back to our Twine Sunbursts and Leaves!
The links in this post may include affiliate links, which means if you purchase anything using these links, you pay no extra, but I may receive a small commission that helps keep this blog running. I truly appreciate you using affiliate links whenever possible. Please know that I will never recommend a product I do not believe in!
TABLE OF CONTENTS:
Oh the Versality!
One of the things I love about this project is its versatility!
I made it with our granddaughter’s nursery in mind. But a ‘tween bedroom, breakfast nook even a fun family hangout room and so many more spots could be livened up with these fun starbursts.
They can be free-standing, or wall-hanging or even mobiles.
And for colors — well, options galore!
Let’s Make Macrame-Inspired Sunbursts
Materials and Supplies–
- Twine, I sed green garden twine and household string
- Cardboard or Plastic Carryout Lids for form
- Cardboard for twine length jig
- Bleach, optional
- Watercolors, optional
- Wood Dowel and Base for Standing or Wire for Hanging
- Super Glue
- Scissors
- Pencil or Pen
- Drill and bits
Step 1) Cut Out the Form-
Determine the size of your sunburst form. Draw your inner and outer circle and cut out the donut-shaped form from either cardboard, or better yet out of plastic.
I made the green one first and used cardboard. This worked fine, unless you want to get your twine wet for either bleaching, dying, watercoloring or other color manipulation.

PRO TIP: The best form can be cut from two plastic carryout lids and layered together.
Step 2) Cut Twine or String-
Once your forms are ready, determine the length of twine you want for knotting around them.
Using a piece of cardboard, or something similar, as a jig, wrap the twine many, many times around it and cut for a quick stack of lengths of twine.
Step 3) Knot Twine Around Form-
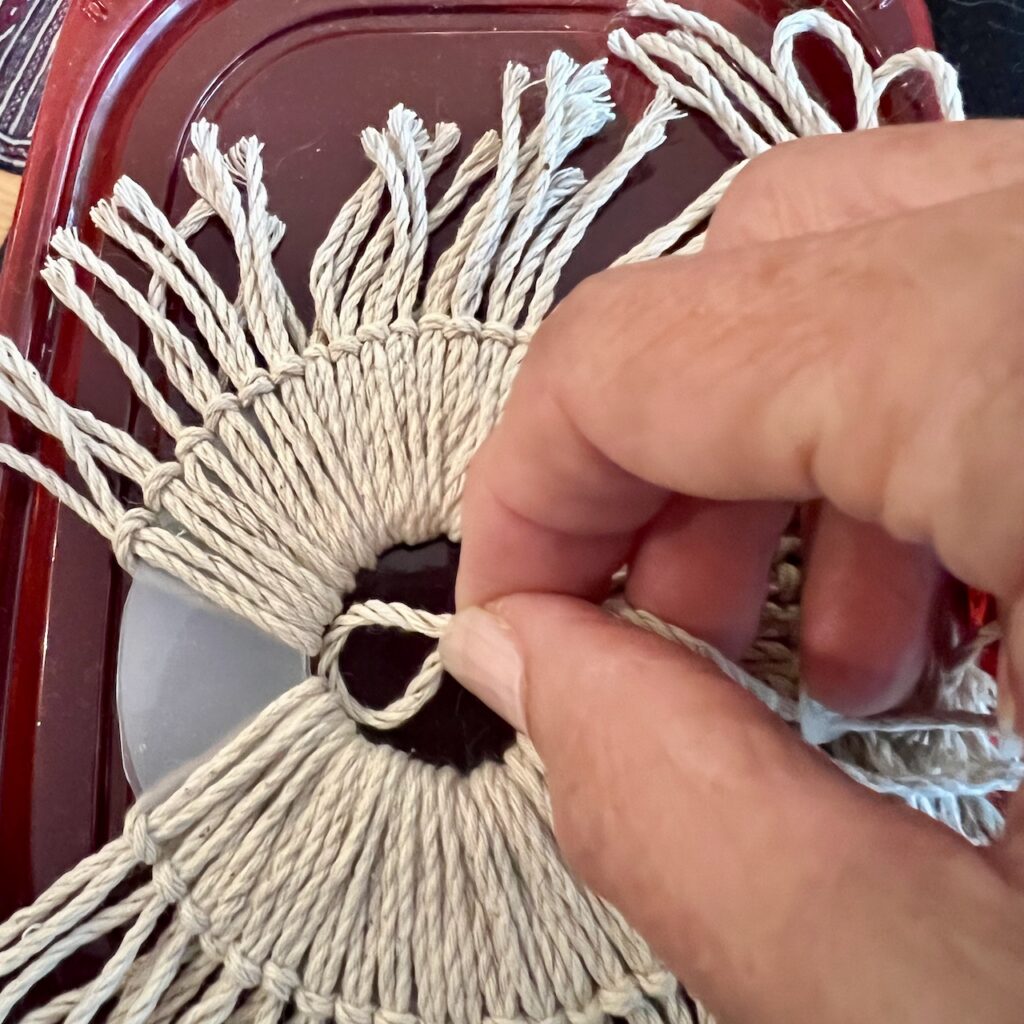
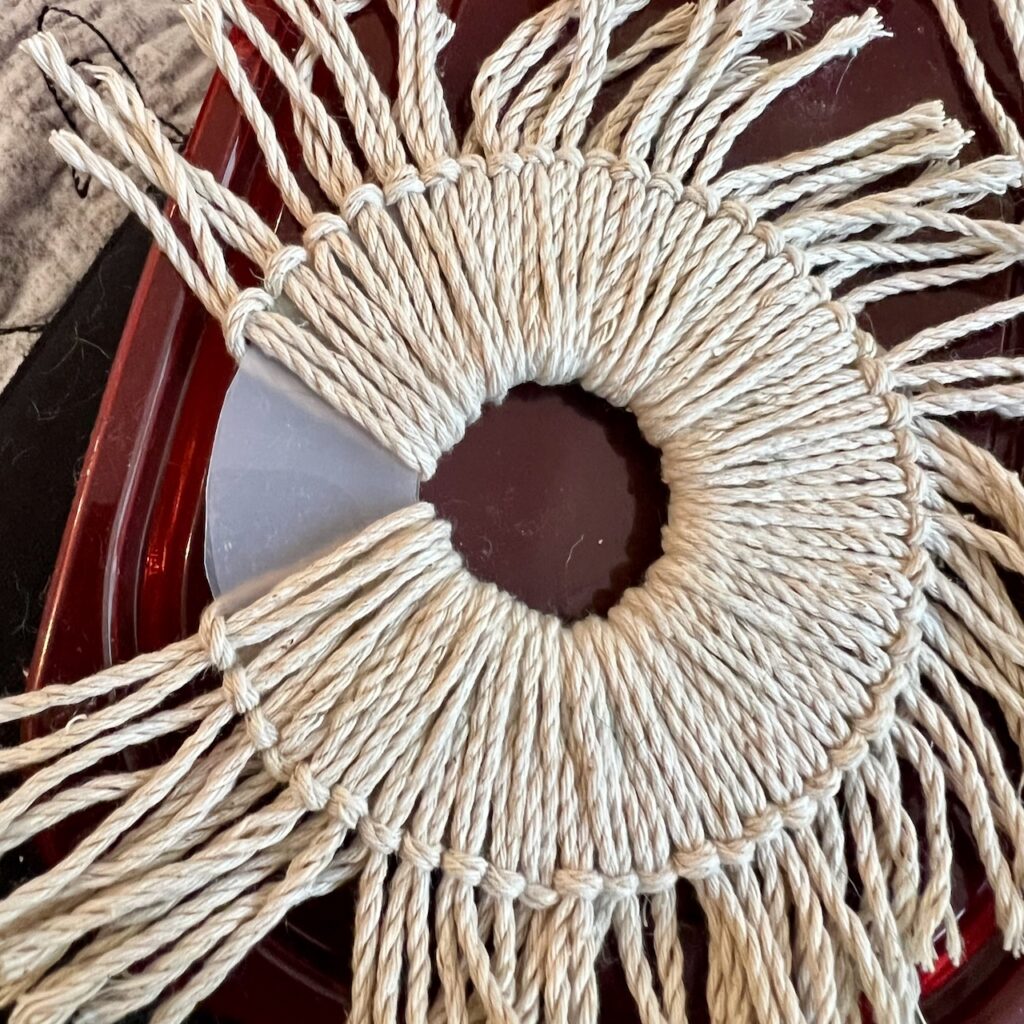
Your sunburst is basically each length of twine slip knotted around the donut. The only real trick is to be sure to have all your loops on the same side. Just be consistent in how you tie your slip knots
Step 4) Optionally, Alter Color and Comb Out Ends-
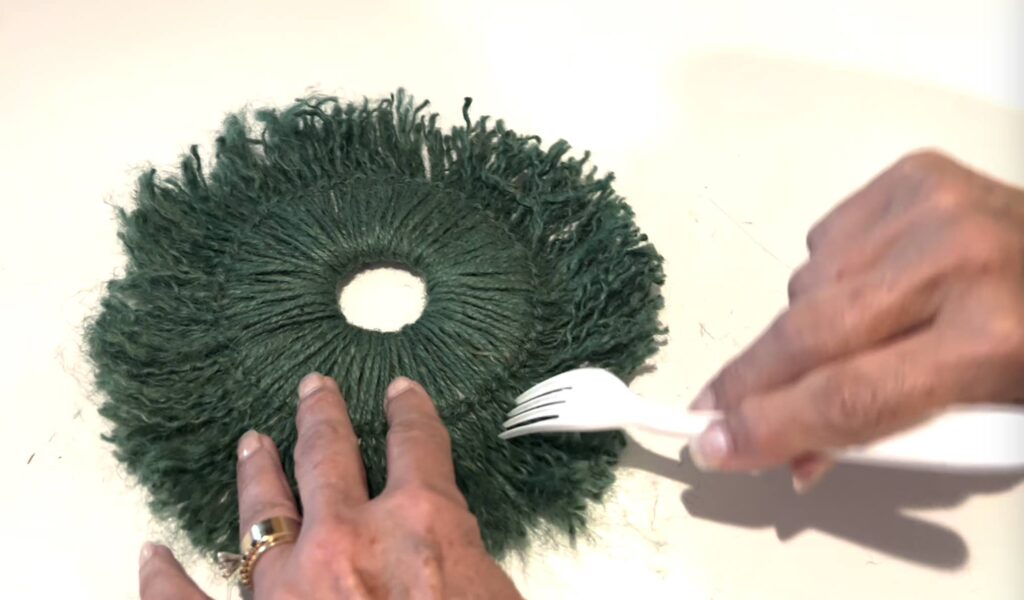
Combing is as easy as untwisting each strand of twine and then raking through it. I used a plastic fork. Keep in mind that combing is optional and whether you comb it before or after altering the color will affect the final style.
Ready to customize your sunburst? Let’s get creative! You can totally transform your twine with:
- Bleach
- Dye
- Watercolors
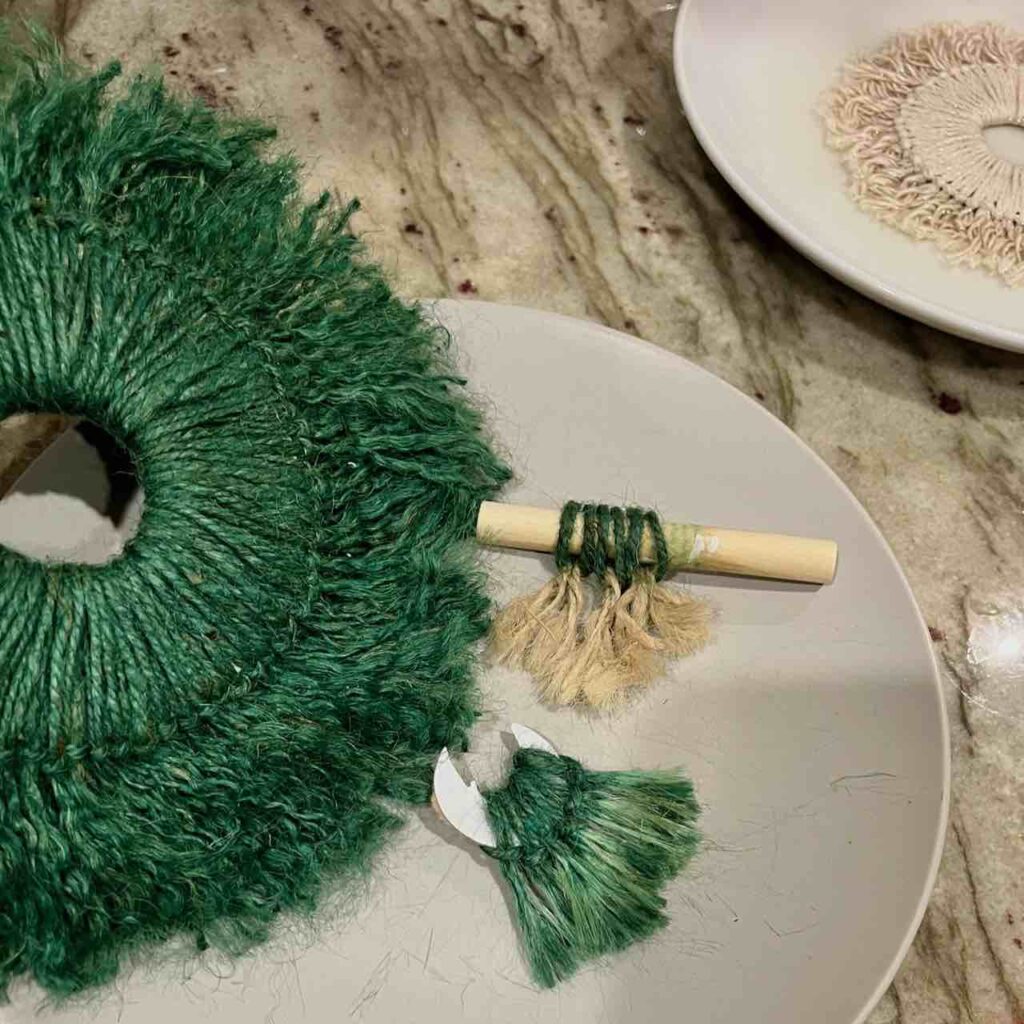
I strongly suggest experimenting on some samples.
And experiment with the different effects that result from starting with combing or starting with coloring.
With bleach, you can go for a subtle ombre by brushing the bleach on the loose strands and then rinsing off the strands or you can go bolder by dipping the strands for a minute and then rinsing.
I experimented with the options and decided I wanted the softer ombre look with the green lightening towards the tips of the sunburst.
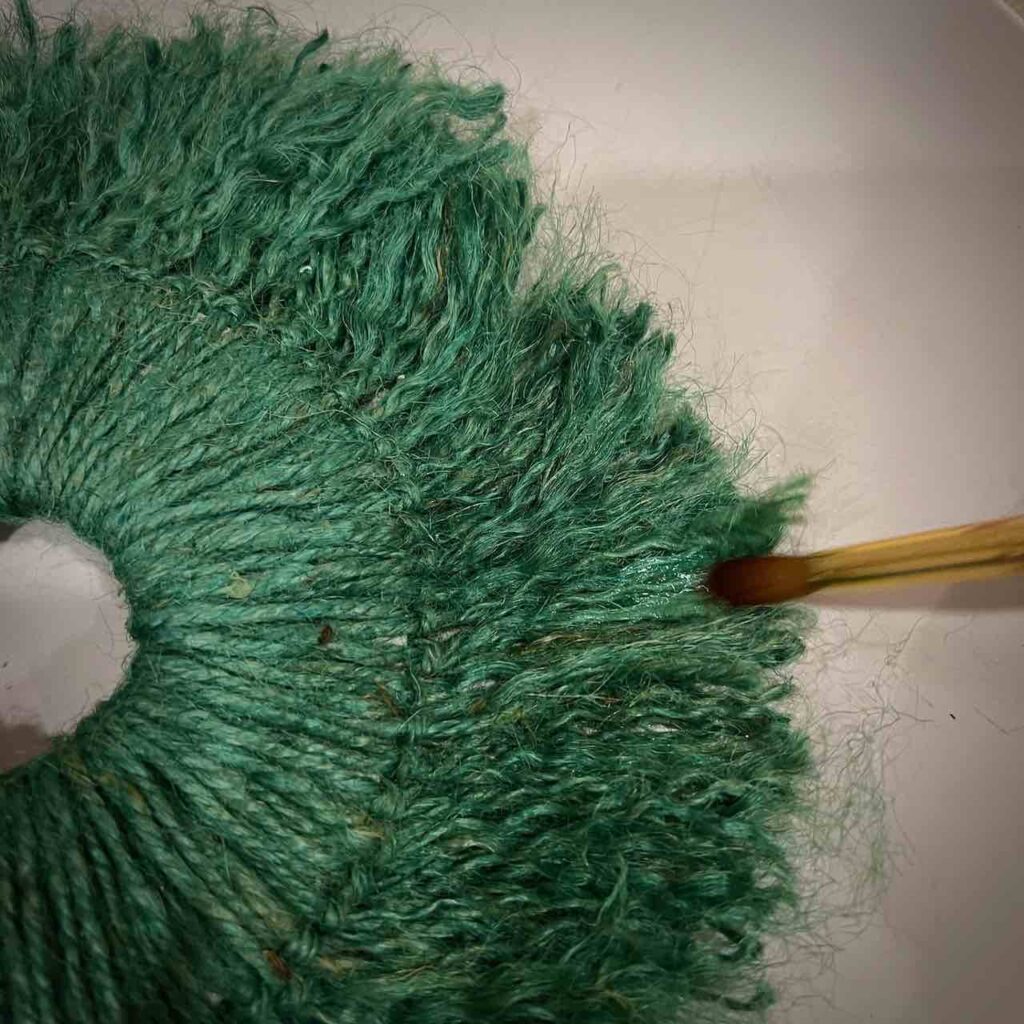

So I brushed on some bleach around the edges, leaving it on for a brief time and then rinsing with water, trying not the get the body of the sunburst wet.
For the smaller cream one, I thought I’d brighten the cream with bleach before I tied the lengths around the form.
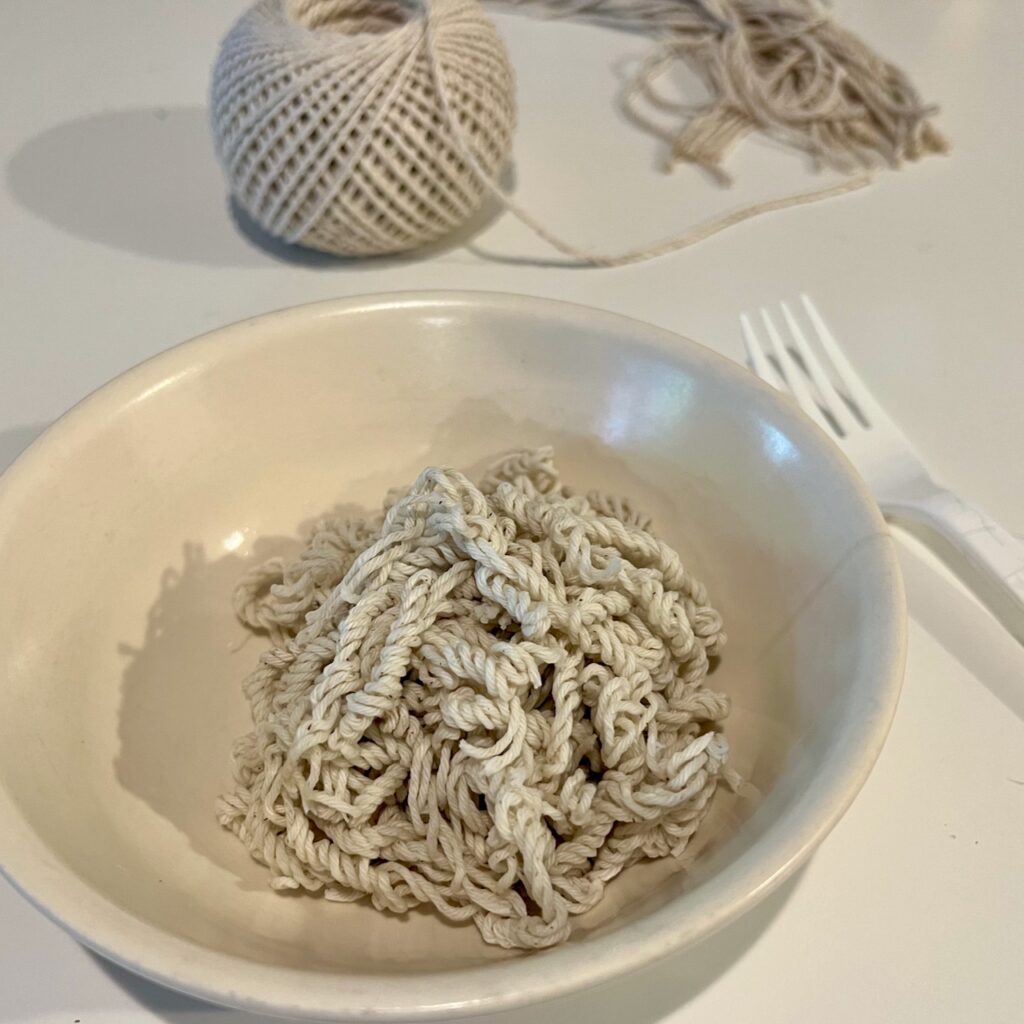
Obviously, I didn’t think this through well!!!
Wetting the string loosened up their twisting and it became more a bowl of pasta, than an easy-to-work with craft medium.
But I did learn!
For one, I learned that with this string, I didn’t need to untwist each strand by hand, but let the bleach do it for me.
My light one, I bleached the entire sunburst by pouring bleach over it and letting it sit in the bleach on a rimmed plate. If you do this, be sure to flip it so both sides are well covered.
I liked the loose curls as a counterpoint to the straight fuzziness of the green one.
I also learned that I needed a moisture proof form, and this is where I came up with the idea of using plastic lids for the form.

If your sunburst is a lighter color and you want to introduce another color, experiment with water colors or fabric dye like I did here.
I expect I’ll be doing this for a Fall piece for our family room! I started with natural jute that I dipped in bleach after slip knotting it around my form. Then I rinsed out the bleach and brushed on some watercolor paints to introduce a bit of color.
I’m crazy about it!!! Just not for our little one’s nursery.
Step 5) Optionally, Stiffen–
The green garden twine, was plenty stiff, especially after unraveling and combing it out.

However, the cream string was a but limp and wanting to droop, so a heavy dose of maximum hold hairspray on each side did the trick.
Step 6) Optionally Add Stand or Hanging Loops–
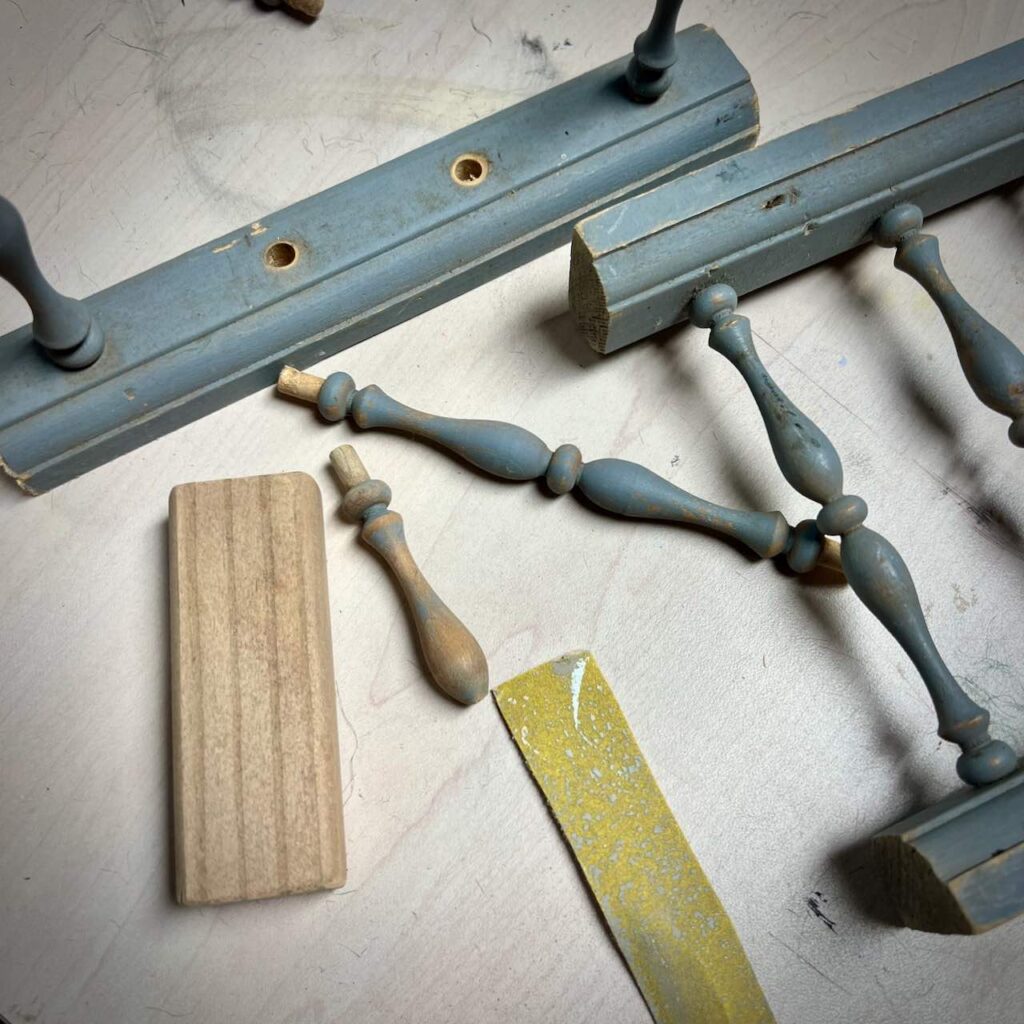
I used a small scrap of wood for my base and two small spindles from my stash for the support. I drilled holes to hold the spindles and added super glue.
Then, again with Super Glue the top of the spindles were glued to the back of the sunburst forms.
For hanging, slip a piece of wire under some twine on the front, inserting the two ends through the form to the back side. Wind them together and use for hanging over a nail or hook.
Now Let’s Make Twine Leaves
Materials and Supplies-
- Twine
- Florist wire, I used Green, gauge
- Super glue
- Needle nose pliers and wire cutters
- Thin cardboard or thick, stiff paper
- Pencil or Pen
- Scissors
- Drill and bits
Step 1) Cut Wire Lengths-
I suggest a double length of wire for each leaf.
Step 2) Draw an Cut Leaf Shapes
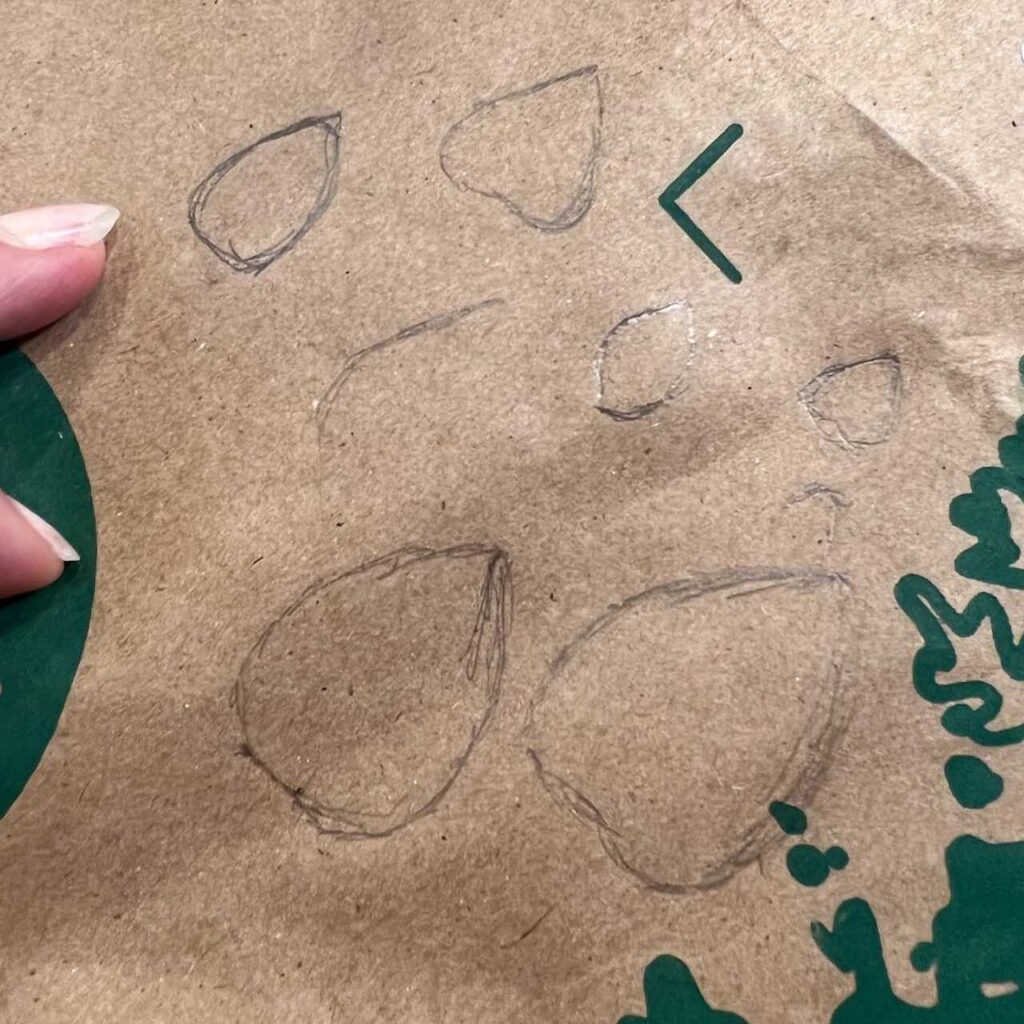
Draw your desired leaf shapes on heavy paper or thin cardboard. I used an insulated brown grocery bag.
Cut out two of each leaf shape and size.
Step 3) Cut Twine Lengths-
Using a jig like we did for the sunbursts, cut good number of lengths of twine.
PRO TIP: It is better to have your lengths longer than you need. You will trim them to the proper length and shape
Step 4) Knot Twine Around Wire Stems-
For the leaves, start with a single slip knot at the center of your wire.
Fold the wire in half, and bend it onto itself as tightly as possible. Your needle nose pliers are great for this.
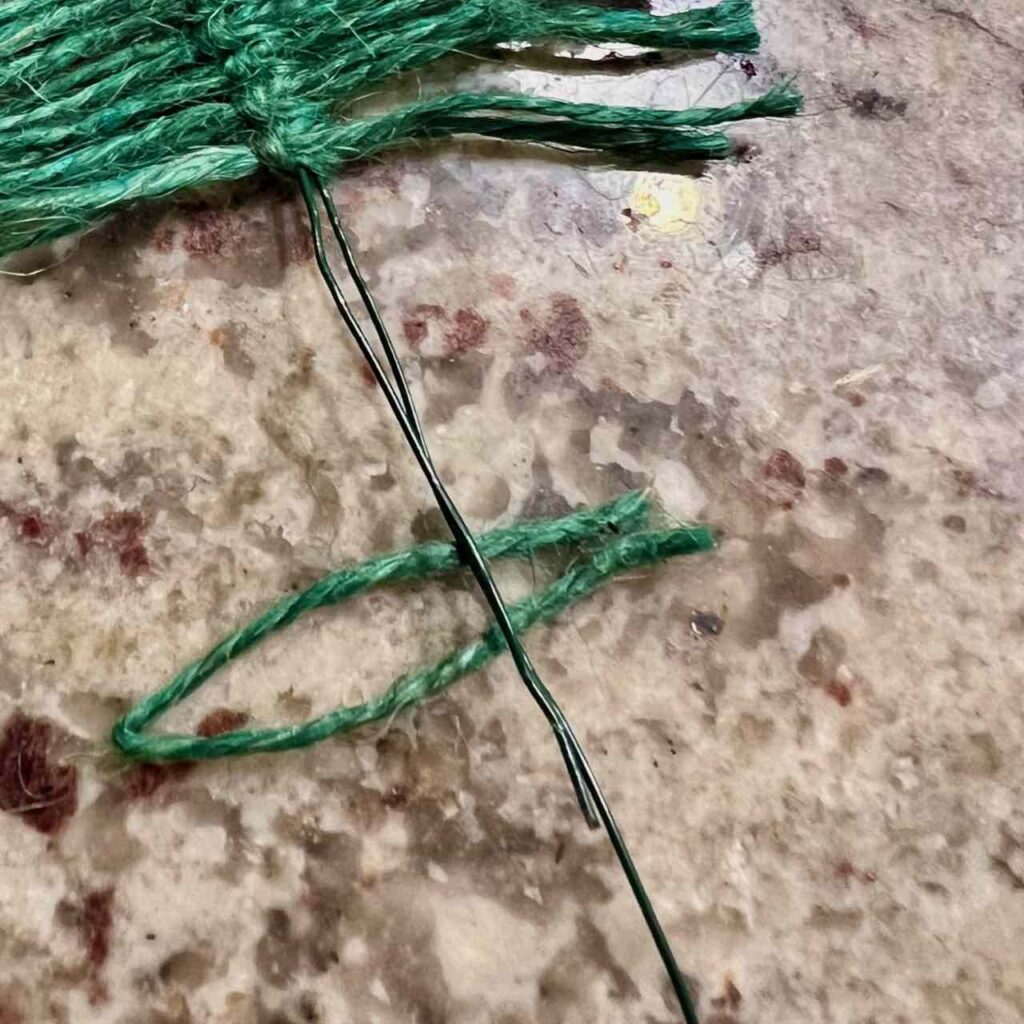
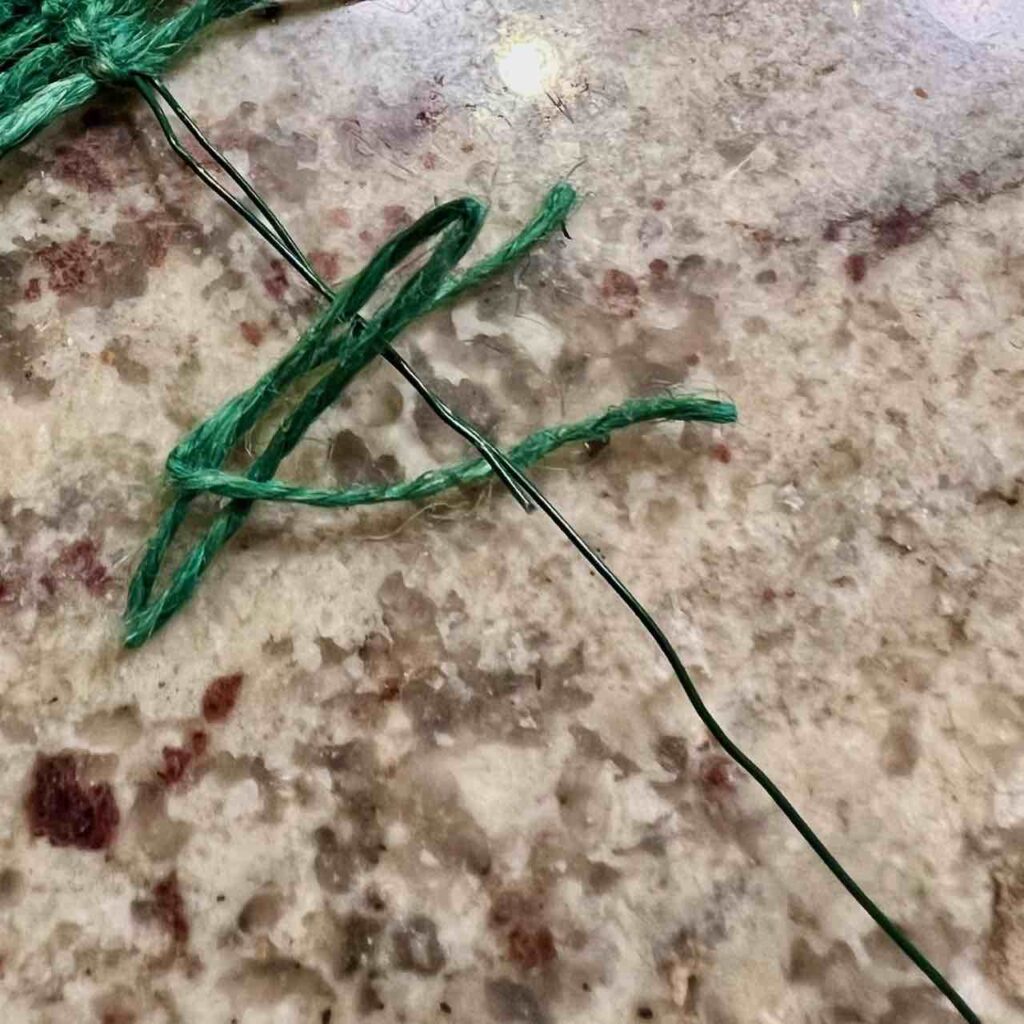

Now using a double slip knot, tie two lengths of twine around the two lengths of wire.
Slide them up the stem as tightly as possible.
When you get to the last pair of twine for each leaf (matching the size of your pattern), knot it around only one of the wires, slide it up next to the other pairs.
Then lock it in place by using the needle nose pliers to twist the wires around each other forming a thick stem.
You’re right!!!
These directions do not follow the pictures exactly. That’s because I figured out an easier, more effective way of creating the leaves. So follow the written directions with the picture to help with three double slip knot.
Step 5) Trim the Twine to Leaf Shape-
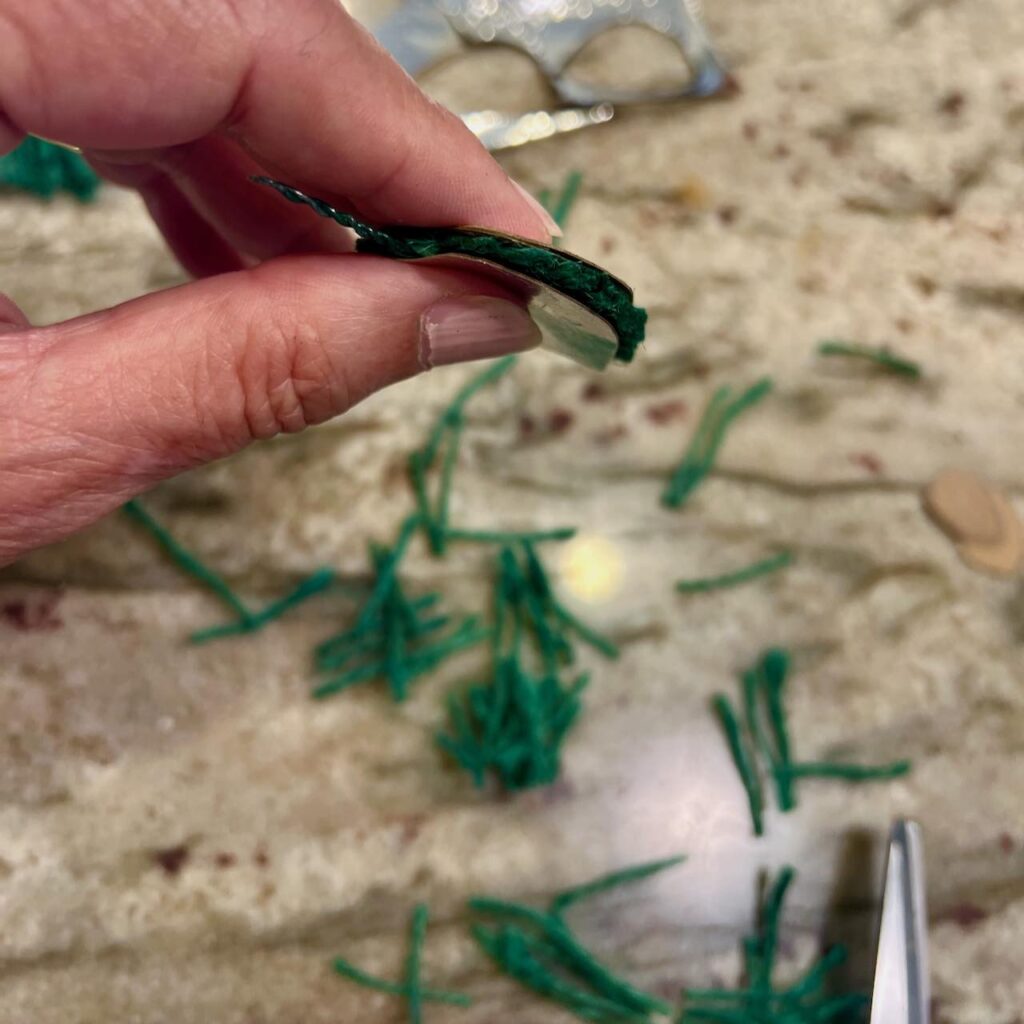
Here’s the reason you cut two pieces of each leaf pattern.
Hold the two patterns tightly sandwiching your leaf and with scissors trim around the pattern.
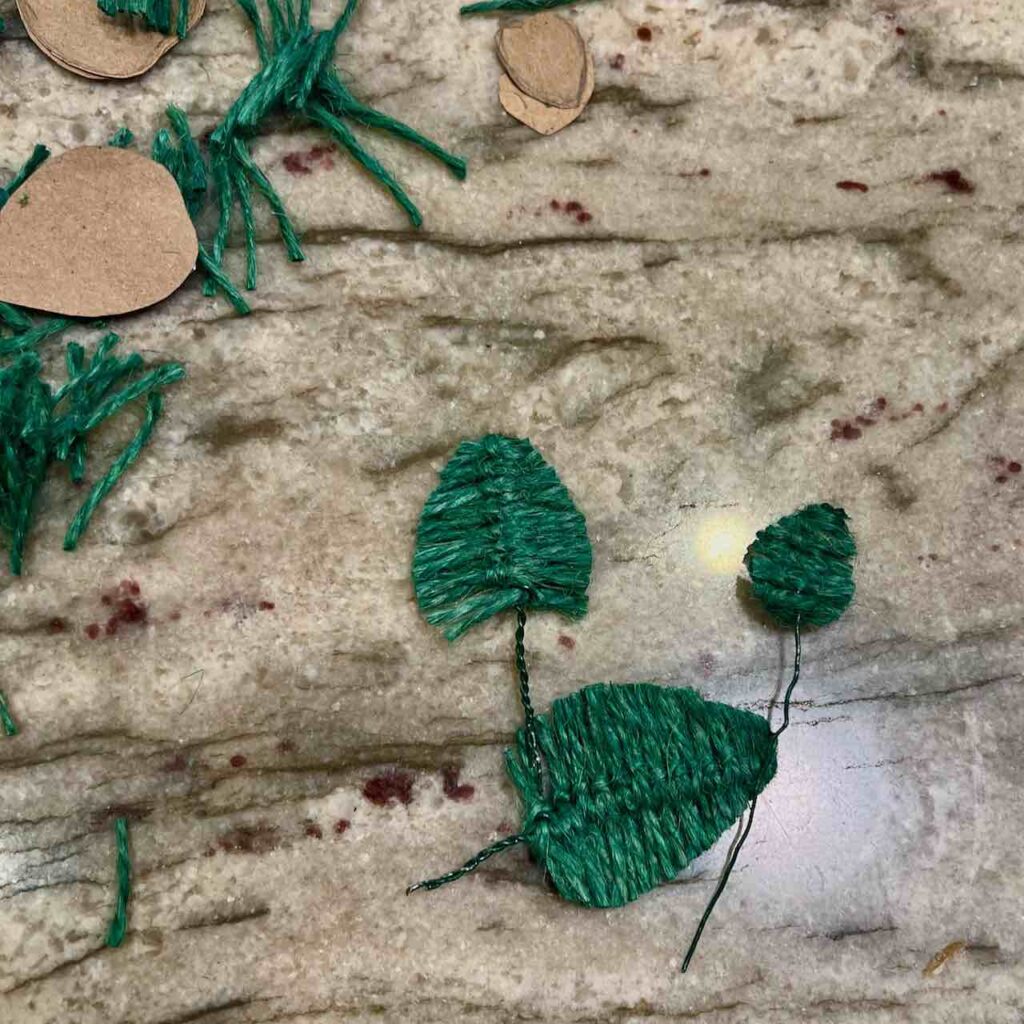
Step 6) Optionally, Color and Comb Leaves–
Just like with the sunbursts above.
I chose to keep my leaves simple on this one. Next time, I think I’ll comb them too.
Step 7) Attach to Stand-
I used a thin drill bit and drilled holes where I wanted my leaves to go.
Then with a dollop of Super Glue on the end of the wire, I held them pin place for a bit and they were good to go.
What Will I Do Differently Next Time?
I love this craft! Isn’t it fun? And so easy and inexpensive!
But I generally always learn something new when I’m crafting and love to share these thoughts with you to help you enjoy each craft all the more and enjoy the greatest success.
I would use a larger base. This narrow block is not particularly stable like I would want. I would probably use a crafting plaque like this or this.
I would definitely make my leaves larger and maybe make the green wreath a bit smaller and more variegation in the ombre effect. I would also make it with a plastic form
The off white one, I love as is! I forgot to trim the ends of the starburst to even up the lengths. But it doesn’t rally bother me because of it’s curly casual vibe.
Tell me what you think — honestly! And what would you do differently?
And then once you leave me a comment below, be sure to jump over and check out all my friends rope crafts! They are all so clever and stylish!!
Just click on each picture or name below and tell them I sent you.





Your sunburst pieces are fabulous, Diane!! I love your creativity and especially the gorgeous green! The addition of the stems and petals is the perfect finishing touch!
These look amazing Diane. You come up with creative ideas.
Congrats on your first grandchild! I’m so happy for you and your family!! I love that you made this for the baby’s room and can’t wait to see the rest of the nursery! This is such a creative idea, Diane! These are so cute and I can’t believe how easy they are to make! The leaves are such a special touch! Pinning now!
What a cool gift idea, Diane! I love that you made these with your grandbaby in mind. It’s so sweet and thoughtful! I love the colors you used and how they add such a pretty layer of texture too. I could totally see your bowl of pasta in an art museum – it’s super creative. Safe travels home and sending prayers for the new baby. It’s such an exciting time, CoCo
How sweet that you made these cute sunburst disks for your grand little’s room. I can’t wait to see photos of the decor. I’m always impressed with your darling projects Diane, and thanks for sharing the ups and downs of crafting too! To me that’s what makes it fun!
Ups and downs for sure! I agree that’s what makes it fun. One of my favorite parts of crafting is the trial and error and figuring out the best way to get the results I want. I love puzzles and that’s how I approach crafting.
Diane, these sunbursts are fun and boho-chic! I want to make some with my granddaughter. She would love them. Congratulations on the birth of your sweet granddaughter.
Thanks bunches Tammy! I almost didn’t write thee post because they are so darn easy! But I know that’s a plus for lots of people. It would be fun to make with your granddaughter – guaranteed success without a lot of intricate steps.
The boho sunbursts are adorable! I learn something new with each new project too which keeps it all interesting!
Isn’t that the truth!!! I think my favorite part of crafting is the figuring out how to do something — even more than the finished craft! Kinda crazy!
The sunbursts are perfectly boho and genius, Diane. Thank you for sharing this inspiration with us. Pinning for future reference.
Kelly, you are there best! Thanks for your kind words!!!
Boho Fabulous! This is so unique and chic. I especially love the ombre detail. And so amazing for your grand little’s room! As always, you and your project are amazing!
Awww Shucks Missy! That is sooo kind of you!
Diane! First CONGRATULATIONS on being a grandmother! Second – your project is amazing. I would never have thought to make leaves in the way you did. They turned out SO good. Love the entire project. Pinned!
That’s just one of the reasons I love crafting. Even when we have there same materials and want to make the same thing, we still go about it in different ways. There’s no true right or wrong!
Such a great way to upcycle plastic lids, Diane!
Thanks so much Beth! Funny how I ended up there when really the intent all along was cardboard. But the plastic lids is much more effective and being clear, helps to hide them alltogether