MCM Dresser Flip: A Changing Table with Raw Wood, Rosy Drawers, and Two Detours
Nobody followed the plan, and the dresser is better for it. Here’s how to chalk paint a dresser, keep the raw wood, and seal it all for years of nursery life.
This post is sponsored by the good people and products of Dixie Belle Paint Company.
They provided the products. The opinions and mid-project detours are all mine.
Please know that I only recommend products I believe in!
You know how some furniture just announces itself.
This mid-century dresser did just that, from a neighborhood vintage consignment shop in DC.
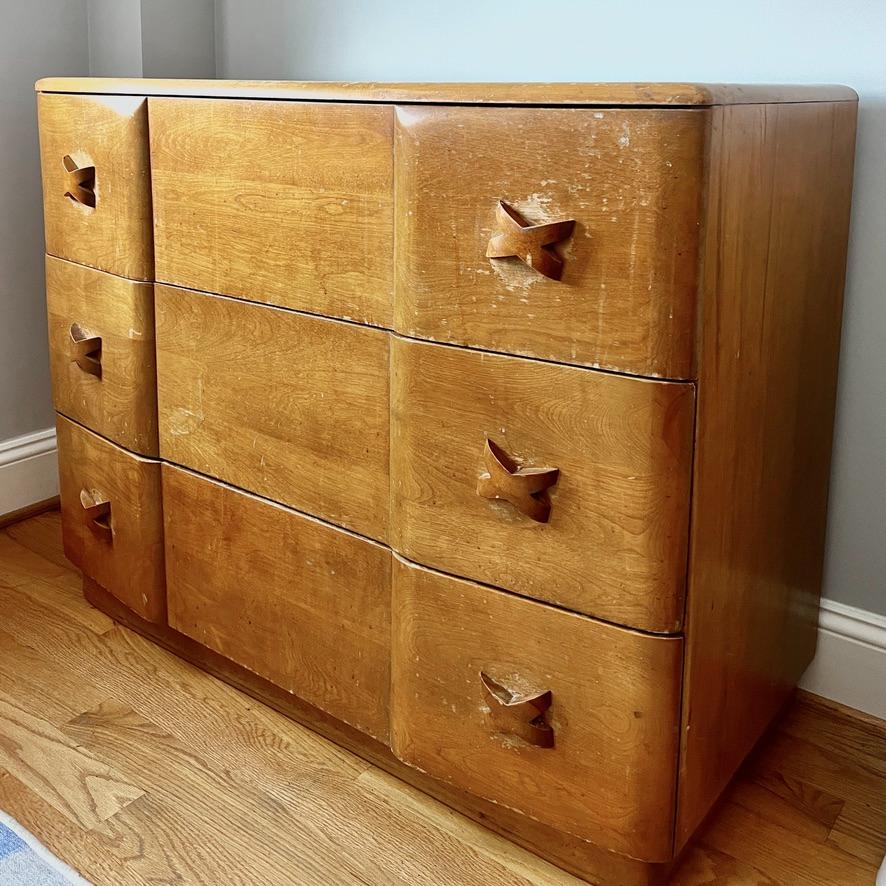
Soft curves, rounded edges, and exactly the right size for a nursery. (It came with an attached mirror too, but that’s a story for another day.)
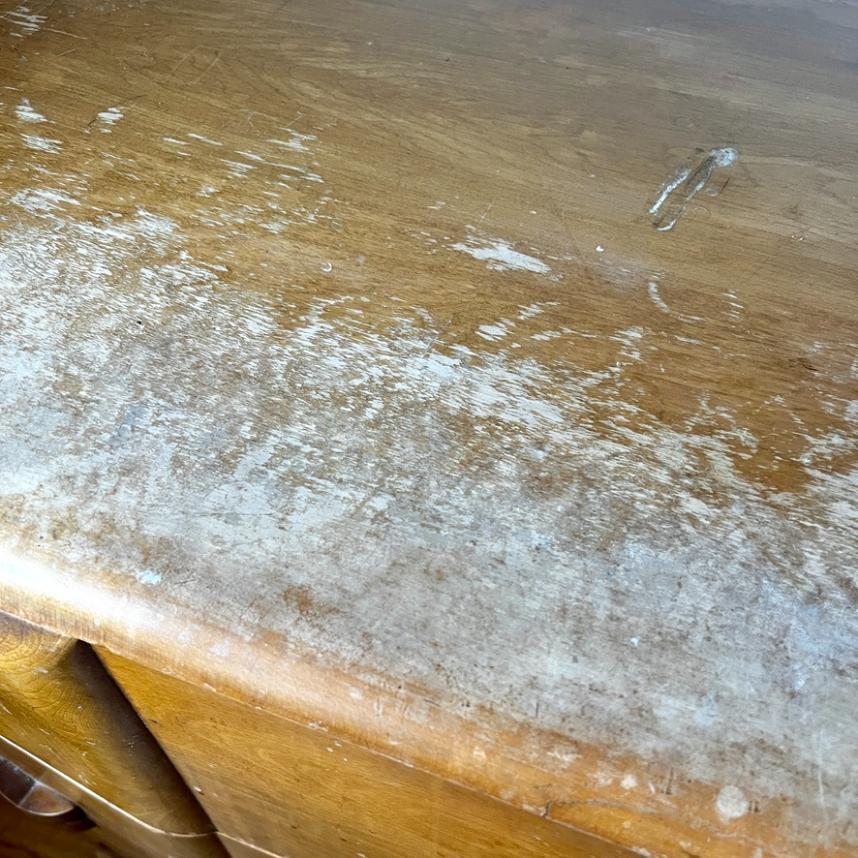
That top!
The plan was simple: a little intensive sanding, a walnut stain paired with some paint, probably dusty blue.
Spoiler alert: nobody followed the plan, me included. Here’s how a vintage dresser became a changing table that can grow right along with our little L. If you’re just finding your way here, this is the 5th episode of a 9 blog post series of how we converted a home gym to a whimsical, joy-filled nursery for our newest granddaughter.
Home Gym to Sweet Nursery Series
- The Plan — planning the transformation
- IKEA Pax Closet Wall — turning wasted closet space into real storage
- Mini Attic Storage Space — claiming the space most people leave empty
- Decal + Paint Accent Wall — adding a playful “watercolor” touch to a simple decal
- MCM Dresser to Changing Table — (you are here) a vintage dresser gets new purpose
- Peekaboo Stenciled Drawers — a surprise hiding inside the changing table
- X & O Drawer Pulls — oversized, playful, and made by hand
- Scalloped Roman Shades — solving light and privacy in style
- The Nursery Reveal — the whole room, start to finish
The links in this post may include affiliate links, which means if you purchase anything using these links, you pay no extra, but I may receive a small commission that helps keep this blog running. I truly appreciate you using affiliate links whenever possible. Please know that I will never recommend a product I do not believe in!
Let’s Get Started on our Dresser Makeover
What You’ll Need:
(Click to Expand)
The Roadmap (With TWO Detours)
Original plan: sand the top and sides, stain them walnut. And bring in a light denim blue on the drawer fronts.
Straight forward, right? HA!
When the top and sides were down to bare wood, I applied the pre-stain conditioner as prep for the walnut No Pain Gel Stain. However, our daughter Katie, walked in the room, took one look and declared, “That’s it!”
What? In Katie’s eyes, all those grains and tones (probably even different varieties of wood) had way more personality than a uniform stain ever could.
If you know Katie, you know matchy-matchy is not her thing.
The drawers followed their own detour.
Katie started with a soft denim blue vision. Then she saw it next to the sage green wall sample and the raw wood, and it just didn’t sit right for her.
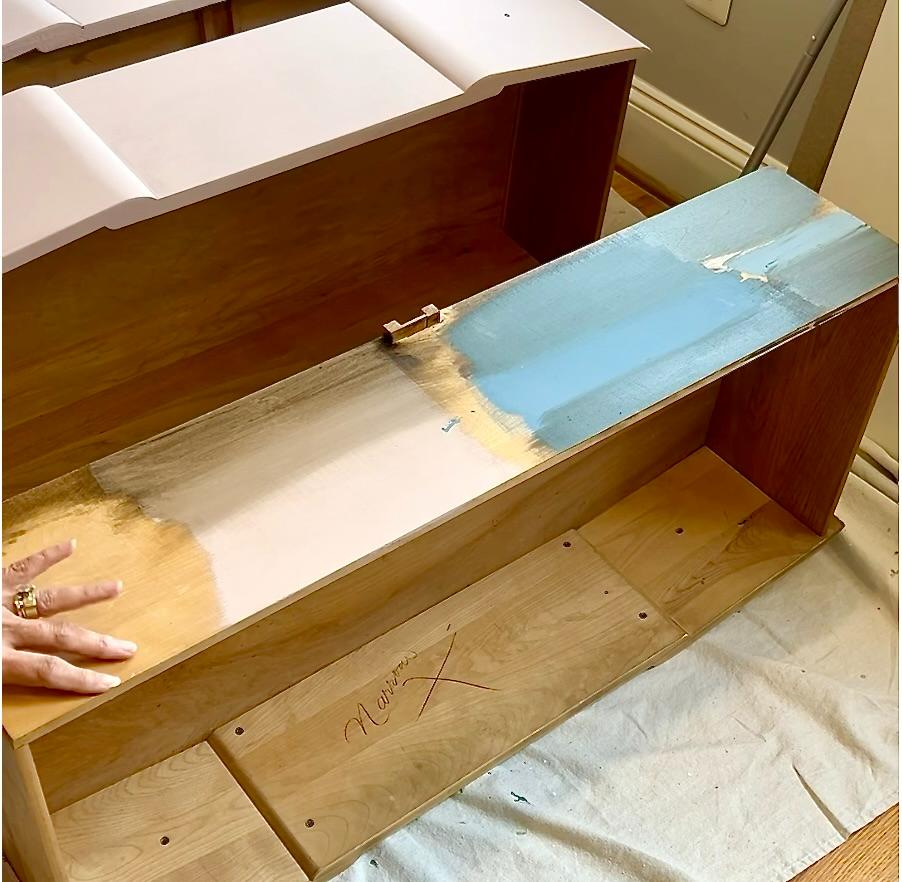
I had ordered Dusty Blue, with Cotton, and Magnolia so I could tone the blue down if needed, and luckily, I had snuck in Tea Rose for some surprise accents. I swatched both colors on the back of a drawer: straight from the jar, then diluted 2:1 with Cotton, then 1:1. I even wiped a little Walnut No Pain Gel Stain over the blue and the rose to see if they’d play nice together.
The winner of all these swatch tests? Tea Rose, straight out of the jar.
Very rarely do I have the whole vision before I start a project. I usually end up changing or adding something along the way, and honestly, that’s my favorite part.
Katie is her mother’s daughter!
PRO TIP: Swatch your color before you commit: straight from the jar, then diluted a couple of ways. Do it on the piece itself (the back of a drawer is perfect) and look at it in the room’s real light.
Steps From MCM Dresser to Changing Table
Remove the Old Hardware
First things first: hardware off. Grab a screwdriver and pliers.
PRO TIP: If the drawer pull spins while you twist the screw, use the pliers to hold the pull still while you turn the screwdriver. And if an old screw simply won’t budge, flip it. Hold the screw still with the screwdriver and turn the pull itself with your hand or pliers.
Don’t forget to bag all the hardware together so nothing gets lost through the makeover.
Clean and Prep
I always start with a good vacuum and cleaning, getting into every nook and cranny, plus the undersides and insides.
I highly recommend Dixie Belle’s White Lightning. It even helps with musty odors! I like the concentrate, which looks like crystals. Mix it into warm water and apply with an automotive sponge or an old t-shirt rag, something that won’t leave lint behind.
Then rinse it thoroughly with a clean, damp rag or sponge.
I prefer sanding to chemical strippers. But you do you to get the finish off.
If you’re sanding, do not skip using a succession of increasing grit numbers as you go. I usually start with 60 and make my way through maybe four levels to end with 300-grit. It truly makes a difference!
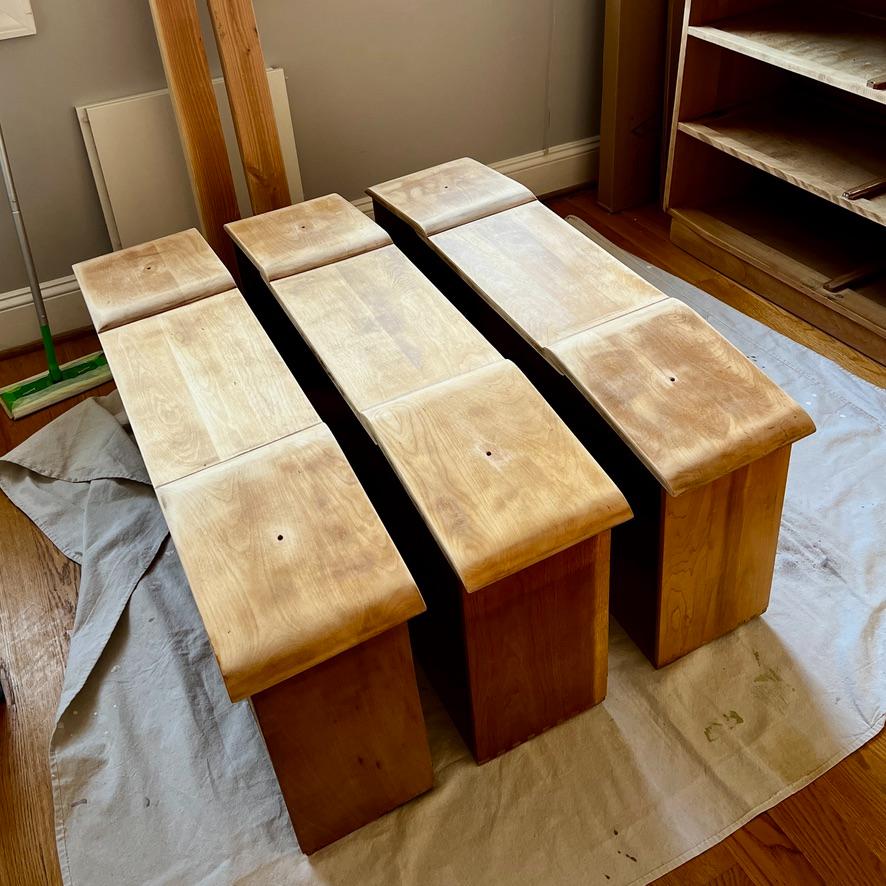
So once everything is completely dry, sand it, then wipe it down with a slightly damp t-shirt rag. (A sanding block or two would work, too. Your arms would just have opinions.)

Chalk Painting The Drawers
Bonding Boss: The Sunscreen Step
Start the to-be-painted drawer fronts with a primer. I used two coats of Bonding Boss.
Technically, this is optional. Particularly with Chalk Mineral Paint, it sticks so well, I often skip this step.
But this dresser will be toddler-tested for years, not just admired. And then there’s those tannins and other staining agents that may be hiding in the wood . . . sigh.
Think of it as sunscreen on a cloudy day: skip it and nothing happens… until it does. Ouch!
Same trade-off with furniture: twenty minutes of Bonding Boss now, or possibly weeks of stripping and refinishing later. Ouch!
PRO TIP: I also reach for Bonding Boss any time there’s a factory finish that might cause trouble down the road. Cheap insurance!
Paint
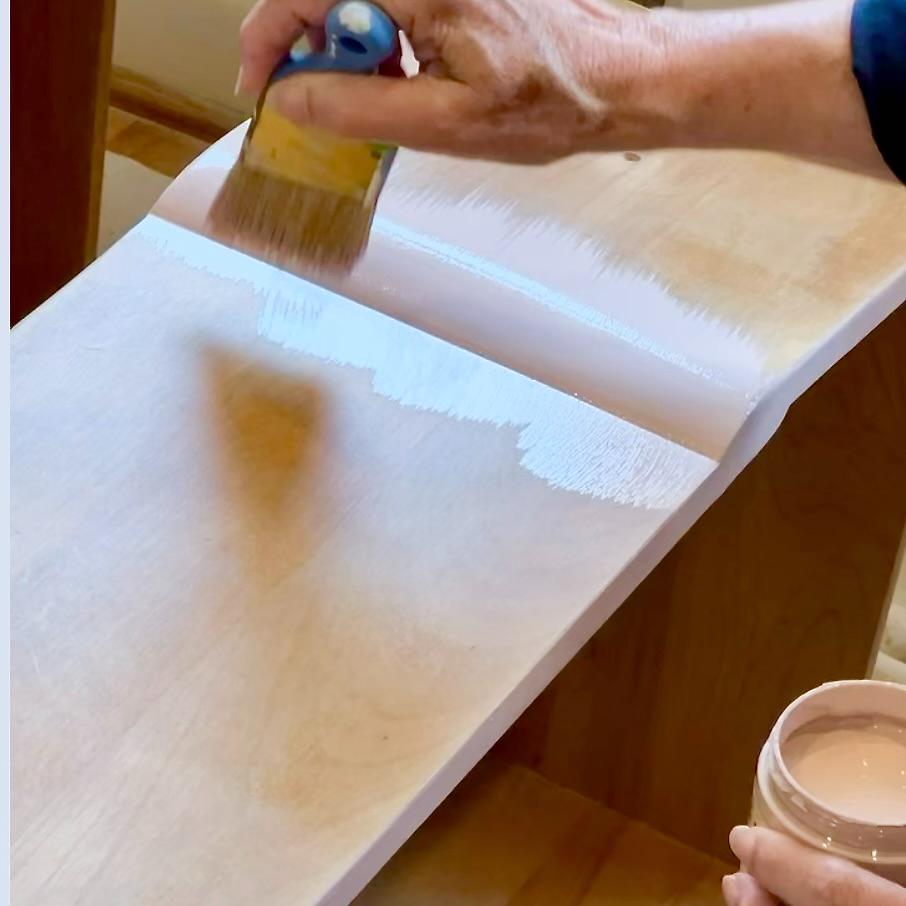
Let the Bonding Boss cure for 24 hours, then it’s paint time.
I used two light coats of Chalk Mineral Paint in Tea Rose. I’m firmly in the two-light-coats camp, not the one-heavy-coat camp. Better, even coverage, fewer drips, smoother surface.
Chalk Mineral Paint is one of the most forgiving paints to work with. The one thing you need to remember is to keep your brush and your surface “wet.” In paint terms that means moist or damp, not dripping wet.
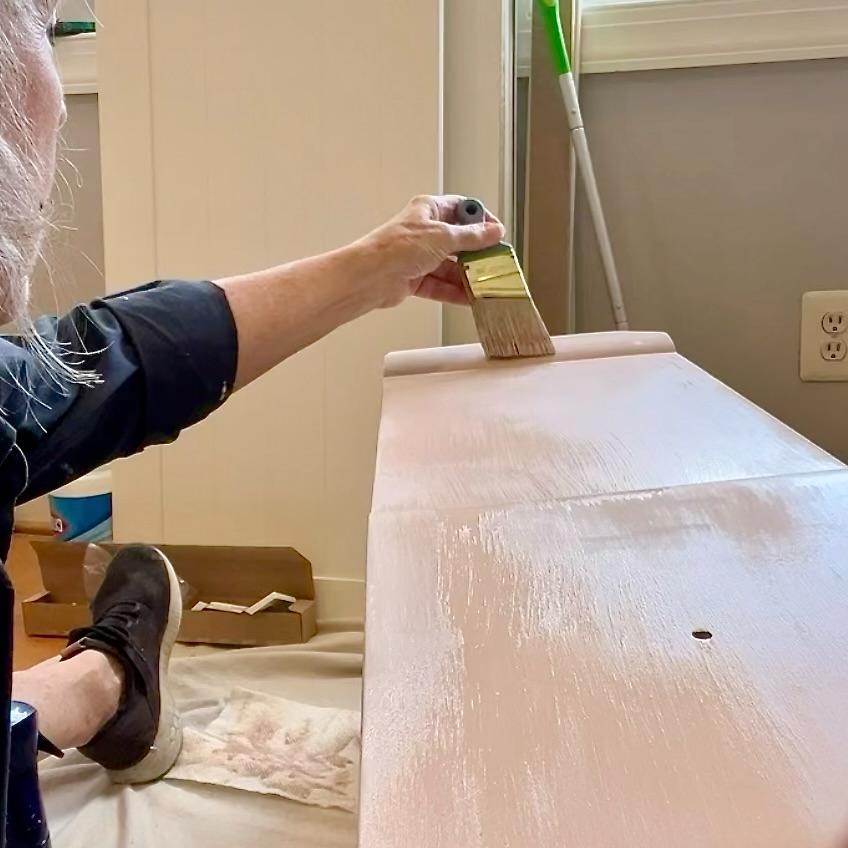
My secret is my continuous misting water bottle. The results are so much better than using a traditional spray bottle. You can spritz the surface, or spritz the brush either before or after you dip it in the paint. Try each way and sees which works best for you.
PRO TIP: When the brush starts pulling or dragging, even making a subtle scratching noise, give it a quick mist. You’ll feel the difference immediately.
Misting also keeps the edges of your painted area “wet” as you work across the piece, so you get one long, clean surface without brush marks where your strokes begin and end.
Allow 15 minutes between coats, I gave each drawer front a very light buffing with a sanding pad (220 grit). And the paint will be fully cured in 21 – 30 days.
Quick Pause to ask if you are finding this helpful. Would you enjoy more? Subscribe to my emails to never miss a thing:
Thanks Bunches! Now back to the dresser flip:
Whitewash Highlighting
Please don’t let whitewashing, antiquing, or any highlighting faux finish intimidate you, especially with my favorite painting tool back in action: a continuous misting water bottle and an old t-shirt rag.
I did this once the Chalk Mineral Paint is good and dry. I was able to let mine rest overnight.
I just wanted a little depth, a nod of character, nothing shocking.
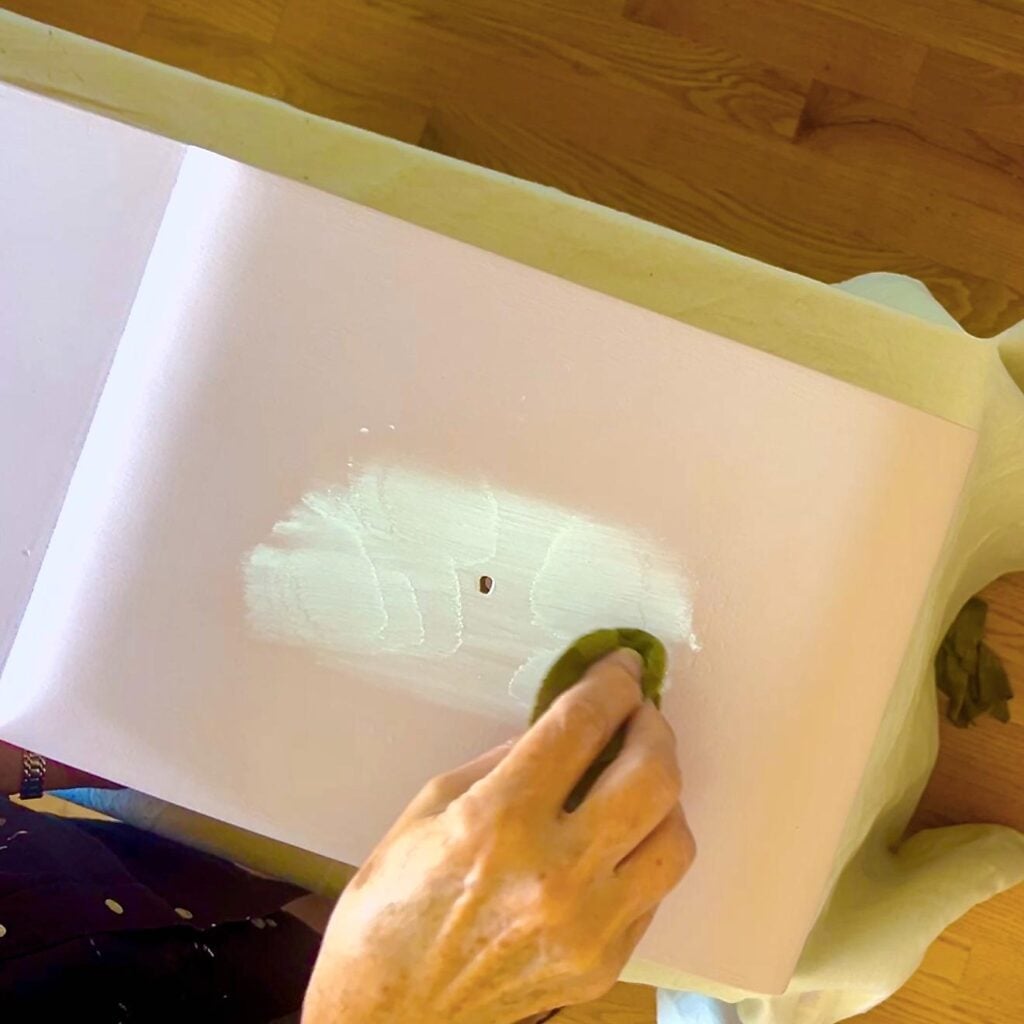
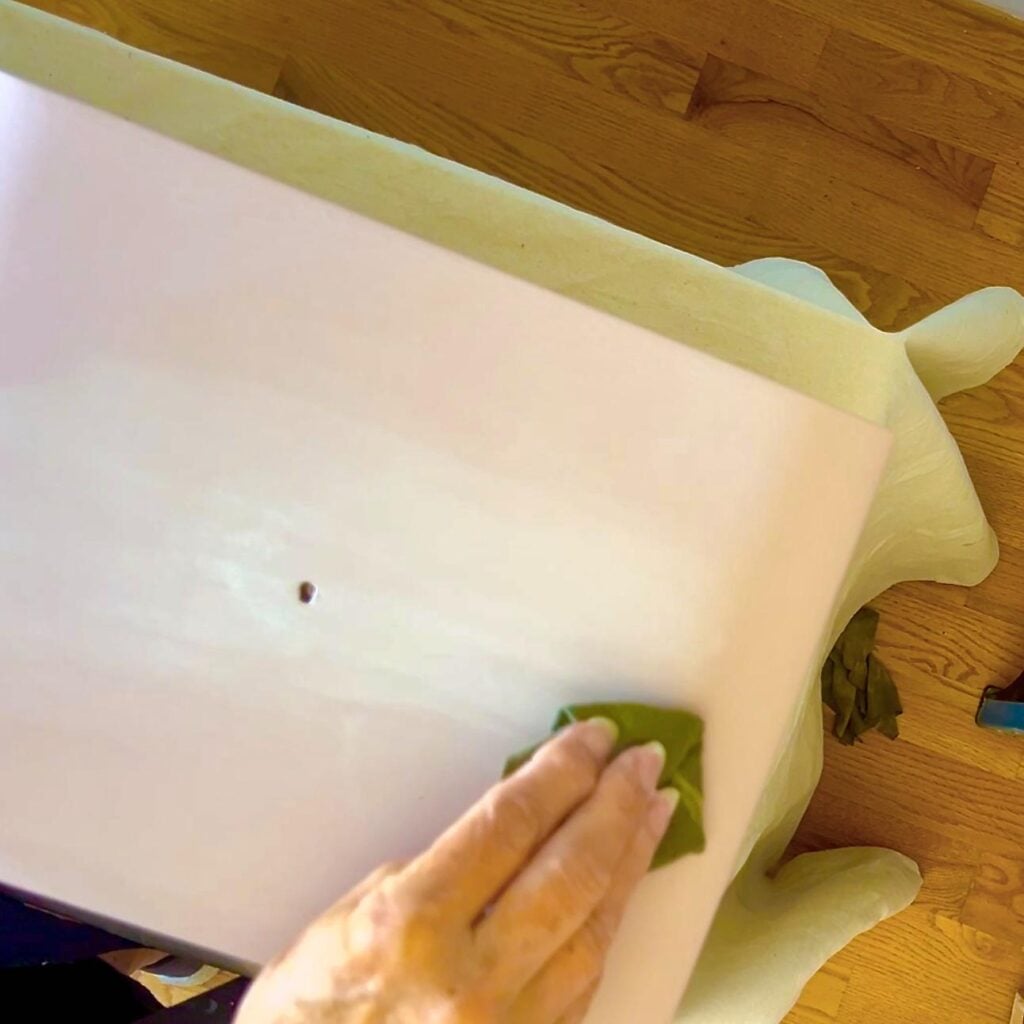
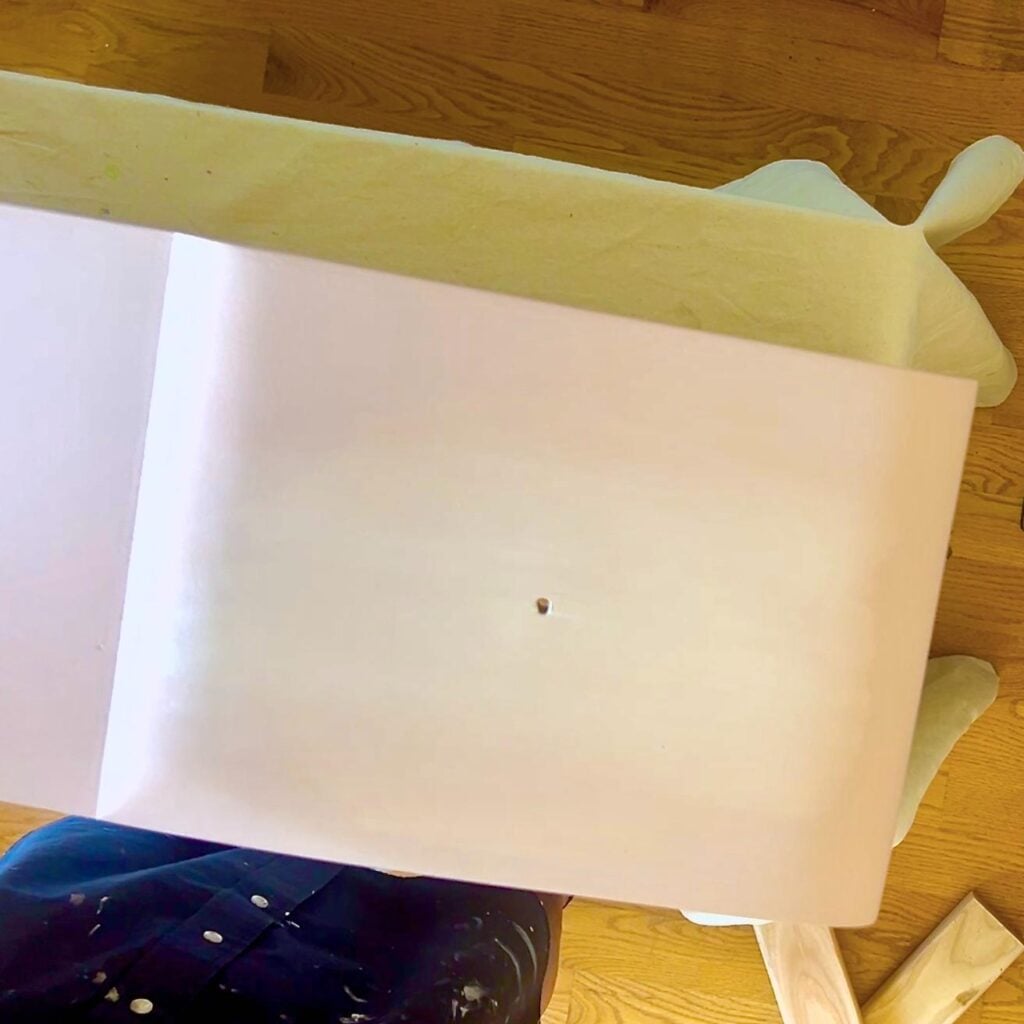
Dab your brush in Magnolia, then brush it on a paper towel until most of the paint is gone.
Now you’ve got a truly “dry” brush. Lightly brush it onto any raised edges or details. I wanted the highlighting in the center of the raised drawer panels where the handles go.
We weren’t after brush strokes here, just a soft fade so the color doesn’t read flat. So I gave the spot a light mist of water and gently spread the Magnolia side to side with a rag.
When all six spots were done, one was a little too strong. A spritz of water and some firmer rubbing, and it matched the other five.
Then after all were dry, with the strong afternoon sun streaming through the windows, I noticed (remember, I’m rather persnickety) that the first drawer looked “off”. I had started with a circular movement to apply the highlighting, then I switched to a back and forth fade.
I wasn’t going for identical drawers. But once I saw it, I couldn’t not see it. So I opened the jar of Tea Rose, swiping a light layer over that one panel. Let it dry, then a fresh dry brush swipe of Magnolia, Mist and gently swiped with the rag back and forth. It really is that easy.
This is Chalk Mineral Paint’s superpower. If a step goes too far, it’s a quick and easy do-over, not a disaster. Nothing here is that precious.
My Love Letter to Scrubby Soap
Confession: I hate cleaning paint brushes!
Between coats of the same color, I just wrap my brushes tightly in plastic wrap or bags.
Between colors? I always wash them with Scrubby Soap, which is basically magic. It smells amazing, it feels good on your hands, and it makes the worst part of painting rather enjoyable.
I’m half tempted to see what it would do to the grout in my brick kitchen floor. (Haven’t tried it. Yet.)
Here’s my routine: get the soap wet under the faucet, wipe the brush over the soap side while it’s bubbling up, then flip it over and work the scrubby side into the bristles. Flip back and forth between soap and scrubby until the water runs clear and no paint is left in the bristles.
Now For the Dresser Frame and Top
Wood Conditioner and Sealing the Raw Wood
For the raw top and sides, I applied wood conditioner before sealing.
I’d brought this pre-stain conditioner along for the walnut stain that never happened. So you may be asking, “Diane, you didn’t stain it. Why use pre-stain conditioner?” Fair question!
After sanding, I had already applied it to the dry parched wood when Katie saw the wood, loved it and called for this detour.
I would have used it under any stain color for two reasons. One, it’s an easy step that takes very little product (one little tin lasts and lasts). Two, this dresser sat somewhere, abused and forgotten, for 60 or 70 years. Before tucking the wood back under a protective sealer, I wanted to give it a little nourishment.
Think of your nails after back-to-back gel manicures: dry, brittle, and begging for conditioner.
PRO TIP: With paint and sealants, oil and water are not like salt and pepper. They do not complement each other. They fight each other. Picture oil and water in a glass: the oil always wins the fight to the top. So if you’re mixing oil-based and water-based, the safest order is water-based first, oil-based on top. Water-based over oil can work, too, but only once the oil is completely cured.
This pre-stain conditioner is oil-based, and Gator Hide is water-based.
Yikes! Time to ask Dixie Belle.
Their answer: Gator Hide over it is fine once the conditioner is completely dry. Wait at least 72 hours, and longer if you put it on heavily. (My own test: if it feels greasy or tacky, it’s not ready.) So keep the coat very light and work off any excess!
I’m living proof on both counts. On the top and sides, the conditioner had about four weeks to cure before the Gator Hide, and it’s holding up beautifully. On a different part of this project (you’ll meet those pieces soon), I waited a bit shy of 72 hours and used a heavier hand. You guessed it: the finish failed almost immediately.
That rescue mission is coming up in episode 7!
Lesson learned: light coat, plenty of drying time.
Not in the mood to wait? For unstained raw wood, Dixie Belle suggests Howdy Do Hemp Oil or Big Mama’s Butta. You can also seal with their Clear Coats or Best Dang Wax.
Gator Hide: Sealing It All
Two coats of Gator Hide, in eggshell sheen, on the painted drawers and the raw top and frame. I love that it covers oil-based No Pain Gel Stain, water-based VooDoo wood stain, and Chalk Mineral Paint, so one product handles the whole piece no matter what’s underneath, or planned to be underneath.
PRO TIP: Between coats, don’t skip a light pass with 220 or 300-grit sandpaper and a wipe-down. That’s what gives you the nicest water-repelling finish.
If you’re new to furniture refinishing, brushing on clear materials can be challenging. What part have you already covered?
PRO TIP: I use an artificial or natural light from one direction, and watch the process from a low angle rather than from above. I’m watching the sheen to clue me in to any missed spots.
Even the eggshell Gator Hide has a shiny sheen while it’s wet. Don’t worry. As it dries that sheen will dull.
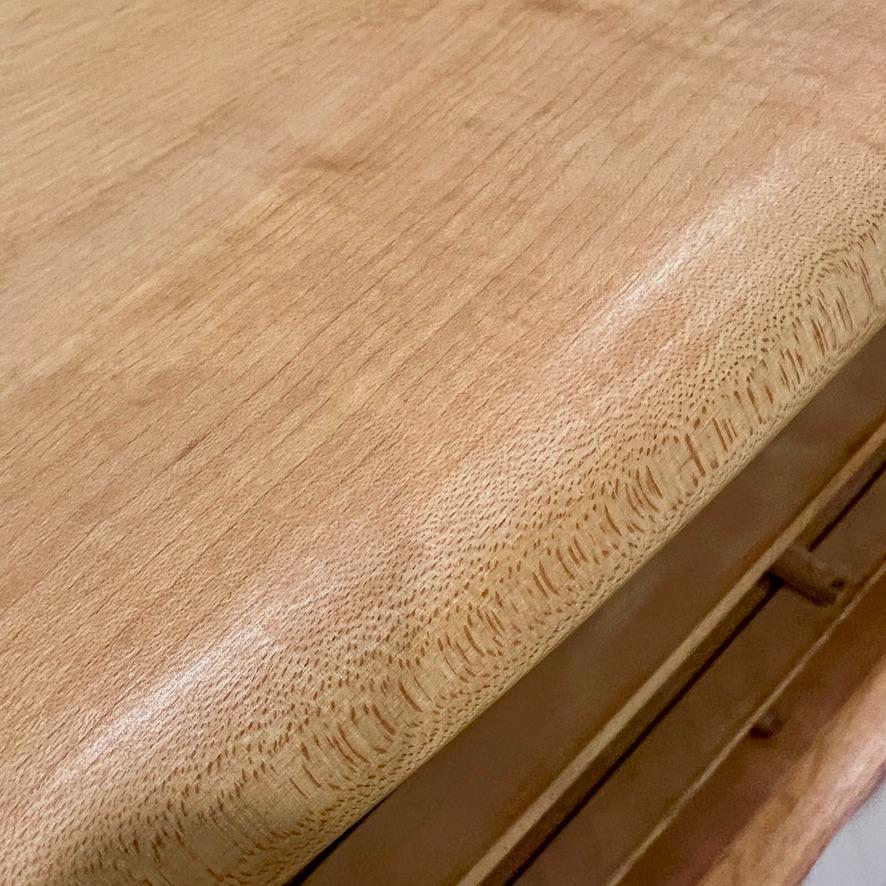
Yes, you could finish with wax instead. But I used the same sunscreen logic as the Bonding Boss. This piece is about to live a real life, not just a looking pretty life, and the durability is worth the extra step.
I stopped at two coats for our victory lap with a light buff with the sanding pad (220-grit) after each coat. Allow 2 hours between coats.
Full curing requires 21 – 30 days.. So we waited 4 weeks before topping it off with this changing pad , but in grey. On sale here. Hocus pocus, now it’s a changing table.
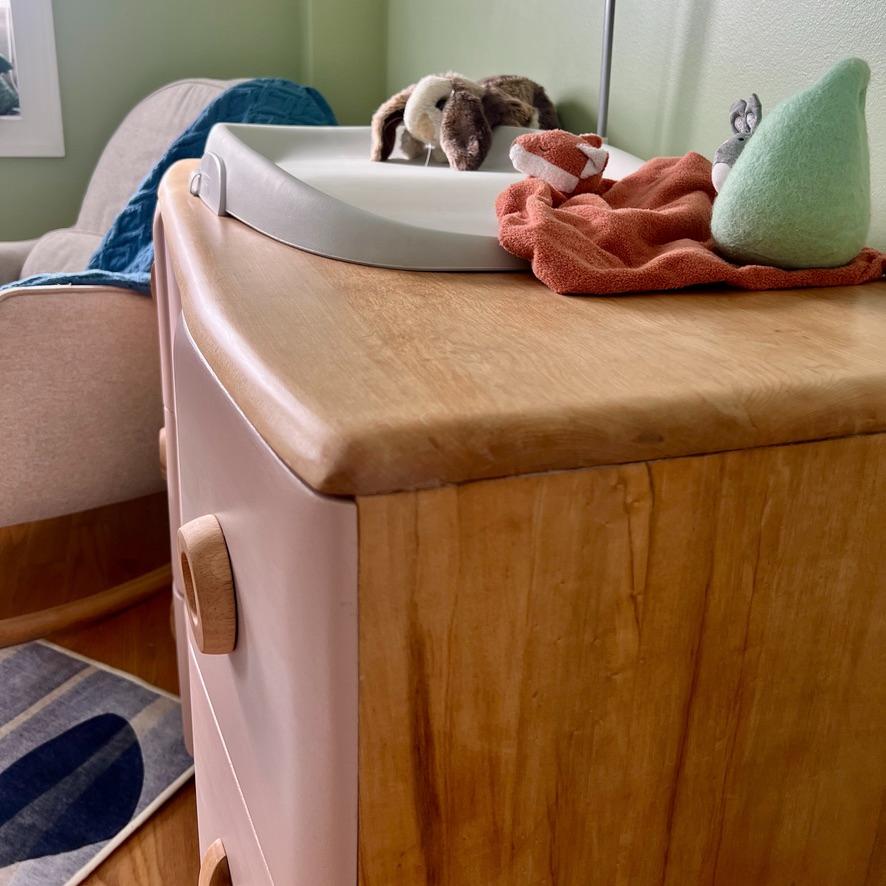
SAFETY TIP: Don’t forget, changing tables should be anchor to the wall.
If your piece is headed somewhere rowdier, like the family room coffee table that handles tossed remotes, reclining feet, climbing toddlers, game pieces, and glasses or cereal bowls sans coasters (you know the piece), layer up..

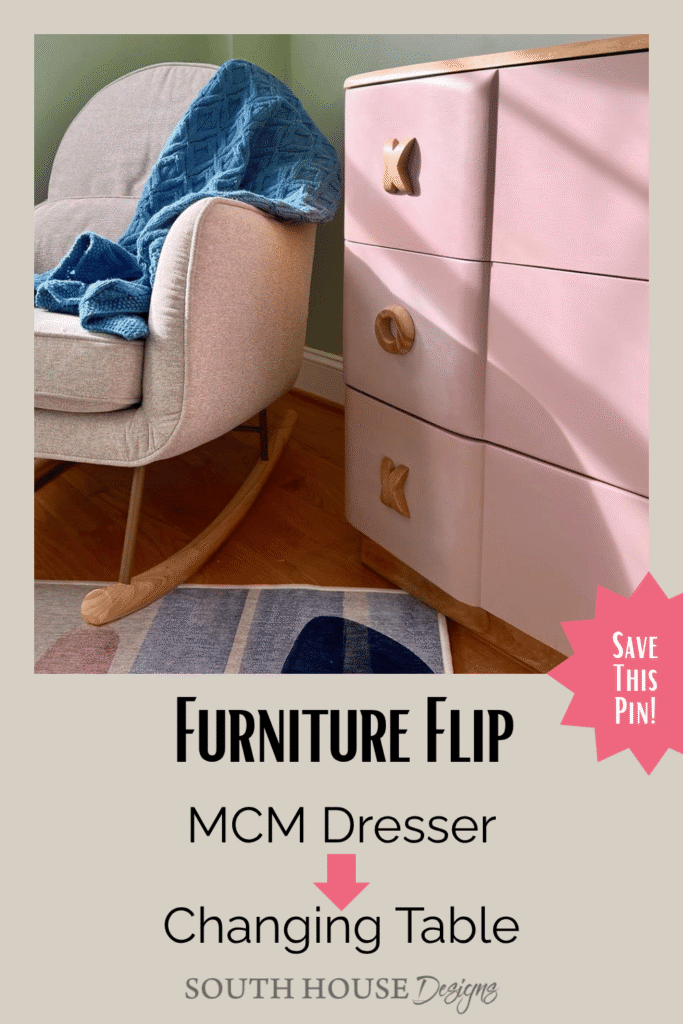
The Reveal (and a Little Teaser)
I am sooo happy with how this piece turned out!
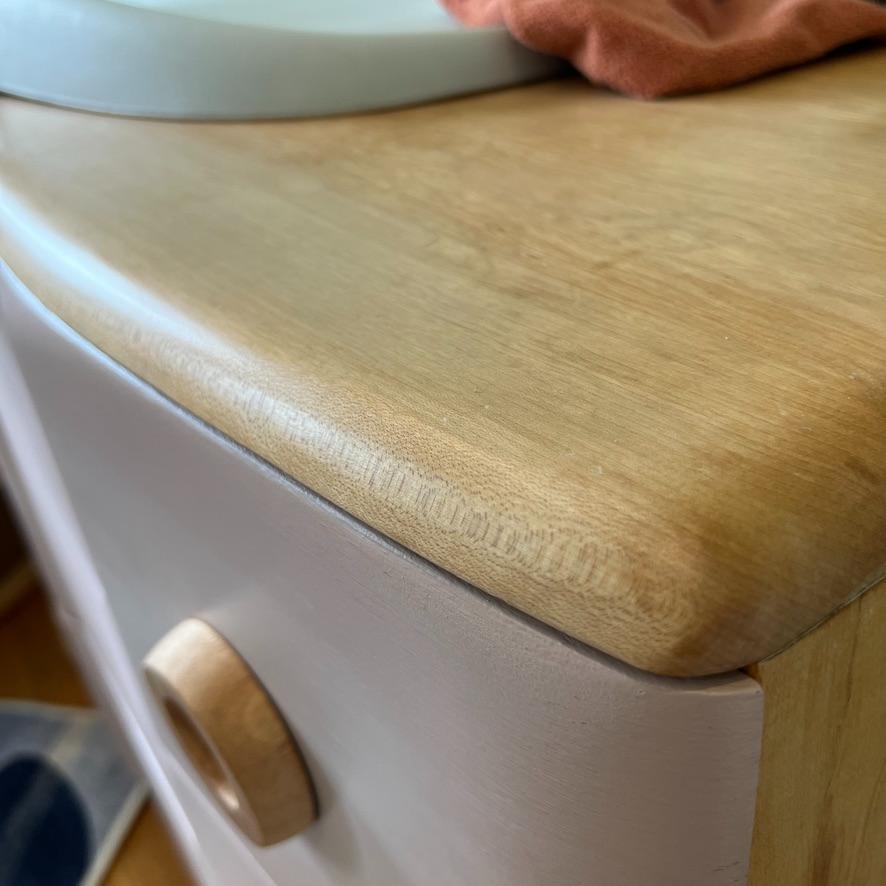
This project came with two challenges beyond your typical furniture refinish: clients, our daughter and bonus son, whose style doesn’t always line up perfectly with mine, and creating far from home, without my usual workshop, my tools, or that one perfect half-used can of paint.
Every DC trip means figuring out what I actually need instead of grabbing what I always grab. So it’s extra nice when everything you need comes from one great, trusted source. Thank you, Dixie Belle!
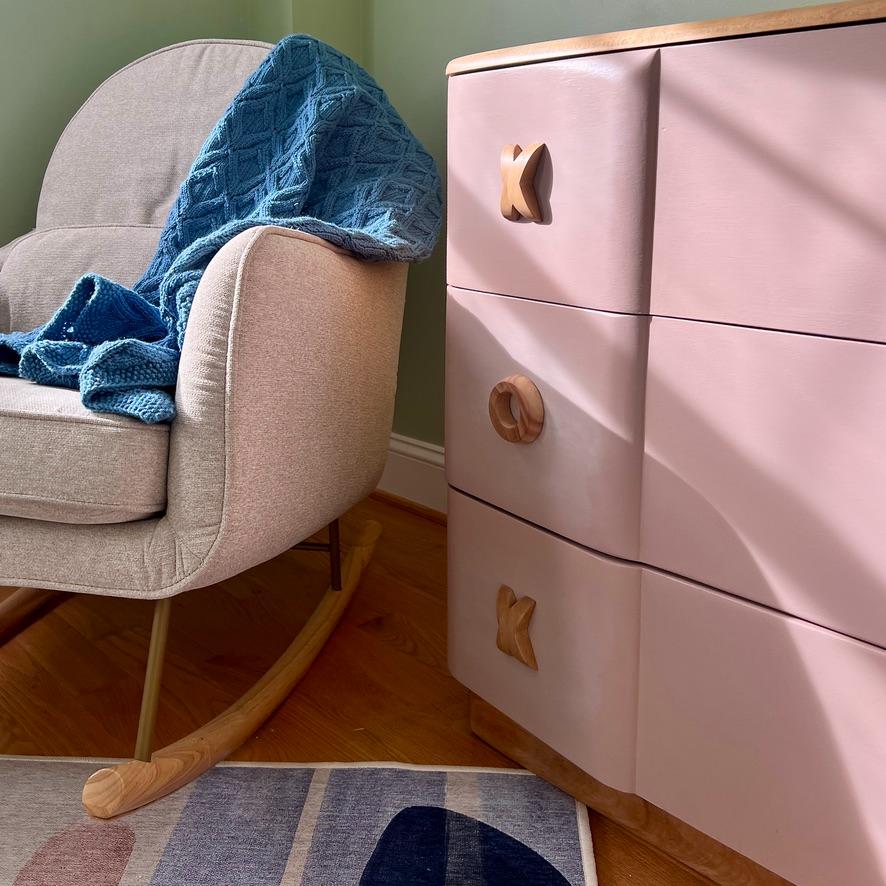
Now, I’ll admit this changing table is already pretty great and distinctive. But remember, from our planning post, we weren’t chasing a theme for L’s nursery. We were chasing a feeling — whimsical, imaginative, soothing, joyful.
So where’s the whimsy? Where’s the imagination?
Oh, it’s coming!
Next up, something fun is hiding inside, ready to delight our little L. And those fabulous criss-cross pulls you can spot in the before photos? They’re only half the story. Wait until you see who they’re pairing up with.
I can’t wait to show you!
As always, I love hearing from you. Any questions? Don’t hesitate; I am here to help.

More Projects to Enjoy