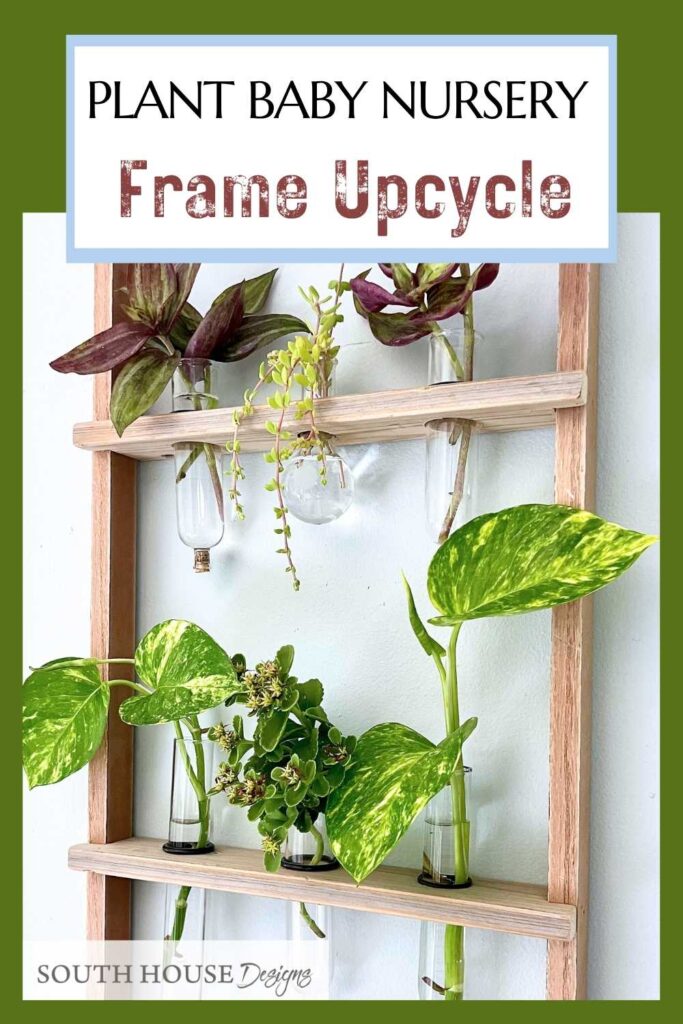
Turn An Old Frame Into a Great Plant Cutting Display
Transform an old frame into a functional, trendy plant cutting display — a propagation station perfect for plant lovers and crafters alike.
Welcome to another monthly meeting of The Handcrafted Society, where a group of my favorite crafting bloggers all come up with new projects around a common theme or medium!
If you’re new here, reply with a wave or “Hey, hey”. Look around and you’ll see we are all about joy-filled living that results from creative problem solving.
This month’s challenge was all about frames – and let me tell you, I was feeling a little… framed in by the possibilities. (Sorry, not sorry for that pun.)
Like any good crafter with a thrifting addiction, I returned from my favorite treasure hunt with four frames that practically begged me to take them home. The cashier gave me that knowing look – you know the one – as I confidently declared, “I’ll definitely find something amazing to do with these!” Famous last words, right?

Fast forward to me sitting on my patio, marveling at how the houseplants I tried for the first time had absolutely flourished during their summer vacation outdoors. They were living their best plant life – more than doubling in size! But then reality hit: where on earth were these botanical giants going to live once cooler temps moved in? I needed to take cuttings before Jack Frost came knocking and propagate a whole new brood of baby plants.
And then – cue the lightbulb moment – these two ideas crashed together like a perfectly timed meet-cute.
Those four lonely frames suddenly had a purpose, and my plant cutting display idea officially took root. (Okay, I promise that’s the last plant pun… maybe.)

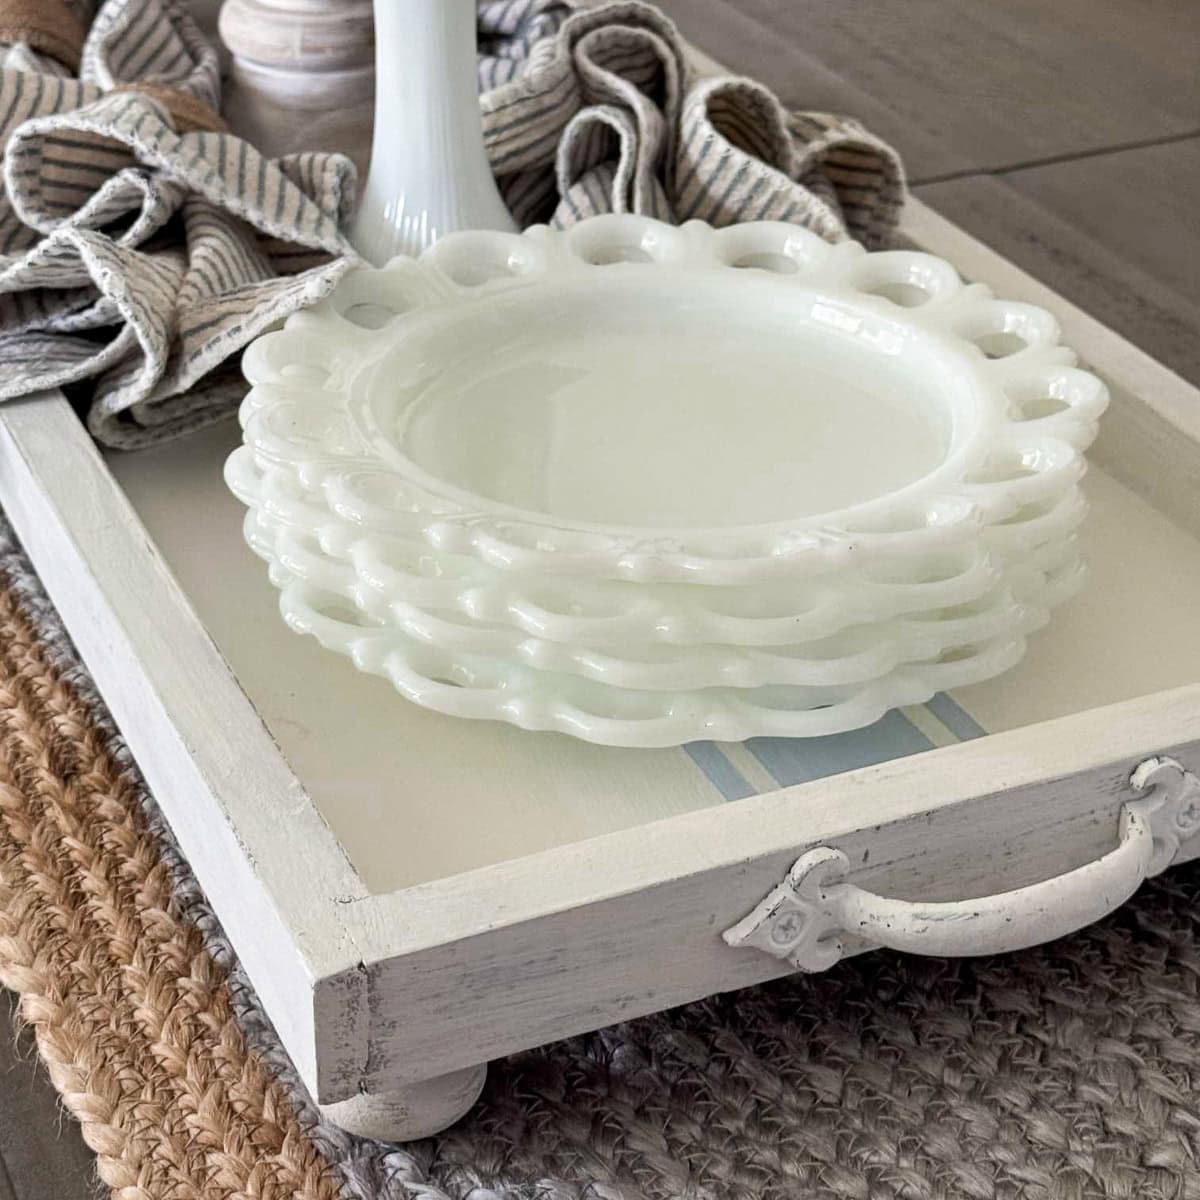
SIDENOTE: Another printed canvas I picked up that day also became a unique wall vase or plant nursery. Check out this one too.
TABLE OF CONTENTS:
The links in this post may include affiliate links, which means if you purchase anything using these links, you pay no extra, but I may receive a small commission that helps keep this blog running. I truly appreciate you using affiliate links whenever possible. Please know that I will never recommend a product I do not believe in!
How to Make Your DIY Plant Cutting Display
Quick and Easy How-To Card for the Confident Crafter
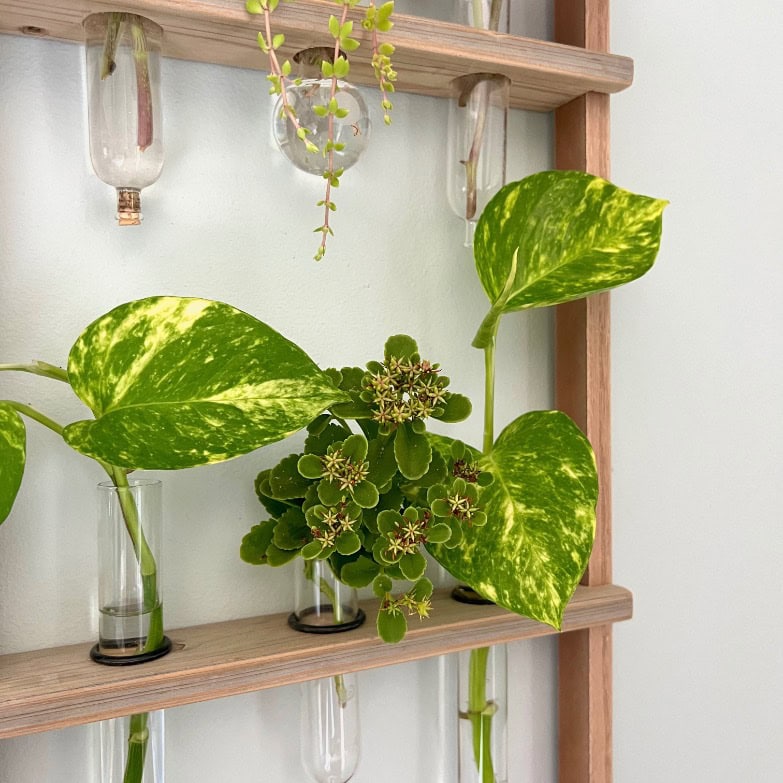
Framed Propagation Station
Perfect project for crafters ready to expand into power tools. This low-cost plant cutting display uses basic power tools and thrift store finds – ideal for building new skills with minimal time and money investment, but maximum plant propagation results!
Materials
- Frame
- Scrap wood
- Glassware, I used scientific glassware
- O-rings from the plumbing department
- Paint or stain, optional
- Picture hangers or twine
Tools
- Saw, I used a miter saw and skill saw, a hand saw will work too
- Brad nailer or hammer with thin brad nails
- Drill with bits sized specifically for your glassware
- Sandpaper
Instructions
1) Prepare the Frame --
Remove any backing, clean and stain or paint if you choose to.
2) Determine shelf size and shape --
Cut accordingly.
I cut mine the width of the outside frame and then cut out the two back corners so the shelf would extend a bit deeper to accommodate the glassware I had.
3) Determine placement of glassware and height of shelves --
Drill the holes and brad nail through the side of the frame into the side of the shelves..
4) Add O-rings --
Work the O-rings over the lip of the glassware and roll down to the desired height.
5) Add Hanging Hardware --
Now install the picture hangers of your choice. Choose whatever fits your vision and where you will be hanging your framed cuttings.
That's it!
Five easy steps to fill a plant momma's heart and freshen any room.
Notes
Scroll further for all my tips and tricks along with suggestions to alter this project to make it truly your stylee.
All the Details and Tips
Almost Like Crafting Right Alongside Me
What You’ll Need
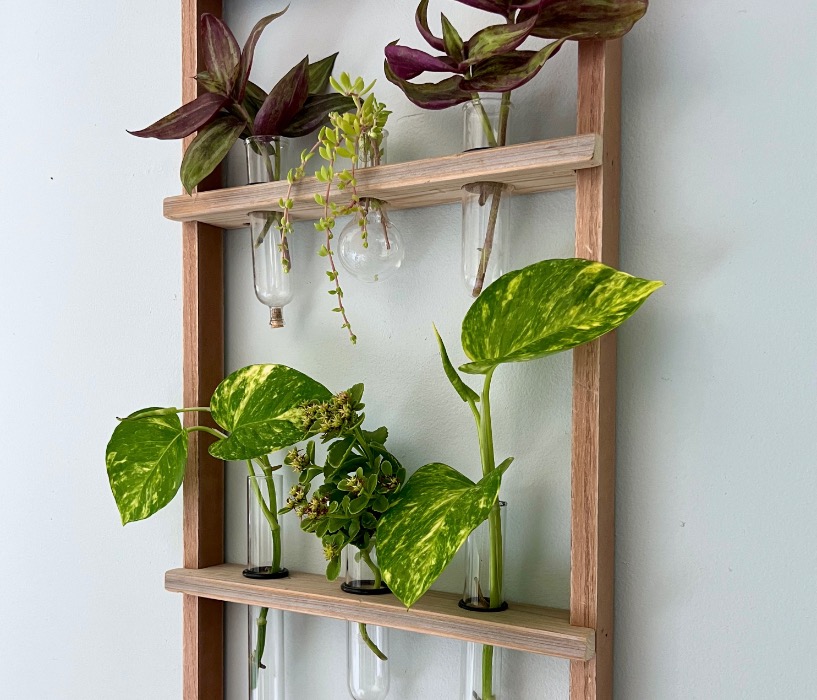
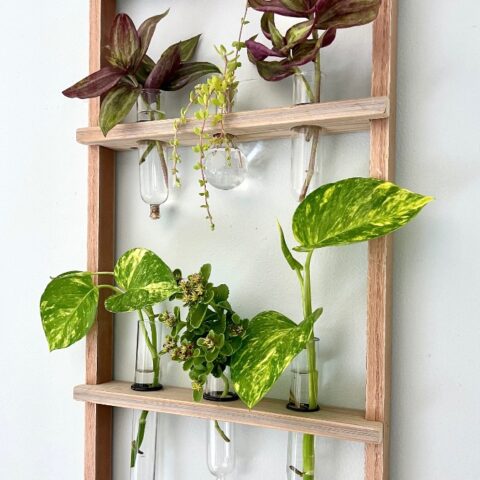
Frame: I used a deep, straight-edged frame that could accommodate shelves thicker than the frame itself. The clean lines give it that perfect laboratory vibe we’re going for! (Don’t worry – I’ll share ideas for working with ornate vintage frames after the step-by-step section.)
Materials:
- Scrap wood for shelving
- Scientific glassware (like these tubes)
- Rubber stoppers (if needed for your glassware)
- O-rings from the plumbing department (trust me on this one!)
- Finishing stain or paint, optional
Tools:
- Saw (I used both a miter saw and skill saw, but work with what you have)
- Brad nailer or hammer with thin brad nails
- Drill with bits sized specifically for your glassware
- Sandpaper
Step-by-Step Instructions–
Step 1) Prepare Your Frame —

Remove any backing, glass, and possibly the hanging hardware if you’re planning to change the orientation of your frame.
Give it a thorough cleaning – you’d be amazed what decades of dust can hide!
Sand any rough spots, then paint or stain if you want to refresh the look. This is your chance to make it match your decor or go bold with a fun color.
Step 2) Determine Shelf Size and Shape —

Here’s where things get interesting. My glass vials are thicker than my frame, so my shelves needed to stick out deeper than the frame itself – no hiding behind a shallow frame for these babies!
I decided to cut my shelves to the length of the outside edges of my frame, then cut out a corner notch on each side.
This way, the shelf sits inside the frame but extends over the face, creating a look that’s both intentional and polished. It’s like giving your frame a little shelf mustache – quirky but sophisticated.
Step 3) Add the Holes —

Now for the fun part – determining the placement of your shelves and drilling the holes!
I laid the frame flat on my worktable and arranged the vials on their sides to visualize the spacing.
Be thoughtful here; I initially planned five vials across the bottom shelf, but when I placed a couple of test cuttings in the vials, I realized the plants needed more breathing room to look their best.
Once you have them positioned how you like, determine shelf placement – I prefer a bit of vial showing above the shelves. But you do you!
IMPORTANT: Make sure there’s enough clearance so you can slide vials in and out freely!

Using a drill fitted with either paddle or Forstner bits, drill the holes where you marked them. The key is matching your bit size exactly to your glassware diameter.

PRO TIP: Place scrap wood under your shelf wood and clamp them together to your work surface. This will prevent the underside of your shelf from splintering.

After drilling, sand the inside and edges of each hole to remove any splinters.
PRO TIP: Wrap a piece of sandpaper around a long cylindrical object – I used the handle of a sponge brush that was lying handy – to smooth the interior of each hole perfectly.

Now brad nail through the side of the frame into the side of the shelves at their planned locations.
Of course, measure carefully that both sides of the shelf are at the proper height. A crooked plat ledge is not what we re going for here!
Step 4: Add O-Rings for a Perfect Fit–

Place a rubber O-ring on the neck of each piece of glassware. These should be a snug, stretchy fit that holds your vessels securely in place at the height you want.
PRO TIP: Take one of each style of glassware to the store and try O-rings on right there in the plumbing department.
The staff gave me some curious looks, but hey – field testing is important!
Step 5) Choose Your Hanging Method-
Determine how you want to hang your propagation station:
- Rustic route: Thread twine through two holes drilled in the frame, or tack twine onto the back corners for that farmhouse vibe
- Traditional approach: Attach two picture hangers along the back top of the frame for a clean, gallery-wall look
Now your cutting nursery is ready to hang, fill with water, and nestle those clippings right in! There’s something so satisfying about watching those little roots develop in their vintage glass homes.
A quick pause in the action, to ask if you are enjoying this project. Well, there’s a lot more, so you should maybe subscribe so you do’t miss a thing:
Many thanks! Now back to our plant babies:
Propagating Tips:
Propagating plat cuttings in water could to be easier!
There are just three rules to keep in mind:
- Place them indirect bright light
- Use clean, fresh tap water and change it regularly (like weekly)
- In between water changes top off the water in your vials with a thin spouted watering can or even a large syringe (I’d use my turkey baster if it did’t leak)

This cute watering can is my absolute favorite — and NO dripping!” It’s cute enough to let sit out and enhance my sweet plant nursery! And four color choices
Styling Your Plant Cutting Display
Best Plants for Propagation-
Just about any tropical houseplant will work beautifully! I’ve included wandering jew and pothos, plus two succulent ground covers as an experiment. The variety is part of the charm.
You can also refer to this list from Backyard Eden, or this list from Complete Gardening.
Arranging Your Glassware-

No hard and fast rules here – typically even spacing looks great (which is how I planned my holes), but I used three different vessel styles to add even more visual interest. Although honestly, the plant variety will take care of that too!
Where to Place Your Station-
Hang it where you can easily access it for watering, and make sure your plants will get great light – but usually not direct sun.
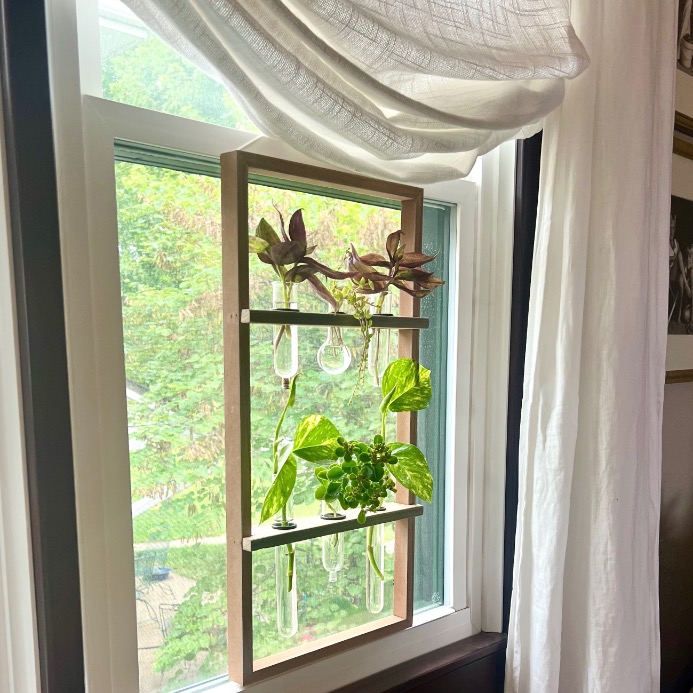
I’m planning to hang mine in my office window next to my desk, using white nylon rope wrapped over the window lock. These north-facing windows give great light without harsh direct sunlight, and since they’re newer insulated windows, I think they’ll be fine through winter (but I’ll keep an eye on that!).
⬇️Please save this to remember it ⬇️, and to help me reach more people. (thanks bunches)
Make It Your Own: Creative Variations
There are so many ways to customize this project!
If you find (or treasure hunt for) a beautiful vintage ornate frame, you can make it work by building a box frame behind it. The decorative frame will float out from the wall – just paint the box your wall color inside and out to help it blend and not detract from those baby plants.
Don’t think you have to be restricted by the size of the frame. Your self could extend beyond the edge the frame on one side. Round the corner and drill a hole for another vessel outside the frame.
If you have a frame with two shelves like mine, each shelf could extend beyond the frame on alternate sides. This would be particularly great if you have two longer test tubes.
Quick math reminder: If your vials are 1-inch in diameter, you need shelves at least 1½ inches deep to allow for ¼-inch of wood on the front and back.
Go big or go home: If you have a large space, create a plant cutting gallery wall with multiple frames! Now that’s what I call a propagation paradise.
Wrapping it Up
This project perfectly combines my love for upcycling thrift store finds with my plant obsession – and honestly, what could be better?
Your old frame gets a second life, your plants get a stylish new nursery, and you get to enjoy watching those tiny roots develop in their vintage glass homes.
Don’t forget to check out what my craft blogging buddies created for this month’s frame challenge! You’ll find links to all their amazing projects below – trust me, you’ll want to see the creative ways they tackled this theme.


Happy crafting, and here’s to many successful plant babies in your new propagation station!

I cannot get over how different this frame looks now, Diane! This is such a creative and clever idea. My sister loves to propagate plants so I’m excited to share this idea with her. She will love it! Big hugs, CoCo
It was such a simple frame that now it doesn’t even look like a frame. Oh I hope your sister makes one or three. Thanks for sharing!!!
What a transformation! You are so good at engineering creative projects. And easing us all into the world of power tools! I love how you place the propagation station in your window…your plant babies will thrive!
Thanks Missy, I am a power tool addict now. They supercharge my creativity. With power tools by my side there really doesn’t feel like there is a limit.
Diane this is awesome – Keep empowering women to pick up the power tools!!! I do LOVE me a great power tool, my husband, not so much. . . all the power tools in our house belong to me. One Christmas my husband gifted me the miter saw I’d been coveting. It was still under the tree as our family and friends arrived for our annual Christmas Day Party. All the men were commenting what a great wife Matt has for buying him such an awesome saw. He was a bit chagrin to admit it was actually MY gift from him!
Oh Michelle, that is such a great story. Yes, the power tools are mine!!! I’m getting ready to add a workshop to our two car garage (which is owned by my sewing studio. The Hubs thought we’d finally be able to park cars in the garage — Ha! 😉
This is such a clever use a frame. I’m always amazed at your creativeness! I’m thinking of making these for my girls as a gift.
I love it Lynn, but I think I detect a slip of the tongue. You meant to say I will draw some up ad have Handy make them for the girls,🤭
Diane, you not only come up with the best projects, but you also execute them so well! I’m so impressed with your frame plant cutting display, and how it came together. Without a doubt I would gladly display this in my home! Pinning!
You are too sweet Michelle! That encouragement is a great charge for my battery. I so appreciate you! Precisely the reason I look forward to our monthly challenges
Hi Diane! You have created another clever project that I absolutely love! Pretty and functional make for the best combination! Makes me wish I had a green thumb so that I could make one for my kitchen window! Enjoy all those new plants you’re going to get!
Secret: you just need a friend or neighbor plant momma, They’ll have more clippings than you can imagine. Once you get started with the babies it’s easy from there.
Thanks for your kind words Donna!
Diane! You come up with the best ideas! I love a plant propagating station. It’s so practical and beautiful! Thanks for the tip to use “O” rings. Also I appreciated all the “punny” remarks in your post.
Oh thanks Anna! Those o-rings really do make the difference — especially if you’re a novice with less than perfect circles. Plus you can raise and lower your little plants all you want. Might even remind you of arranging and rearranging your dollhouse’s furniture. ( was always way more into the dollhouse than the dolls anyway).