From Blah to Aha: How to Upcycle Mass-Produced Prints Into 3D Art
Turn cheap, mass-produced canvases into surprising DIY 3D wall art. Make fun, budget-friendly art anyone can do.
You know those mass-produced canvas prints stacked at thrift stores and clearance aisles? The ones that feel more blah than wow?
Well, here’s the fun twist: with just a few tears (yes, actual rips!), a touch of glue, and a dash of creativity, you can turn those flat, factory-made canvases into dimensional, one-of-a-kind wall art.
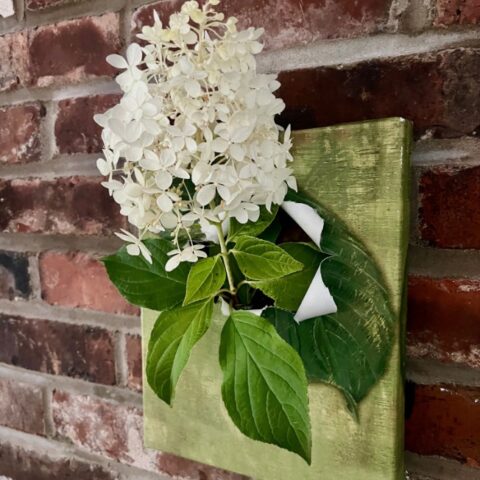
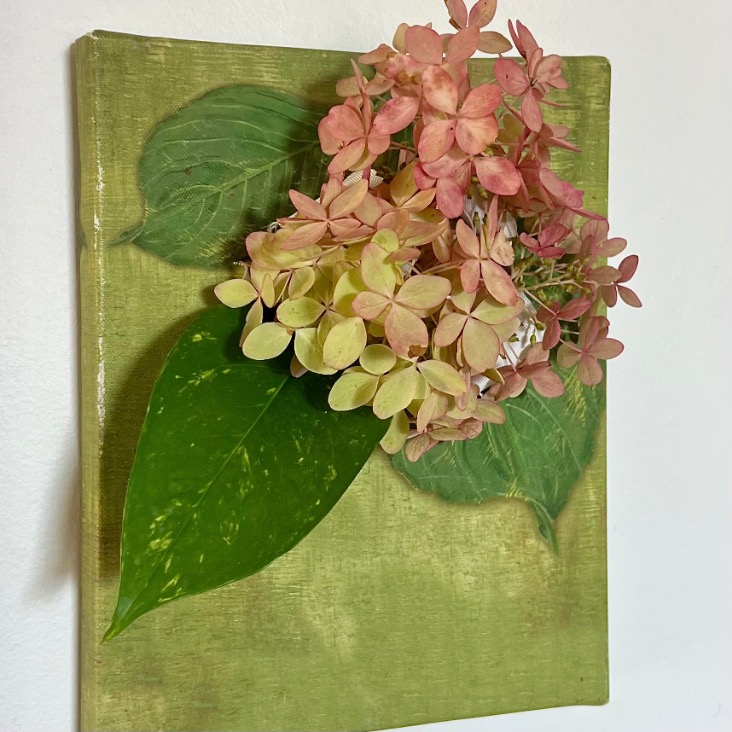
For example, I stumbled on a print of three oversized green leaves. A little slicing and tearing, plus a hidden test tube, and suddenly my flat print became a living propagation station — plant cuttings sprouting right through the painted leaves!
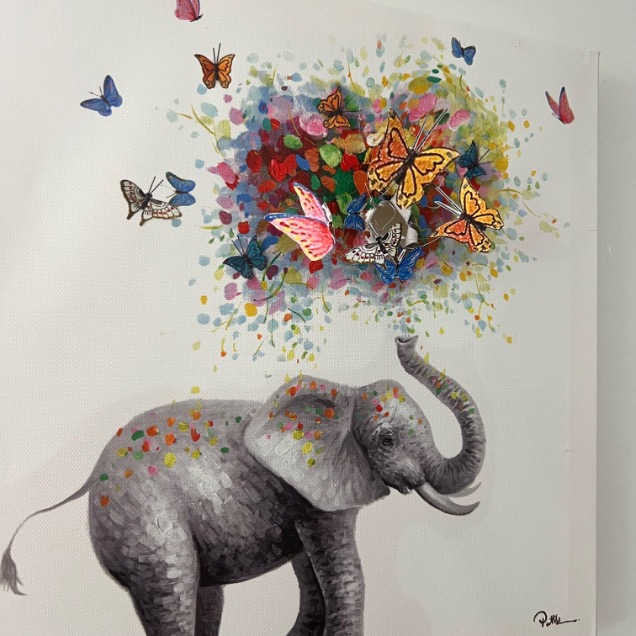
Then I took it a step further with a playful elephant canvas, making butterflies “fly” out of the confetti it was blowing. Suddenly, this mass-produced piece had unexpected depth, movement, and a whole lot more personality.
That’s the magic of this DIY: it’s budget-friendly, wildly customizable, and full of surprises. Whether you’re a plant lover, a butterfly dreamer, or a comic-book fan who wants Hulk punching through the wall, this project is your ticket to transforming blah canvases into aha décor.
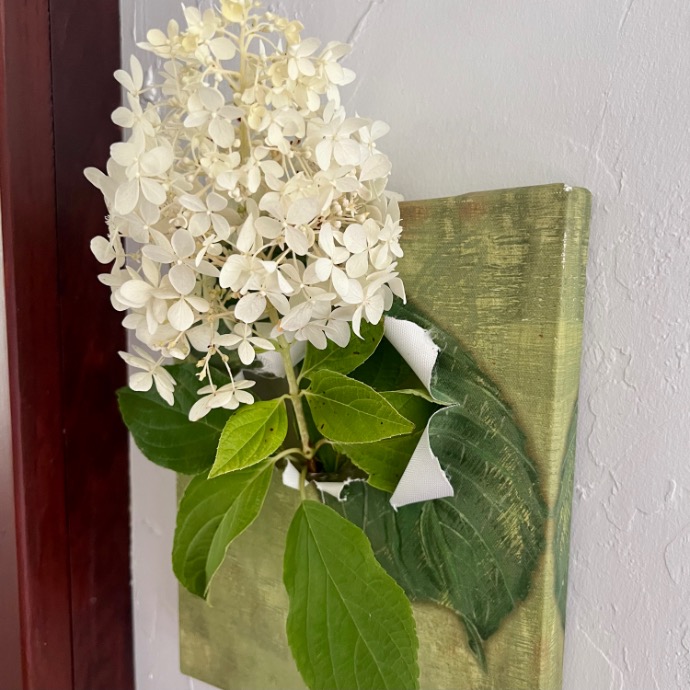
TABLE OF CONTENTS:
Step-by-Step Tutorial: Create Fun Wall Art
Let’s start with a Quick How-To Card for you skimmers.
Keep scrolling for all my details and tips if that’s more your style.
DIY 3D Canvas Art: From Blah to Aha
Easy and quick DIY to transform mass-produced canvases into unique 3D wall art with just a tear, a curl, and a clever add-on. Works with plants, butterflies, toys, and more!
A fun, budget-friendly DIY anyone can do.
Materials
- Thrifted or mass-produced canvas print
- Test tube + scrap wood (for plants) OR cutouts, toys, faux florals, etc.
Tools
- Craft knife or X-Acto blade
- Hot glue or strong adhesive
- Optional: scissors, ruler, pencil
- Possibly Scissors, ruler, pencil, wire, tape, depending on your 3D element
- Saw, if needing a wood support
- Drill, if using a test tube
- Brad nailer, or hammer and nails, if needing a wood support
Instructions
1) Pick your canvas:
Look for bold shapes or focal points (leaves, animals, bursts of color).
2) Plan the tear & element:
Decide where something will “break through” and prep it (test tube for plants, printed cutouts on wire, toy car, dino head, etc.).
3) Make the tear:
Use a craft knife to cut an irregular opening. Place cardboard behind the canvas to give resistance and keep it from stretching.
4) Shape the opening:
Curl torn edges around a skewer for drama; secure a few with tiny dots of hot glue.
5) Add your element:
Slide in the test tube for cuttings, feed in wires, or glue a toy to a wood support. Adjust until balanced.
6) Hang & admire:
Make sure it’s secure, then display your new 3D statement art!
Notes
Think of the story your art is telling — the subject guides what bursts through.
Keep scrolling for all the details and tips!
And Now For All the Details and Tips
Step 1) Pick Your Canvas Print-
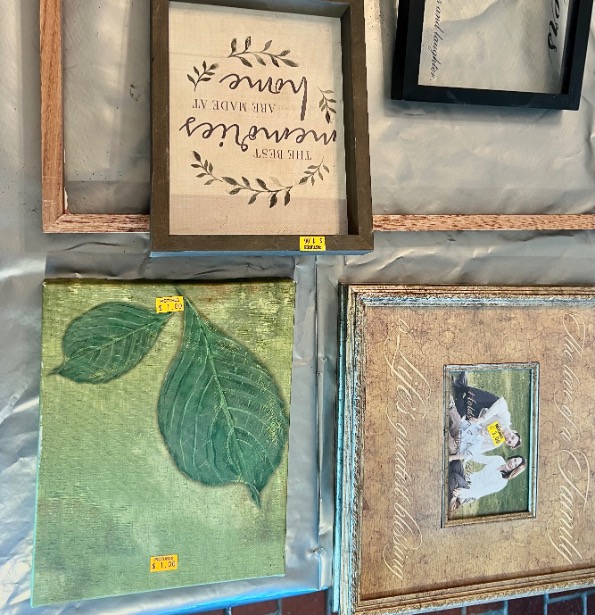
Head to your favorite thrift store, flea market, or even the clearance aisle at a big-box store.
You’re looking for those sad, mass-produced canvases — the ones that usually get passed by because they’re just a little… blah.
Here’s the secret: you don’t need a masterpiece. You need bold shapes or focal points.
Maybe oversized leaves, an animal, a burst of balloons or confetti — something you can play with. That subject will help you decide what will “break through” the canvas later.
Sidenote: Do you recognize the large thin brown wood frame above the leaf canvas? I upcycled that one into a propagation station.
Step 2) Plan the Breakthrough Point (and the Element)–
Before you start slashing, pause to plan both the spot for the tear and the object that will emerge.
For my leaf canvas, I knew I wanted fresh cuttings, which meant I needed a sneaky little test tube behind the canvas — think of it as a secret watering hole for your stems.
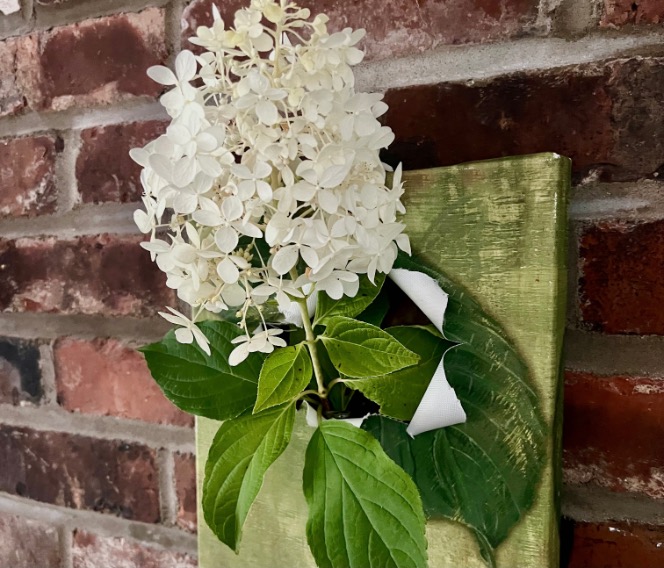
And it works as a vase for dried or faux flowers too.
The height of my test tube also determined the placement of the cut so that the test tube wouldn’t show through the torn hole.
To hold my test tube, I used a piece of scrap wood.
Start by cutting it to match the width of the inside of your frame.
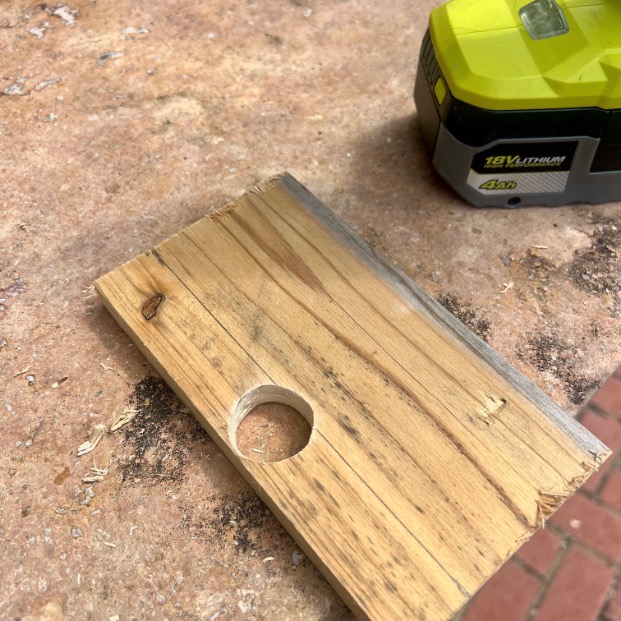
Draw a cut line down the length of this board to match the depth of the frame.
Drill your test tube hole leaving one side of the wood intact and barely overlapping the other if needed.
Once the hole is drilled, cut the width you marked previously.
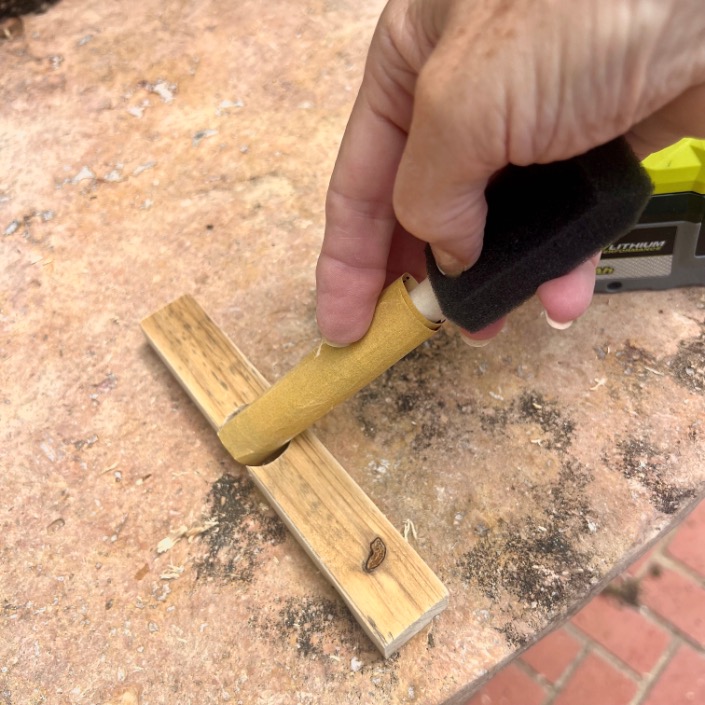
PRO TIP: Wrap sandpaper around a paintbrush handle or dowel to smooth the interior of the hole.


Test fit support shelf and test tube.
PRO TIP: Make sure you have clearance above to easily remove the tube for cleaning.
When your support is at the right height, and square the frame, use a brad nailer through each side into the ends of the support
- For toys or heavier props (like a dinosaur head or car), you may need to cut the toy in half so only part protrudes, and it’s easier to mount. A car will have a relatively flat base, so it can be glued to the top of a supporting wood shelf. A dinosaur head will only be flat where it is cut, so plan to glue the cut surface to the face of a thin wood support.
PRO TIP: think through what fits the story of the art and prepare that element before you make your first cut.
Step 3) Make the Tear-
Now comes the fun (and a little nerve-wracking) part — tearing into that canvas.
This is where your art starts to transform from flat to dimensional.


- Use an X-Acto or craft knife to start your cut. Make it intentionally irregular, like something really did punch through
- Once the opening is started, widen it with irregular cuts expanding out. If you canvas is thin enough, you might be able to add these additional tears by hand for a truly organic look.
PRO TIP: If you are not using a wood support, a stack of cardboard or a scrap board behind the canvas gives you resistance so the canvas doesn’t stretch while you slice, and it protects your work surface too.
Step 4) Shape and Support the Opening-
A raw tear can look a little flat. Let’s give it some drama:


- Curl the edges: Wrap loose canvas flaps around a skewer or pencil to curl them outward. It adds depth and a more “exploded” look.
- Set the curls: A teeny dot of hot glue will keep a few curls in place so the opening doesn’t flop closed again.
Step 5) Install Your 3D Element-
Now for the moment we’ve been working toward — the canvas morphs from flat art into fun dimensional storytelling.
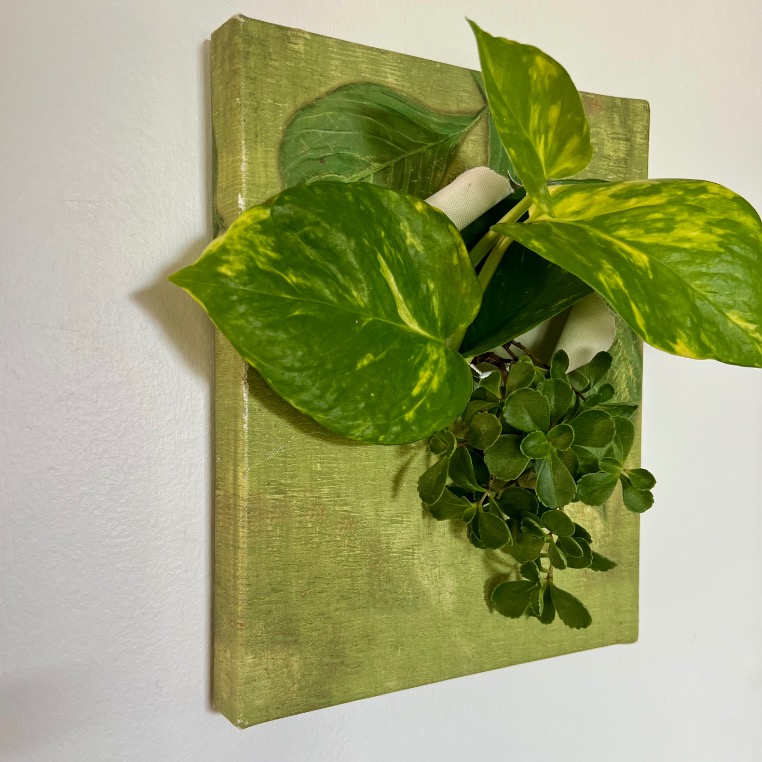
- For plants and florals: Slide your test tube into the support board you added earlier. Fill with water and add your fresh cuttings, or use it as a vase for dried stems or faux florals.
- For lightweight elements (like butterflies): Feed the wires through the tear and secure them on the back with hot glue. Bend and adjust until they “fly” in different directions for a natural look.
- For toys or heavier props: Position the piece against or on your wood support.
- Mark the placement of the prop on the support board
- And the placement of the support board against the frame edges.
- Remove from the canvas and glue the prop in its proper spot.
- When dry, slide in from the back and with brad nails secure the shelf in place.
Step 6) Hang and Admire-
You’ve done it — flat art has officially gone 3D! Before you hang it up, double-check the balance:
- Make sure any heavier elements (like test tubes, toys, or props) feel secure and aren’t tugging the canvas forward.
- If your piece feels wobbly, add a second support board across the back or reinforce with brackets.
Once it’s stable, hang it just like any other stretched canvas — a nail, hook, or picture-hanging hardware will do the trick. Step back, take it in, and enjoy how your once blah, mass-produced print now jumps off the wall with personality and depth.
PRO TIP: If you are adding something with weight, such as a car or dinosaur, you may nee to add a sufficient hanger to the back of the woof frame.
Creative Twist: Elephant Canvas + 3D Butterflies
Once you’ve seen how a leafy print can transform into a living propagation station, it’s easy to imagine other possibilities.
One of my favorites came from a mass-produced elephant canvas I found, where the elephant was blowing a storm of confetti and butterflies from its trunk.
The image already had motion — it just needed a 3D boost to really come alive.


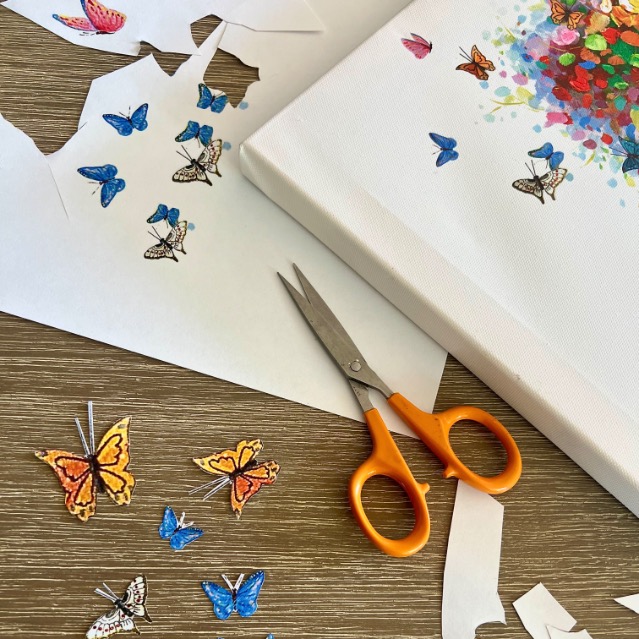


Here’s how I approached it:
- Scan and Prep the Butterflies: I scanned the actual canvas and dropped it into Canva. There, I cropped out several butterflies, resized them larger, and even mirrored a few to create variety. After printing, I cut them out.
- Add “Fly” Wire: To give them lift, I twisted the end of thin wire into a tiny node, bent it at a right angle, and hot-glued that little tab to the back of each paper butterfly.
- Tear the Canvas: I made an irregular tear right at the epicenter of the confetti burst — the natural focal point of the art. Just like with the leaf canvas, I curled some of the edges back for texture and held a few in place with a dab of hot glue.
- Make Them Fly: I fed the wires through the opening and glued the wire ends to the back of the canvas. By bending the wires at different angles, I could make them “fly” in slightly different directions, just like real butterflies caught on a breeze.
The result? Instead of confetti and butterflies painted flat on the canvas, butterflies now burst forward in 3D.
I love the whimsy of this piece for a child’s bedroom, or reading corner or above their art desk.
Wrap-Up: Ideas to Spark Your Own 3D Canvas
The best part of this project is how adaptable it is. Once you start looking at those mass-produced canvases, you’ll see endless opportunities to bring them to life. Here are a few to get your wheels turning:
- Upcycled Canvas Ideas for Kids: Dinosaurs, Cars, and Space Themes:
Think dinosaurs roaring out of a prehistoric scene, toy cars tearing through city streets, a rocket ship blasting out of a galaxy print, or a stuffed animal paw sneaking through a woodland canvas. - DIY Art Inspired by Your Sports Fan’s favorite sport or team:
A baseball breaking through the stadium lights, the tip of a football spiraling out of a field scene, or even a hockey puck “shattering” the ice. - Turn Comic Book Canvas Prints Into Unique Superhero Wall Art:
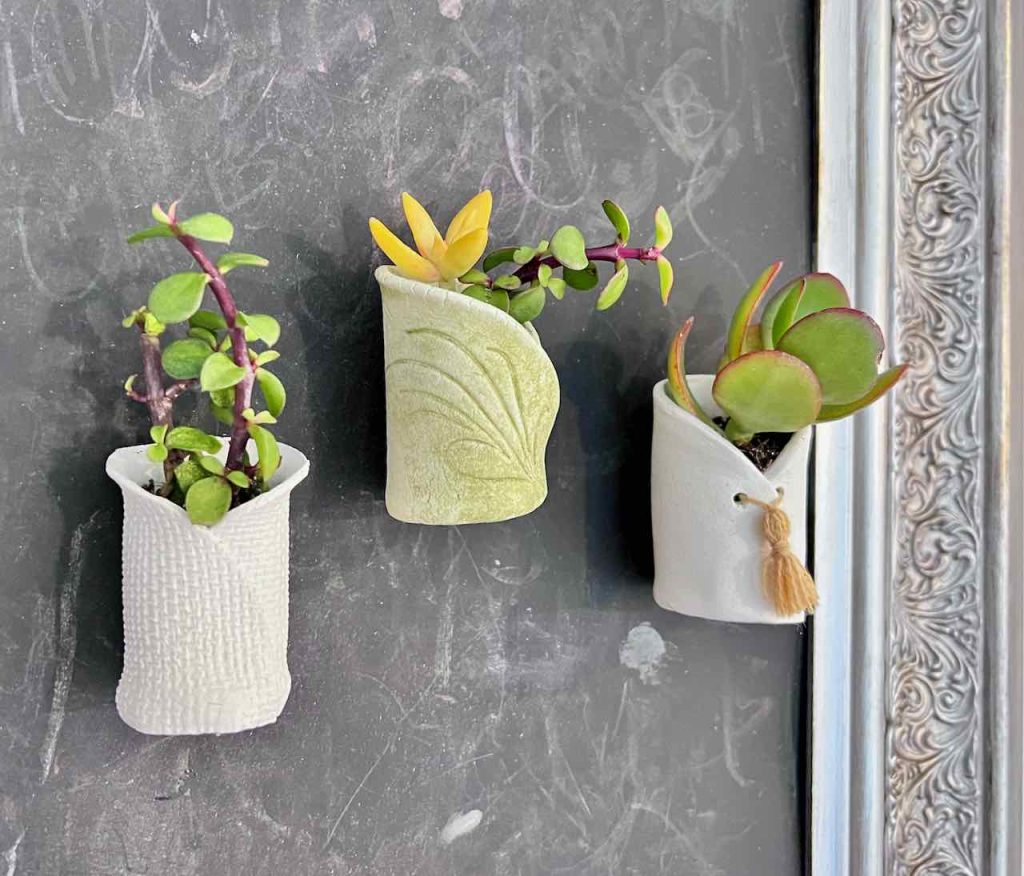
Hulk’s fist punching out of a comic panel, Spider-Man’s hand reaching through a web, or a shield, cape, or mask breaking the fourth wall (literally). - Upcycle Art Into Wall Vases or Propagation Stations:
Turn leafy prints into propagation stations or hidden vases. Orchids, ferns, or faux florals can all peek through torn openings for a living, changing piece of art. - Creative 3D Canvas Wall Art for Holidays and Parties:
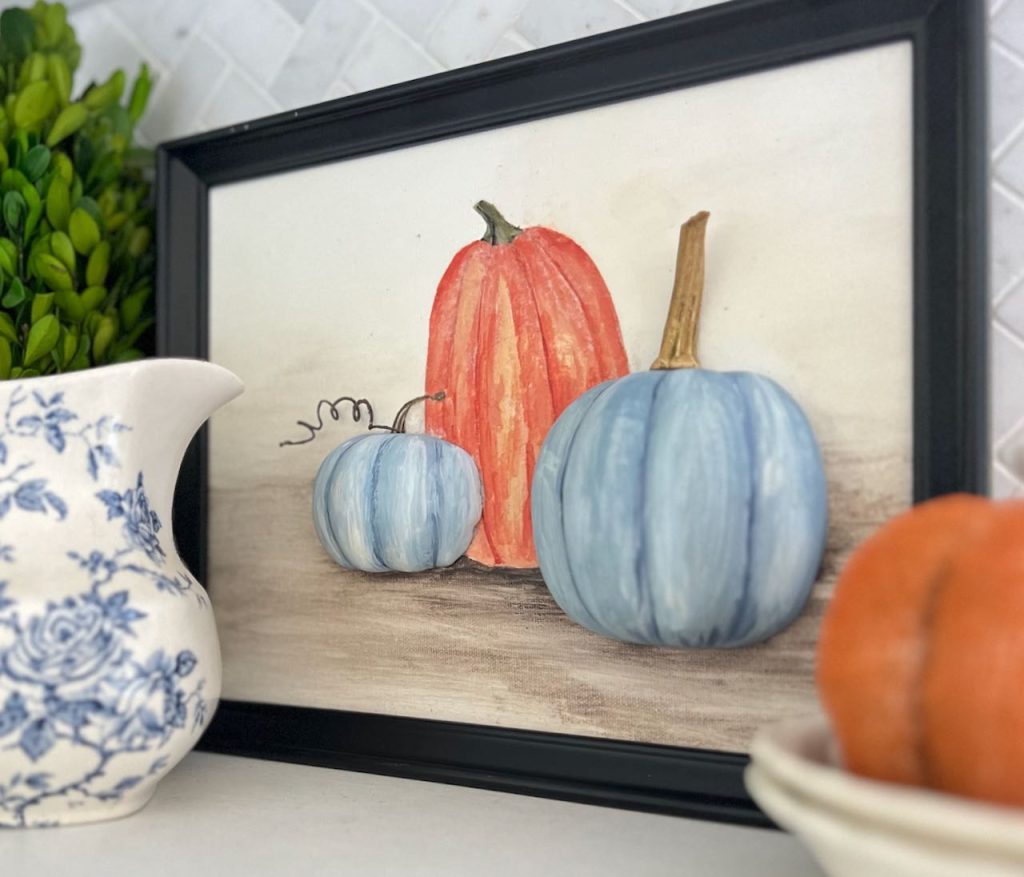
Balloons or butterflies floating out of a party scene, confetti bursting through, or even seasonal swaps like pumpkins, ornaments, or hearts for holidays. Just think of the Halloween possibilities with skeleton hands, spider and such.
This is your chance to turn those blah thrift store finds into bold, personalized statements. Once you start tearing into canvases, you’ll never look at the clearance aisle the same way again.
From Blah to Aha
And there you have it — the easiest way to take a blah, mass-produced print and give it an aha! moment. With just a tear, a curl, and a clever add-on, you’ve turned something flat and forgettable into wall art that makes people stop and smile.
And such a fast and easy way to keep your decor fresh without busting the budget!
Don’t forget to save this pin, so you’ll have it handy when you stumble onto a great canvas that’s just a tad bit boring:

I’d love to see how you spin this idea! Whether it’s dinosaurs in the playroom, superheroes in the den, or butterflies in the kitchen, share your own 3D canvas creations — or pin this project for when you stumble across your next thrift store treasure.

More Posts You’ll Enjoy:

Such a clever idea! love how you turned canvas prints into something 3D!