
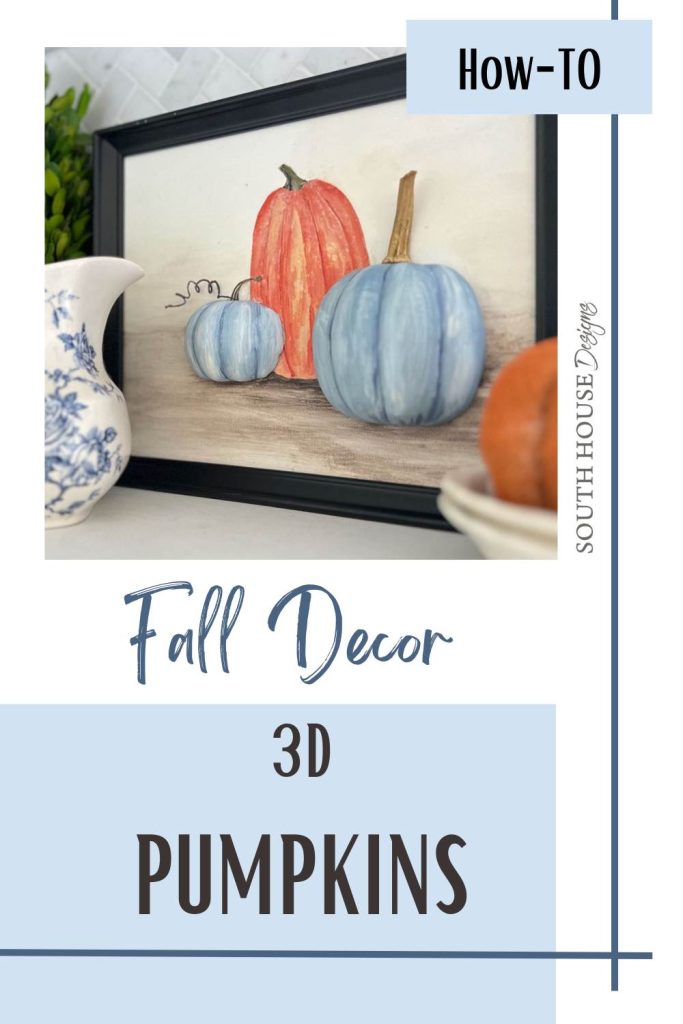
How-To Make Great Pumpkin Wall Art Using Foam Pumpkins
How about some Fall art with Pumpkins ready to jump off the canvas? Here’s a complete step-by-step tutorial to make your own!
You ready to welcome Fall too?
I’m really a Summer gal. But this year? This year I am all in on Fall and the cooler weather blowing our way. (Still not embracing the shorter days that are coming too)
I’ve been lovin’, and still lovin’ pumpkins, acorns, gourds, and the nature goodies that come with Fall!
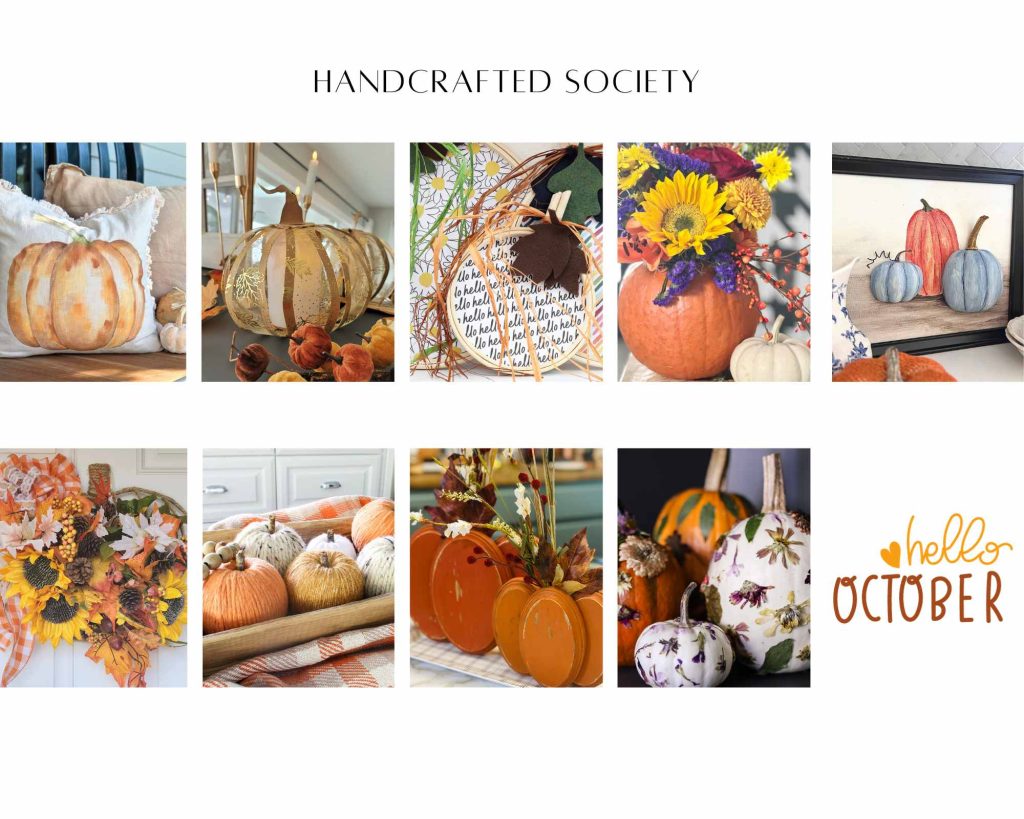
So I’m thrilled this is the first Tuesday — which you might remember means the Handcrafted Society is convening (with TWO guests this month).
Yep, you guessed it. Pumpkins served as our muse! Oh my, but there’s some good ones here!!!
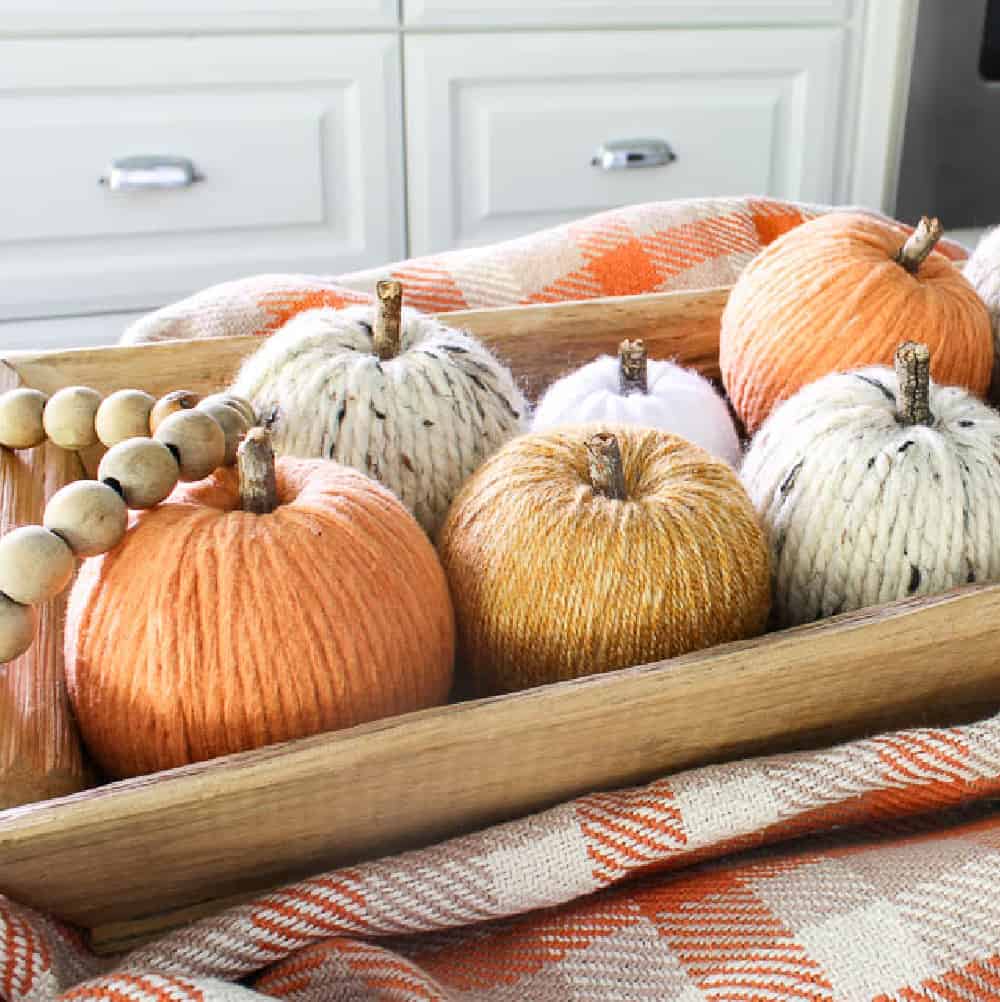
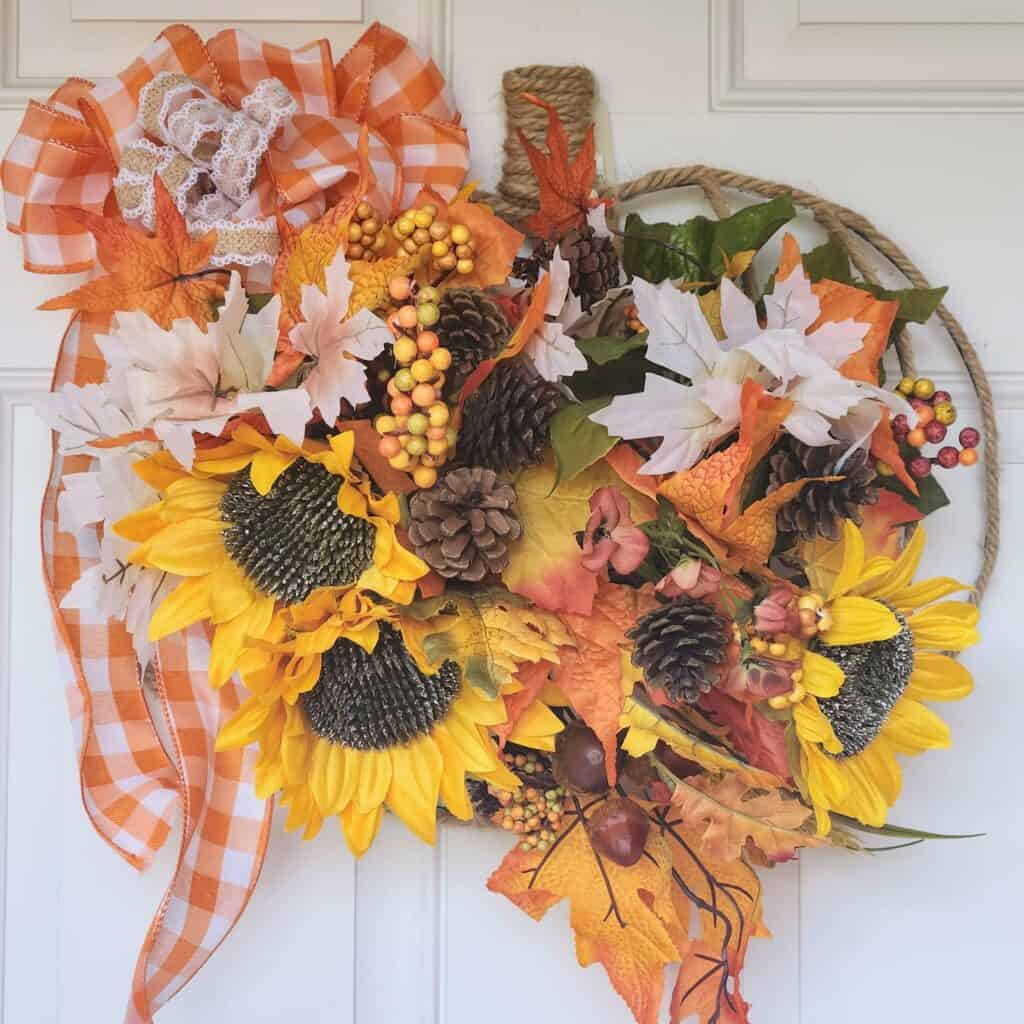
Did you come over from Carol at Blue Sky Home? Aren’t those little yarn pumpkins so much fun? All the pumpkin craft posts are linked at the end of my post. There’s so many great craft projects, I’m sure you’ll find the perfect one to embrace the new season with some diy fall decor for your home.
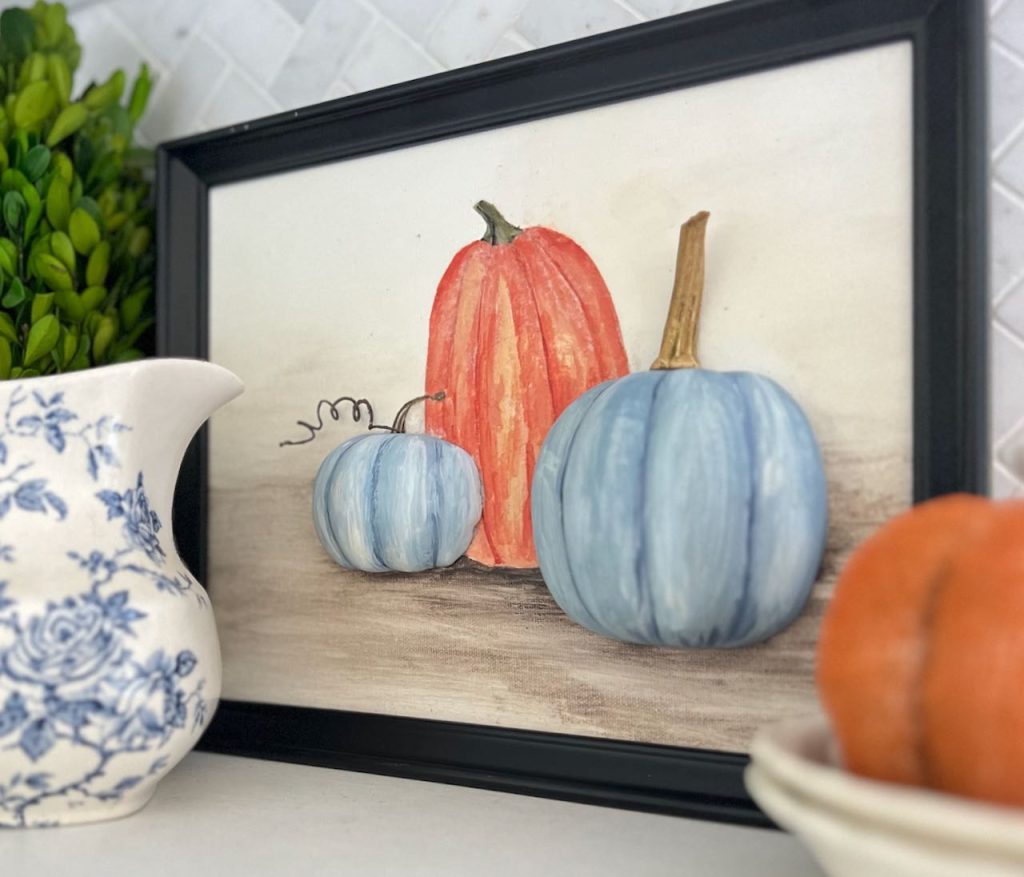
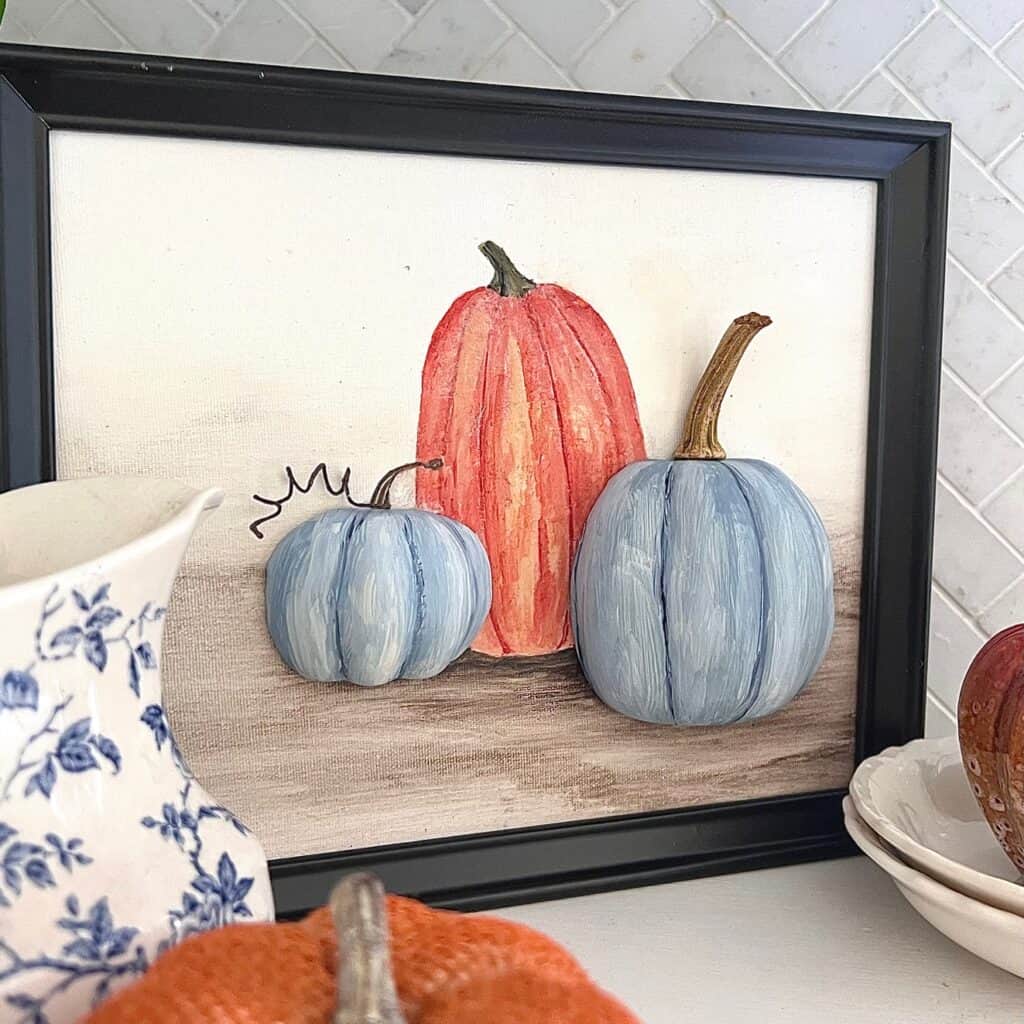
I don’t know about you, but I have pumpkins in all shapes and sizes, but most of them sit on horizontal surfaces. I needed some fun pumpkin-core by way of pumpkin wall art.
However, I didn’t want to lose the endearing bulbous pumpkin shape with flat wall art — so we’re going 3D!
No, we’re not busting out the clay (as much I love playing with clay). We’re going much simpler than that.
Some links in this post may be affiliate links which means you pay nothing more, but I may receive a small compensation. (I would greatly appreciate your support by using my links when possible).
How To Make 3-D Pumpkin Wall Art
Materials and Supplies:
- Styrofoam pumpkins
- Acrylic paint, in different colors of your choice, I used inexpensive craft paint
- Blank canvas, mine are 8 x 10, any size will do
- Printed pumpkin art, mine are available to my followers in my Printables Library
- Picture Frame, optional
- Real pumpkin stems, optional
- Small length of covered florist wire
- Mod Podge, or equivalent
- Sealer
- Micro or detail sander, this is the one I can’t function without
- Large brads or
- Paint brushes
- Palette, disposable plate, or waxA paper
- Scissors
- Long knife and cutting board or mat
- Hot glue gun and glue sticks or Multi-purpose adhesive like E6000
- Paper towel
- Water in a cup
A quick pause to ask If you’re intrigued by this project and where we’re headed. If so, please subscribe so you’ll be included in all the activity going on here:
Thanks bunches — Now Back to Our Pumpkins . . . .
Step 1) Print out Pumpkins-
The art I used for both of mine, is in my Printables Library. All followers have access 24/7 for instant download.
Adjust the graphics or art for the size you need.
I found the easiest way for me is to print two copies. One copy will become your background, the other will be your muse to help guide you when painting your half pumpkins.
Step 2) Add Background Pumpkin to Canvas-
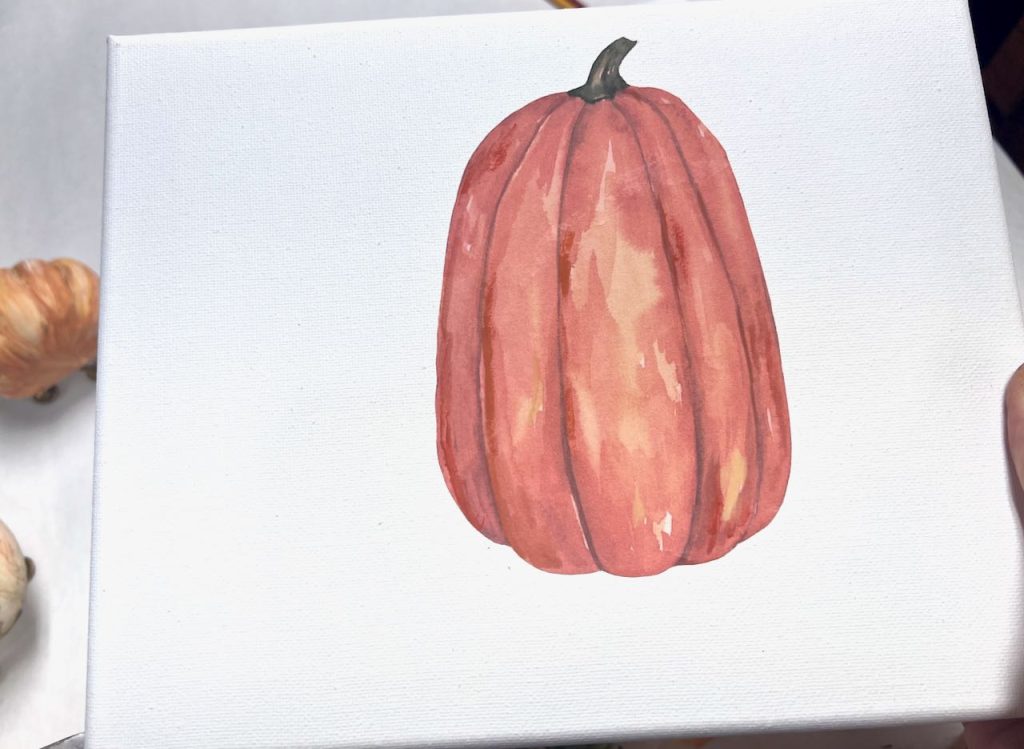
I chose to keep my canvas, for the most part, white. There are other suggestions in the Customizing Section below. If you choose to give your’s a more colorful background, start by painting that now.
While the paint is drying, cut out your background image,
For my wall art, the large orange pumpkin in the middle is all I needed to cut out.
Once you have your background element(s) cut out, carefully paint an even coat of Mod Podge on the back of your background.
It’s important that the back is completely covered, and as evenly as you can.
PRO TIP: Tilt in bright light to see the shine of the wet Mod Podge and make sure the entire back is thoroughly and evenly coated
Gently place it where you want it on your canvas . With your fingertips, smooth it out working from the center outwards. If any extra Mod Podge oozes out, wipe it off while still wet.
Step 3) Cut Faux Pumpkins-
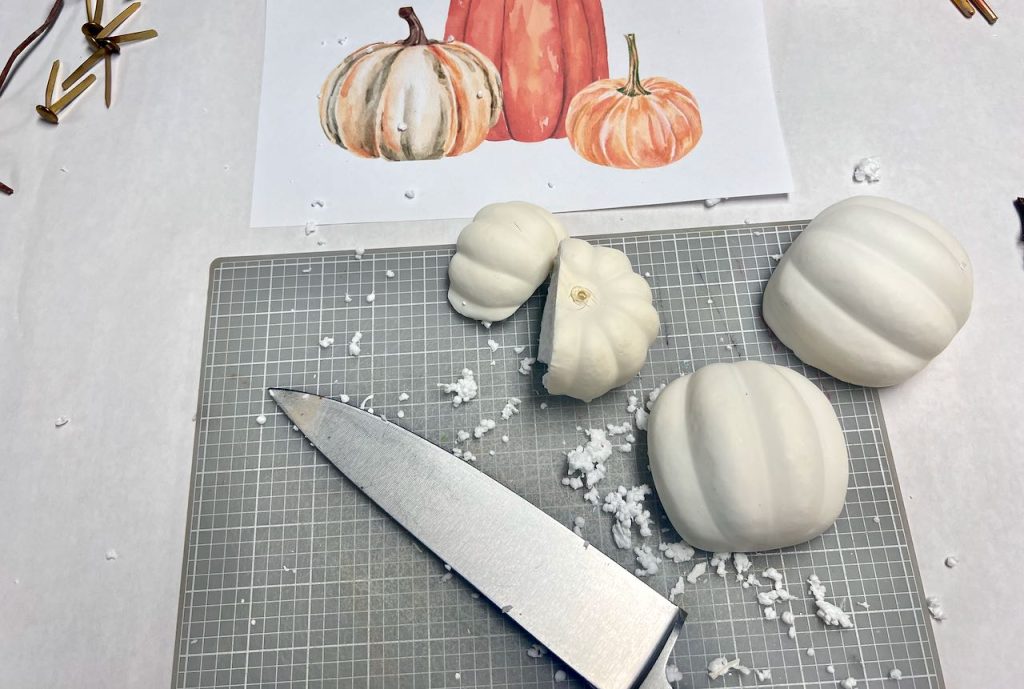
Determine how thick you want each pumpkin.
PRO TIP: The pumpkin you want to be the foremost should be the thickest.
Remove the plastic stem by pulling it straight out.
Using a long knife, carefully slice in a straight line across your pumpkins. Depending on the coating of your pumpkin it can require quite a bit of pressure, and others are quite easy.
Step 4) Modify Pumpkin stem if needed-
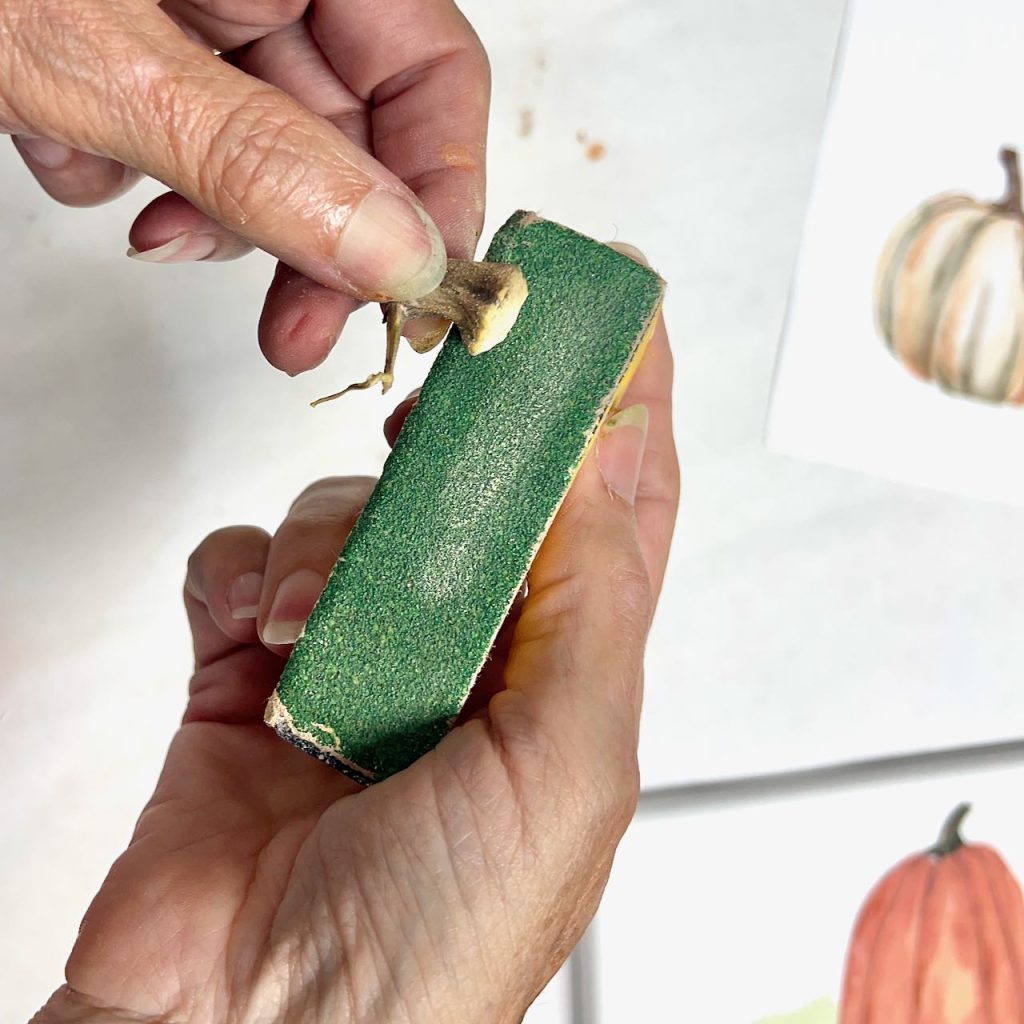
Not everyone keeps their stems from year to year, right? So if you need to, feel free to substitute a small twig you forage outside. Or, did you know you can order real stems on Etsy?
Depending on how far back your stem sits on the top of the pumpkin, you may want to smooth down one side of the real pumpkin stem so the base sits snuggly against the canvas.
The best way to do this is with a micro or detail sander fitted with coarse grit sandpaper.
I went years without a micro sander, and now that I;ve had one for over two years, truly I don’t know how I crafted and upcycled without one. One of the best tools in my workroom — and they are inexpensive. Do yourself a favor and order the one I use right now!
I also like to color my stems a bit.
Watercolor paints or a thin wash of acrylic paint works well. With it quite thin, it will run into the valleys of the stems ribbing and really highlight the uniqueness of a pumpkin stem’s structure.
Step 5) Paint Faux Pumpkins-
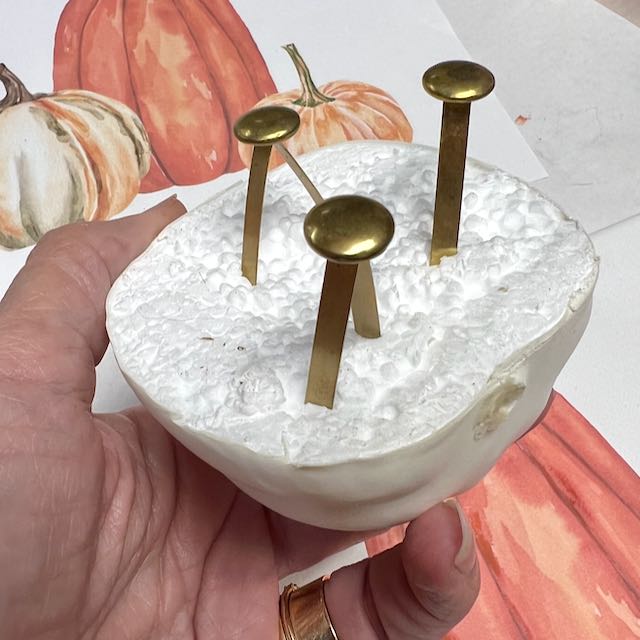
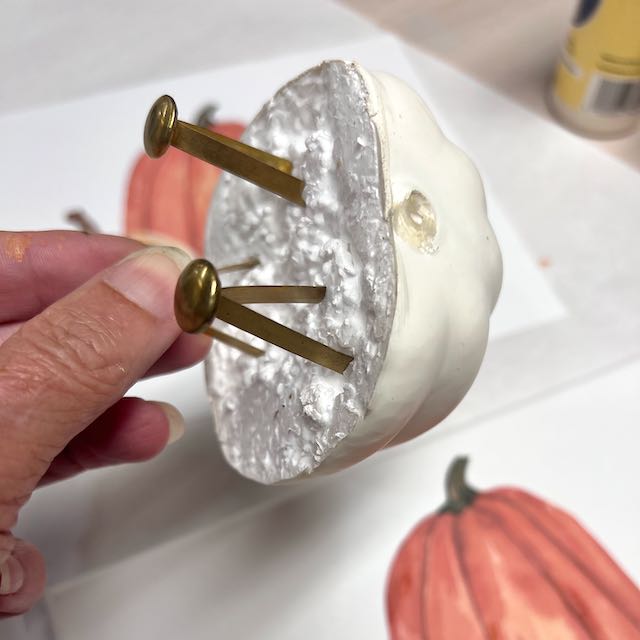
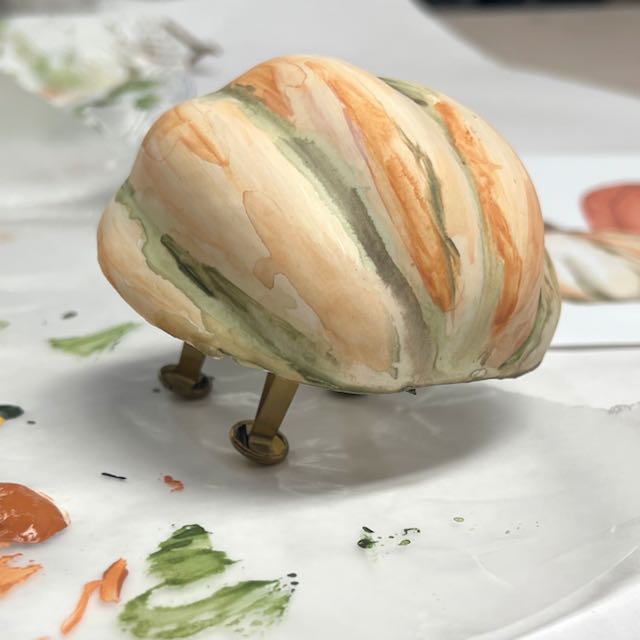
Insert three brads in the cut side of the half pumpkins (left). These act as handles to hold the pumpkins while painting (center) and then as feet while the pumpkins dry (right).
Mix your paints, so you have many shades.
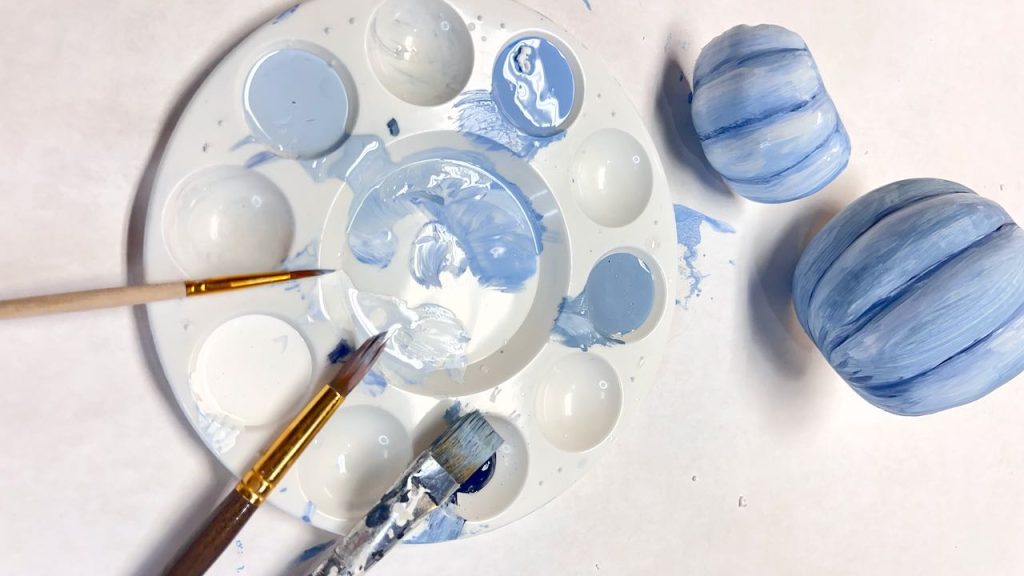
Apply with a paint brush in long strokes, then with a very thin brush add a deeper color down the rib indents. Before the paint dries add a dab of water to spread the various shades around, blending as desired. I took my cue from the muse artwork and went for a more “painterly” look, I did not blend my shades very much.
Optionally paint or color wash stem, any leaves or other details you might be adding if needed.
This is also when I washed a bit of color around the background pumpkin. I also test fit where my 3D pumpkins would sit so I could darken the green for shadowing.
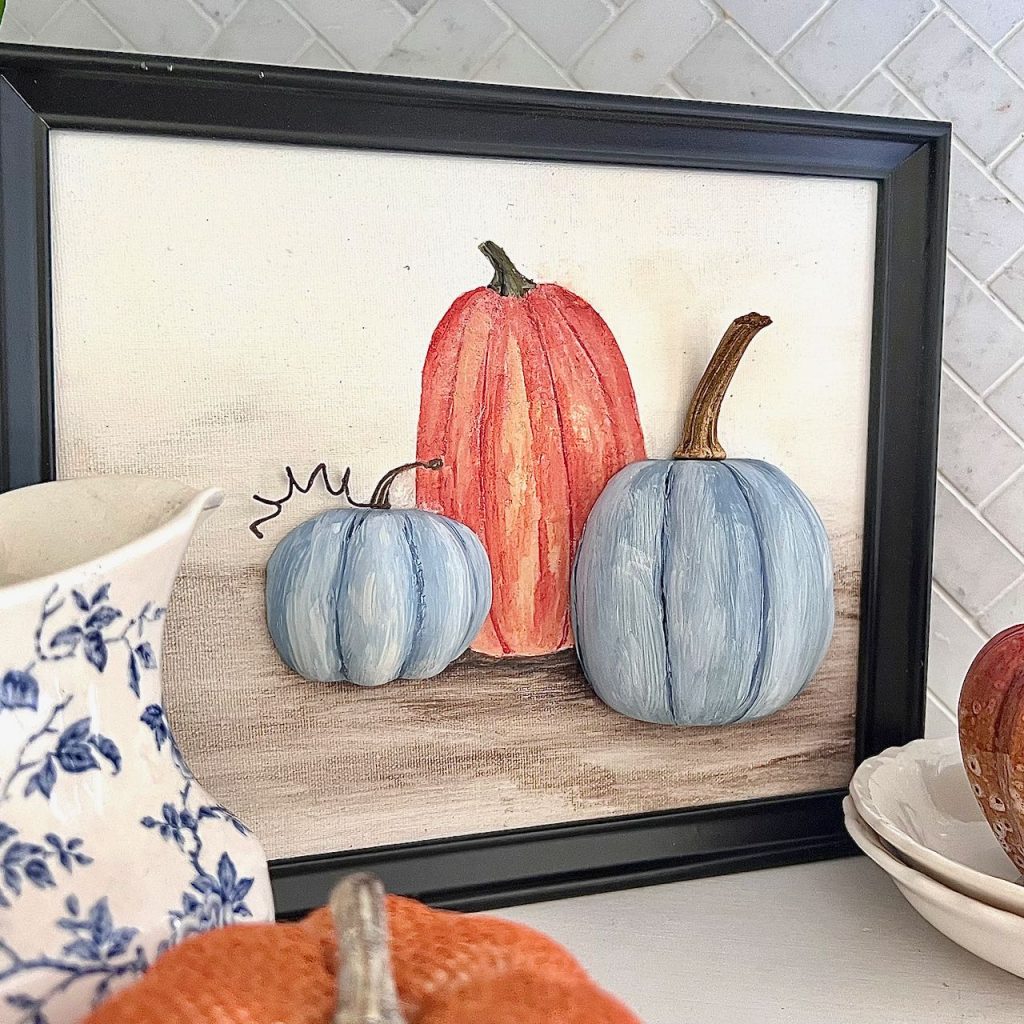
Step 6) Add Pumpkins to Canvas-
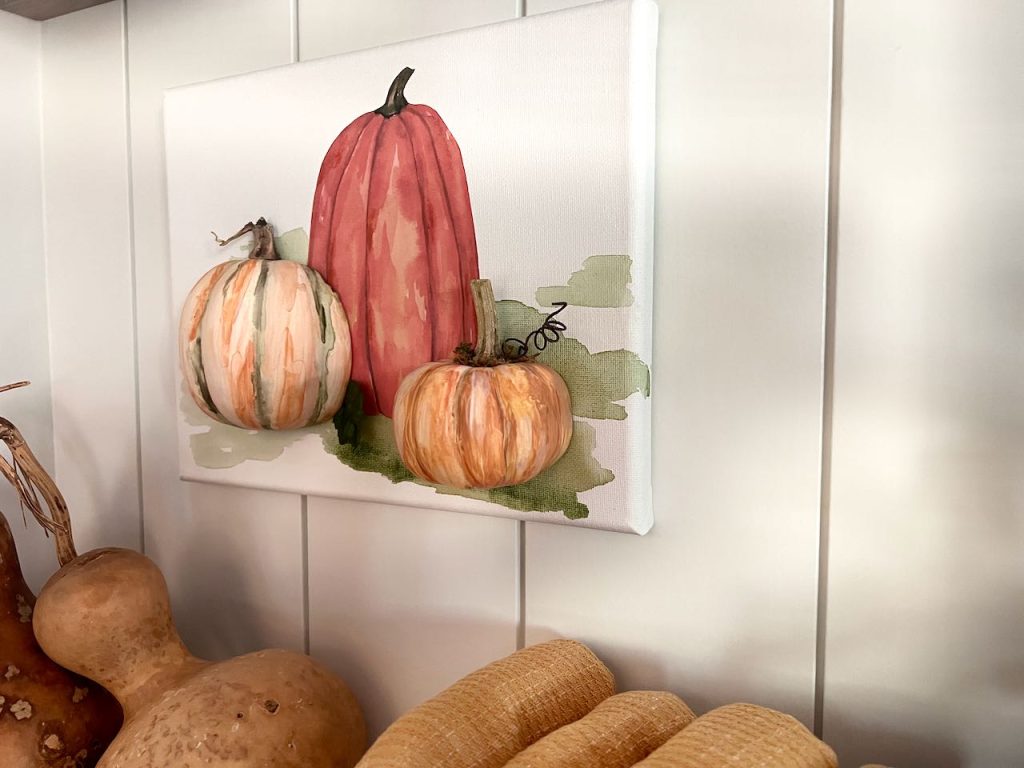
Once the Mod Podge and all your paint is dry, adhere your 3D pumpkins to your canvas.
I used E6000 for the blue pumpkins and hot glue for the orange and green ones.
Both options worked equally well.
Glue on any 3D pumpkin stems. A straight end of the wire tendrils were stuck between the pumpkin and the canvas.
Step 7) Seal Your Project-
The final touch is to seal your project.
Due to the variety of surfaces, the easy way is to use a spray sealer. There are many options out there. I used Clearcoat Acrylic Enamel from Dupli-Color. It’s what I had on hand in a matte finish.
I used matte, as that was my preference for this project. By all means go for the gloss if that’s what you’re into!
PRO TIP: Use multiple very light coats of spray to keep it from running off the sides of your pumpkins.
Isn’t it great to stand back and look at what you just made, feeling like a true artist?
I know! I love that feeling!!!
And I love a fun project that turns out looking like it takes way more artistic skill than the little bit I actually have. This is that kind of project!
Before we talk about ways to customize this craft,
please pin it so you’ll remember it.
Suggestions for Customizing to Your Home Decor Style
Size and Shape of Your Canvas-
A larger canvas is obviously an option, but also a pixie size pumpkin on a small canvas could be really charming for a tiered tray or as a small component in a larger gallery wall.
Or grab that short long wall art at the thrift store. Paint over it to give you a new blank canvas to work on. And it doesn’t have to be white!
A very loose watery suggestion of a garden would be cute. with a whole row of different thicknesses of pumpkin halves laying every which way from one corner of the canvas diagonally to the other and one long vine connecting them all.
Add More 3D Details-
My first one, the blue one, only one pumpkin had a 3D stem. The other had a tendril. But the second canvas, both 3D pumpkins had real stems. I added a tendril, some moss and even a leaf.
Background-
Add just a suggestion of a background as I did with my blue and orange pumpkins.
Or for a different look, go a bit more detailed with a watery suggestion of a field as I mentioned above.
Or go all out with a very detailed setting, either painted free hand or using free printable art similar to how we added the background pumpkin. How about a stylized version of your front porch with a small pumpkin on each side of your door.
Or go simplistic, but dramatic! Open a can of black paint or black spray paint to make your background a black canvas for your pumpkins to pop off.
If your style is vintage farmhouse, paint your canvas one of your happy colors and then sand the outer edge for that worn chippy look!
Add a Frame-
Just adding a frame can make quite the difference!
Of course, the style of the frame will make a huge difference too! I think an over-the-top ornate frame could be really fun with the more stylized pumpkins. Or maybe your style is more a reclaimed barnwood frame.
Keep in mind you can easily change the frame color too.
Change the Style of How You Paint Your Pumpkins-
I used a painterly style on my pumpkins to coordinate with the background pumpkin.
It would be fun to do s super soft shading with a printed background of a fine art painting.
Or how about a basic base coat of any color and then finish them off with rub-on vinyl decals for a tole painted look, or maybe a chinoiserie look or line art botanicals, or just about anything you could imagine.
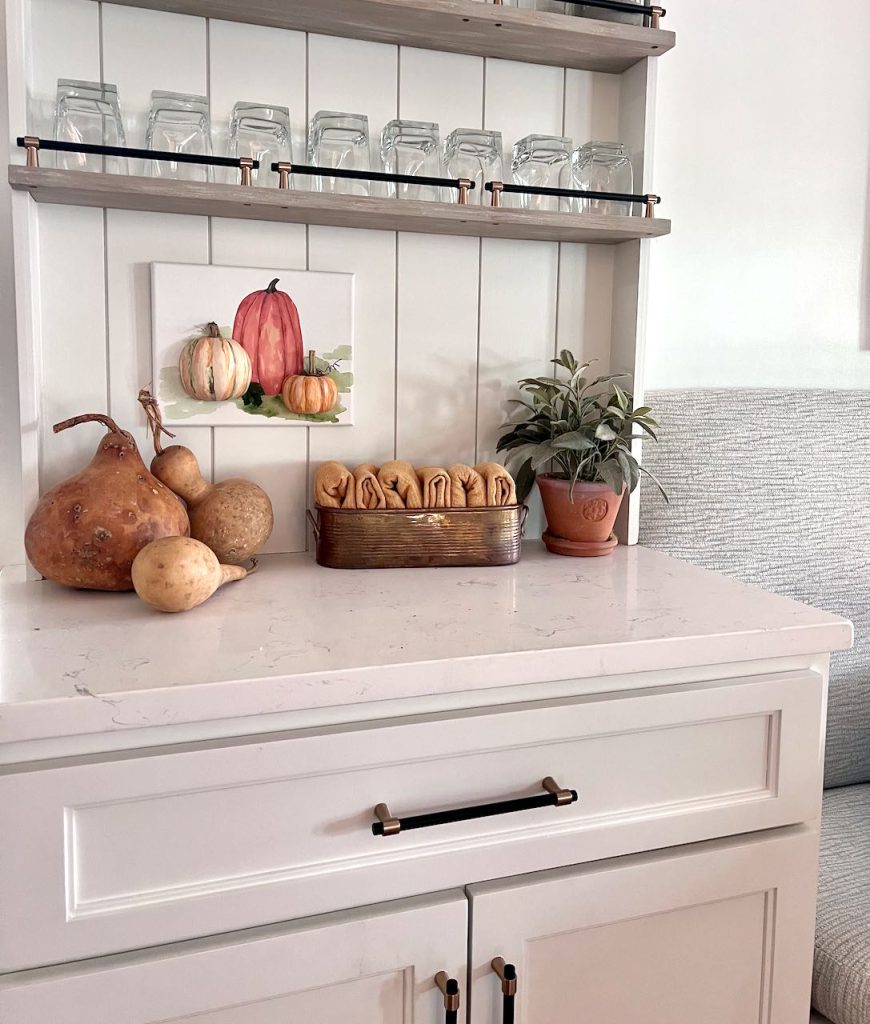
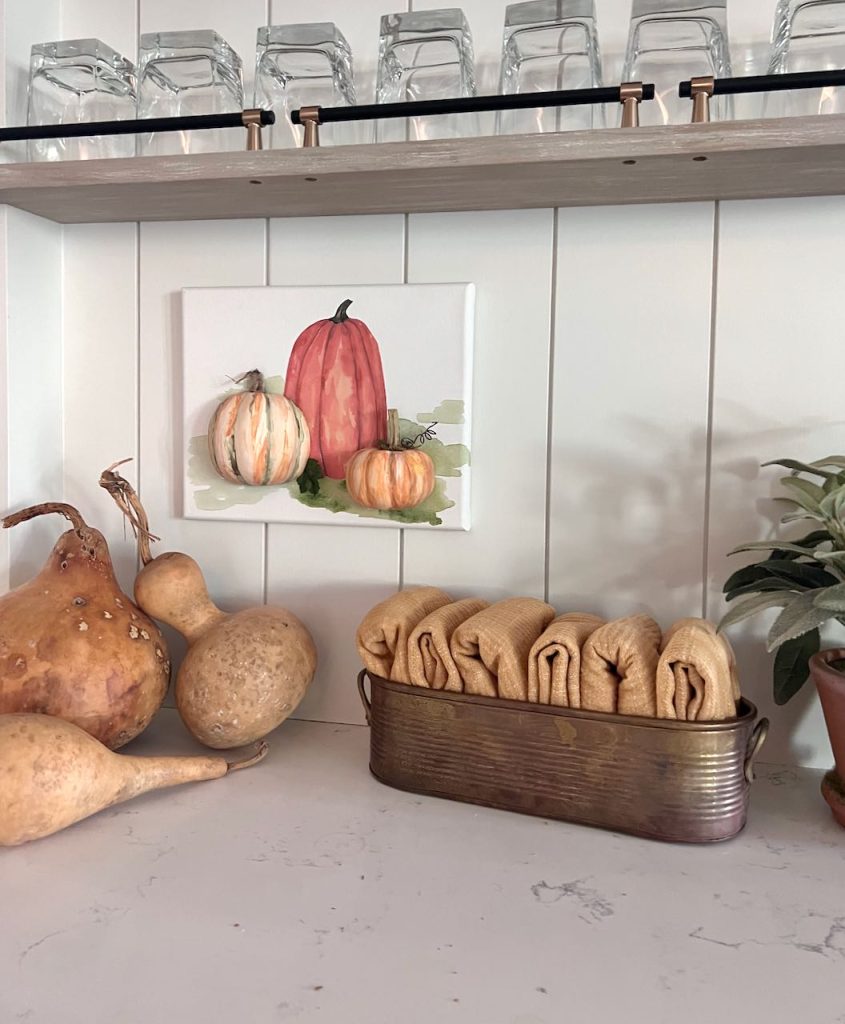
How & Where to Style Your Pumpkin Art
First thing, there are NO rules!
The more you think outside the box, the more your unexpected 3D pumpkin will have impact.
But here’s a bit of brainstorming to get you started:
- Mount on your backsplash with command strips or a plate hanger
- As part of a seasonal gallery wall
- Hang two or three on the center spines of built-in bookcases
- Peeking out from the center of a seasonal wreath
- On a protected porch as part of your Fall decor
- As a temporary sub for a framed photo that predictably (yawn!) hangs in the same spot all year long
I hope you enjoyed this and your head is swimming with creative ideas for this Fall craft. I hope you make one — or several — customizing it to your style. Please share pics with me. I’d LOVE to see what you come up with.
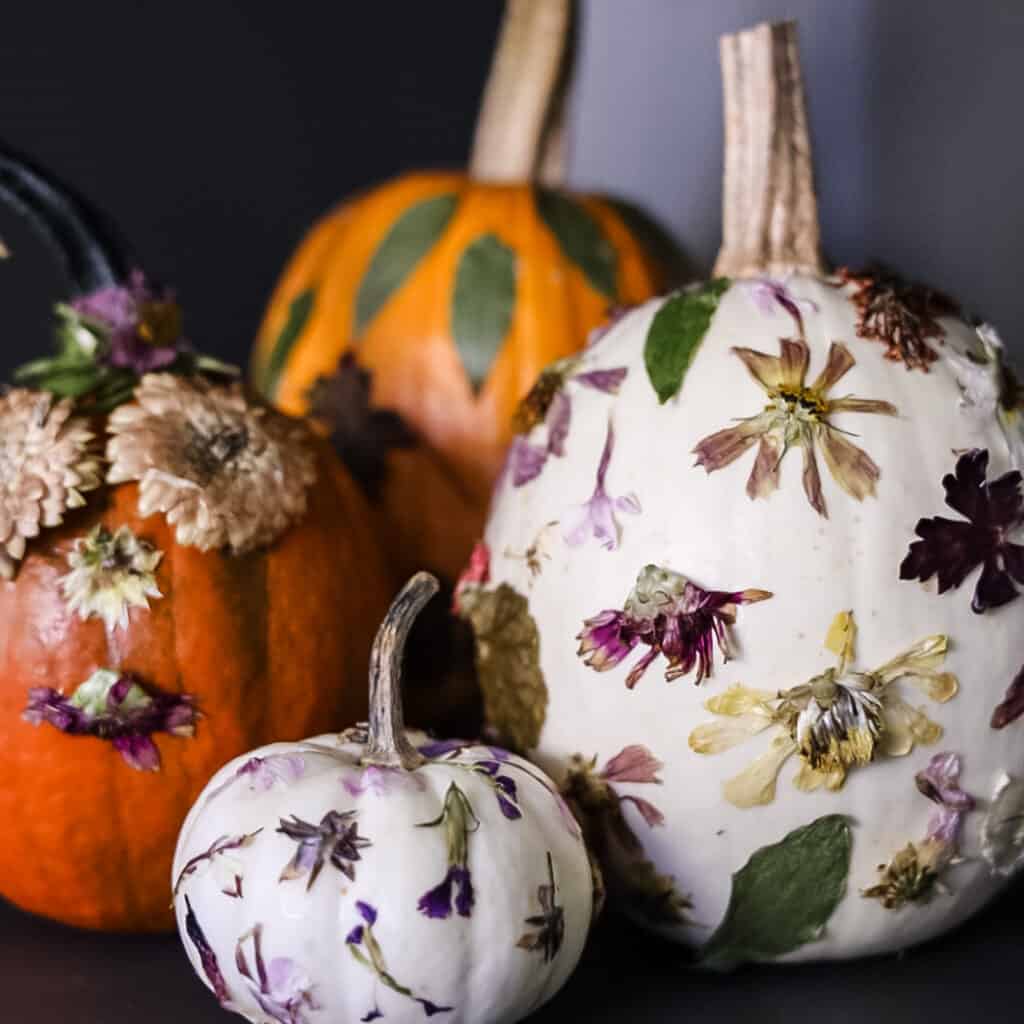
And now it’s tine for me to send you on to Jennifer at Cottage on Bunker Hill to be dazzled by her pressed flower pumpkins. She’s amazing, isn’t she? Tell Jennifer I said “Hi”.
And all the other talented ladies are listed and linked below:


As always, I so appreciate you stopping in and spending time with me. Please don’t hesitate to leave me comments or questions.I do read every one of them and try to respond as quickly as possible.

Oh my goodness I adore 3d painted art projects! This one is fabulous. I love the colors you picked and it turned out so wonderfully well. Looks like it is out of an art gallery!
Woo Hoo Crystal! I couldn’t hope for more. Fun having you along this month!!!
Your 3D pumpkins are so darn cute Diane! I just love your art project! Pinning!
Thanks Michelle!
I love how the Handcrafted Society really motivates me to push a bit further.
Diane these are so good! I love the idea of 3D wall art for the season!
3D is made for the season! I mean, really! Pumpkins were made to be bulbous don’t you think?
Another project of brilliance, Diane! I love the 3-D effect. With each photo, I want to reach out and grab a pumpkin! Beautifully painted and beautifully executed! Love it!
Diane, this is so creative. Not only are you so artistic, but making the pumpkins 3D is so cool. What a great idea. Definitely want to touch it.
Thanks Carol! The artistic piece Is incredibly easy when you use something like my printables to copy.
Oh my gosh, what a cool idea! You are so creative.
Diane, you are one talented lady. The 3D pumpkin art was such a cool idea. Thank you for sharing your inspiration with us!