This easy DIY project turns dollar store finds into a statement centerpiece. Create moss-covered garden orbs and arrange them with aged pots, small plants, and vintage treasures for a magical touch.
Hey friend! Have you noticed moss everywhere lately?
It’s seriously having more than a moment!
And for good reason – that lush green adds a touch of the outdoors to any space.
But we’re ditching the basic moss bowl for something a bit more whimsical – moss covered garden orbs!
They’re super easy and inexpensive (Hello, Dollar Tree!) to make, and they add a delightful pop of nature-inspired magic to your home.
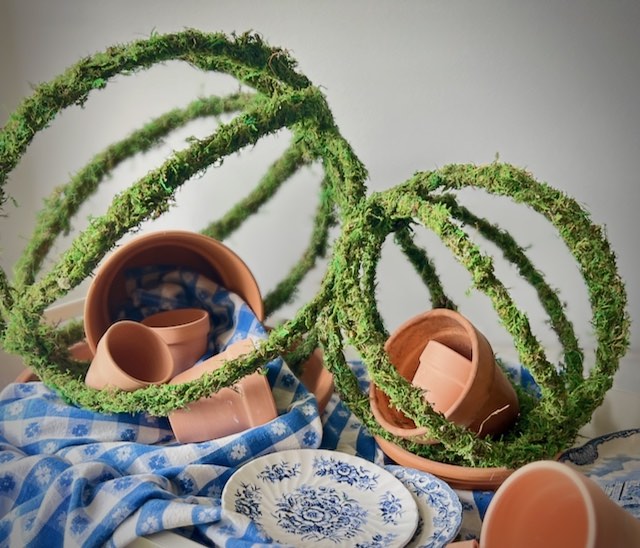
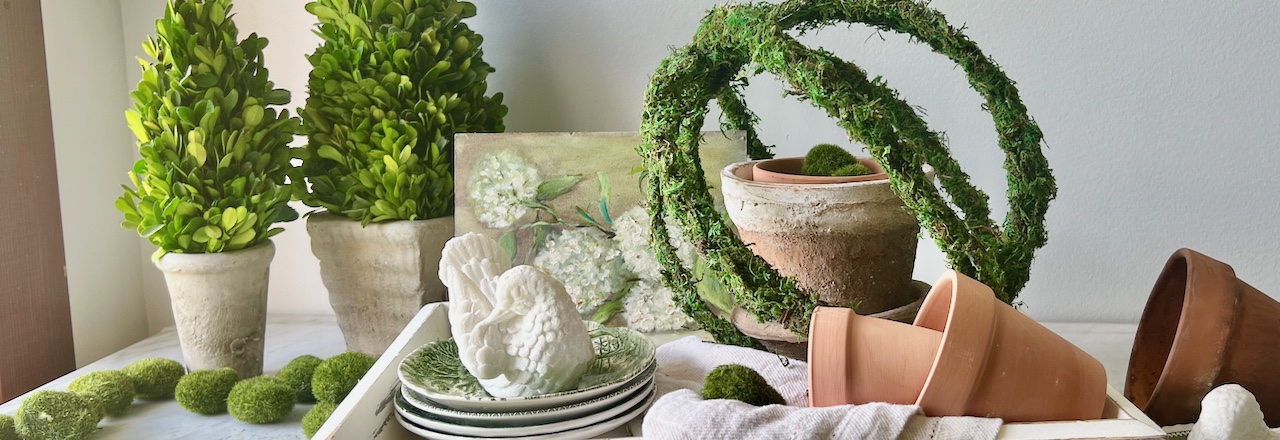
Whether for a themed dining table centerpiece, or for a coffee table, even a console table in the entry, a moss-covered orb with some aged pots and vintage garden tools or other thrift store finds can make the most memorable and charming display.
TABLE OF CONTENTS:
Let’s not waste time and get right to it:
All About Moss
Live Moss vs. Preserved Moss-
- LIVE MOSS-
- Requires more care (misting, indirect light)
- May not be readily available in all regions
- Can add a fresh, earthy scent to your space which is like saying your blind date had a great personality.
- PRESERVED MOSS–
- Low maintenance (doesn’t require watering or sunlight)
- Widely available in craft stores and online retailers
- Comes in a variety of colors
Common Types of Moss For Crafting-
- Sheet Moss: Not to be confused with rolled moss. Sheet moss it’s somewhat flat but with varying thickness. Kind of like as it was harvested from different terrains and it has different root systems. It’s ideal for covering flat surfaces and displays where you want variation
- Reindeer Moss: Airy and branched moss, with a variety of colors available (preserved). It’s like little separate pillowy bundles of moss or moss mounds
- Spanish Moss: there’s quite a bit of variety here, but Spanish moss is an air plant, it grows hanging from the trees in the South, and has starred in plenty movie backdrops. Easy to find in craft stores and in varying shades from natural to vibrant green.
- Rolled Moss: Popular right now are rolls of moss, usually a bright green and the same thickness and over look through the roll. It’s usually preserved moss that has been dyed and processed to a mess backing.
DIY Moss Covered Garden Orbs
First thing to know, there are two different ways I covered the same orbs. They each use different types of moss. With two very different results.
The fun-loving “hairy” orb uses Spanish moss in either natural or green using florist wire.
The more restrained orb is covered with rolled moss using hot glue.
So pick the one that fits your style best or the type of moss you already have on hand.
Just a quick pause to ask if you are a subscriber. If you’d like more great, but very do-able ideas and how-tos, please consider joining us:
Thanks bunches! Now back to our garden spheres:
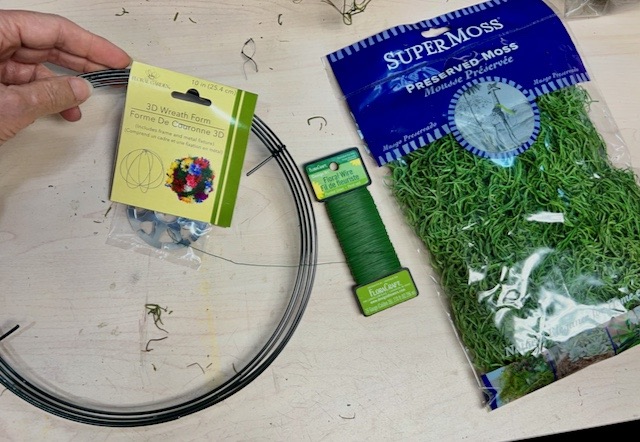
Materials and Supplies-
The links in this post may include affiliate links, which means if you purchase anything using these links, you pay no extra, but I may receive a small commission that helps keep this blog running. I truly appreciate you using affiliate links whenever possible. Please know that I will never recommend a product I do not believe in!
Option 1) “Fun-loving Hairy”-
- Spanish moss, I used green
- Garden orb frame
- Florist wire, I used green 26 gauge wire
- wire snips
Option 2) Traditional and Taylor-ed-
- Rolled moss, this is the one I used*
- Garden orb frame
- Hot glue sticks, these are my fave hot glue
- Scissors or seam ripper
- Hot glue gun, preferably with a low temp setting, this is mine
*NOTE: One package of 14 x 48-inches rolled moss made three small orbs and one large orb with some moss left over.
Step-By-Step Guide
Option 1) “Fun-Loving Hairy”-

Step 1) Assemble Your Orb-

Don’t be alarmed. It is so easy to do!
Each orb has four overlapping rings, for a total of 8 spines. And each orb comes with two then metal plates that you wrap around the spines to hold the rings in place. I have found that I only need one. I save the others for when I recycle an orb for another project (which, yes, I have done).
Here is a quick little video that shows just how I assemble them.
Step 2) Prepare the Moss-
To make sure I didn’t run out of Spanish moss and to help keep an even density around my orb, I emptied my plastic bag of green Spanish moss on my table. I then divided the whole thing in half, then each half in half again, then divided each of those four in half. Now I had 8 somewhat equal amounts of moss.
Step 3) Cover the Spines-
Starting at one of the poles, I secured the end of the wire to the center, then I held a bundle of moss to cover about 3 or four inches of the rib in place while I wrapped the wire around it. Sometimes I laid the moss on top and sometimes I held thee moss below the metal rib, but either way I was encasing the wire rib in moss all around it.
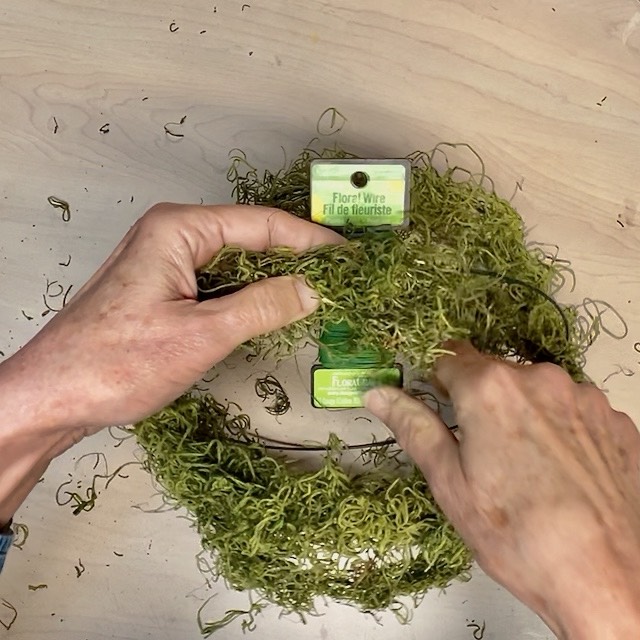
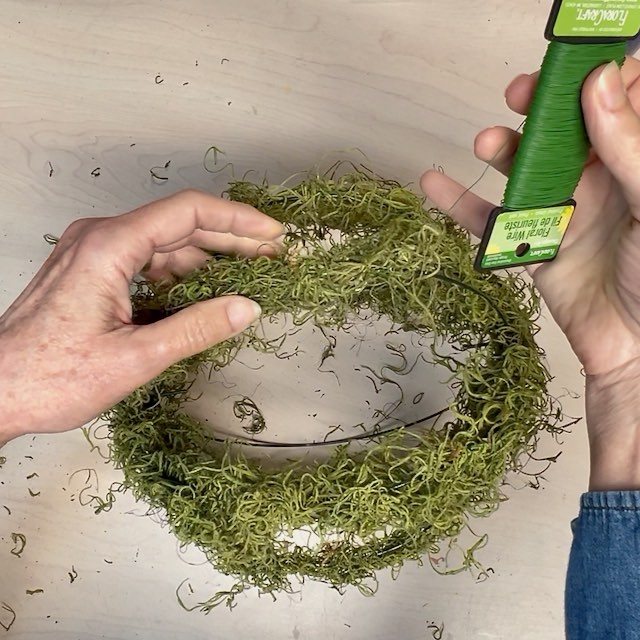
I added another bundle of moss overlapping the first a bit and continued to wrap the spool of wire over the moss and rib back under and over, pulling the wire fairly tight to the frames rib.
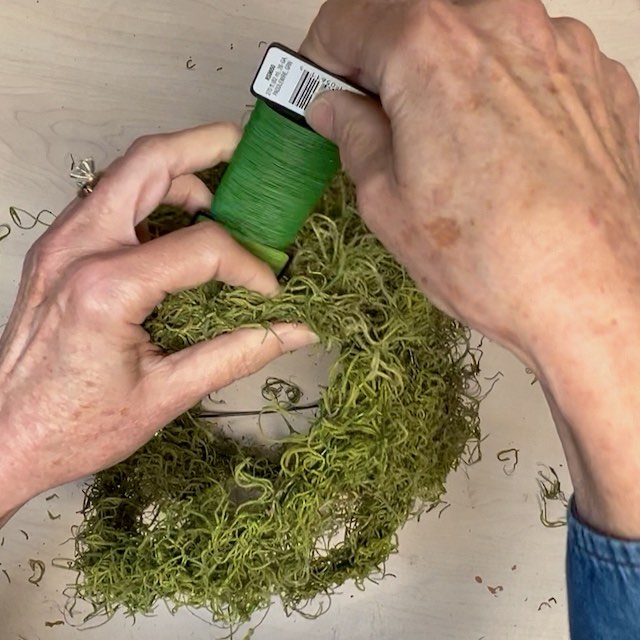
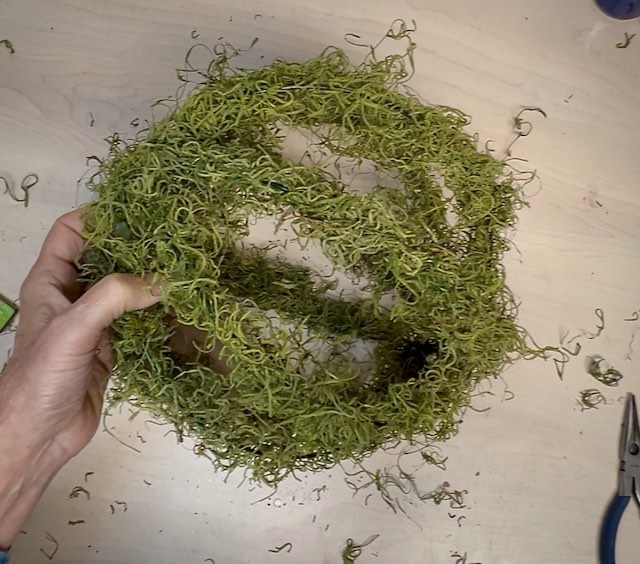
I proceeded down the length of the rib this way across the opposite pole and back up the other half of the ring to my starting point. Then I moved on to the next ring and the next continuing the wrap small bundles of moss around the wire frame and then wrapping the florist wire around that.
And that’s it. Easy Peasy, right?
I kept my moss on this one pretty loose and absolutely loved this look. I felt like it has a fresh, easy going attitude.
But then I wanted to see what would happen with a more tailored and traditional look.
Option 2) “Traditional and Taylor-ed”-
Step 1) Assemble Your Orb-
Second verse, just like the first.
The orbs are the same so the assembly is, you guessed it, the same!
Step 2) Prepare the Moss-
This time we are using rolled moss.
I had a partial roll in my stash of floral supplies. I wish I had more of that exact same moss. I have no clue how long I’ve had it or where is came from
I loved the more natural look of the moss, more like forest moss. This might just be because it is old and a bit faded.
More important than the look, the mesh on the back was thinner and you could easily tear it. Every roll I found locally has a heavier mesh and it must be cut. This takes just a bit more time, but is not difficult.
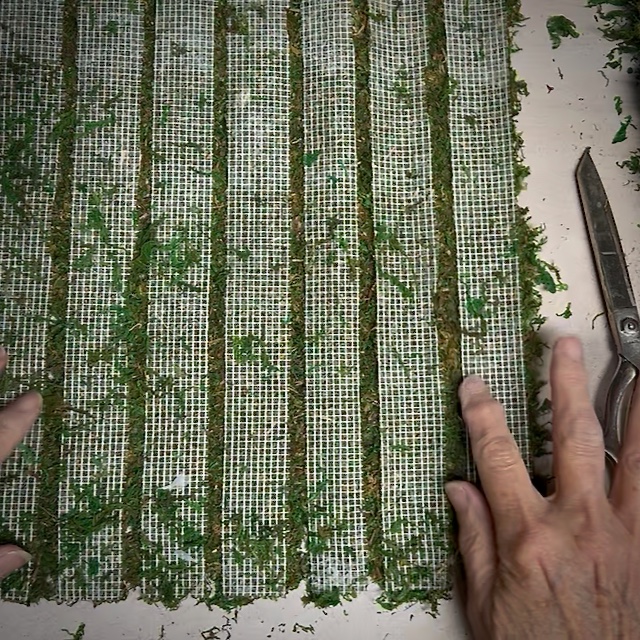
Lay your mosss with the mesh up. You want to cut the moss backing into strips just over and inch wide. Use a sharp pair of scissor or a seam ripper to cut through the mesh following the lines of the grid. Try not to cut through the moss too. Then jump over two grid lines and cut again.
The two grid lines will leave a space between the strips that you will use to tear the moss and this will help to cover the mesh when you’re gluing it to the sphere’s frame.
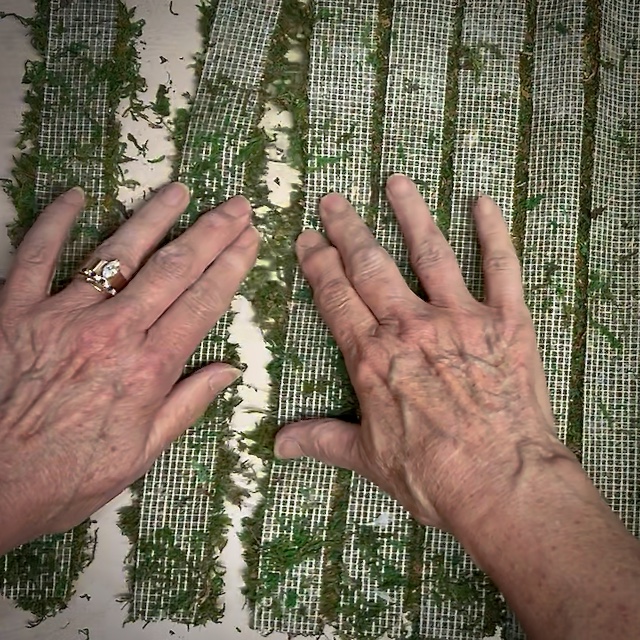
When you have all the strips cut, gently pull the strip apart separating the moss in a very organic way. A straight line cut in the moss will show.
One strip is just a little bit longer than you need for one rib of the 10-inch sphere. You’ll need about a strip and a half foreach rib of the 14-inch sphere.
Step 3) Cover the Spines-
Hot glue worked great for this. And I’m not one of those crafters who wears a hot gun holster. But it’s a great way to tackle this project.
But be sure to use low temp for this project or at least have some silicone finger protectors if not
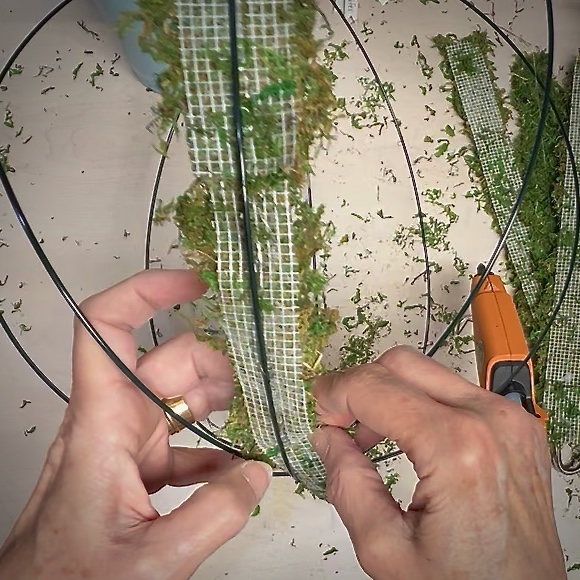
I found the best results by running a length of hot glue down the center of the mesh. Then I carefully picked up the strip and reaching through the ribs I applied it against the inside of the rib.
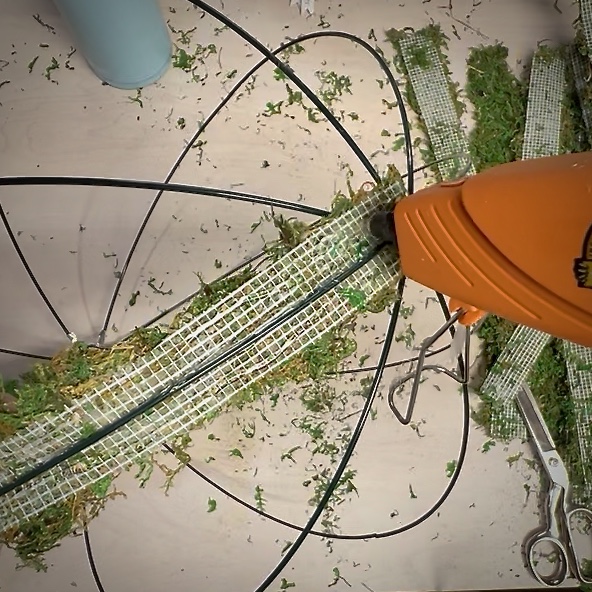
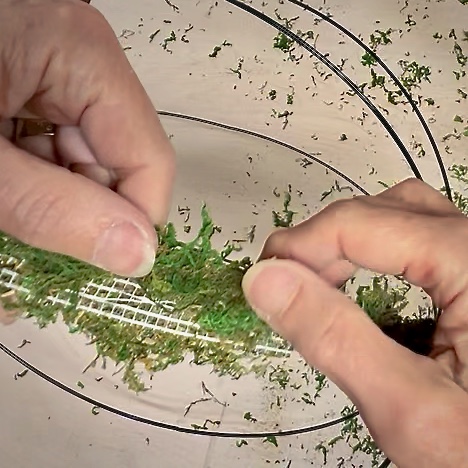
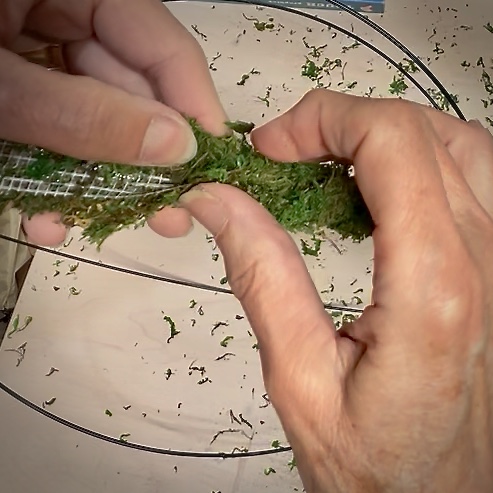
Then I ran glue along both outer edges and folded them into each other over the rib. It seems backwards to have the seam on the outside, but it is so much easier. And because we tore the moss instead of cutting it, the irregularity of the edge disguises the seam.
Continue down each rib. You may find that you need to cover the pole that has the metal rib holder. That’s easy to do with some hot glue and random scraps of moss.
Time to admire your handiwork.
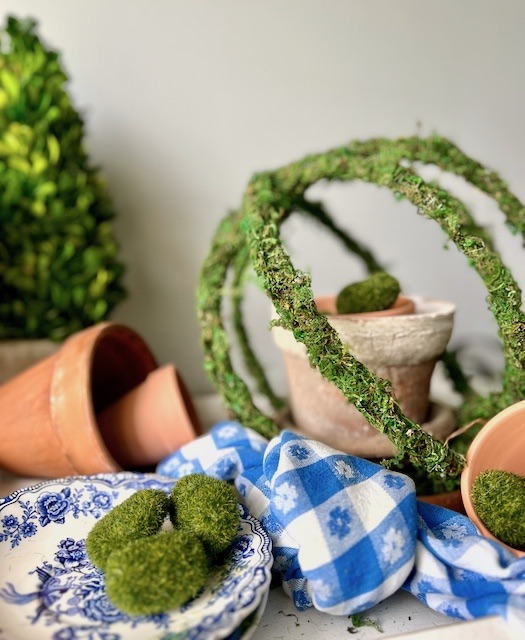
Create a Moss Orb or Sphere Centerpiece
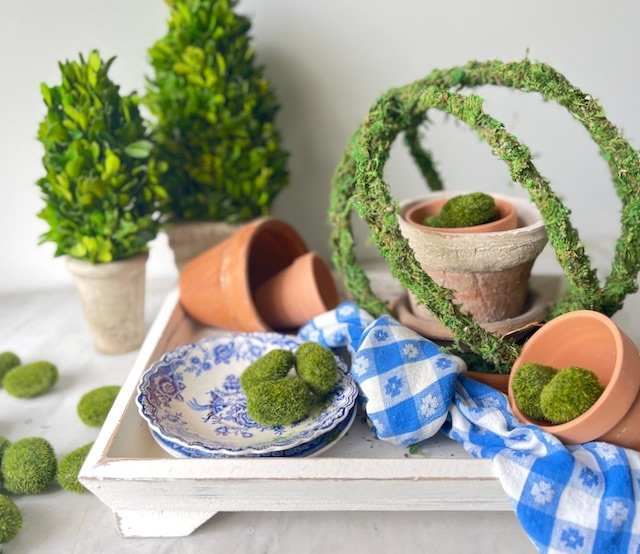
Mixing and Matching Ideas-
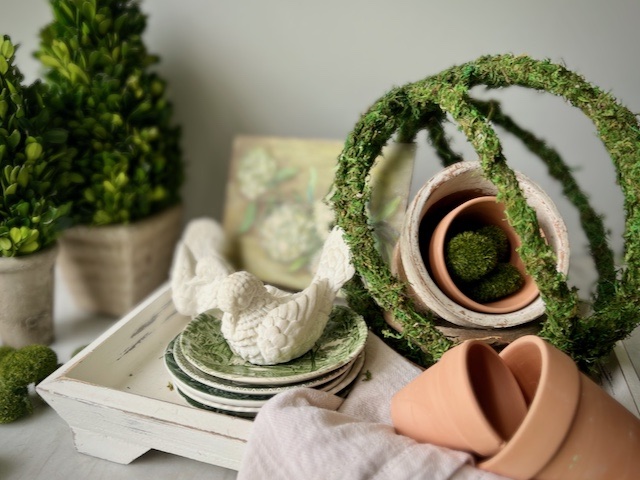
- Use various sizes of your elements for a layered effect
- Smaller moss balls or other moss pieces can work well beside the larger moss spheres
- A smooth surface is good to mix with the highly textured moss
- Combine them with aged flower pots with or without a few small indoor plants
- Perhaps add in some vintage garden tools
- A textile makes a great addition to displays, this could be ribbon, cute garden gloves, a tea towel or napkin
- Optionally a spot of color, like a cute bird perched on the orb
- Any garden statuary could be a cute
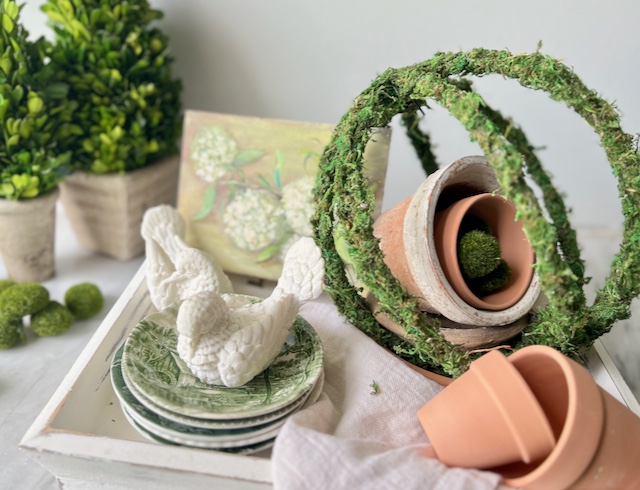
Placement Suggestions-
- Create a display on a large tray on a hutch or console table
- As a centerpiece on a coffee table or dining table
- On a front porch
- On a screened porch
- For a seasonal display in your entry
- And the orbs are fun hanging too!
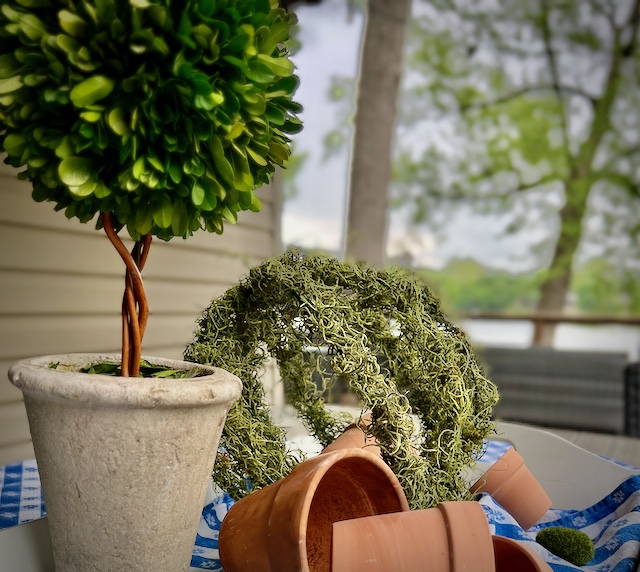
What a fun project, right? I can see three of them hanging on our patio, or some for a garden party shower.
How about you? But before anything, pin it to remember it:
I hope this has inspired you to make some fun moss covered garden spheres or globes. Please share yours with me and how you use them. Send me pics that I can share in my socials and possibly in updating this post. I love encouraging each other as a community of creatives.




I really like these. I can envision them on a summer outdoor table for a dinner party or beautifully simple centerpieces for a small wedding. Thanks for sharing the idea and of course I pin it for inspiration when needed. This post will be a feature at the next party. #HomeMattersParty
Oh Donna, thanks so much! I truly appreciate the feature!!!
Oh my gosh I absolutely love these!!! I actually just did a post about moss crafts and decor ideas round up. I have never done orbs. You have inspired me and pinned to add to my mossy repertoire. It’s great you showed two different looks and I love both. Thanks so much for the inspiration and great tutorials. XO- MaryJo @ masterpiecesmylife.com
Oh thanks for letting me know MaryJo!!! I’m so happy to hear they inspired you.
Beautiful! I love that this could be added to an outdoor tea garden tablescape. Thank you for sharing at our link party—The Crazy Little Lovebirds link party #47.
These are lovely, Diane! I’m visiting via Karin’s Kottage link party! We miss you at Tuesday Turn About and would love to be on your link party schedule! Hope to see you this week!