
Make the Cutest Housewarming Gift
[et_pb_section fb_built=”1″ _builder_version=”4.7.7″ _module_preset=”default”][et_pb_row _builder_version=”4.5.3″ custom_margin=”0px||||false|false” custom_padding=”0px||||false|false”][et_pb_column type=”4_4″ _builder_version=”4.4.9″][et_pb_image src=”https://southhousedesigns.com/wp-content/uploads/2021/04/C061BF4F-981C-4591-B857-A77E928ED38A_1_105_c.jpeg” alt=”Closeup of speckled eggs in nest in frame” title_text=”C061BF4F-981C-4591-B857-A77E928ED38A_1_105_c” _builder_version=”4.7.7″ _module_preset=”default”][/et_pb_image][et_pb_text admin_label=”Blog Post Title” _builder_version=”4.7.7″ header_font=”Crimson Pro|600|||||||” header_text_color=”#db7c7c” header_font_size=”63px” background_color=”#f1edeb” text_orientation=”center” width=”70%” max_width=”100%” module_alignment=”center” custom_margin=”-75px||||false|false” custom_padding=”35px||35px||false|false”]
How to Make the Cutest Housewarming Gift
[/et_pb_text][/et_pb_column][/et_pb_row][et_pb_row _builder_version=”4.7.7″ _module_preset=”default”][et_pb_column type=”4_4″ _builder_version=”4.7.7″ _module_preset=”default”][et_pb_text _builder_version=”4.7.7″ _module_preset=”default” text_font_size=”16px”]
Make the cutest housewarming gift, a memento marking this big step, a new nest, for newlyweds, for friends, for yourself.
[/et_pb_text][et_pb_text _builder_version=”4.7.7″ _module_preset=”default” link_option_url_new_window=”on”]
There’s nothing quite like a new home, whether it’s your first or your fourth! This is an occasion that deserves to be marked with a housewarming gift. A handmade gift, personalized with the new address.
[/et_pb_text][et_pb_image src=”https://southhousedesigns.com/wp-content/uploads/2021/04/Framed-Nest-on-Shelf-IGPost.jpeg” alt=”Framed Nest on Kitchen Ledge” title_text=”Framed Nest on Shelf-IGPost” _builder_version=”4.7.7″ _module_preset=”default”][/et_pb_image][et_pb_text _builder_version=”4.7.7″ _module_preset=”default”]
What is the best gift for housewarming?
Something personalized to the new home and homeowner(s)!
- Like with the street address, right?
- Number of family members in the new nest!
- How about their favorite decor color or style included
Something handmade — it doesn’t get any more personal than handmade!
[/et_pb_text][et_pb_text _builder_version=”4.7.7″ _module_preset=”default”]
What is a good inexpensive housewarming gift?
Handmade can be inexpensive, depending on the supplies — and is always special.
My framed nest was made with an assortment of supplies I had on hand.,
If you are not a craft supply stasher, these nest could run you as anywhere from $5 – $25, depending on how many supplies you need or want to buy.
[/et_pb_text][/et_pb_column][/et_pb_row][et_pb_row column_structure=”1_2,1_2″ _builder_version=”4.7.7″ _module_preset=”default”][et_pb_column type=”1_2″ _builder_version=”4.7.7″ _module_preset=”default”][et_pb_text _builder_version=”4.7.7″ _module_preset=”default”]
You’re busy right now? I get it!
But you want to make this sometime.
So pin this to your Crafts board,
Or to your Spring board,
Or to your daughter Katie board (if you have one of those),
Or to whatever board makes sense for you, so you have it handy when you’re ready to get started.
[/et_pb_text][/et_pb_column][et_pb_column type=”1_2″ _builder_version=”4.7.7″ _module_preset=”default”][et_pb_image src=”https://southhousedesigns.com/wp-content/uploads/2021/04/FramedNest-Pin2.jpg” alt=”Pin showing hand squeezing glue on frame over pic of finished Framed Nest” title_text=”FramedNest-Pin2″ _builder_version=”4.7.7″ _module_preset=”default”][/et_pb_image][/et_pb_column][/et_pb_row][et_pb_row _builder_version=”4.7.7″ _module_preset=”default”][et_pb_column type=”4_4″ _builder_version=”4.7.7″ _module_preset=”default”][et_pb_text _builder_version=”4.7.7″ _module_preset=”default”]
Here’s How I Made This Framed Nest for Our Katie & Jon:
[/et_pb_text][et_pb_text _builder_version=”4.7.7″ _module_preset=”default” custom_padding=”||2px|||”]
As Always, Start By Gathering Your Supplies & Materials
- Shallow box, or tray or deep frame
- Small nest with eggs
- Scrapbook Paper or just paint for the background
- Metal label frame and brads
- Scrap cardboard
- Small thin ring
- 6 – 8 inches of ribbon
- Drill with very thin drill bit
- Basic white glue with paint brush or spray adhesive
- Craft Paint and brushes and calligraphy pen if your eggs need repair like mine
- Exactp knife or razor blade
NOTE: Be sure to read through directions first, as many of these supplies will not be needed if you are starting with a frame that has an easel back.
To make things a bit easier for you, I have included some links at the end.
[/et_pb_text][/et_pb_column][/et_pb_row][et_pb_row _builder_version=”3.25″ background_size=”initial” background_position=”top_left” background_repeat=”repeat” collapsed=”off”][et_pb_column type=”4_4″ _builder_version=”3.25″ custom_padding=”|||” custom_padding__hover=”|||”][et_pb_text _builder_version=”4.7.7″ _module_preset=”default”]
Step 1) Optional – Change shiny silver frame to aged gold
[/et_pb_text][et_pb_image src=”https://southhousedesigns.com/wp-content/uploads/2021/04/Framed-Nest-Gold-Sharpie.jpeg” alt=”silver metal label holder with a gold sharpie marker and a label holder changed to gold” title_text=”Framed Nest – Gold Sharpie” _builder_version=”4.7.7″ _module_preset=”default”][/et_pb_image][et_pb_text _builder_version=”4.7.7″ _module_preset=”default”]
I only had these shiny silver frames in my stash. But, luckily I also had a gold sharpie. Problem solved!
(truth be told, I started with my go-to favorite — Rub ‘n Buff. But sadly, it did not work at all on that thin metal.)
[/et_pb_text][/et_pb_column][/et_pb_row][et_pb_row _builder_version=”3.25″ background_size=”initial” background_position=”top_left” background_repeat=”repeat” collapsed=”off”][et_pb_column type=”4_4″ _builder_version=”3.25″ custom_padding=”|||” custom_padding__hover=”|||”][et_pb_text _builder_version=”4.7.7″ _module_preset=”default”]
Step 2) Repair Eggs, a Step You Probably Won’t Need:
[/et_pb_text][et_pb_image src=”https://southhousedesigns.com/wp-content/uploads/2021/04/Framed-Nest-Paint-Fix-on-Eggs.jpeg” alt=”freshly painted eggs in nest with paintbrush and paint nearby” title_text=”Framed Nest – Paint Fix on Eggs” _builder_version=”4.7.7″ _module_preset=”default”][/et_pb_image][et_pb_text _builder_version=”4.7.7″ _module_preset=”default”]
The nest was adorable, but the eggs were sad and a bit beaten up. But this was a very easy fix.
I used three craft paints, white, soft yellow and a deep golden color. A small squirt of each on a piece of wax paper and I was sailing along. There was even a hole in one of the styrofoam eggs. I thought about using spackling to fill it, but realized that I can better camouflage it with speckles.
[/et_pb_text][et_pb_image src=”https://southhousedesigns.com/wp-content/uploads/2021/04/Framed-Nest-Egg-Speckles.jpeg” alt=”nest with eggs with calligraphy pen and paint puddle” title_text=”Framed Nest – Egg Speckles” _builder_version=”4.7.7″ _module_preset=”default”][/et_pb_image][et_pb_text _builder_version=”4.7.7″ _module_preset=”default”]
And then with a squirt of brown and a squirt of black craft paints, I swirled a calligraphy pen in them and added a few tiny speckles. And they are all better now.
[/et_pb_text][/et_pb_column][/et_pb_row][et_pb_row _builder_version=”3.25″ background_size=”initial” background_position=”top_left” background_repeat=”repeat” collapsed=”off”][et_pb_column type=”4_4″ _builder_version=”3.25″ custom_padding=”|||” custom_padding__hover=”|||”][et_pb_text _builder_version=”4.7.7″ _module_preset=”default”]
Step 3) Finish the Box (or Frame)
NOTE: You’ll Skip This Step if Starting With a Finished Frame:
[/et_pb_text][et_pb_image src=”https://southhousedesigns.com/wp-content/uploads/2021/04/Framed-Nest-Finish-Box.jpeg” alt=”wood box with a sanded and waxed finish with can of wax and rag shown nearby” title_text=”Framed Nest – Finish Box” _builder_version=”4.7.7″ _module_preset=”default”][/et_pb_image][et_pb_text _builder_version=”4.7.7″ _module_preset=”default”]
I started by sanding it really well. particularly the corners to give it a more expensive cabinetry-made frame feel. Then I used some furniture paste wax I keep on hand.
Love the clean lines and natural feel. But of course, all kinds of stain and paint effects could work.
[/et_pb_text][/et_pb_column][/et_pb_row][et_pb_row _builder_version=”3.25″ background_size=”initial” background_position=”top_left” background_repeat=”repeat” collapsed=”off”][et_pb_column type=”4_4″ _builder_version=”3.25″ custom_padding=”|||” custom_padding__hover=”|||”][et_pb_text _builder_version=”4.7.7″ _module_preset=”default”]
Step 4) Cut (or Paint) the Background
[/et_pb_text][et_pb_image src=”https://southhousedesigns.com/wp-content/uploads/2021/04/Framed-Nest-Cut-Background.jpeg” alt=”square of scrapbook paper cut out of a larger piece and the wood box” title_text=”Framed Nest – Cut Background” _builder_version=”4.7.7″ _module_preset=”default”][/et_pb_image][et_pb_text _builder_version=”4.7.7″ _module_preset=”default”]
Measure your background surface and cut out scrapbooking paper as I did or you can go fancier on this and paint it, stain it, or decoupage it with a collage of torn papers.
[/et_pb_text][/et_pb_column][/et_pb_row][et_pb_row _builder_version=”3.25″ background_size=”initial” background_position=”top_left” background_repeat=”repeat” collapsed=”off”][et_pb_column type=”4_4″ _builder_version=”3.25″ custom_padding=”|||” custom_padding__hover=”|||”][et_pb_text _builder_version=”4.7.7″ _module_preset=”default”]
Step 5) Apply to Background
[/et_pb_text][/et_pb_column][/et_pb_row][et_pb_row column_structure=”1_2,1_2″ _builder_version=”4.7.7″ _module_preset=”default”][et_pb_column type=”1_2″ _builder_version=”4.7.7″ _module_preset=”default”][et_pb_image src=”https://southhousedesigns.com/wp-content/uploads/2021/04/Framed-Nest-Squirt-Glue.jpeg” alt=”hand squirting elmers glue into wood box” title_text=”Framed Nest – Squirt Glue” _builder_version=”4.7.7″ _module_preset=”default”][/et_pb_image][/et_pb_column][et_pb_column type=”1_2″ _builder_version=”4.7.7″ _module_preset=”default”][et_pb_image src=”https://southhousedesigns.com/wp-content/uploads/2021/04/Framed-Nest-Spread-Glue.jpeg” alt=”hand spreading glue with paintbrush” title_text=”Framed Nest – Spread Glue” _builder_version=”4.7.7″ _module_preset=”default”][/et_pb_image][/et_pb_column][/et_pb_row][et_pb_row _builder_version=”4.7.7″ _module_preset=”default”][et_pb_column type=”4_4″ _builder_version=”4.7.7″ _module_preset=”default”][et_pb_text _builder_version=”4.7.7″ _module_preset=”default”]
Use basic white glue or spray adhesive.
For liquid glue, squirt from the bottle, but then be sure to spread ti a thin even layer.
[/et_pb_text][/et_pb_column][/et_pb_row][et_pb_row _builder_version=”3.25″ background_size=”initial” background_position=”top_left” background_repeat=”repeat” collapsed=”off”][et_pb_column type=”4_4″ _builder_version=”3.25″ custom_padding=”|||” custom_padding__hover=”|||”][et_pb_text _builder_version=”4.7.7″ _module_preset=”default”]
Step 6) Apply Address Holder
[/et_pb_text][/et_pb_column][/et_pb_row][et_pb_row column_structure=”1_2,1_2″ _builder_version=”4.7.7″ _module_preset=”default”][et_pb_column type=”1_2″ _builder_version=”4.7.7″ _module_preset=”default”][et_pb_image src=”https://southhousedesigns.com/wp-content/uploads/2021/04/Framed-Nest-Address-Placement.jpeg” alt=”address frame shown in bottom of box withh pencil to mark holes and a homemade guide to find center” title_text=”Framed Nest – Address Placement” _builder_version=”4.7.7″ _module_preset=”default”][/et_pb_image][/et_pb_column][et_pb_column type=”1_2″ _builder_version=”4.7.7″ _module_preset=”default”][et_pb_image src=”https://southhousedesigns.com/wp-content/uploads/2021/04/Framed-Nest-Drill-Holes-For-Brads.jpeg” alt=”closeup of drilling tiny holes for brads” title_text=”Framed Nest – Drill Holes For Brads” _builder_version=”4.7.7″ _module_preset=”default”][/et_pb_image][/et_pb_column][/et_pb_row][et_pb_row _builder_version=”3.25″ background_size=”initial” background_position=”top_left” background_repeat=”repeat” collapsed=”off”][et_pb_column type=”4_4″ _builder_version=”3.25″ custom_padding=”|||” custom_padding__hover=”|||”][et_pb_text _builder_version=”4.7.7″ _module_preset=”default”]
This was the trickiest part of the whole project — making sure I had the label frame centered.
I ended up cutting a piece of paper the width of the box base. Then I folded the paper in half, laid it under the label frame, lining up the fold with the center of the frame, and marked the hole through both thicknesses of paper. Opened the paper and made sure the holes lined up with the frame. If the holes didn’t line up, that mwould mean one of my measurements was off.
Now with my paper template was ready, I laid it in the frame, marked my holes and then with a very fine bit drilled each hole.
[/et_pb_text][/et_pb_column][/et_pb_row][et_pb_row column_structure=”1_2,1_2″ _builder_version=”4.7.7″ _module_preset=”default”][et_pb_column type=”1_2″ _builder_version=”4.7.7″ _module_preset=”default”][et_pb_image src=”https://southhousedesigns.com/wp-content/uploads/2021/04/Framed-NEST-Attach-Address.jpeg” alt=”address label in metal holder centeredmat bottom of box” title_text=”Framed NEST – Attach Address” _builder_version=”4.7.7″ _module_preset=”default”][/et_pb_image][/et_pb_column][et_pb_column type=”1_2″ _builder_version=”4.7.7″ _module_preset=”default”][et_pb_image src=”https://southhousedesigns.com/wp-content/uploads/2021/04/Framed-Nest-Brads-on-Back-with-Glue.jpeg” alt=”bottom of wood box with the tiny brad legs coming through, tapped open and gued” title_text=”Framed Nest – Brads on Back with Glue” _builder_version=”4.7.7″ _module_preset=”default”][/et_pb_image][/et_pb_column][/et_pb_row][et_pb_row _builder_version=”4.7.7″ background_size=”initial” background_position=”top_left” background_repeat=”repeat” collapsed=”off”][et_pb_column type=”4_4″ _builder_version=”3.25″ custom_padding=”|||” custom_padding__hover=”|||”][et_pb_text _builder_version=”4.7.7″ _module_preset=”default”]
Next, Put your label frame in place and then I slipped the little brads through the holes. These brads were designed with scrapbooking in mind — thick paper. Not thin wood. But there was just enough length to the brad arms that i could spread them just a bit and tap them with a hammer to set them. For extra security I added a mound of glue on each on the back.
[/et_pb_text][et_pb_text _builder_version=”4.7.7″ _module_preset=”default”]
Step 8) Add the Nest
[/et_pb_text][et_pb_image src=”https://southhousedesigns.com/wp-content/uploads/2021/04/Framed-Nest-Hot-Glue-Nest.jpeg” alt=”liner in box with address complete and hot glue gun and nest nearby” title_text=”Framed Nest – Hot Glue Nest” _builder_version=”4.7.7″ _module_preset=”default”][/et_pb_image][et_pb_text _builder_version=”4.7.7″ _module_preset=”default”]
This is the fun part!
Hot glue your nest in place. I imagine other varieties of glue would work if you don’t have a glue gun. But this is the perfect excuse to get one.
[/et_pb_text][/et_pb_column][/et_pb_row][et_pb_row _builder_version=”3.25″ background_size=”initial” background_position=”top_left” background_repeat=”repeat” collapsed=”off”][et_pb_column type=”4_4″ _builder_version=”3.25″ custom_padding=”|||” custom_padding__hover=”|||”][et_pb_text _builder_version=”4.7.7″ _module_preset=”default”]
Step 9) Add Hanging or Standing Options
If Using a Frame With An Easel Back, You Are Done And Get to Skip This Step!
[/et_pb_text][/et_pb_column][/et_pb_row][et_pb_row column_structure=”1_3,1_3,1_3″ _builder_version=”4.7.7″ _module_preset=”default”][et_pb_column type=”1_3″ _builder_version=”4.7.7″ _module_preset=”default”][et_pb_image src=”https://southhousedesigns.com/wp-content/uploads/2021/04/Framed-Nest-Cut-Easels-and-Ribbon.jpeg” alt=”two triangles cut of cardboard with exacto knife, ribbon and small metal ring” title_text=”Framed Nest – Cut Easels and Ribbon” _builder_version=”4.7.7″ _module_preset=”default”][/et_pb_image][/et_pb_column][et_pb_column type=”1_3″ _builder_version=”4.7.7″ _module_preset=”default”][et_pb_image src=”https://southhousedesigns.com/wp-content/uploads/2021/04/Framed-Nest-Cut-Slit-For-Ribbon.jpeg” alt=”hand holding exacto knife cutting slit for riibbon in one side of easel” title_text=”Framed Nest – Cut Slit For Ribbon” _builder_version=”4.7.7″ _module_preset=”default”][/et_pb_image][/et_pb_column][et_pb_column type=”1_3″ _builder_version=”4.7.7″ _module_preset=”default”][et_pb_image src=”https://southhousedesigns.com/wp-content/uploads/2021/04/Framed-Nest-Ribbon-Through-Ring.jpeg” alt=”ribbon with ring laying on easel” title_text=”Framed Nest – Ribbon Through Ring” admin_label=”Image” _builder_version=”4.7.7″ _module_preset=”default”][/et_pb_image][/et_pb_column][/et_pb_row][et_pb_row _builder_version=”4.7.7″ _module_preset=”default”][et_pb_column type=”4_4″ _builder_version=”4.7.7″ _module_preset=”default”][et_pb_text _builder_version=”4.7.7″ _module_preset=”default”]
For our new nesters, I wanted to give them the option of hanging or standing on a shelf.
This is how I made a convertible easel on the back:
Cut out two matching triangles of thin but sturdy cardboard. You’ll need a bit of ribbon, mine is 6-inches, and a thin ring.
With an Exacto knife or razor blade, cut a slit in one triangle about an inch up from the bottom and wide enough for the ribbon to slip through.
[/et_pb_text][/et_pb_column][/et_pb_row][et_pb_row column_structure=”1_3,1_3,1_3″ _builder_version=”4.7.7″ _module_preset=”default”][et_pb_column type=”1_3″ _builder_version=”4.7.7″ _module_preset=”default”][et_pb_image src=”https://southhousedesigns.com/wp-content/uploads/2021/04/Framed-Nest-Glue-Ribbon.jpeg” alt=”ribbon with ring glued to easel with easel back next to it” title_text=”Framed Nest – Glue Ribbon” _builder_version=”4.7.7″ _module_preset=”default”][/et_pb_image][/et_pb_column][et_pb_column type=”1_3″ _builder_version=”4.7.7″ _module_preset=”default”][et_pb_image src=”https://southhousedesigns.com/wp-content/uploads/2021/04/Framed-Nest-Glue-2nd-Easel.jpeg” alt=”easel back glued onto the easel front with ribbon and ring peeking out the top” title_text=”Framed Nest – Glue 2nd Easel” _builder_version=”4.7.7″ _module_preset=”default”][/et_pb_image][/et_pb_column][et_pb_column type=”1_3″ _builder_version=”4.7.7″ _module_preset=”default”][et_pb_image src=”https://southhousedesigns.com/wp-content/uploads/2021/04/Framed-Nest-Score-Easel-and-Glue.jpeg” alt=”hand holding easel glued to back of box” title_text=”Framed Nest – Score Easel and Glue” _builder_version=”4.7.7″ _module_preset=”default”][/et_pb_image][/et_pb_column][/et_pb_row][et_pb_row _builder_version=”3.25″ background_size=”initial” background_position=”top_left” background_repeat=”repeat” collapsed=”off”][et_pb_column type=”4_4″ _builder_version=”3.25″ custom_padding=”|||” custom_padding__hover=”|||”][et_pb_text _builder_version=”4.7.7″ _module_preset=”default”]
Slip one end of the ribbon through the slit and glue the ribbon down the center of the first triangle. The other end of the ribbon will hold the ring.
Fold the top ribbon end down with the ring exposed just above the top of the triangle easel. Now glue on the second triangle encasing the ribbon.
Score the front side of the easel about 1-1/2 inches below the top. And now this top part is glued to the back of the box as well as the end of the ribbon coming through the slit on the other side.
[/et_pb_text][et_pb_image src=”https://southhousedesigns.com/wp-content/uploads/2021/04/Framed-Nest-All-Done.jpeg” alt=”Finished framed nest on work table” title_text=”Framed Nest — All Done” _builder_version=”4.7.7″ _module_preset=”default”][/et_pb_image][et_pb_text _builder_version=”4.7.7″ _module_preset=”default”]
Ta Da! You are done and ready to spread some joy and words of congratulations to the happy homeowner(s).
And Nothing Beats a Personalized Housewarming Gift
I encourage you to personalize this little gift. How many eggs in the nest? What color and style makes your nester smile? I used a very simple box but with an interesting geometry about it. You could use a very ornate frame in dark color or an ornate frame that you distress or white-wash or gild in gold. You decide.
And the background? You can paint it a solid color or do a paper as I did. There are so many fun options in the scrapbooking aisle, even some sheet music or a mosaic of torn bookpages would be cute. If that is the case I would suggest putting a Mod Podge coating on top.
Of course, the street address makes it very personal too.
And don’t forget a handwritten note of congratulations or well-wishes for their future on the back of your frame.
[/et_pb_text][/et_pb_column][/et_pb_row][et_pb_row _builder_version=”4.7.7″ _module_preset=”default” column_structure=”1_2,1_2″][et_pb_column _builder_version=”4.7.7″ _module_preset=”default” type=”1_2″][et_pb_text _builder_version=”4.7.7″ _module_preset=”default” hover_enabled=”0″ sticky_enabled=”0″]
And if you question the reaction your handcrafted framed nest will receive, I can testify it will be quite well received!
Here are my happy nesters!
[/et_pb_text][/et_pb_column][et_pb_column _builder_version=”4.7.7″ _module_preset=”default” type=”1_2″][et_pb_image _builder_version=”4.7.7″ _module_preset=”default” alt=”Picture of happy couple making a heart with their hands over the framed nest followed by text message saying %22it’s the sweetest thing we ever received! What a perfect little way to mark our new nest.%22″ title_text=”Screen Shot 2021-04-05 at 11.14.10 AM” src=”https://southhousedesigns.com/wp-content/uploads/2021/04/Screen-Shot-2021-04-05-at-11.14.10-AM.jpg” hover_enabled=”0″ sticky_enabled=”0″][/et_pb_image][/et_pb_column][/et_pb_row][/et_pb_section][et_pb_section fb_built=”1″ _builder_version=”4.7.7″ _module_preset=”default”][et_pb_row _builder_version=”4.7.7″ _module_preset=”default”][et_pb_column type=”4_4″ _builder_version=”4.7.7″ _module_preset=”default”][et_pb_text _builder_version=”4.7.7″ _module_preset=”default” text_font=”||on||||||” text_font_size=”10px”]
The following links are affiliate links, which means if you purchase anything using these links, you pay no extra, but I may receive a small commission. Please know that I will never recommend a product I do not believe in!
[/et_pb_text][/et_pb_column][/et_pb_row][et_pb_row column_structure=”1_6,1_6,1_6,1_6,1_6,1_6″ _builder_version=”4.7.7″ _module_preset=”default”][et_pb_column type=”1_6″ _builder_version=”4.7.7″ _module_preset=”default”][et_pb_code _builder_version=”4.7.7″ _module_preset=”default”]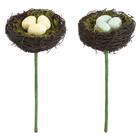 [/et_pb_code][/et_pb_column][et_pb_column type=”1_6″ _builder_version=”4.7.7″ _module_preset=”default”][et_pb_code _builder_version=”4.7.7″ _module_preset=”default”]
 [/et_pb_code][/et_pb_column][et_pb_column type=”1_6″ _builder_version=”4.7.7″ _module_preset=”default”][et_pb_code _builder_version=”4.7.7″ _module_preset=”default”]
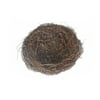 [/et_pb_code][/et_pb_column][et_pb_column type=”1_6″ _builder_version=”4.7.7″ _module_preset=”default”][et_pb_code _builder_version=”4.7.7″ _module_preset=”default”]
 [/et_pb_code][/et_pb_column][et_pb_column type=”1_6″ _builder_version=”4.7.7″ _module_preset=”default”][et_pb_code _builder_version=”4.7.7″ _module_preset=”default”]
 [/et_pb_code][/et_pb_column][et_pb_column type=”1_6″ _builder_version=”4.7.7″ _module_preset=”default”][et_pb_code _builder_version=”4.7.7″ _module_preset=”default”]
 [/et_pb_code][/et_pb_column][/et_pb_row][et_pb_row column_structure=”1_2,1_2″ _builder_version=”4.7.7″ _module_preset=”default”][et_pb_column type=”1_2″ _builder_version=”4.7.7″ _module_preset=”default”][et_pb_image src=”https://southhousedesigns.com/wp-content/uploads/2020/06/Pin-It-Now-MC.png” title_text=”Pin-It-Now-MC” _builder_version=”4.7.7″ _module_preset=”default”][/et_pb_image][/et_pb_column][et_pb_column type=”1_2″ _builder_version=”4.7.7″ _module_preset=”default”][et_pb_image src=”https://southhousedesigns.com/wp-content/uploads/2021/04/FramedNest-Pin1.jpg” alt=”Pin showing hand squeezing glue on frame over pic of finished Framed Nest” title_text=”FramedNest-Pin1″ _builder_version=”4.7.7″ _module_preset=”default”][/et_pb_image][/et_pb_column][/et_pb_row][et_pb_row column_structure=”1_2,1_2″ _builder_version=”4.7.7″ _module_preset=”default”][et_pb_column type=”1_2″ _builder_version=”4.7.7″ _module_preset=”default”][et_pb_image src=”https://southhousedesigns.com/wp-content/uploads/2020/08/LargerHeres-to-Joy-filled-Living.png” alt=”Here’s to Joy-Filled Living, Diane” title_text=”LargerHere’s to Joy-filled Living” _builder_version=”4.7.7″ _module_preset=”default”][/et_pb_image][/et_pb_column][et_pb_column type=”1_2″ _builder_version=”4.7.7″ _module_preset=”default”][et_pb_image src=”https://southhousedesigns.com/wp-content/uploads/sub.png” title_text=”sub” url=”/subscribe” url_new_window=”on” show_bottom_space=”off” align=”right” _builder_version=”4.5.6″ _module_preset=”default” max_width=”400px” module_alignment=”right” custom_margin=”0px|0px|0px|0px|false|false” custom_padding=”0px|0px|0px|0px|false|false”][/et_pb_image][/et_pb_column][/et_pb_row][/et_pb_section]
What a great gift! It doesn’t look difficult and something I think I could pull off! Thanks for sharing. Hope you have a great week!
Thanks Carrie! I KNOW you can pull this off. Please be sure to send a pic. Best of weekends to you!