How-To Upgrade Your Puzzle Board By Adding Great Extra Features
From Basic to brilliant: Upgrade any puzzle board with 4 game-changing features.
Here’s how to add comfort, style, and functionality for a bargain price.
You know that feeling when you spot a treasure at a thrift store and your heart does a little happy dance?
That’s exactly what happened when I stumbled upon a puzzle board with four drawers for just $6.50!
As a self-proclaimed Puzzle Nerd who values both my hobby and my bank account, I knew I had to rescue this diamond in the rough. Sure, it needed more than a dab of wood glue, but compared to the $65 price tag on Amazon? Total steal!
But why stop at basic when we can transform this thrifted gem into a puzzle paradise?
I’d like to share how I upgraded my budget board into a puzzle station that rivals those fancy catalog versions—without the fancy price tag. Just in case your stumble on a puzzle board at a yard sale or thrift store near you.
And why not save this Pin, for when the day comes you need to find this info:
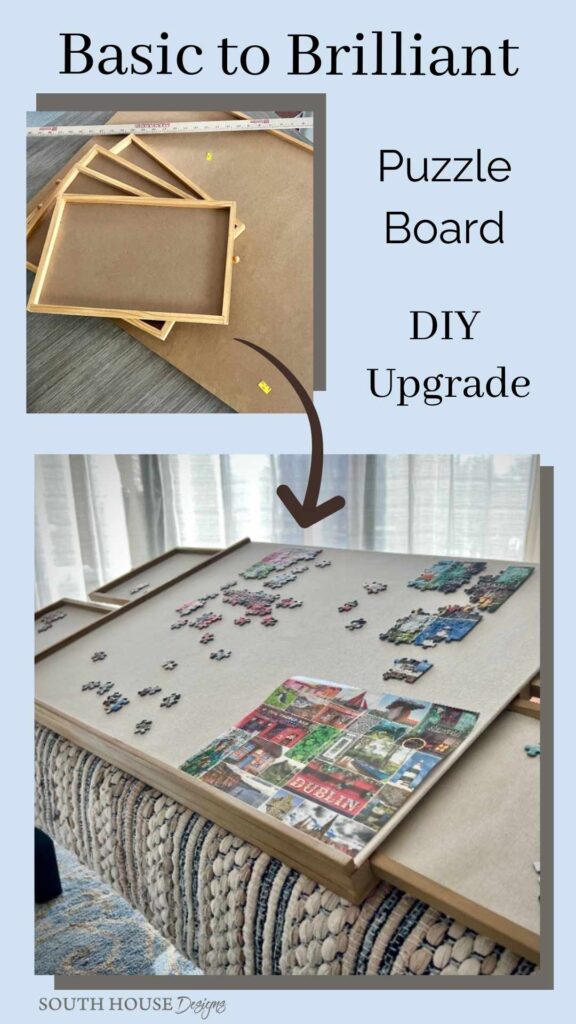
TABLE OF CONTENTS:
Assessing Your Thrifted Puzzle Board
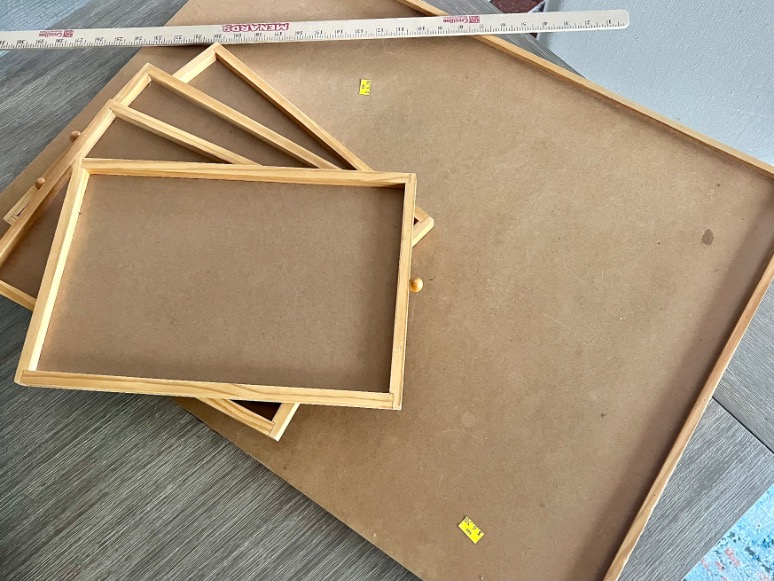
When you’re hunting through thrift stores, garage sales, or flea markets for puzzle boards, it’s important to know what to look for. Sure, I jumped at my $6.50 find, but I also knew what flaws I could fix and which ones would be deal-breakers.
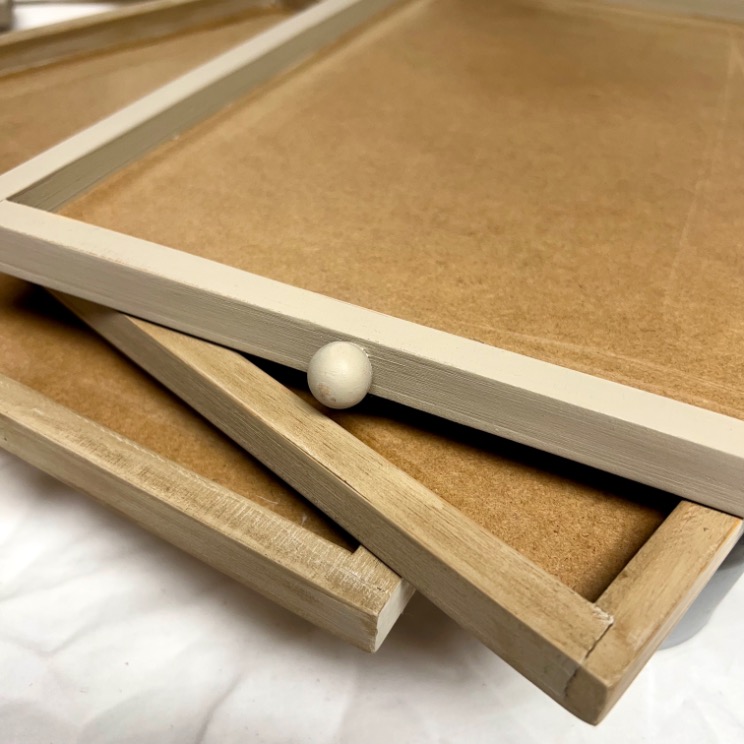
First, check that the board is structurally sound. Minor issues like loose joints that need a touch of wood glue are totally fixable. My board just needed some re-gluing. This actually helped with adding my features. In less than two minutes I separated the top from the bottom and the cross support members were exposed.
However, if a board is severely warped, cracked, or water-damaged, you might want to leave it behind. These issues are much harder to fix.
Missing drawers are usually a deal-breaker. Those little compartments are essential for sorting pieces. Fabricating replacements can be more trouble than it’s worth. I was lucky that all four drawers on my board were intact.
IMPORTANT NOTE: many puzzle boards only have raised edges on two or three sides, not all four. This isn’t a defect! It’s actually designed to make it easier to slide a completed puzzle off the board. My thrifted find has this exact design—edges on the bottom and left side only. If you see a board missing what appears to be an edge or “guard rail,” check to see if there are mounting marks where one would have been attached. If not, it’s likely intentional.
Even if one of these edges is legitimately missing, I’d still say grab it if the price is right. Since we’re planning to add our upgrades anyway, we’ll be addressing the edges as part of our modifications.
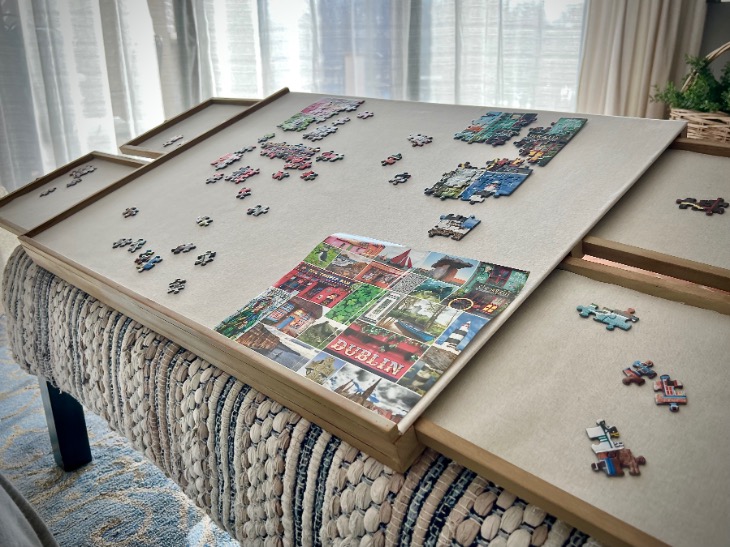
Before leaving the store, also make sure to measure your find or at least check its dimensions. My 22 x 30 board works for most standard puzzles up to 1000 pieces. If you’re into larger puzzles, you might need a bigger board.
Take a few minutes to imagine your upgrades while still at the store. Is there enough space on the back to add an easel? Is the surface smooth enough for applying felt? These considerations can help you decide if this particular board is worth bringing home.
DIY Puzzle Board Upgrades
Materials and Supplies-
- Your Puzzle Board
- Scrap Wood
- Pair of small hinges with screws
- Fabric
- Clear Vinyl or acrylic sheet
- Webbing, ribbon or chain for an easel stop
- Paint, stain with wax or sealer, of your choice
- Wood Glue
- Miter saw, or equivalent
- Sandpaper
- Drill with small bit and Phillip’s bit
- Brad Nailer with brads
- Tack hammer and tacks
- Paint brush and rags
- Painter’s tape
Now let’s transform that basic board into something special! I’ll walk you through each of the four game-changing upgrades that’ll take your puzzling experience to the next level.
Prep Phase: Cutting and Preparing Your Wood
Before diving into the enhancements, you’ll need to prepare all the wooden components for your puzzle board upgrade:
Step 1: Orientation and Planning-
If your puzzle board has an open side with no edge or guard rail, that’s the top of your puzzle board.
PRO TIP: Use painter’s tape to clearly mark the top and bottom on the back of your board to avoid confusion.
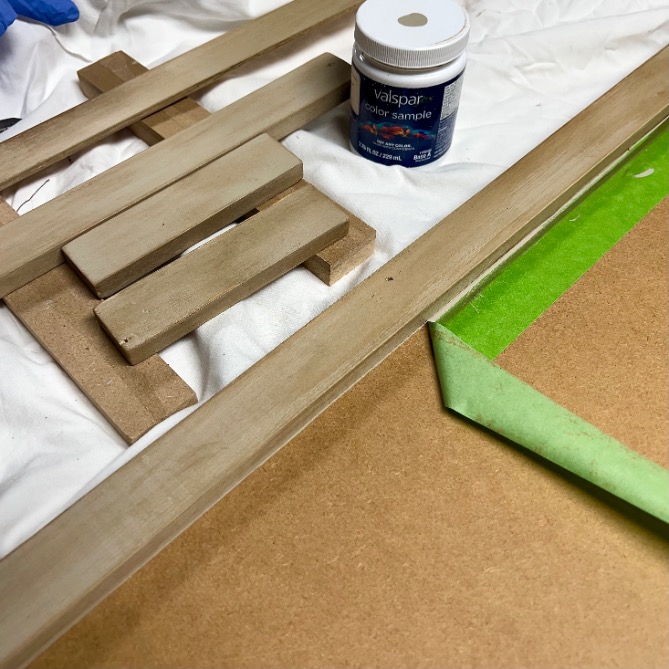
Step 2: Cut Support Rails–
- Cut two strips of scrap lumber (I used 1/2-inch thick by 1-3/8-inch wide) to match the width of your puzzle board:
- One strip for the top edge (where your easel will hinge)
- One strip for the bottom edge (so your board sits flat when not tilted)
Step 3: Cut Easel Pieces-
For the actual easel frame, cut three pieces from the same lumber:
- Two vertical supports (5-1/2 inches long)
- One horizontal crosspiece (17-1/2 inches long, or whatever length works for your board between 10-25 inches)
Step 4: Cut Finishing Pieces-
- Cut a piece of thin lattice the same length as your top and bottom rails
- If you don’t have quite enough, no worries. After cutting the full top piece, I cut what I had leftover in half and set them out to the edge with a gap in the middle
Step 5: Dry Fit Everything-
Test all your cut pieces together to ensure proper fit before moving on to the enhancements.
Feature 1: Create a Luxe Finish
Transform your mismatched wood pieces into a cohesive, professional-looking set:
Step 1: Sand Everything Smooth-
Lightly sand all edges and surfaces of your cut wood pieces to remove any roughness.
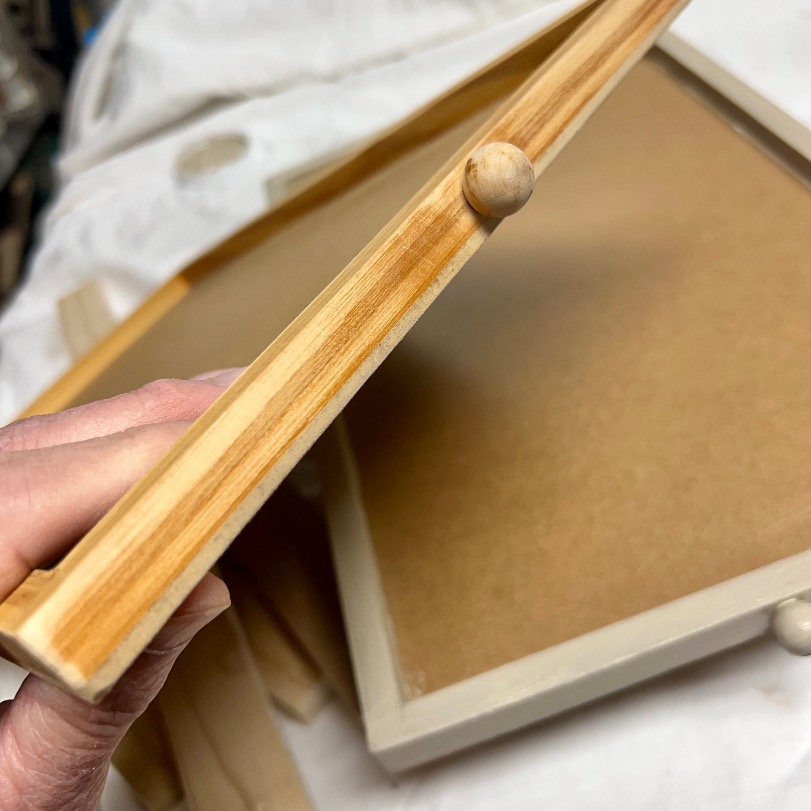
I also sanded the edges of my drawers, the guardrails and exposed edges of the original puzzle board ad frame.
Step 2: Apply Paint or Stain-
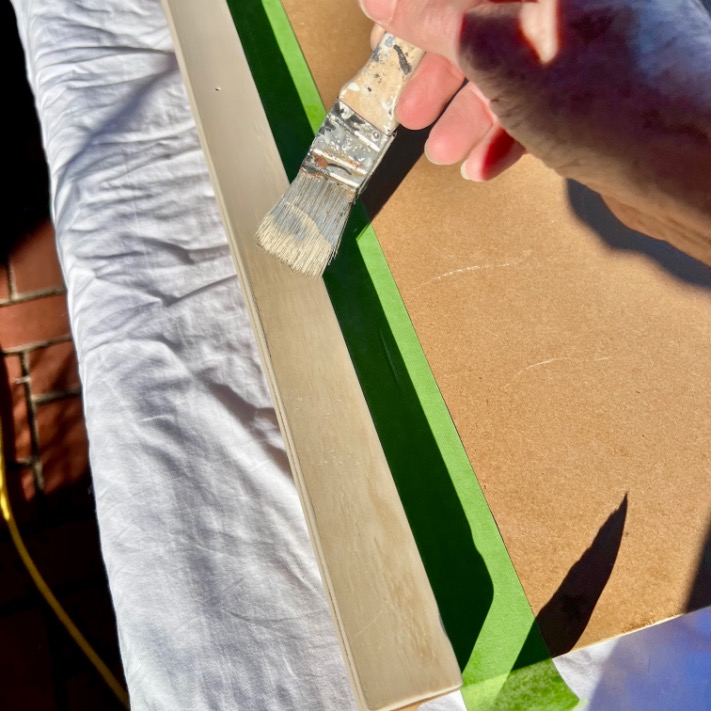
- Choose a paint or stain for your puzzle board (I used leftover Valspar Gristmill Greige)
- Apply evenly to all wood pieces and let dry completely
Step 3: Add a Protective Finish-
- Once dry, lightly sand with fine grit sandpaper any rough areas
- Wipe on a layer of brown wax (or however you choose to seal the wood)
- Immediately polish it off for a subtle sheen
- This not only protects the wood but gives it that high-end, cohesive appearance
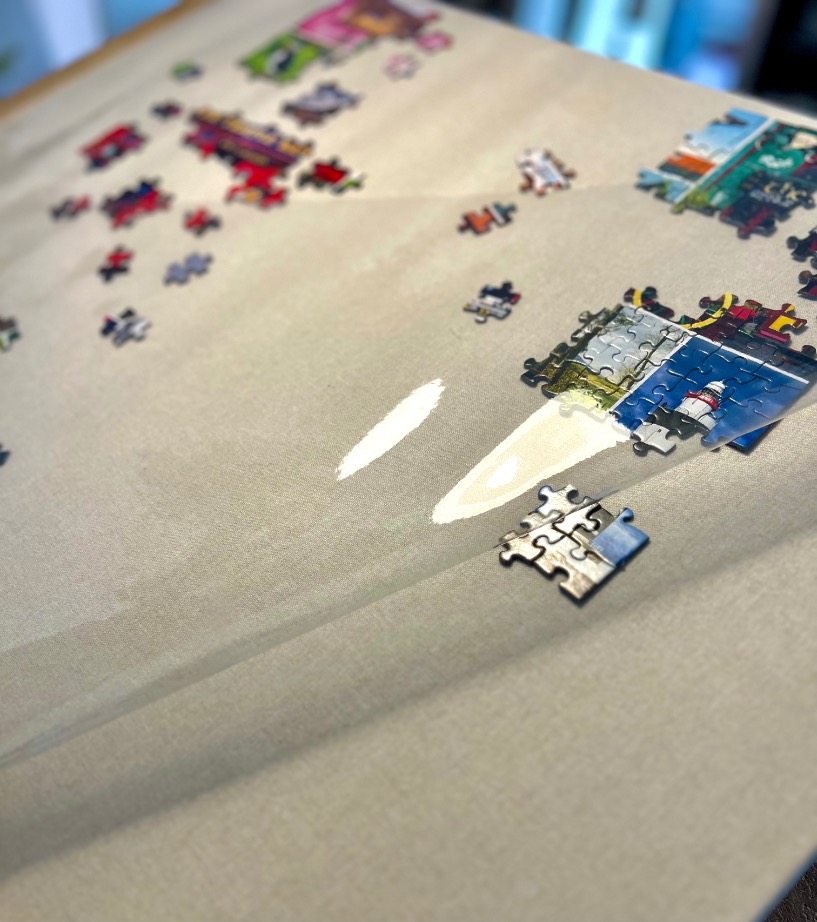
Feature 2: Add a Soft-Touch Surface
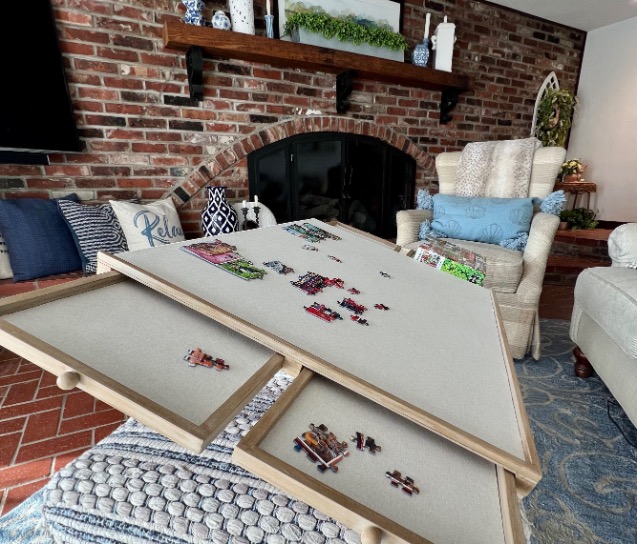
This game-changing upgrade prevents pieces from sliding (especially appreciated on a tilting board) and makes small pieces easier to pick up:
Step 1: Select Your Fabric-
- Choose a non-stretchy fabric with a soft, slightly textured surface
- Flannel, felt, or brushed cotton work great
- Opt for a neutral color that won’t compete with puzzle pieces and is easy on the eyes
From my fabric stash, I chose a light neutral decor fabric with a brushed finish.
Step 2: Measure and Cut Your Fabric-
- For sides WITH guard rails intact: Cut fabric to reach the inner edge of the rail
- For sides WITHOUT guard rails: Cut fabric about 1 inch larger than the board
- For loose guard rails: Remove the guard rail carefully, cut fabric to the halfway point of the rail’s width
- Don’t forget to cut fabric for the drawers
Step 3: Attach Your Fabric-
- Apply spray adhesive or use a tape runner as I did to the board surface
- Carefully lay down your fabric, smoothing from center outward
- For overhang areas, wrap fabric to the underside and secure with adhesive
- Replace any guard rails you removed
I was worried that the overhang edges might get frayed from the drawers sliding in and out. So I further added a half width of duct tape over the fabric edges and onto the back of the board.
Feature 3: Add Easy-Tilt to Save Your Neck
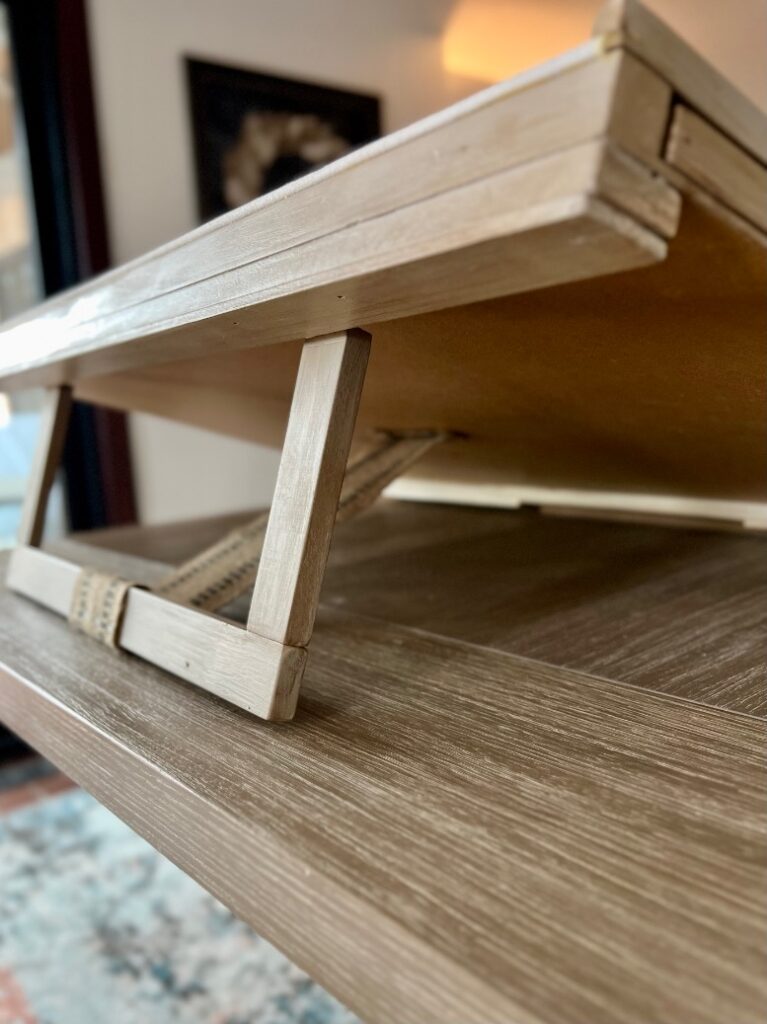
Create an adjustable easel back for ergonomic puzzling. Your neck and shoulders will thank you!!!
Step 1: Attach Support Rails-
- Secure the top and bottom rails to the back of your puzzle board with wood screws, or as I did with wood glue and brads
Step 2: Assemble the Easel Frame-
- Attach one side of your hinge on the end of each of the vertical easel legs
- Add the crosspiece on top of the two legs forming a U-shape. Make sure the hinges are going the same direction
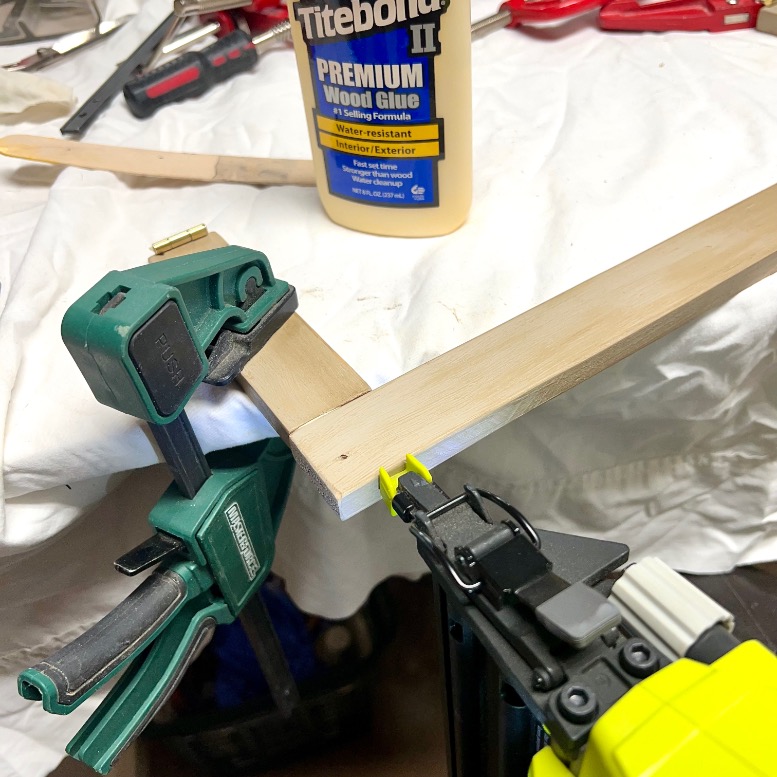
- Use wood glue and brad nails or wood screws to attach the top of the legs to the underside of the crosspiece
- Make sure connections are strong and square
Step 3: Attach the Easel-
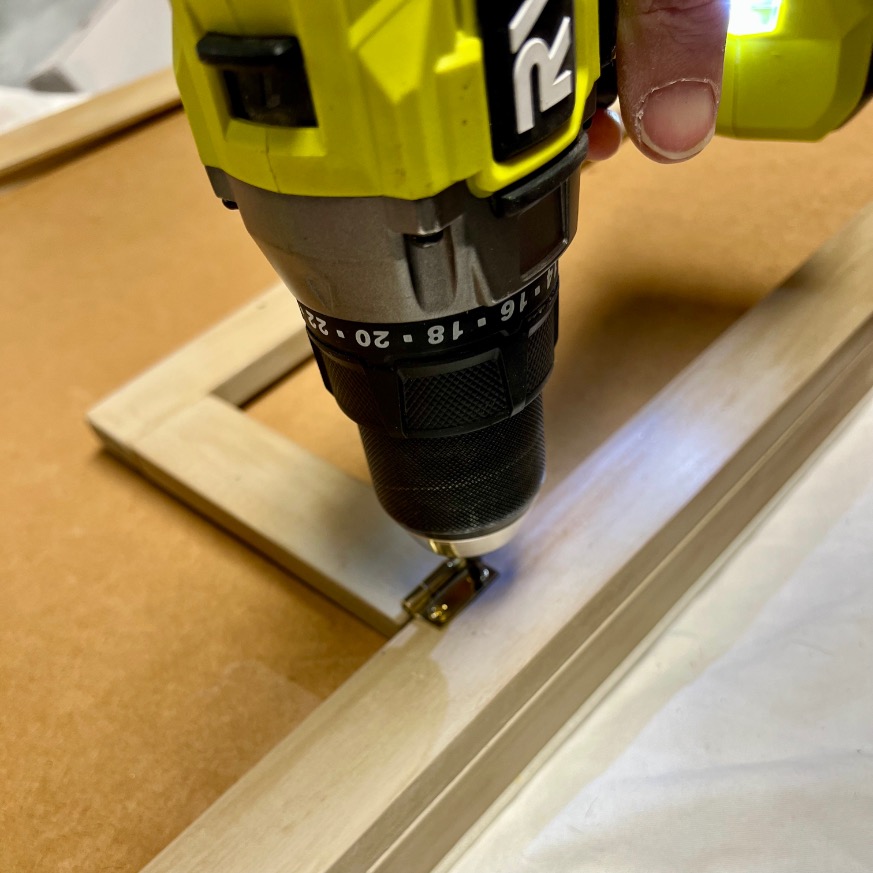
- Connect the easel to the TOP rail by attaching the free side of each hinge to the face of the top rail
- Test the folding action to ensure smooth operation
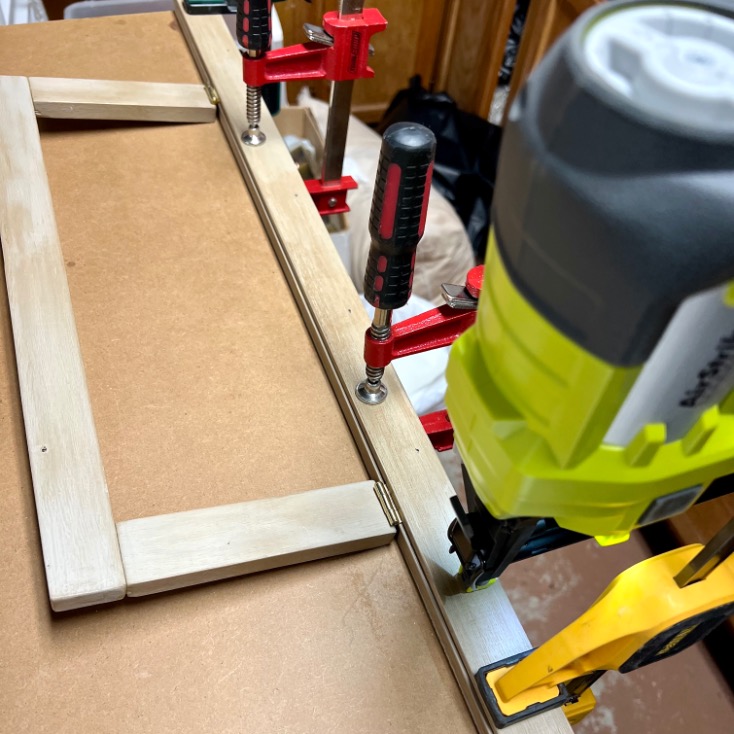
- The spine of the hinge will be sitting higher than the new rails, so add the thin piece of lattice on top of the support rail and the hinges (see picture above)
- Add the lattice board to the bottom support rail so your puzzle board will lay flat
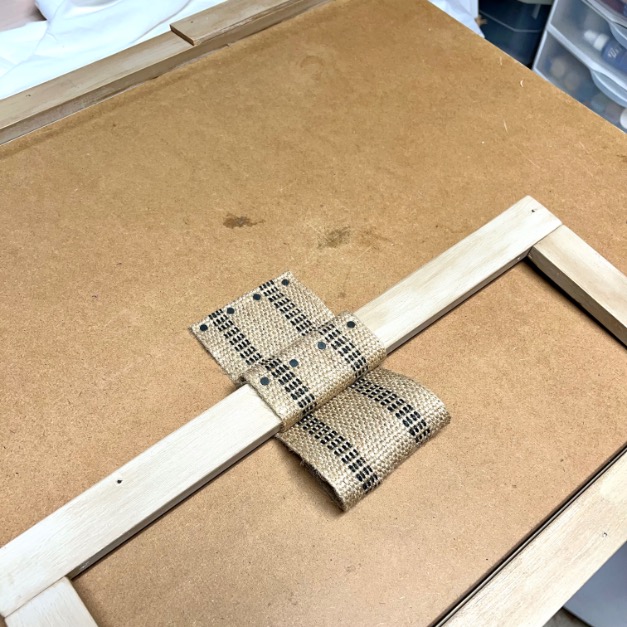
- I used some upholstery webbing and black upholstery tacks, but feel free to use what you have on hand. Perhaps ribbon or chain or even strips of leather will create a stop for the easel back. I wrapped mine around the crossmember, tacking it in place there and at the halfway point of the back.
IMPORTANT: Be sure to only attach the easel stop to the back along the center rib where there is a filler board to screw or nail into.
PRO TIP: Place the drawers on top of the board to see clearly where the cross members are located between the top and bottom of your puzzle board.
Feature 4: Add a Protective Cover
Keep dust, pets, and accidents away from your in-progress puzzles:
Step 1: Measure for Your Cover-
- Measure the inside dimensions of your puzzle board
Step 2: Select and Cut Your Material-
- Clear acrylic or plexiglass sheets work well (available at hardware stores), but I kept it simple and inexpensive ($3) with a thick piece of clear vinyl from Hobby Lobby (in Decor Fabric Dept.)
Final Extra Touches
Now that you’ve transformed your thrifted find into a premium puzzling station, consider these finishing touches:
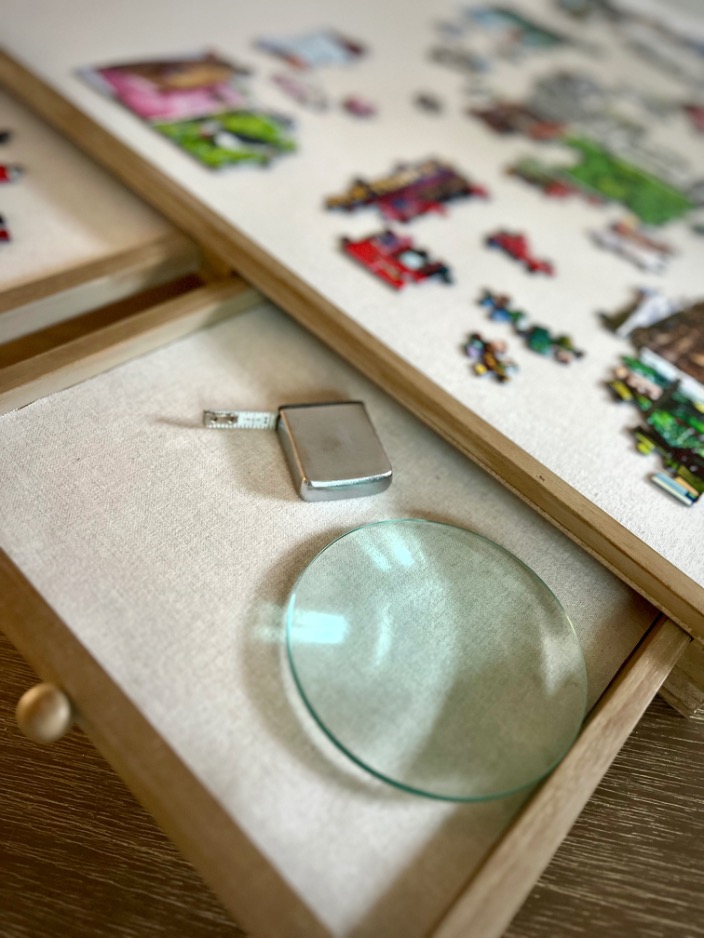
You know how we start with the edges first? On the really hard puzzles, sometimes we have found ourselves questioning if we have all the pieces or maybe a piece too many and then we have to go hunting down a yardstick.
So initially, I planned to add tick marks on the guard rails in 1-inch increments.
Rather, I decided it would be more beneficial to just keep a small retracting tape measure in one of the drawers.
And the same goes for a magnifying glass for those really tricky puzzles with tiny pieces!
Why I Skipped the Lazy Susan
When researching puzzle board upgrades, you’ll inevitably come across the rotating lazy susan base. It’s certainly one of the most popular “extra” features on high-end puzzle boards, but I deliberately chose not to include it—and I wanted to explain why.
Ergonomics First-
The main reason I passed on the lazy susan is simple: I believe the ergonomic tilt is far more valuable to your puzzling experience. The easel back addresses the real problem of neck and back strain from hunching over a flat puzzle for hours.
Let’s be honest—who actually enjoys working on a puzzle upside down or sideways? That’s essentially what a lazy susan allows you to do. While it sounds convenient in theory, in practice, most puzzlers still prefer to see their puzzle right-side up, making the rotating feature less useful than advertised.
Just like in my decorating and DIY projects, I am a disciple of Function First!!! Then we can make it pretty!!!
Practical Limitations-
There are also some practical considerations:
- Combining features: Adding both a tilt mechanism and a rotating base gets complicated quickly and isn’t easy to DIY.
- Weight concerns: A quality spinning mechanism that can support a large puzzle board adds weight, making your portable puzzle station much less portable.
- Cost effectiveness: A heavy-duty lazy susan mechanism that won’t wobble or stick can be surprisingly expensive— more than I paid for the entire thrifted board!
The Better Solution-
Instead of overcomplicating my puzzle board with features I might not use, I focused on what would genuinely improve my puzzling experience: the ergonomic tilt for comfort, the soft surface for piece control, the protective cover for practicality and then a cohesive finish that’s my style.
Sometimes the best upgrades are the ones that solve real problems rather than the ones that just look impressive in advertisements. Your neck and shoulders will thank you for choosing the tilt over the spin!
Accountability
So what did I spend?
- $6.50 for the original board
- $2.50 for the pair of little hinges
- $3.00 for the clear vinyl
- $12.00 TOTAL
Everything else I found in my stash.
Now, you may not have as extensive a “stash” as I have. In that case, you might need to buy a piece of trim board and a piece of lattice. And maybe a piece of fabric and some spray glue or a tape runner (found in the scrap booking section).
I am thrilled with my investment of $12.00 and a couple of hours of creative tinkering.
I hope you found this helpful and you might upgrade your basic board or keep an eye out for a thrifted puzzle board — after all we are just about to enter yard and garage sale season!
