Dead tree, undead decoration! Learn how to create a creepy Halloween focal point with this step-by-step DIY tutorial.
We’re on a quick descent into “Spooky Season”. Yes, Halloween, but I try to avoid the typical, bright orange plastic decorations. Just not my vibe.
It can be a challenge when I don’t care for the predictable, yet I want to have some fun with a spooky edge and I want to spend minimal $.
So what’s a girl to do?
When a tree in our yard met its end, I immediately knew what I was to do.
I saw it as a chance to create a budget-friendly Halloween decoration — a diy spooky Halloween tree.

Instead of shelling out literally hundreds for expensive store-bought displays, I decided to repurpose the fallen tree into a spooky focal point for our courtyard/front porch.
My only expense was off-brand black spray paint and two skeleton hands from Dollar Tree.
Join me as I walk you through this step-by-step DIY project that’s sure to be a hit with your neighbors.

And not only this, but also 7 more projects from my friends in The Handcrafted Society!
These projects made from foraged materials are all linked at the bottom of this post.
TABLE OF CONTENTS:
The links in this post may include affiliate links, which means if you purchase anything using these links, you pay no extra, but I may receive a small commission that helps keep this blog running. I truly appreciate you using affiliate links whenever possible. Please know that I will never recommend a product I do not believe in!
Find and Prepare a Tree for a Halloween Focal Point
Step 1) Foraging the Perfect Tree-
It’s never a happy day when you lose a tree!
We had a very hard winter and this tree had been struggling for a couple of years. Of course, I was sad it didn’t make it, but the timing was great.
Chances are you will not be so “lucky” and will have to forage a bit. Consider checking with some tree cutting services. They will be happy to let you carry one off so they don’t have to cut and chip it.
If they are taking down a large tree, you may not need the whole tree, but rather just one or two large branches.
Finding the Right Tree
The first step in creating your spooky Halloween tree is to find the perfect candidate. Look for a dead tree that’s still standing, as this will make it easier to transport. Here are some things to consider when choosing your tree:
- Size: The tree should be large enough to make a statement, but not so big that it’s difficult to handle.
- Shape: A tree with interesting branches and a unique shape will add character to your creation.
- Condition: The tree should be dry and free of any pests or diseases.
Safety First
When foraging for a tree, it’s important to prioritize safety. Here are a few tips:
- Wear appropriate clothing: Long sleeves, pants, and sturdy shoes will protect you from thorns and other hazards.
- Be mindful of your surroundings: Watch out for wildlife and avoid areas that are unstable.
- Obtain permission: If the tree is on private property, make sure you have the owner’s permission before taking it.
Once you’ve found the perfect tree, it’s time to move on to the next step: preparing it for your spooky transformation.
Step 2) Preparing Your Tree-
Now that you’ve found the perfect tree, it’s time to give it a makeover! Here are a few tips for preparing your tree with a quick and easy clean-up:
- Remove debris: Shake off any leaves, dirt, or loose bark.
- Trim: Use pruning shears to remove any branches that are aren’t wanted.
Now is the best time to shape your tree. Trim larger branches back to the tree trunk if they will brush against your house or a window. Or just trim them a bit to shorten the length of the branches. Is your tree over-populated with weak, smaller branches? Snap them off now — less to paint.
Step 3) Painting Your Tree-
Choosing the Perfect Color
While black paint is a classic choice for a spooky Halloween tree, you can also consider other dark colors like deep purple or even a ghostly white for a more ethereal look. If your home has a darker color scheme, a white tree might stand out beautifully.
Setting Up Your Workspace
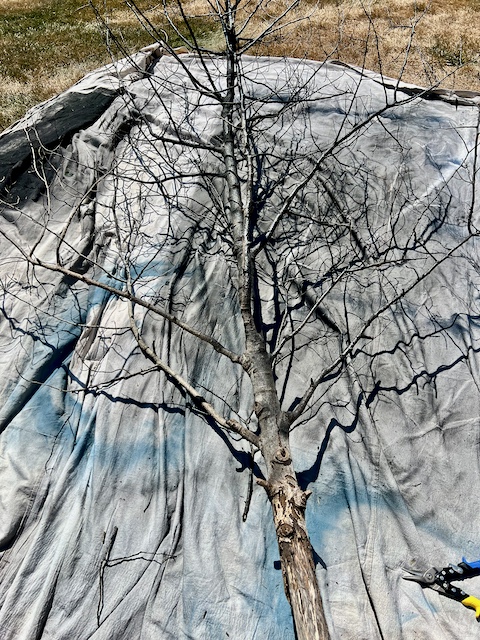
To ensure an easy paint job, it’s important to set up your workspace properly. Here are a few tips:
- Choose a shaded area: in the bright sun, it’s hard to see what you have and haven’t sprayed.
- Lay down a drop cloth: Protect your surfaces from paint spills and drips.
- Work on a still day: Wind can affect the application of spray paint, so choose a calm day for this step.
Applying the Paint
Now it’s time to transform your tree! Here’s a step-by-step guide:
- Hold the can properly: Grip the can firmly and spray at a distance of about 8-10 inches from the tree.
- Use light, even strokes: Move the can in a sweeping motion to create a smooth, even coat.
- Apply multiple coats: For a deep, rich color, apply your first or base coat of paint. After a few minutes, apply at least one more coat.
- Turn the tree: When one side is dry to touch, roll the tree and paint the other side of the tree trunk and branches.

Pro Tip: You definitely want to use a pistol grip attachment. If your grip doesn’t fit tight on a a store brand can, use masking tape over the top of the grip and down the sides of the can. Worked great for me.
This is not a difficult spray job requiring experience or skill. It just requires a bit of patience to spray an entire tree, yep, all the whole thing.
This is one of those diy projects that does not require the best paint. So I used this cheap black spray paint from Walmart. My tree took four cans — right at $10.
SAVE TIME: I’ve learned!!! Walmart keeps all the spray paint behind locked glass doors. It can take “forever” to find someone who has a key that actually works. Order ahead online for store pickup and save a bunch of time and frustration.
Step 4) Creating a Stable Base-
The base of the tree must be sturdy and stable, ready to hold your tree securely in fall winds and potential storms.
Choosing the Right Base
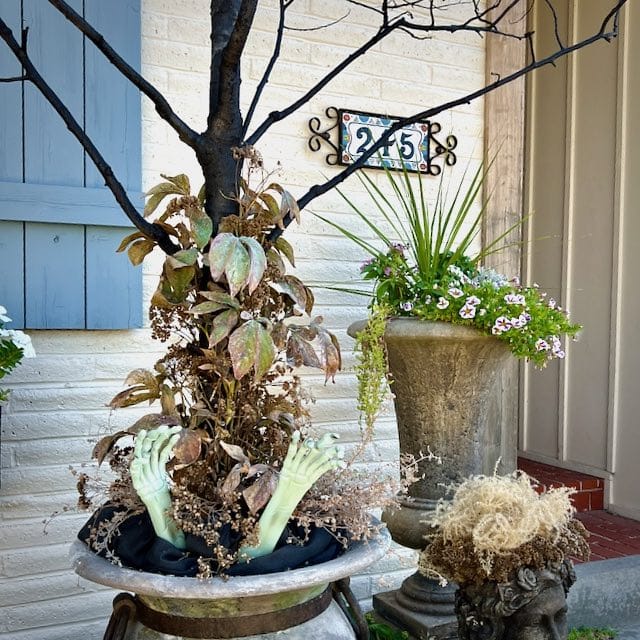
A sturdy base is essential for supporting your spooky Halloween tree. A large garden urn like I used can be a great option, as it provides both stability and a decorative element.

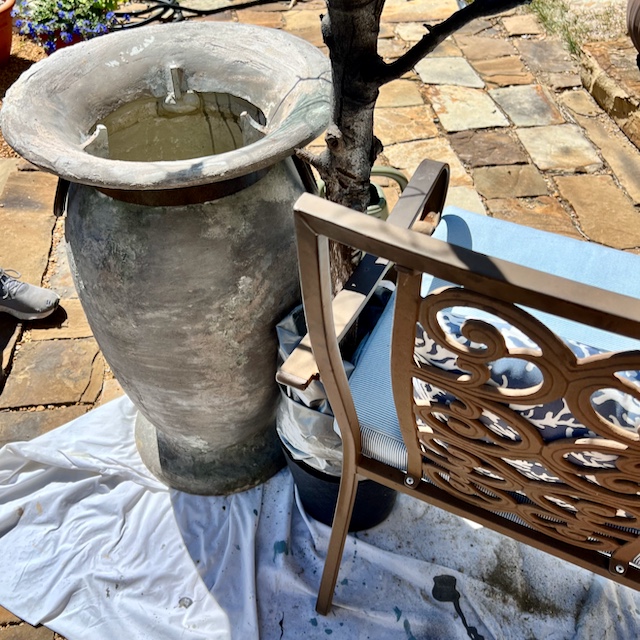
This is a before picture of the fountain urn I thrifted. Needless to say it did receive a makeover (I still need to publish that post).
Keep an eye out for how I transformed it. My subscribers will be alerted as soon as it goes live. Not a subscriber yet? No worries you can take care of that right now — easy peasy, I promise:
Thanks bunches! Now back to our Spooky Trees:
You could also build a plywood base or even a Christmas tree holder, then hide the base or holder with rocks, bricks, flower pots, etc.
Creating a Concrete Base
To ensure our tree remains upright and secure, we created a concrete base inside the urn. Here’s how we did it:
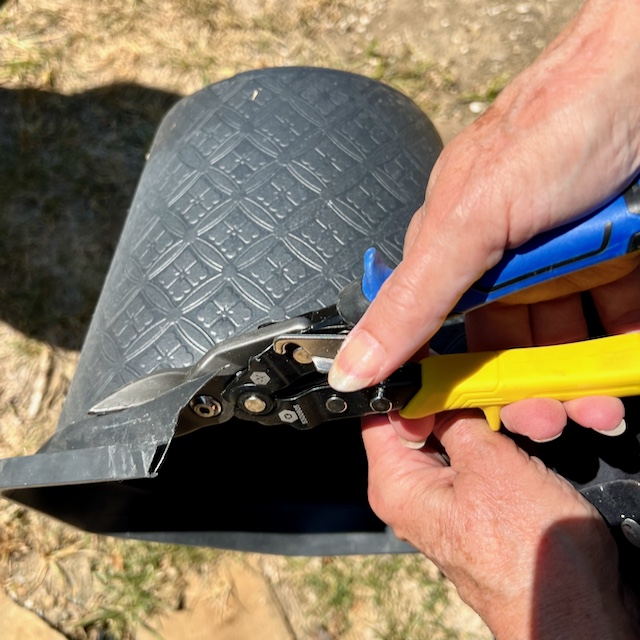
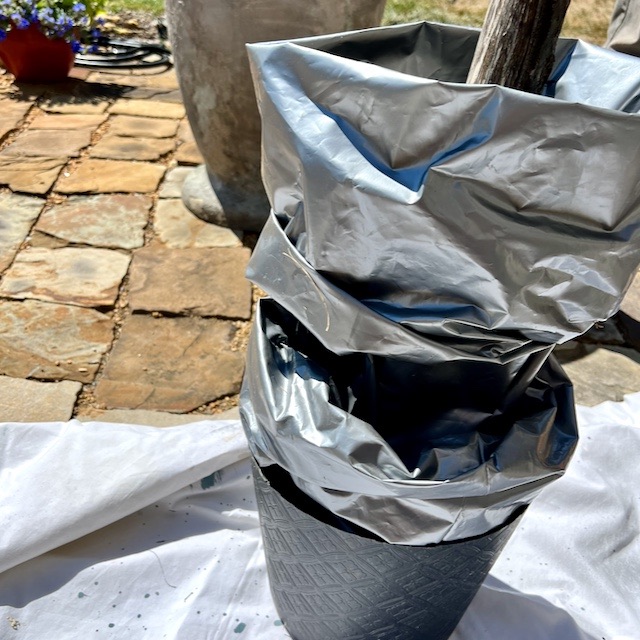

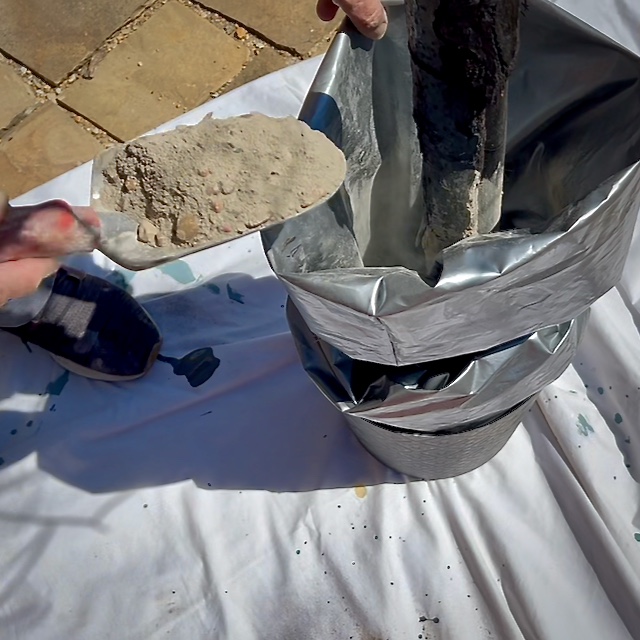
- Used a thick, plastic bag: We used a plastic bag (that decorator fabric rolls comes in) for the concrete so we could lift it in and out of the urn
- Create a mold: I dug out a plastic flower pot from our tool cabana that fit (once I cut the top rim off) past the opening of the urn. I placed the bottom of the bag in this pot to keep the concrete in a shape the will lift through the neck of the urn.
- Mix the concrete: We mixed the concrete in the plastic bag to simplify steps. While The Hubs held the tree upright in the bag, I scooped the concrete mix into the bag, stopping periodically to add some water and stir it around with a dowel. I kept layering concrete, then water, then stir. Repeat and repeat and repeat again..
- Allow to dry: Let the concrete dry completely before removing the plastic bag.
- Set the tree: Once the concrete is dry, we set it in the urn in it place of honor as our Halloween focal point.
Filling the Gaps:
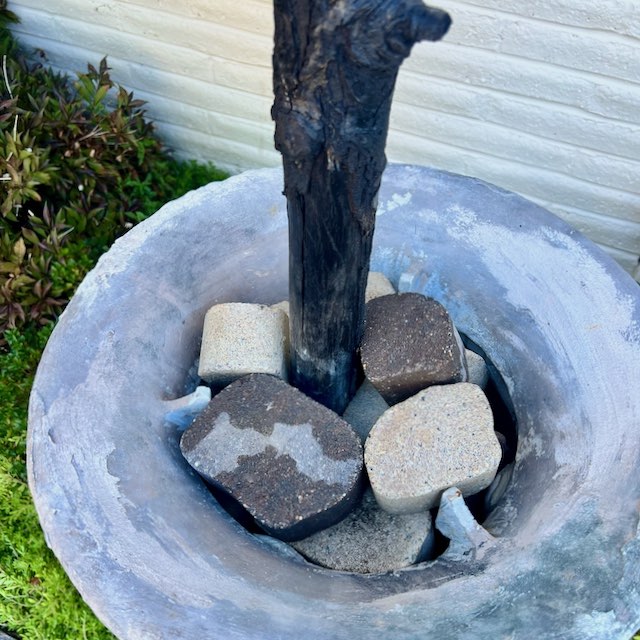
Use rocks, bricks or whatever you have to fill the voids between the concrete and tree trunk and the walls of the urn to keep this tree upright and steady during the fiercest fall winds.
Step 5) Lighting Your Spooky Tree-
Lighting is essential for creating a spooky atmosphere. Here are a few lighting options to consider:

- Fairy lights: Twinkling or steady fairy lights can add a magical touch to your tree. Choose colors like orange,purple, or green for a Halloween-themed look.
- Outdoor string lights: Wrap string lights around the branches for a festive and spooky glow. Consider using orange or purple lights for a Halloween-appropriate color scheme.
- Solar-powered spotlights: Place solar-powered spotlights around the base of the tree to create dramatic shadows and eerie effects.
- Battery-powered candles: For a more traditional look, use battery-powered candles with a remote control to create a flickering flame effect.
Tips for Lighting Your Tree:
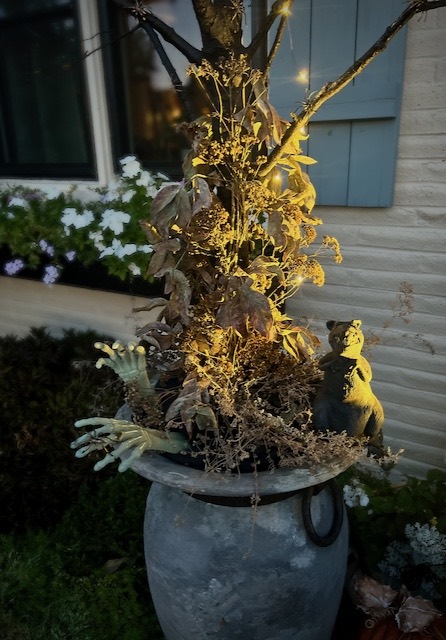
- Experiment with different lighting options: Try out different lighting combinations to find the perfect look for your tree.
- Consider the overall mood: Choose lighting that complements the spooky atmosphere you’re trying to create.
- Use a timer: If you want your lights to come on automatically at dusk, consider using a timer.
I settled on a combination of fairy lights from last Christmas in the tree and a solar spotlight that used to be on the tree.
With the right lighting, your spooky Halloween tree will be the centerpiece of your yard or porch!
Turning Your Foraged Tree into True Halloween Decor
There are many ways you can choose to go with your tree decor:
- Creepy, spooky: spiders, bats, a few skeleton bones, a black crow, maybe a rat or two.
- Fun & Whimsical: smiling ghosts, google eyes, orange pumpkins and such to delight young children
- Horror: blood dripping, hatchets, ball & chains, etc.
I’m going the Creepy, Spooky Route, but you do you.
Creating a Creepy Base-
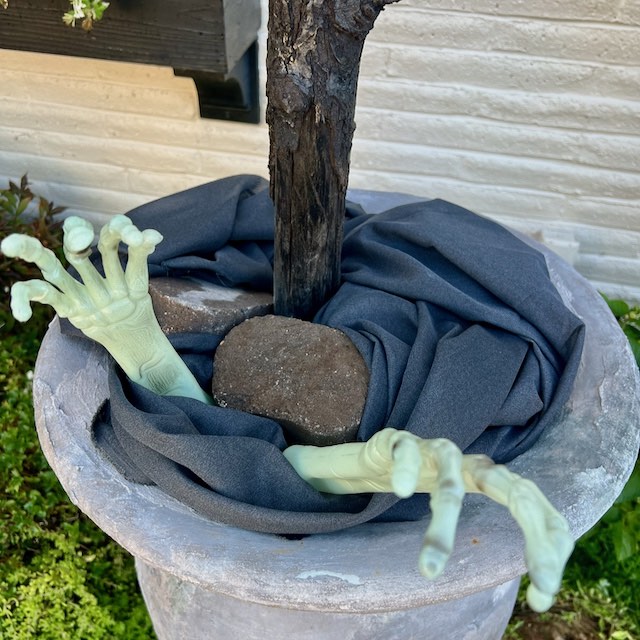
First thing, we needed to cover the cobbles and rock in our large urn. I used some dark grey fabric I had in my stash and made sure the ends and several other spots were tucked well under the cobbles to hold it in place.
Since my urn is quite tall and I left quite a bit of trunk coming out of the urn, the bottom of the tree is in prominent view.
So I wanted to extended my spooky vignette to include the pot itself.
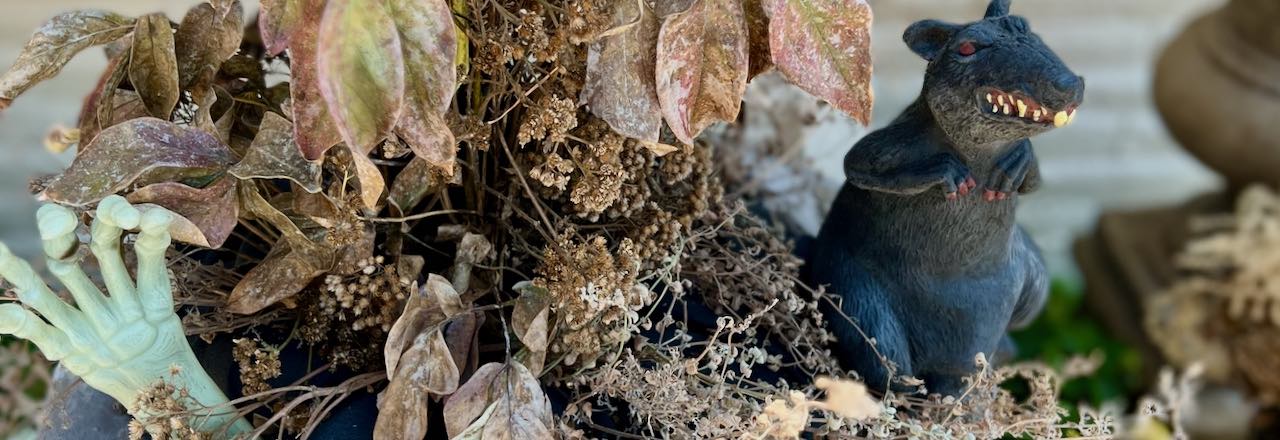
I found glow-in-the-dark skeleton hands at Dollar Tree this year.
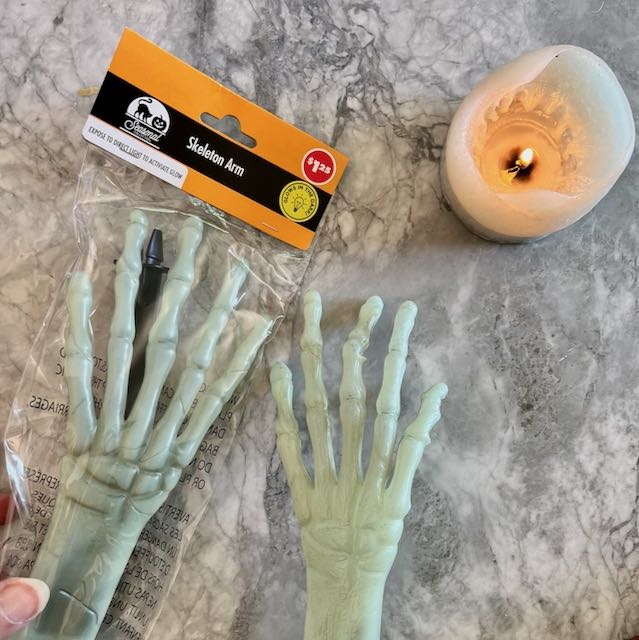
They are very flat in their original state. I wanted some dimension that a hand clawing out of the dirt would have. So I molded them with a bit of heat from a candle.
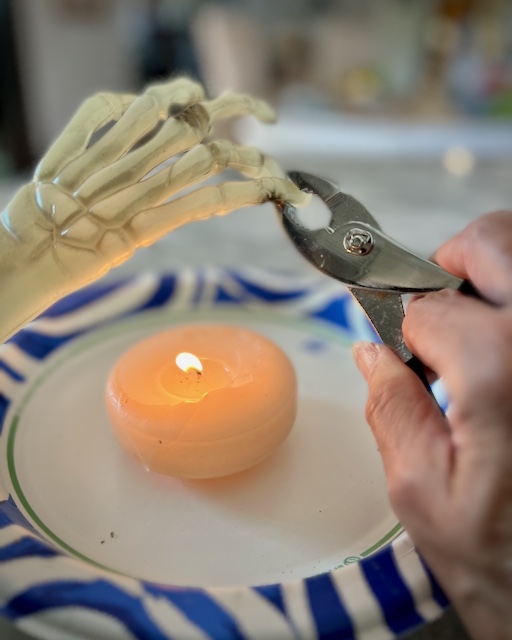
PRO TIP: It’s often very easy to mold a plastic item into a different shape. The fingers of the hands I heated over a candle and bent them as I wanted. Using a heat gun, or submerging in boiling water will also work.
CAUTION: Just to be on the safe side, I wear a respirator whenever I do this as we just don’t know what chemicals were used in the plastic and whether the heat will release them into the air. And I used pliers to grab the heated plastic. Safety First, right?
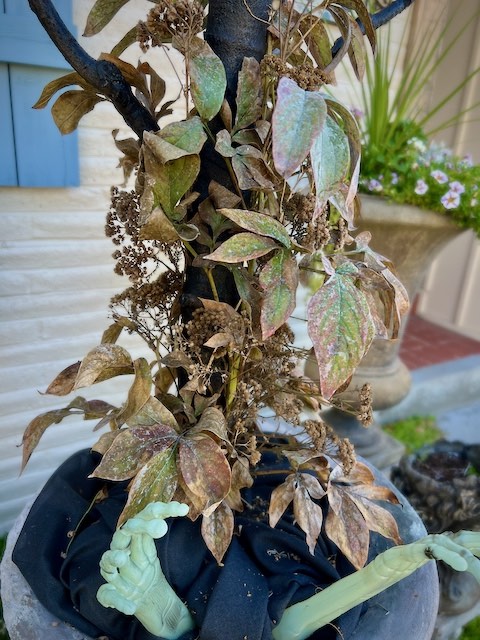
Lastly, I added faded peony stalks, yarrow and catmint foraged from my garden beds. I used black wire to hold them in place.around the trunk. This served as a great transition from the fabric to the tree.


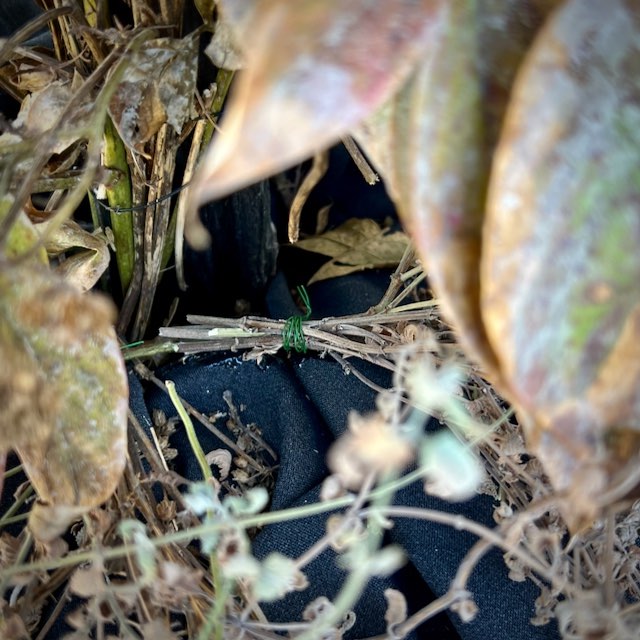
I added a few bundles of the catmint and yarrow over the grey fabric to really round out my display. I bundled them with some florist wire and then used E-6000 glue to adhere them to the cloth.
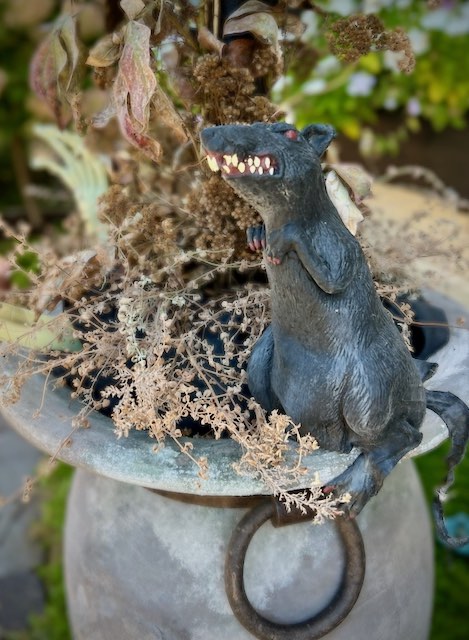
This nasty rubber rat perched on the lip of the urn? He was in my Halloween stash, just waiting for his perfect stage.
Decorating the Branches-
To make your tree truly creepy, decorate the branches with spooky accessories:
- Plastic spiders: Give your tree a creepy crawly infestation by attaching plastic spiders to the branches. See my tip below.
- Cobwebs: Drape fake cobwebs over the branches to create a web-filled nightmare. I opted not to do that as pollinators often get stuck in the webs. And this tree is in the midst of many of my remaining Summer flowers.
- Drape a few long strips of tea dyed gauze: on the branches, to look like a mummy just passed this way.
- Glowing eyes: Attach small, glowing eyes to the branches for a menacing effect.
- Bats: are a great option if your branches are thick enough for the weight.
- Black Crows: another fun creepy addition
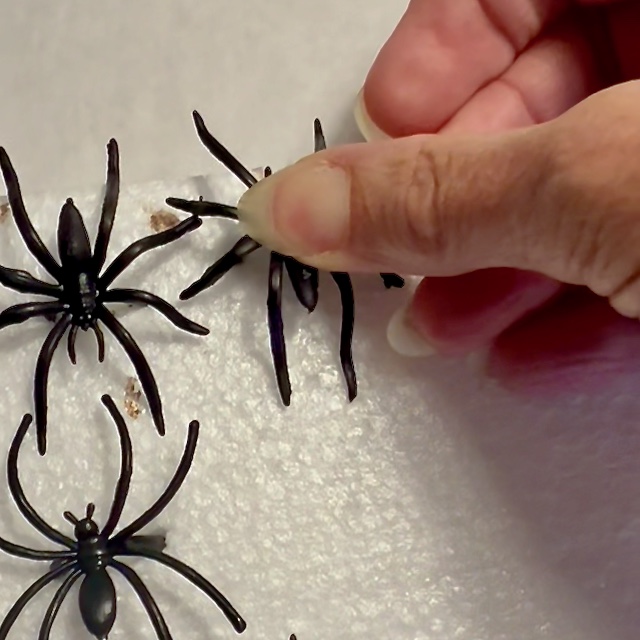
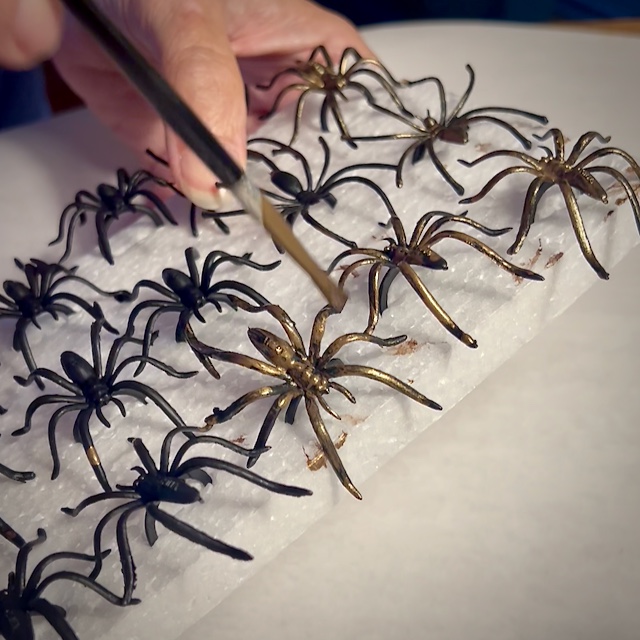
PRO TIP: Black plastic spiders did not stand out against the black tree, To help with this, paint the top of them with metallic gold paint.
To Add Spiders to the Tree-

Slit the ring in the back. Push against thick branches for the ring to separate and grab on.
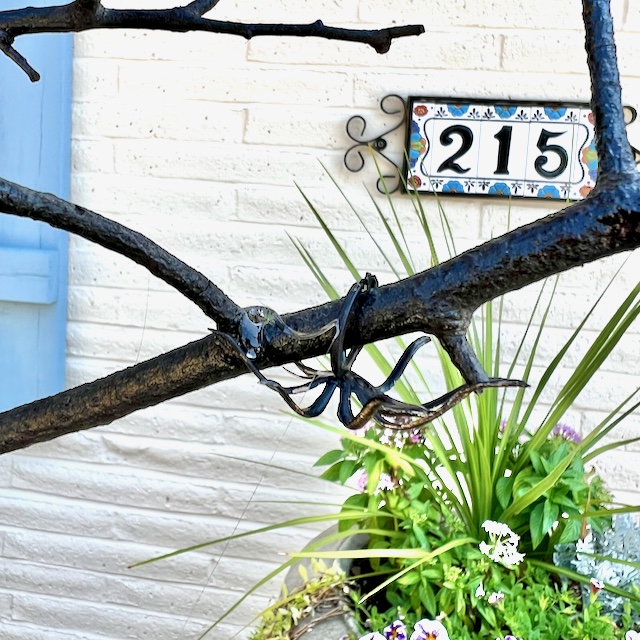
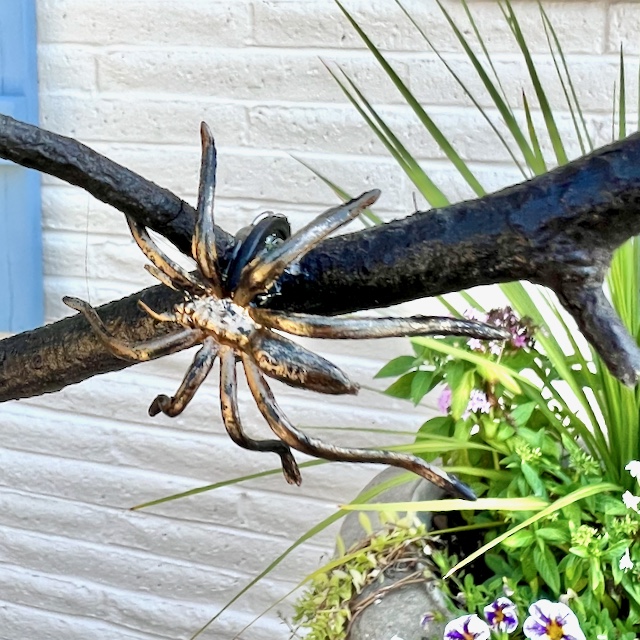
For thinner branches, place your spider where you’d like it, move it a bit to the side, add a glob of hot glue and then carefully press your spider into the glue to hold it in place.
For spider on a really thick spot, cut the ring off, add hot glue where you want your spider and carefully press the spider in place.
With these spooky additions, your Halloween tree will delight all who come by and maybe scare away any tricksters who dare to approach!
The Handcrafted Society
Remember I mentioned this is the second Tuesday — The Handcrafted Society meet-up day.
Just look at all the amazing projects everyone came up with when challenged with “Foraged” medium. Wow — sticks, flowers, baby pinecones, moss and more!
Be sure to check out all these wonderful projects. I feel to honored and enriched by exploring alongside these women.
Please Save this Pin 📌 👇

Hoping you’re enjoying the last bits of summer with just a hint of fall in the air.








This is so stinking cute, Diane! We make Spooky Trees like this every year with the all the branches that have fallen following hurricanes and tropical storms but I’ve never thought to add a rat or creepy hands. Two of my nephews are obsessed with spooky season so I can’t wait to surprise them with your idea this year. They will be over the moon excited! Thanks so much for the inspiration and for all that you do to put these hops together. Big hugs, CoCo
Oh that is so great to hear CoCo. I’m sorry you have so many limits each year – Yikes! I was happy to have a tree I could save from the chipper this year.
How fun, Diane! That rat cracks me up! Love the spiders on it too.
Isn’t that the creepiest? Until I get to looking a bit closer at it and think I see bits of Ratatouille in him.
Oh my goodness Diane, you must have had so much fun with this spooky tree project! The rat is a nice touch, and those spiders! Yikes they look too real LOL! Love it!
Eeeks! I’m not a big Halloween fan, but you mastered the spooky tree, Diane. I’m afraid I’d jump at those spiders whenever I saw them. Haha.
I’m with you! Not that much of a big Halloween decorator, at least outside. But this poor tree just fell at me feet — literally! So what else could I do?
Such a cute idea Diane! Thanks for sharing.
Such a fun and spooky idea Diane! This would look perfect on my front porch! I cut a few branches when I was foraging the Spanish moss and spray painted them black for my dining room! I may take your lead and add some spiders! Thanks for the inspiration, my friend!
You are so clever! It is always sad to lose a tree but you turned lemons into. creepy lemonade! The skeleton hands and that rat! EEK! This made me smile and gave me the shivers at the same time…perfect Halloween vibe!