Alcohol Ink Tricks That Turns Vintage Pressed Glass Into Christmas Magic
Those piles of dusty pressed glass pieces at the thrift store? It’s not junk — it’s your next Christmas decor waiting on a few drops of alcohol ink.
Those dusty pressed glass pieces on the bottom shelf at the thrift store? Clear, bumpy, and priced like nobody wants them. Here’s the beans-spilling part. Alcohol ink on pressed glass turns all those ridges and swirls into color, and suddenly your $2 find looks like it came from a boutique.
The ink goes on the back, so the top stays plain glass. That means a tray or plate can still carry homemade bread, cookies, or bar cookies, and the food only ever touches clear glass.
Hmmm, that color’s not quite what you imagined? Rubbing alcohol wipes unsealed ink right off, so you can start over, or recolor a favorite swirly plate from Christmas colors to spring colors for a shower you’re hosting in April.
Make it as a handmade hostess gift she’ll actually keep, or color a piece to match your own table when you’re the one hosting.
This month’s Handcrafted Society challenge is handcrafted hostess gifts. Could you guess? Scroll to the very end for more creative ideas from my crafty friends
The links in this post may include affiliate links, which means if you purchase anything using these links, you pay no extra, but I may receive a small commission that helps keep this blog running. I truly appreciate you using affiliate links whenever possible. Please know that I will never recommend a product I do not believe in!

What You Need for Alcohol Ink on Pressed Glass
- A pressed glass piece with a textured pattern on the side you’ll be inking
- Alcohol inks (I used Piñata Colors by Jacquard, Copic refill tubes, and Brea Reese inks, plus Mars Black by Brea Reese for the angel plate)
- Alcohol ink marker (Master’s Touch from Hobby Lobby)
- A thick, smooth makeup-style sponge
- Toothpicks and/or straight pins
- A fine artist brush
- A dry rag
- 91% or 99% isopropyl alcohol (70% is fine for cleaning)
- Small disposable cups
- Paper towels or a t-shirt rag
- Gloves
- Optional, for sealing: Krylon Kamar Spray Varnish
How to Use Alcohol Ink on Pressed Glass
Step 1: Choose Your Glass-
Pick a piece whose pattern is on the side you’ll be inking. If you’re new to this, start with a simple piece like the vase or candleholder and save the painted scene for later.
CAUTION: This technique is best saved for inexpensive, pressed glass — not heirloom pieces. If a piece has any hairline cracks, there’s no guarantee you’ll ever get all the ink back out if you change your mind.
I tested with a crazed piece of ironstone — see how that turned out in this post on alcohol ink in the kitchen.)
Step 2) Clean and Prep-
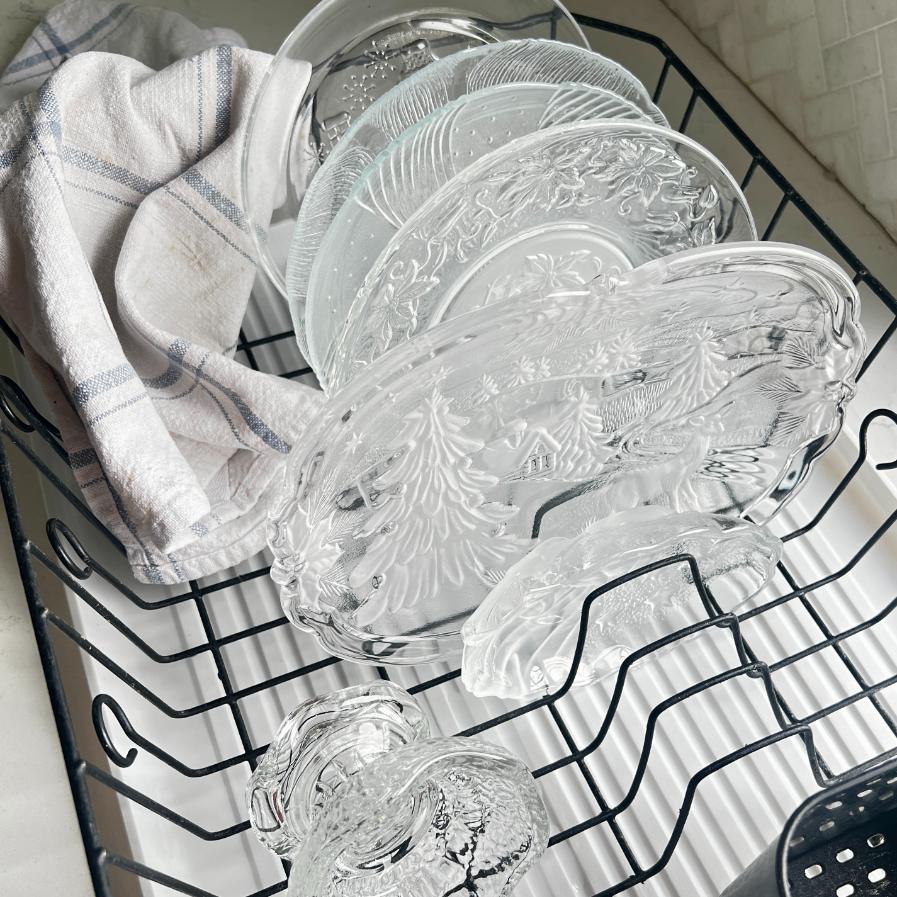
Wash the piece, dry it completely, then wipe it down with rubbing alcohol so the ink has a clean surface to grab. 70% isopropyl works fine for cleaning, but 91% or 99% is better.
Step 3. Set up your space
Work somewhere ventilated, wear gloves, and cover your table. Alcohol ink wanders.
Are you enjoying this post? Would you like more, including my free Creatives’ Tool Kit?
Step 4. Choose your method
Pick one, or mix them. Each gives a different look.
CAUTION: All ink goes on the back of the piece, the side food never touches. Keep it off the top face and the rim.
PRO TIP: To lighten a color, drip a small amount of ink into a small disposable cup (hello, Dixie) and add the tiniest amount of 91% or 99% isopropyl to thin it. Transfer it with a fine artist brush. The same isopropyl helps two colors blend together, but skip it with metallic inks.
4A. Color-Drenched Full Coverage —
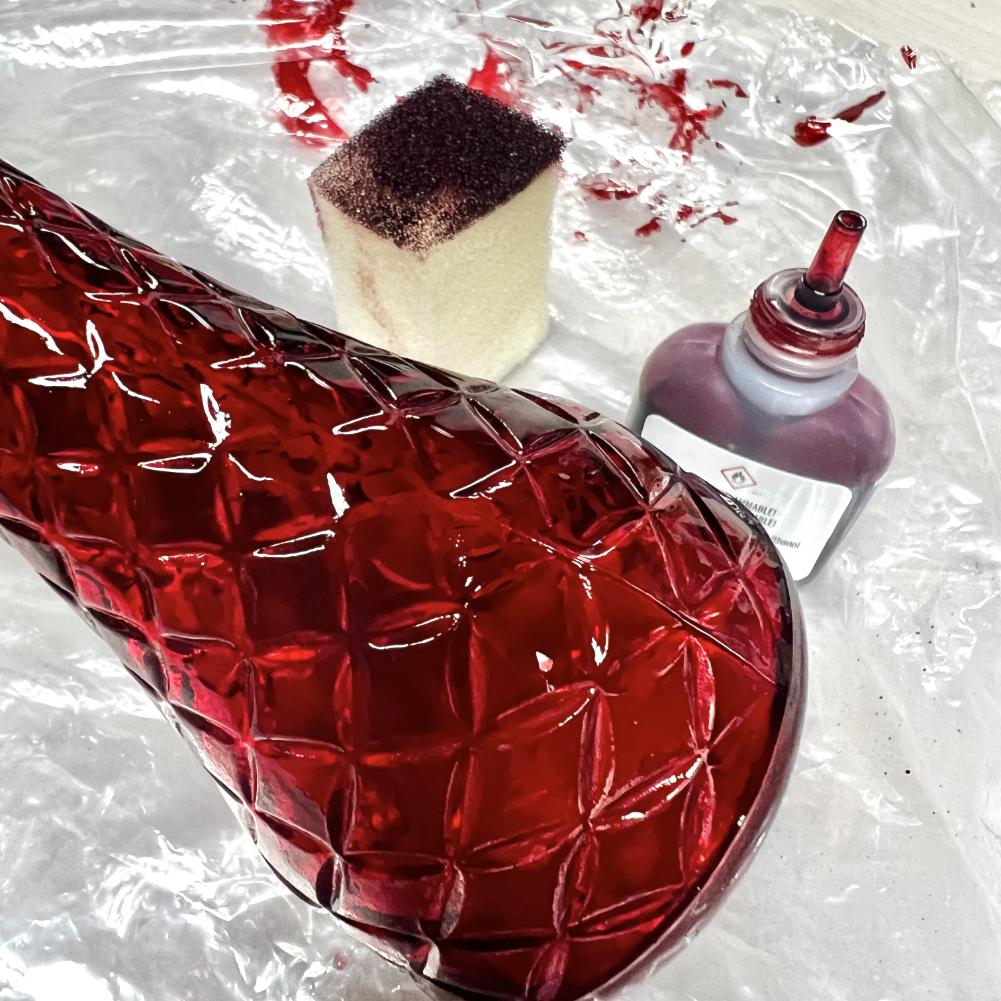
- Grab a thick, smooth sponge, like a makeup sponge. Skip the ones with holes and lots of texture.
- Drip a drop or two of bottled ink onto one end of the sponge.
- Rub it over the textured glass, working the ink into every groove.
- Make several passes if you want deeper color.
HINT: Not the color you imagined? Rubbing alcohol wipes unsealed ink right off, so you can start over.
4B. Peaks or Valleys
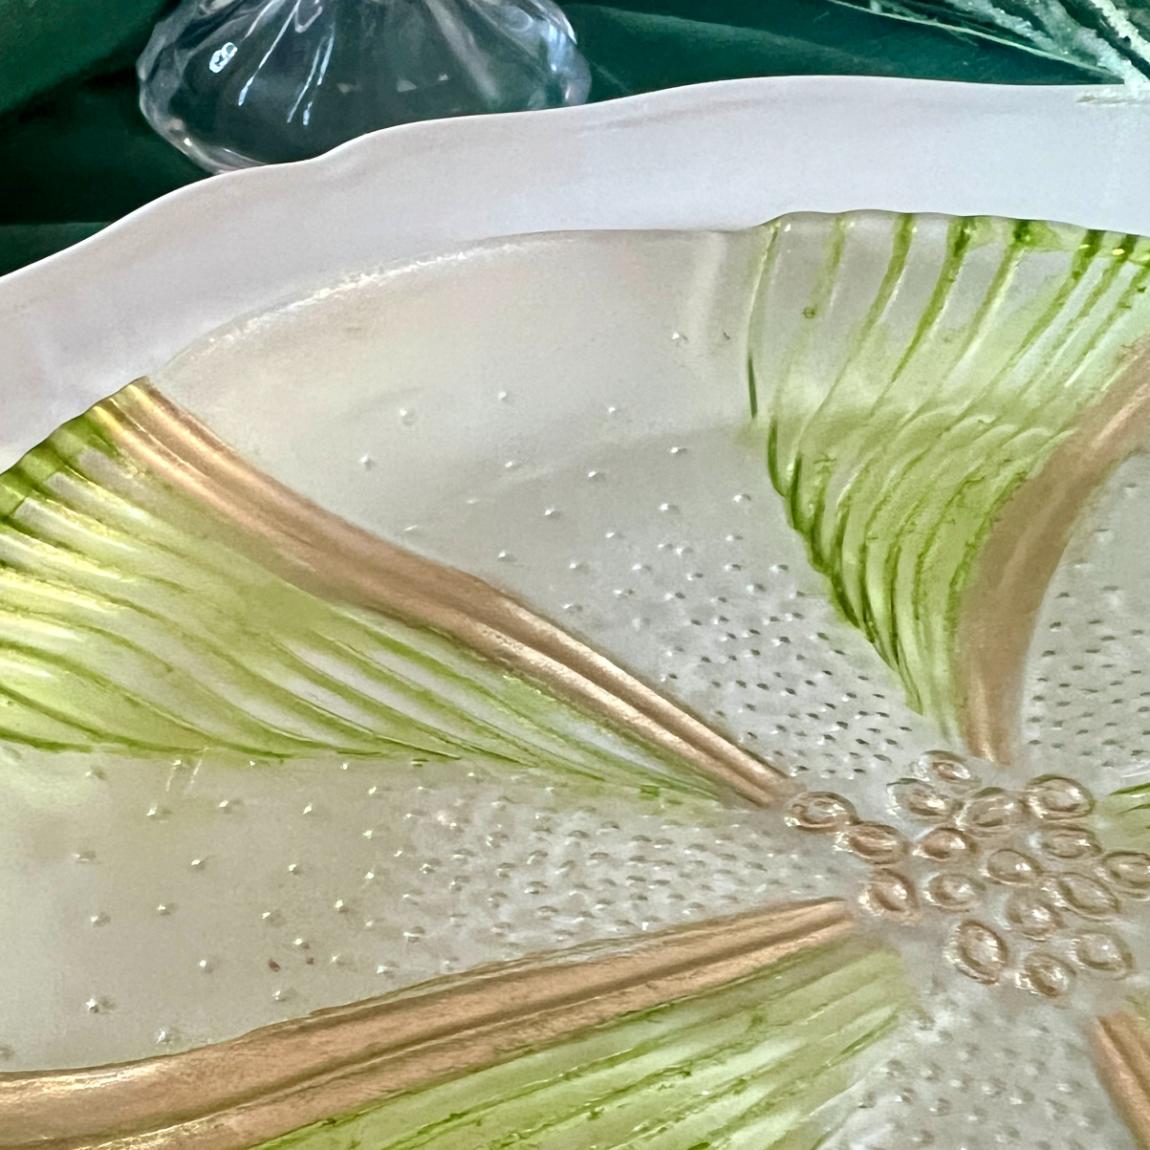
Best for making the pattern itself the star. Do one, or do both, like the green and gold plate.
Valleys
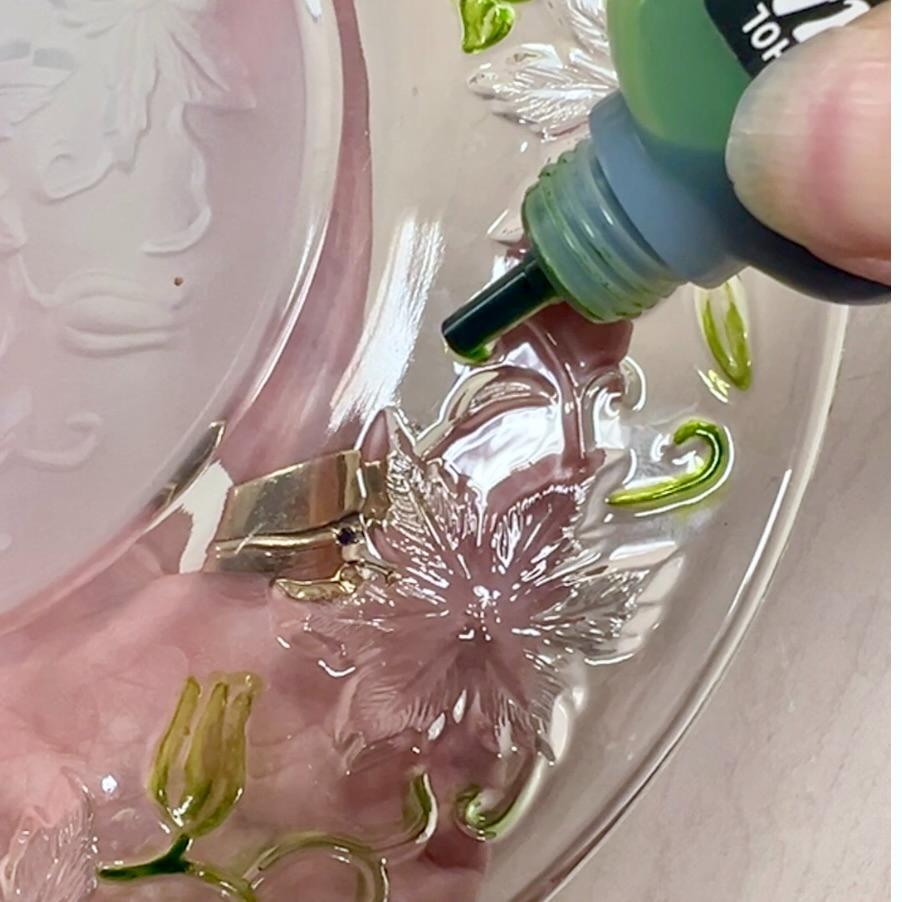
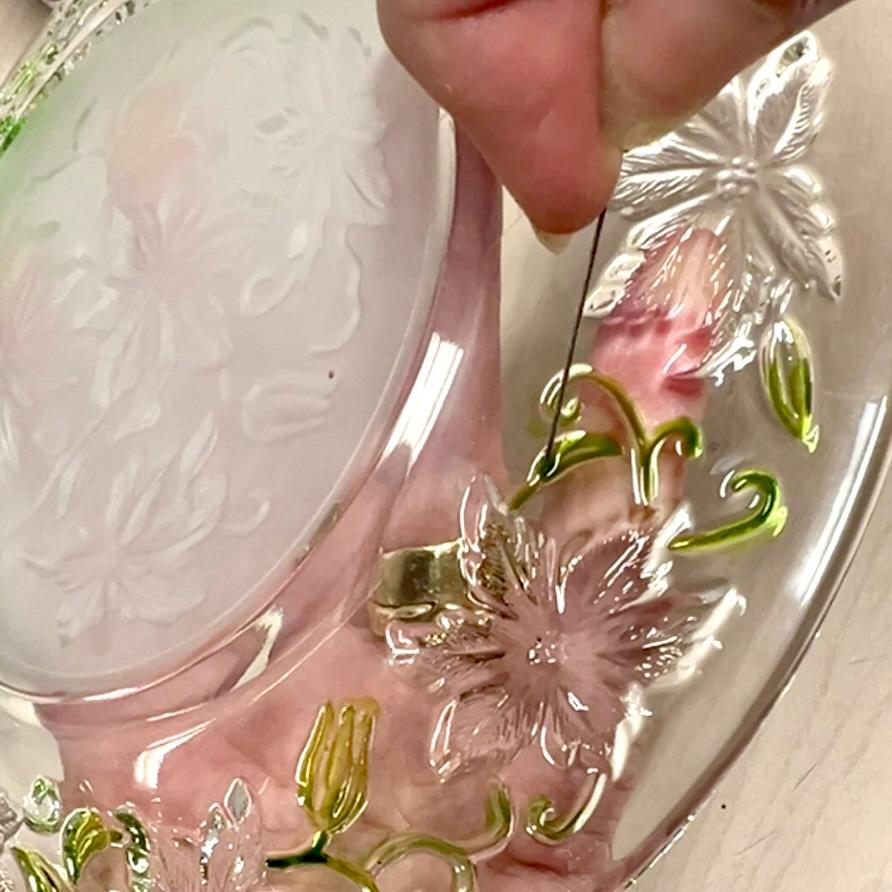
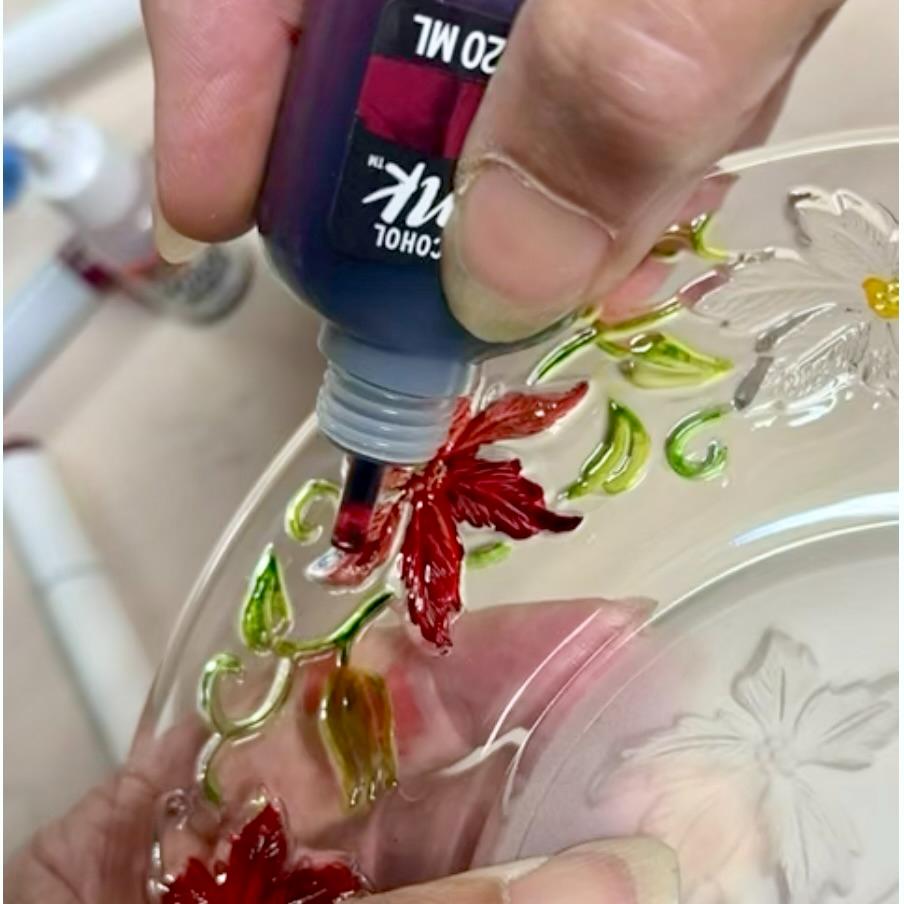
- Drop ink from a bottle (Piñata Colors by Jacquard, Copic refill tubes, or Brea Reese) into a valley.
- Tilt the dish so the ink runs and fills the valley.
- Drag the ink into tight corners or down long, skinny grooves and vines with a toothpick or straight pin.
Peaks
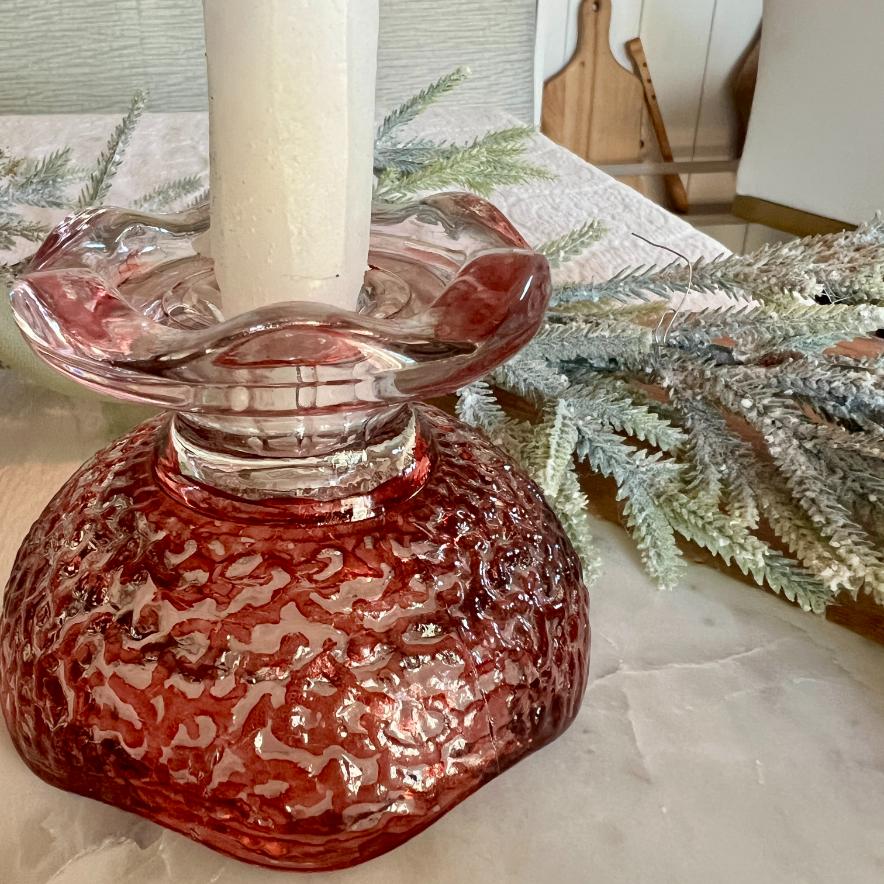
- Turn an ink marker on its side (I like Master’s Touch from Hobby Lobby) and run the nub over the raised peaks. Think crayon rubbings from our youth.
4C. Antiqued Wipe-Back
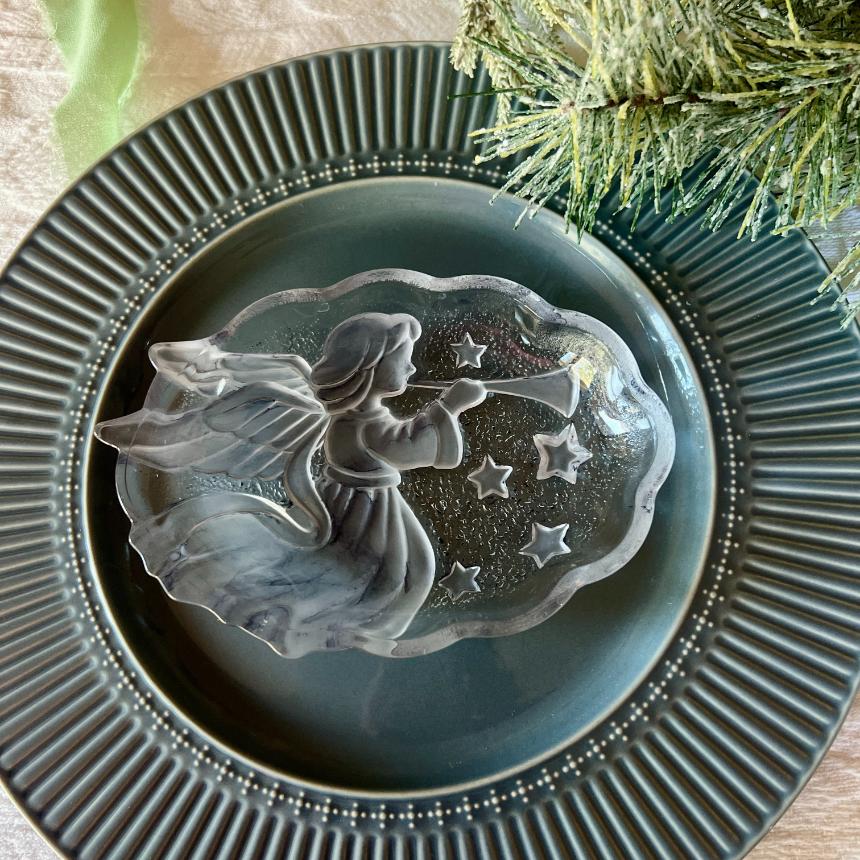
Best for plates with a matte or sand-blasted look.
- Drip ink onto the glass and spread it over the whole piece with a sponge until it’s covered in one solid color. I used Mars Black by Brea Reese on my angel plate. Brown would give you a warm sepia tone.
- Wipe off the excess with a dry rag. Rub harder where you want it lighter, and leave more ink where you want shadows.
PRO TIP: If the ink dried before you finished wiping, go back over it with light pressure and a paper towel or t-shirt rag barely dampened with rubbing alcohol.
4D. Reverse-Painted Scene
Best for when you’re ready to paint a picture.
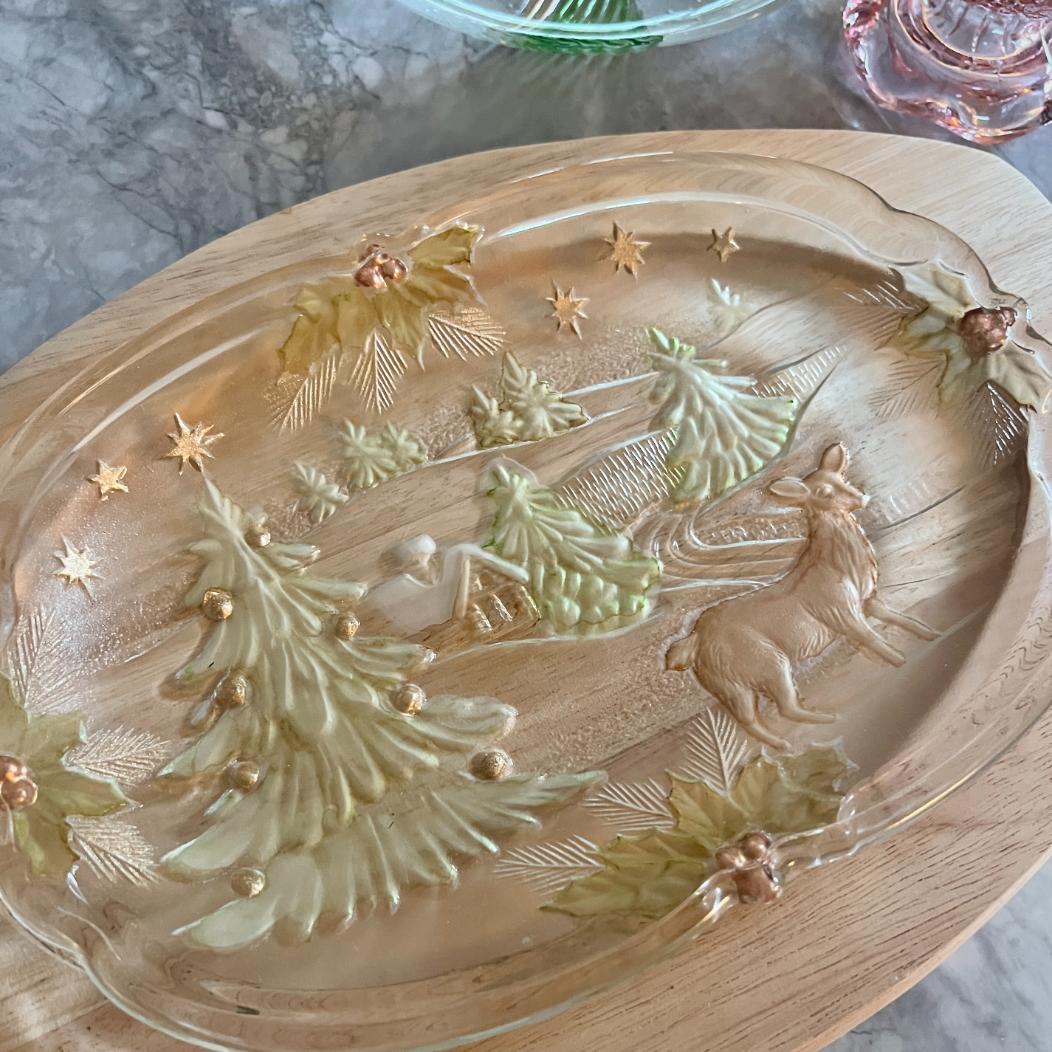
REMEMBER: You’re looking through the glass, so you paint in reverse.
- Start with whatever will sit most in the foreground. For a tree, that’s the ornaments first, then any tufts of snow you want to color, then the green fir branches.
- Drop your ink and spread it with a pin, toothpick, or fine brush. Layer colors where the scene needs depth.
Unlike paint, alcohol ink dries fast, so you’re mixing, blending, and correcting right as you add the ink.
PRO TIP: Metallic alcohol inks are fussier to work with. Save them for small accents, like a single divot for a bulb on a tree.
Ready to bring it all together? This is it! And where it’s worth slowing down, because it’s easy to change your mind partway through, and that’s completely fine.
Here’s how it played out on one of my favorite plates: I started with fairly vivid green trees with red bulbs — and wasn’t crazy about it. So I moved on to the deer, colored him in a thinned golden brown, and loved the subtlety so much more than the bold color I’d started with. I carried that same soft, thinned tone into the holly leaves along the edge, mixing green with thinned gold. Then went pure solid gold (Pinata brass) on the stars.
By that point, I’d landed on a new direction entirely — not sepia, but every color tinted in shades of metallic gold, like an old photograph. I mixed a little coral into the brass for the holly berries, and blended brass with green and brown with a smidge of rubbing alcohol (it goes a long way for mixing) for the background trees.
To knock back that first vivid green tree with red bulbs, I dipped cotton swabs in rubbing alcohol and wiped away most of the green along with all the red on the large tree’s bulbs. Then I dropped in solid brass ink for the bulbs.
PRO TIP: Keep cotton swabs and rubbing alcohol on hand the whole time you’re working, not just for the final cleanup. They’re your built-in “undo” button — dip and wipe to lift color anywhere you’ve changed your mind, then recolor right over it.
Step 5. Let it dry
Give any of these methods 24 to 48 hours to dry before you do anything else, and definitely before sealing. This is not a step to rush.
Step 6. Seal it (optional)
Confession time. I didn’t seal any of these pieces, but if you want extra protection, I highly recommend Krylon Kamar Spray Varnish. Spray the back only, in a well-ventilated spot, and very lightly. Let the first light spray dry and then add another coat or two..
CAUTION: The sealer stays on the back, same as the ink. Keep it off the front face and the rim.
Step 7. Clean up the front
Wipe any stray ink off the food side with rubbing alcohol, then hand-wash gently from here on.

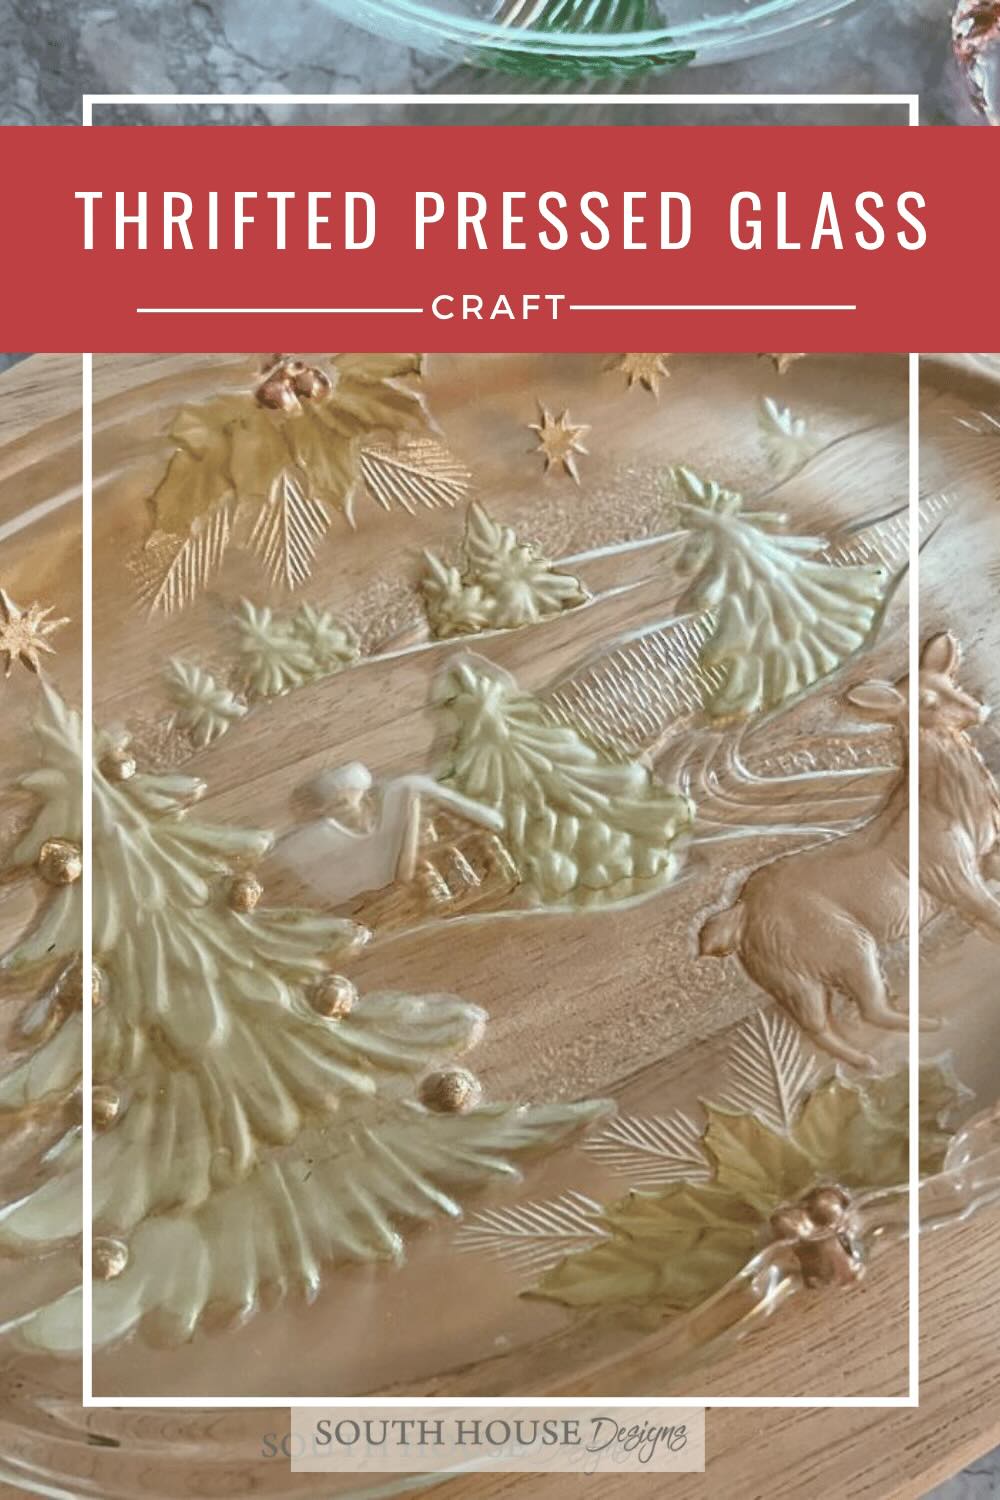
Pin this post so it’s waiting the next time you spot a swirly plate at the thrift store, and browse more of my alcohol ink projects while you’re at it.
Styling Your Colored Pressed Glass
However you land on color, these pieces are built to work into a display, not just sit alone:
Layer them into a tablescape. A colored plate makes a beautiful base under a smaller bowl, candle, or centerpiece — the pressed detail catches the light differently once it’s got color pooled into it.
Stack for height. Pair a larger colored plate with a smaller one (or a candlestick) for instant dimension on a mantel or sideboard, especially if you keep the color story consistent across pieces.
Mix metallics with the real thing. A gold-toned plate sits right at home next to actual brass or gold-rimmed pieces.
Let the soft vintage pieces do quiet work. Not every piece needs to shout. The thinned, monotone plates are especially good tucked in among neutral, textural decor where you want warmth without competing for attention.
Hang in a window reminiscent of stained glass.
Alternative Uses
This technique isn’t limited to Christmas plates and candle holders — it works on any pressed glass with detail worth highlighting: cake stands, trinket dishes, votives you’ll use year-round, even a glass photo frame.
Do you have a box of punch cups stealing valuable real estate in your attic or basement? Give them a beautiful alcohol ink makeover. Then hang them on the tree or garland with pretty ribbon through the handle. Or gift them to neighbors filled with delicious cookies or snack mix.
Once you’ve got the hang of markers-for-raised, liquid-for-recessed, it translates to just about anything non-porous and slick.
(If you love this medium, don’t miss these alcohol ink Christmas ornaments too.)
Key Take Away
That thrift store shelf full of “nobody wants this” pressed glass?
It’s actually a stack of blank canvases waiting for a few drops of ink and twenty minutes of your time.
Whether you land on glitzy gold, bold color, festive brights, or that quiet vintage glow, the best part is that none of it’s permanent unless you decide it should be — so there’s really no wrong way to start.
More Handcrafted Hostess Gifts
Thanks to this month’s Handcrafted Society challenge, you don’t have to stop at one gift. Here are three more creative, handmade DIY hostess gift ideas from my talented friends. Which one would you most want to be handed at the door?
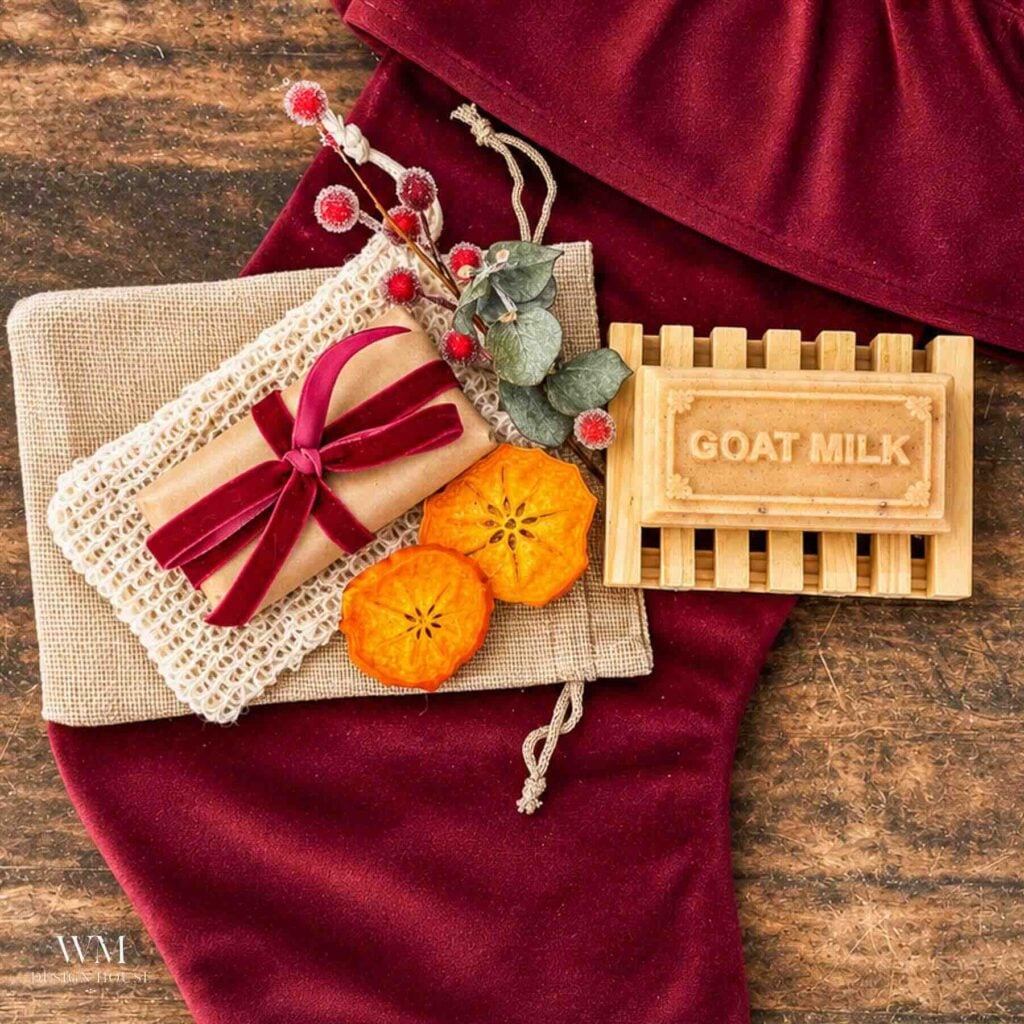
Wendy @ WM Design House
Wendy from WM Design House shares how she likes treating a hostess to a spa treatment at home. Starting by turning a basket of persimmons into goat milk soap, flecked with dried persimmon and clove, then wrapped each bar in brown paper with rosemary and packed it in a linen bag with a soap dish and loofah pouch. A handmade gift that comes together in about twenty minutes, no lye required.
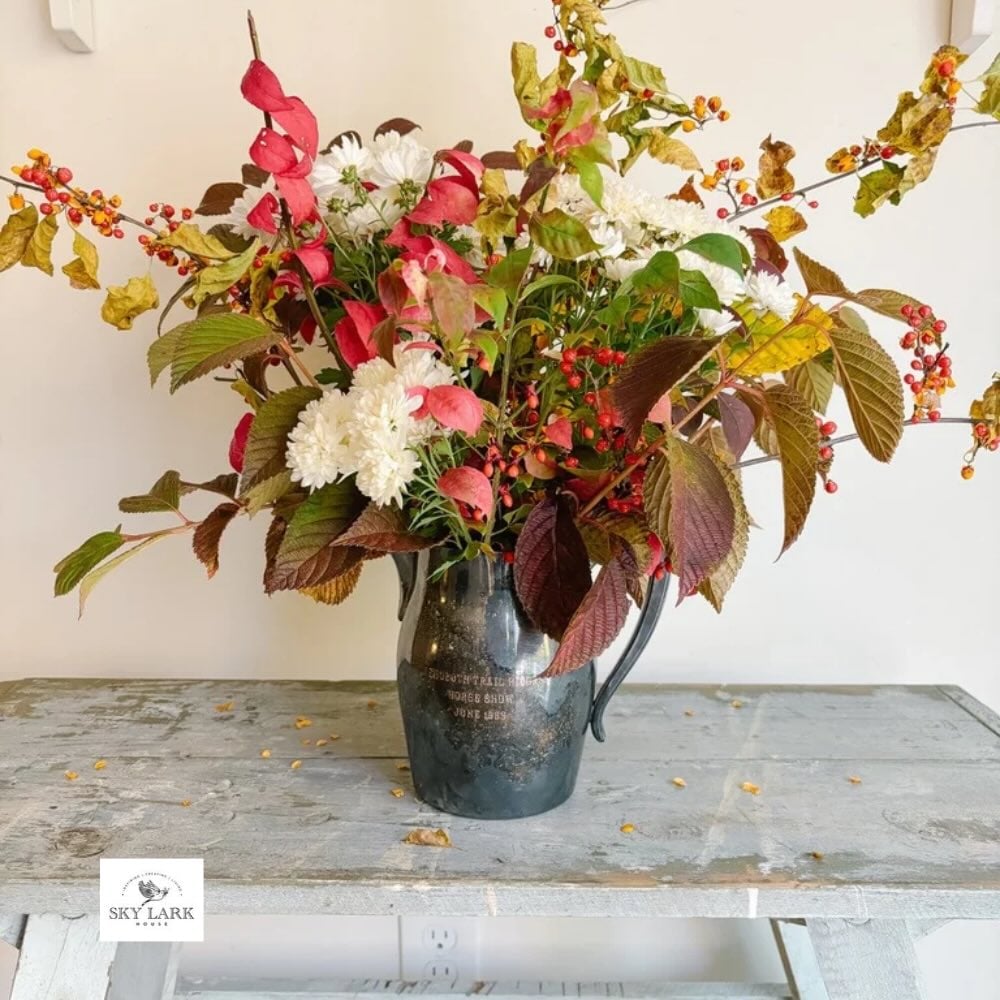
Anna @ Sky Lark House
Anna’s favorite hostess gift to give is a stunnning fall arrangement inspired that is meaningful and affordable using foliage and natural elements. Don’t miss her tips!
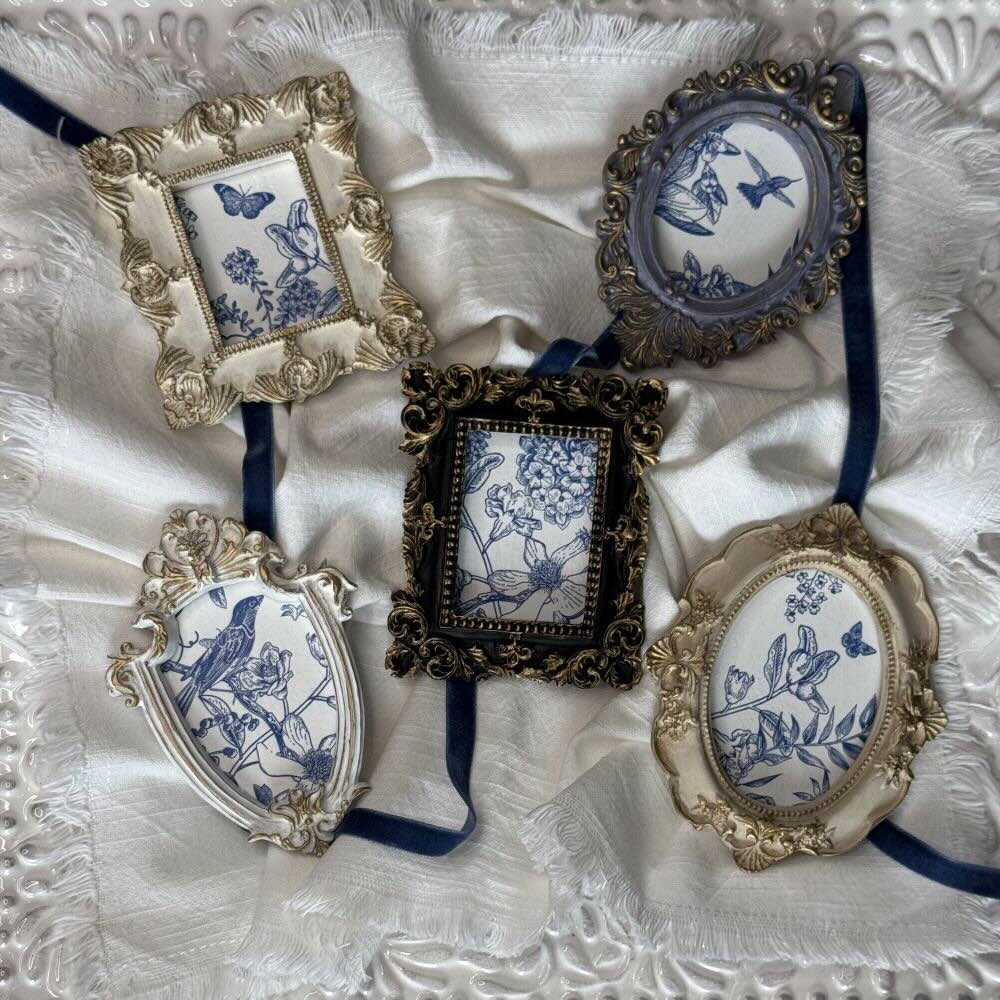
Donna @ An Organized Season
Donna is teaching us how to turn miniature picture frames into beautiful DIY refrigerator magnets! These charming magnets have a vintage-inspired look and make a thoughtful hostess gift

More Christmas Makeovers to Enjoy

Hi Diane! I’m not familiar with alcohol ink, so I’m very excited to learn about it. This looks like such a fun project and I adore how pretty every piece you transformed turned out! Thanks for the inspiration, such a great gift idea!!