Croquet O’Clock: A Colorful DIY Clock for Outdoor Spaces
DIY outdoor clock meets vintage croquet set in this playful upcycle. See how colorful mallets become a timekeeping wreath for outdoor spaces.
Hey there, fellow Outdoor lovers !
Pull up a comfy seat and let me share with you my latest backyard creation. Plus introduce you to 6 of the best bloggers who all came up with a great upcycling project.,
You guessed it, this is the Second Tuesday of March which means it’s a convening of the Hand Crafted Society. And this month, everyone focused on upcycling something you might fid in their garden shed.
Have you ever wondered what to do with that dusty old croquet set in your garage (besides accidentally tripping over it every three months)?
I’ve got just the answer! And it is sooo fun!!!

TABLE OF CONTENTS:
- The Inspiration
- The Creative Journey (aka My Non-Linear Brain at Work)
- Creating the Clock Face
- Creating the Garden Party Vibe
- The Great Mallet Transformation
- My Clock-Making Education (Or: Things I Learned the Hard Way)
- The Perfect Spot
- The “Something’s Missing” Moment
- Materials That Made It Happen
- Tips From Someone Who Just Figured This Out
- What Would I Do Differently
The links in this post may include affiliate links, which means if you purchase anything using these links, you pay no extra, but I may receive a small commission that helps keep this blog running. I truly appreciate you using affiliate links whenever possible. Please know that I will never recommend a product I do not believe in!
The Inspiration
Living on a lake means outdoor living isn’t just a hobby—it’s practically our religion around here.
Our patio and backyard are where memories are made, whether it’s morning coffee watching the sunrise or evening gatherings with neighbors who’ve become family.
I wanted something unique for our outdoor space that would capture that playful, laid-back vibe we all treasure.
When I stumbled upon a vintage croquet set at a thrift store, those colorful mallet heads screamed, “Take me home and make me fabulous again!” Who was I to argue?
The Creative Journey
(aka My Non-Linear Brain at Work)
Truth be told, this is not the true order of how my glimmer of an idea evolved.
My brain does not think that linearly.
I’ve tried to organize this post to make it a bit easier for you to follow. I mean I even have trouble following my brain when it’s being spontaneous and creative.
I found the croquet set and quickly decided I wanted to make a large outdoor wall clock with its pieces and parts.
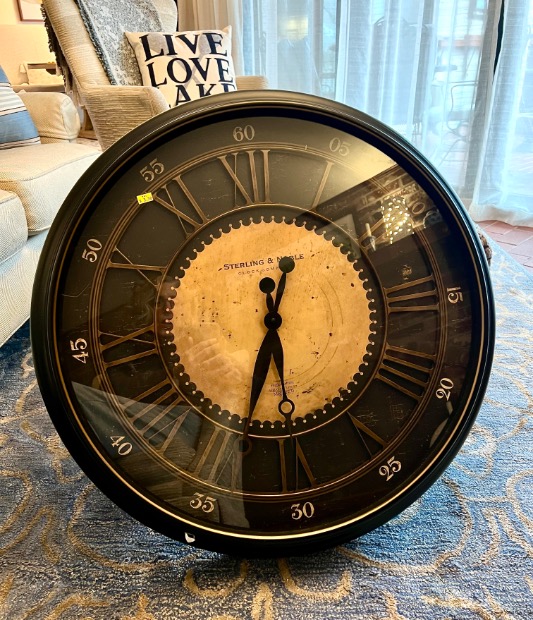
At the same thrift store, maybe a month later, I found a large clock roughly the size I needed for $3.50. Seems like it was meant to be!
For clocks with a minute hand over 5inches, you need a high-torque mechanism, and this one had that. It also had a solid flat backing that I could turn into my clock face.

After taking closeup pictures of the assembly, I dismantled the clock with no difficulty.
Creating the Clock Face
As a nod to the black and white accents in our outdoor space (our tool cabana’s double doors sport a classic black and white awning just around the corner), I painted the clock face vintage white with some strategic worn spots—like it’s been keeping time for generations of lakeside gatherings.
When I was out shopping for my greenery, I stumbled on a charger at Hobby Lobby that had the perfect finish for the clock face. Studying closely, it looks like some dark brown was very subtly dry-brushed on the otherwise flat white surface. It reminded me of when we aged scrapbook pages by brushing the edges with an ink pad.
After experimenting a bit along the edges that will be mostly covered with ivy, I went for it.

With an extremely light hand I brushed the widest ink pad I had across the entire face in one long stroke. Repeated again and again, roughly lining up one stroke right next to the one before. This gave the sense of planks of wood — adding just enough suggestion of texture and age to this otherwise flat clock face.

Here’s a lesson learned: see the straight rectangular shape in the lower left of the clock face? That’s what can happen when you start, or stop, your ink pad on the face.
PRO TIP: Start your ink pad off the edge and use one continuous swipe all the way across and off the opposite edge.
Everything’s sealed with exterior paint and sealer because, hello, lake weather!
Creating the Garden Party Vibe
Remember those perfectly manicured lawns where fancy people played croquet in old movies?
I wanted to capture that essence, minus the white gloves and stuffy conversations.
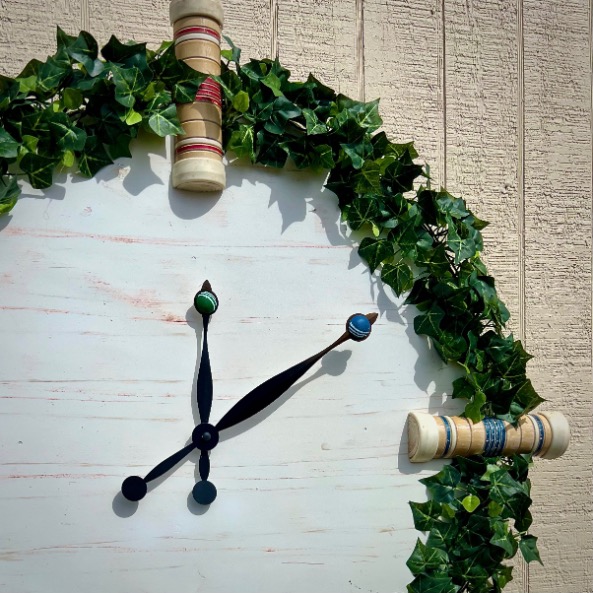
So I created an ivy hedge to encircle the entire clock, with the colorful mallet heads peeking out at 12, 3, 6, and 9.
It’s part clock, part wreath, and 100% conversation starter!
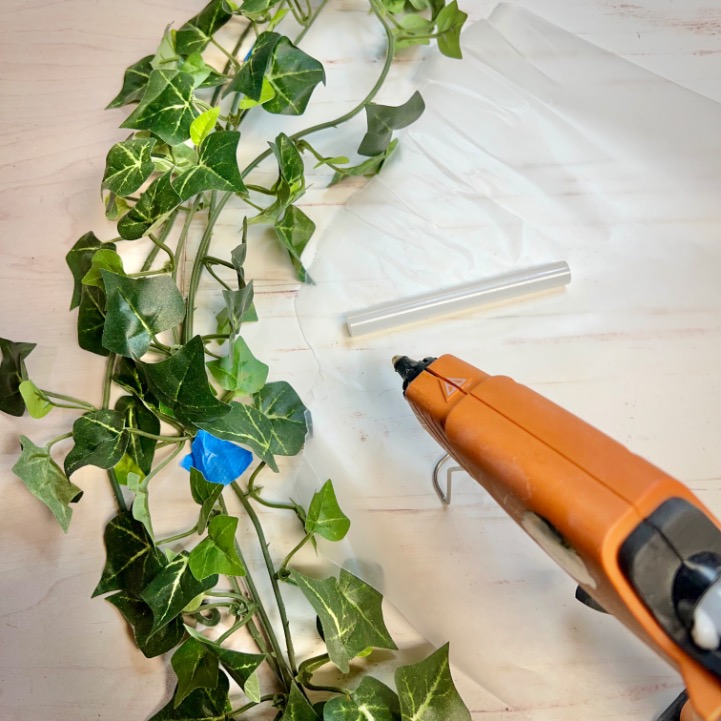
Hot glue is your best friend here! Plus thin florist wire!
After about 12-inch of trying to hold the rows of ivy together with painter’s tape, I wrapped three rounds of ivy together with wire and THEN glued them in place on the edge.
So much faster and better results from using both wire and glue.
Then the last two laps around the clock were hot glued as I went.
NOTE: The ivy I liked best was at Hobby Lobby and is a 25′ garland at 12.99 (plus 40% off of course). One would go around my clock 3+ times. But I wanted it fuller so I used half of a second one.
The Great Mallet Transformation
Armed with determination (and my neighbor’s band saw—thanks, Ron!), we sliced four mallet heads lengthwise.

PRO TIP: if you’re trying this at home, aim to center the handle hole on one side for a future project.
Those halves with the holes are tucked away for another project. Stay tuned for that adventure!
And don’t skip the rubber ends. I mean really, beside the classic stripes, the rubber ends define croquet . . . . . and a bit of friendly competition.
Mine came through the saw a bit fuzzy on the cut edges — nothing my handy micro sander couldn’t smooth out in a jiffy. And I just glued them in place with my go-to E-6000.
The best part? Each mallet head from this set sports a different color, giving my clock that perfect “I’m sophisticated but also know how to have fun” vibe we’re going for in our outdoor space.
My Clock-Making Education
(Or: Things I Learned the Hard Way)

Picture this: Me, standing proudly with two halves of a croquet stake, envisioning them as majestic clock hands sweeping across my creation.
Then came the research phase, (a bit backwards I admit) where I discovered what actual clock-makers already know—clock hands are finicky little divas that need perfect balance and precise matching to their mechanisms.
There’s no universal standard, folks! Who knew?
After a brief mourning period for my original vision (and maybe a glass of wine on the dock), I pivoted.
The vintage-style hands from my thrifted oversized clock would stay, BUT they needed a croquet makeover.
My solution? Crafting tiny half croquet balls from air-dry clay to nestle into those circular openings at the tips of the hands. Small detail, big impact!
I just rolled s smidgeon of clay in my palms and crafted it into shallow domes.
The next day I used my can’t-live-without micro sander to smooth the base flat and sand off as much height as I needed for clearance between the two hands.

PRO TIP: When painting itsy bitsy bits, hold a piece of painters or masking tape and let the other end to the tape hold the item.
I painted one blue and one green using multi-surface craft paint. Then I went back and added the signature white stripes with a chalk marker. A spray of sealer and we’re set to add a bit of fun to the original click hands.
I glued them in place with favorite glue, E-6000 of course.
Then came the slightly tricky task of balancing the hands.

I experimented with assorted washers in our tool caddy until I found the right weight. Glued the washers to the back of the short end of the hands.
Then it was just a matter of re-assembling the clock mechanism o the back ad the ads o the front of my new clock.
The Perfect Spot
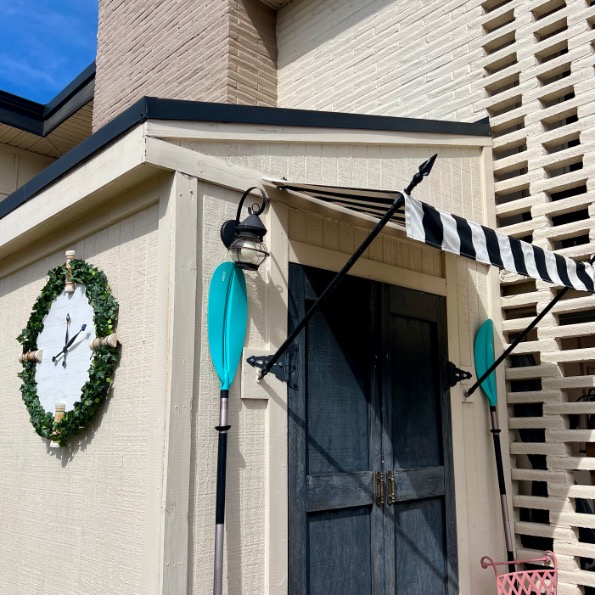
This clock-wreath masterpiece has found its home on the side of our tool cabana. Just around the corner, we have double doors sporting a classic black and white awning (very fancy for storing shovels, I know).
The “Something’s Missing” Moment
You know that feeling when a project is “done” but . . . . .
. . . . . is it really?
After hanging my “finished” croquet clock and stepping back, I knew it needed something more.
That big white face with just four colorful mallet heads looked a bit… sparse.
Back to my neighbor Ron (the band saw wizard) I went!
This time, we sliced four of the croquet balls in half.

With these colorful half-spheres in hand, I carefully glued them in place to serve as the “other” hour indicators.
Perfectly spaced between the mallet heads, these vibrant ball halves brought the exact pop of color the clock face needed to feel complete.
Sometimes the best design decisions happen after you think you’re finished!
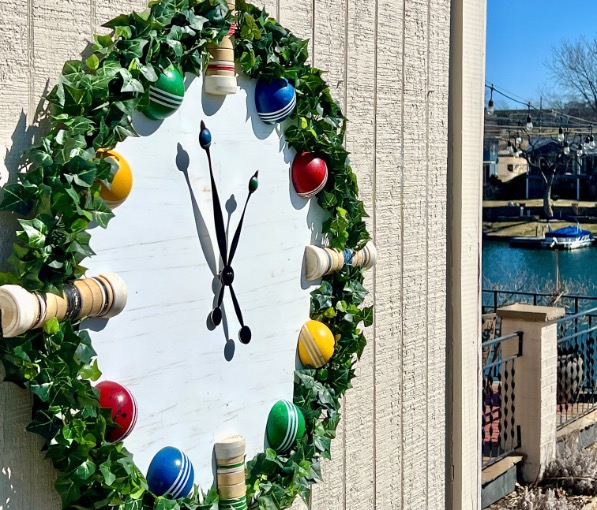
Much better, right?

And from the other direction.
Materials That Made It Happen
- Vintage croquet set (the more weathered, the more character!)
- Oversized thrifted clock, using the clock face, mechanism and hands
- Band saw (or a very patient friend with one)
- Micro sander (indispensable for all of my projects)
- E-6000 glue or substitute
- Air-dry clay for the mini croquet balls
- Exterior grade craft paint and sealer
- 1 1/2 25-foot garlands of Artificial ivy for the hedge frame
- Florist wire
- Hot glue gun and glue sticks, this and these are my favorites
- Exterior white paint and brown or black stamp pad
- Weather-resistant sealer
- My favorite playlist and maybe a lakeside cocktail for inspiration
SIDENOTE: I know you’re wondering about the rest of the clock . . . . .
. . . . . honestly, so am I !
I have an inkling of an idea that’s starting to form in my brain. Hang around to see if it works out.
If it does, it will be impressive!
So you don’t miss out, be sure to subscribe to the level of email notices you’d like:
Thanks bunches! Now back to our garden clock:
Tips From Someone Who Just Figured This Out
- Clock hands are NOT a DIY project unless you’re secretly a Swiss watchmaker
- Band saws and cocktails don’t mix—safety first, celebration after
- Take photos before disassembling anything (learned this one the hard way)
- When in doubt, add more sealer—lake humidity is no joke
- Invite neighbors over to admire your work—they bring compliments AND snacks
What Would I Do Differently

The hands! They were the only part that was remotely tricky.

Once that I added the balls to the clock face, those little balls I made for the hands are not necessary. They’re still very cute, though.
I might order a new set of hands that have a very simple long shape to them and paint stripes on them to mimic the wood stakes.
And before long, I will probably move it behind the patio bar or above the sectional on the balcony. Both those locations would protect it from the elements.
I think it would also be cute with astroturf, artificial grass or moss covering the face if you wanted something other than the slightly distressed white.
This project has already become a favorite talking point when friends come over. “Is that a…croquet mallet? On your clock?” Why yes, yes it is. And let me tell you all about it while I refill your glass!
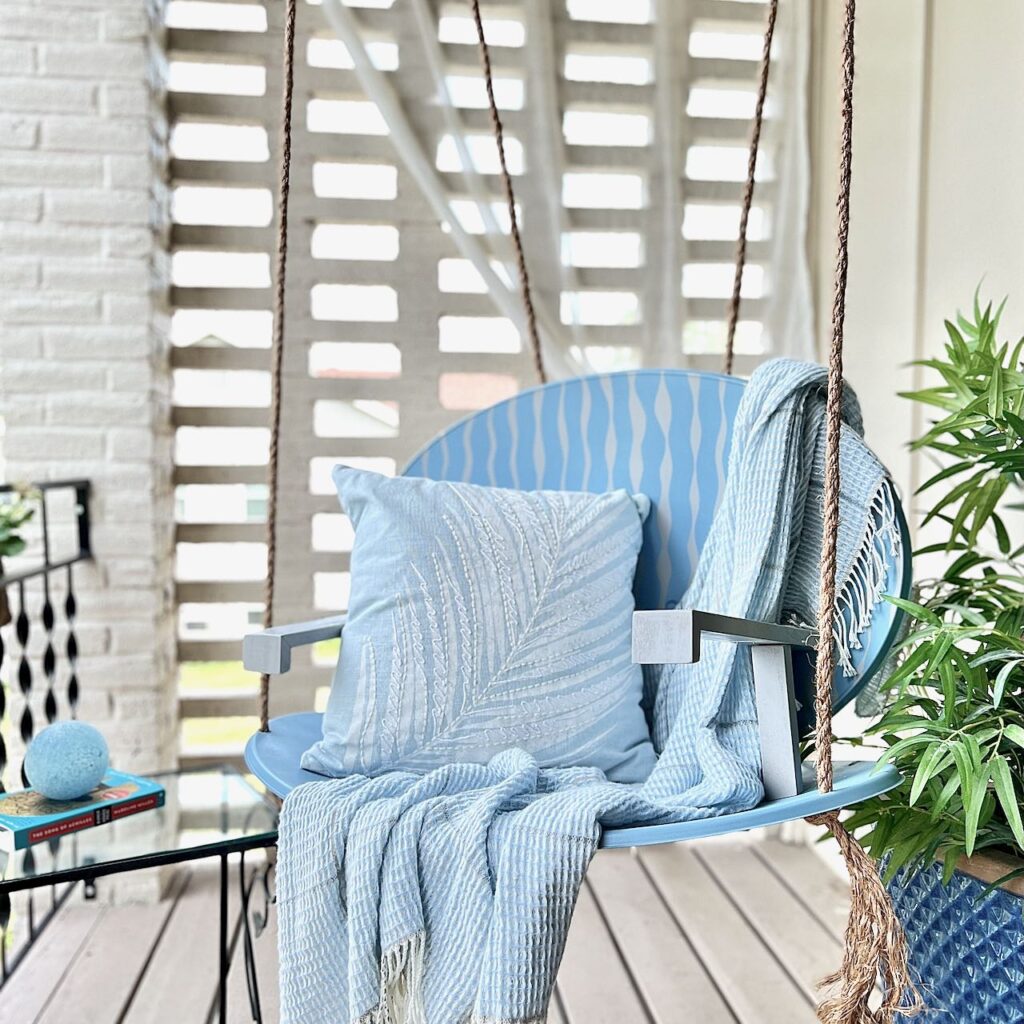
The other project that gets so much reaction is this swing I made for the balcony. Can you guess what I upcycled for it?
Who else has repurposed something unexpected for their outdoor space?
Drop a comment below—I’m always looking for my next project inspiration!
Speaking of inspiration: These ladies are my Go-To’s for all the clever, beautiful and fun Inspiration we all enjoy. Don’t forget to hop over to each one. And really make their day by leaving them a comment, or maybe pin their project.


Diane, your croquet clock is just adorable! I love the hour markers, and once again so impressed with your skills! I’ll be over with snacks for a cocktail at 5:00! Cheers!
Why wait til 5:00 Michelle?
How fun! A great project for an artist and an engineer (or if you are Diane, you are both!) Clocks are finicky but this one gets the Oscar for costume design 👏🏼!!
That is sooo sweet of you Carole! Hopefully you’ll be here this Fall and we can hang out on the patio.
This is next-level amazing! So clever, Diane. And I love the addition of the sliced balls. Cocktails on the patio are at what time? Great job!
Cocktails anytime with you Missy! We don’t need a clock for that.
What a fun and fabulous creation, Diane! Adding the croquet balls brought in the perfect pops of color! You have to love an item that’s functional and looks wonderful, too! Wish we lived closer so I could see it in person!
I wished you lived closer too so we could just hang out!!!
You always dream up the most creative projects. I love this clock. It’s perfect for outside in your garden area with the croquet pieces.
Thanks Lynn! I’m looking forward to have my trellis vines grow up around it!
Diane, this is an adorable clock. You are so creative, and I love the mini croquet balls you made out of air-dried clay. You will enjoy this for so many years ot come.
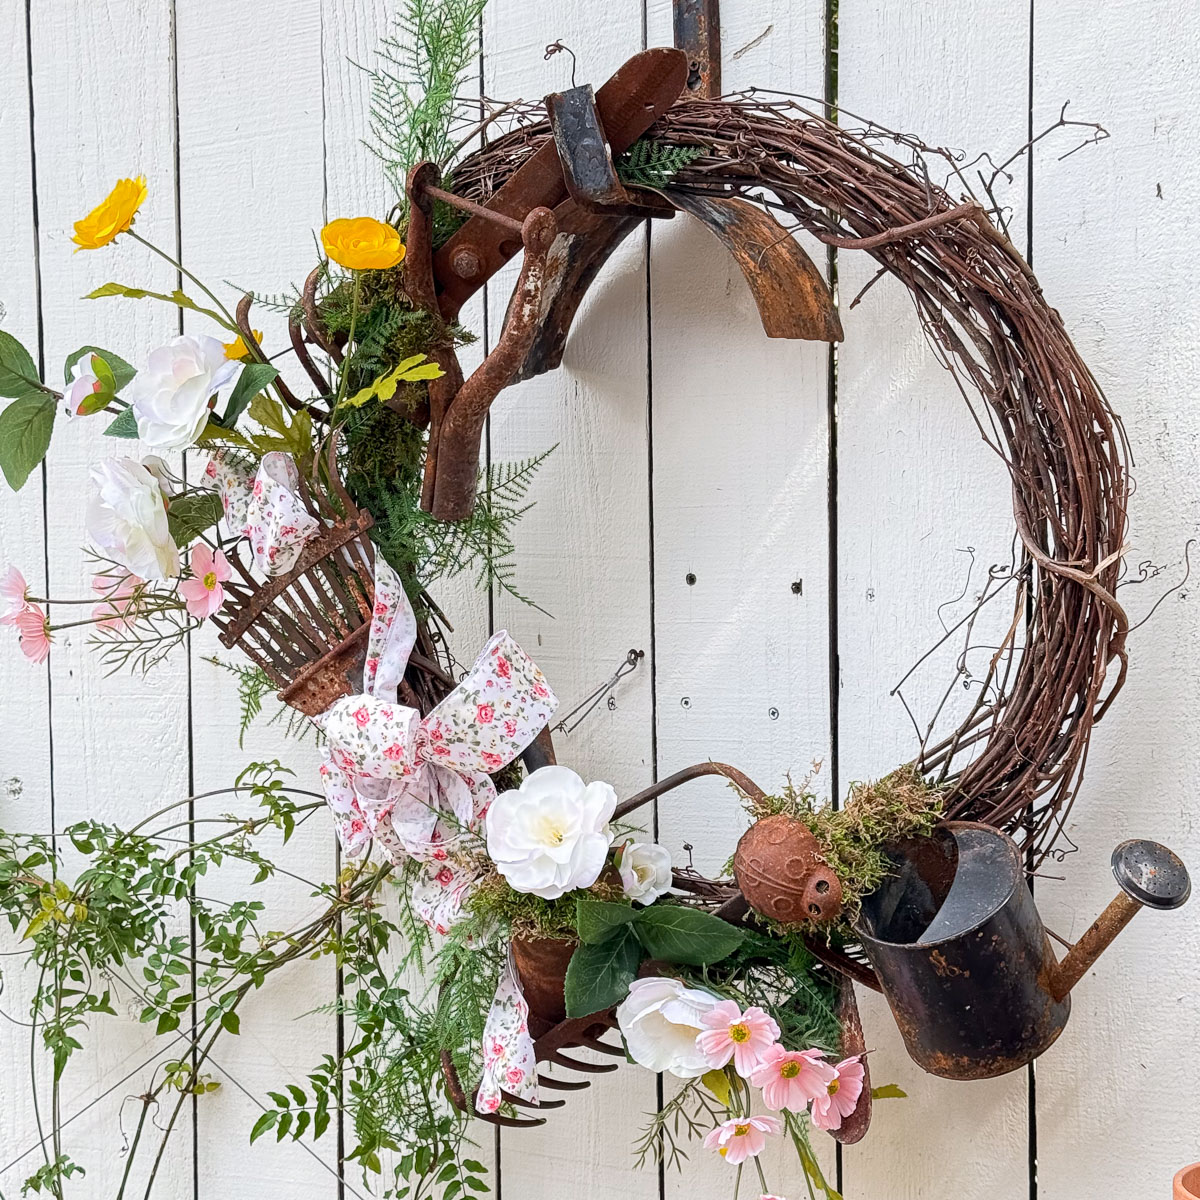
Thanks Wendy! Can you guess what inspired me? Yep, your garden tool clock!!!
Diane, love the croquet set use into a clock. It is so unique.
Thanks so much Tammy! We sure missed you!!!
Well, this is neat! So creative! I haven’t played croquet in so long but I love it and this is such a good nostalgia project! I love it!
What a creative use of an old croquet set Diane! Love you idea and creative way to get those pieces cut – neighbors can be so helpful!
How very cleaver! I so relate to a brain that can’t keep up with the creativity! My brain is literally never linear – it’s jumping all over the place ALLL the time! And I do love a good thrifted makeover. I see old clocks like this one you used all the time in thrift shops! I just might have to grab one and try this out!